
Inverness, Nova Scotia, Canada
Architect: Rod Whitman
6,803 Yards, Par 70
My Quick Review: True links golf on wonderfully sandy soil -- unlike anything I have experienced in Canada -- Cabot Links is the real deal and any lover of golf course architecture must get to Cape Breton immediately!
All Yardages and pictures will be from the second from back green tees (par 70, 6,405 Yards, 70.6/125 which seems crazy low!).
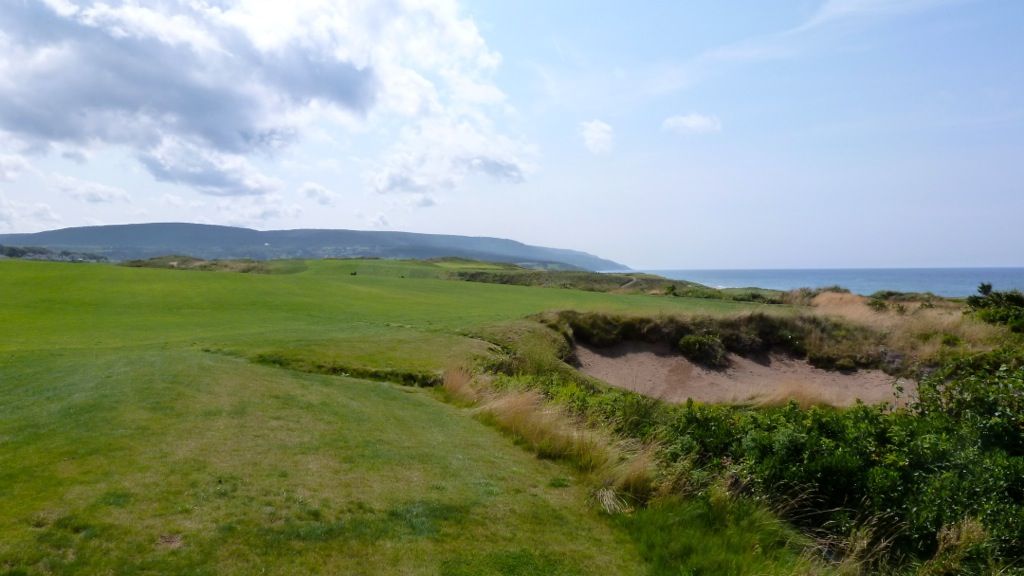
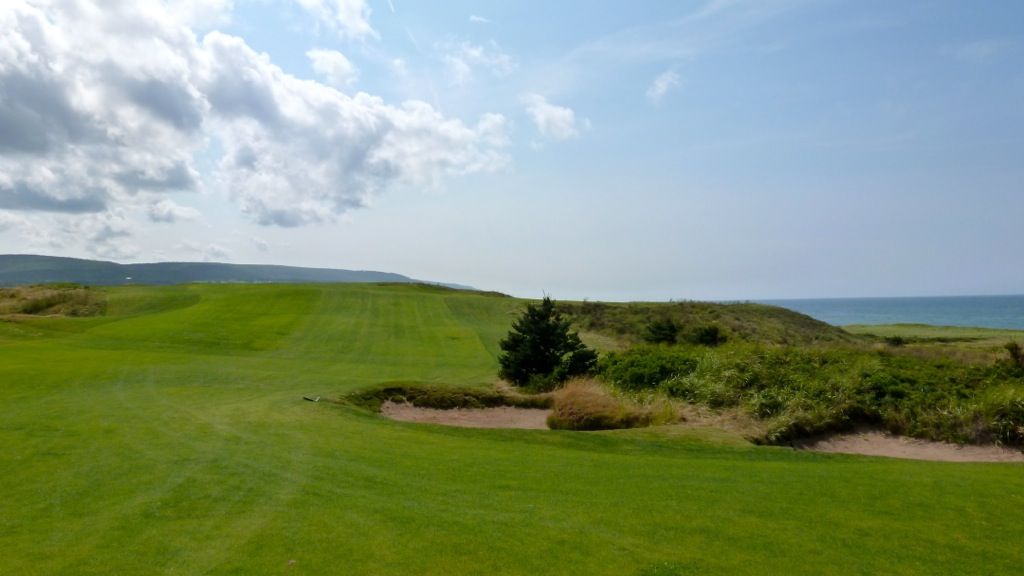
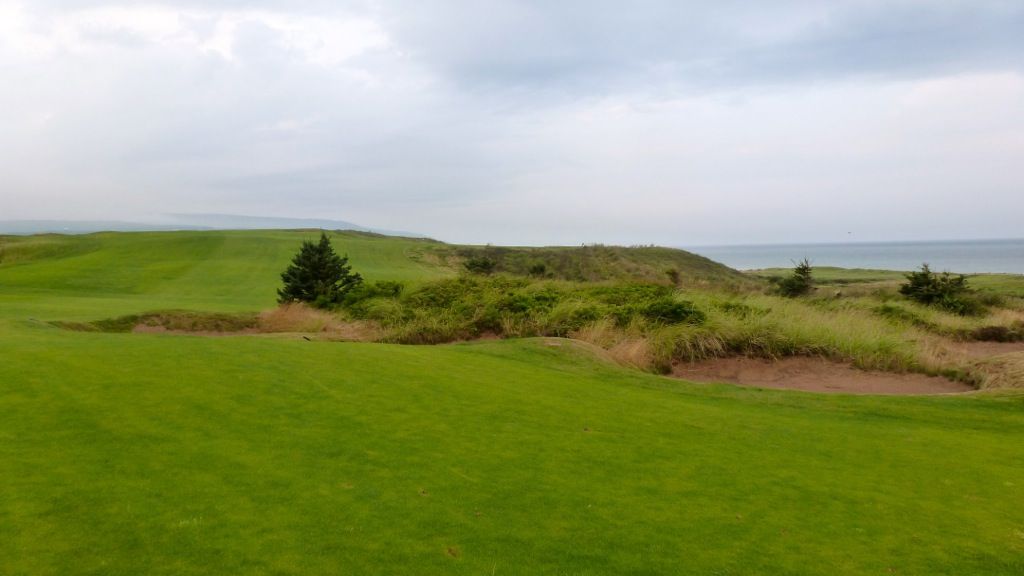
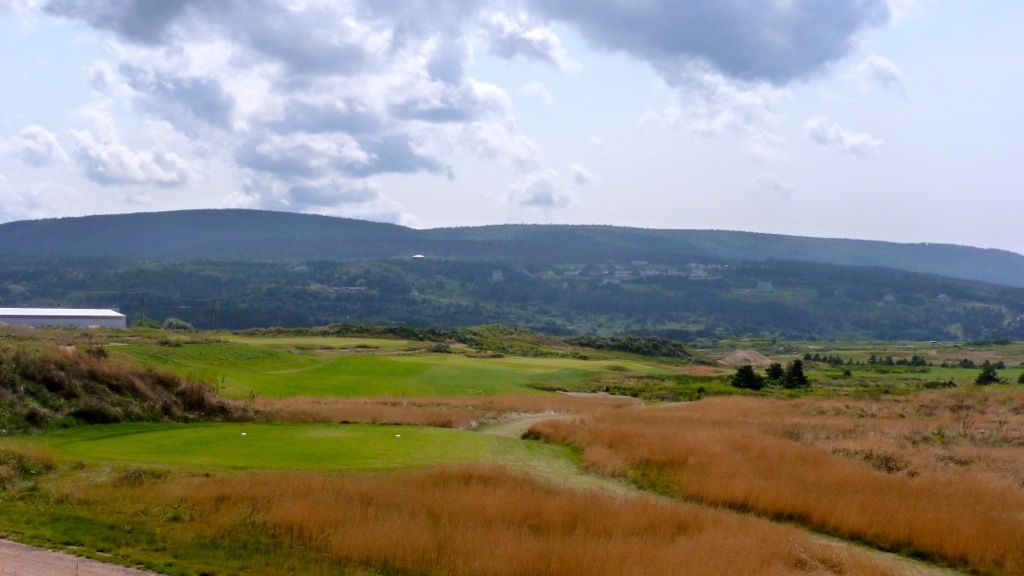
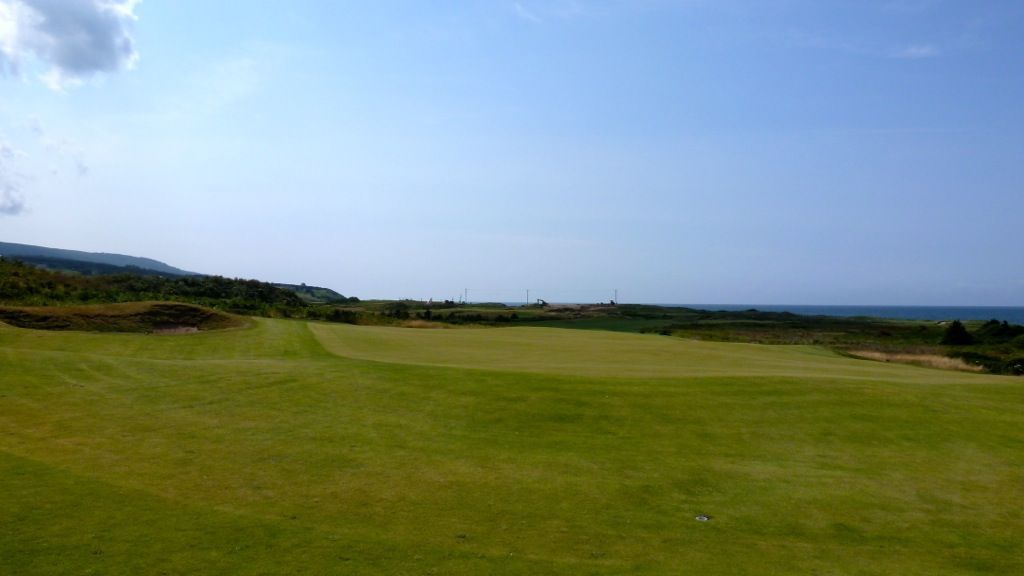
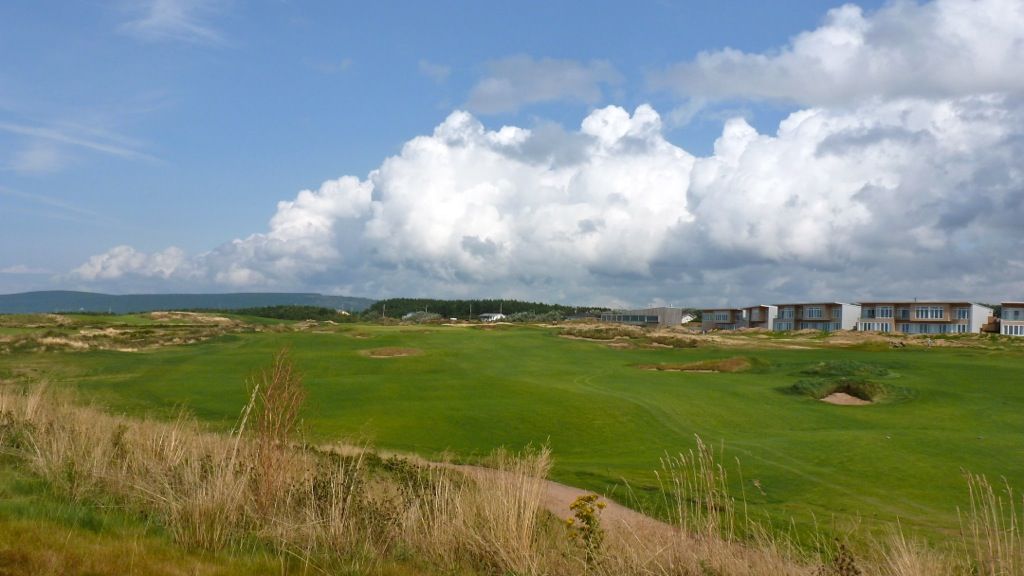
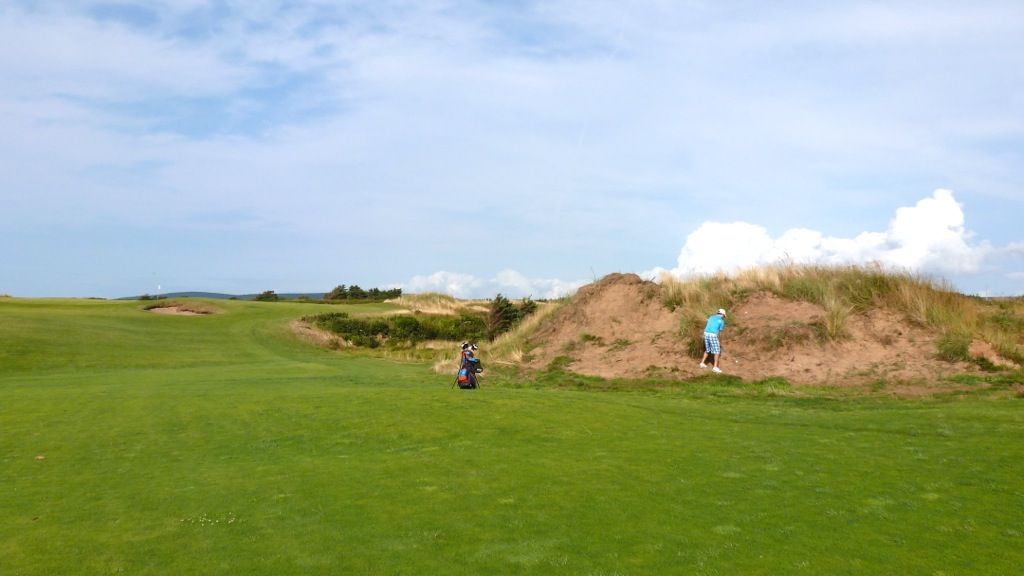
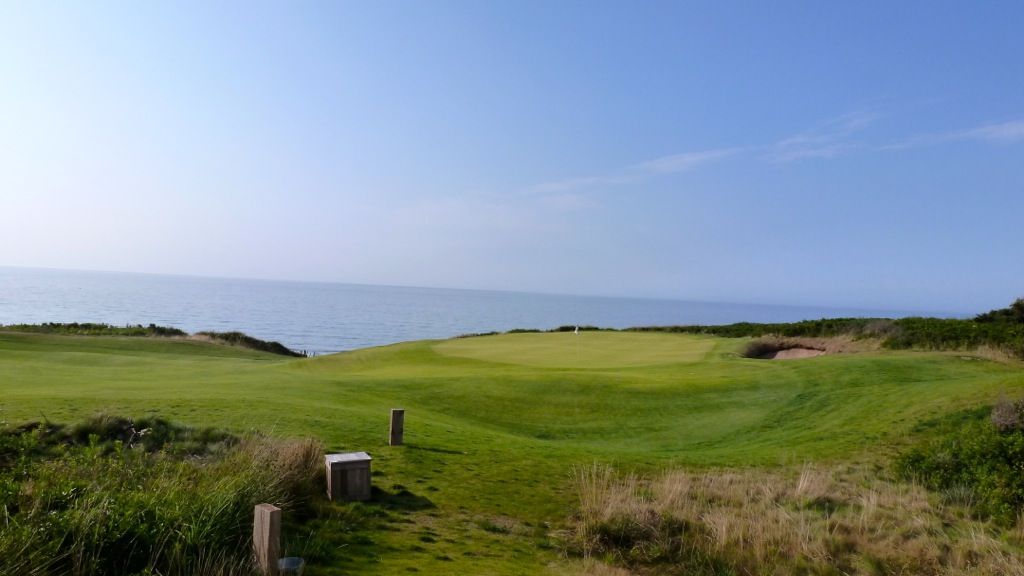
Hole 1: Par 4, 355 Yards -- Playing gently downbreeze this was certainly a gentle handshake. Like many of the fairways at CL, the fairway is massively wide, though the tee shot is more about finding the correct side of the fairway than just finding the fairway. A duo of deep bunkers and one of the largest dunes on the course intimidate the nervous golfer and protect the ideal line, though a golfer playing the correct tee (absent a strong headwind) should have no problem carrying the trouble.
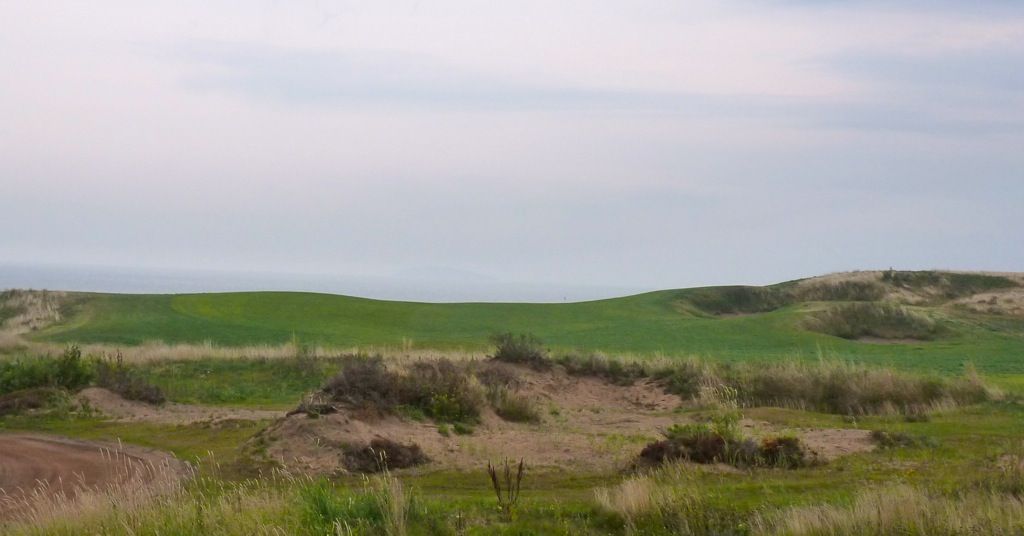
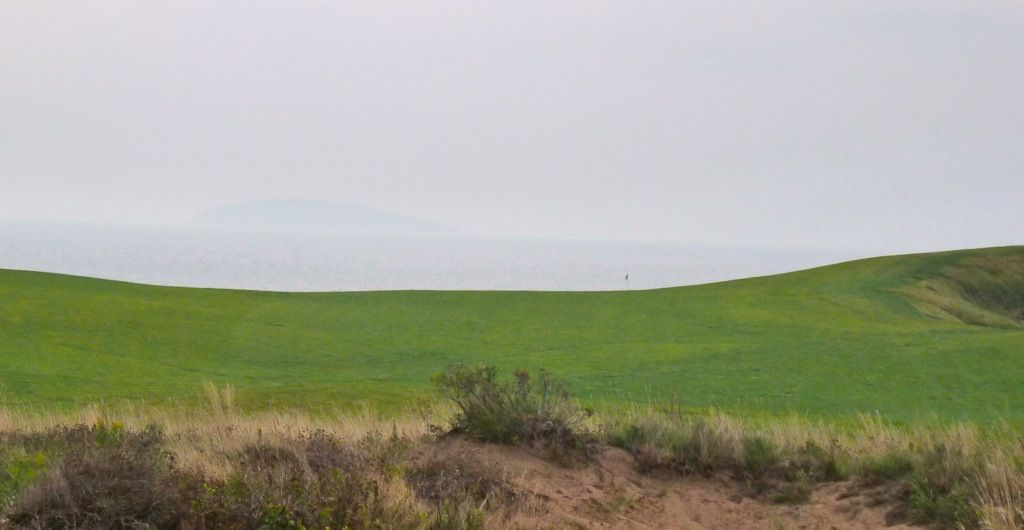
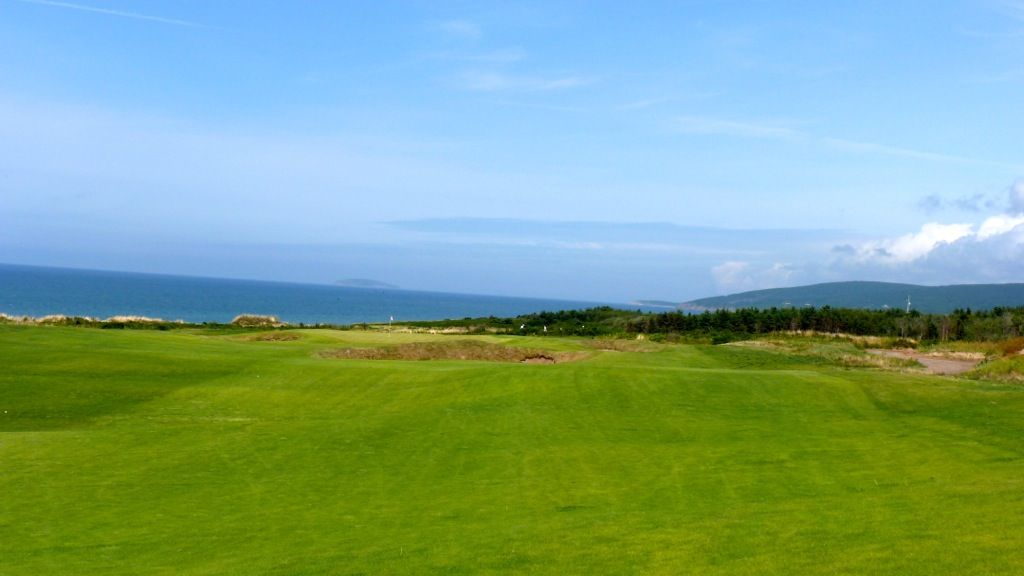
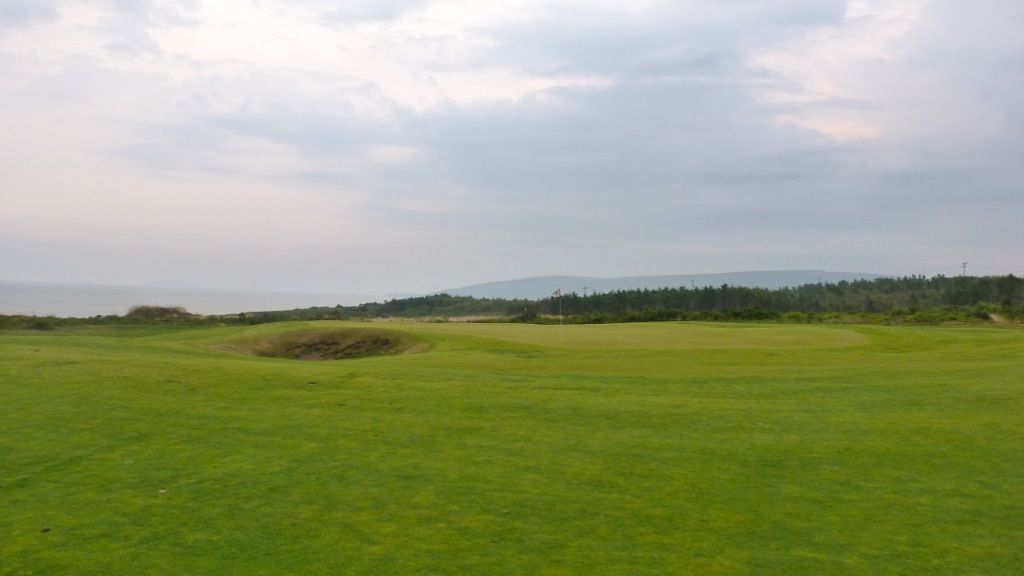
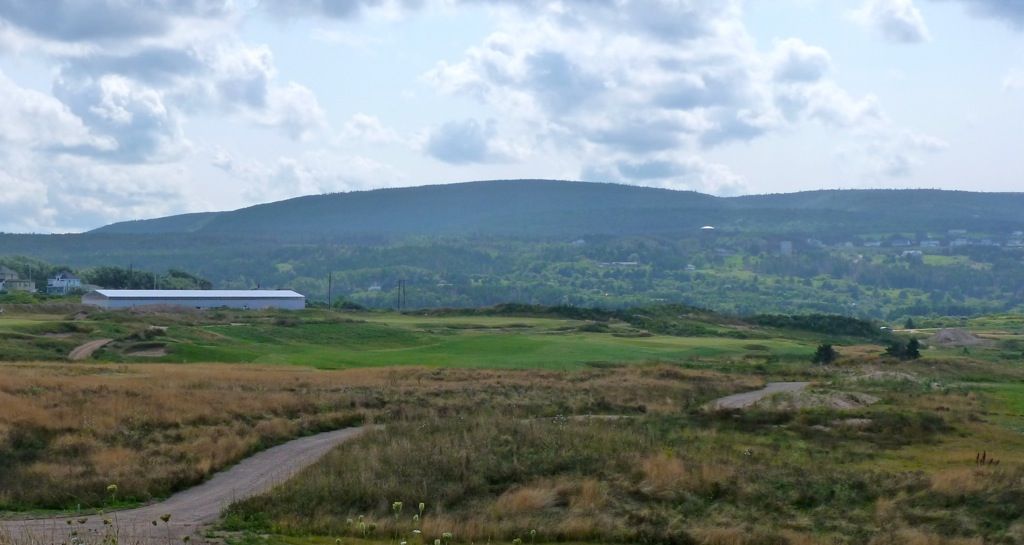
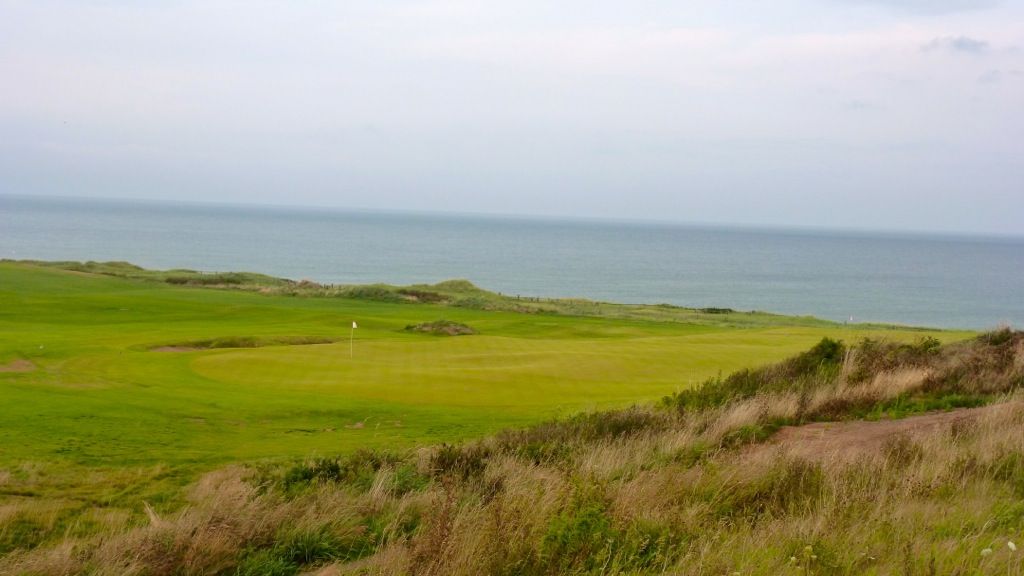
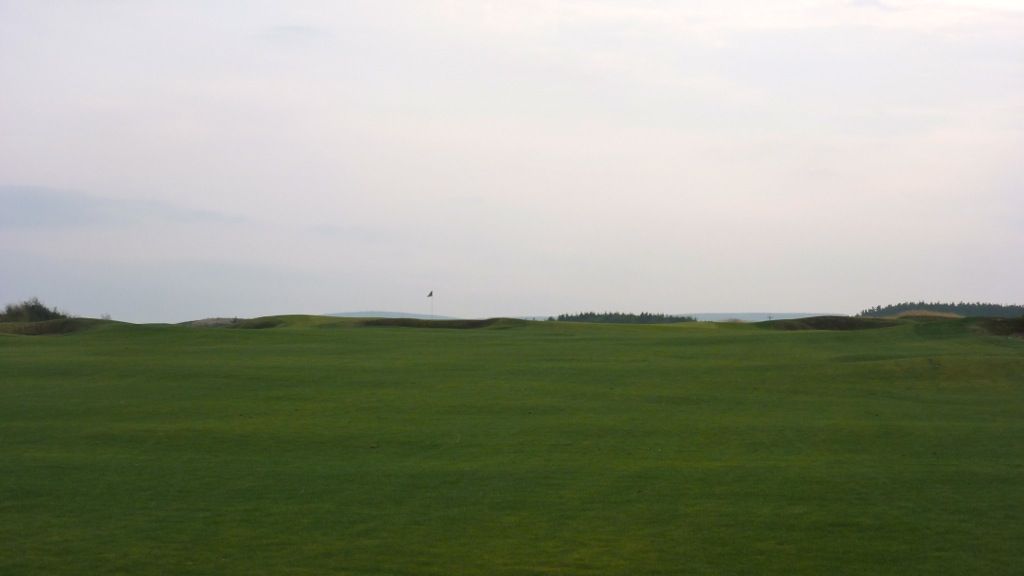
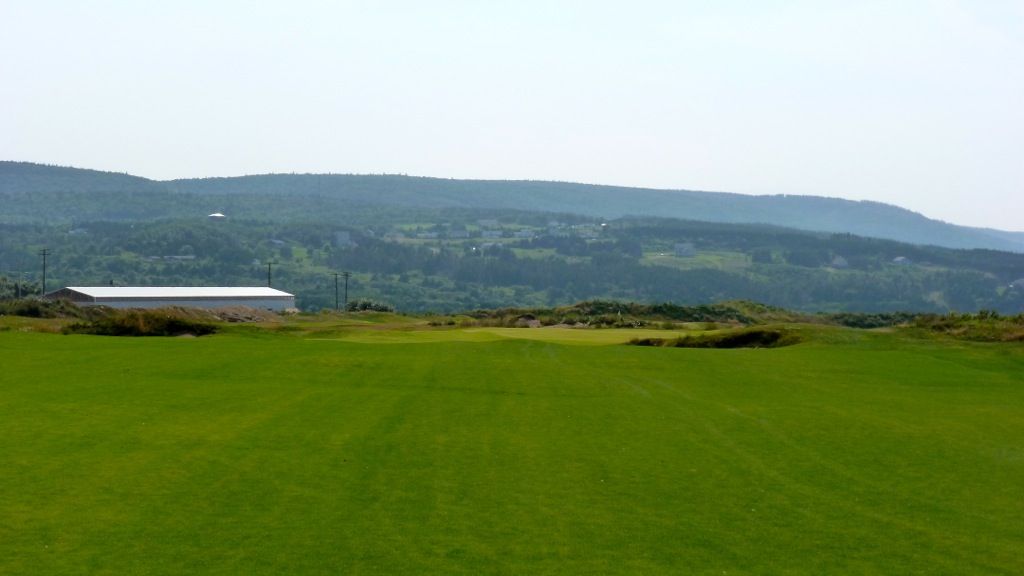
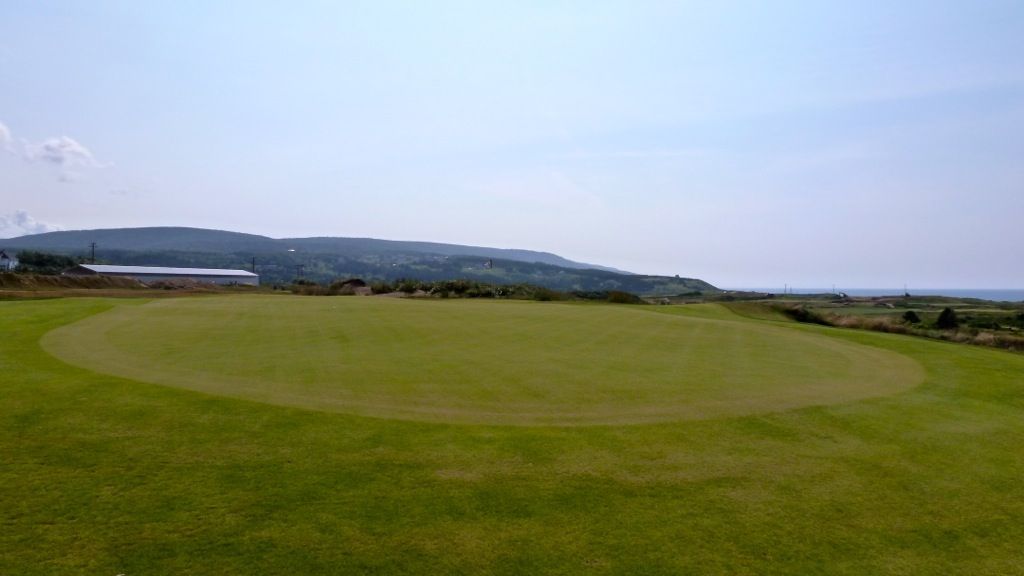
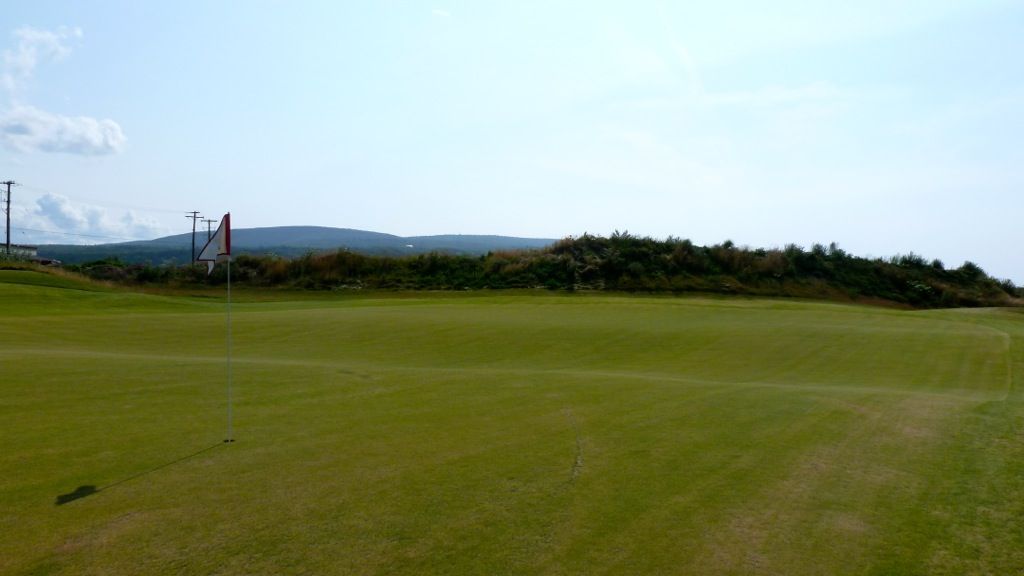
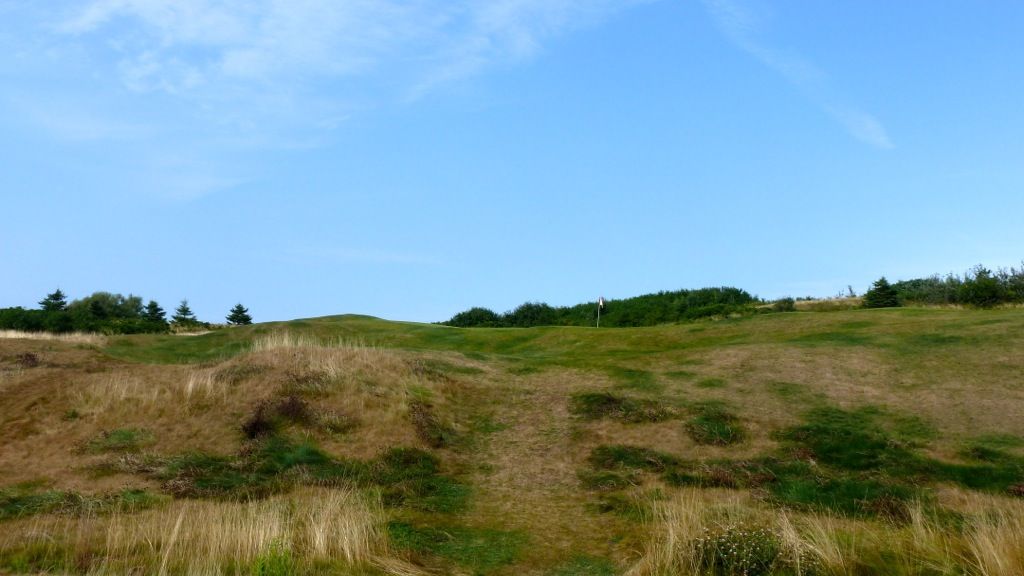
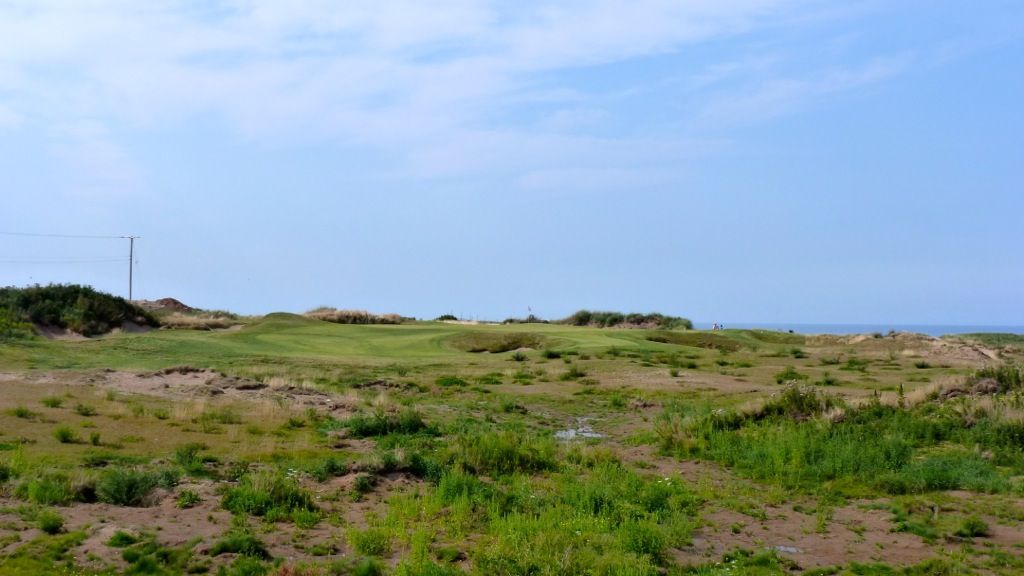
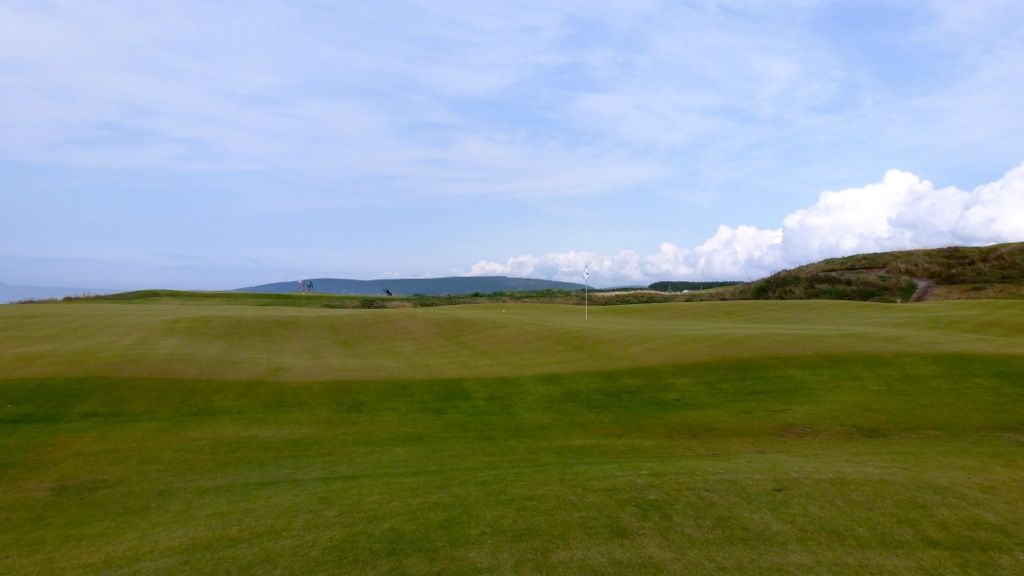
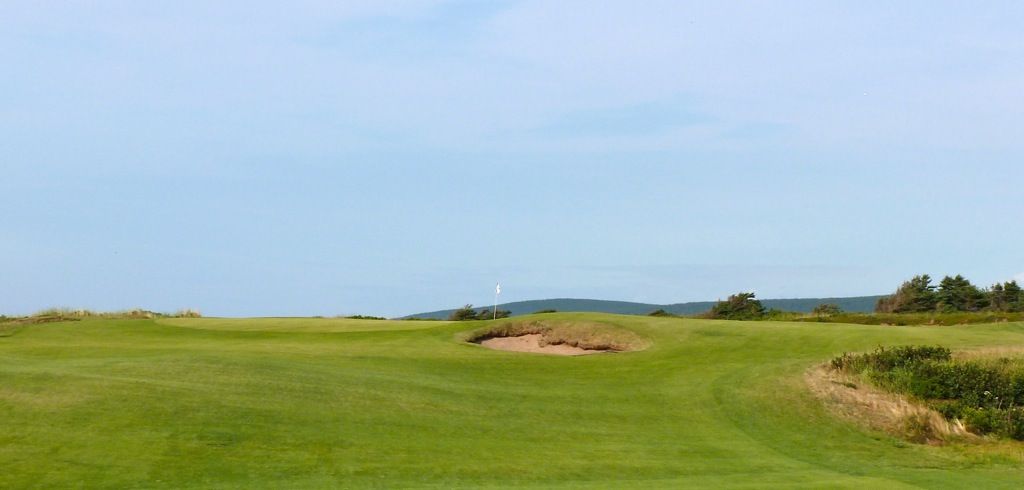
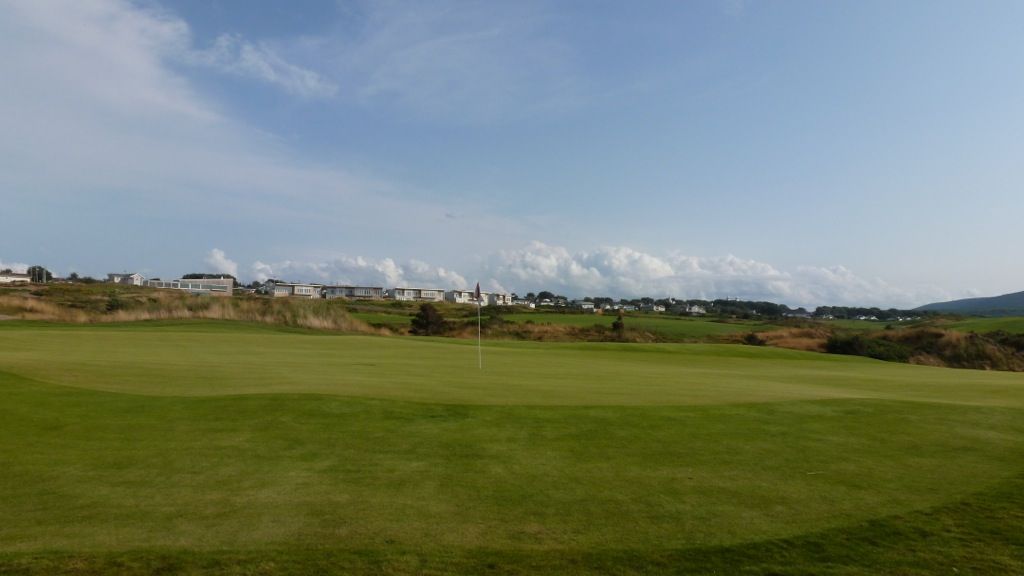
The view from the 3rd from the backs, Silver tees. From here the bunkers are less in play and one can get a view of the flag (and just the flag) over the crest of the hill.
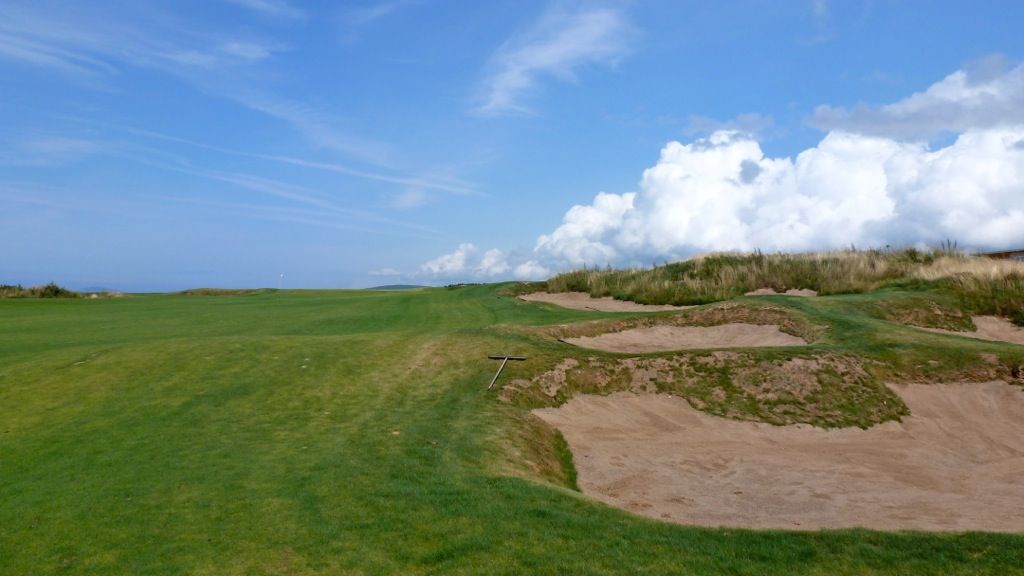
The fairway bunkers right. Out-of-play except when they're in play.
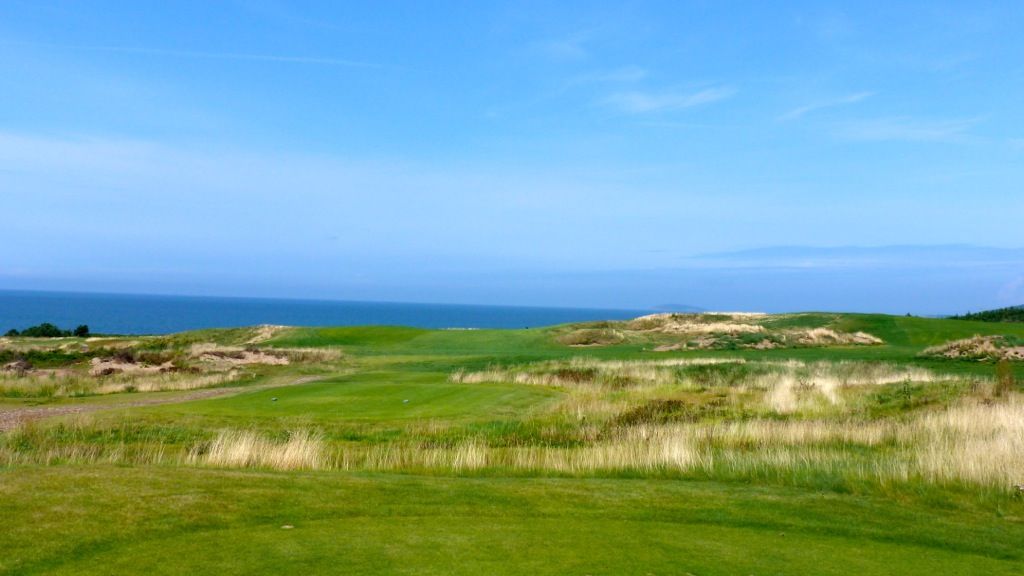
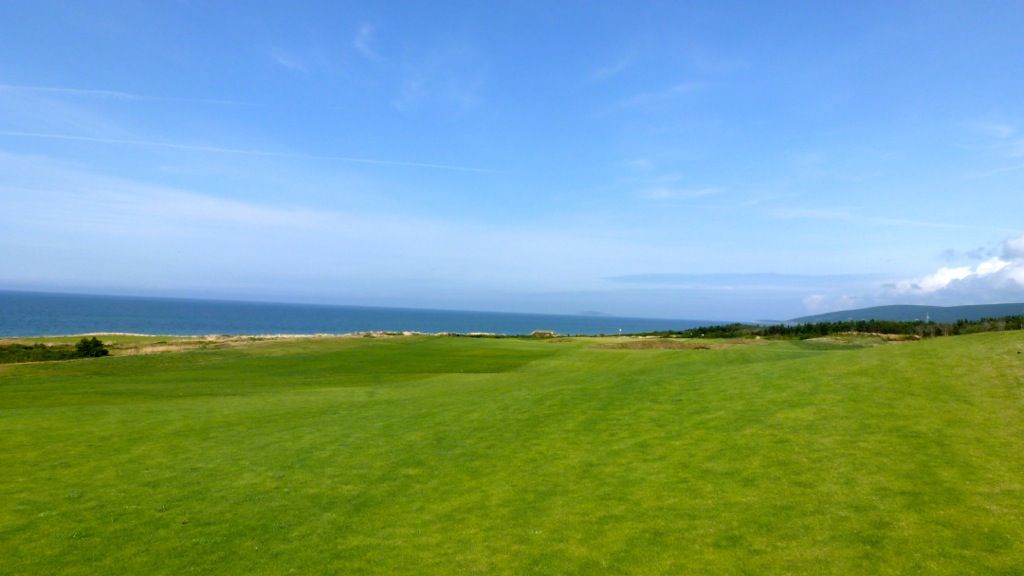
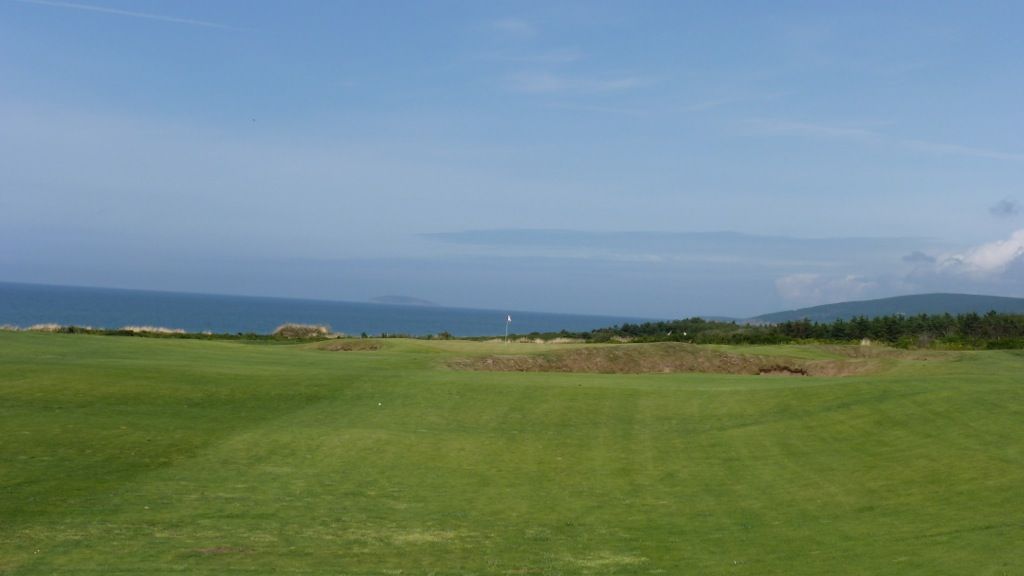
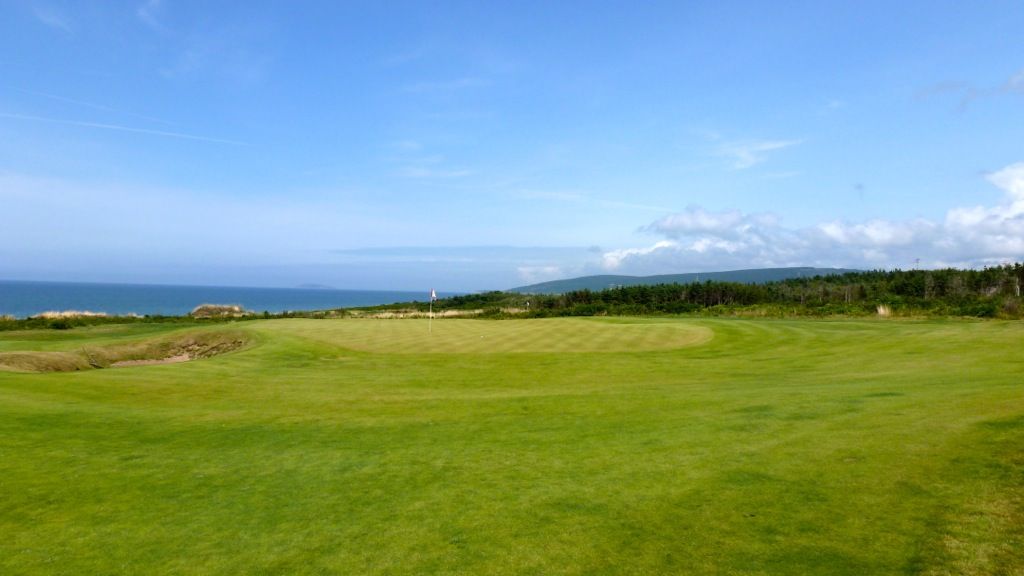
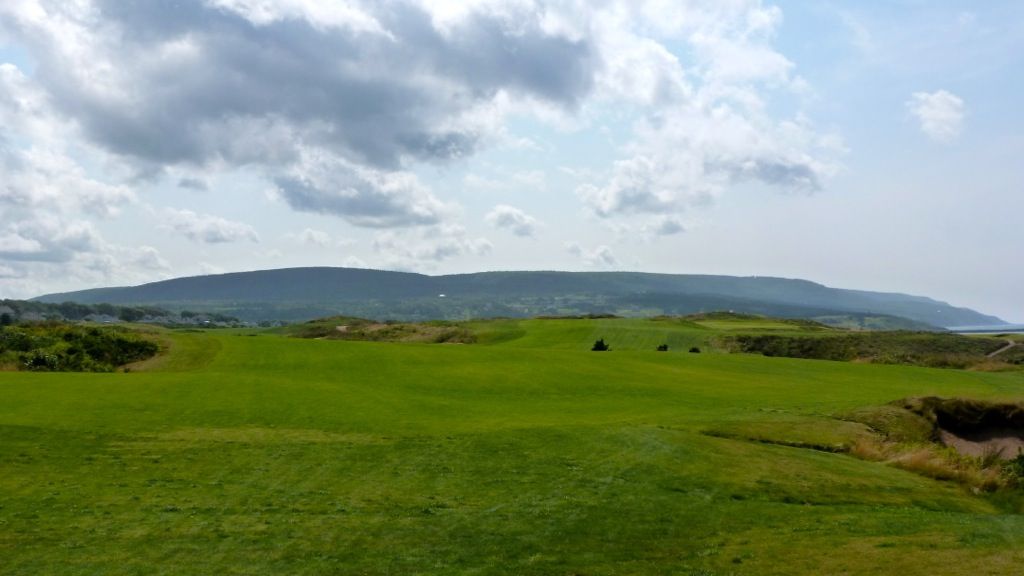
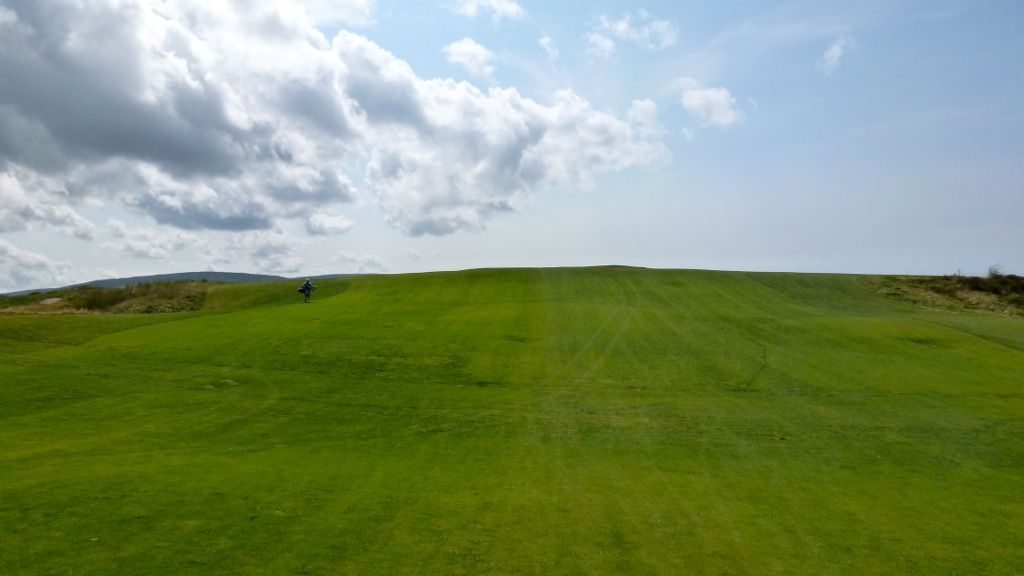
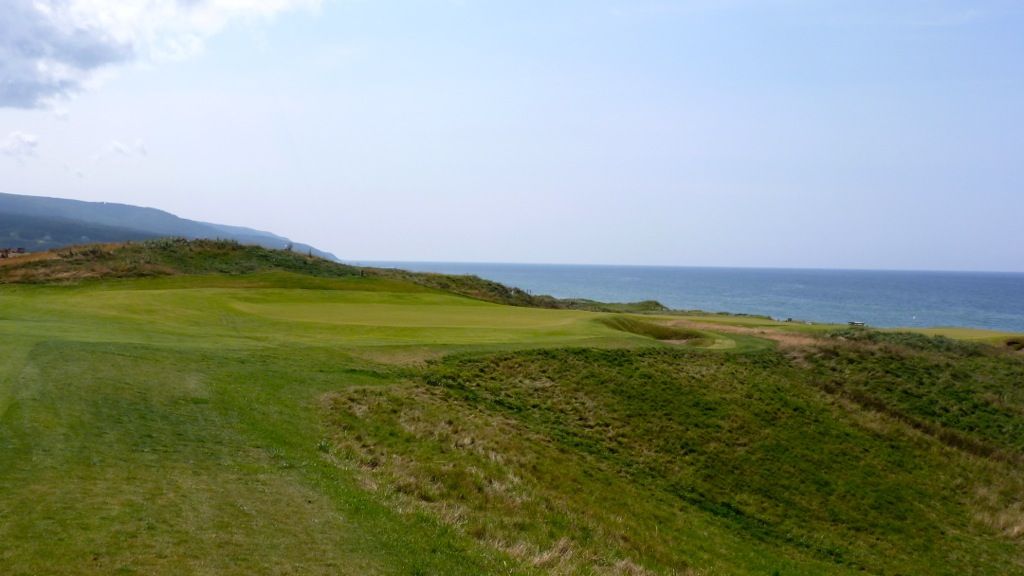
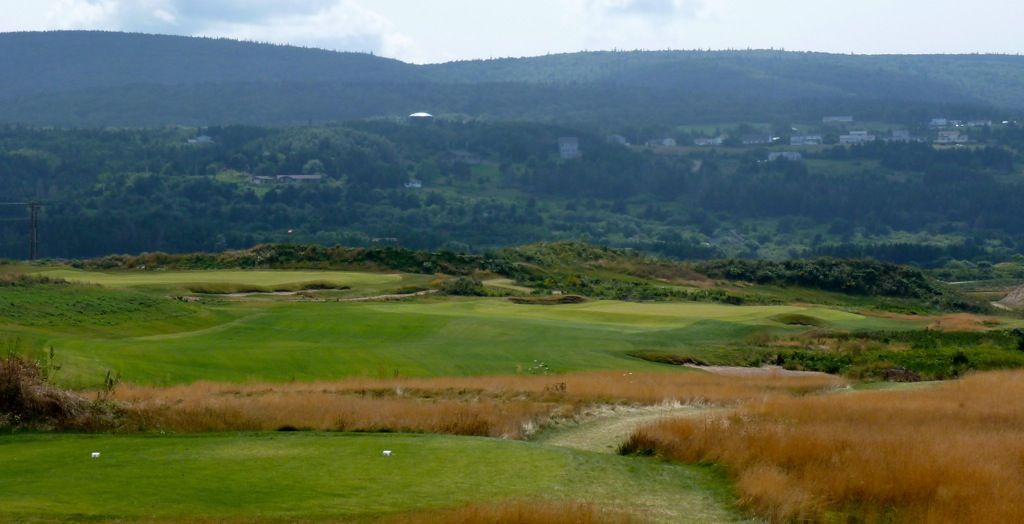
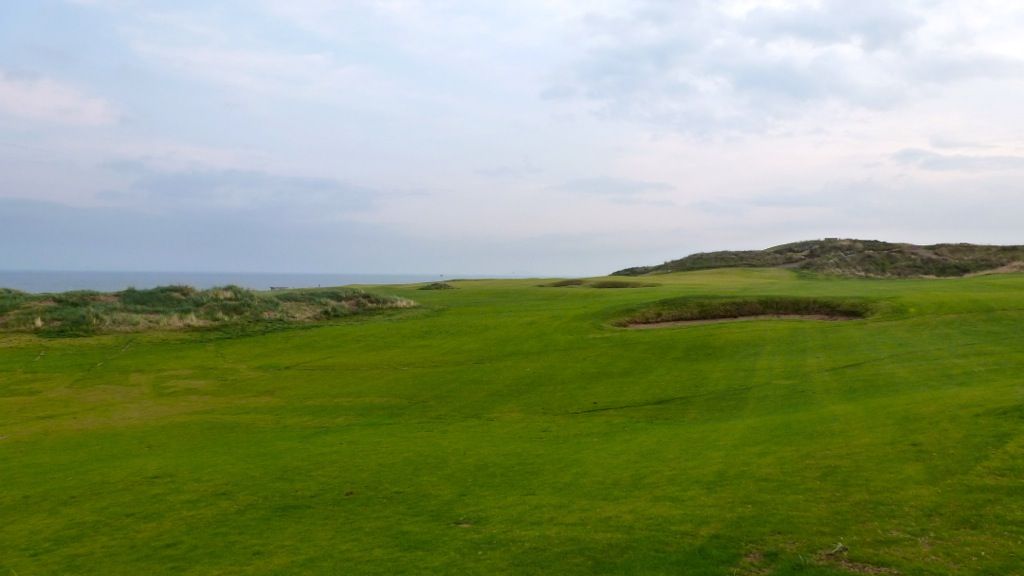
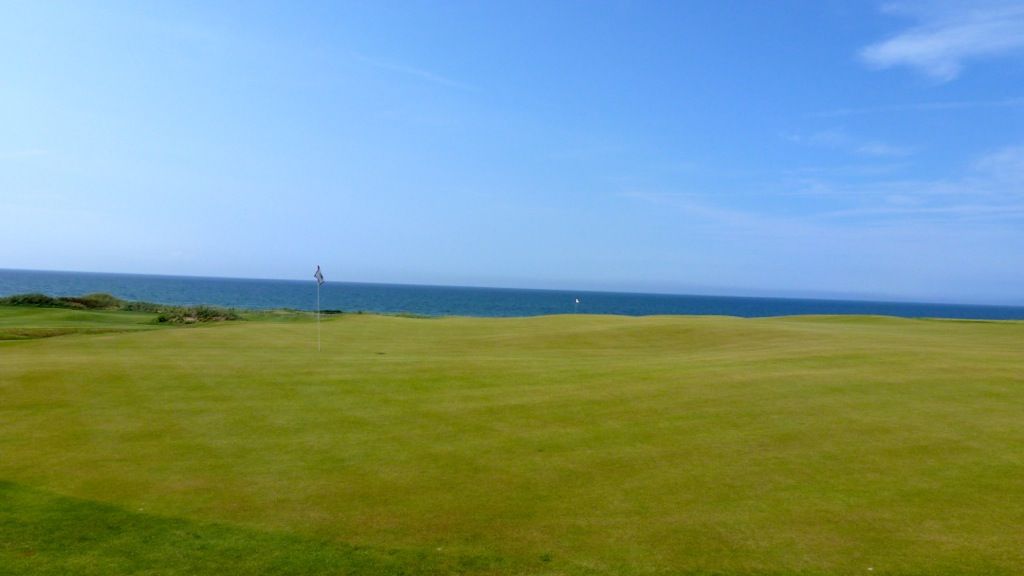
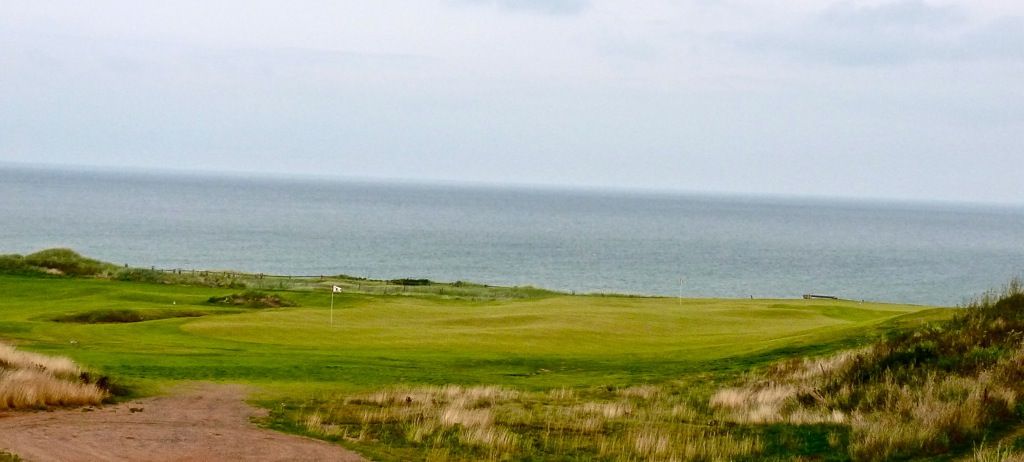
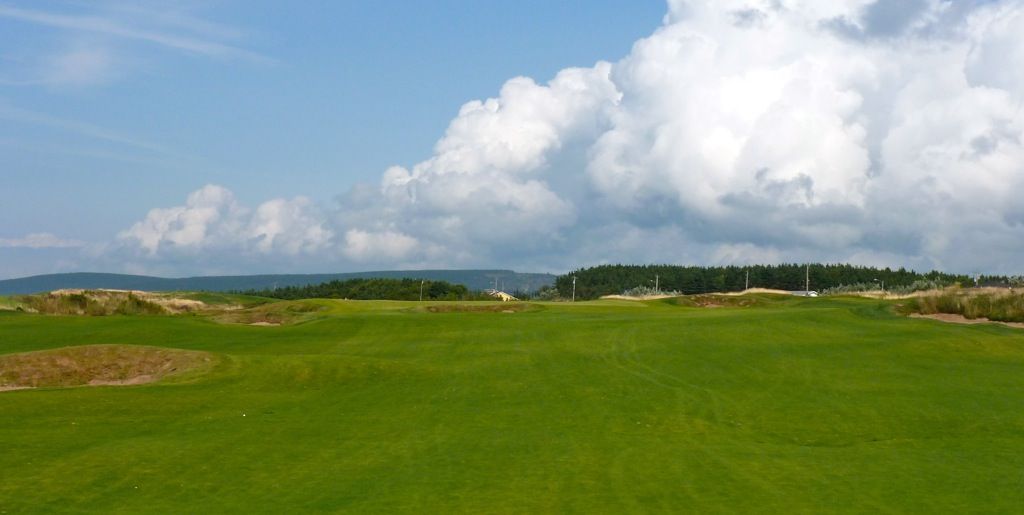
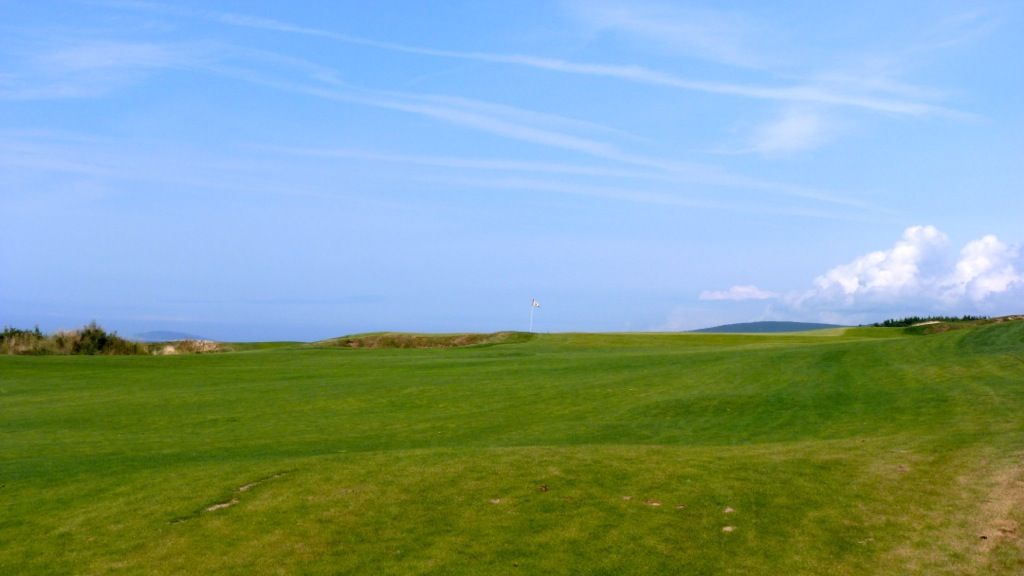
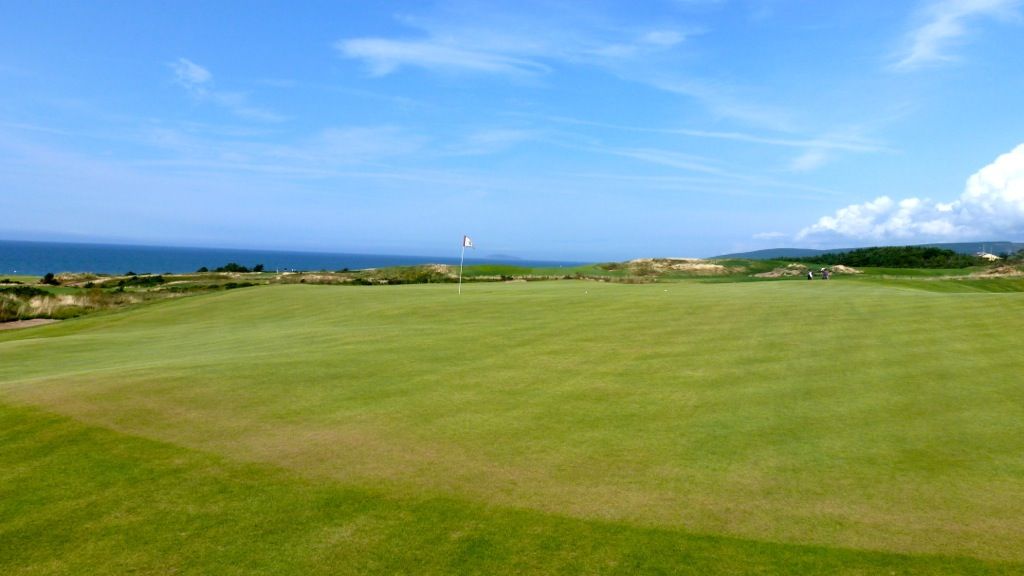
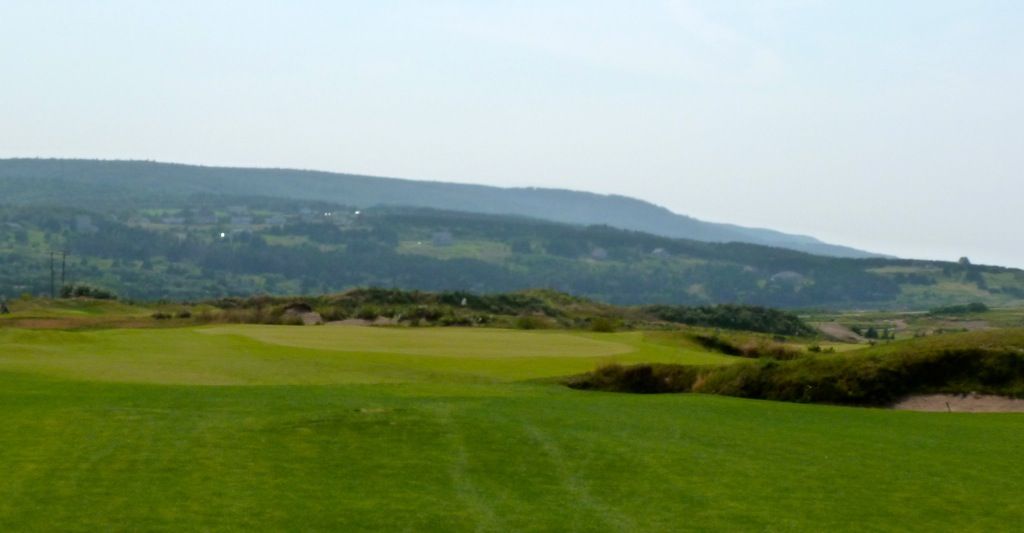
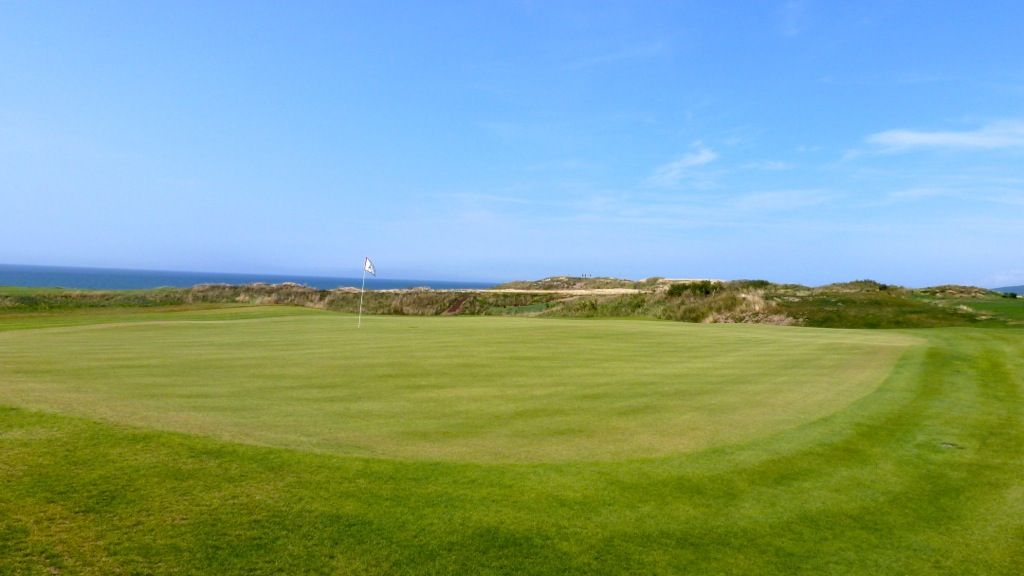
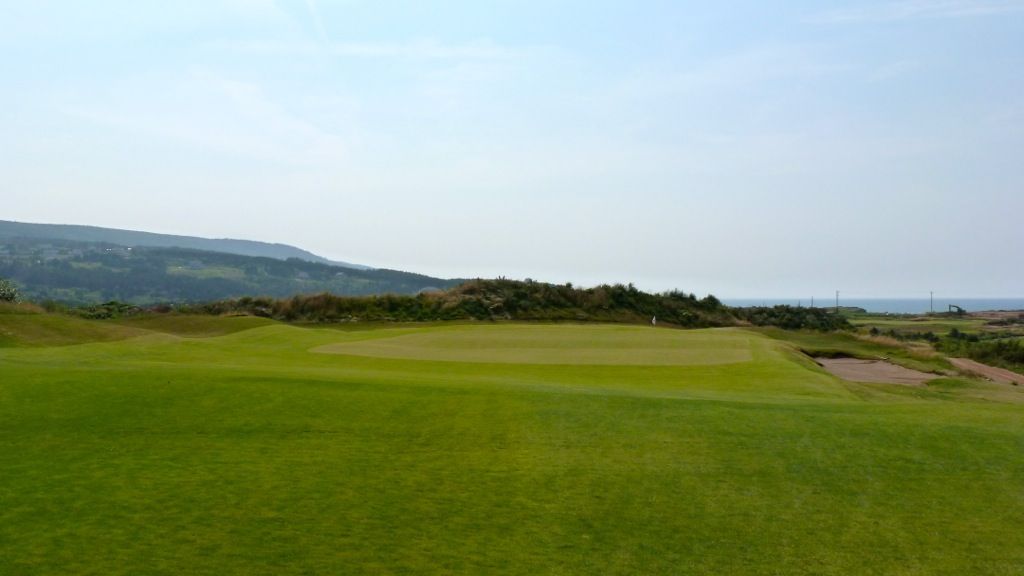
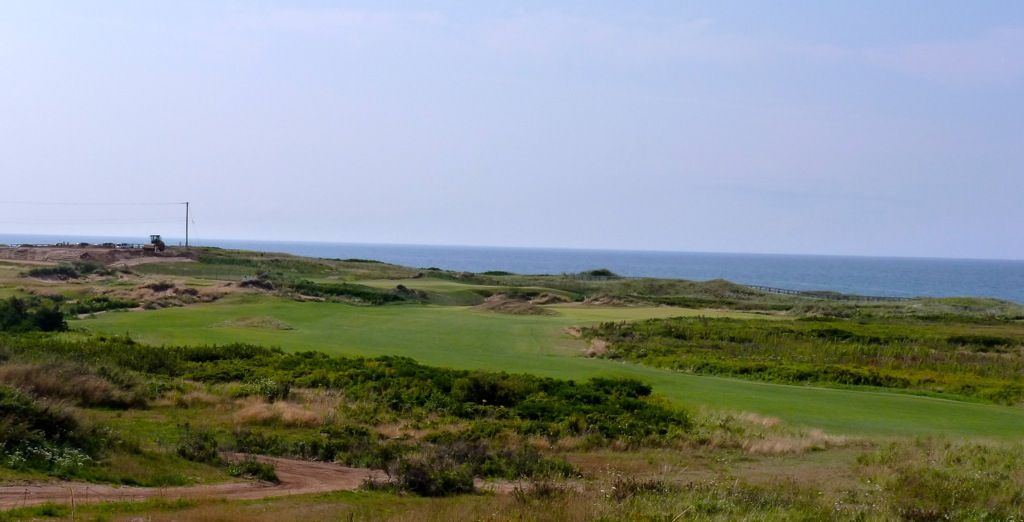
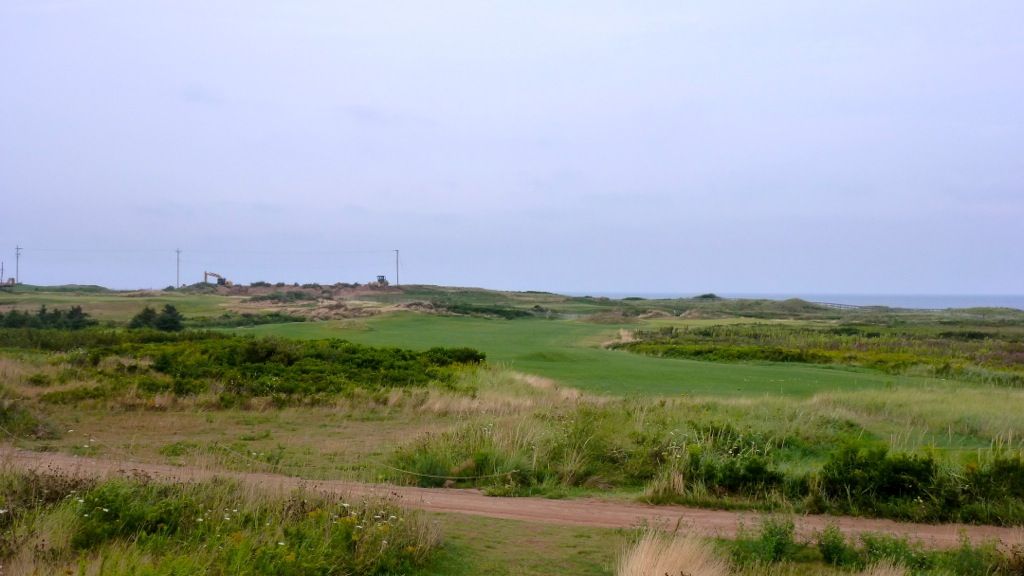
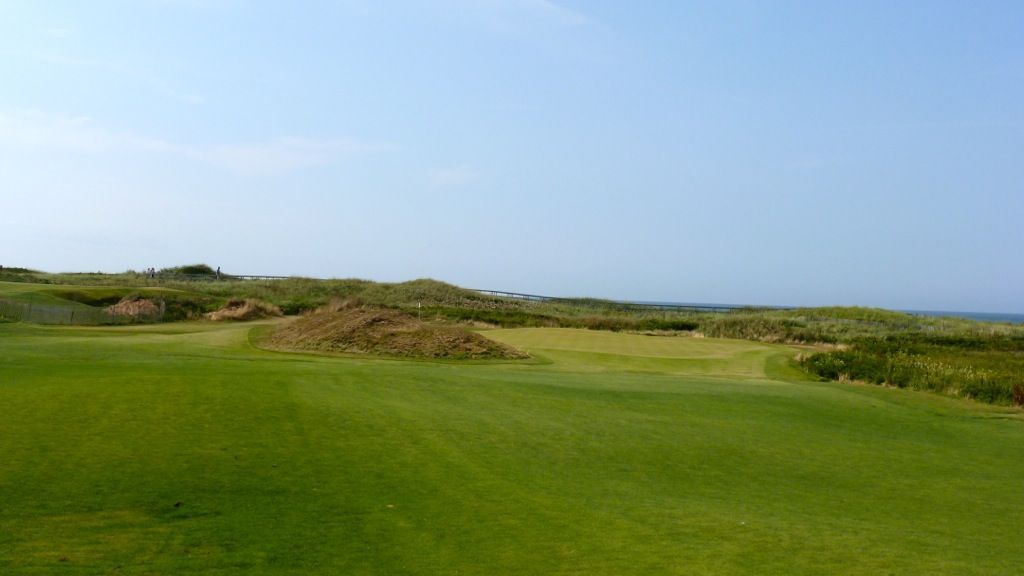
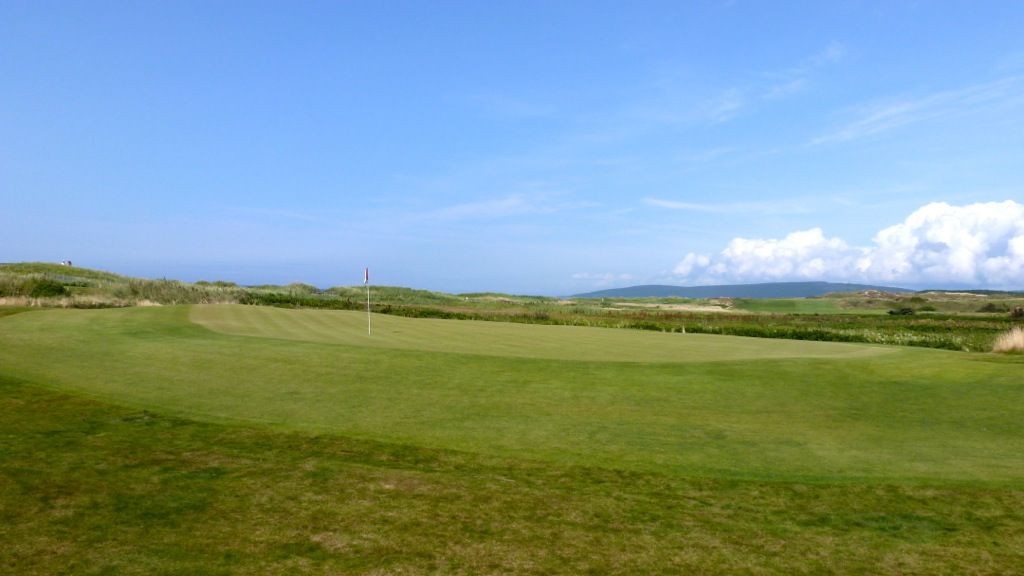
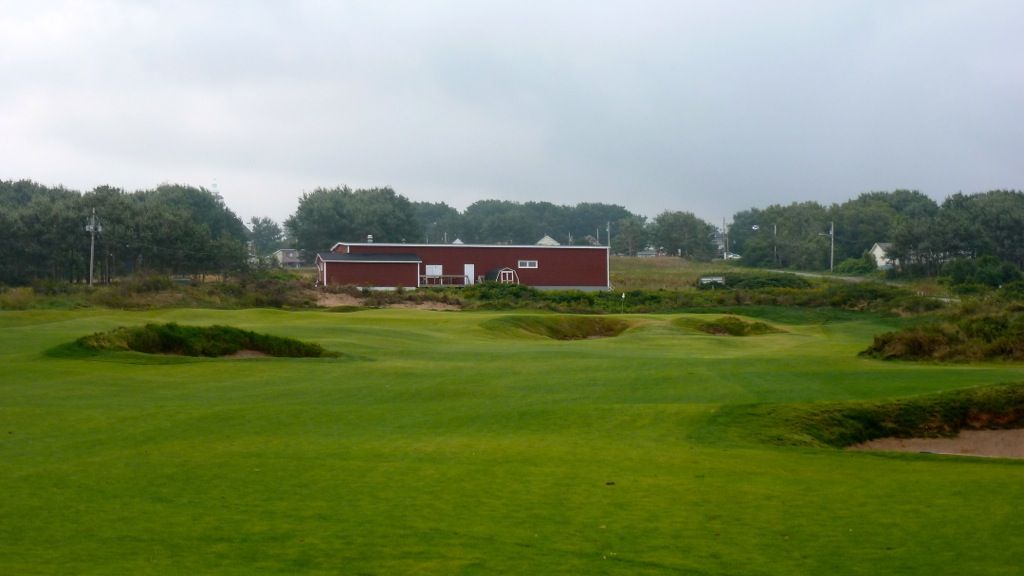
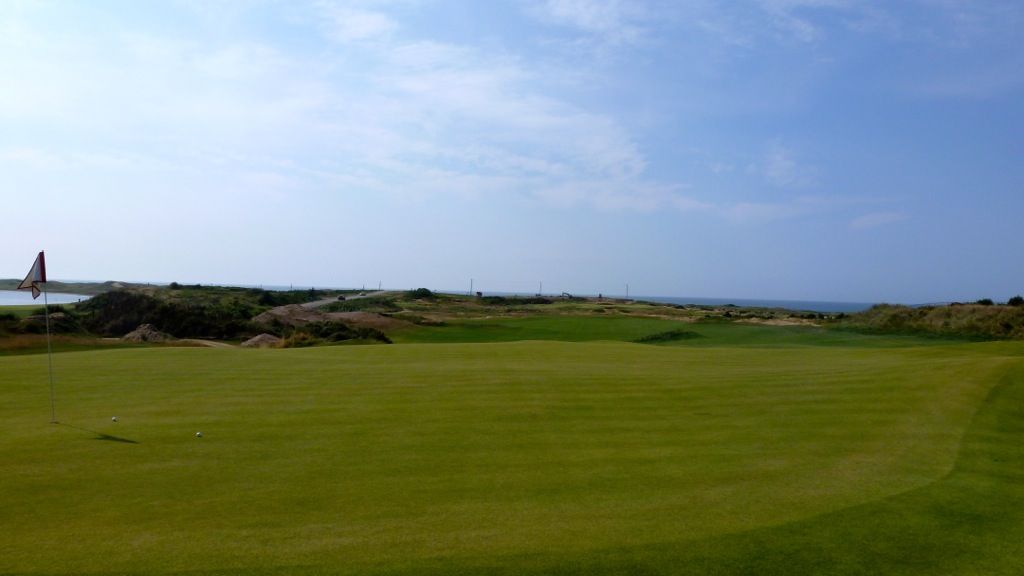
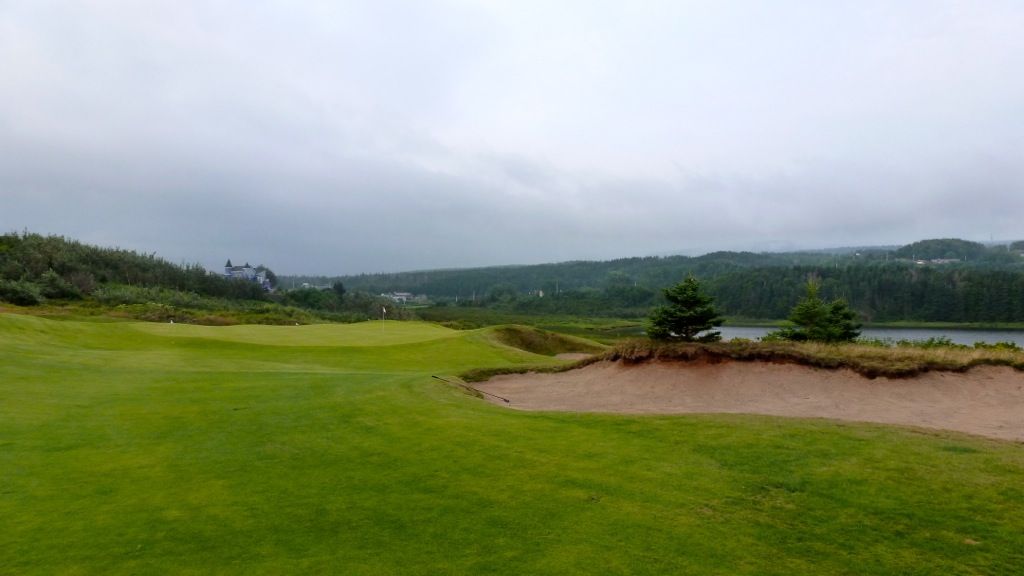
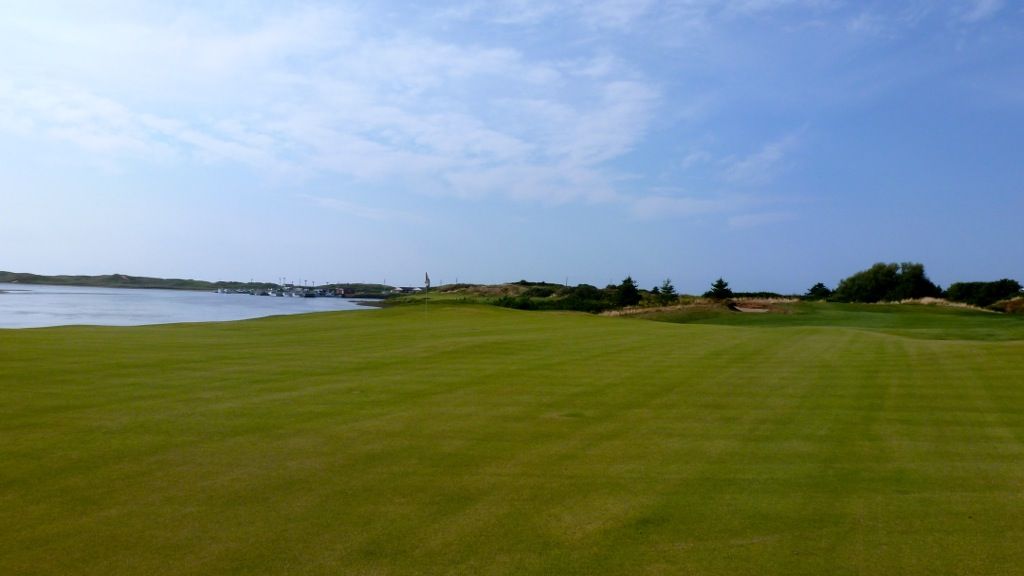
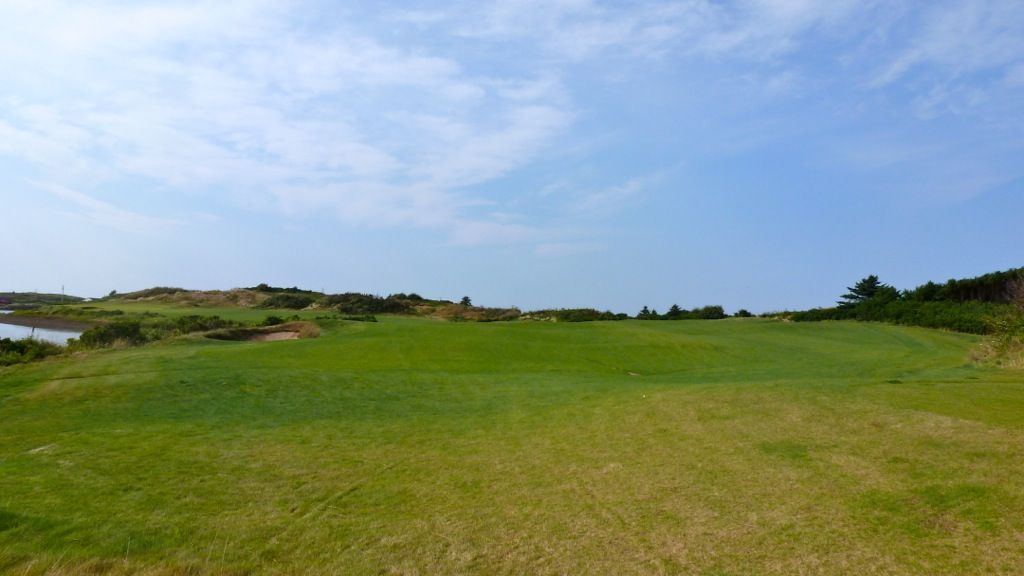
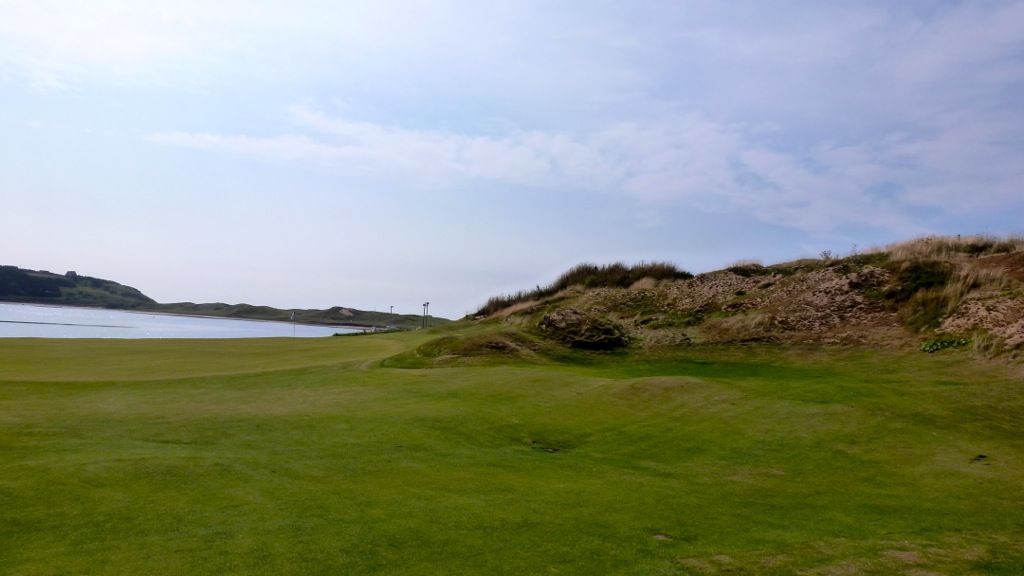
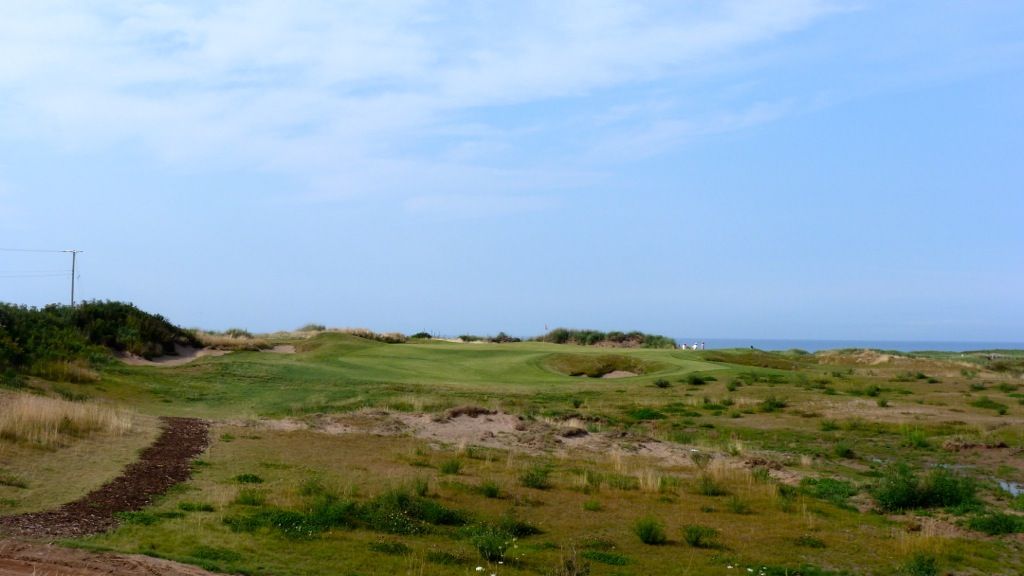
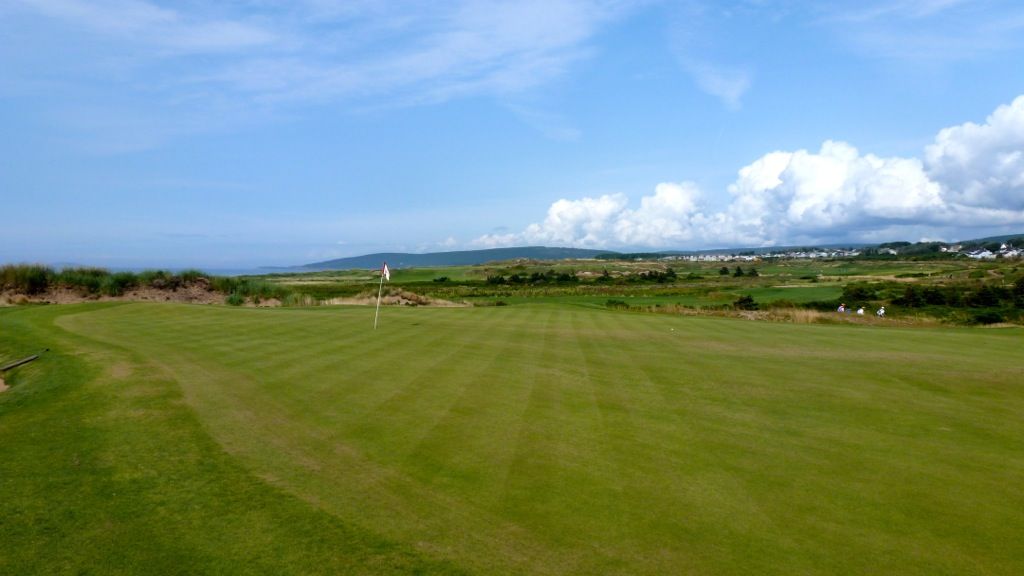
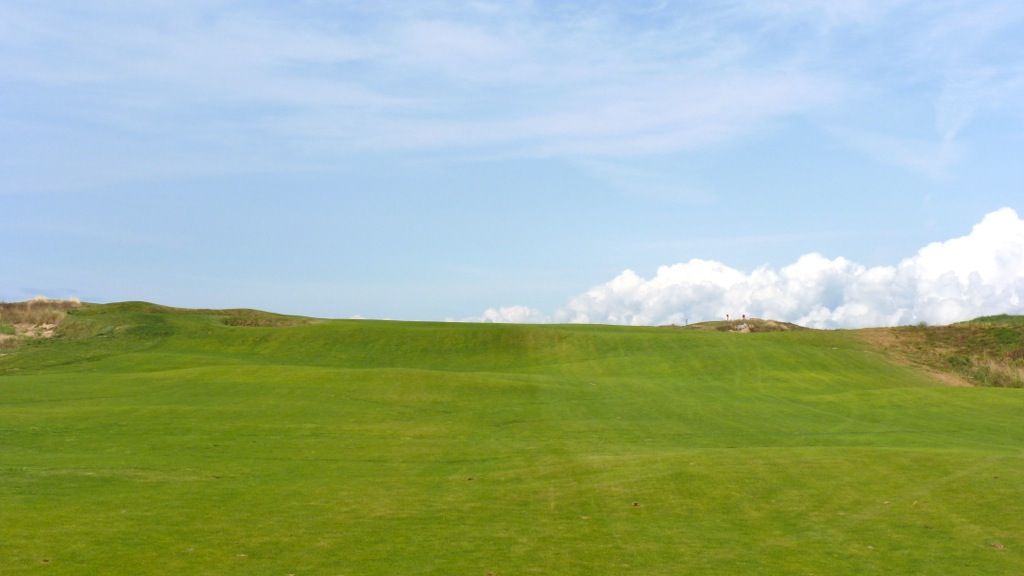
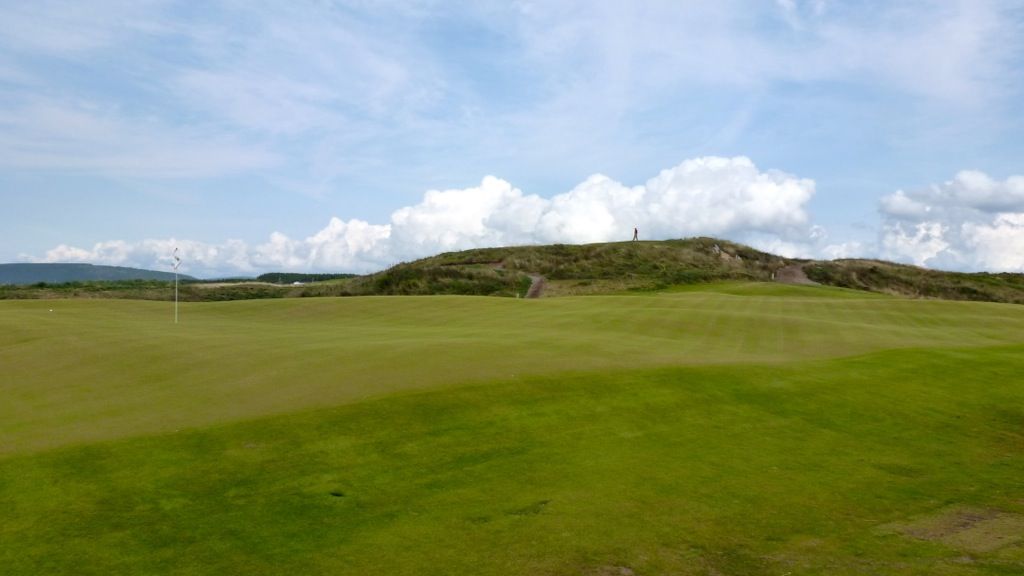
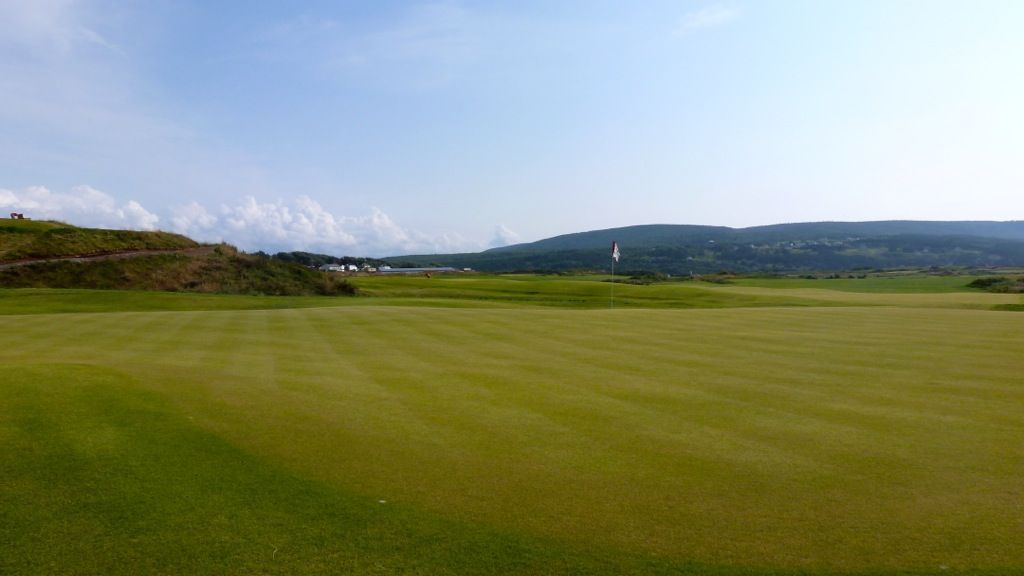
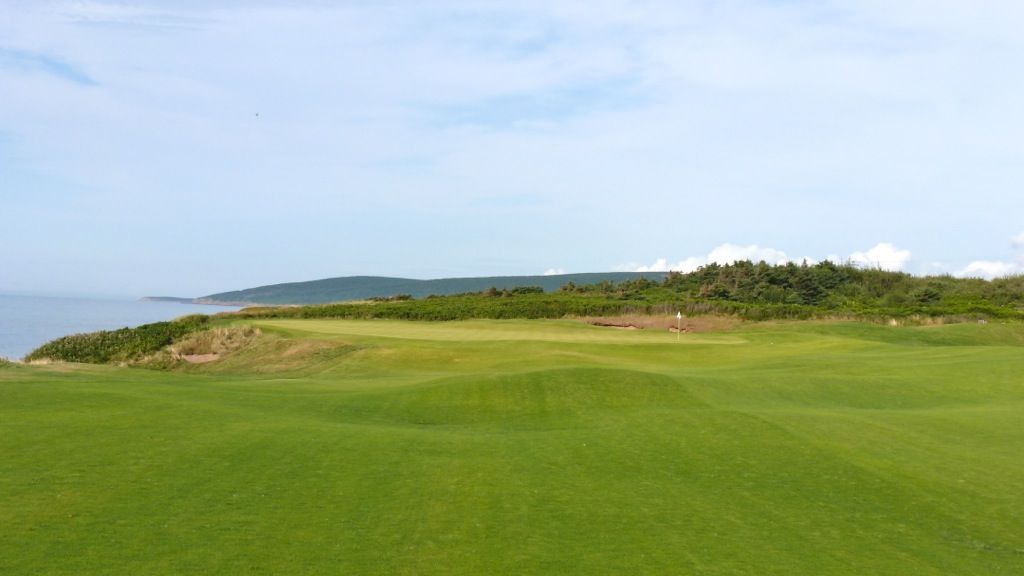
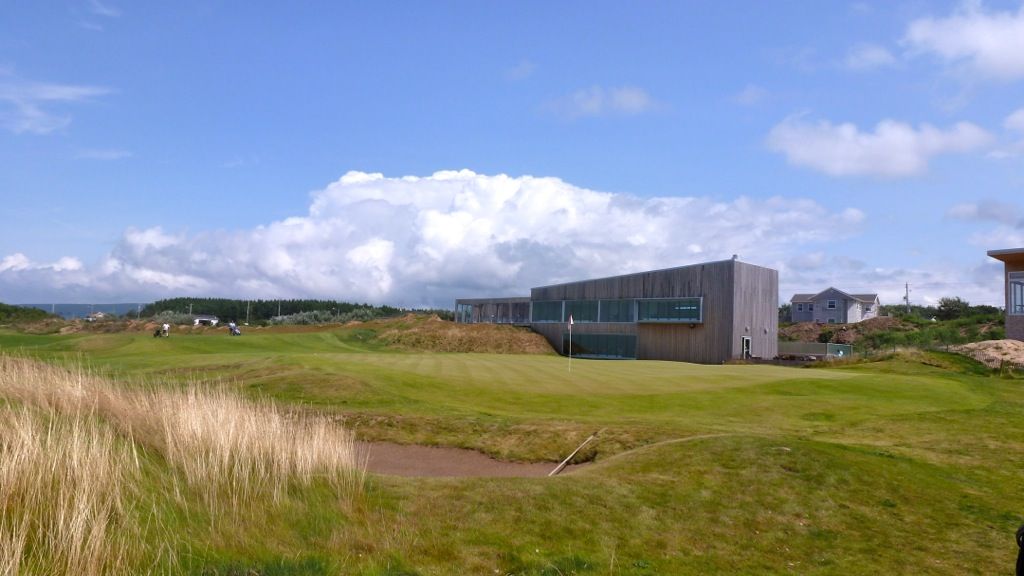
Anticipation builds as the golfer ascends the hill. Cresting the hill no golfer will be disappointed. A great view of the massive fairway, wildly undulating green and the Gulf of St Lawrence awaits! As expected, mowing lines are excellent and kickers and speed-slots effectively reward aggressively played tee shots.
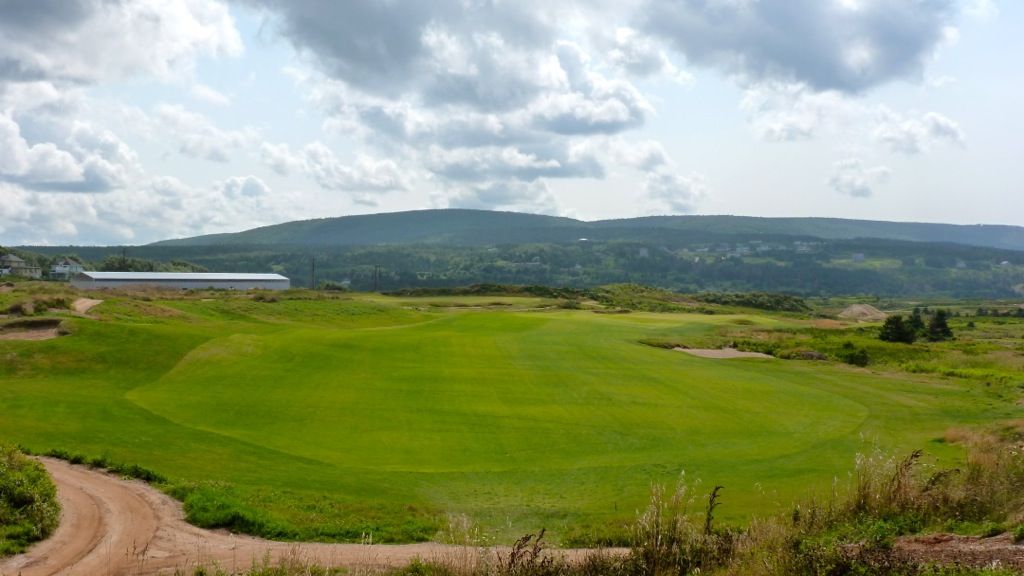
The first fairway is separated left and right by a ridge running down its centre (the right side is the high side).
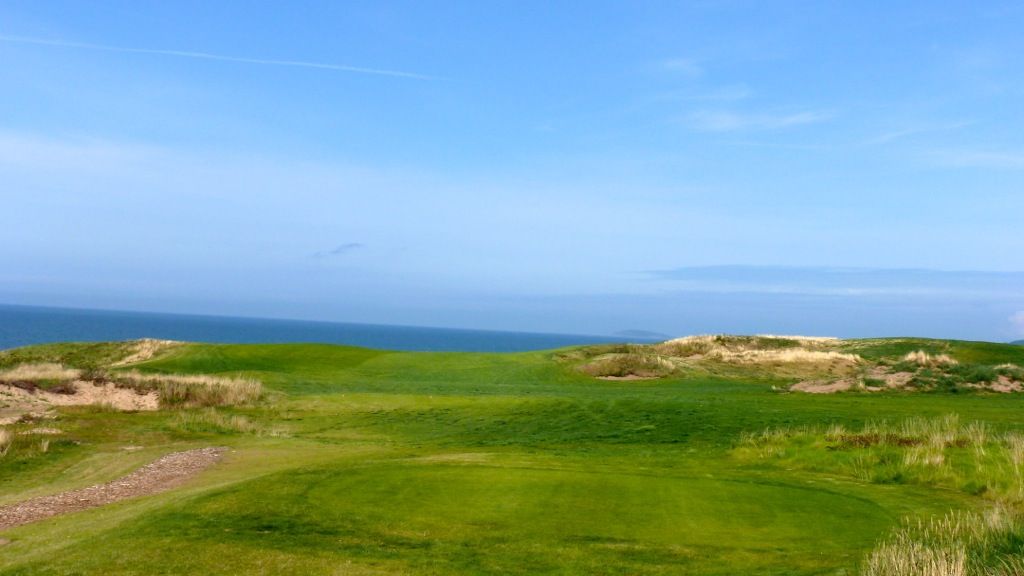
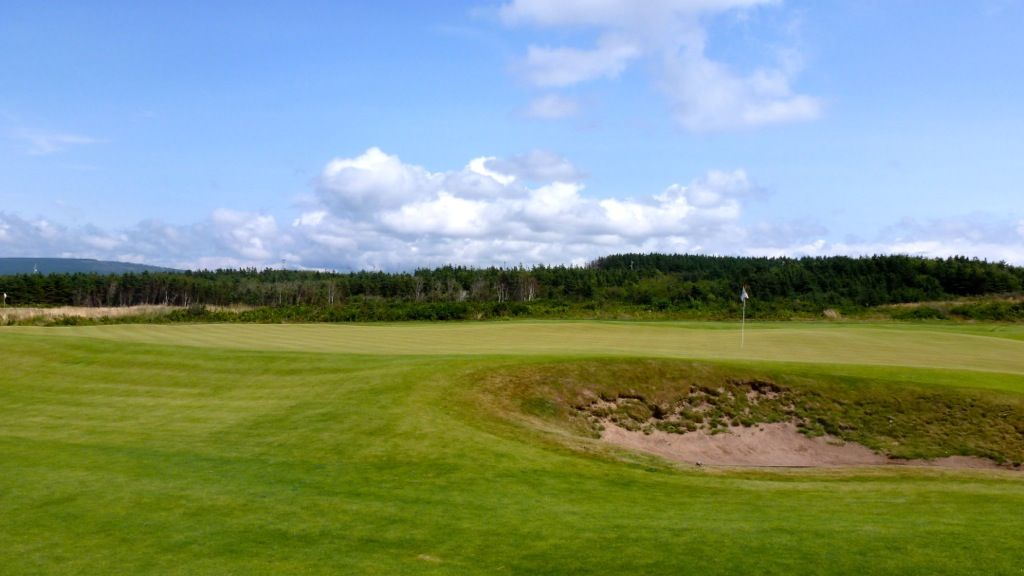
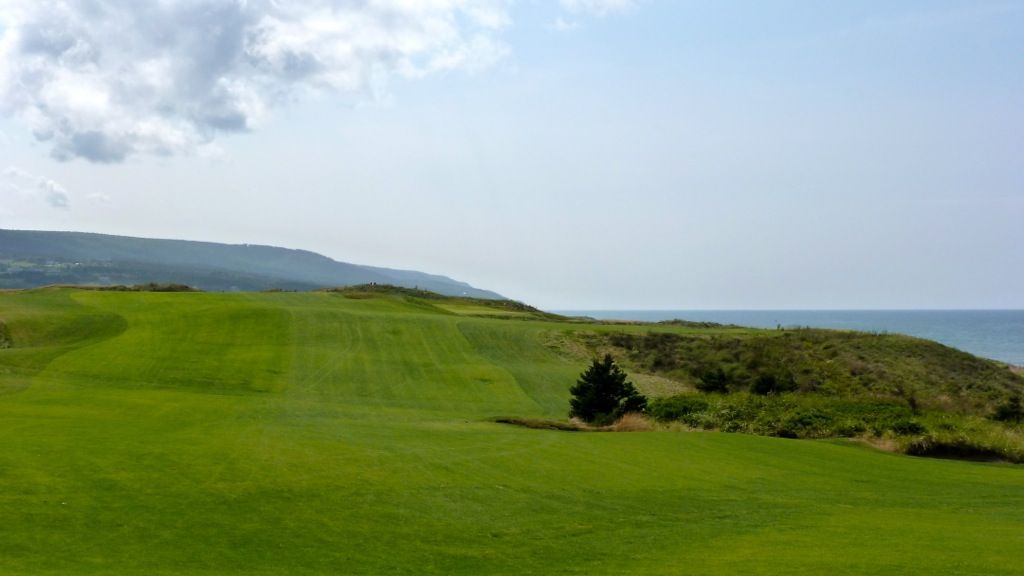
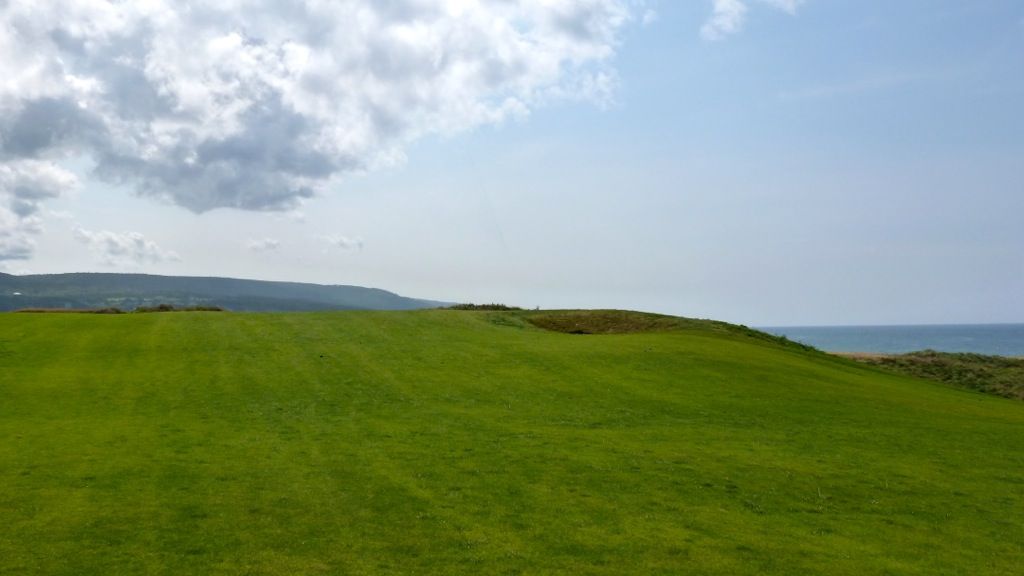
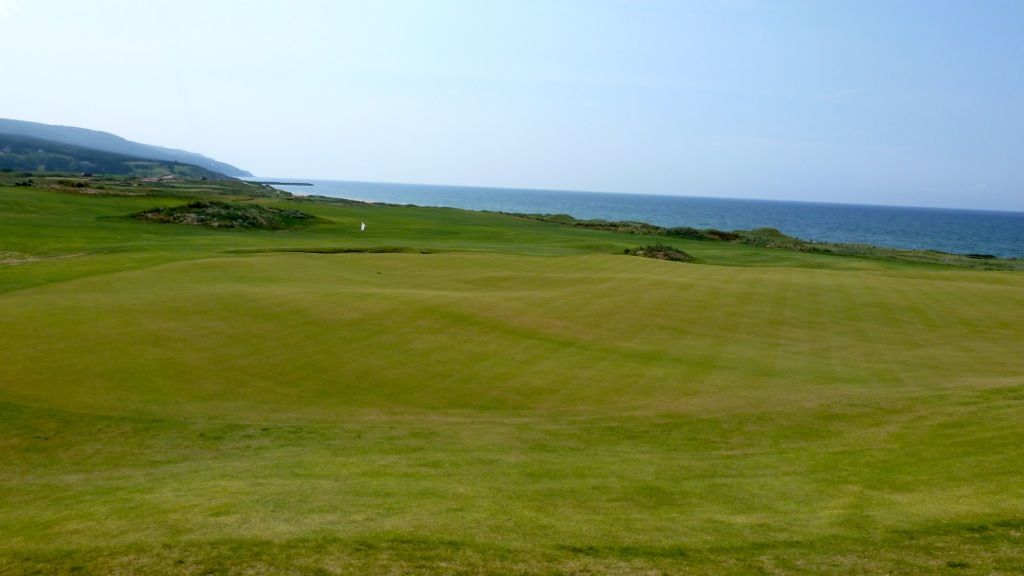
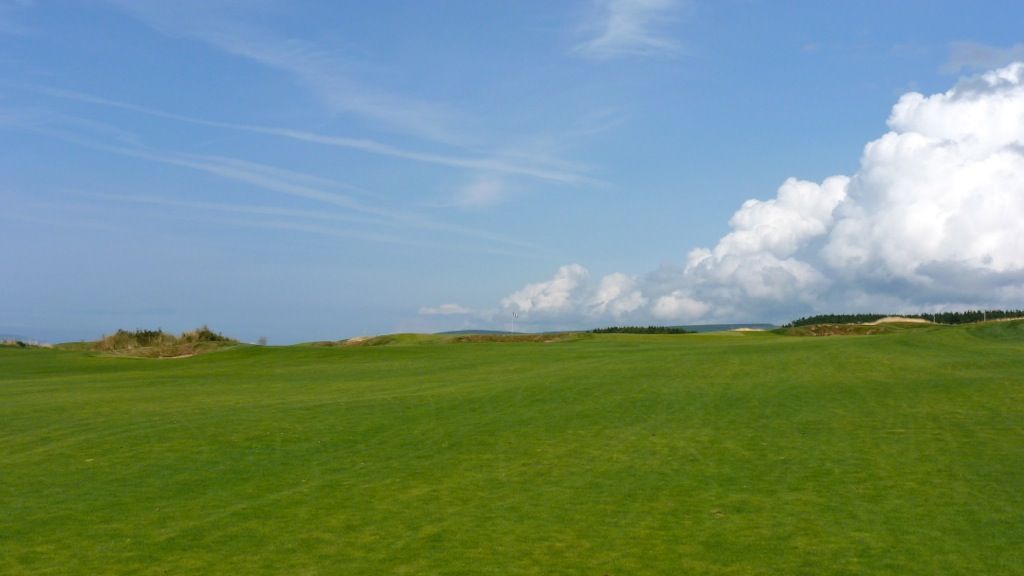
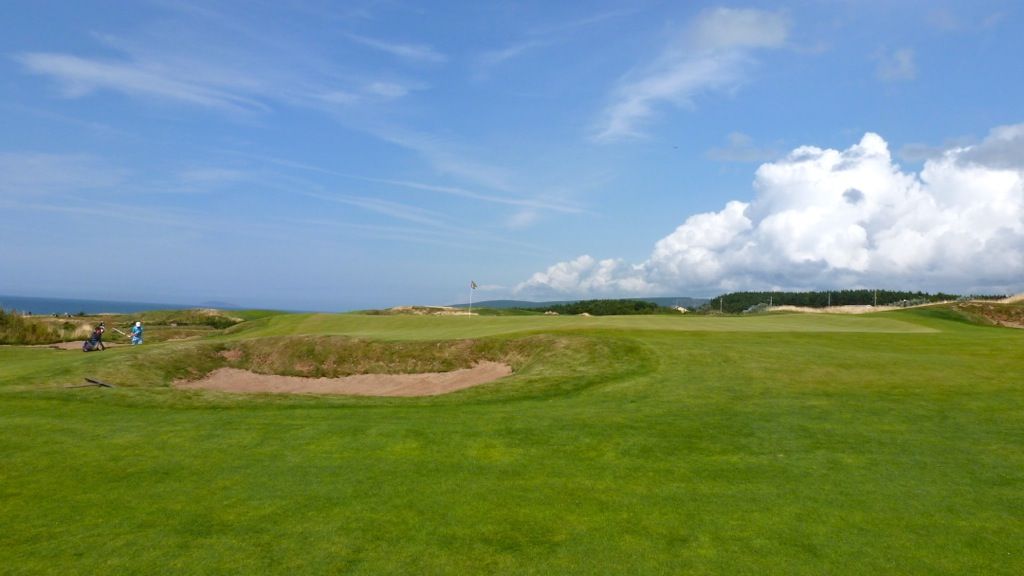
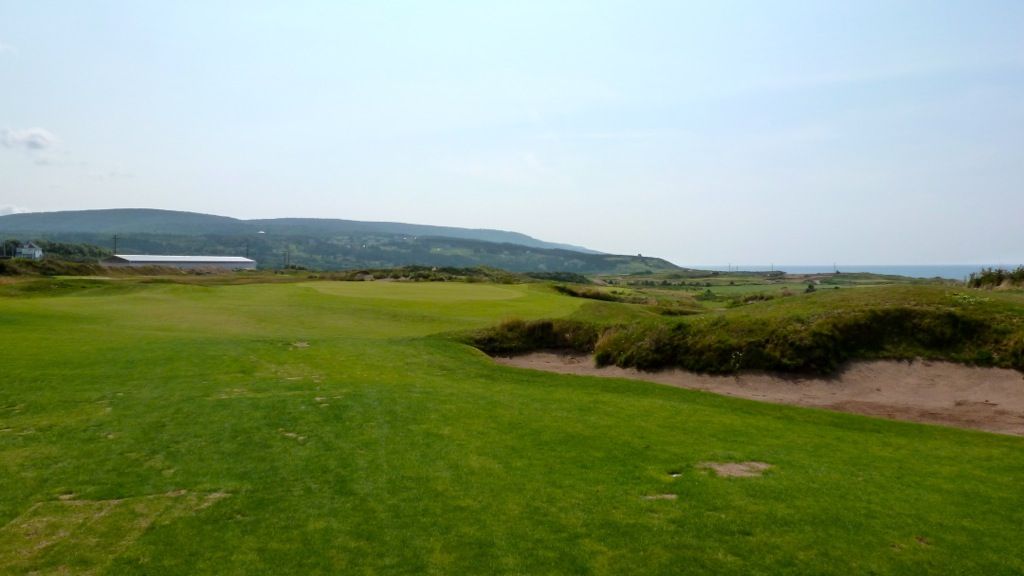
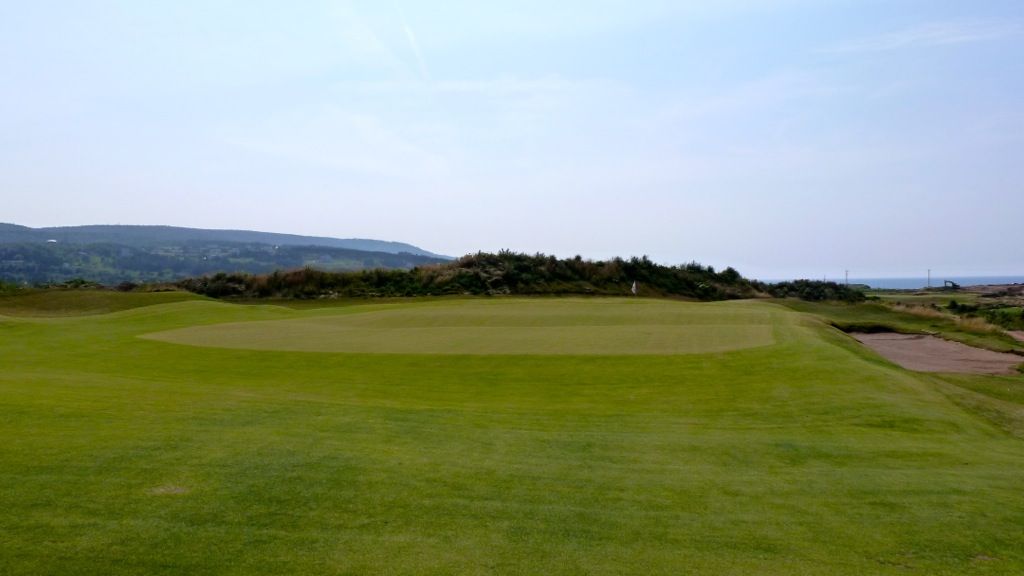
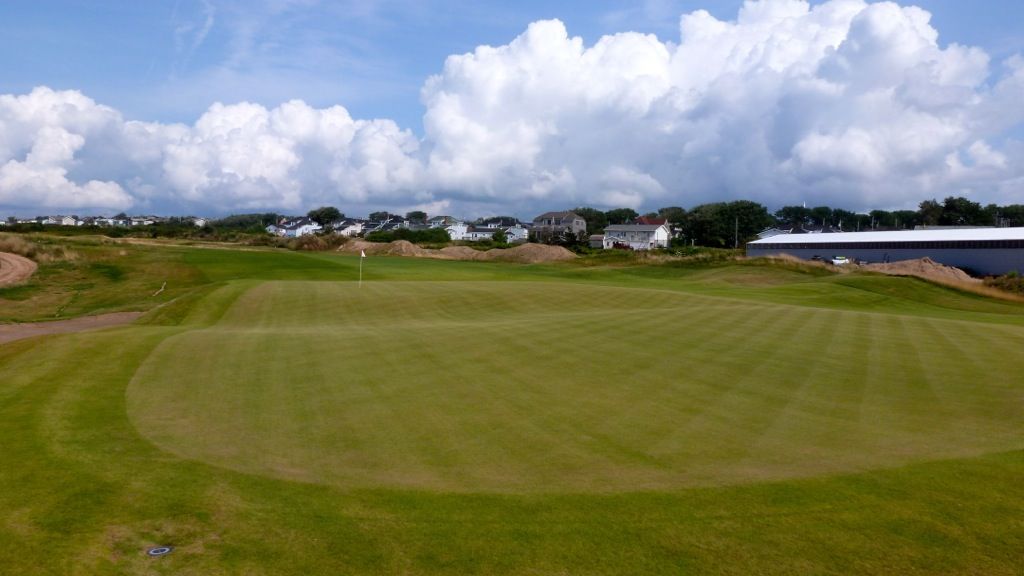
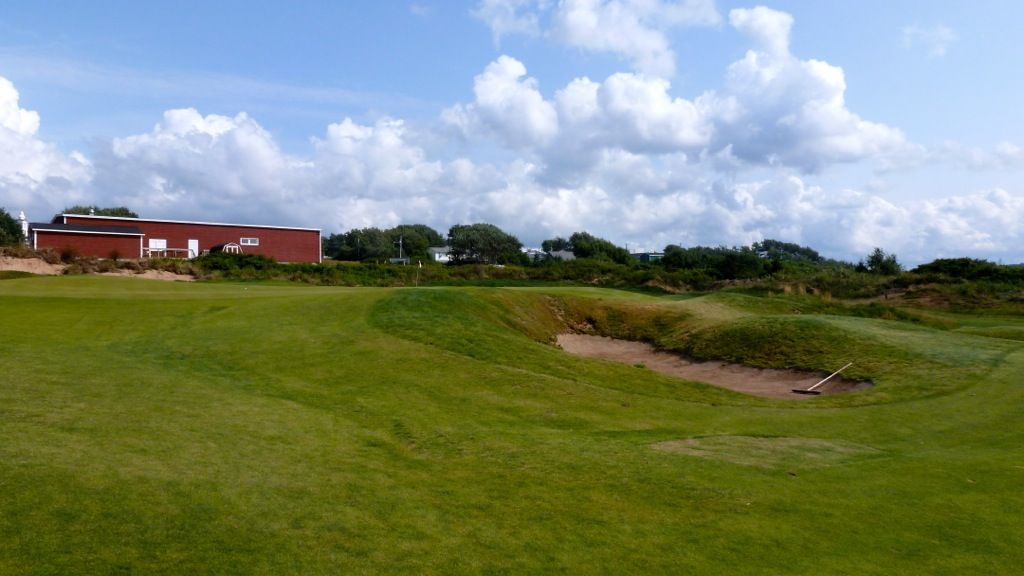
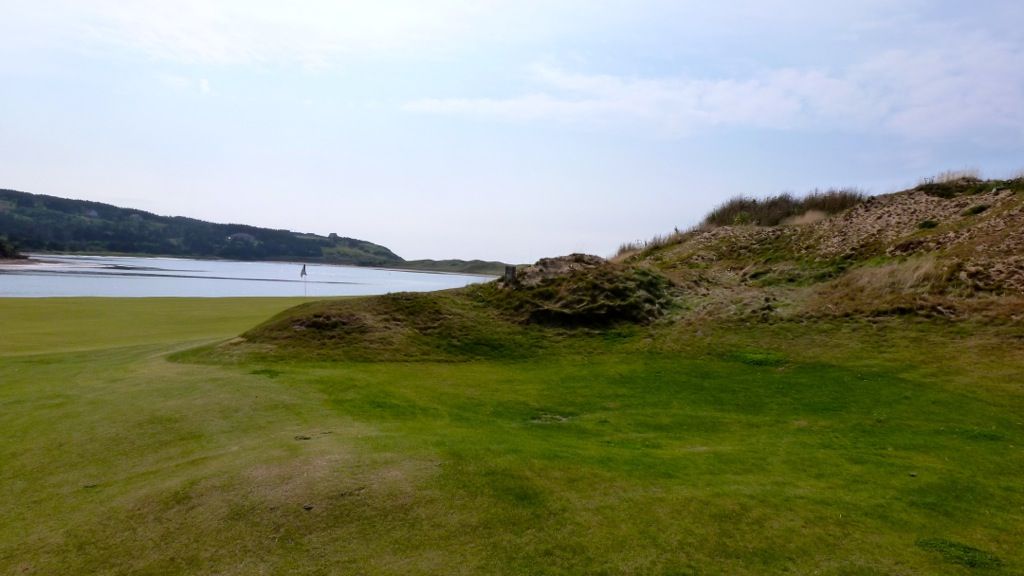
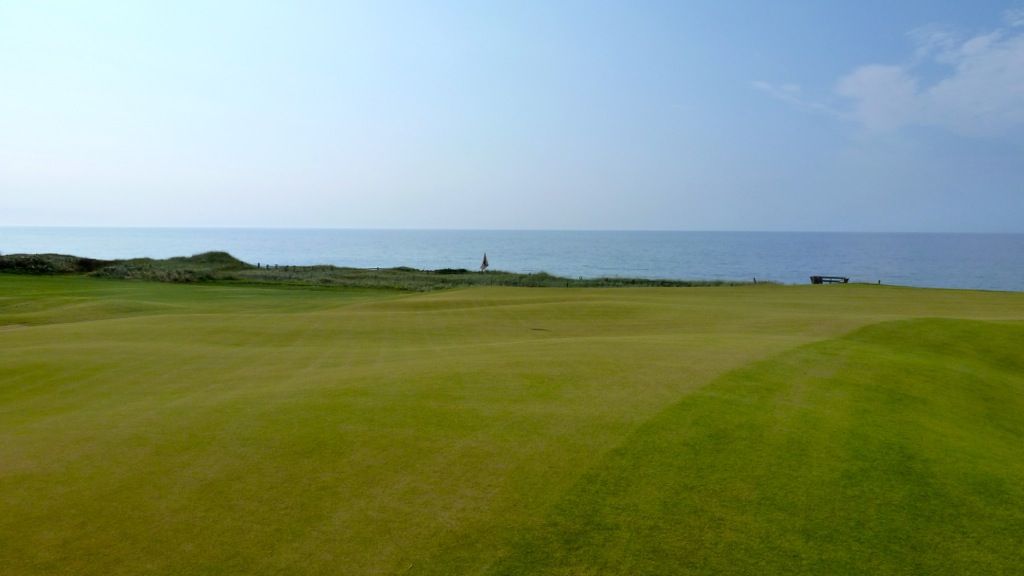
Approaching the green from the extreme right side of the fairway requires an approach that carries a cross bunker and provides easiest access to a back pin.
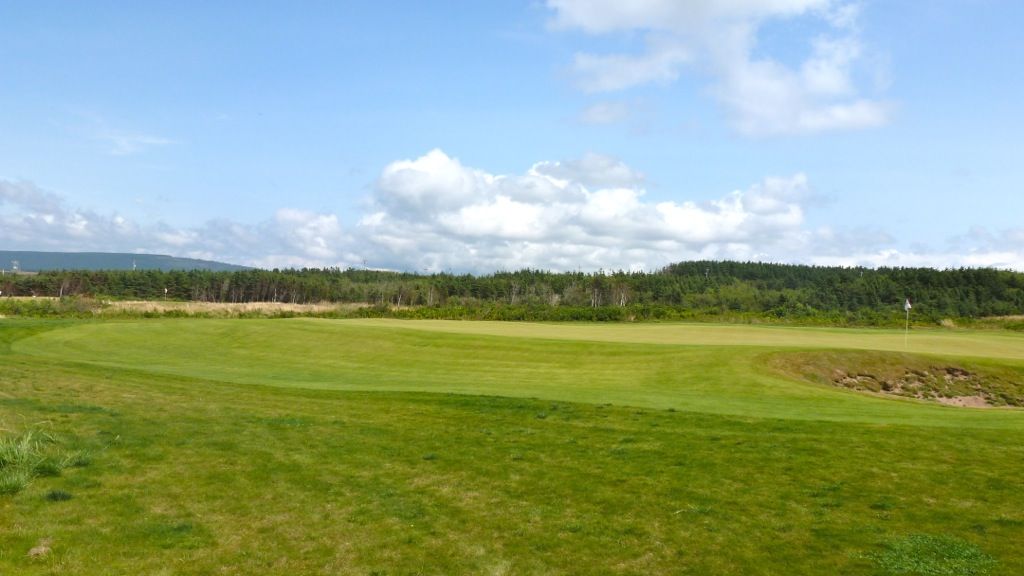
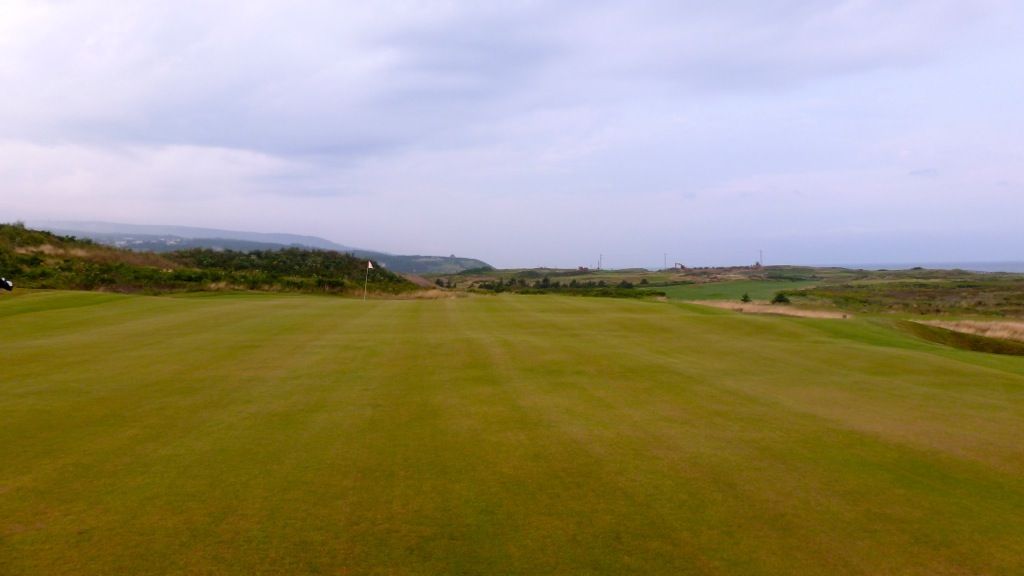
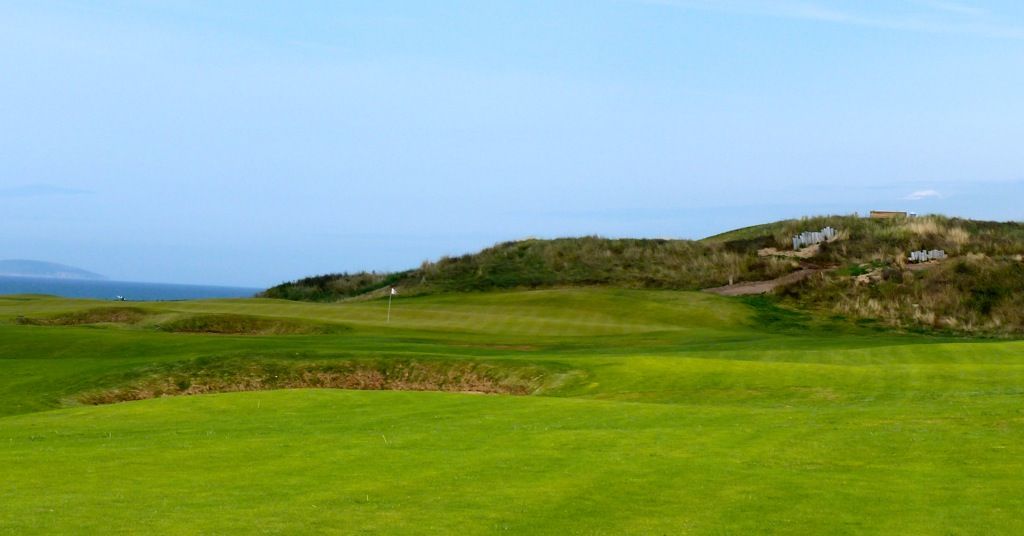
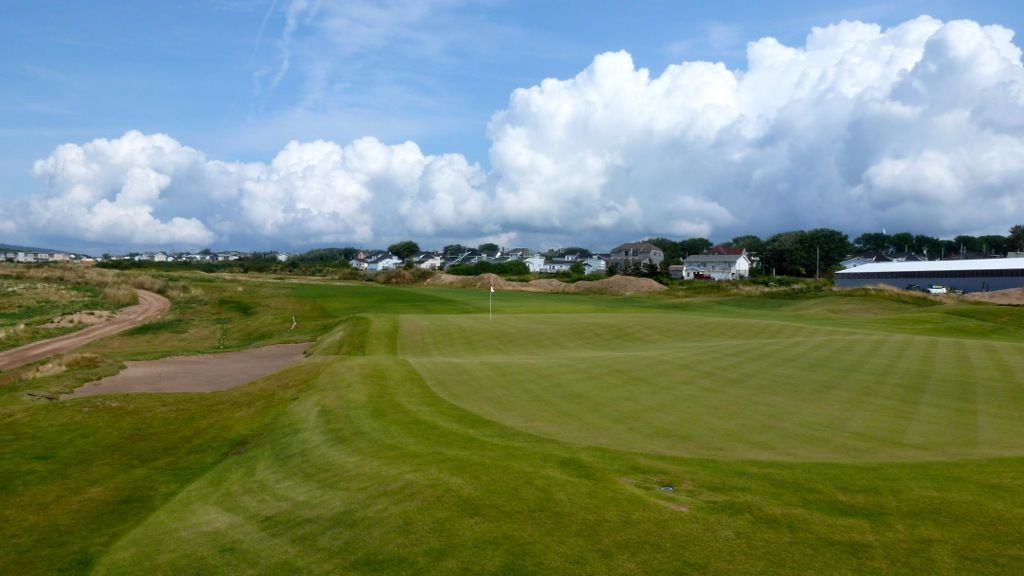
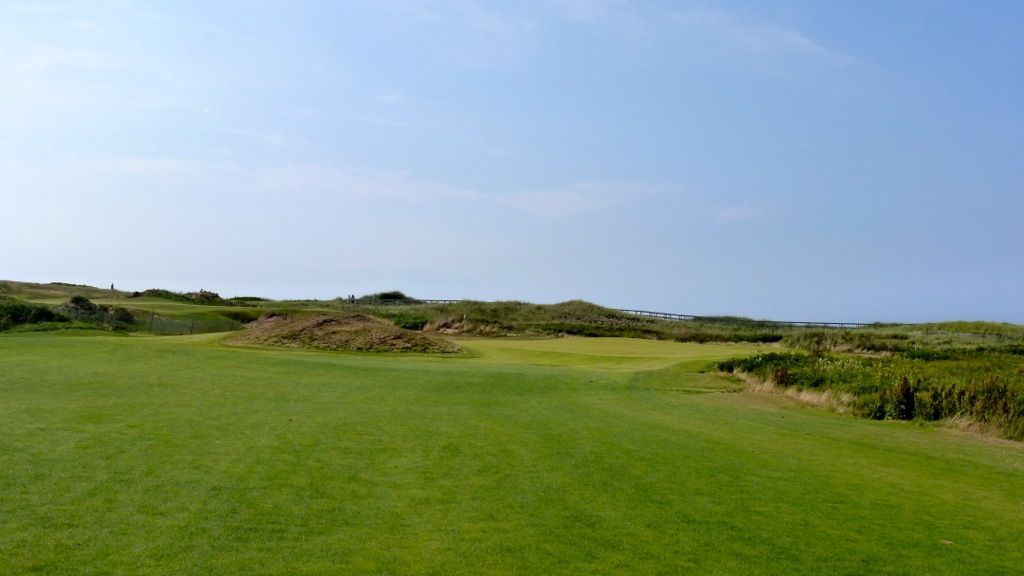
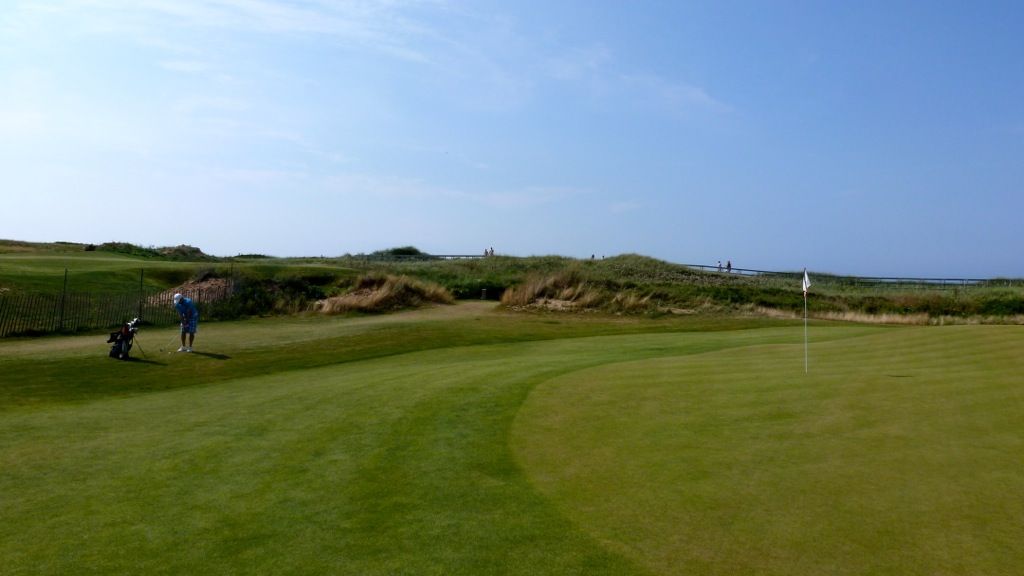
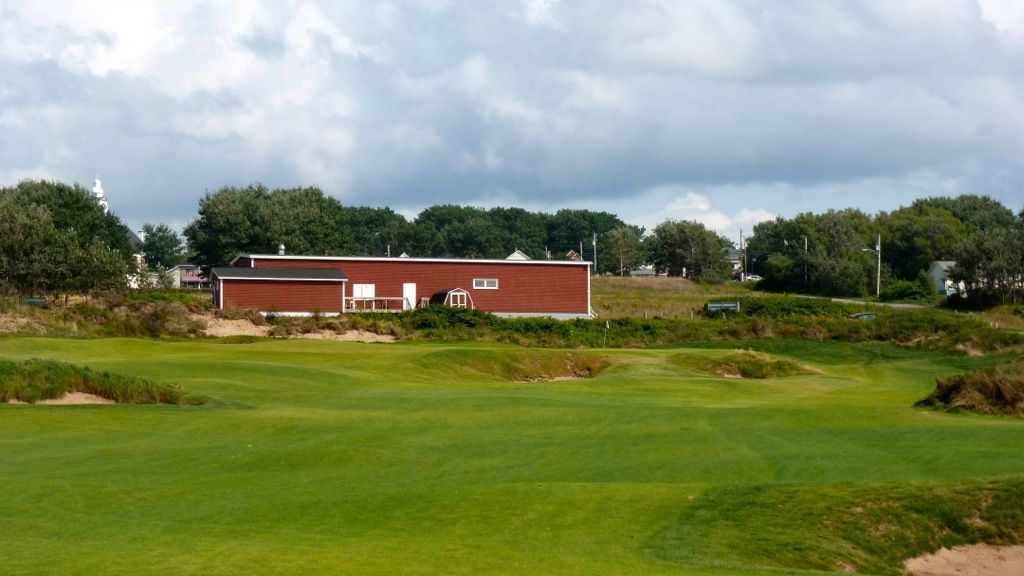
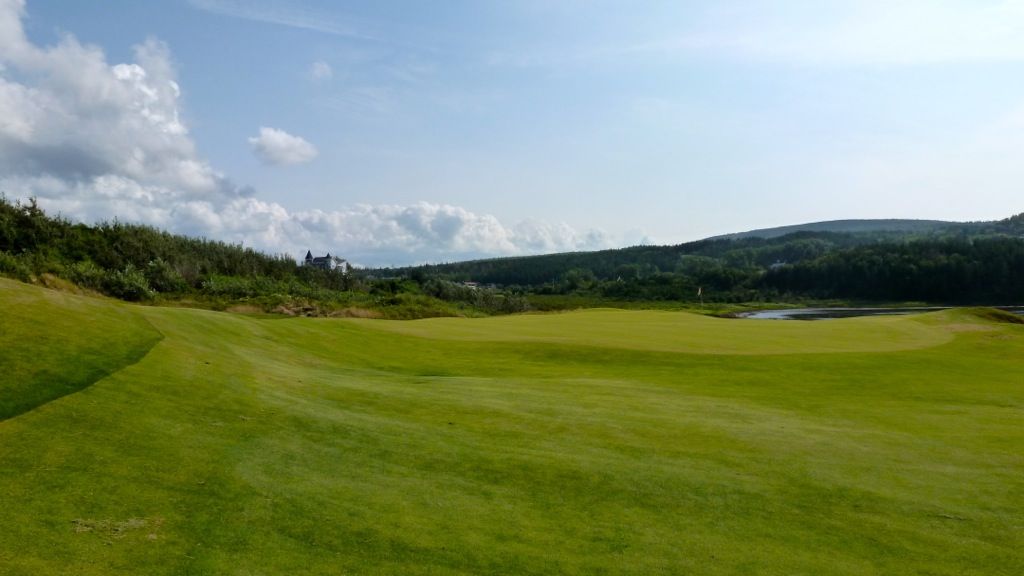
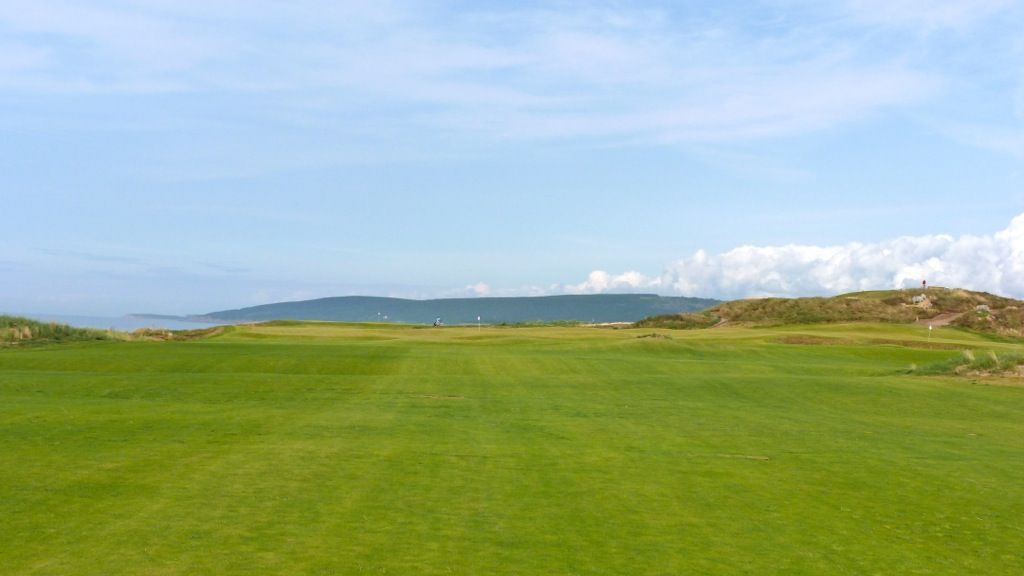
Interestingly, approaching the front portion of the green is easiest from the left-hand side of the fairway. Here's the view from what we thought was a hooked drive.
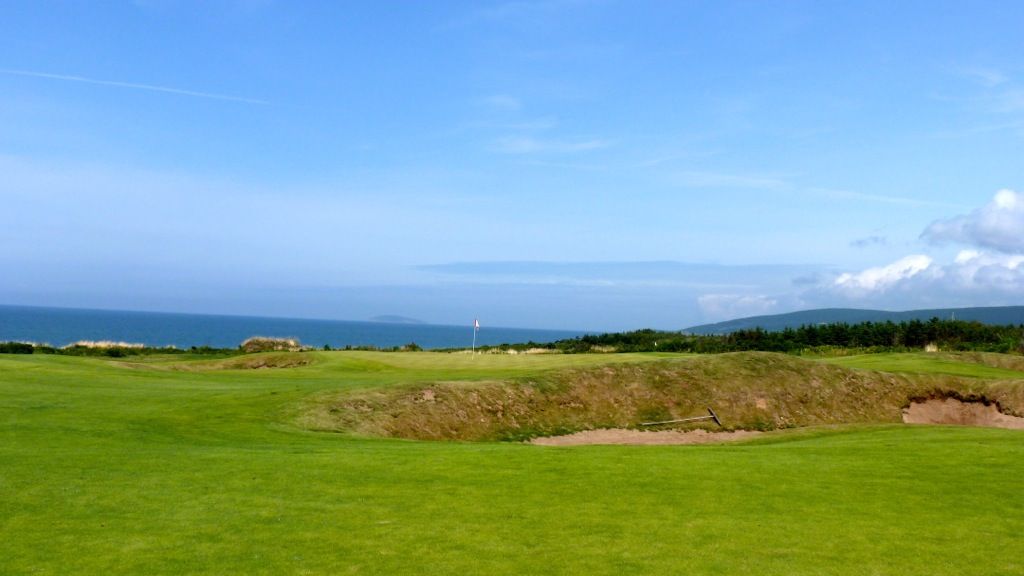
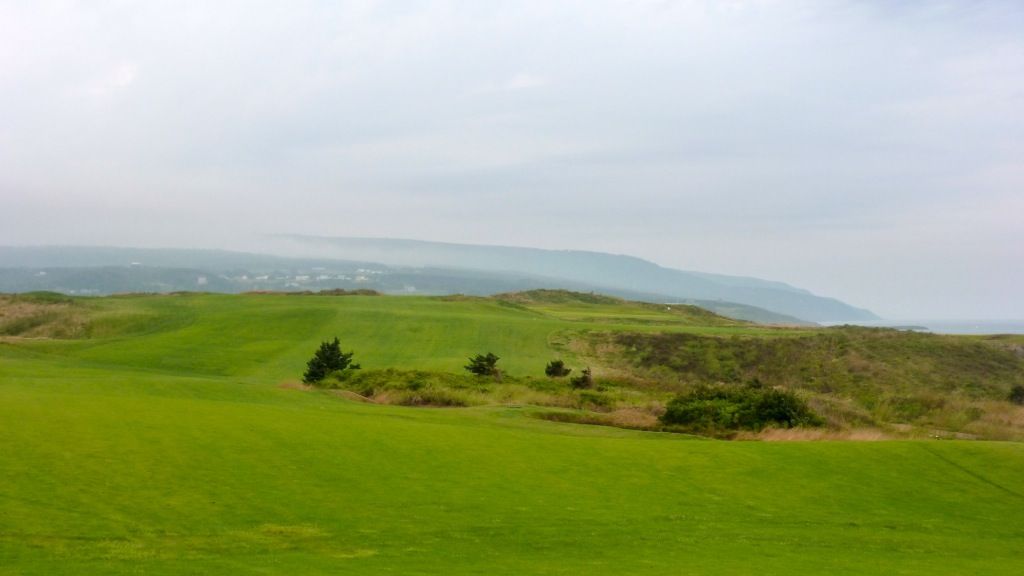
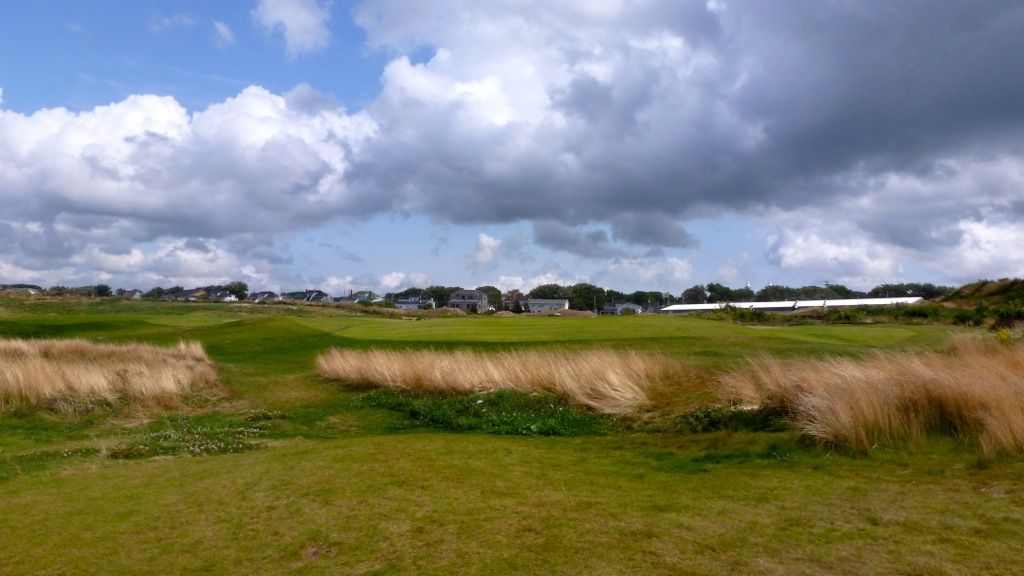
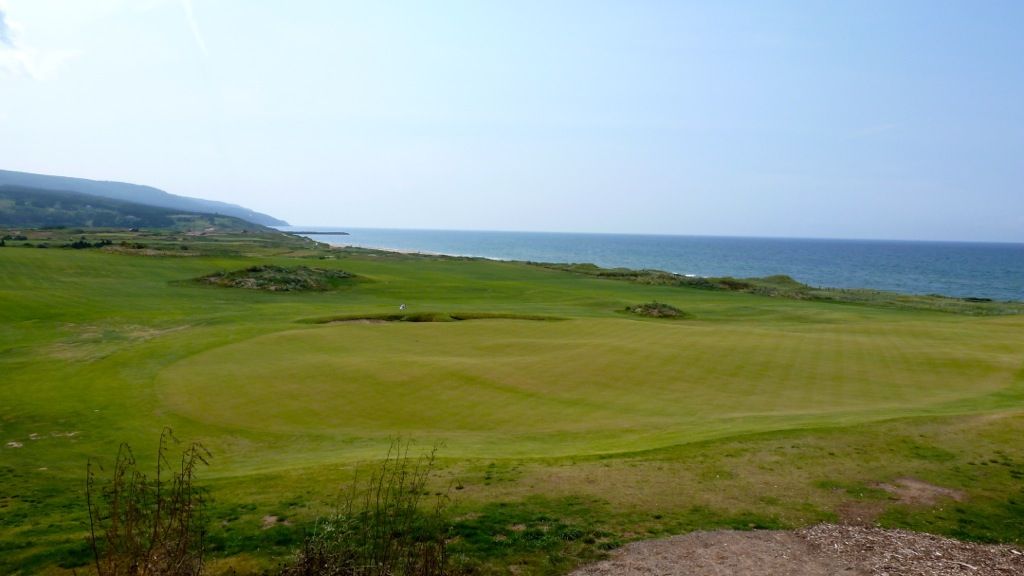
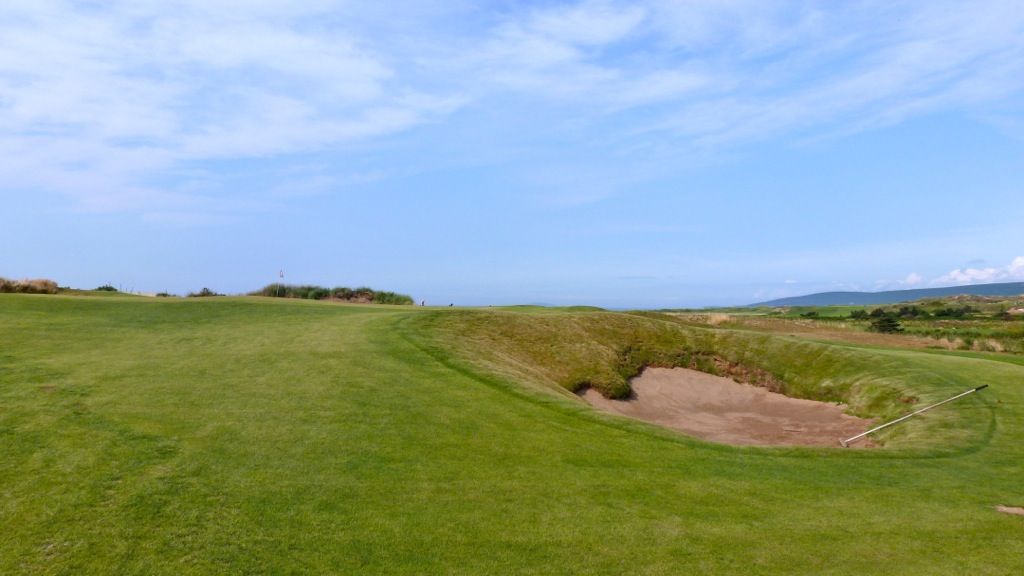
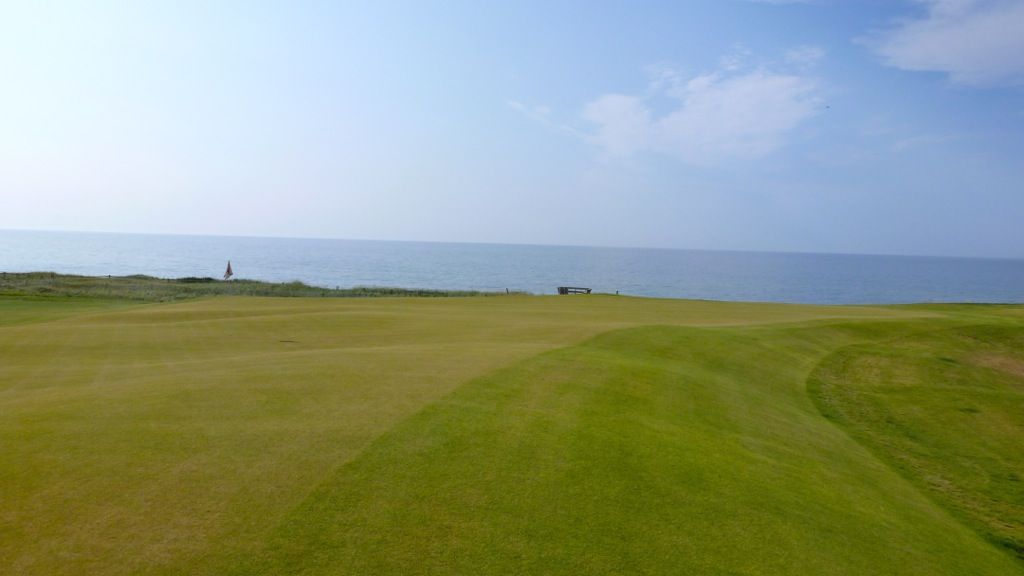
A cross-bunker 30 yards short of the green will be a factor for the bombers, but more than anything it adds some thought to those playing a running approach on this downwind short par-4. Good golfers who oppose open green fronts often say the option of the ground-game means that mis-struck approaches are not properly penalized. Perhaps this is the solution.
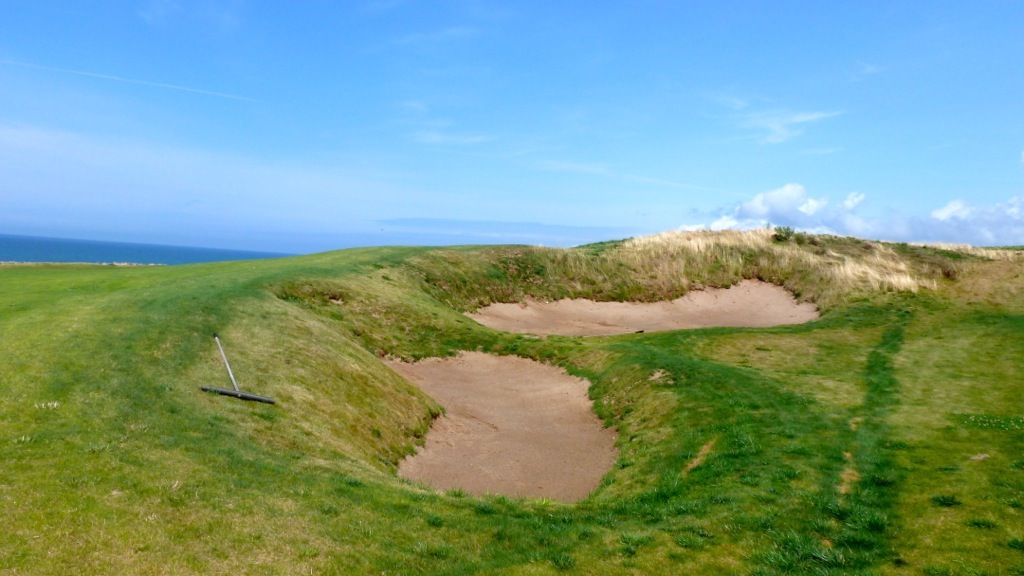
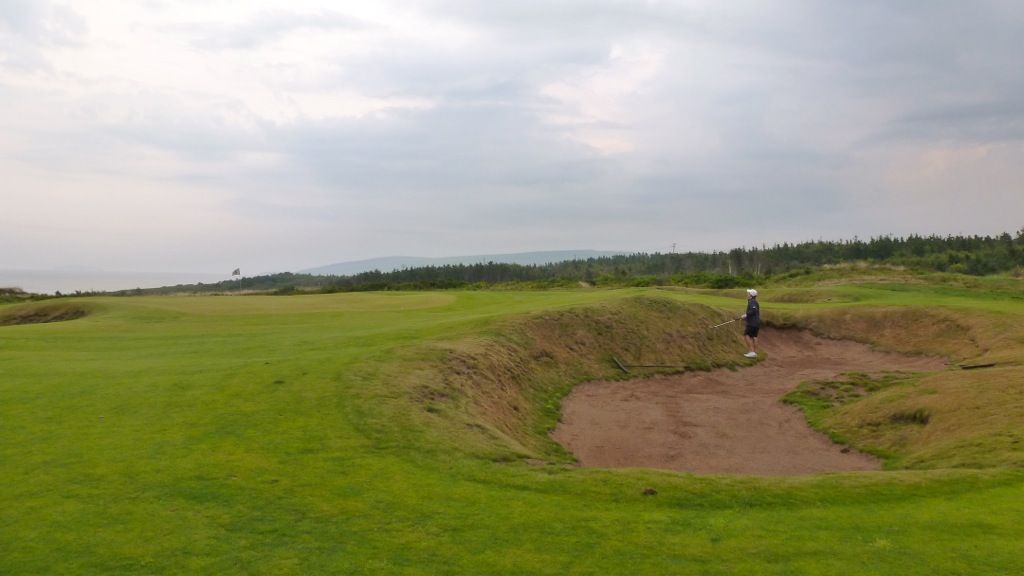
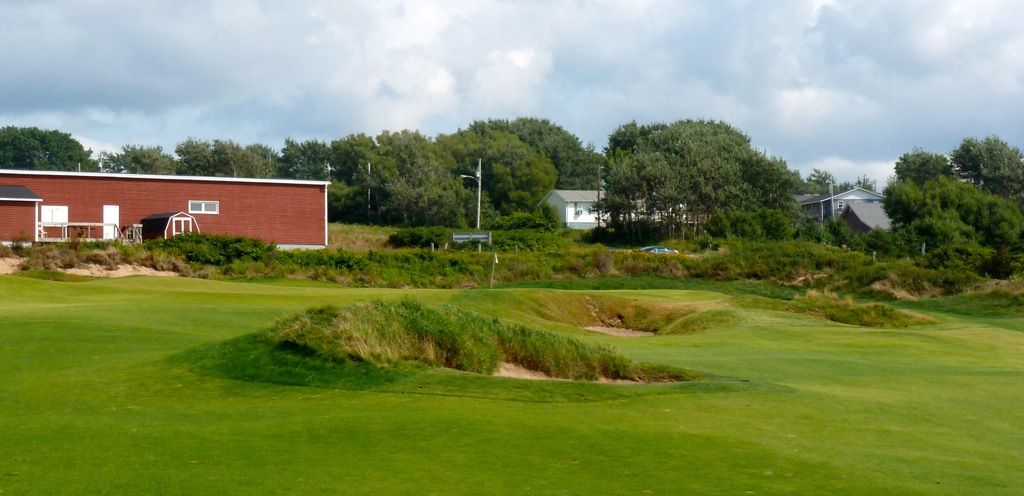
My unlucky playing partner found the bunker after (what we thought was) an excellent drive. Fortunately for us he helps to give a sense of the bunker's scale.
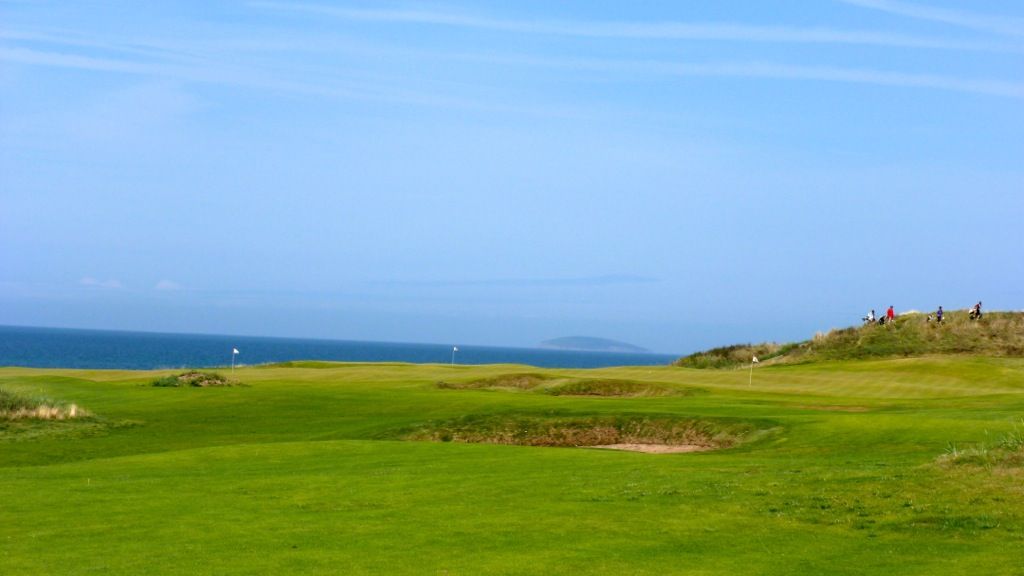
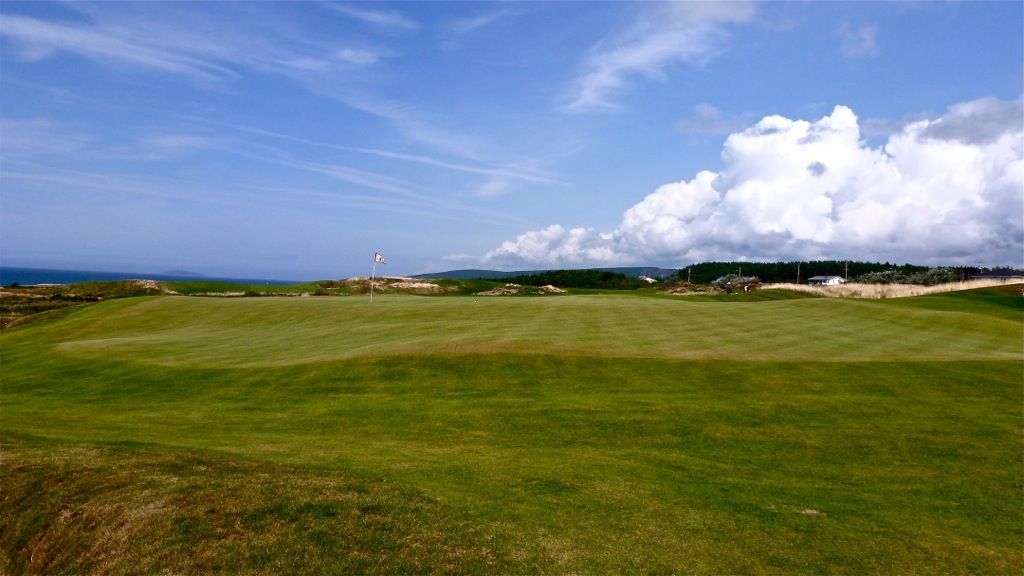
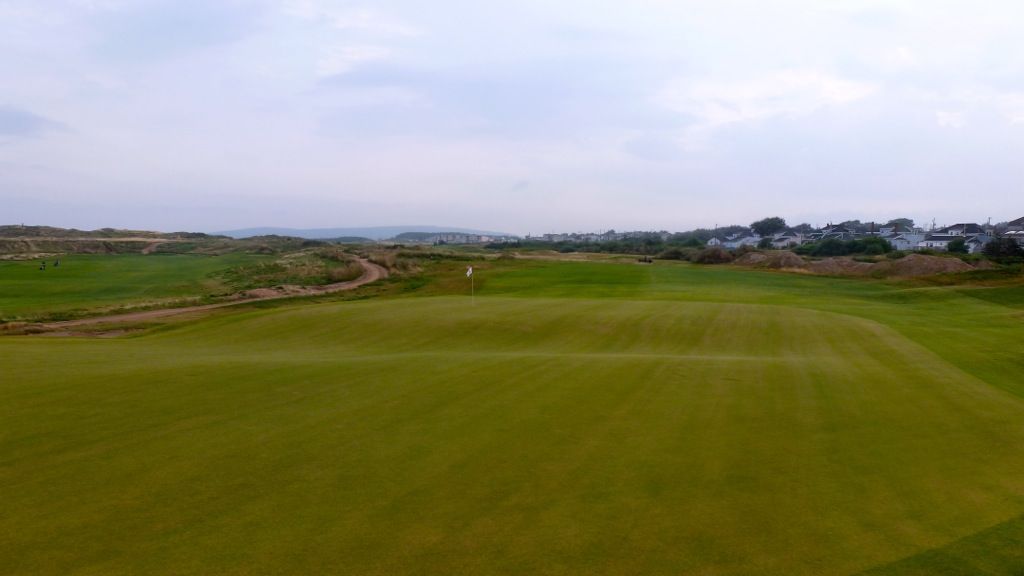
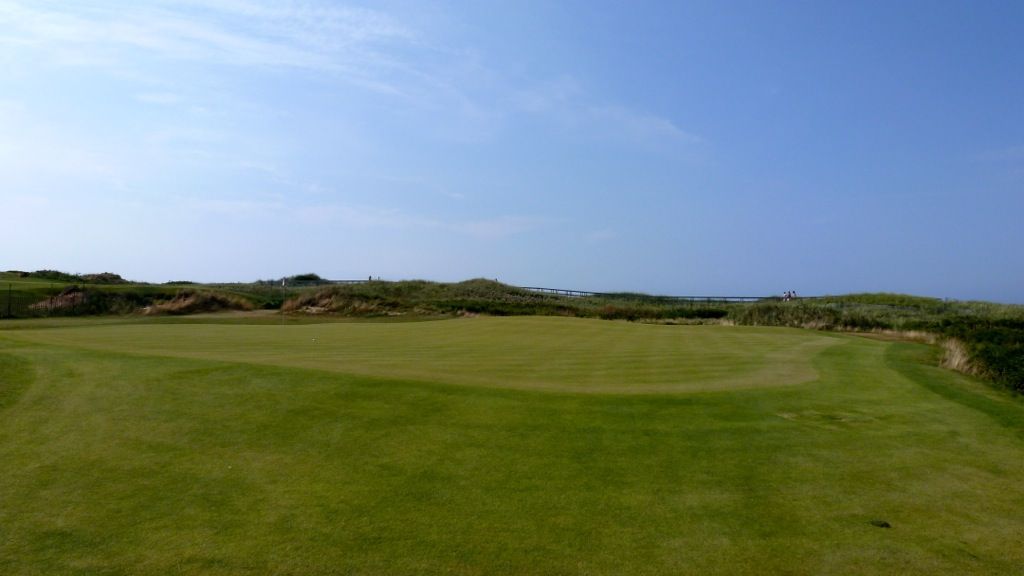
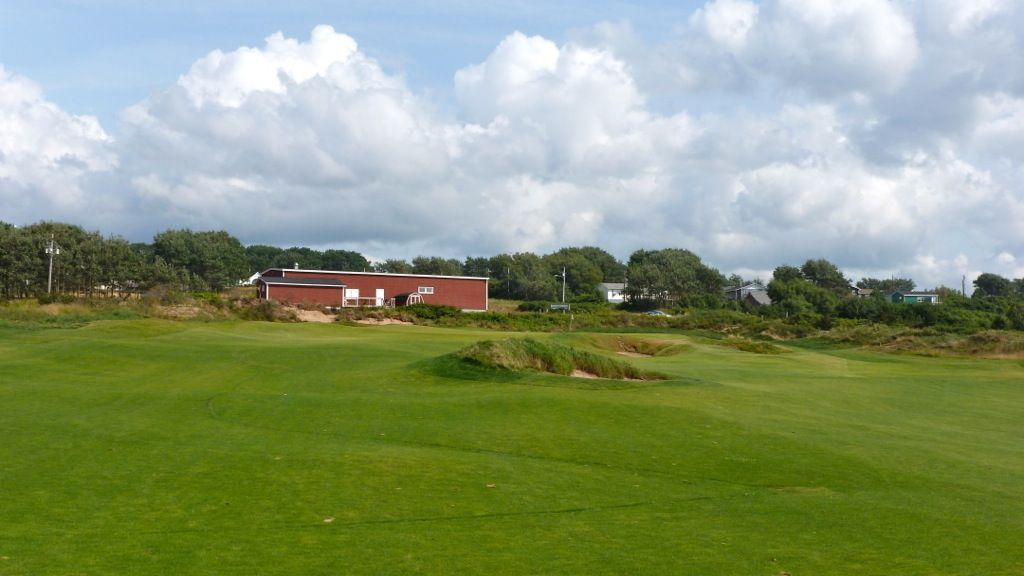
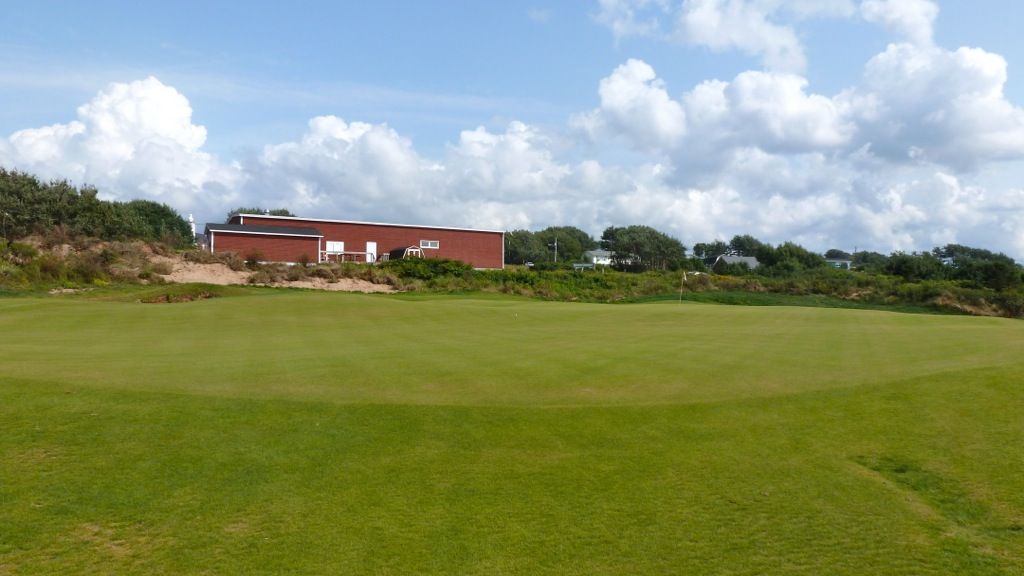
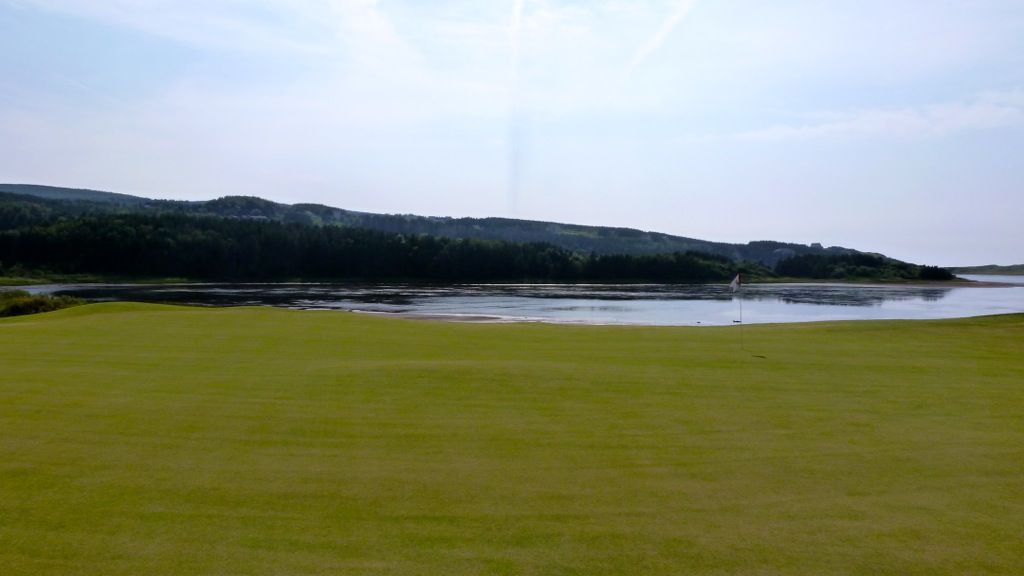
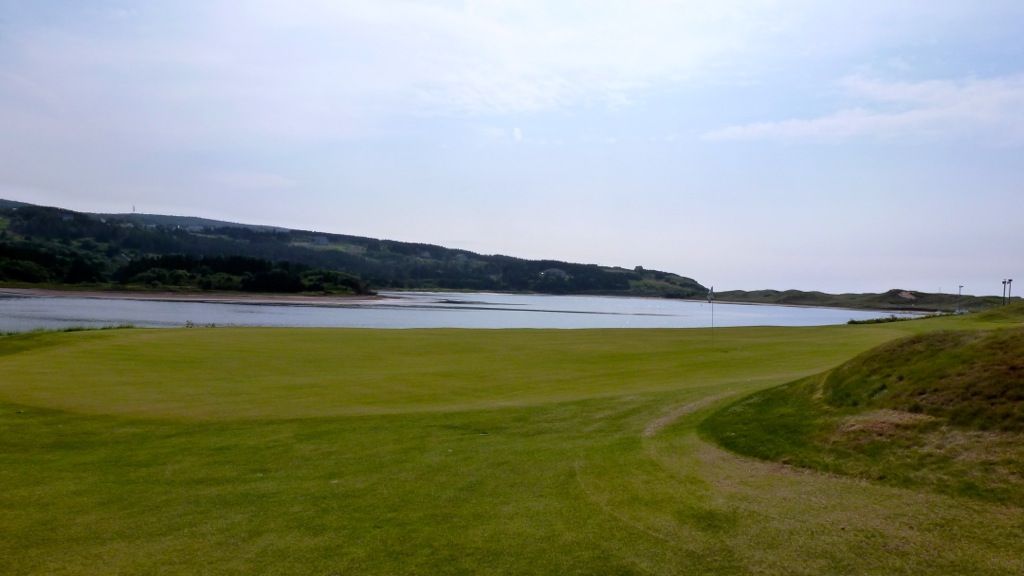
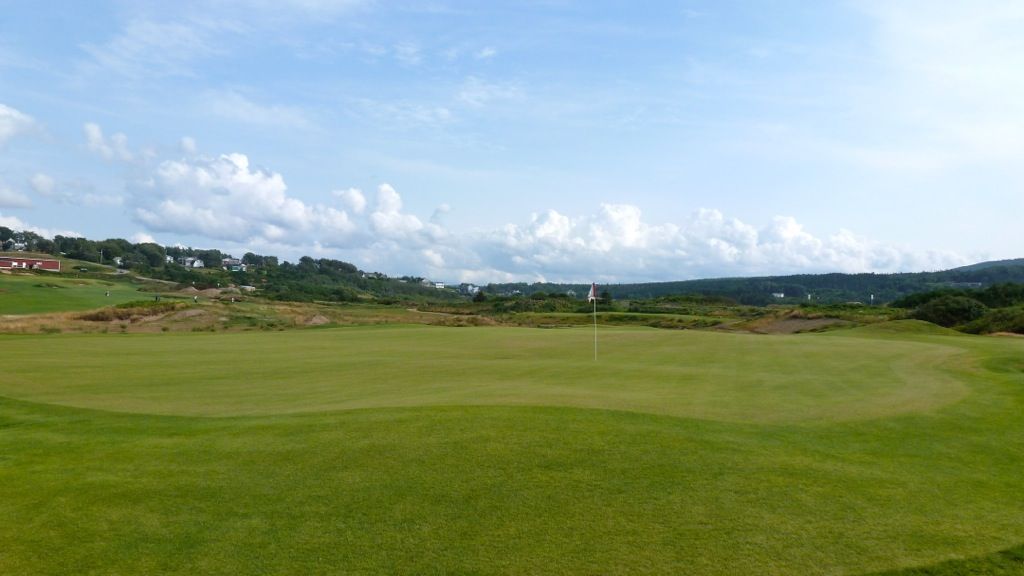
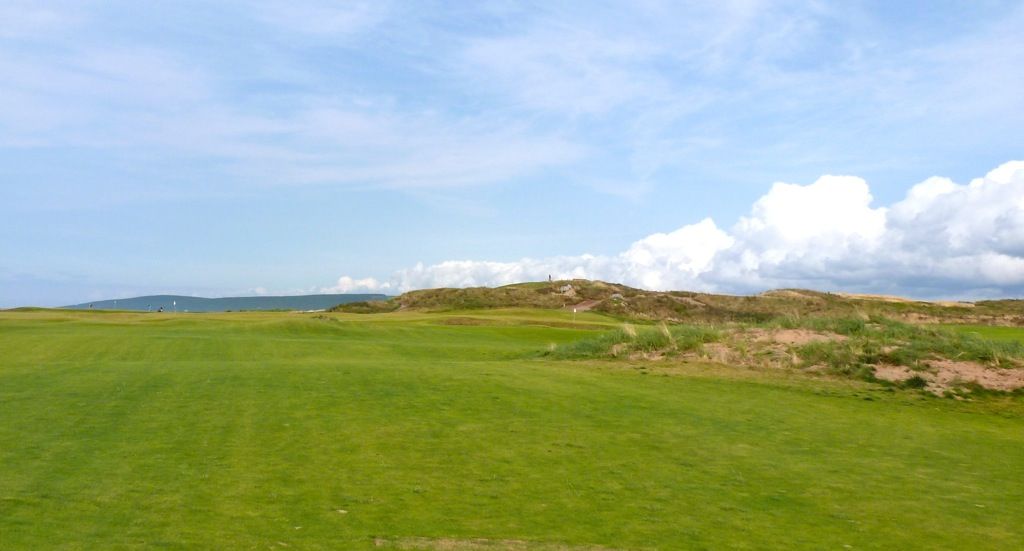
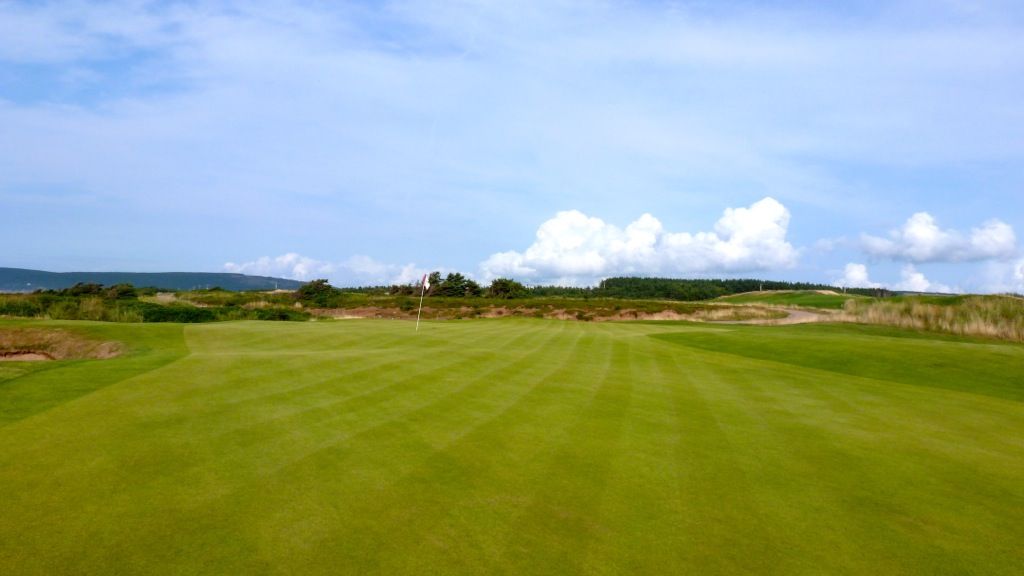
Plenty of room to run the ball onto the 1st green over the cross-bunker.
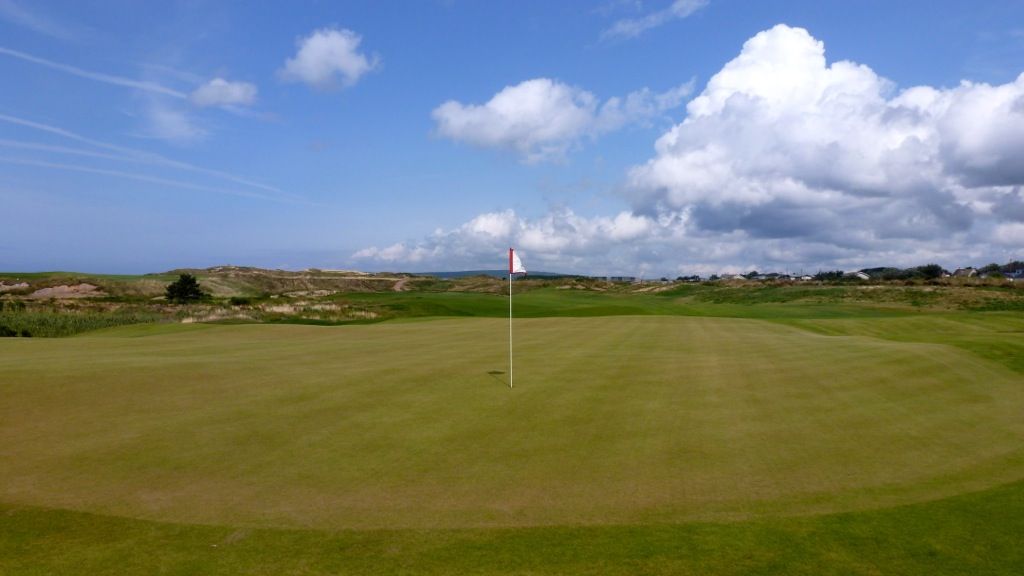
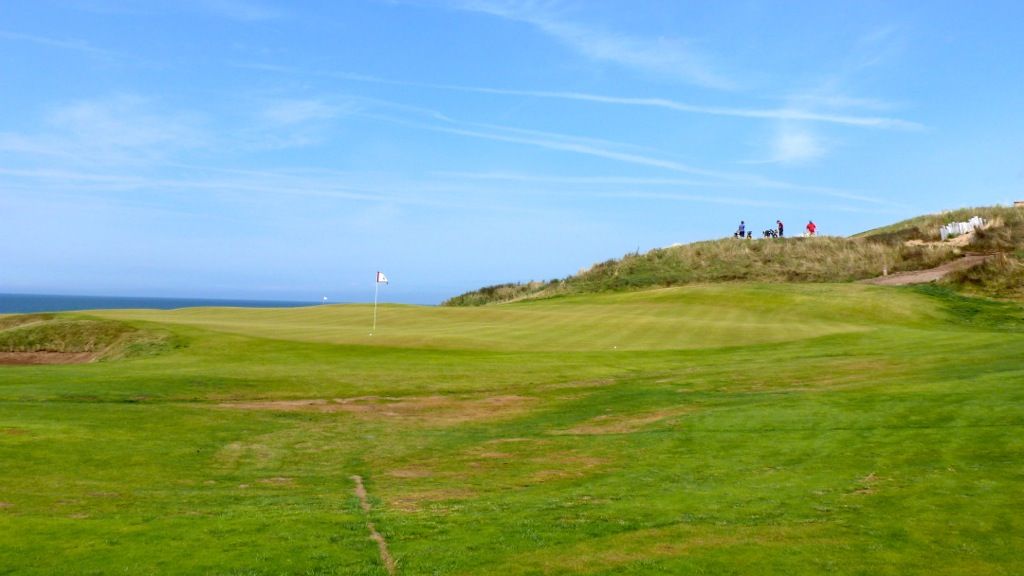
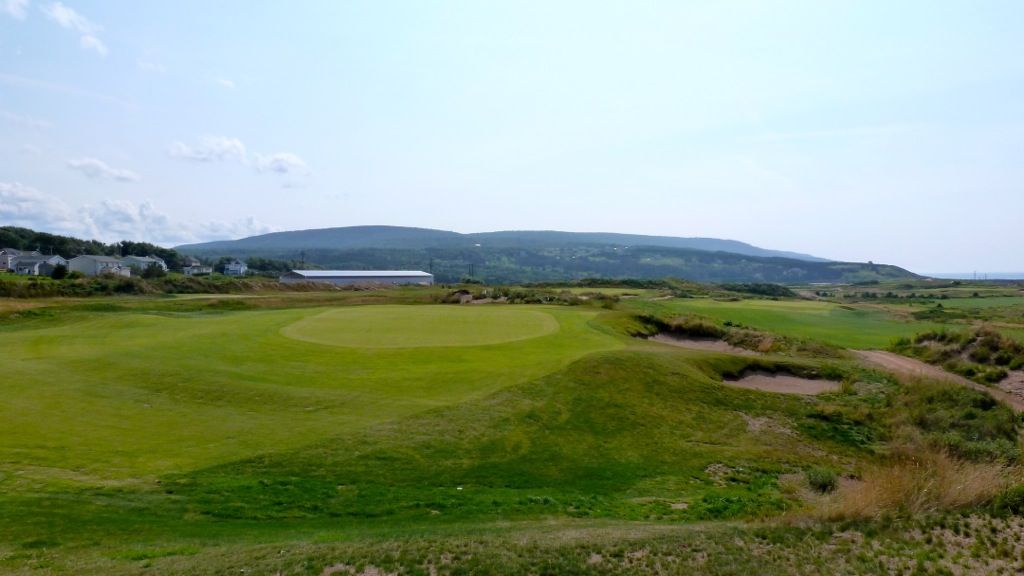
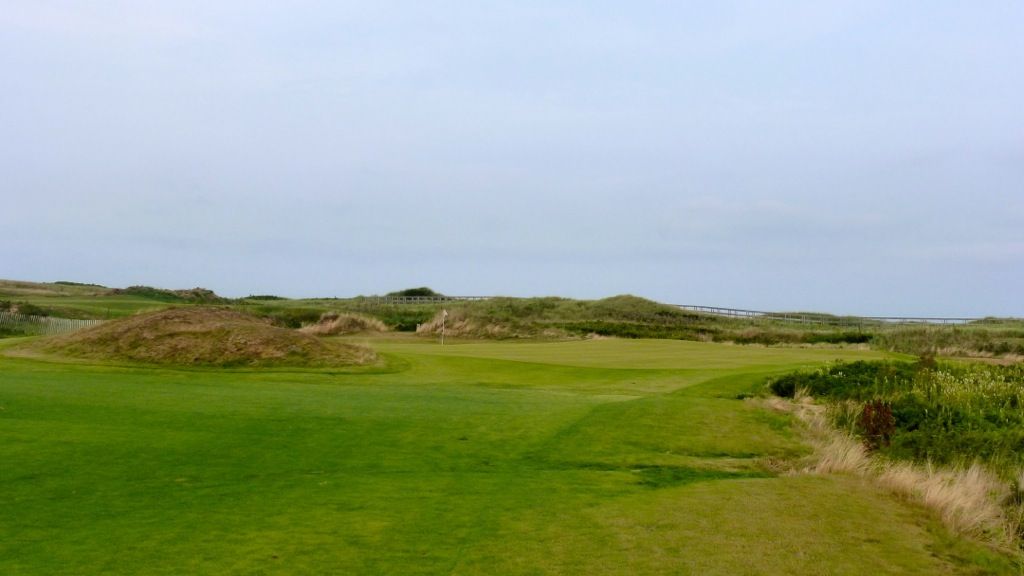
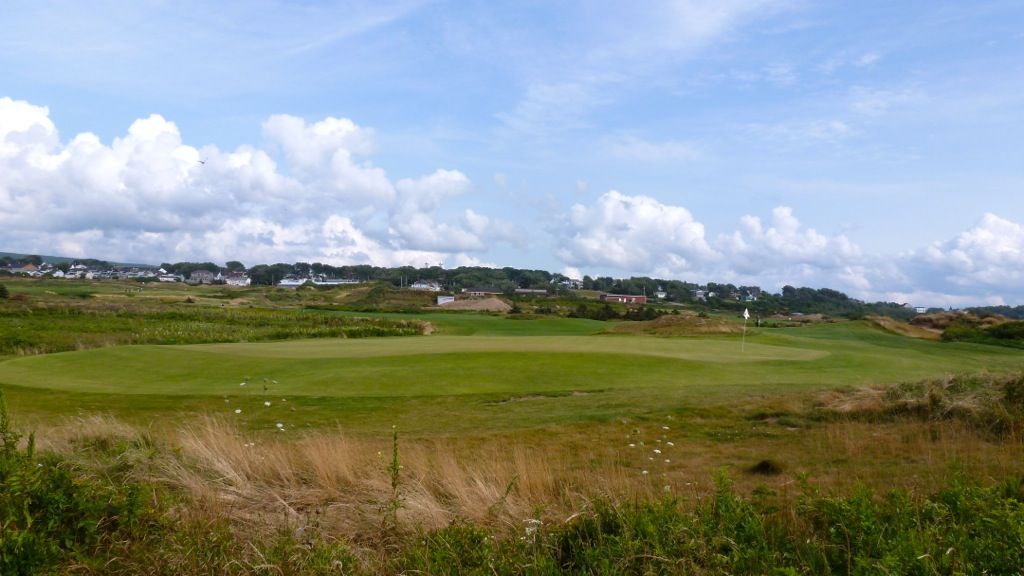
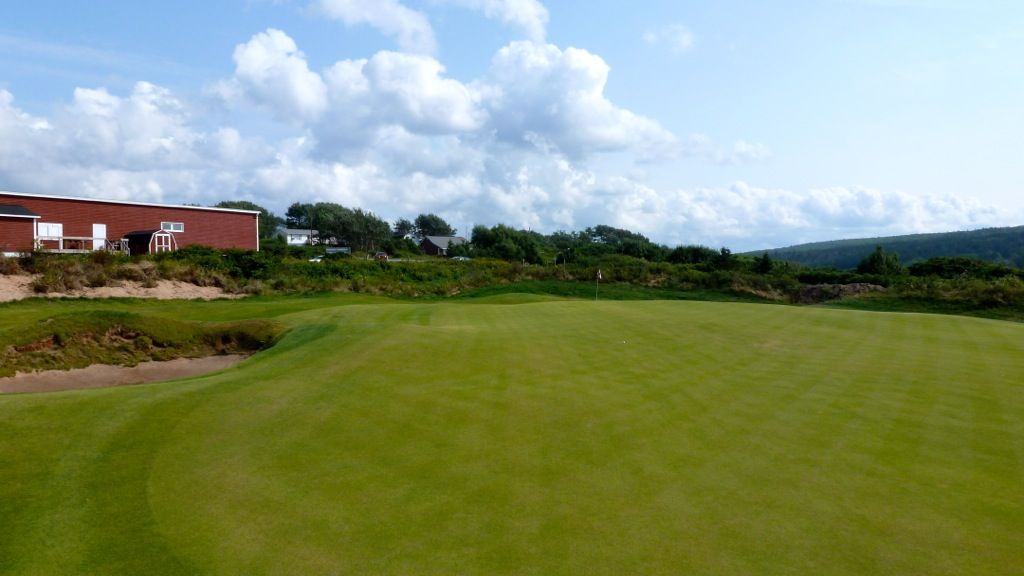
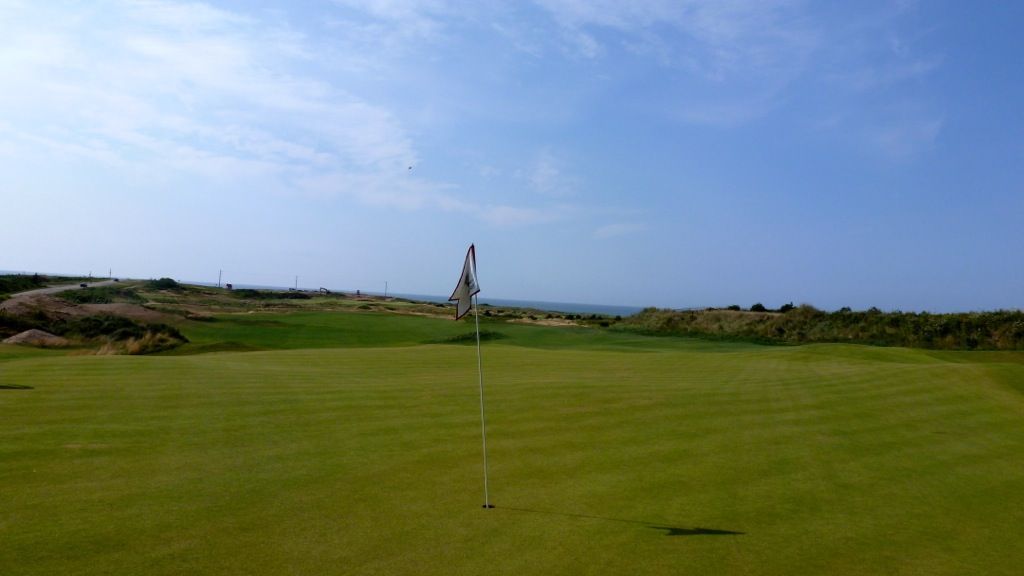
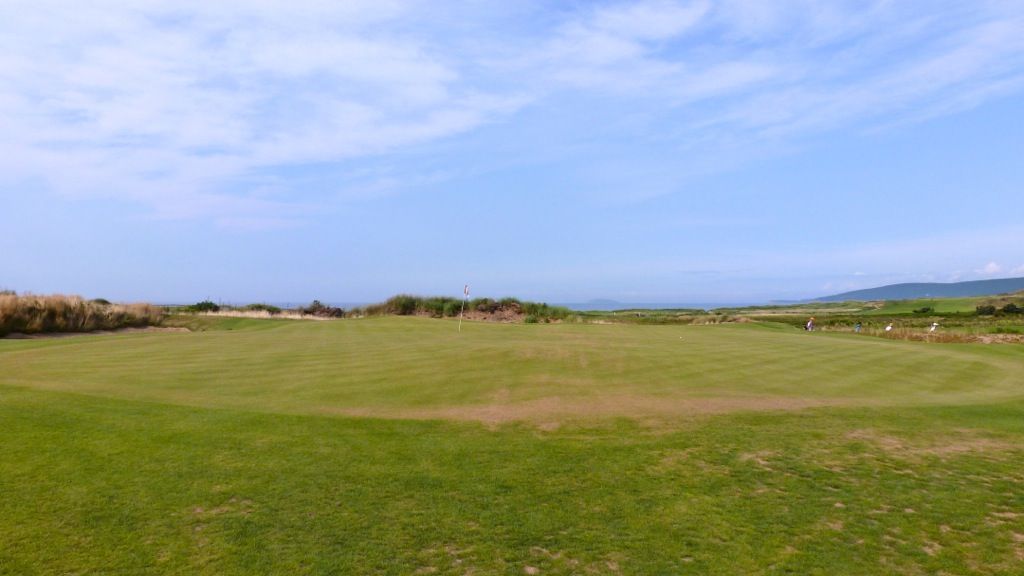
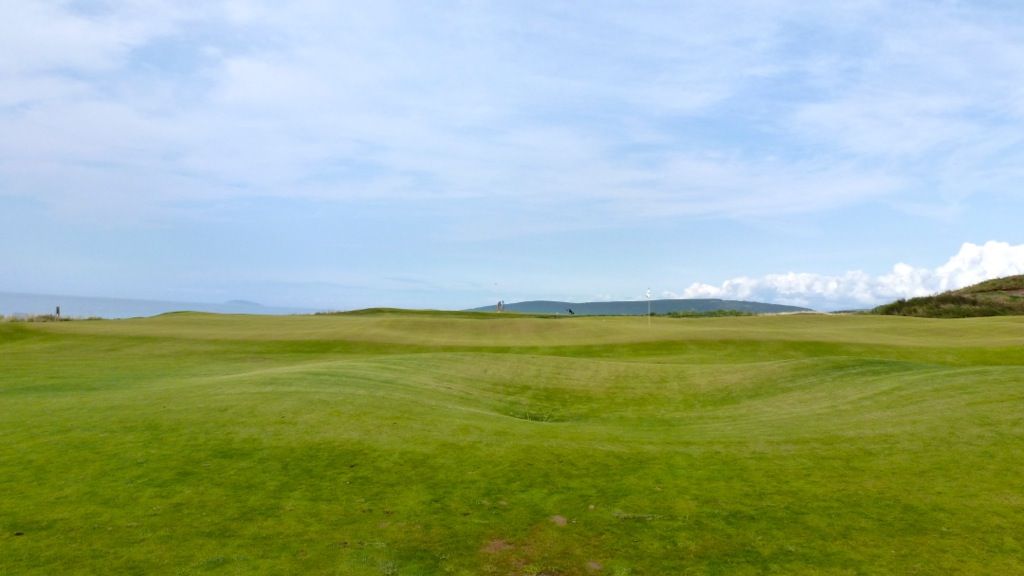
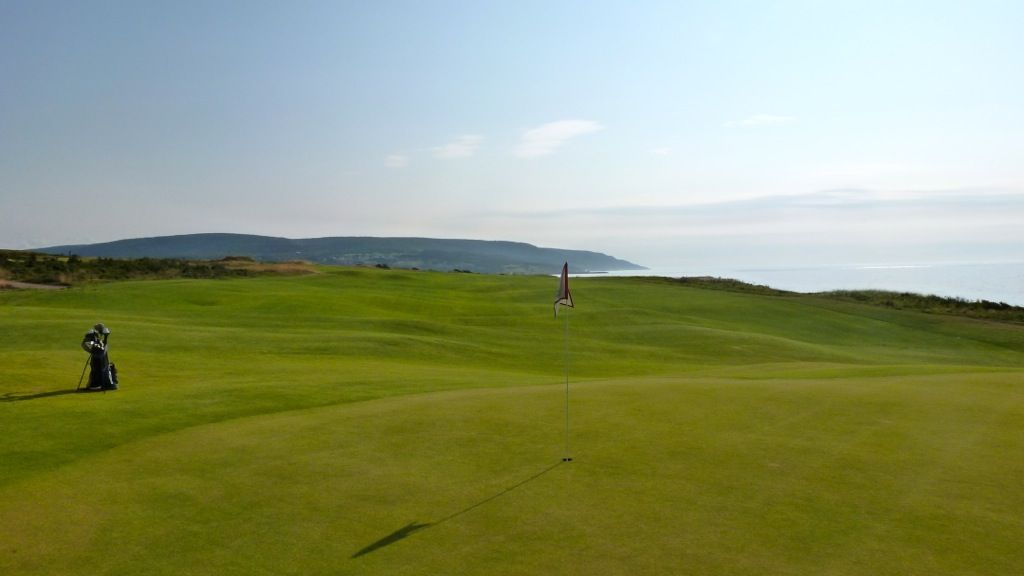
As is always the greatest limitation of playing a course only once or twice, I have trouble describing the green contours. The 1st green humps and bumps, especially in the front half, and generally tilts from front-to-back.
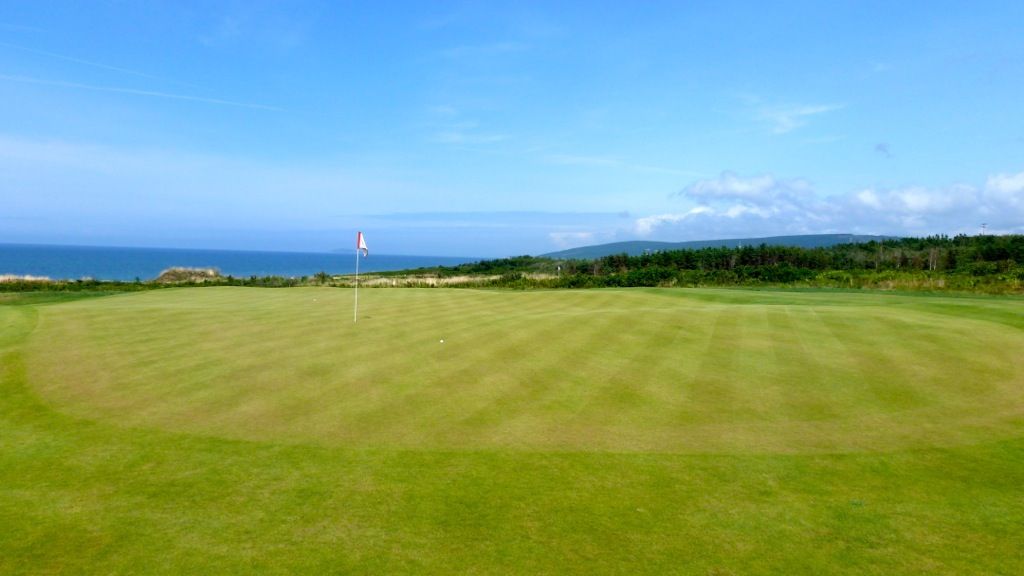

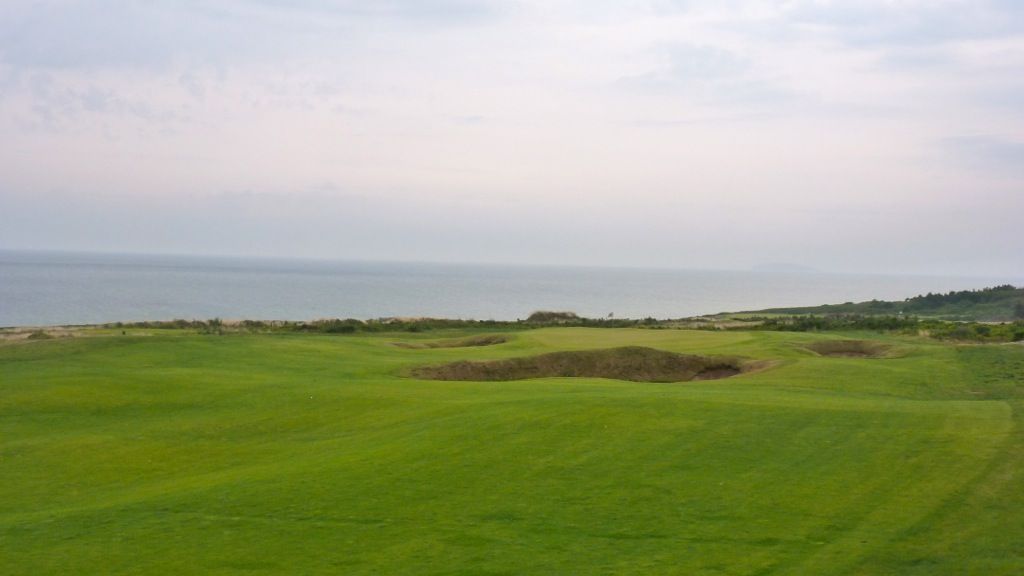
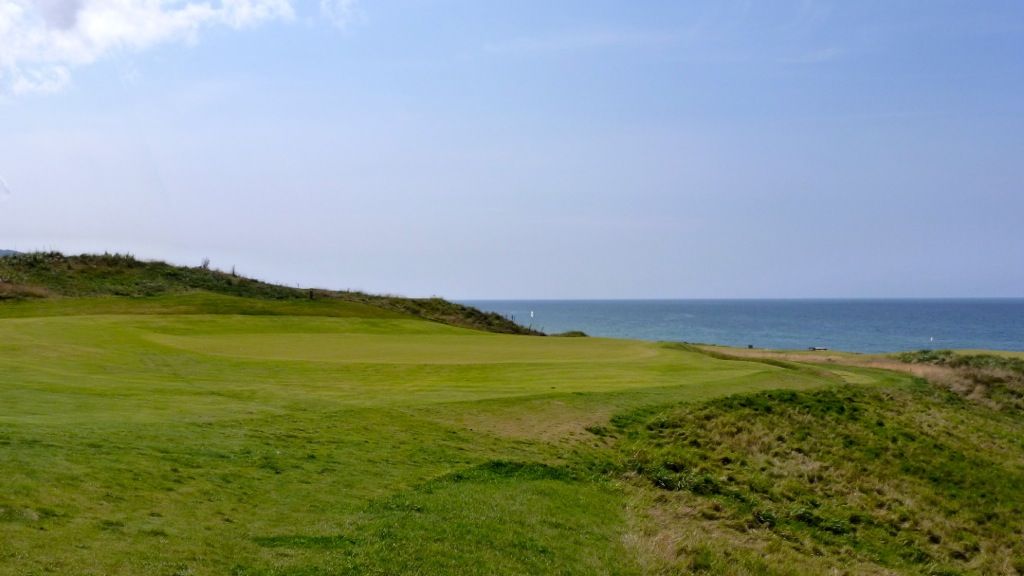
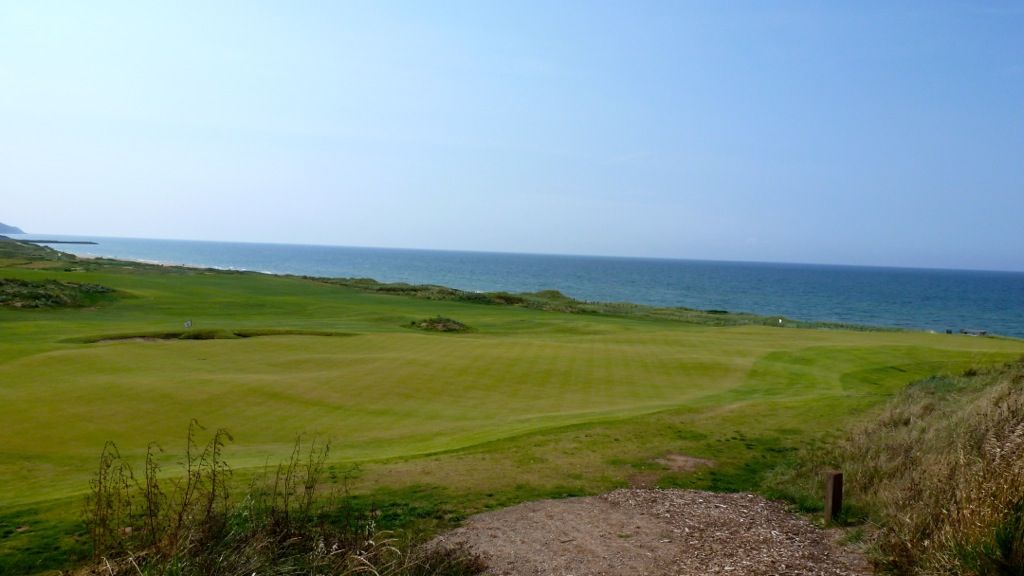
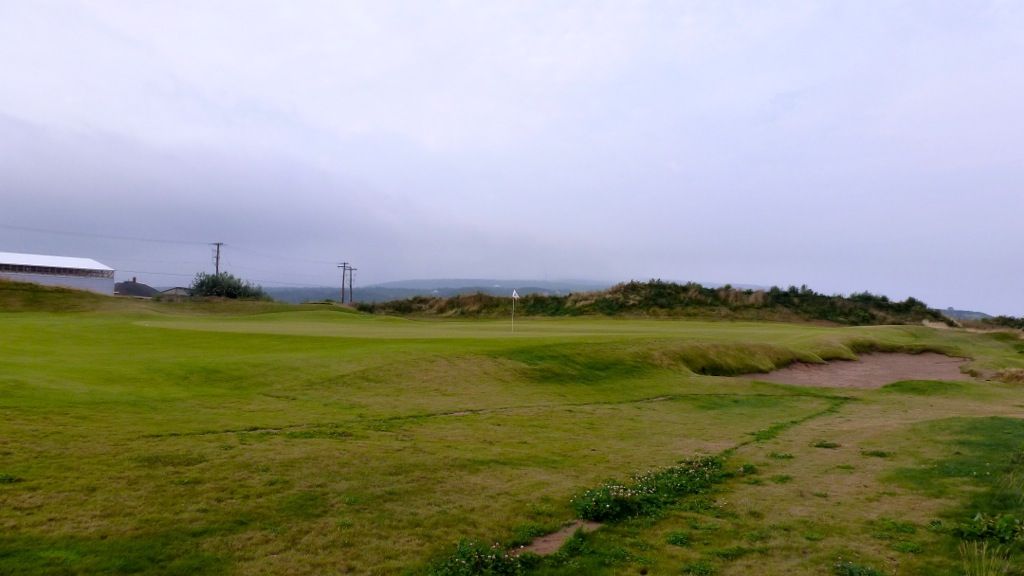
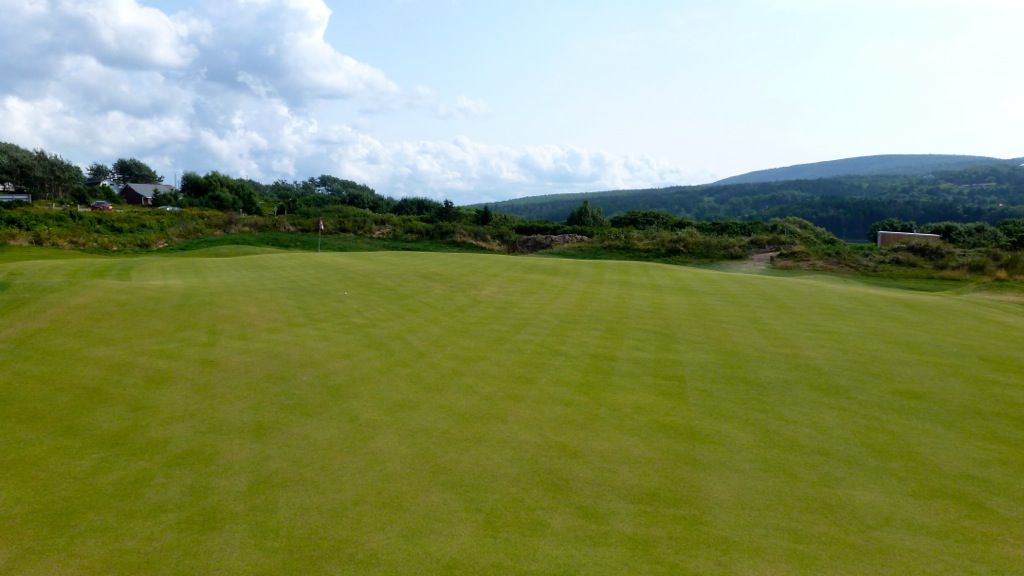
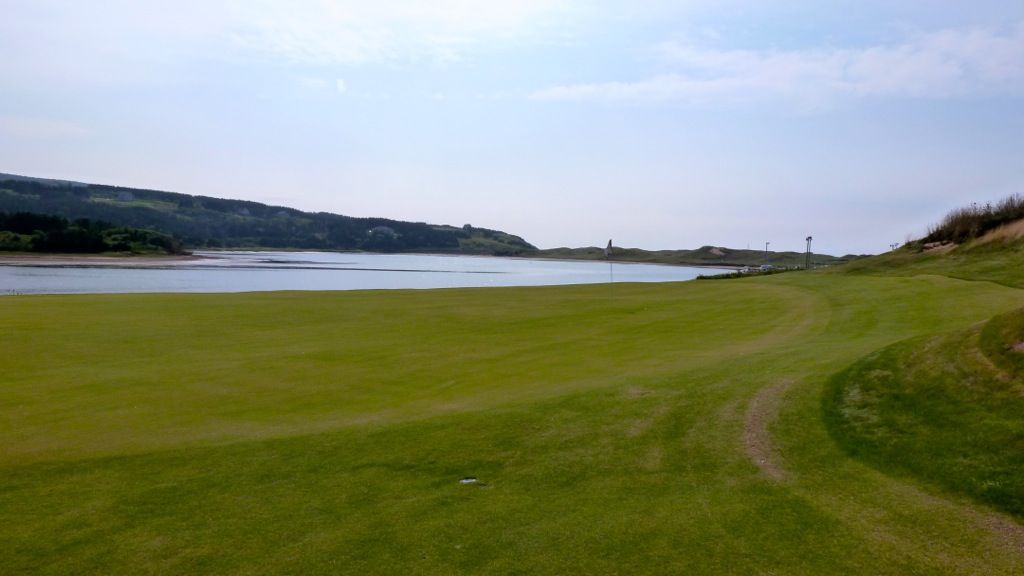
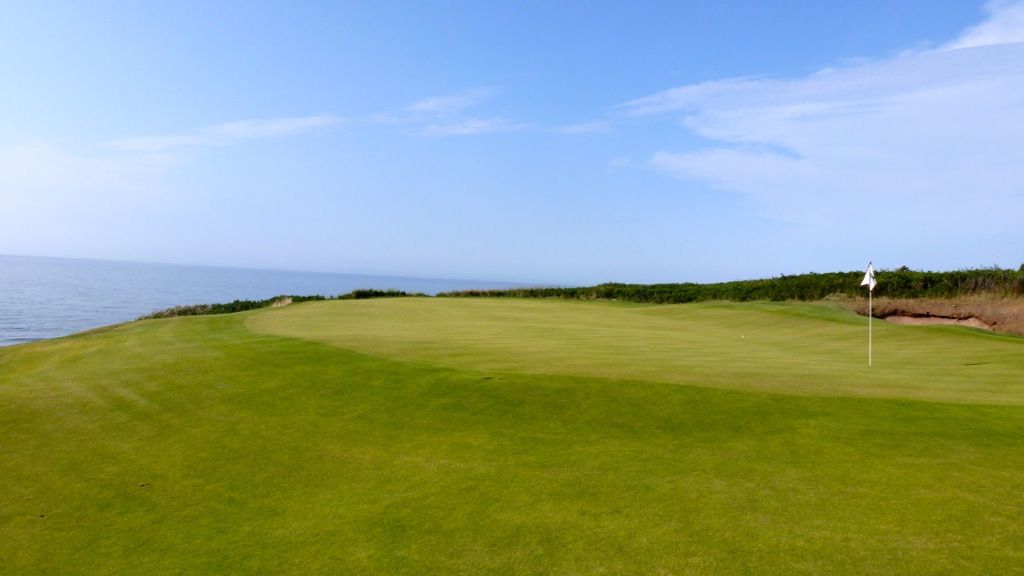
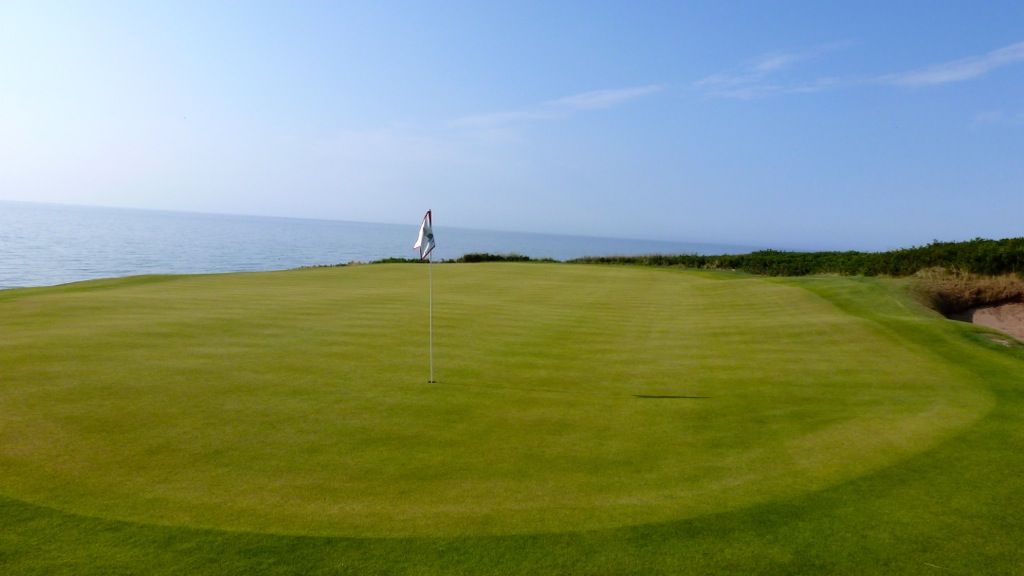
A run-off and a bunker guard the left side of the green. Those unfamiliar with links golf and decide to land the ball pin high will finish here.
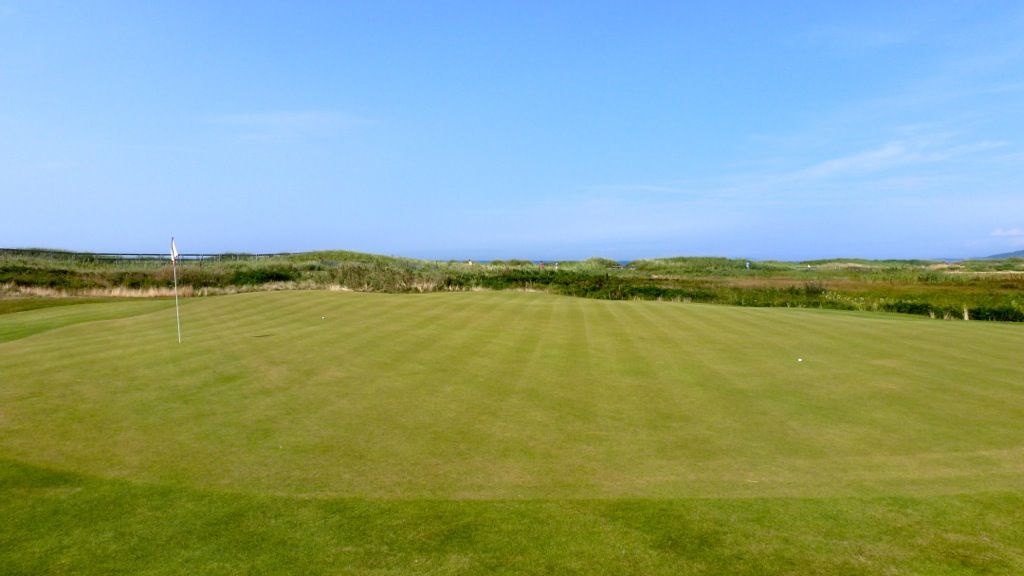
A look back down the fairway.

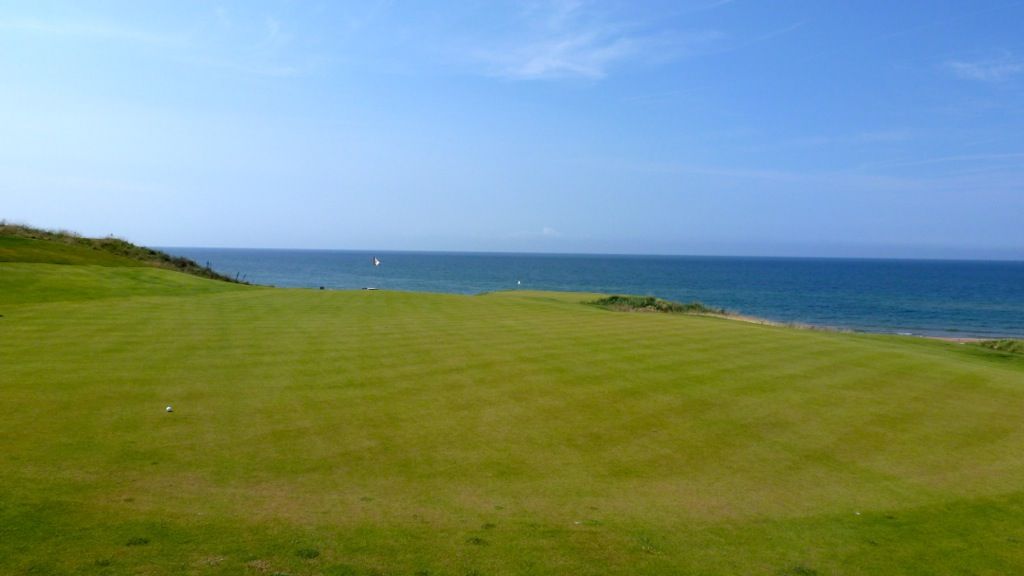
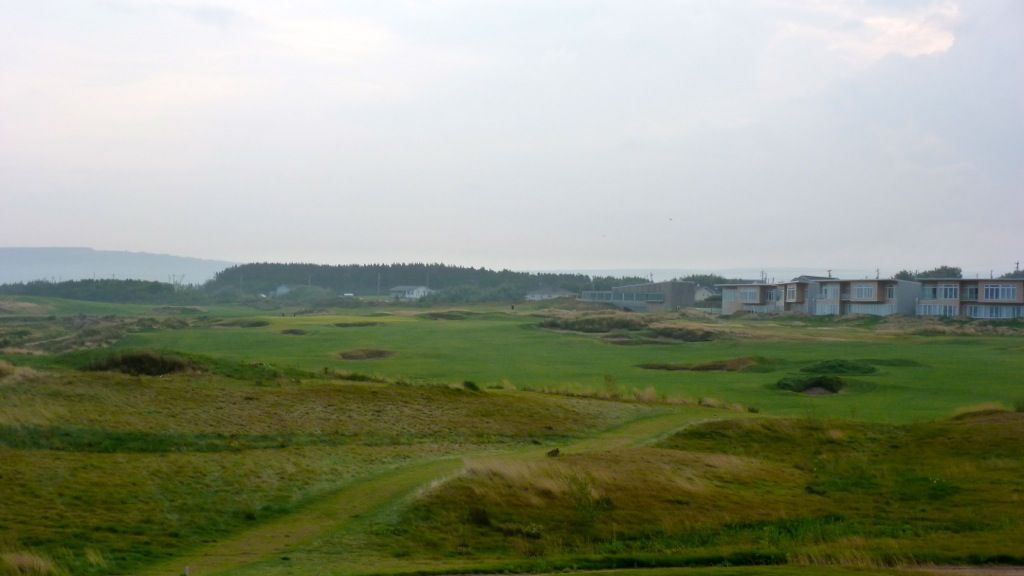
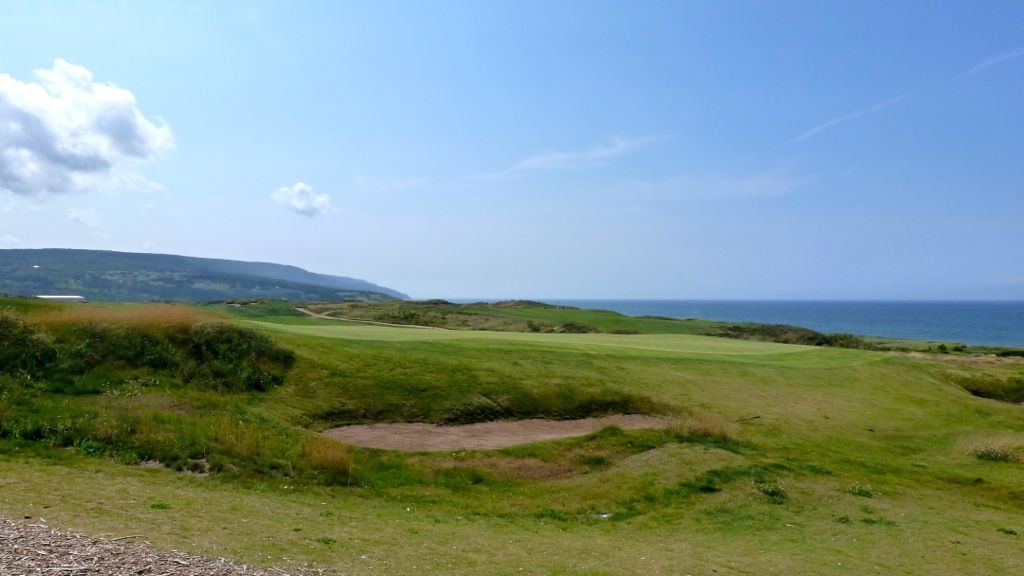
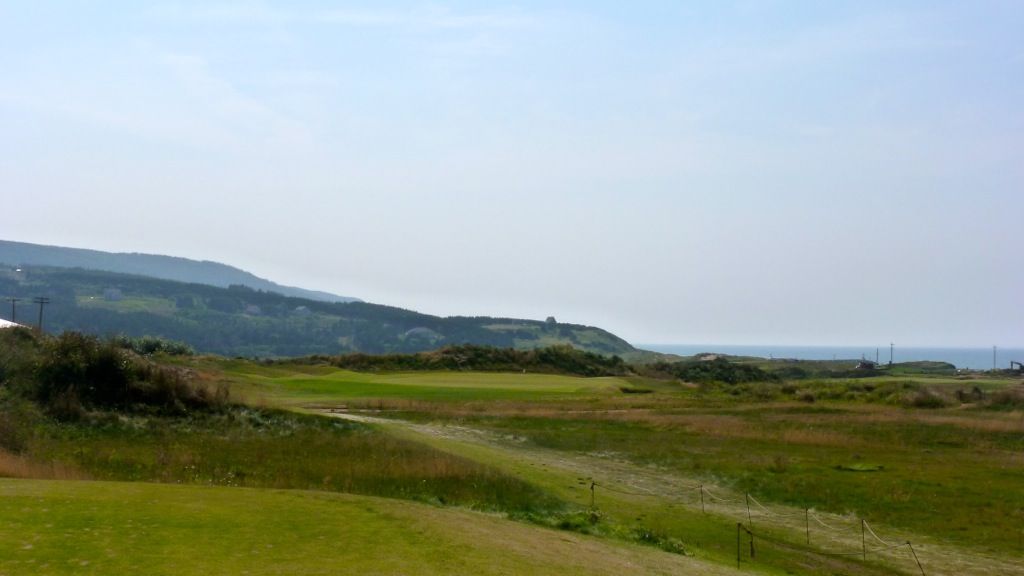
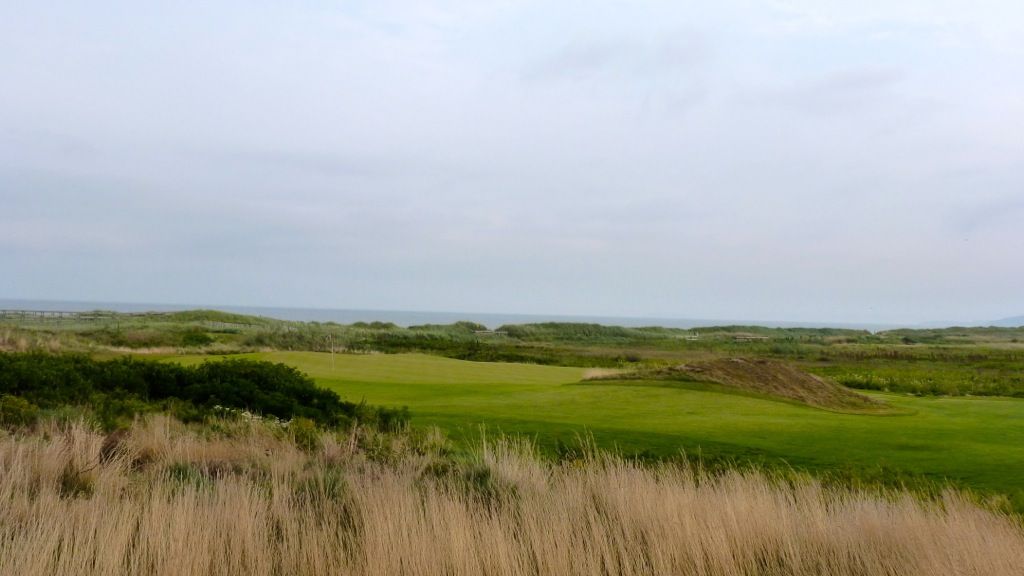
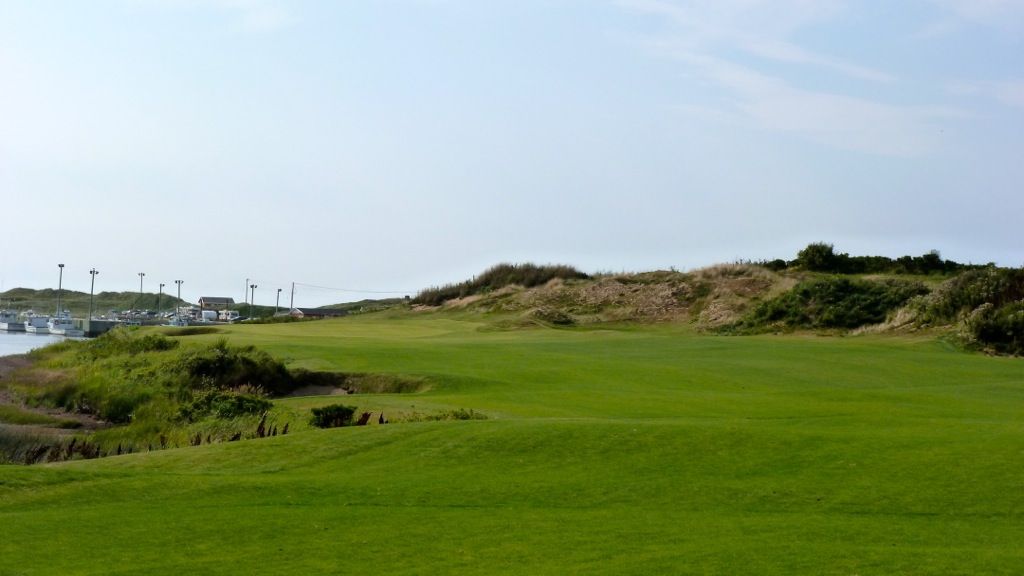
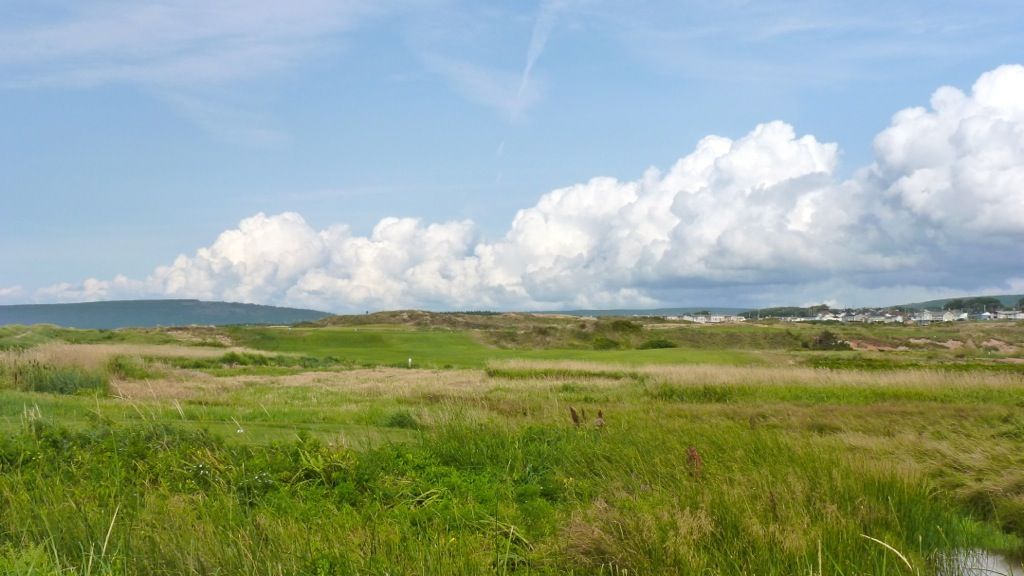
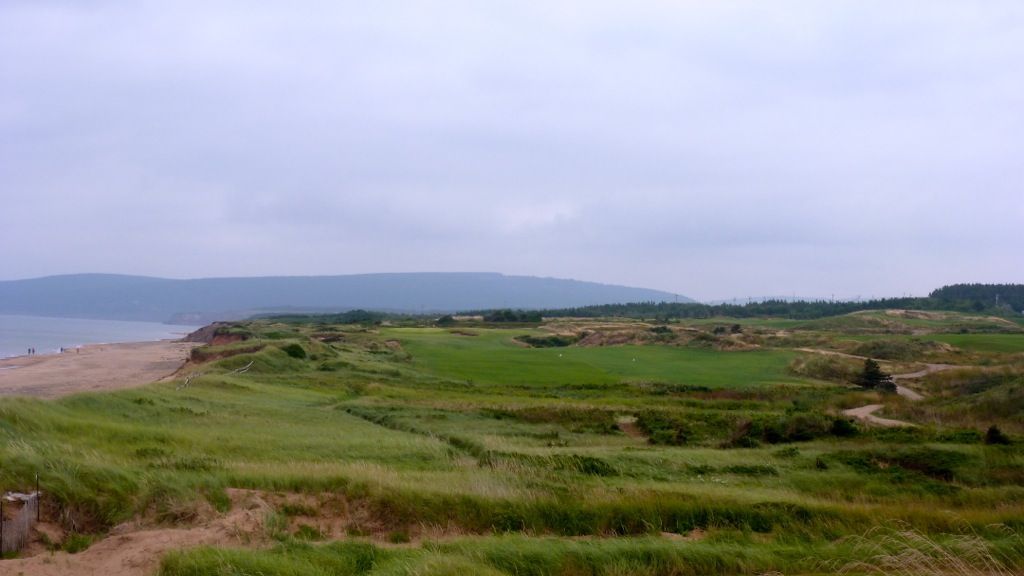
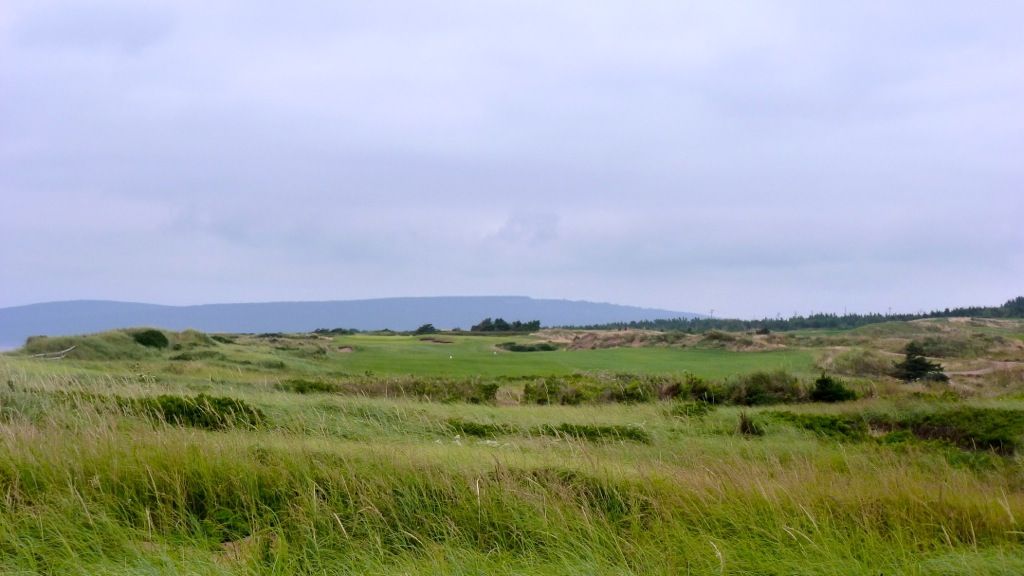
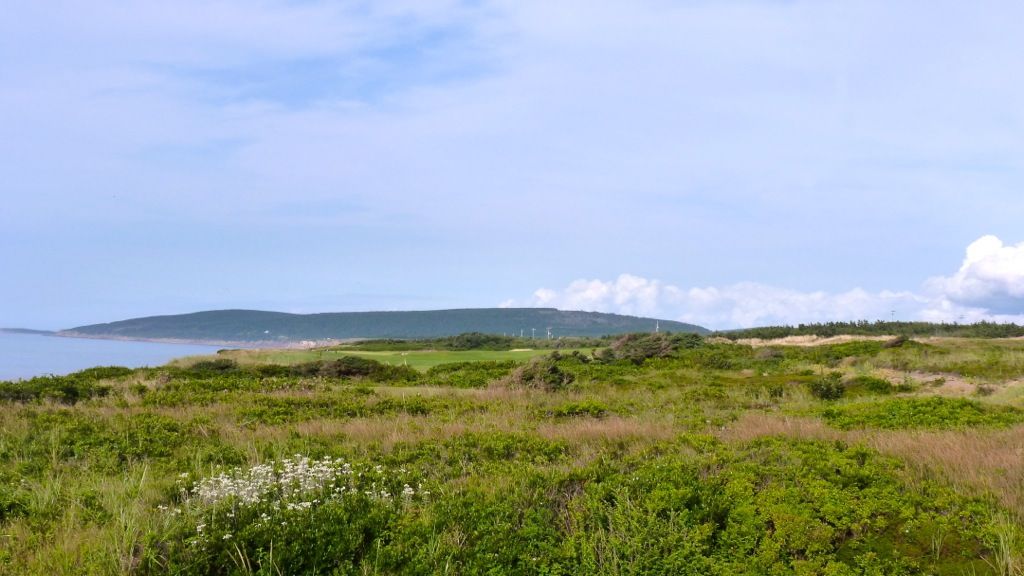
Hole 2: Par 5, 580 Yards -- Along with the 10th at Rock Creek Cattle Company (Doak; MT, USA) this is the best modern par-5 I have played. With the prevailing wind playing into and from the left and with the hole playing significantly uphill, this is one beast of a golf hole! The 2nd plays over wildly rolling terrain, the most extreme on the course, and the view of the flag perched over a cliff seemingly miles away is an intimidating sight.
The ideal line on this tee shot will be up the left side of the this rightward tilting fairway. Playing from the 620 yards back tees, the angle changes slightly making it more difficult to find the left side of the fairway.
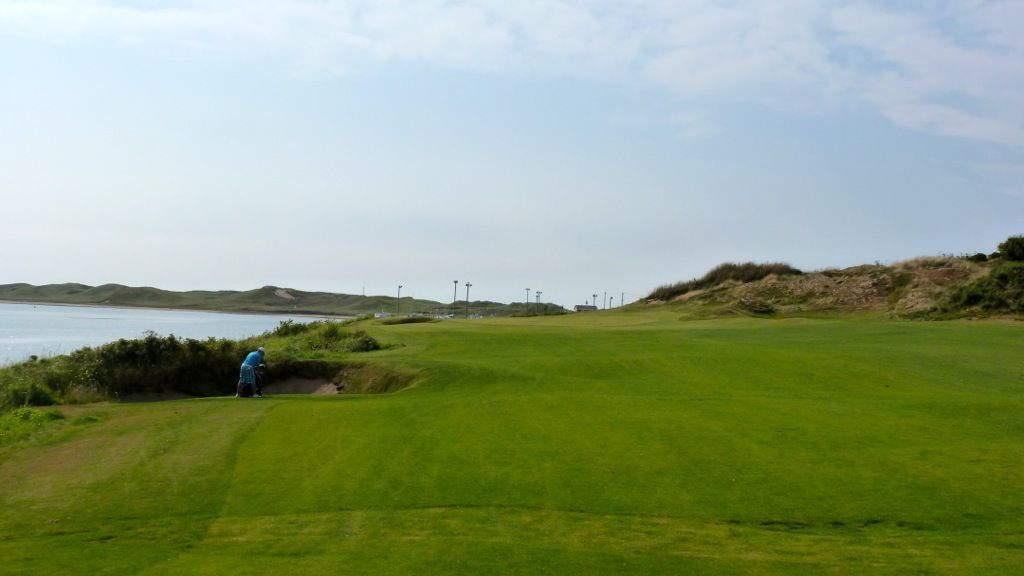
From the green tees it is easier to play a tee shot into the slope of the fairway and thus have the ball remain on the left side.
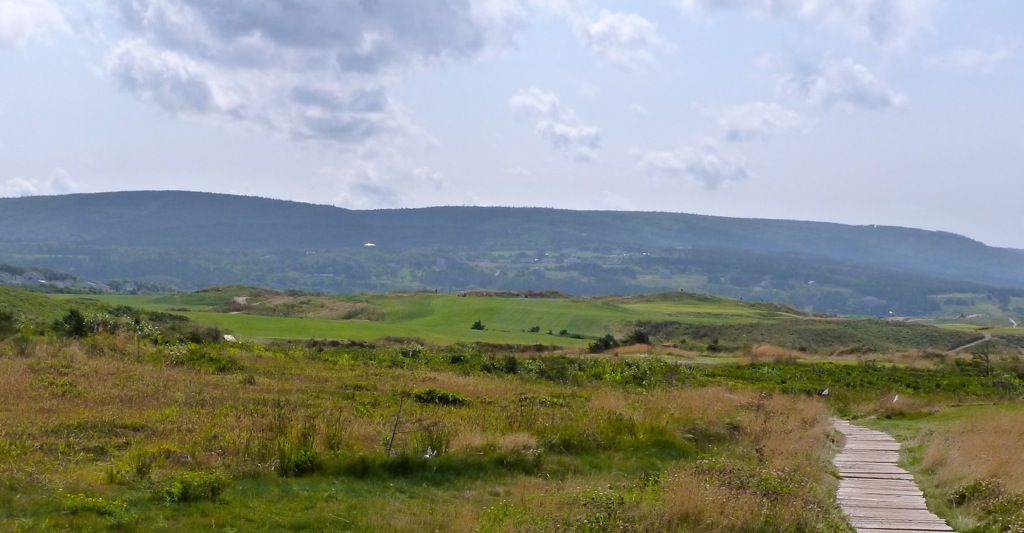
The path to greatness...
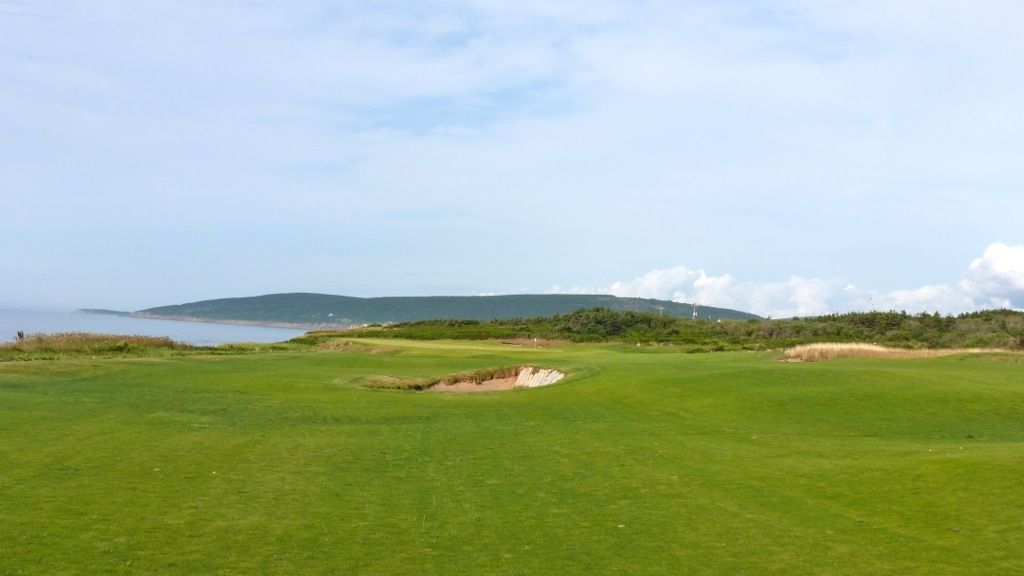
A top shot bunker guards the front-edge of the fairway.
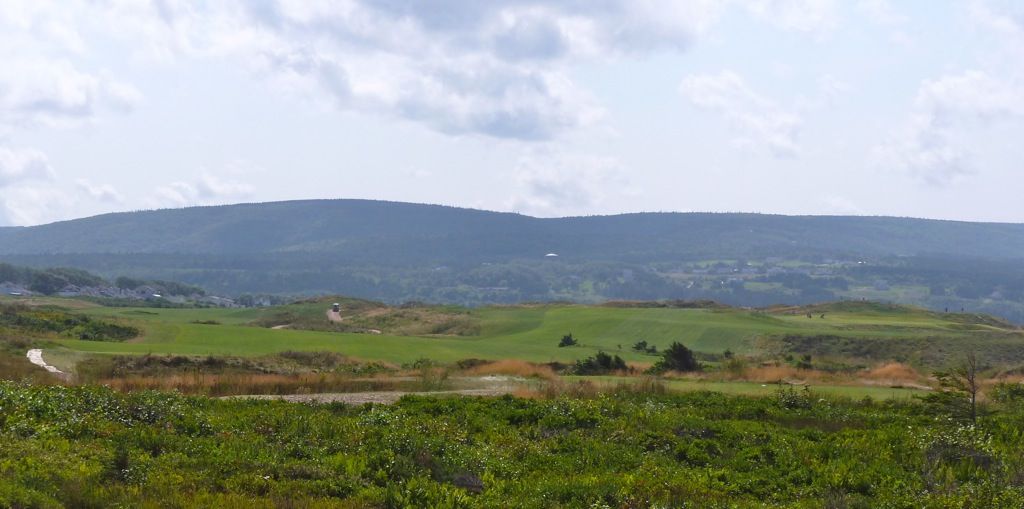
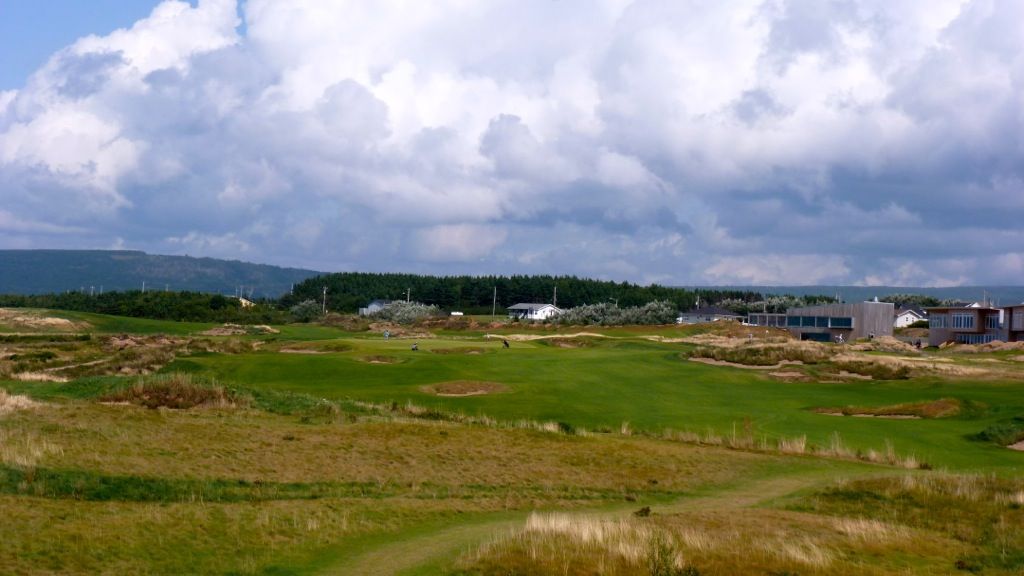
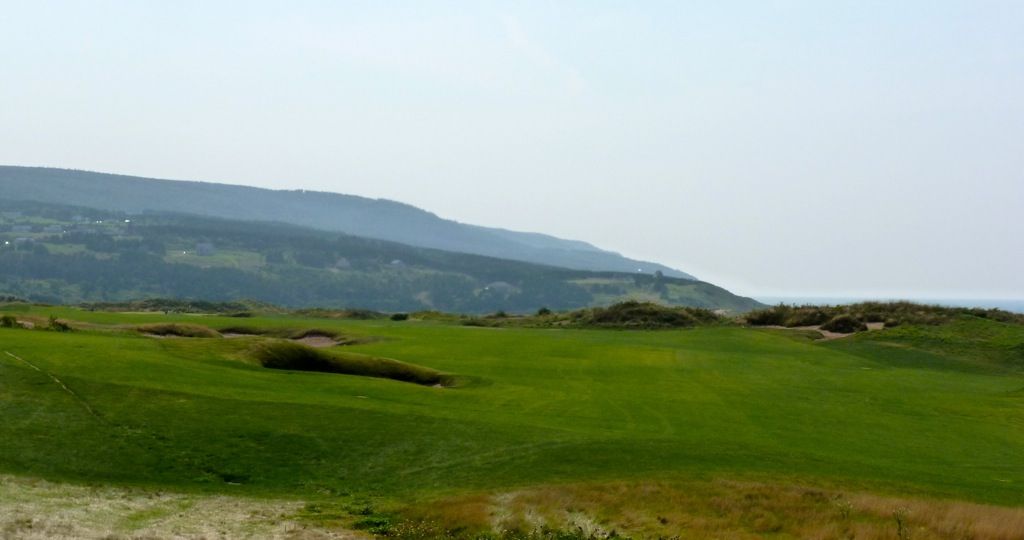
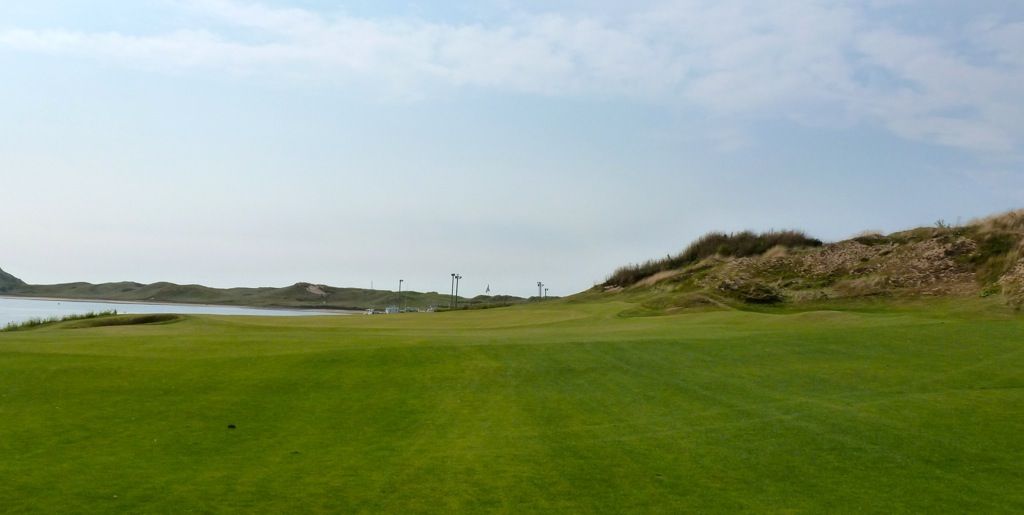
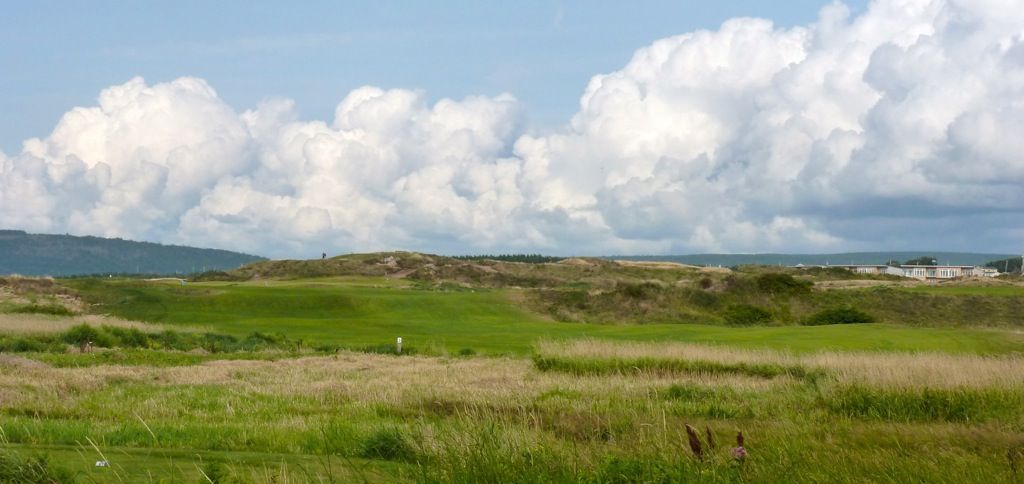
As the golfer reaches the fairway he sees that the though the tee shot was intimidating, there is extreme width to play to. Again, the correct side of the fairway is the key.
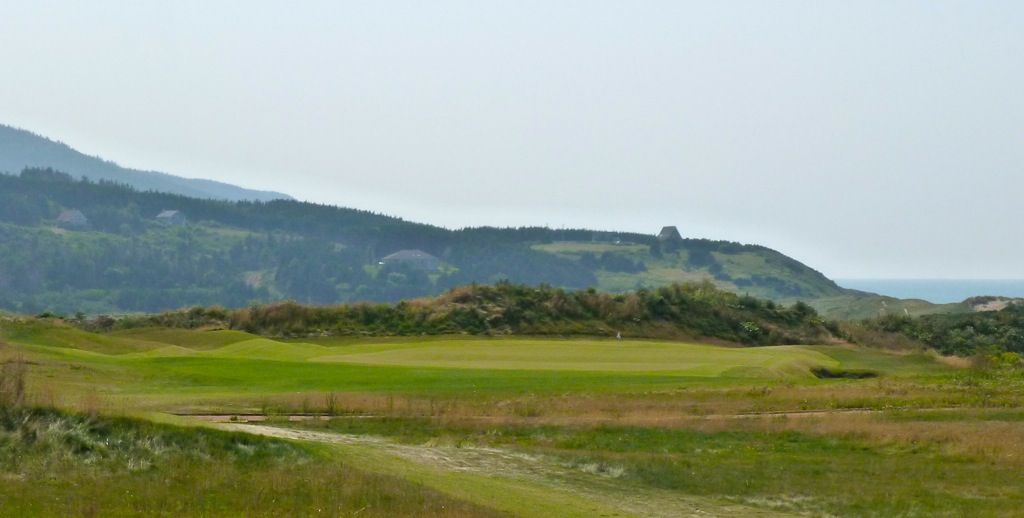
The second shot is played over (or into) a massive hill. Ideally, the golfer will play to the fairway plateau out to the right, from which he will have a clear view of the green. From the left side of the fairway this plateau can be accessed without a forced a carry...
But from the right, the lay-up to the plateau requires a long forced carry.
And the farther right you get, the worse the view of the plateau area...
A series of saving bunkers will stop a drive from finding the gunch on the right.
A look at the hill that must be carried on the second shot to reach the plateau in the fairway. Again my playing partner helps to give a sense of scale. Awesome!
While reaching the plateau is ideal, playing into the wind my partner and I could not crest the hill with out second shots. Playing your third from the side of this hill is no easy task -- completely blind, uphill/sidehill lie, into the wind, and requiring a lot of carry to reach the green.
Cresting the hill but not finding the plateau to the right will leave a view like this...
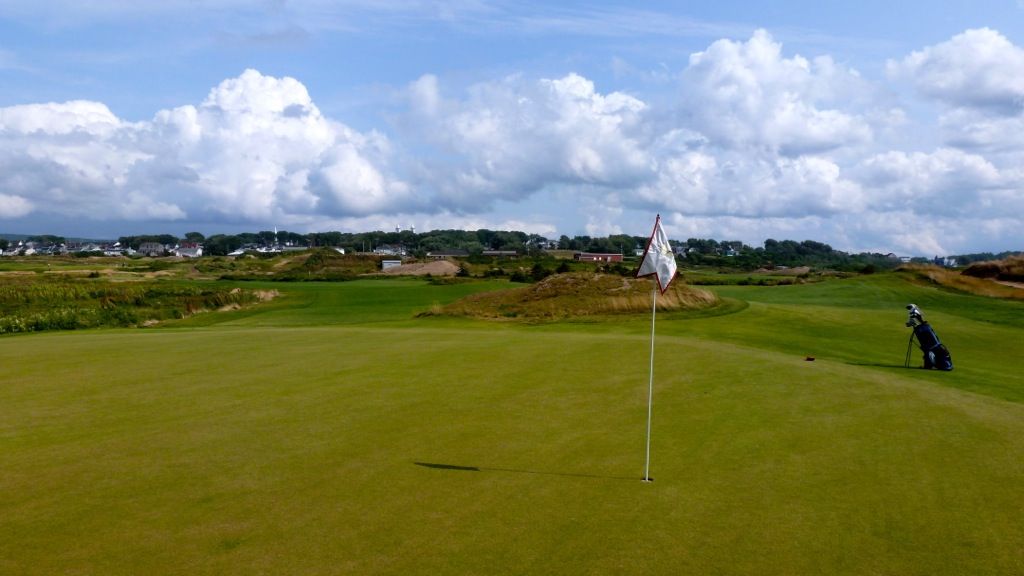
And the view of an approach from the plateau. Certainly more appealing.

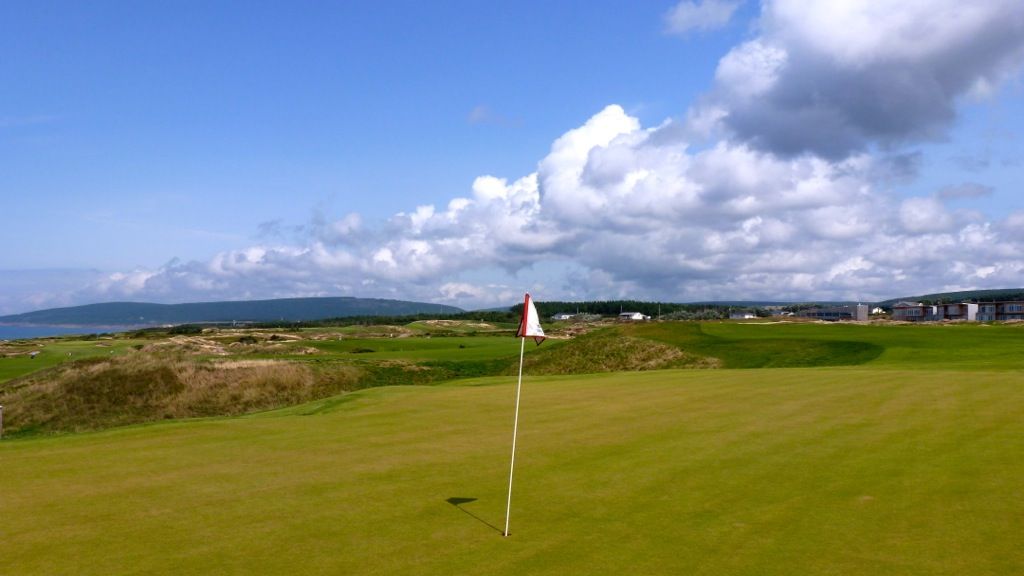
And from over the single fairway bunker. This green is designed to accept running approaches from the left, allowing the golfer to avoid all of the forced carry to the right.
A back stop can be used to help funnel a ball to back pin positions.

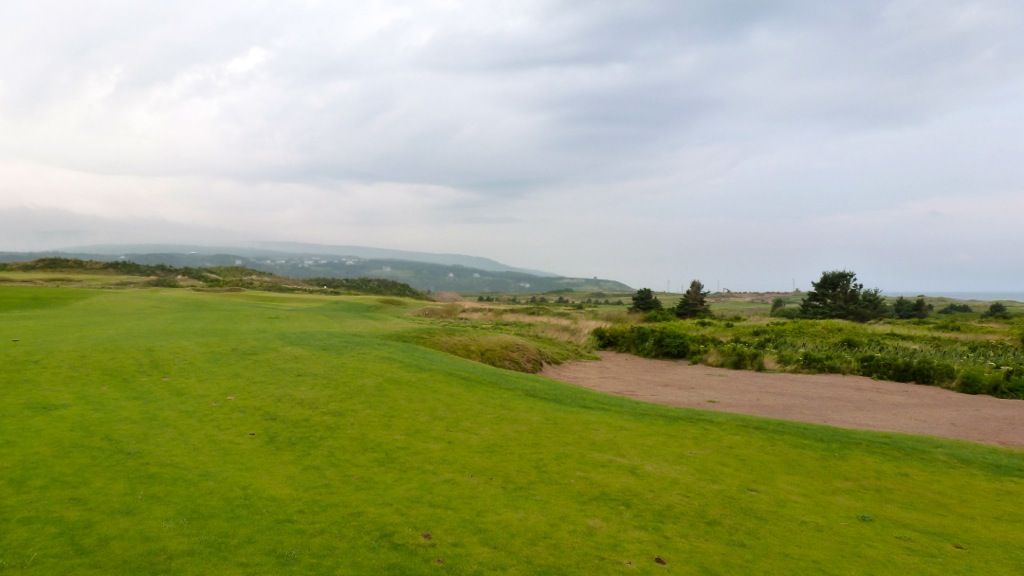
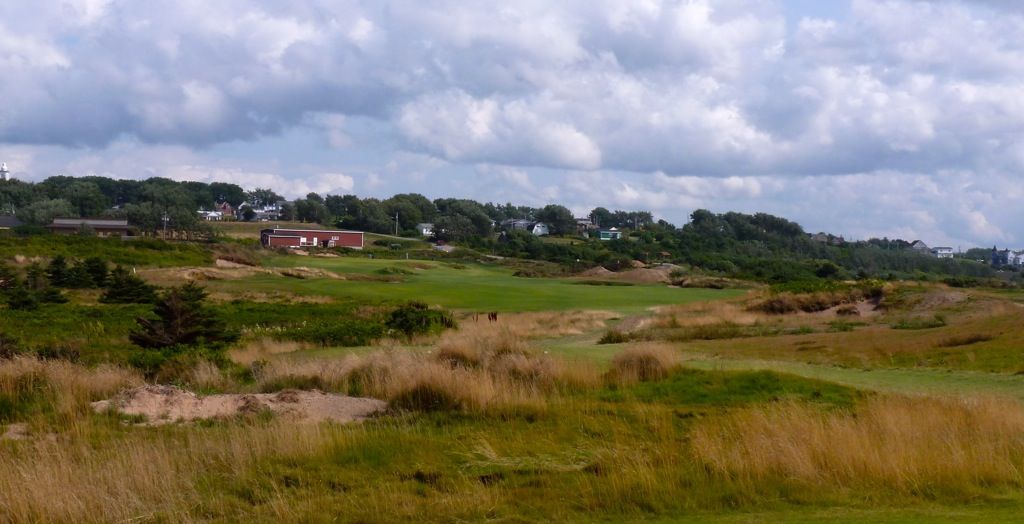
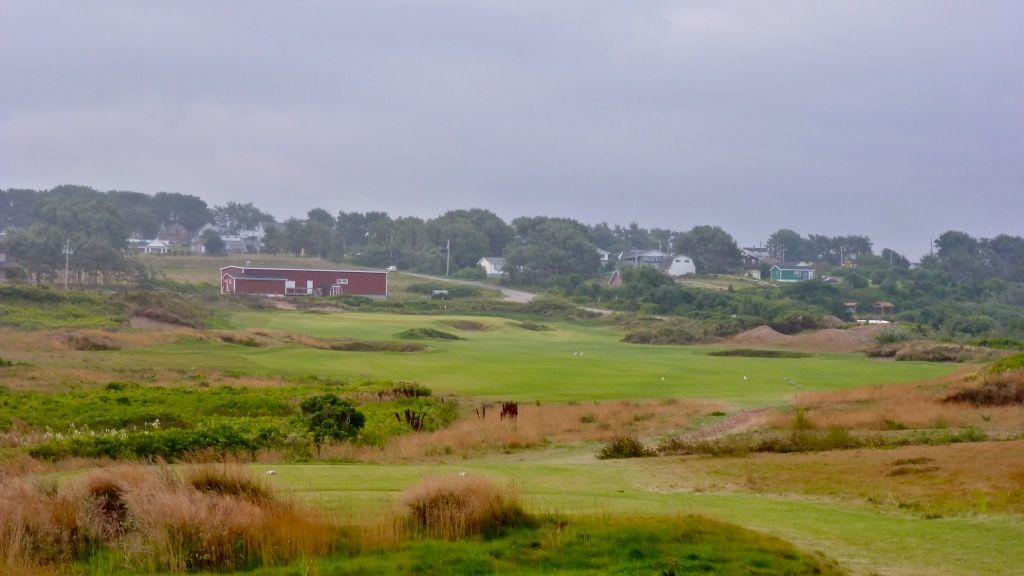
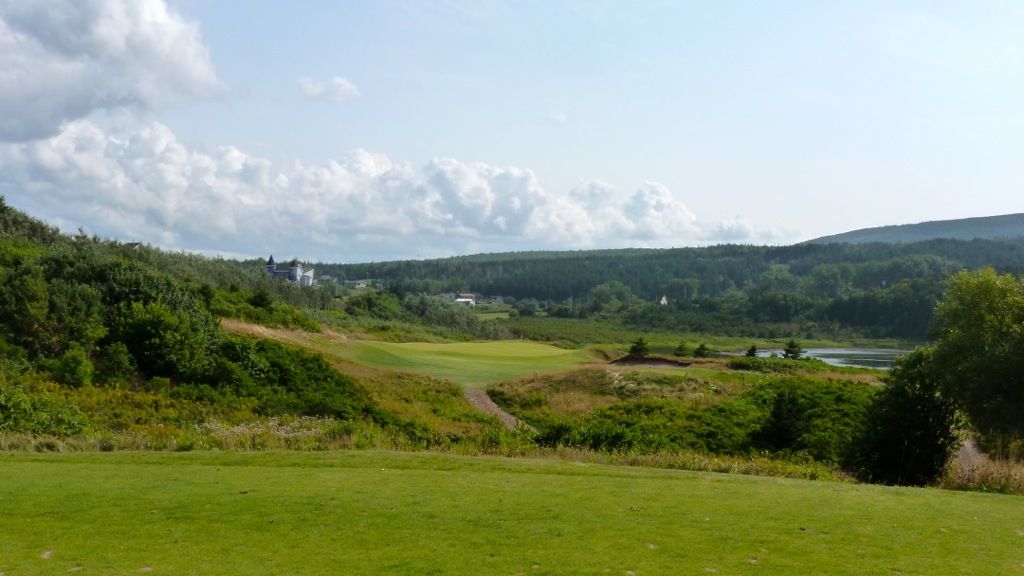
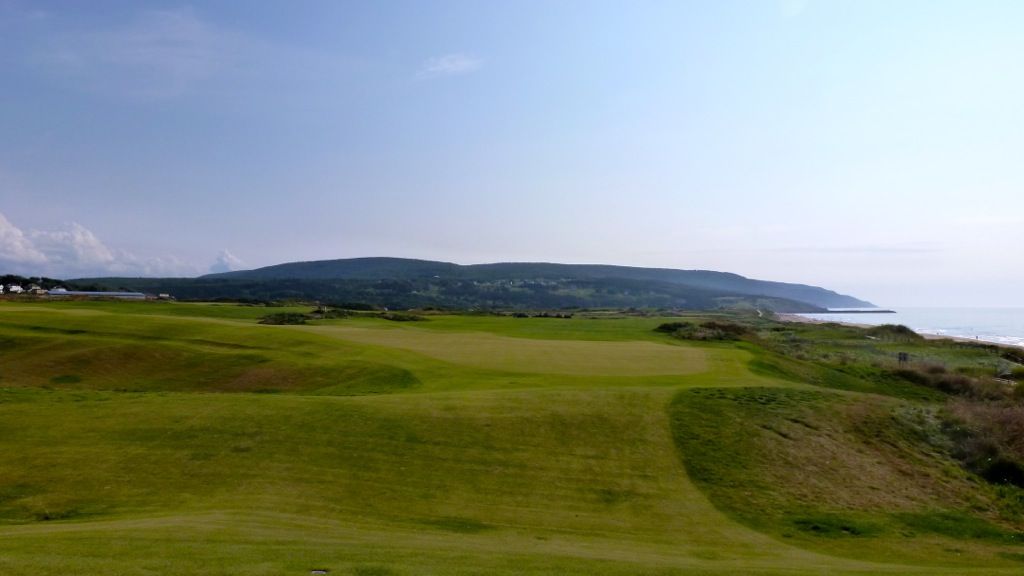
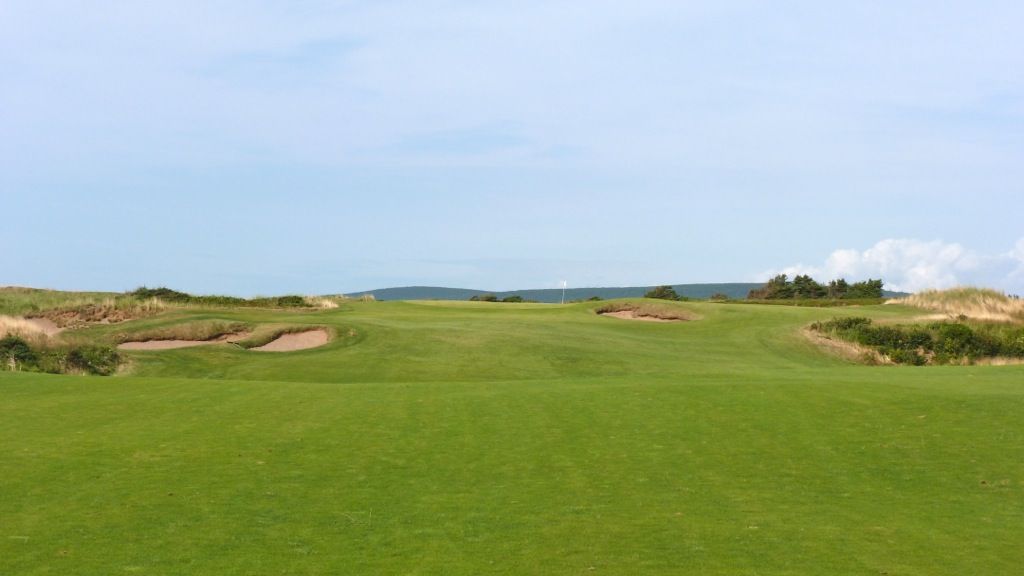
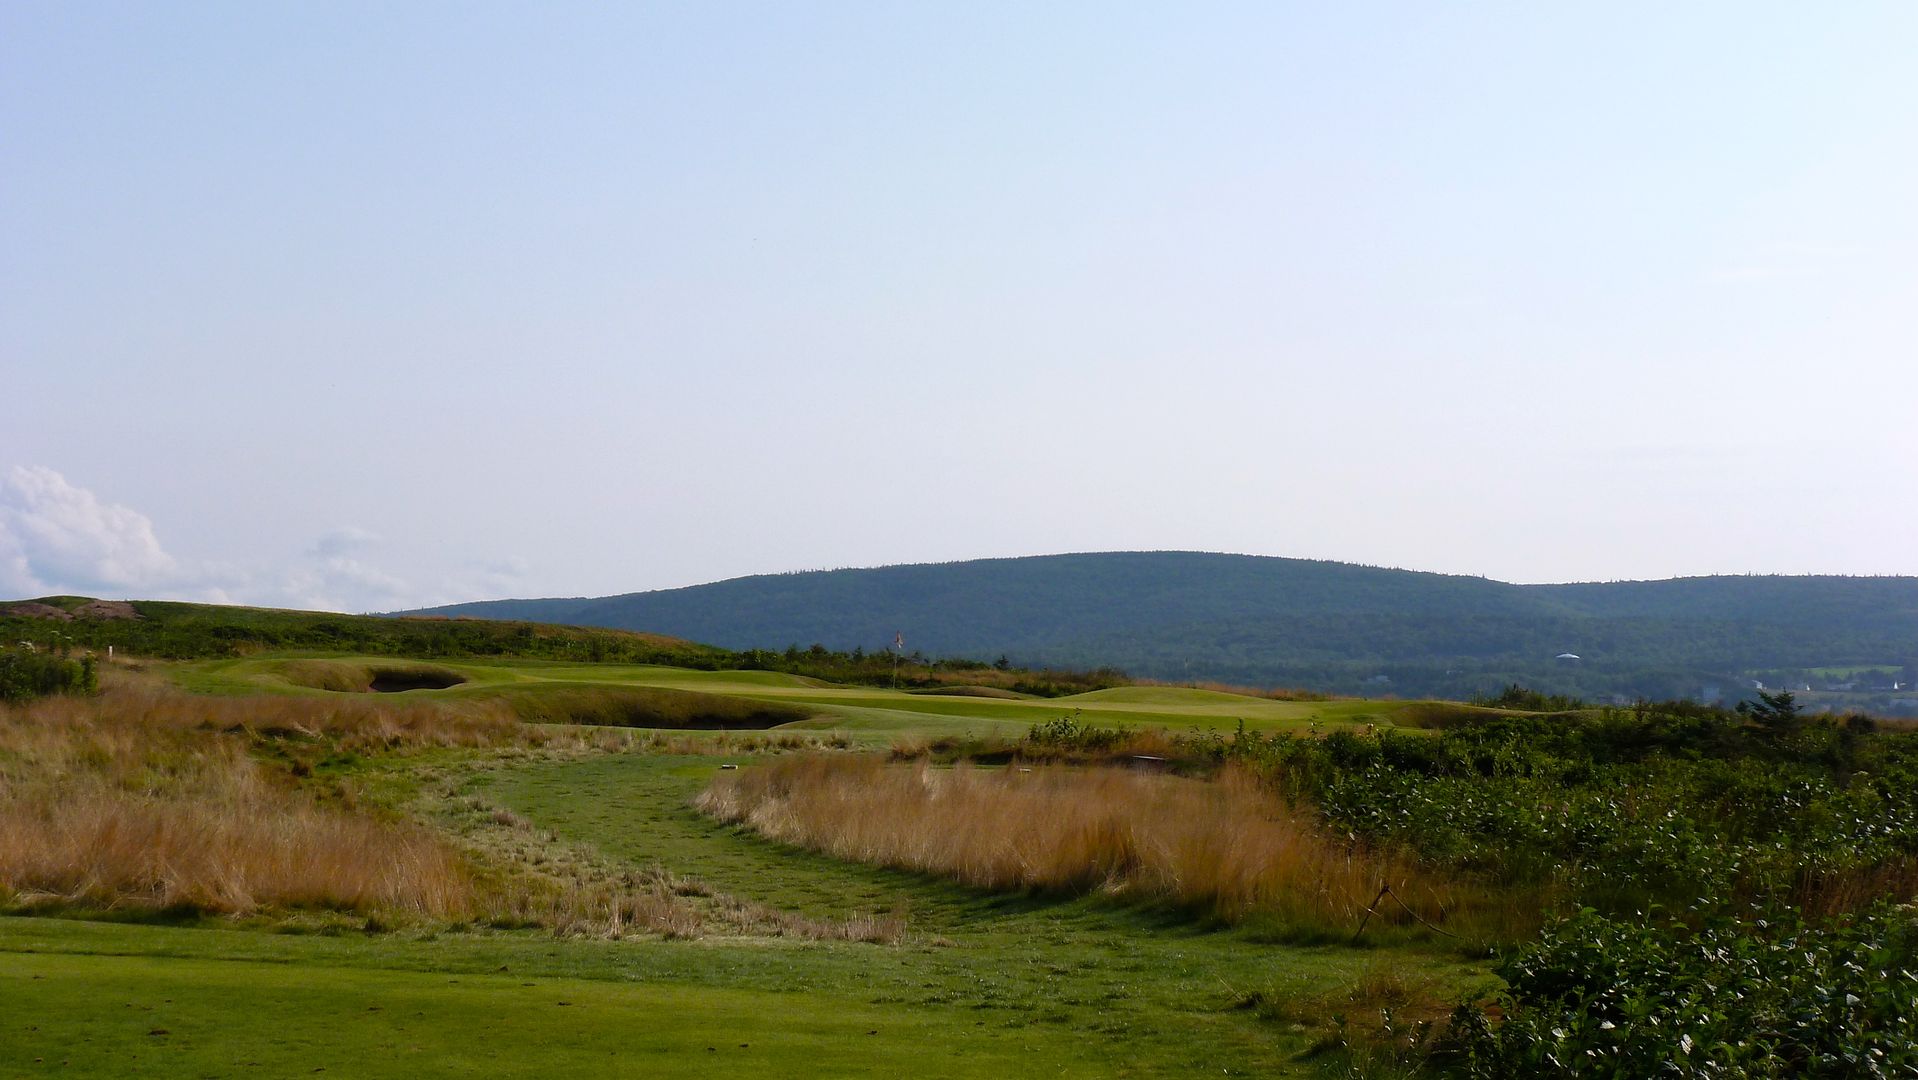
Hole 3: Par 4, 425 Yards -- A mid-length par-4 on the scorecard, but the 3rd plays in the same direction as the 2nd and will often be played into a headwind. The tee shot is downhill played into a valley to a fairway tilted to the right. Approaches from the left side are preferred, but the tilt of the fairway (and the gunch left of the fairway) make finding the ideal line a difficult task.
Back Tee View -- Back tees are farther to the right creating an entirely different teeing angle than all other sets.
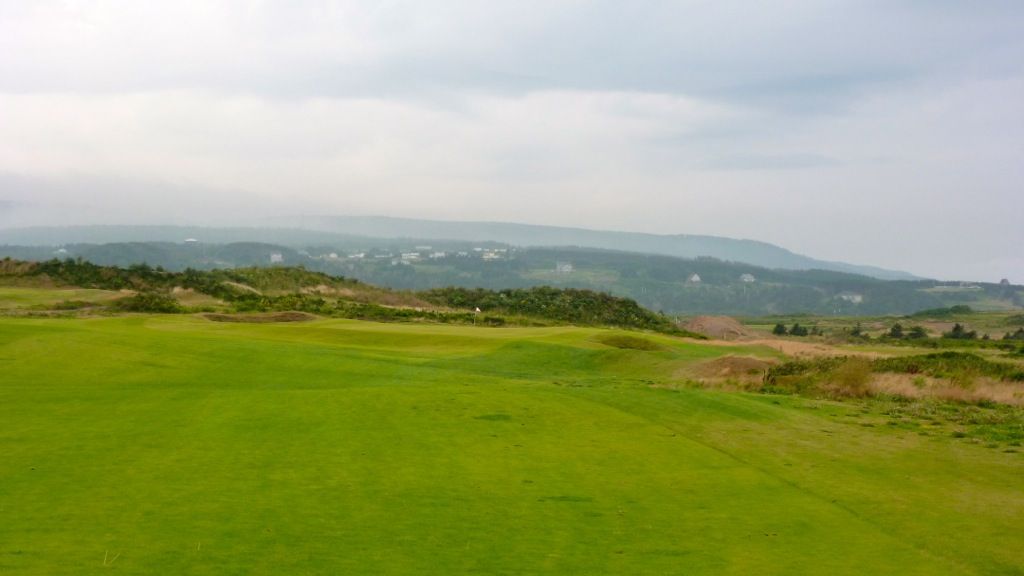
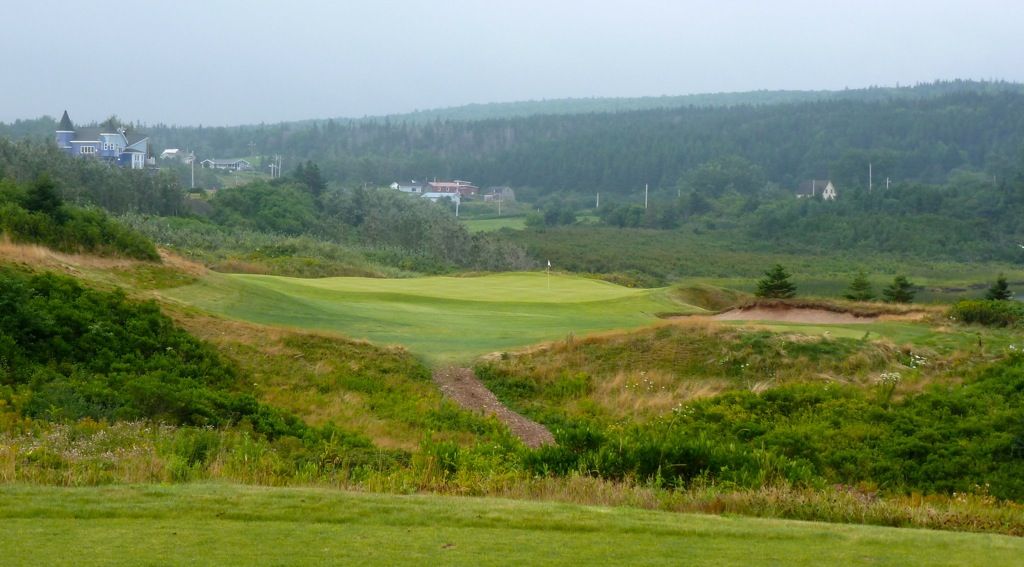
Green Tee View
Though the fairway looks somewhat narrow from the tee, once the golfer gets a clear look at its width he sees there is plenty of room to miss.
This bunker on the right side of the fairway will likely save more shots than it penalizes.
Approaching from the right is certainly more difficult with the green at an angle from here.
Approaching from the left allows the golfer to use the ground contours to run the ball onto the green.
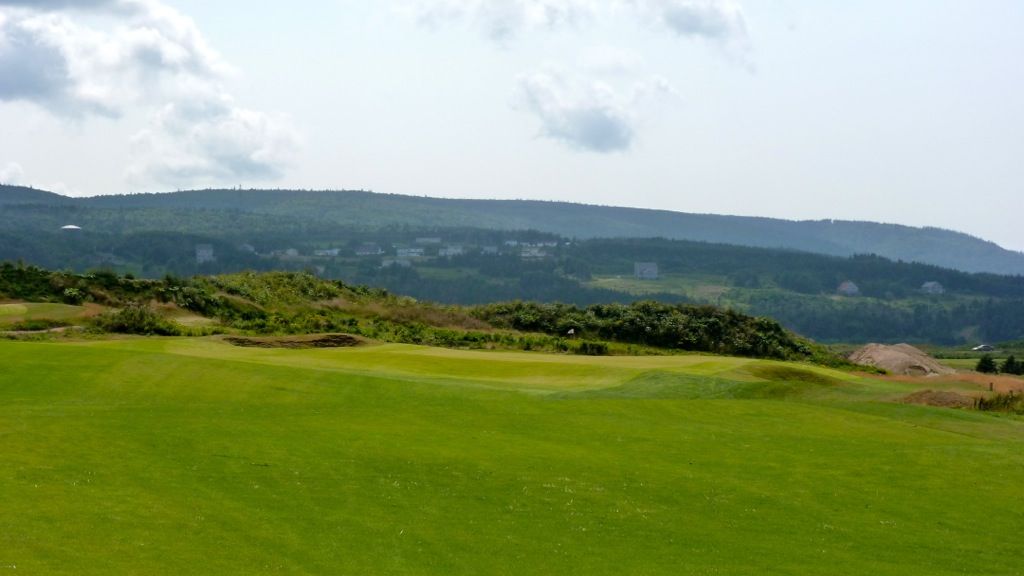
Contouring and a gentle upslope make judging a running shot a little more difficult.
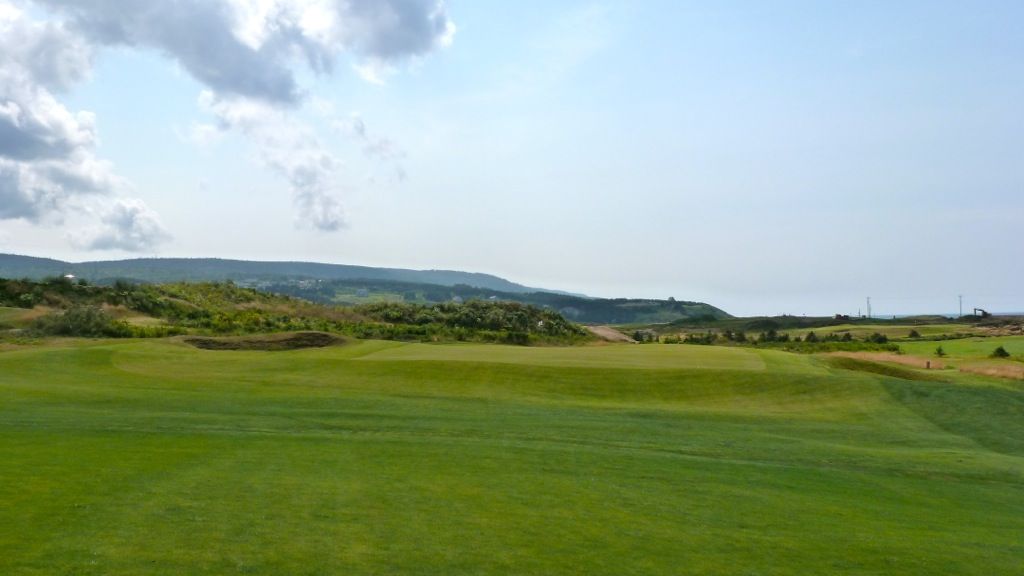
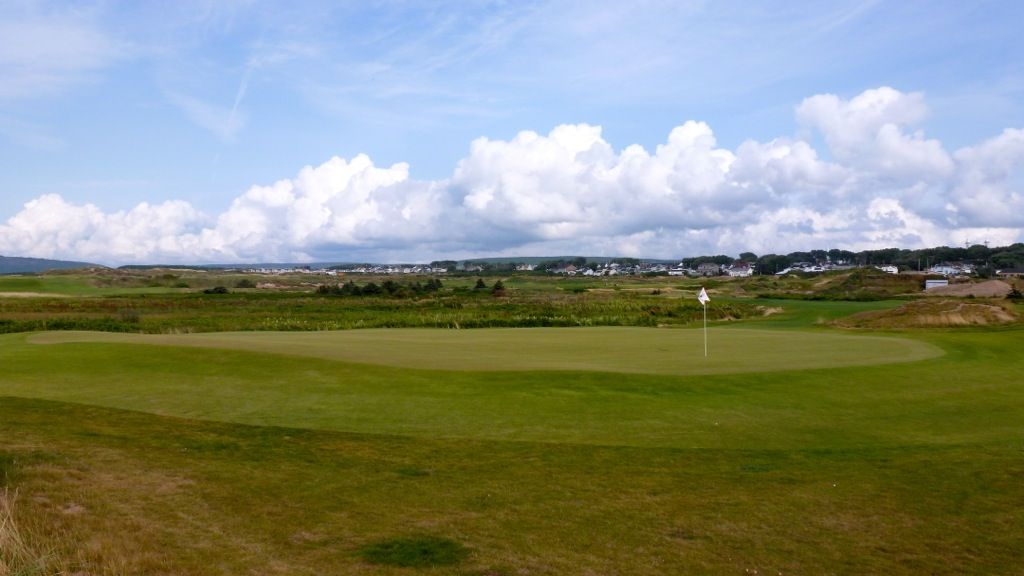
The 3rd green is long and narrow and gently rippling. It does not have the broad contours that are found on many of the other greens at Cabot.

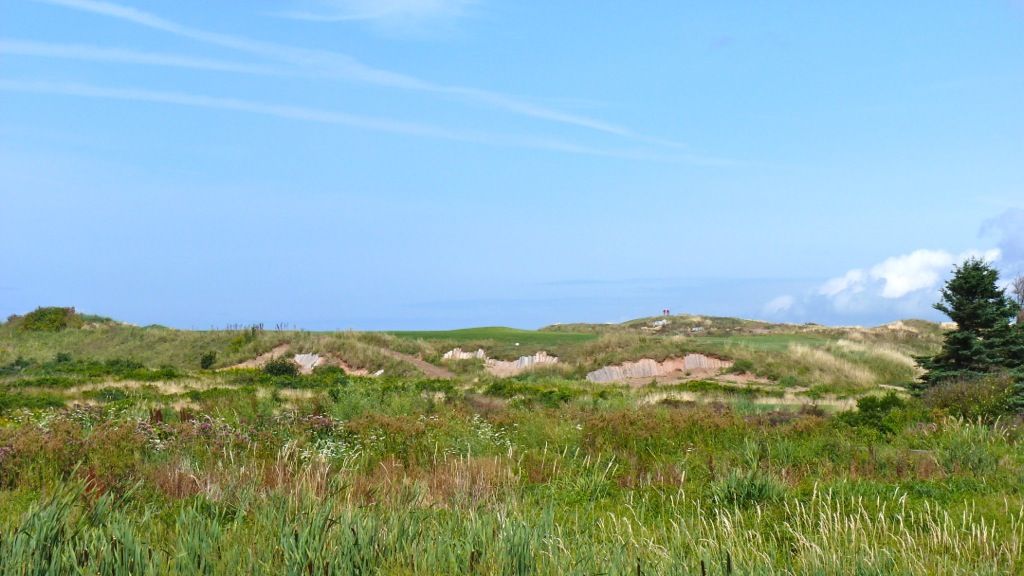
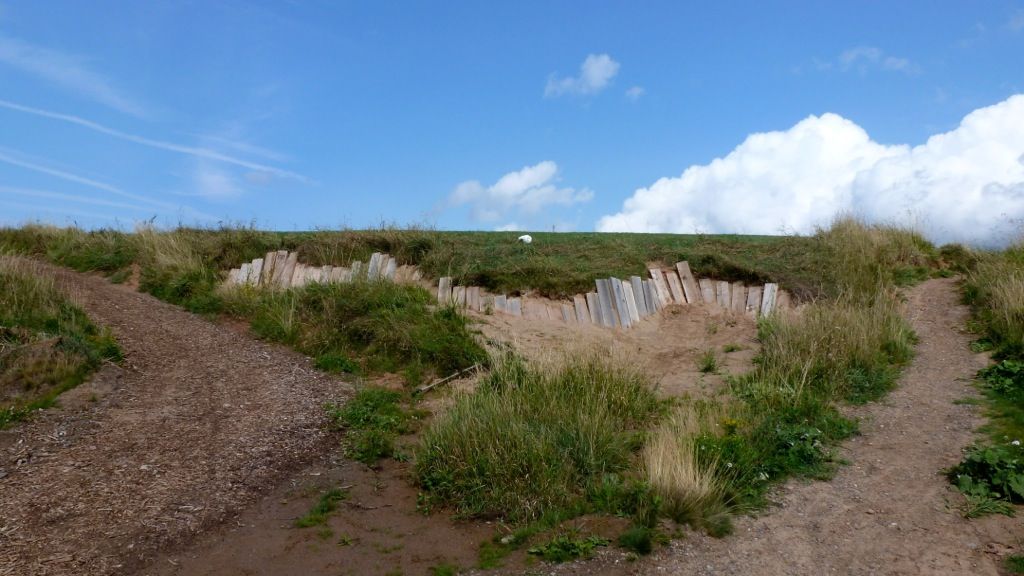
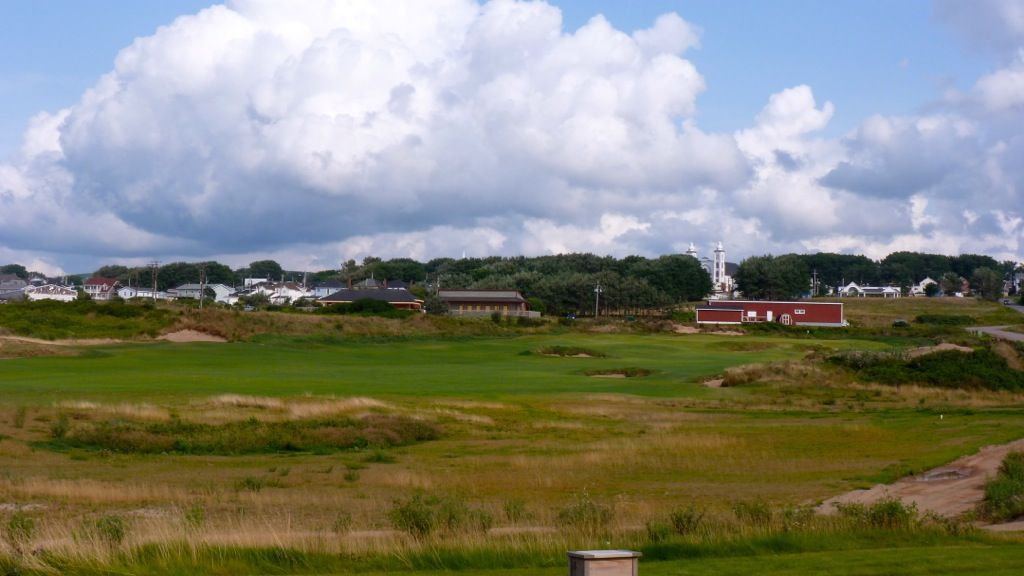
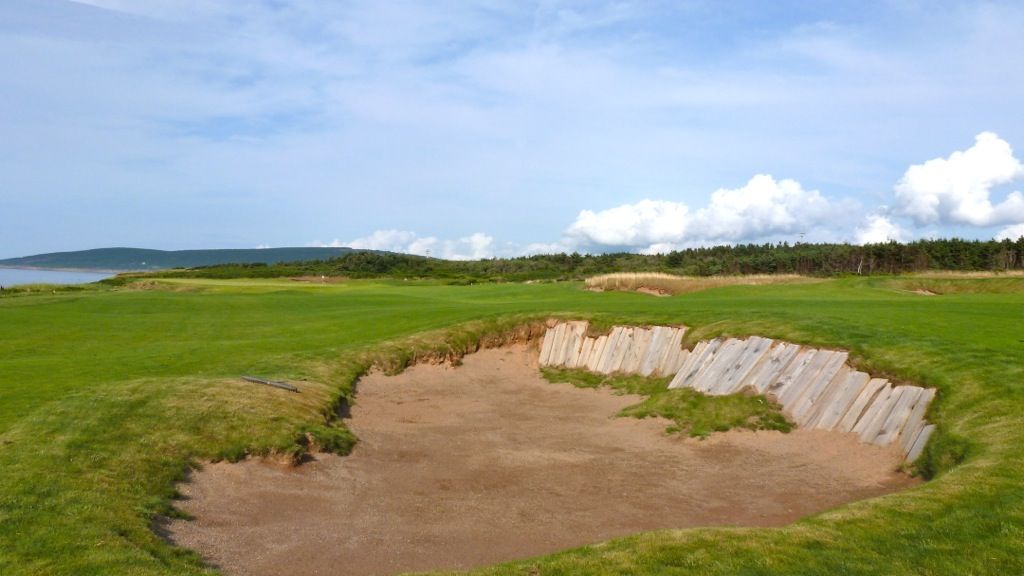
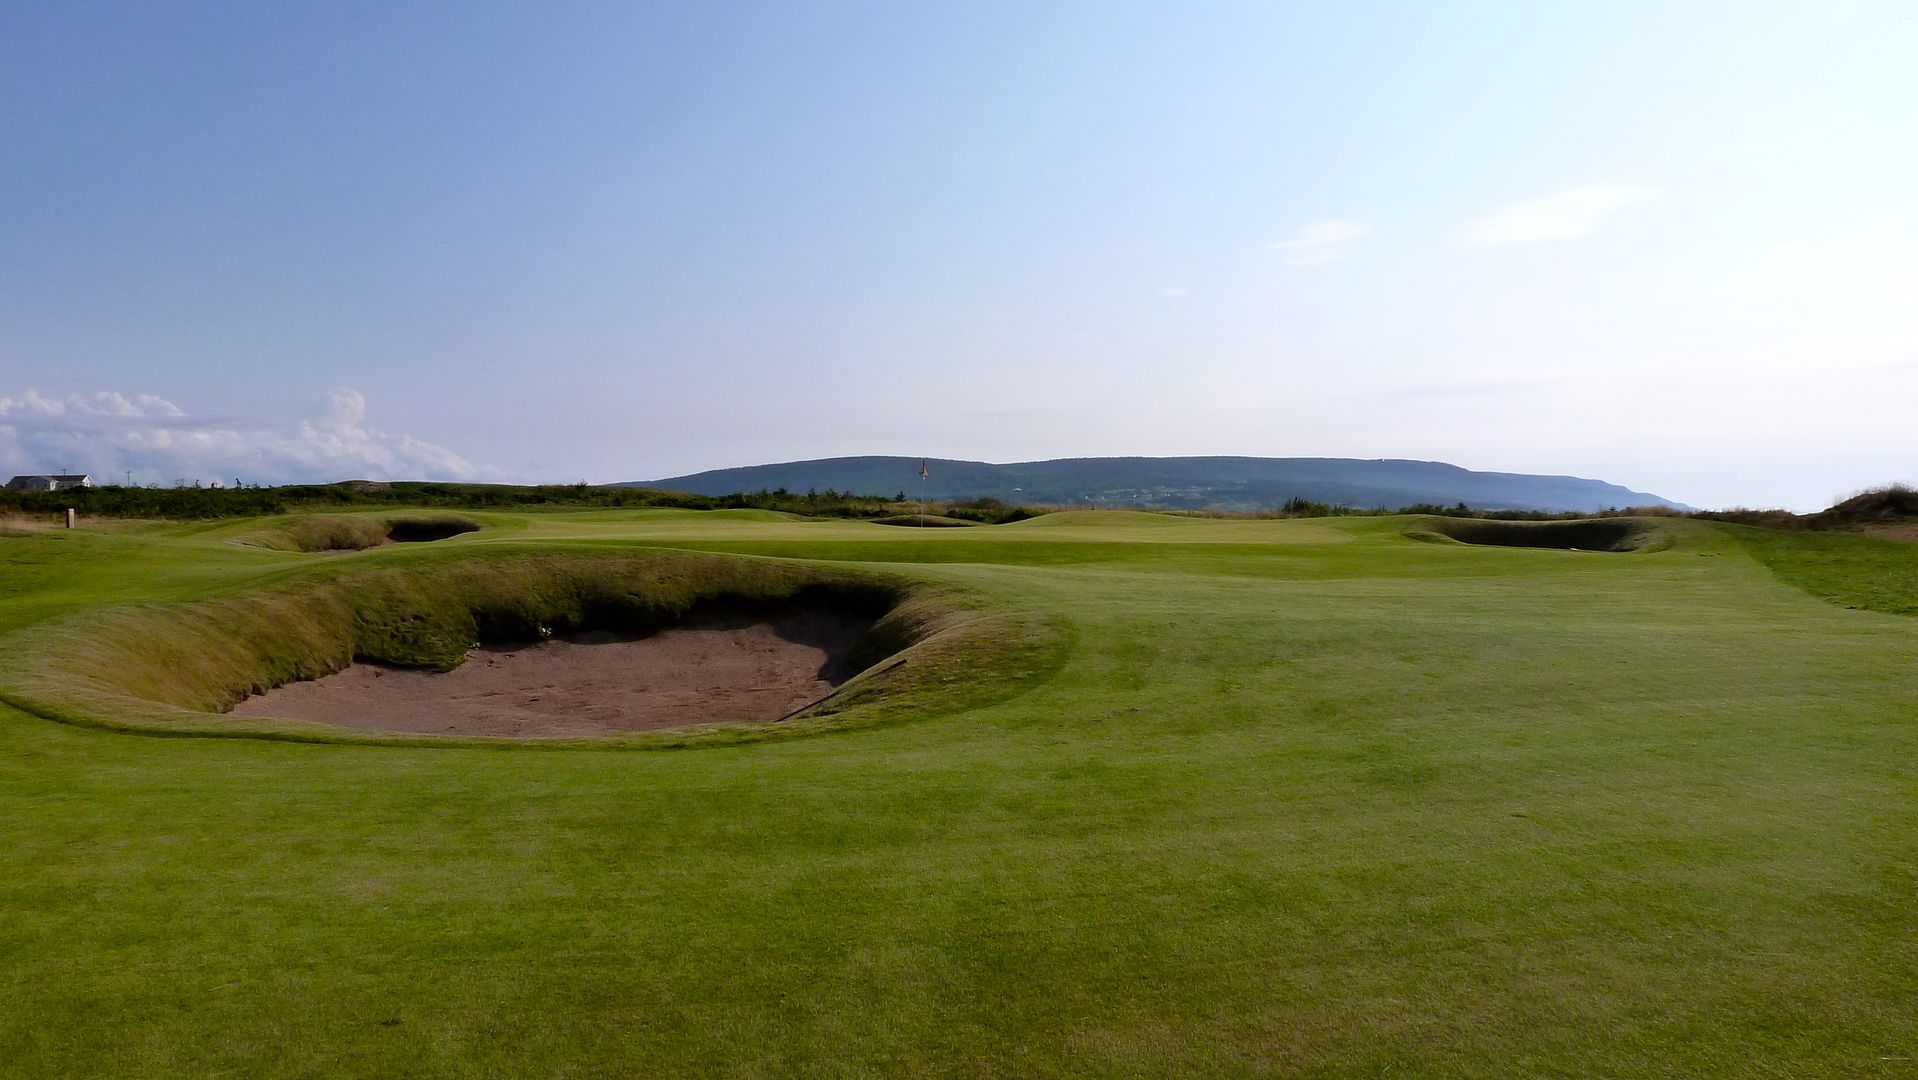
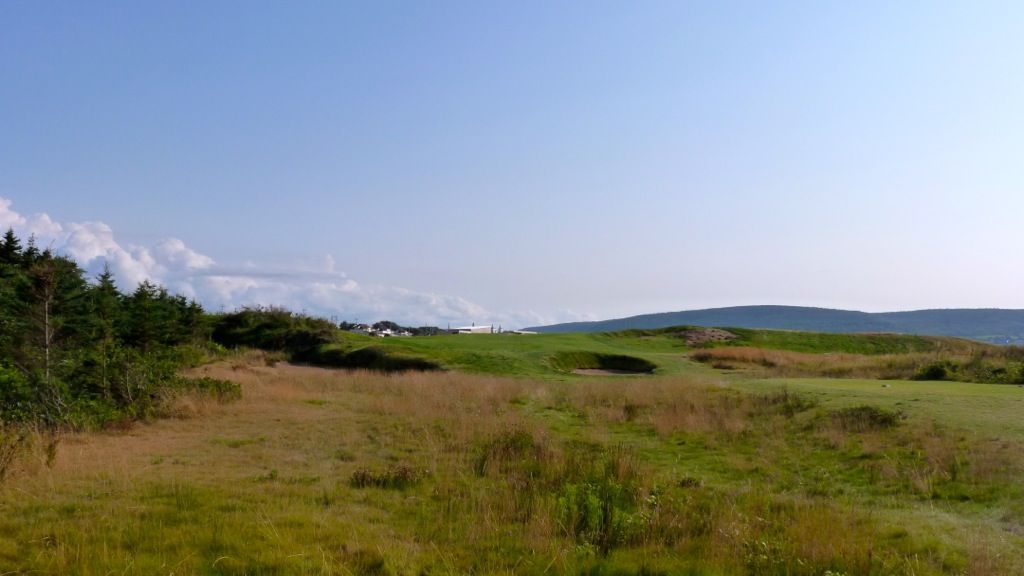
Hole 4: Par 4, 420 Yards -- The 4th hole plays alongside the 3rd hole and should be downwind (though curiously the wind died down both times I played the hole). The tee shot is completely blind (the only blind tee shot on the golf course) and a short forced carry over a trio of menacing bunkers. With the white rock aiming marker and the railroad tie bunkers, the tee shot feels like a mix of Lahinch, Pete Dye and Prestwick. Though the ideal line is not clear from the tee (aside from the aiming marker), once the golfers sees the fairway he knows the right side is preferred.
Tee View:
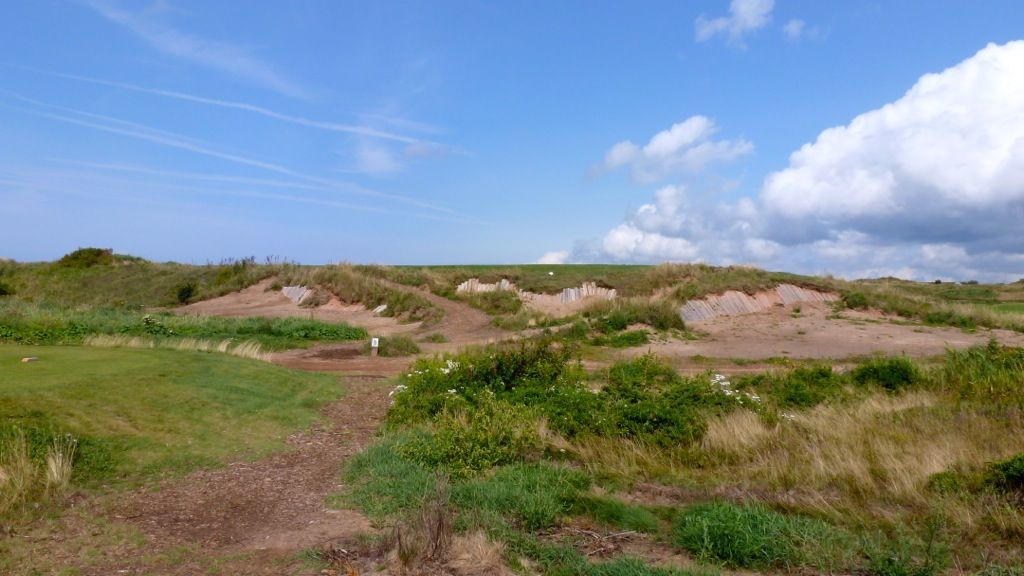
A closer look at the bunkers:
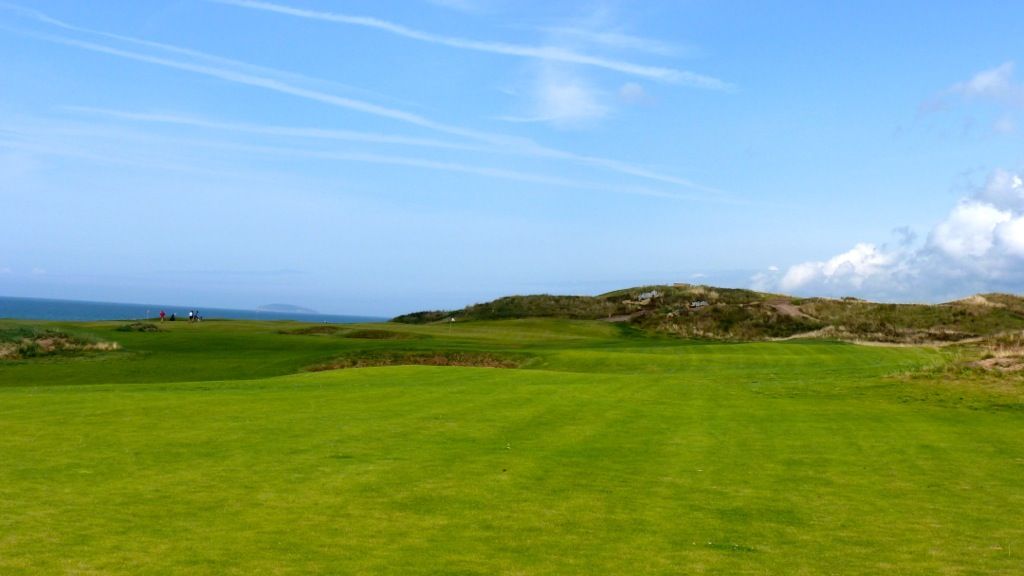
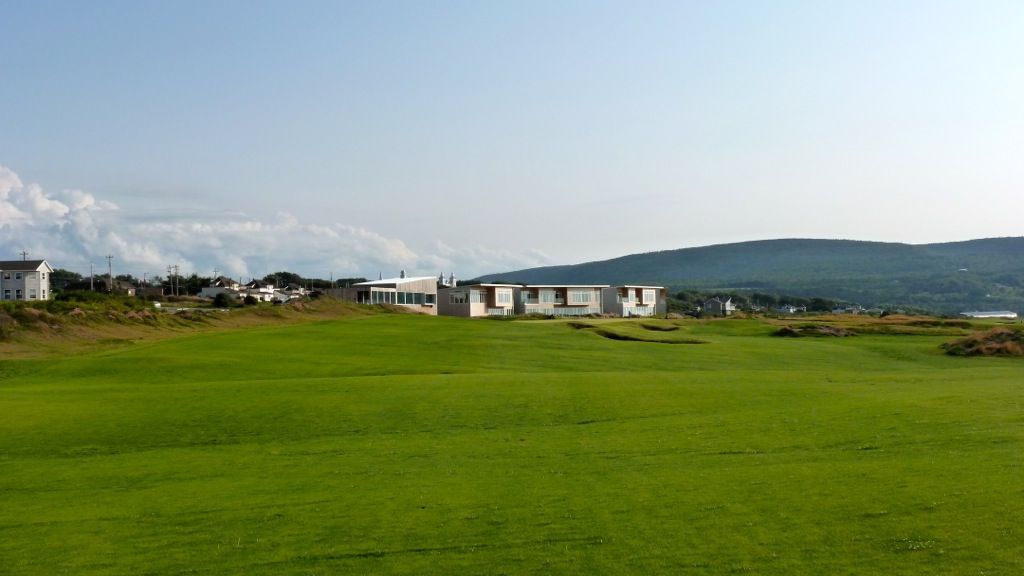
First view of another wide fairway at Cabot Links:
Tee shots played left of centre will find this hollow in the fairway and will face a semi-blind second from a difficult angle:
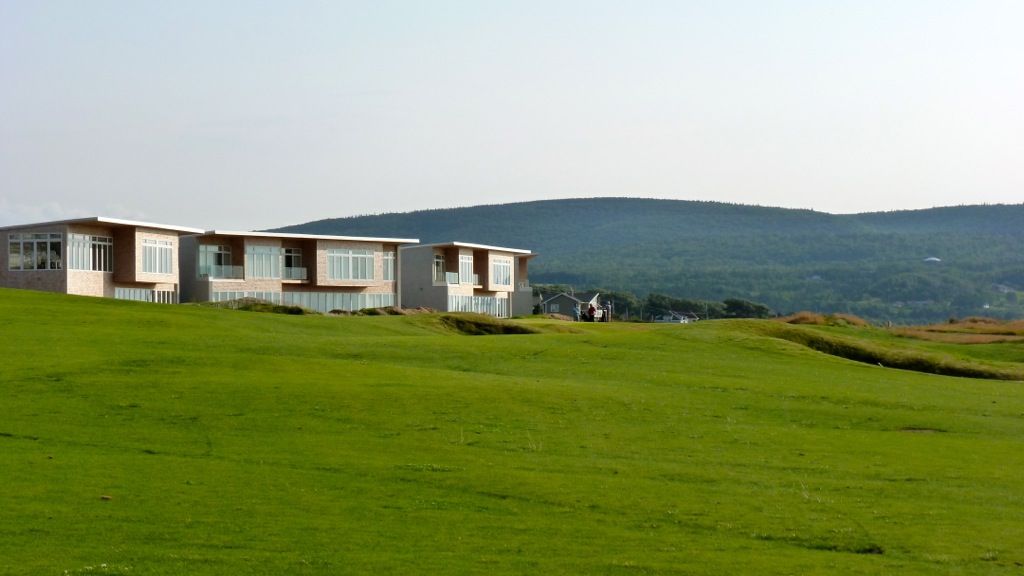
Approaching from the right allows the golfer to run the ball onto this massive green. Shots played to the right will not kick left onto the green.
Pretty cool shot of the massive double green (hole 4/13) and the flag on the short 14th in the background, all set against the water.
From short-right. Note the counterslope in the green that will repel shots played along the right edge.
And many looks at the green with so many humps, bumps, kickers and backstops that one could not possibly take it all in in two plays, nor could they possibly describe it with any clarity.

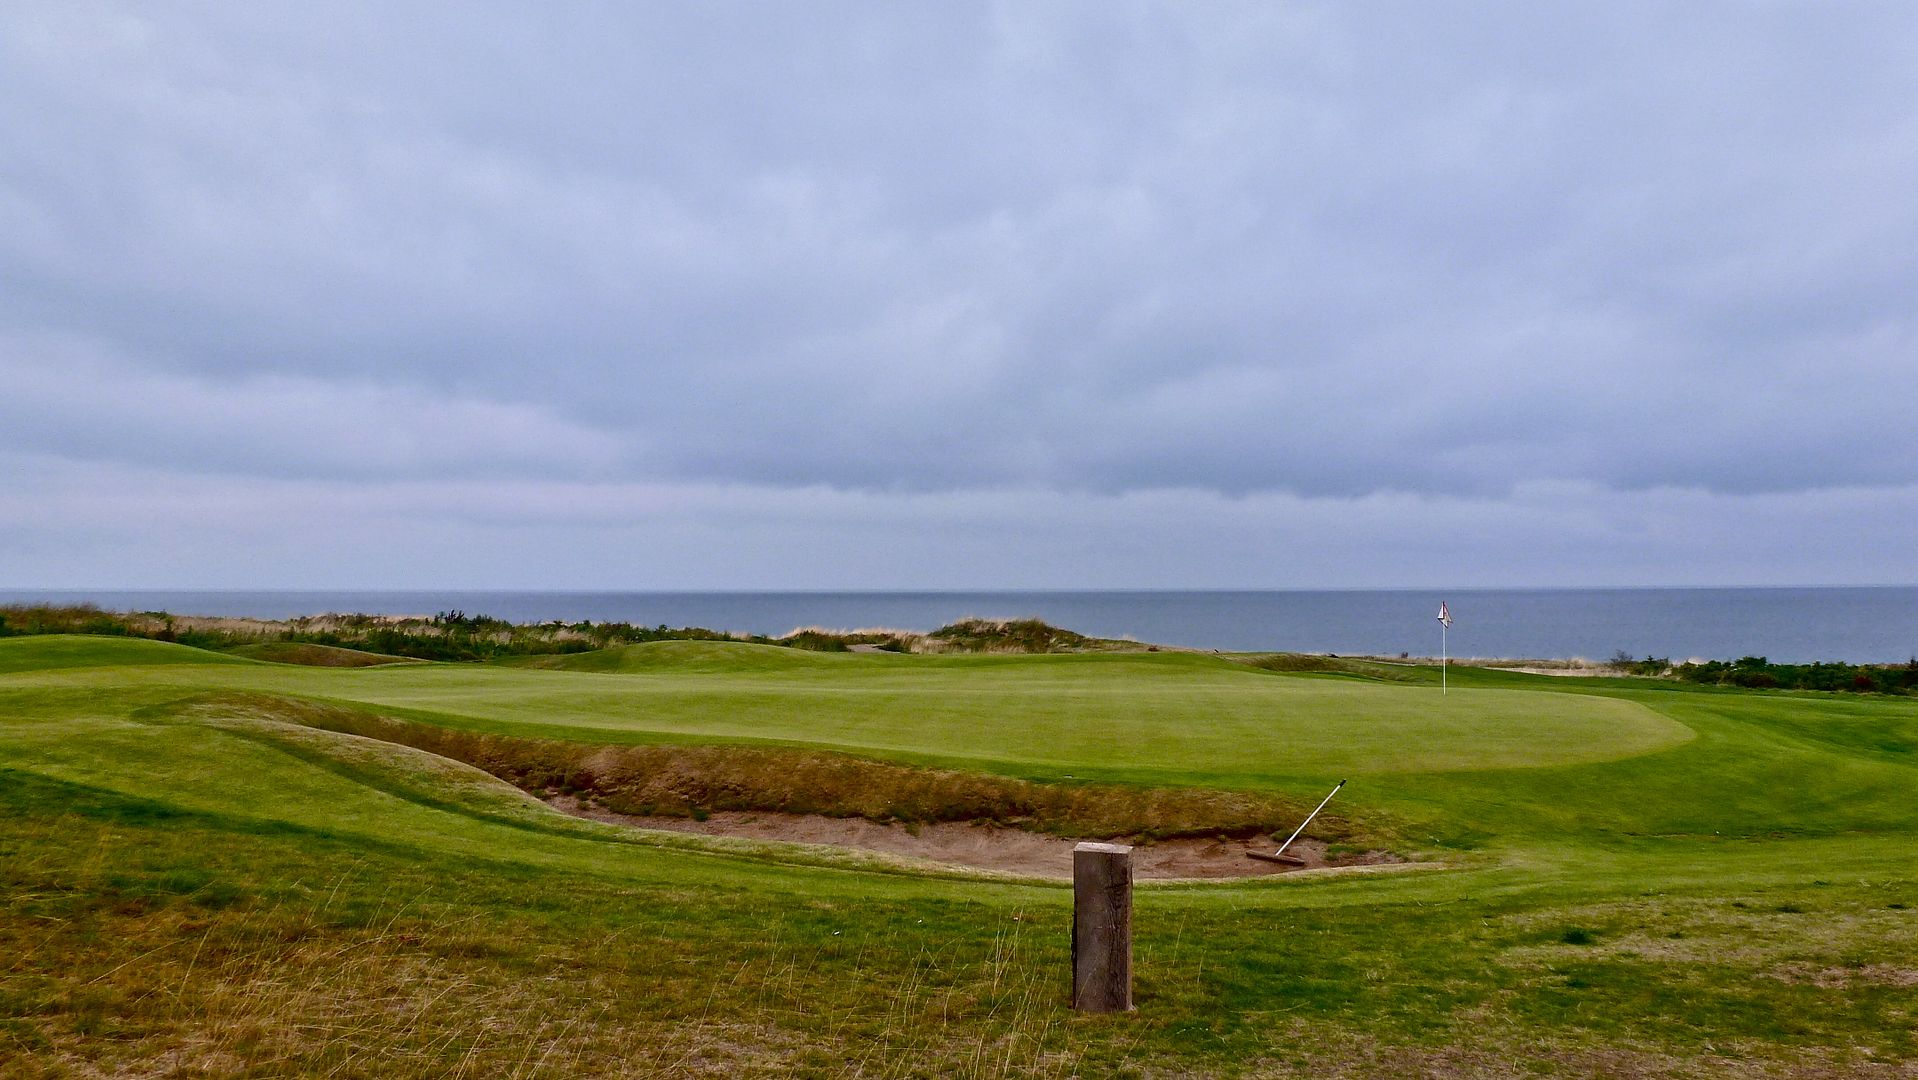
Hole 5: Par 4, 340 Yards -- A good short 4 and the first hole that plays straight downwind. Some will consider driving the green, but for many the key to the hole is a properly placed tee shot. A centreline bunker dictates play on the tee shot, though I cannot understand why a golfer would purposely play left of the bunker. For mine, the key is to play the tee shot as near the far-right fairway bunkers as possible. Then again, I only saw a single pin so perhaps there are reasons to play farther left.
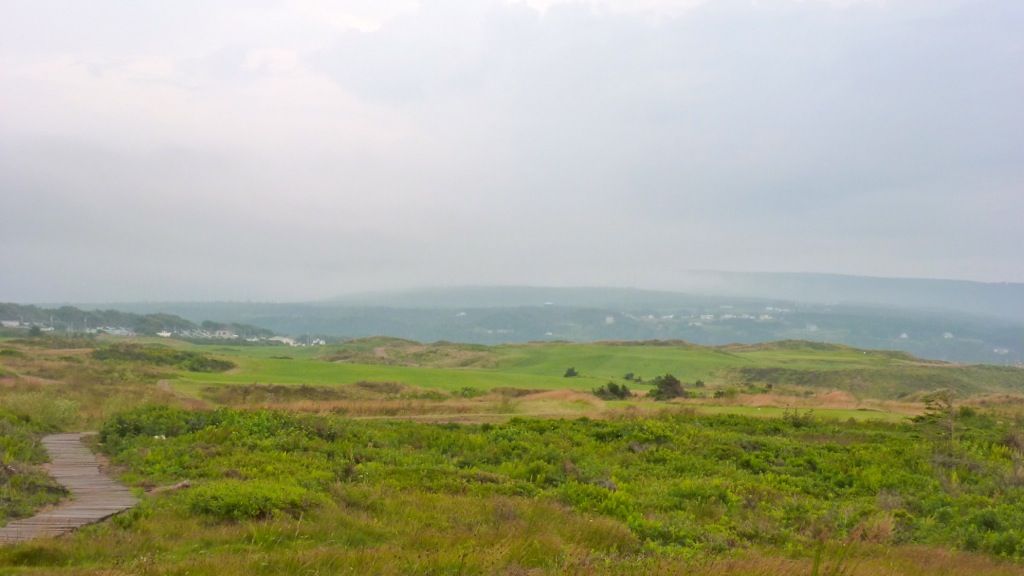
Tee view (UK weather):
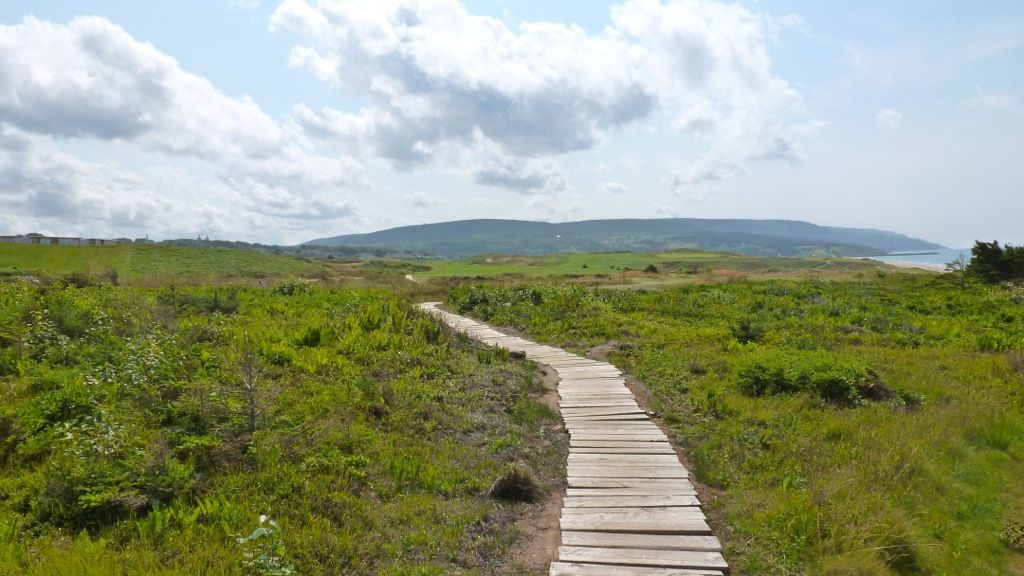
Tee View (Normal, sunny NS weather):
First full view of fairway:
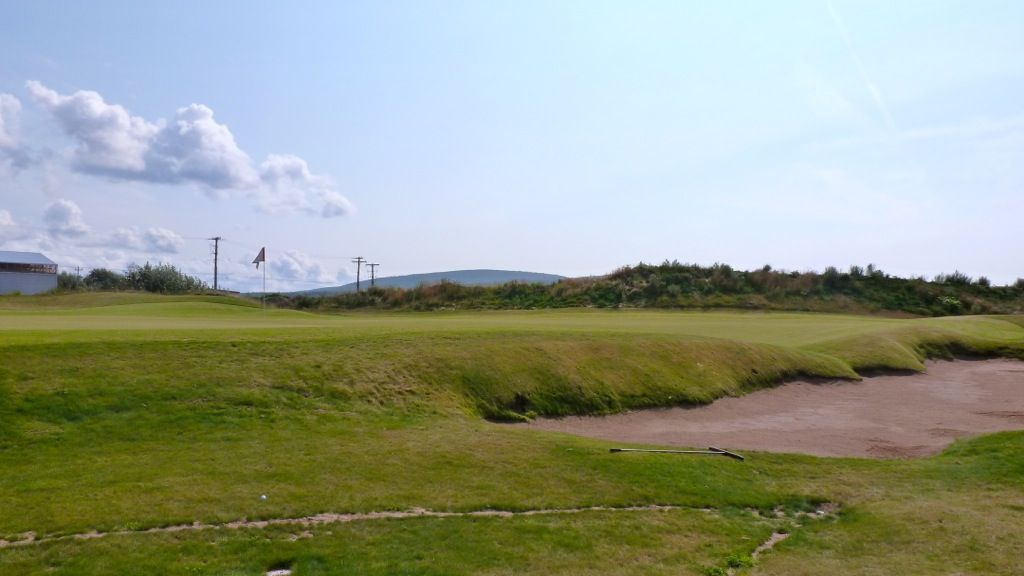
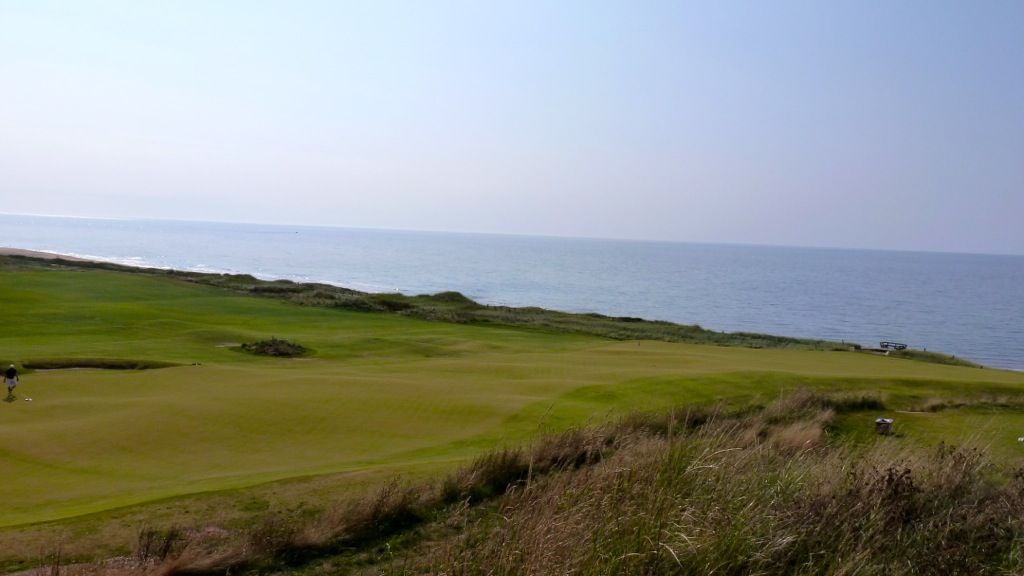
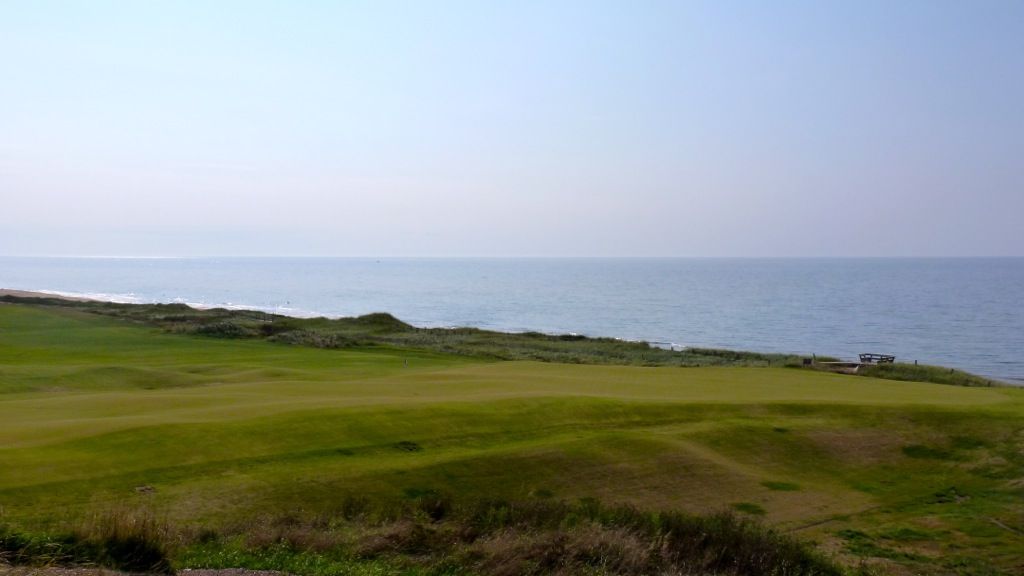
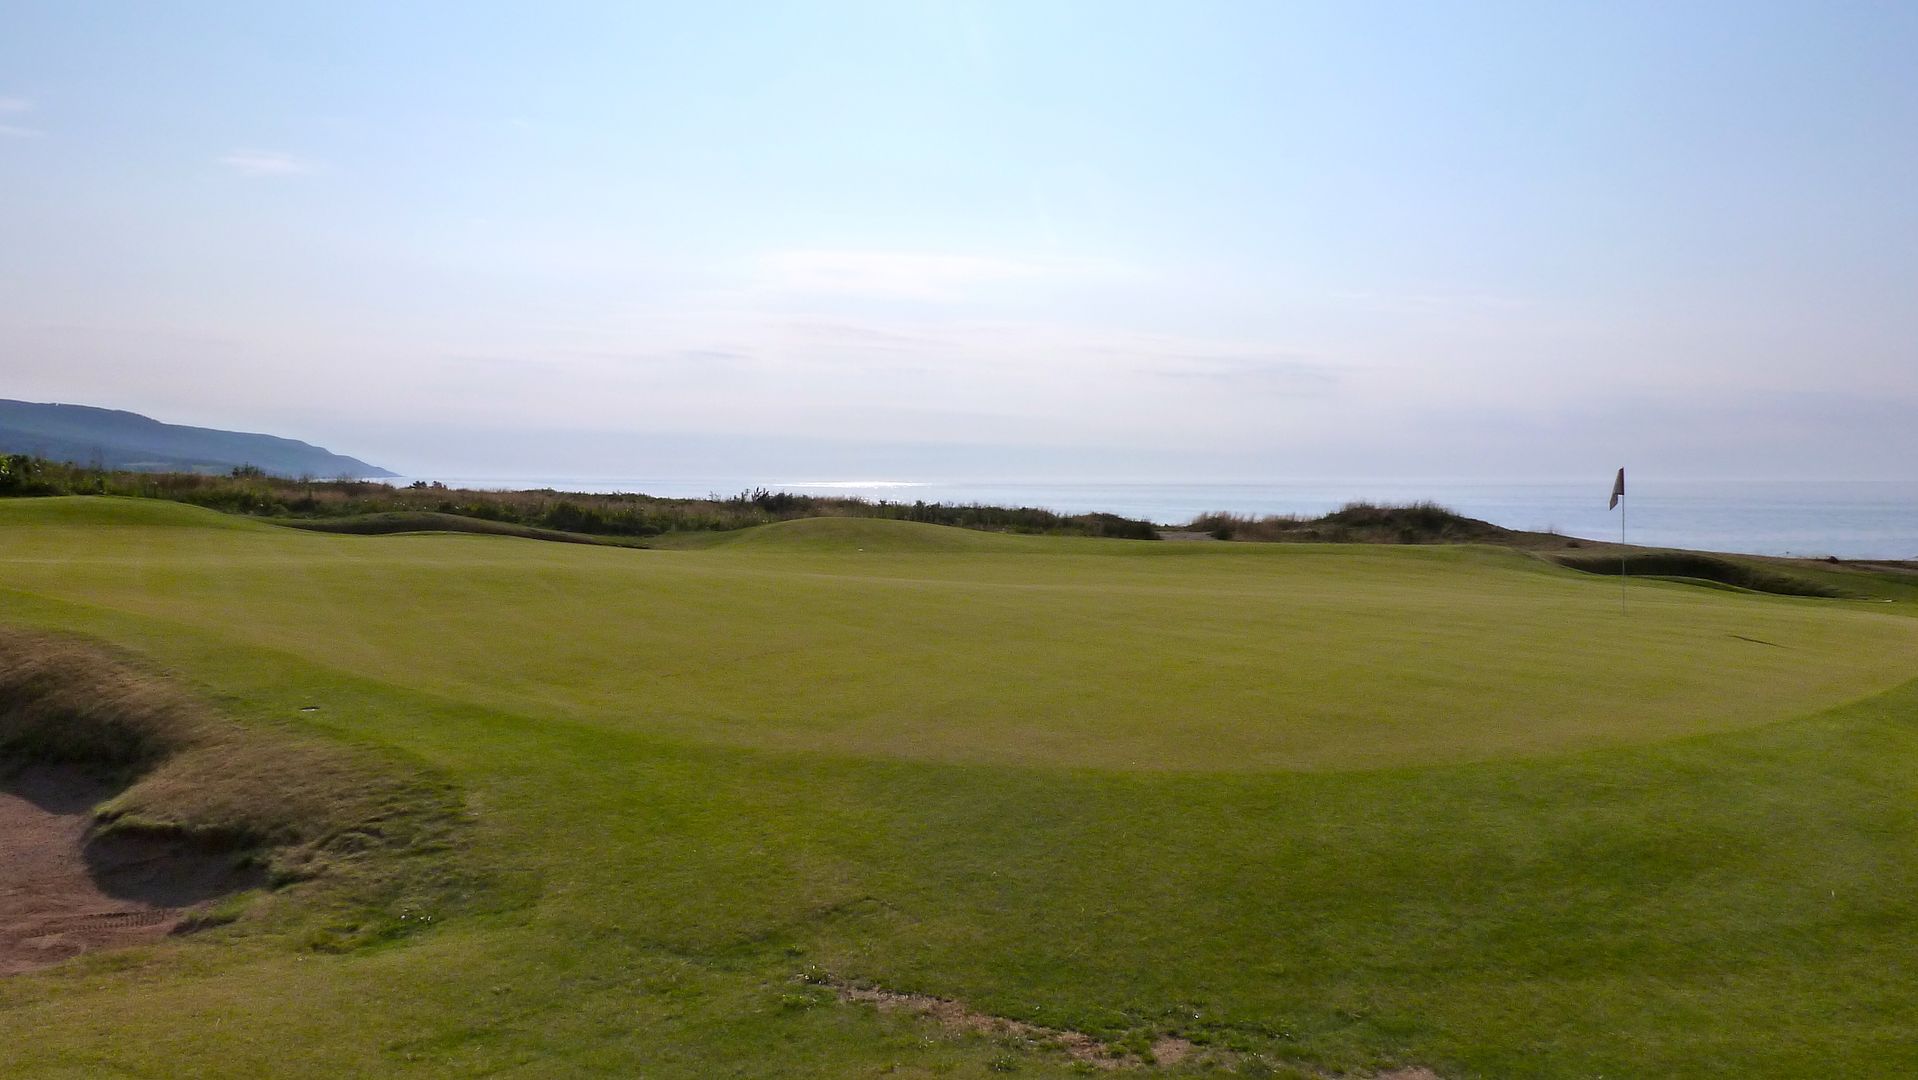
The approach from the centre of the fairway is a short but difficult one. A huge (HUGE) false-front guards the left portion of the green and only a well-nipped shot can carry it and remain on the green. For me, the ideal play is to land the ball on the right half of the green and use the green contours to feed the ball left.
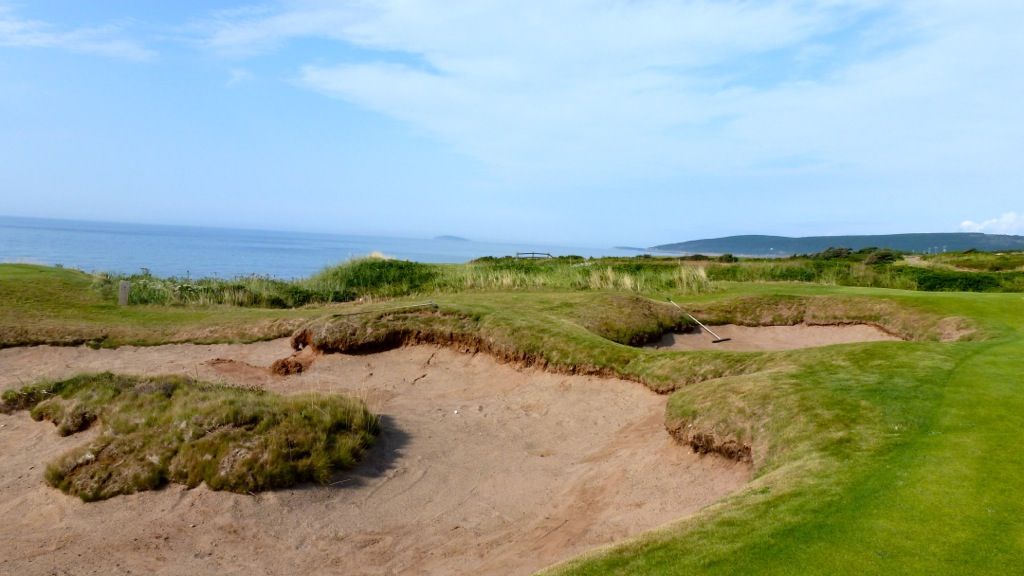
Approaching from the extreme right side of the fairway near this set of fairway bunkers leaves not only a wicked-cool view to this eternity green but also a much preferred angle, from which the false-front should not be in play.
My playing partner gives an idea of the depth of the left greenside bunker. If you're a tall man you may get a glimpse of the top of the flag.
A closer look at the false-front on the left half of the green:
As seen from the 1st tee, a duo of saving bunkers behind the green will stop the ball from running too far long.
The ideal line on this tee shot will be up the left side of the this rightward tilting fairway. Playing from the 620 yards back tees, the angle changes slightly making it more difficult to find the left side of the fairway.
From the green tees it is easier to play a tee shot into the slope of the fairway and thus have the ball remain on the left side.
The path to greatness...
A top shot bunker guards the front-edge of the fairway.
As the golfer reaches the fairway he sees that the though the tee shot was intimidating, there is extreme width to play to. Again, the correct side of the fairway is the key.
The second shot is played over (or into) a massive hill. Ideally, the golfer will play to the fairway plateau out to the right, from which he will have a clear view of the green. From the left side of the fairway this plateau can be accessed without a forced a carry...
But from the right, the lay-up to the plateau requires a long forced carry.
And the farther right you get, the worse the view of the plateau area...
A series of saving bunkers will stop a drive from finding the gunch on the right.
A look at the hill that must be carried on the second shot to reach the plateau in the fairway. Again my playing partner helps to give a sense of scale. Awesome!
While reaching the plateau is ideal, playing into the wind my partner and I could not crest the hill with out second shots. Playing your third from the side of this hill is no easy task -- completely blind, uphill/sidehill lie, into the wind, and requiring a lot of carry to reach the green.
Cresting the hill but not finding the plateau to the right will leave a view like this...
And the view of an approach from the plateau. Certainly more appealing.
And from over the single fairway bunker. This green is designed to accept running approaches from the left, allowing the golfer to avoid all of the forced carry to the right.
A back stop can be used to help funnel a ball to back pin positions.
Hole 3: Par 4, 425 Yards -- A mid-length par-4 on the scorecard, but the 3rd plays in the same direction as the 2nd and will often be played into a headwind. The tee shot is downhill played into a valley to a fairway tilted to the right. Approaches from the left side are preferred, but the tilt of the fairway (and the gunch left of the fairway) make finding the ideal line a difficult task.
Back Tee View -- Back tees are farther to the right creating an entirely different teeing angle than all other sets.
Green Tee View
Though the fairway looks somewhat narrow from the tee, once the golfer gets a clear look at its width he sees there is plenty of room to miss.
This bunker on the right side of the fairway will likely save more shots than it penalizes.
Approaching from the right is certainly more difficult with the green at an angle from here.
Approaching from the left allows the golfer to use the ground contours to run the ball onto the green.
Contouring and a gentle upslope make judging a running shot a little more difficult.
The 3rd green is long and narrow and gently rippling. It does not have the broad contours that are found on many of the other greens at Cabot.
Hole 4: Par 4, 420 Yards -- The 4th hole plays alongside the 3rd hole and should be downwind (though curiously the wind died down both times I played the hole). The tee shot is completely blind (the only blind tee shot on the golf course) and a short forced carry over a trio of menacing bunkers. With the white rock aiming marker and the railroad tie bunkers, the tee shot feels like a mix of Lahinch, Pete Dye and Prestwick. Though the ideal line is not clear from the tee (aside from the aiming marker), once the golfers sees the fairway he knows the right side is preferred.
Tee View:
A closer look at the bunkers:
First view of another wide fairway at Cabot Links:
Tee shots played left of centre will find this hollow in the fairway and will face a semi-blind second from a difficult angle:
Approaching from the right allows the golfer to run the ball onto this massive green. Shots played to the right will not kick left onto the green.
Pretty cool shot of the massive double green (hole 4/13) and the flag on the short 14th in the background, all set against the water.
From short-right. Note the counterslope in the green that will repel shots played along the right edge.
And many looks at the green with so many humps, bumps, kickers and backstops that one could not possibly take it all in in two plays, nor could they possibly describe it with any clarity.
Hole 5: Par 4, 340 Yards -- A good short 4 and the first hole that plays straight downwind. Some will consider driving the green, but for many the key to the hole is a properly placed tee shot. A centreline bunker dictates play on the tee shot, though I cannot understand why a golfer would purposely play left of the bunker. For mine, the key is to play the tee shot as near the far-right fairway bunkers as possible. Then again, I only saw a single pin so perhaps there are reasons to play farther left.
Tee view (UK weather):
Tee View (Normal, sunny NS weather):
First full view of fairway:
The approach from the centre of the fairway is a short but difficult one. A huge (HUGE) false-front guards the left portion of the green and only a well-nipped shot can carry it and remain on the green. For me, the ideal play is to land the ball on the right half of the green and use the green contours to feed the ball left.
Approaching from the extreme right side of the fairway near this set of fairway bunkers leaves not only a wicked-cool view to this eternity green but also a much preferred angle, from which the false-front should not be in play.
My playing partner gives an idea of the depth of the left greenside bunker. If you're a tall man you may get a glimpse of the top of the flag.
A closer look at the false-front on the left half of the green:
As seen from the 1st tee, a duo of saving bunkers behind the green will stop the ball from running too far long.
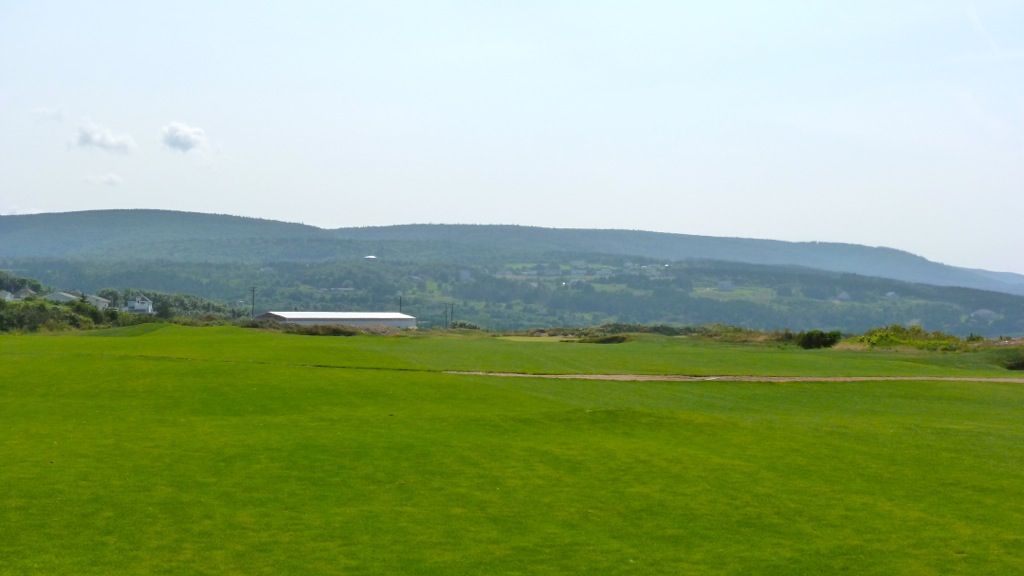
Hole 6: Par 5, 530 Yards -- A mid-length par-5, theoretically reachable in two, but playing into the prevailing wind that will be an option for only a small group of players. The golfer's eye is drawn to the large bunker on the left, though a cleverly placed top-shot bunkers makes depth perception difficult and the fact that it is nearly 250 yards to carry difficult to see.

Played over the flattest land on the golf course, there is little visual definition on the second shot at the 6th. Golfers looking to leave as short a shot into the green as possible, must play between bunkers that flank the fairway 100 yards short of the green. Most will look to lay-up short of this area to leave a 3rd of 125ish yards.
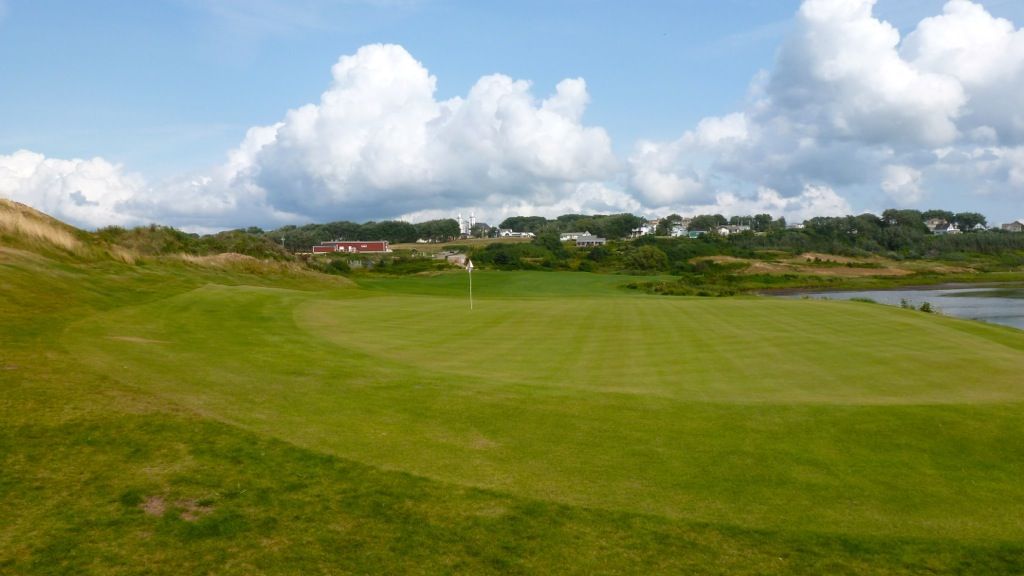
The 6th green is wide open in front, with the green tilting with the lay of the land from left-to-right. If a golfer misses the green left there is plenty of fairway grass but the recovery may be tricky, played down the slope of the green. Miss right and the golfer will find deep pot bunkers and tallgrass, but recoveries from this side of the green are more easily controlled.
As seen from the 7th tee, the area to the extreme left of the 6th green "is an area of hillocks and depressions reminiscent of hole #3 at Prestwick Golf Club in Scotland" (taken from Cabot Links hole description).

Hole 7: Par 3, 230 Yards -- Whitman must have channelled MacRaynor with his design of the 7th, a unique redan-Biarritz combo. The green is open in front and a kick-plate left of the green calls for a running shot on that side.
The tilted land short of the green...
A Banks-like straight line fall-off right of the green...
The green itself is a modified Biarritz. A Massive green with a deep swale running diagonally across its centre.
Hole 8: Par 4, 313 Yards -- Theoretically driveable, though the predominant wind is into and from the left, making the hole play considerably more difficult. A large dune protects the left side of the green, mandating a drive down the right side near wetlands if the golfer wants a clear view of the green. The driving zone is further complicated by a dune in the left-centre of the fairway. Some will choose to lay back short of the centreline dune to leave a longer approach but a greater chance of finding the wider fairway.
Tee View:

An equally (if not more) compelling tee shot from the 256 yard orange tees. The tee shot angle has changed slightly, now creating an angled tee shot over a hazard with the option of bailing out to leave a more difficult approach. At 256, many would be tempted to try and drive the green from here too!
The widest part of the fairway short of the centreline dune...

Approaching from the right leaves a clearer view of the green...
While approaching from the left requires an approach over the dune, though perhaps provides easier access to back-right pins...
The fun (or not) of firm conditions and short grass around the greens. This approach landed just feet off the green's surface but bounced and trundled its way to leave a very awkward pitch.
Several looks at the green...
From short.
From short-left.
From left.
From behind.
Hole 9: Par 4, 450 Yards -- The longest par-4 on the front 9, and it plays uphill and into the wind! A series of bunkers on the left guard the ideal line, while a pair of bunkers on the right may catch shots that are big-time bailed-out, though into the wind they are unreachable for most. On a day where the 9th plays downwind, the longest of hitters may be tempted to carry the bunkers on the left, and, if successful, great mowing lines and a perfectly placed speed-slot will help to reward the bold tee shot.
View of fairway from right:
Approaching from the right is a difficult task as a duo of bunkers set into the hill will catch any mis-struck shot.
Approaching from the left is ideal, though a cross-bunker obscures the golfer's view. From here the golfer can run the ball onto the green and can use the green's contours to more easily access back pins.
Missing short/left is not bad...
But missing right may find deep bunkers or this fairway cut run-off that will send the ball caroming a long way from the green...

The 9th green is massive. The green tilts generally back toward the fairway and at its rear is steeply contoured to help to contain long-iron / fairway wood approaches. Heaven forbid you miss long in the back bunker, though.
Hole 10: Par 3, 172 Yards -- We cross the road the reach the short 10th, one of the 4 par-3s on the back-nine. The tee shot is played to a generous green with a kicker than can be used on the left and a deep bunker and steep fall-off on the right. If the wind is down this is a birdie hole, but with the predominant wind playing into and across from the left, this short hole can turn into a brute.
This short bunker affects depth perception and hides the view of...
this much deeper greenside bunker.

A kicker left of the green...
Missing long/right is terrible...
The green is massive with gentle undulations and in particular a large knob in its centre...

Hole 11: Par 4, 440 Yards
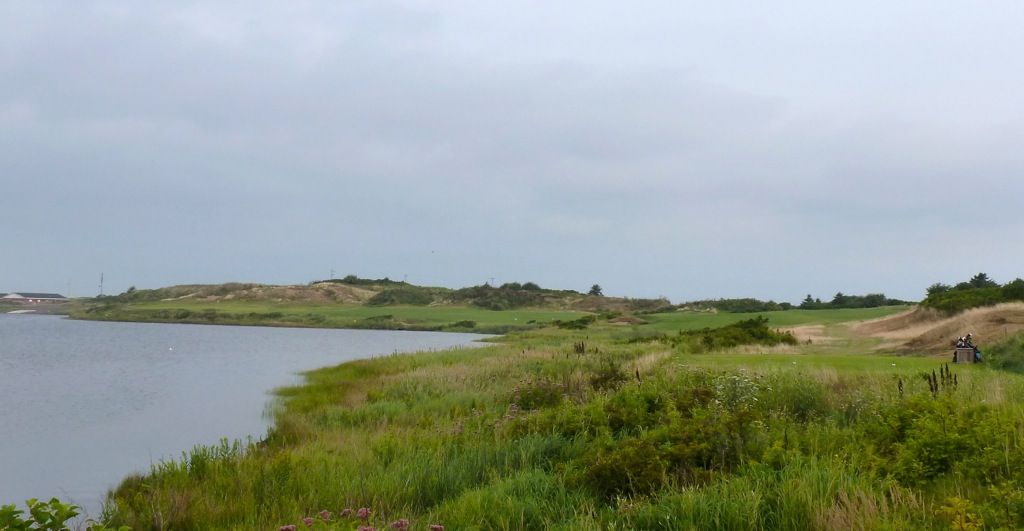
From the back tee (465 yards) the tee shot must be played over the edge of the harbour, but from any of the more forward sets the golfer will want to play away from the water and bunker on the inside of the dogleg.
Back Tee View:
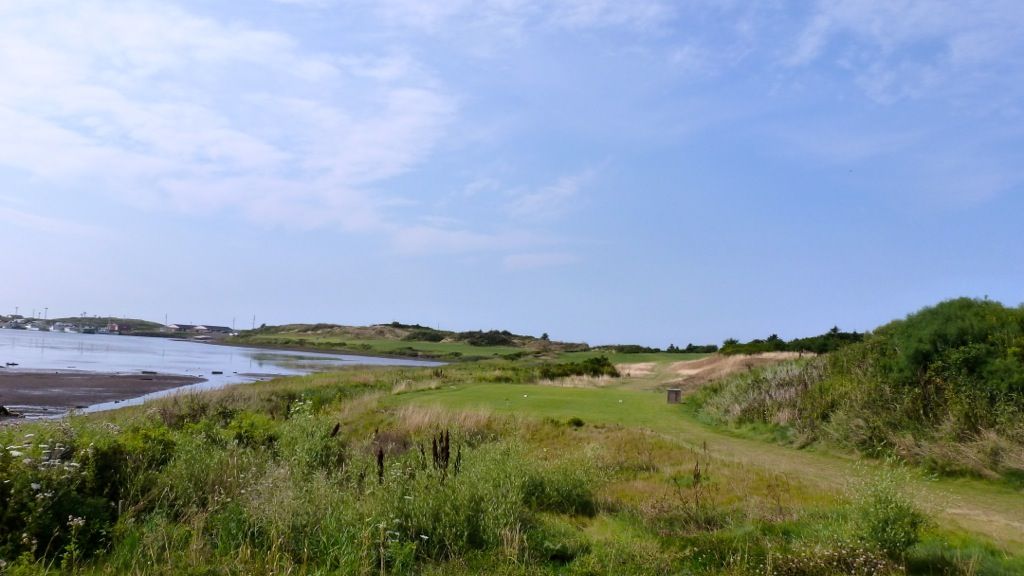
Green Tee View:

There's more room to the right than appears from the tee, but bailing out too far will leave a long approach from an awkward angle...
The land on the entire hole slopes from the right toward the water on the left. With the ball above the golfer's feet, the golfer will do well not to draw the ball too far. Aiming at the dune right of the green takes faith in one's swing.
Once again, Whitman allows the golfer to run the ball onto the green...
An example of the benefits of mowing at fairway height. This little nook of fairway leaves a very interesting pitch over the corner of the dune, made exponentially more difficult because it is a pitch from a tight fairway lie.
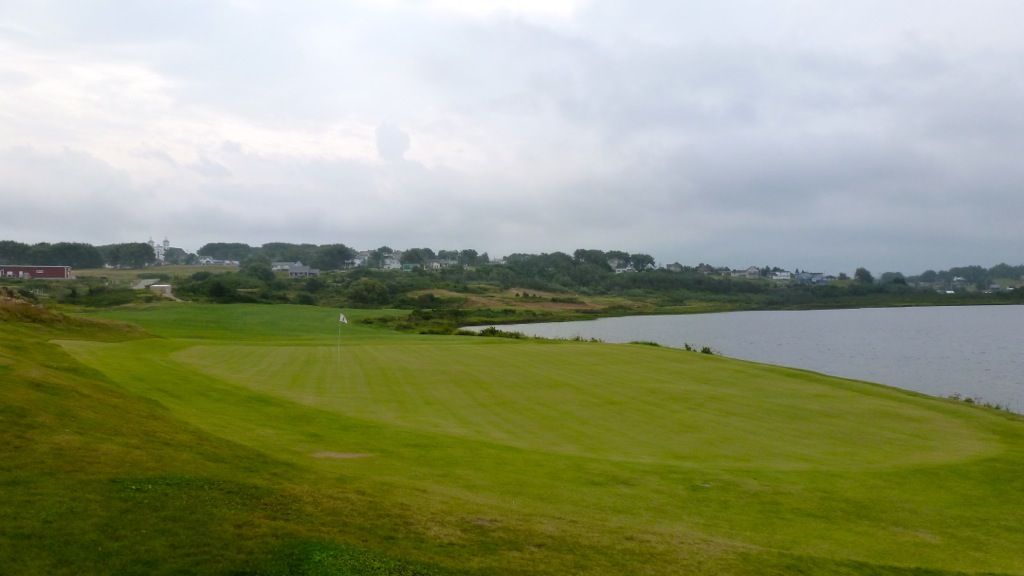
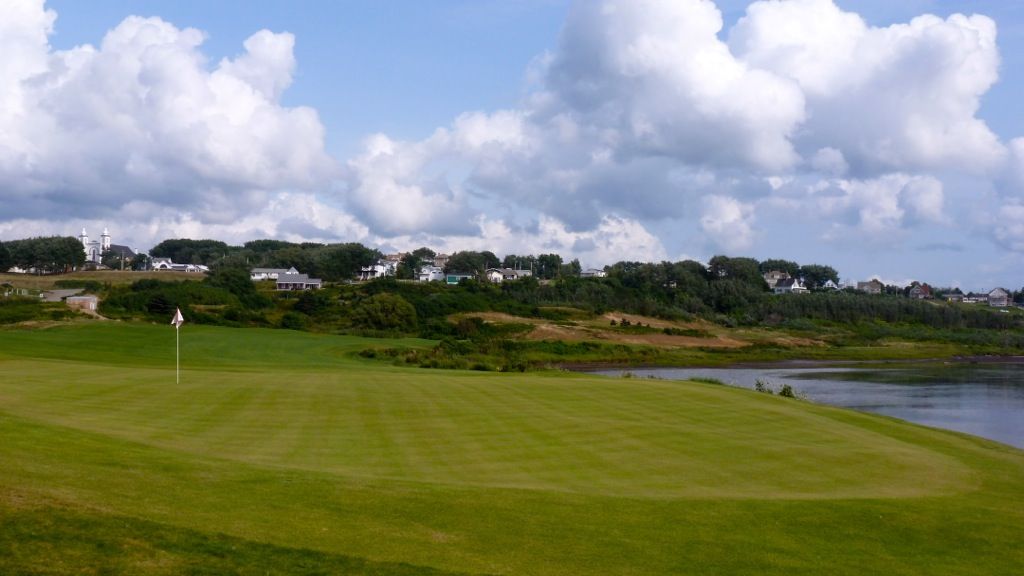
The green is generous, but the combination of wind, fairway tilt, green tilt, harbour and dune make it a scary approach and an elusive target.
Green from short-right:
Green from behind:
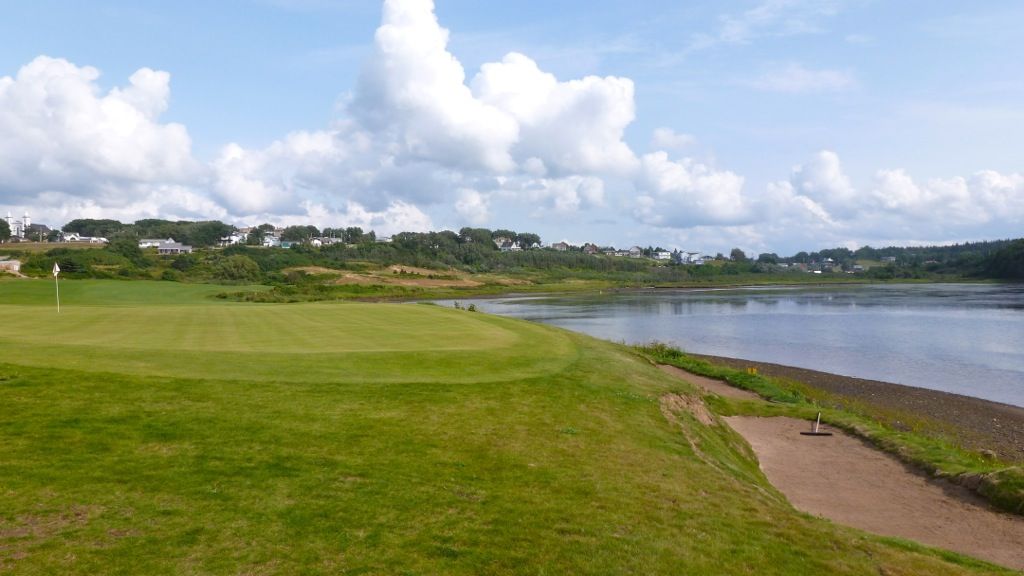
These saving bunkers left of the green will save at least some shots from finding the water.
Hole 12: Par 3, 136 Yards -- A simple if slightly underwhelming connector hole. This short par-3 is an easy target if the wind is down, but when windy, combined with the green's significant contours and a series of bunkers and run-offs protecting the green's edges, this birdie-hole becomes a tough par. As I understand it, there is a new 12th hole under construction, which lay closer to the water's edge.
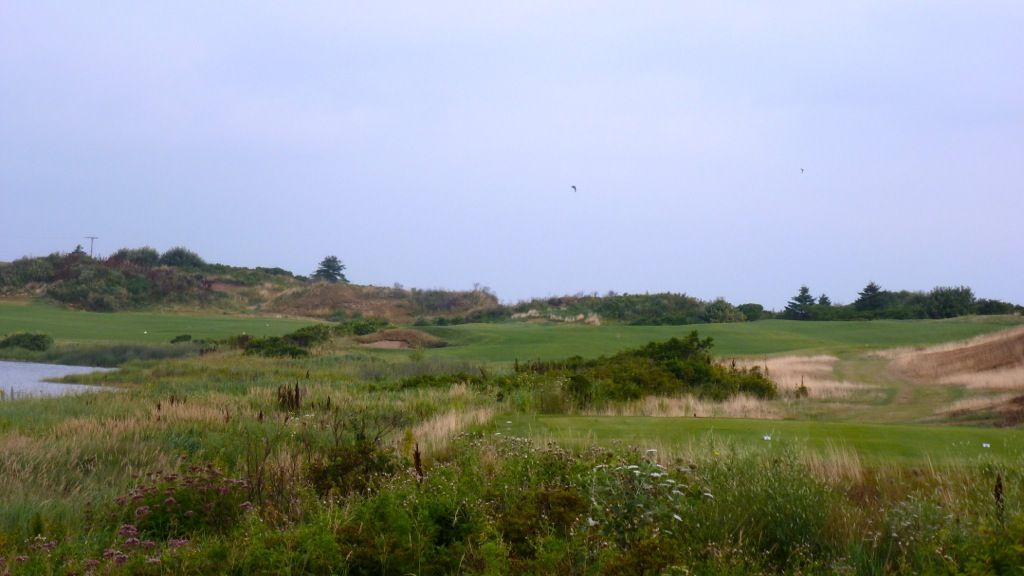
Back Tee View:
Middle Tee View:
Short of Green:
Green:
Hole 13: Par 5, 550 Yards -- I wish I had read Ben's hole description before I played the hole. As he says, "The tee shot can be difficult, requiring a forced carry over native grass to the fairway with the correct line being farther to the right than the golfer first suspects." The Line of Instinct draws the golfer to the left, but for most this is a three-shot hole and there is little reason to flirt with the left side.
The second is completely blind, and into the wind many golfers will be happy just to crest the hill with their second shots. A pair of bunkers set into the hill on the left may steer the first-time player on a line that is not advisable.
A lovely sight upon clearing the hill. The preferred angle of approach is probably from left of centre, though really anything in the fairway will do.
A sand/fescue covered mound may catch golfers that bail-out right.
Truly one of the wildest greens I've ever seen. We're back at the double green (shared with the 4th), and as interesting as the contouring on the right side was, it pales in comparison to the several foot high swales in the left side of the green. The green's contours tie-in perfectly to contouring short of the green -- a running approach is probably preferred here, though it must be well-conceived. A back-left portion of the green nearer the water makes for a dramatic possible Sunday pin, though the green does flatten out quite a bit there.


Played over the flattest land on the golf course, there is little visual definition on the second shot at the 6th. Golfers looking to leave as short a shot into the green as possible, must play between bunkers that flank the fairway 100 yards short of the green. Most will look to lay-up short of this area to leave a 3rd of 125ish yards.
The 6th green is wide open in front, with the green tilting with the lay of the land from left-to-right. If a golfer misses the green left there is plenty of fairway grass but the recovery may be tricky, played down the slope of the green. Miss right and the golfer will find deep pot bunkers and tallgrass, but recoveries from this side of the green are more easily controlled.
As seen from the 7th tee, the area to the extreme left of the 6th green "is an area of hillocks and depressions reminiscent of hole #3 at Prestwick Golf Club in Scotland" (taken from Cabot Links hole description).
Hole 7: Par 3, 230 Yards -- Whitman must have channelled MacRaynor with his design of the 7th, a unique redan-Biarritz combo. The green is open in front and a kick-plate left of the green calls for a running shot on that side.
The tilted land short of the green...
A Banks-like straight line fall-off right of the green...
The green itself is a modified Biarritz. A Massive green with a deep swale running diagonally across its centre.
Hole 8: Par 4, 313 Yards -- Theoretically driveable, though the predominant wind is into and from the left, making the hole play considerably more difficult. A large dune protects the left side of the green, mandating a drive down the right side near wetlands if the golfer wants a clear view of the green. The driving zone is further complicated by a dune in the left-centre of the fairway. Some will choose to lay back short of the centreline dune to leave a longer approach but a greater chance of finding the wider fairway.
Tee View:
An equally (if not more) compelling tee shot from the 256 yard orange tees. The tee shot angle has changed slightly, now creating an angled tee shot over a hazard with the option of bailing out to leave a more difficult approach. At 256, many would be tempted to try and drive the green from here too!
The widest part of the fairway short of the centreline dune...
Approaching from the right leaves a clearer view of the green...
While approaching from the left requires an approach over the dune, though perhaps provides easier access to back-right pins...
The fun (or not) of firm conditions and short grass around the greens. This approach landed just feet off the green's surface but bounced and trundled its way to leave a very awkward pitch.
Several looks at the green...
From short.
From short-left.
From left.
From behind.
Hole 9: Par 4, 450 Yards -- The longest par-4 on the front 9, and it plays uphill and into the wind! A series of bunkers on the left guard the ideal line, while a pair of bunkers on the right may catch shots that are big-time bailed-out, though into the wind they are unreachable for most. On a day where the 9th plays downwind, the longest of hitters may be tempted to carry the bunkers on the left, and, if successful, great mowing lines and a perfectly placed speed-slot will help to reward the bold tee shot.
View of fairway from right:
Approaching from the right is a difficult task as a duo of bunkers set into the hill will catch any mis-struck shot.
Approaching from the left is ideal, though a cross-bunker obscures the golfer's view. From here the golfer can run the ball onto the green and can use the green's contours to more easily access back pins.
Missing short/left is not bad...
But missing right may find deep bunkers or this fairway cut run-off that will send the ball caroming a long way from the green...
The 9th green is massive. The green tilts generally back toward the fairway and at its rear is steeply contoured to help to contain long-iron / fairway wood approaches. Heaven forbid you miss long in the back bunker, though.
Hole 10: Par 3, 172 Yards -- We cross the road the reach the short 10th, one of the 4 par-3s on the back-nine. The tee shot is played to a generous green with a kicker than can be used on the left and a deep bunker and steep fall-off on the right. If the wind is down this is a birdie hole, but with the predominant wind playing into and across from the left, this short hole can turn into a brute.
This short bunker affects depth perception and hides the view of...
this much deeper greenside bunker.
A kicker left of the green...
Missing long/right is terrible...
The green is massive with gentle undulations and in particular a large knob in its centre...
Hole 11: Par 4, 440 Yards
From the back tee (465 yards) the tee shot must be played over the edge of the harbour, but from any of the more forward sets the golfer will want to play away from the water and bunker on the inside of the dogleg.
Back Tee View:
Green Tee View:
There's more room to the right than appears from the tee, but bailing out too far will leave a long approach from an awkward angle...
The land on the entire hole slopes from the right toward the water on the left. With the ball above the golfer's feet, the golfer will do well not to draw the ball too far. Aiming at the dune right of the green takes faith in one's swing.
Once again, Whitman allows the golfer to run the ball onto the green...
An example of the benefits of mowing at fairway height. This little nook of fairway leaves a very interesting pitch over the corner of the dune, made exponentially more difficult because it is a pitch from a tight fairway lie.
The green is generous, but the combination of wind, fairway tilt, green tilt, harbour and dune make it a scary approach and an elusive target.
Green from short-right:
Green from behind:
These saving bunkers left of the green will save at least some shots from finding the water.
Hole 12: Par 3, 136 Yards -- A simple if slightly underwhelming connector hole. This short par-3 is an easy target if the wind is down, but when windy, combined with the green's significant contours and a series of bunkers and run-offs protecting the green's edges, this birdie-hole becomes a tough par. As I understand it, there is a new 12th hole under construction, which lay closer to the water's edge.
Back Tee View:
Middle Tee View:
Short of Green:
Green:
Hole 13: Par 5, 550 Yards -- I wish I had read Ben's hole description before I played the hole. As he says, "The tee shot can be difficult, requiring a forced carry over native grass to the fairway with the correct line being farther to the right than the golfer first suspects." The Line of Instinct draws the golfer to the left, but for most this is a three-shot hole and there is little reason to flirt with the left side.
The second is completely blind, and into the wind many golfers will be happy just to crest the hill with their second shots. A pair of bunkers set into the hill on the left may steer the first-time player on a line that is not advisable.
A lovely sight upon clearing the hill. The preferred angle of approach is probably from left of centre, though really anything in the fairway will do.
A sand/fescue covered mound may catch golfers that bail-out right.
Truly one of the wildest greens I've ever seen. We're back at the double green (shared with the 4th), and as interesting as the contouring on the right side was, it pales in comparison to the several foot high swales in the left side of the green. The green's contours tie-in perfectly to contouring short of the green -- a running approach is probably preferred here, though it must be well-conceived. A back-left portion of the green nearer the water makes for a dramatic possible Sunday pin, though the green does flatten out quite a bit there.
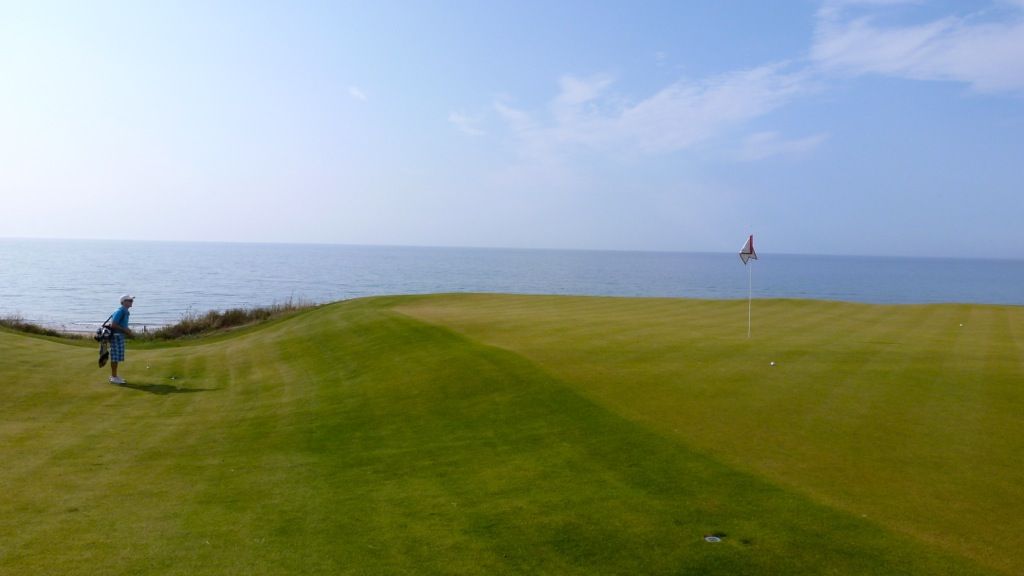
Hole 14: Par 3, 95 Yards -- An obvious ode to the short 7th at Pebble Beach, the 14th at Cabot Links is a beautiful and easy golf hole (except when the wind is up!). The tee is set atop the highest dune on the golf course, and the tee shot is played some 40 feet downhill to an eternity green with the Gulf as a backdrop, and a series of runoffs and a single bunker ready to gobble up any shot even slightly offline.
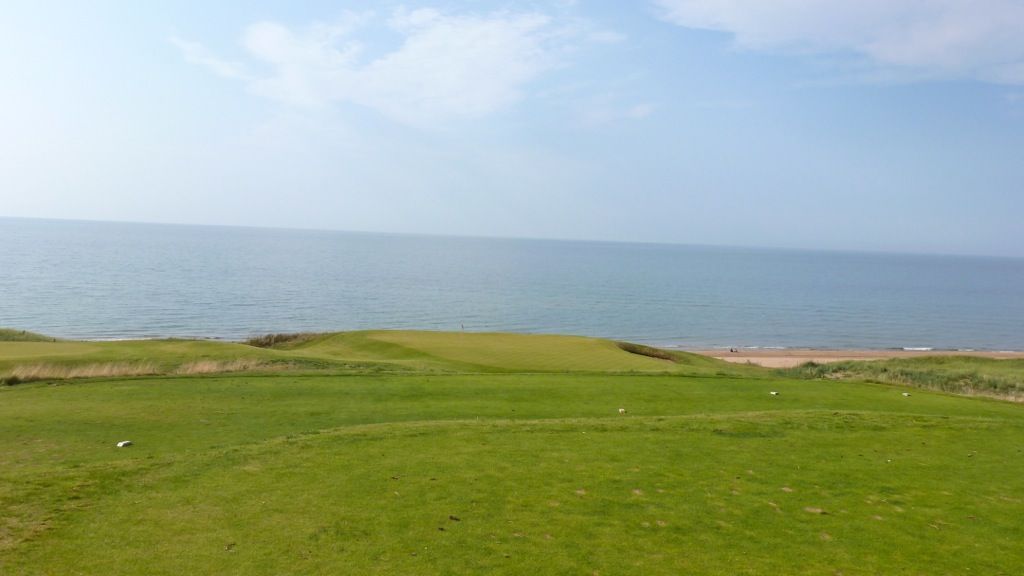
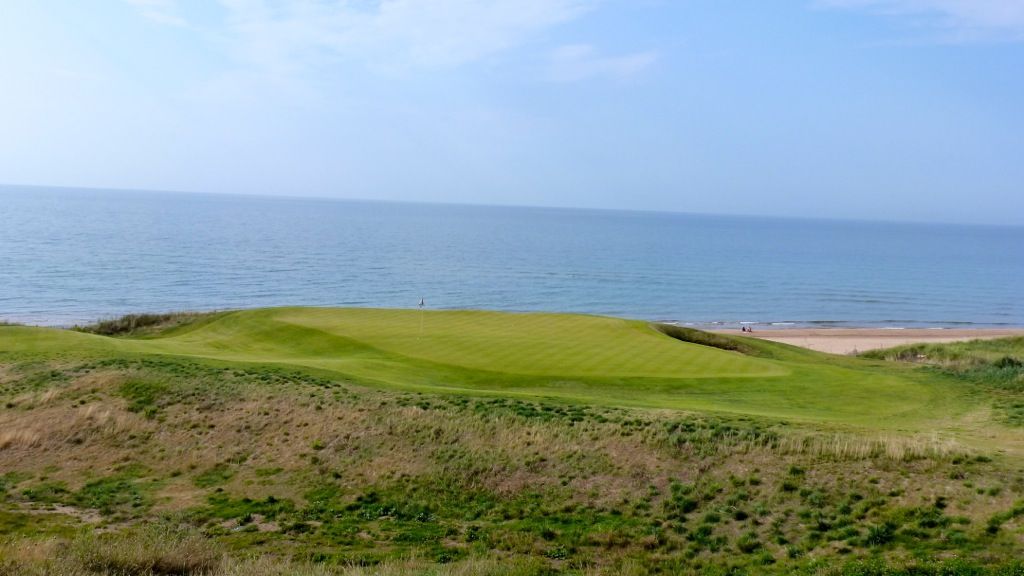
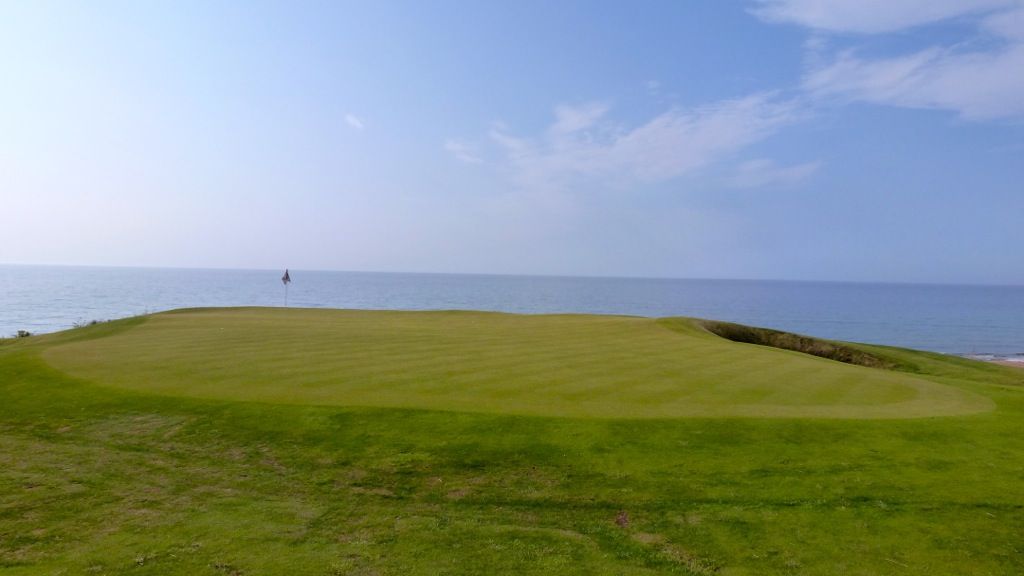
Fairway grass surrounds the green, and a shot landing near an edge of the putting surface can run away from the green.
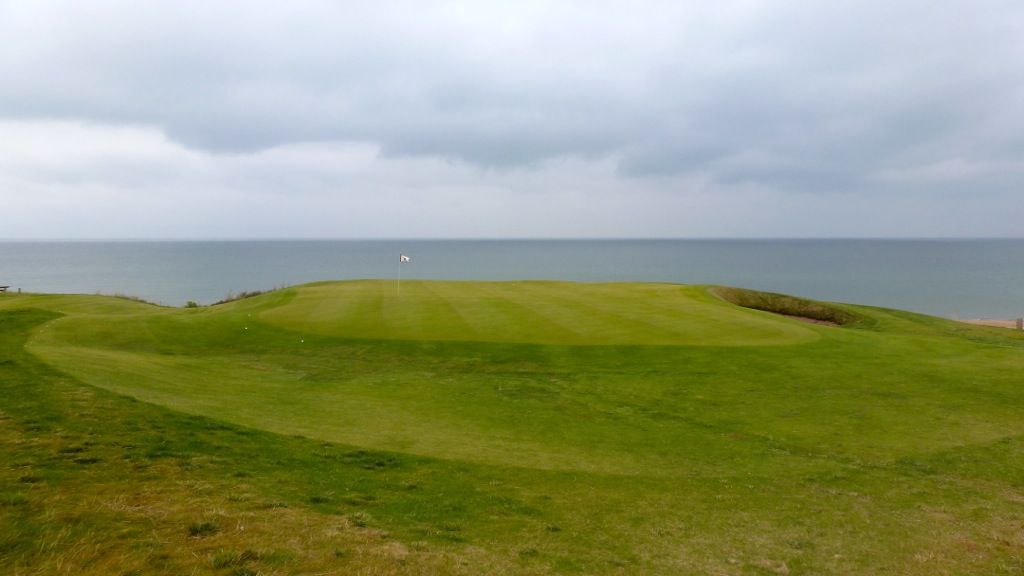
The run-offs are several feet deep...
The green itself is not excessively contoured. Quite the change from the previous green!
Fairway grass surrounds the green, and a shot landing near an edge of the putting surface can run away from the green.
The run-offs are several feet deep...
The green itself is not excessively contoured. Quite the change from the previous green!
Hole 15: Par 4, 385 Yards -- A very pretty hole playing alongside the Gulf, though only those golfers playing the Black tees (situated just steps over the 14th green) will get the best view. The fairway is wide and bunkerless, with the ideal line being down the left.
Back Tee View:
Green Tee View:
Playing downwind this uniquely shaped green is a difficult target to find. A single bunker fronting the centre of the green must be avoided.
This sandy dune right of the fairway should not be in play, but sometimes it is...
The green is almost a u-shape, similar to the Coore/Crenshaw template, though the right side of the u doesn't come all the way around.
Greenside bunkering.
Hole 16: Par 4, 430 Yards -- Another hole running north set against the ocean. The view from the tee gives the feel of a narrow fairway, but the fairway is massively wide and tilts from the right. Three fairway bunkers jut into the fairway but are only in play for the longest of hitters.
The green is set hard against the water and begs for a running approach. Missing short could find a collection area on the left, but missing long is an impossible recovery.
Hole 17: Par 3, 142 Yards -- The 17th moves back inland and for the first time since the 10th hole the golfer will play into the wind.
Though not encircled by bunkers, the 17th green is bunkered on all sides.
The green is large and undulating, sloping generally from back-to-front.
Hole 18: Par 4, 452 Yards [Photos from 392 yard tee] -- Comfortably the most difficult hole on the course as, like the 17th, the hole plays uphill and into the wind. The tee shot is played over a pair of top-shot bunkers and though a bunker set into the hill suggests the right side is the ideal line, tee shots down the left will leave a far more palatable angle of approach into a diagonal green.
No comments:
Post a Comment