Beacon Hall Golf Club
Aurora, Ontario, Canada
Architect: Bob Cupp (1988)
Yardage: 7,001 Yards, Par 72
Rating/Slope: 74.3/148
My Quick Review: Two very distinct nines that transition flawlessly, natural use of great golfing terrain, bold green shaping and contouring, and it might just be the best conditioned course in Canada.
My Thoughts
As I considered the holes to include in the 'Holes to Note' section below, I realized Beacon Hall truly has 18 good holes. I gave serious consideration to including every hole on the golf course, with the exception of holes 1, 17 and 18 -- all three are decent holes, but not of the quality of the rest of the course. Beacon Hall crescendo's perfectly with holes 14 to 16, but the two finishing holes are a bit of a disappointment.
Course conditioning is generally of little interest to me as it can fluctuate over the course of the season. Nevertheless, it is necessary to recognize the flawless conditioning at Beacon Hall -- among the very best I have seen anywhere. The fairways were lush green and beautifully cross-cut, but they were hard and bouncy, and the greens were firm and very fast.
Beacon Hall has a very natural feel. In truth, I have no idea how much land was moved to build the golf course, but as I traversed the mounds between the first tee and fairway, I got the feeling that course was routed using the land's natural features. Containment mounding which plagued many courses built in the same era as Beacon Hall is (thankfully) nowhere to be found.
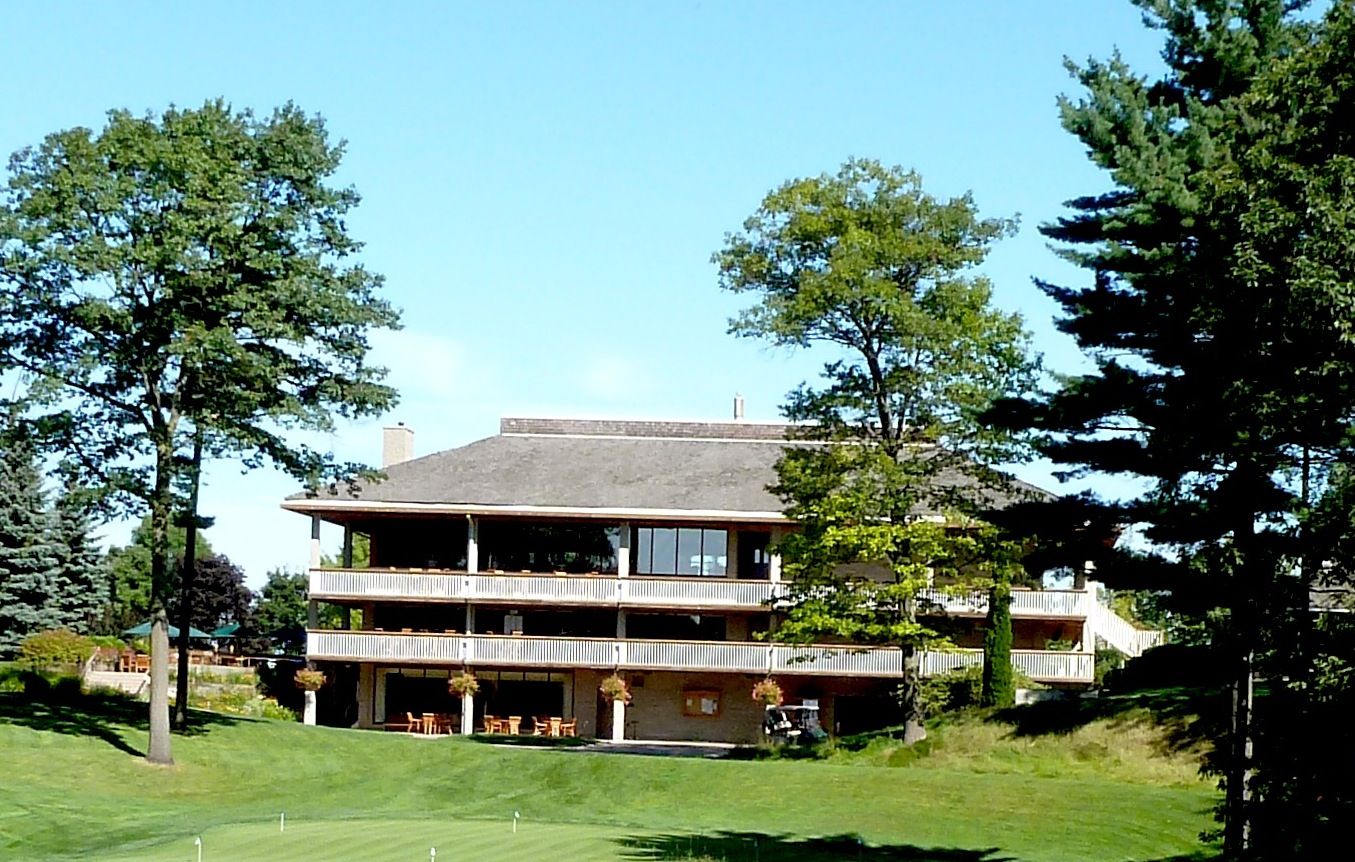 |
| Beacon Hall's Comfortable Clubhouse |
The shape of the greens at Beacon Hall is very creative. Many greens are designed to lay at an angle to fairway, providing a clear advantage for a properly placed tee shot. Though the first and eighteenth greens are somewhat 'ho-hum' and circular in shape, the remainder of the greens are very bold in shape, including the left-to-right angled third; 50-yard-wide eighth; devilishly tiny 8th; and horseshoe'd 17th.
Holes to Note
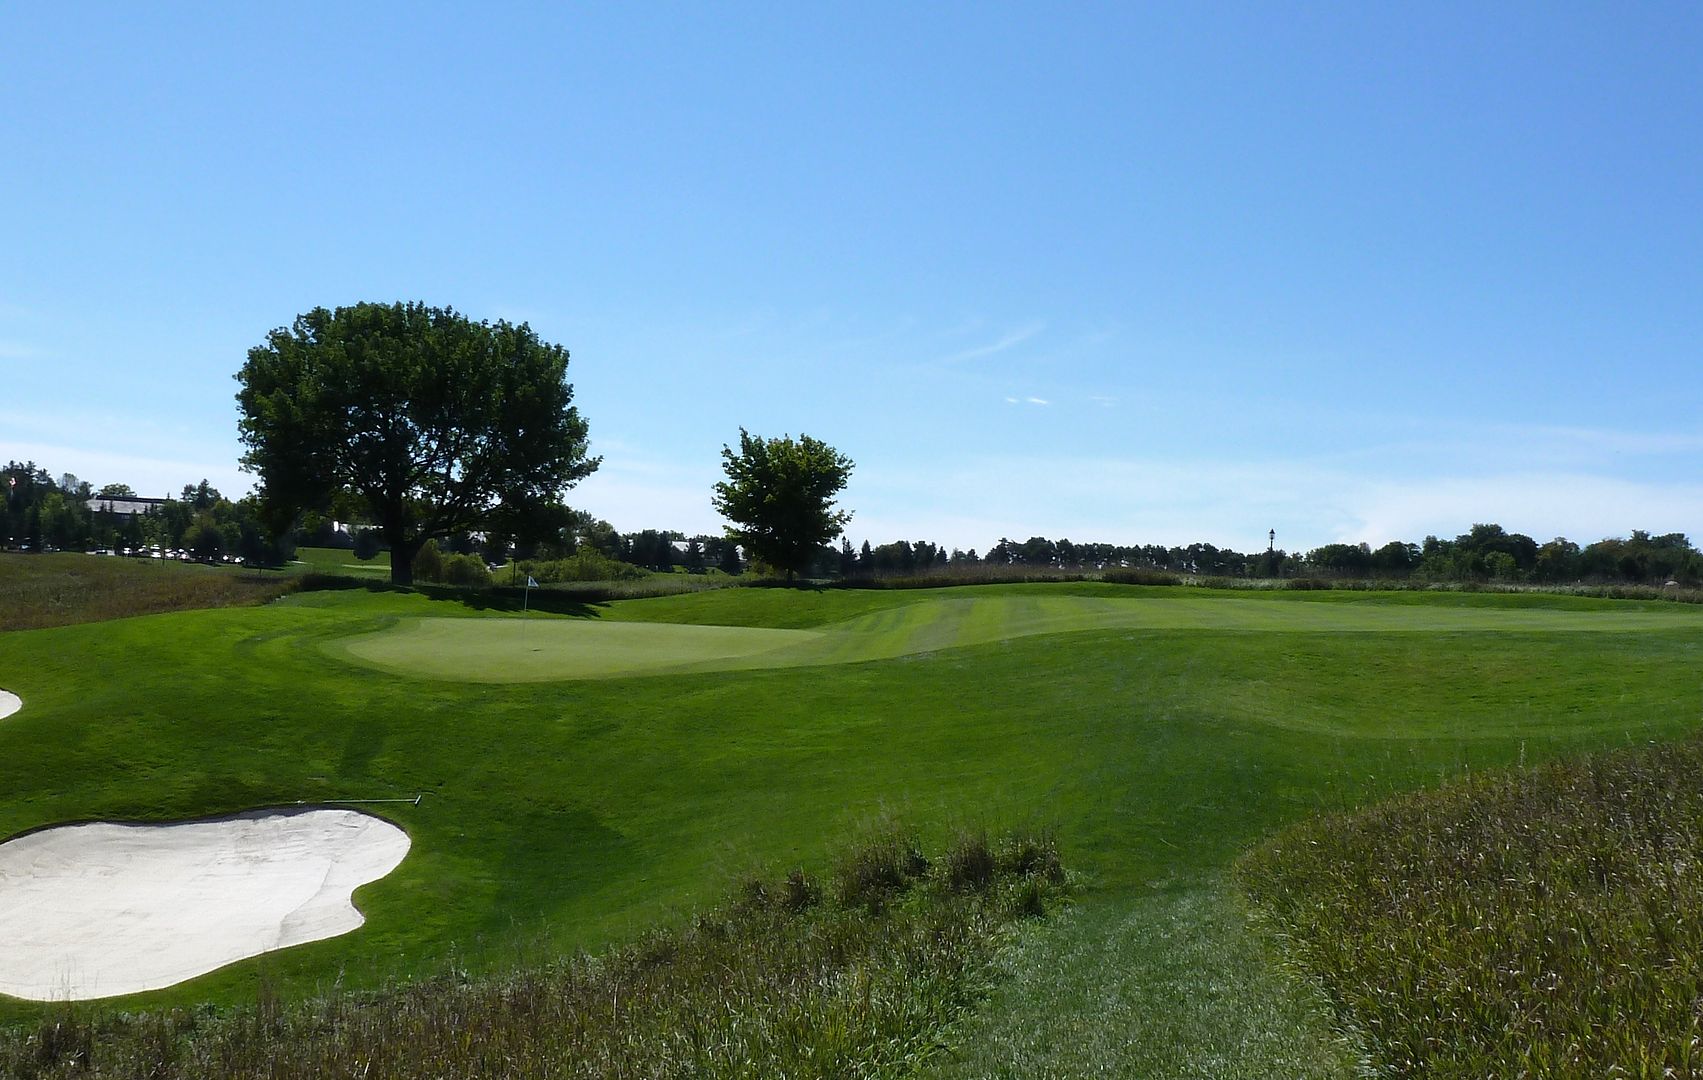
Hole 2: Par 4, 360 Yards
The brilliant strategic design begins at the second. Though it appears narrow, there is a fair amount of room left of the fairway bunkers. Less aggressive players will try to play left of the bunkers, while aggressive players will try to carry the bunkers to leave the ideal approach angle into the green.
 |
| 2nd Tee |
The approach to the second gets much easier the farther right one is in the fairway as the green angles from right to left. Approaching from the left requires a carry over two of the deepest bunkers on the golf course.
 |
| 2nd Approach |
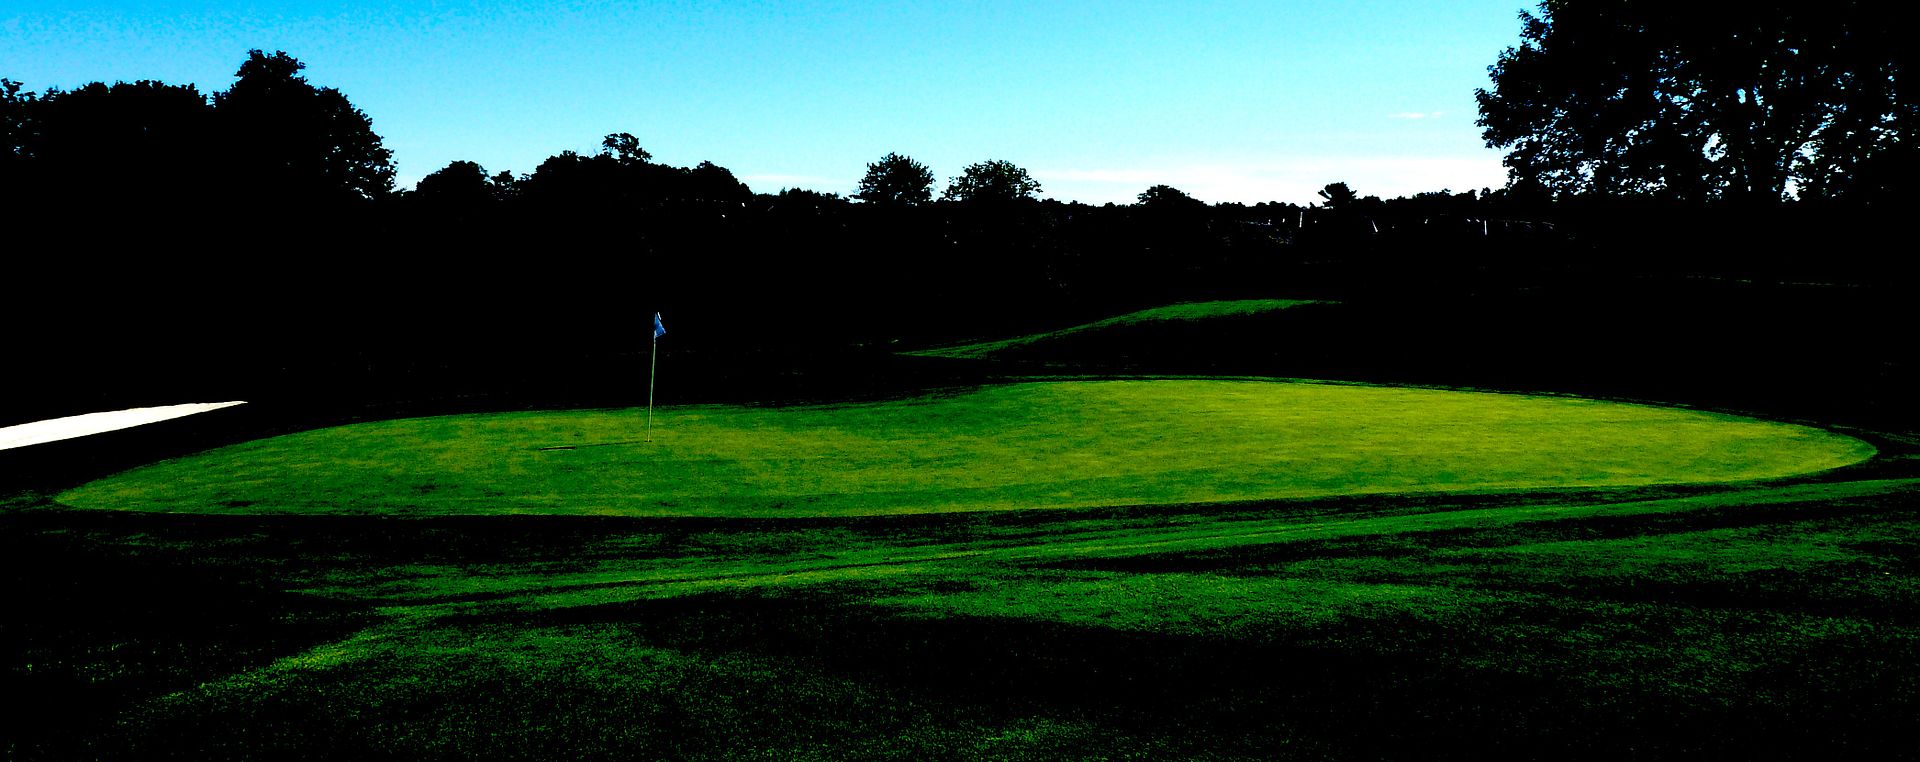
The green is very narrow. Approaching from the right allows the golfer to play down the throat of the green, but it is still no easy shot.
 |
| 2nd Green |
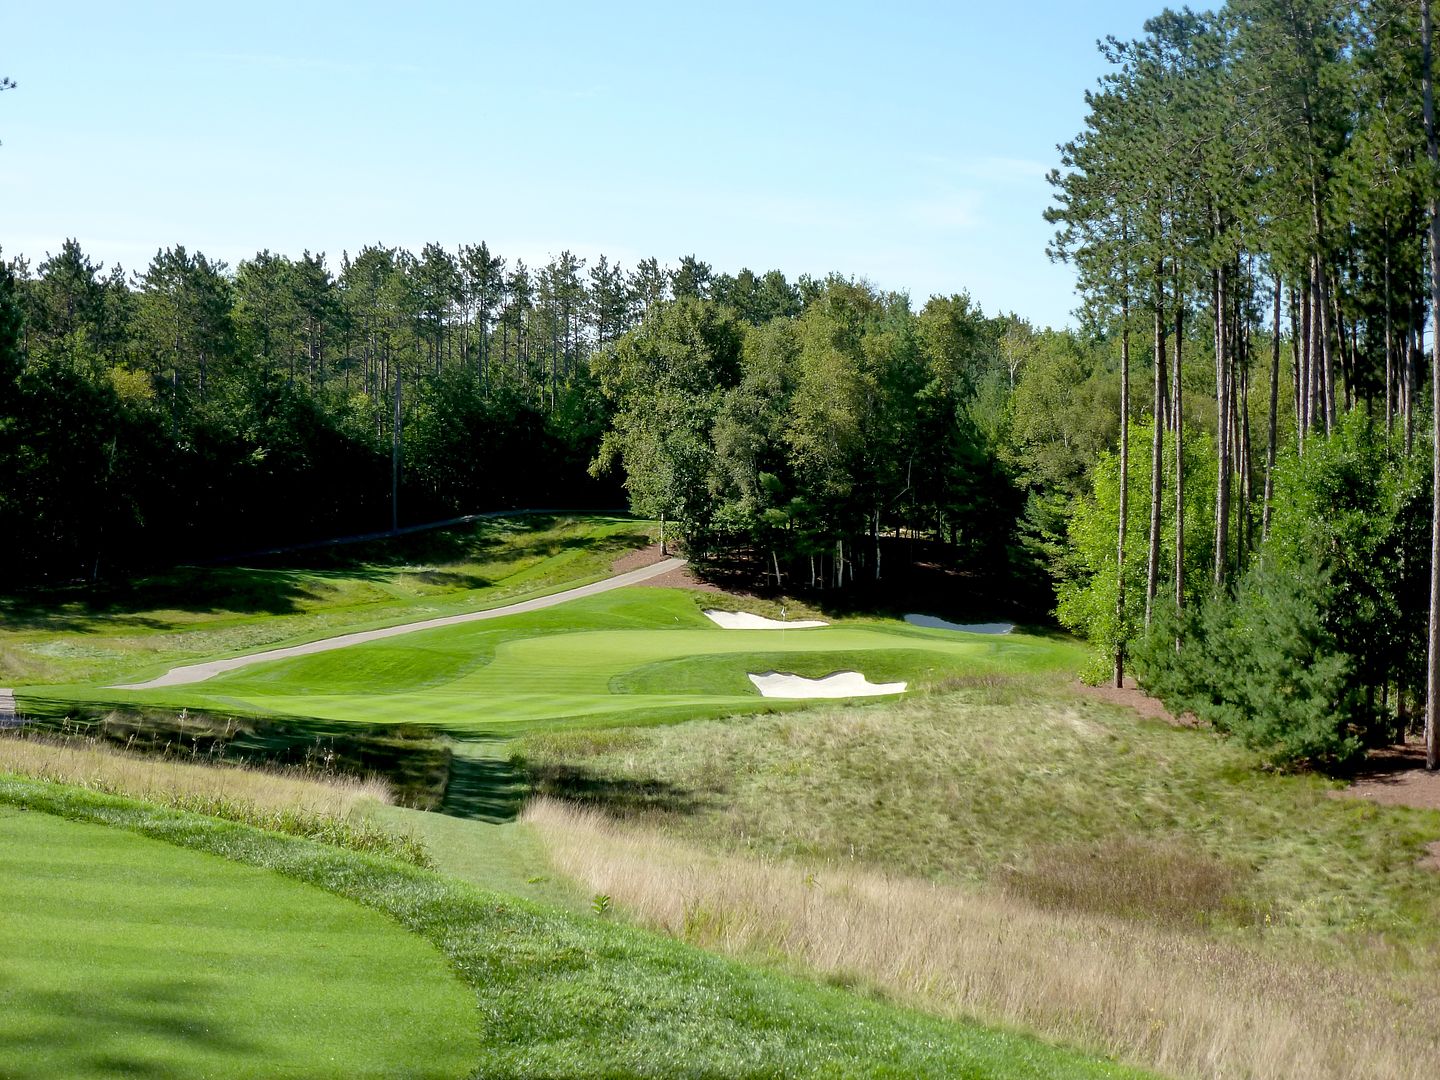
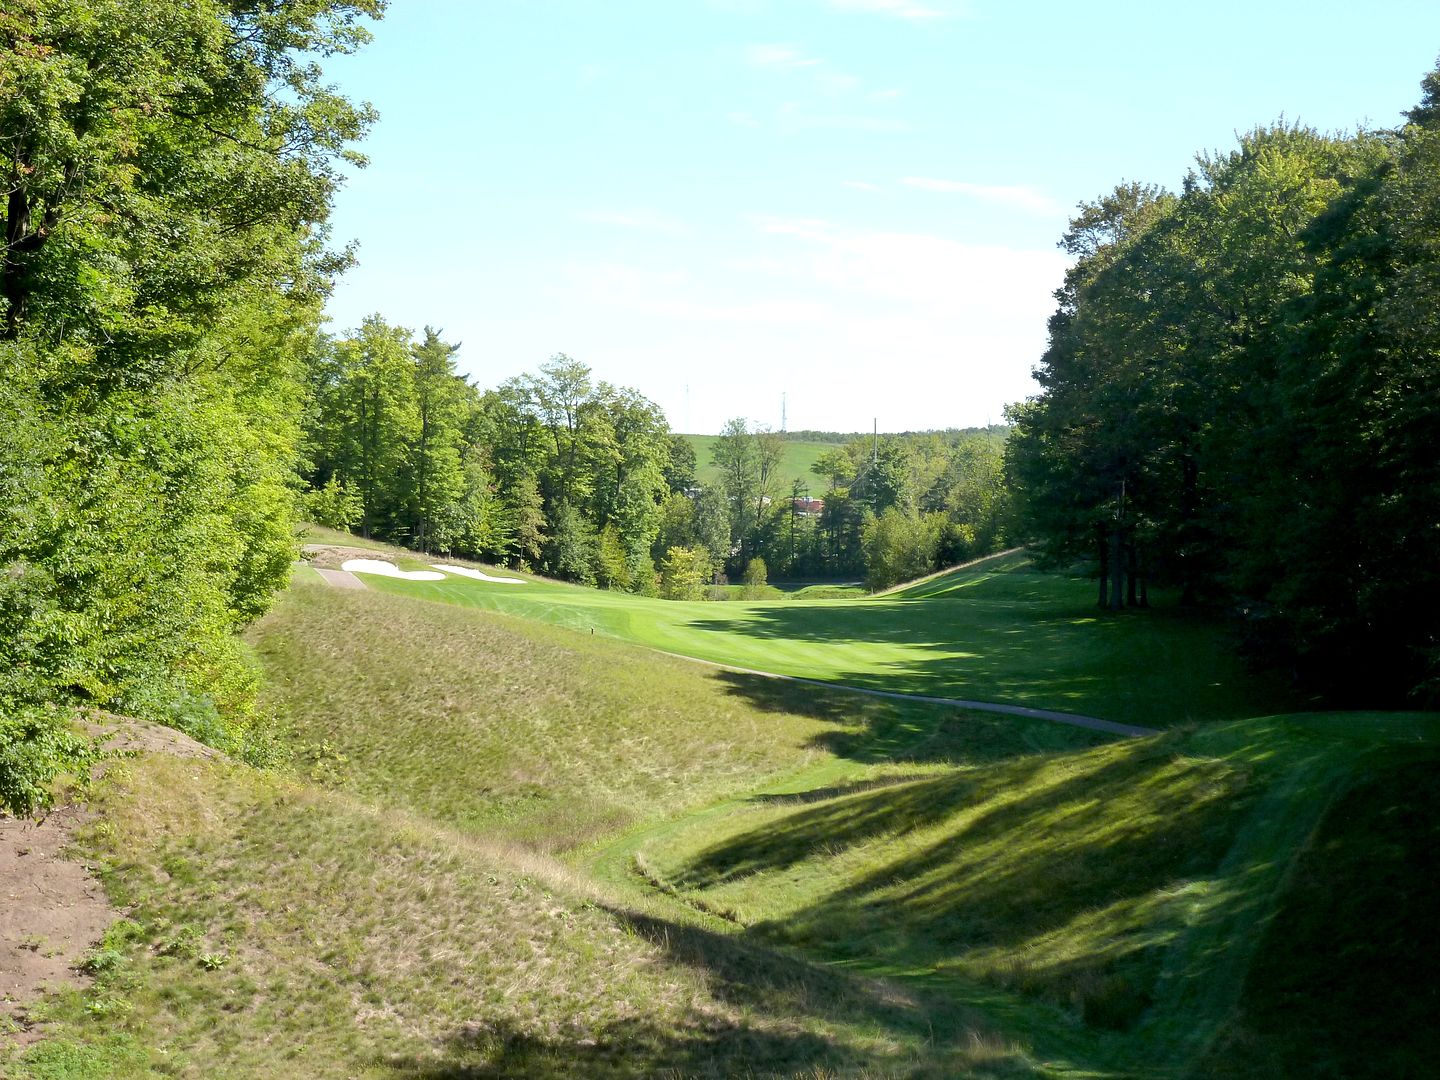
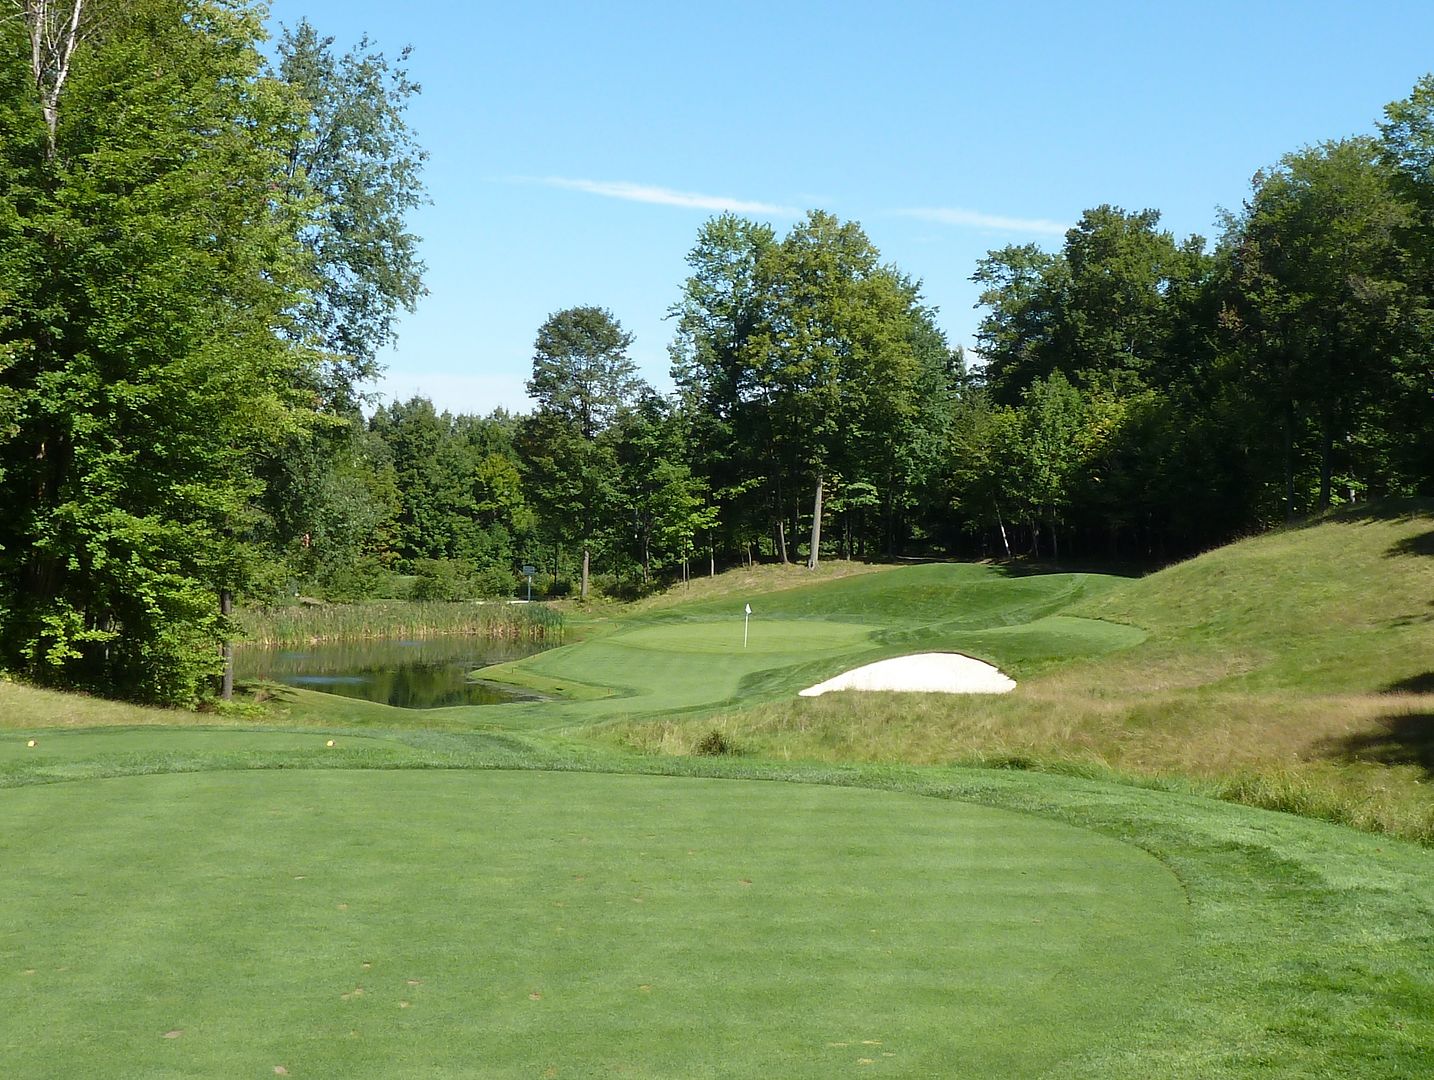
Hole 3: Par 3, 191 Yards
The third is the first of a great set of par-3s. The tee shot is played significantly downhill to a green that angles from left-to-right. The tee shot begs for a high cut, and while missing short in the swale or deep front bunkers seems bad, missing long is the only place you really do not want to be.
 |
| 3rd Back Tee |
From the back tee there is no option to run the ball onto the green, but as the golfer moves up in tee boxes, the approach angle gets easier.
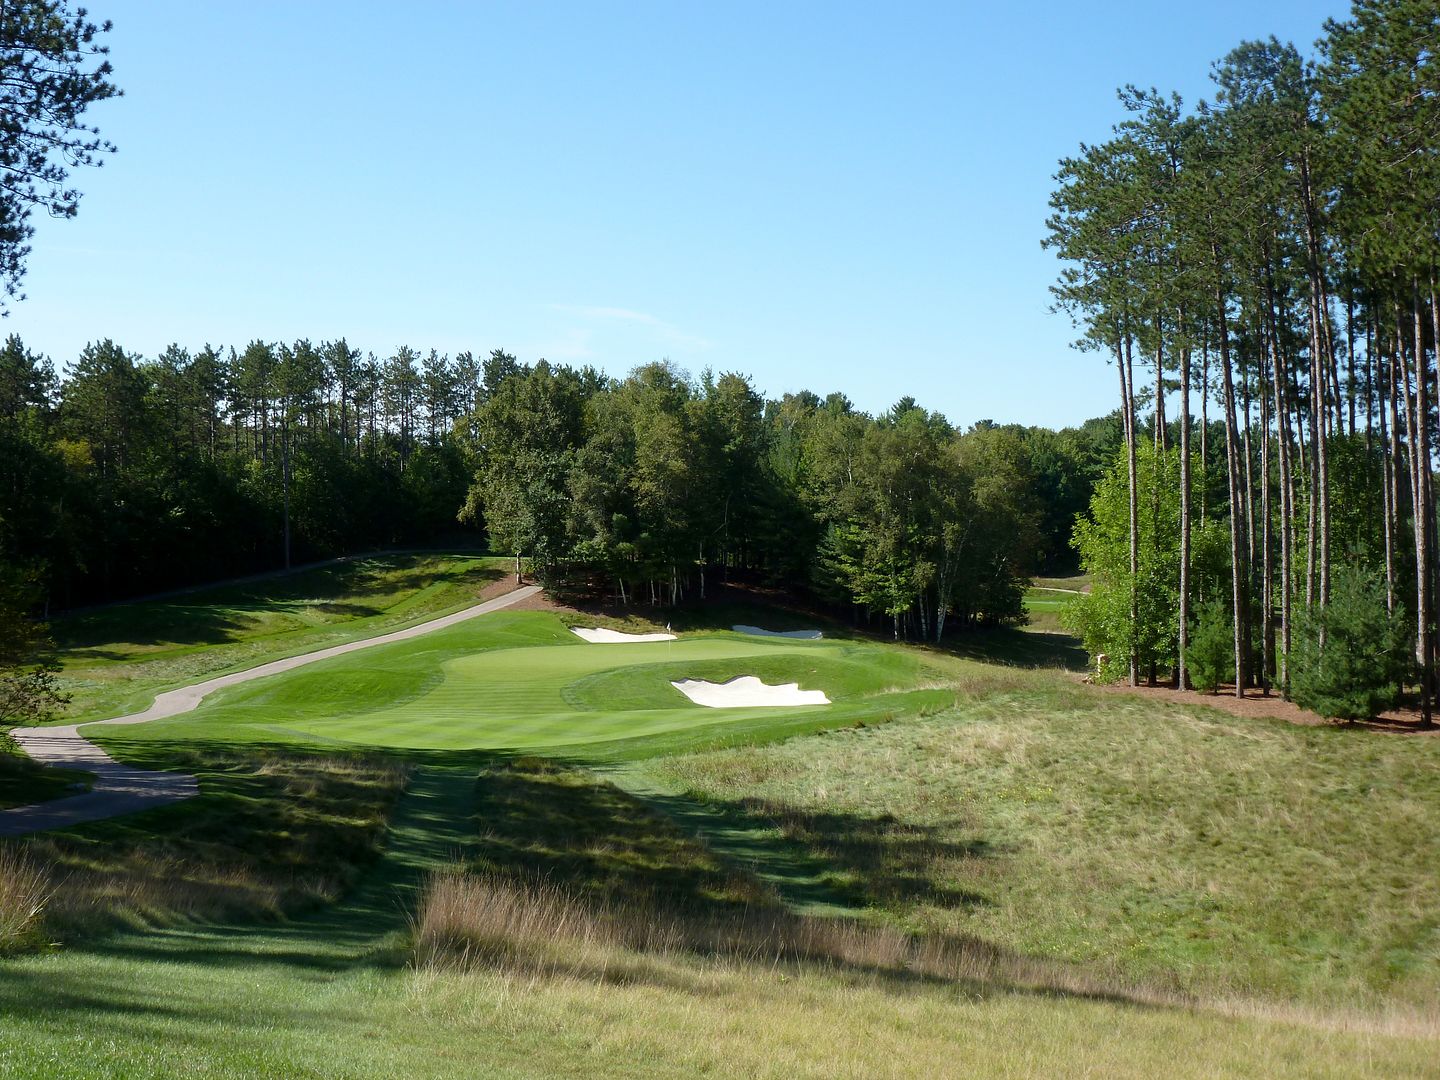 |
| 3rd Middle Tee |
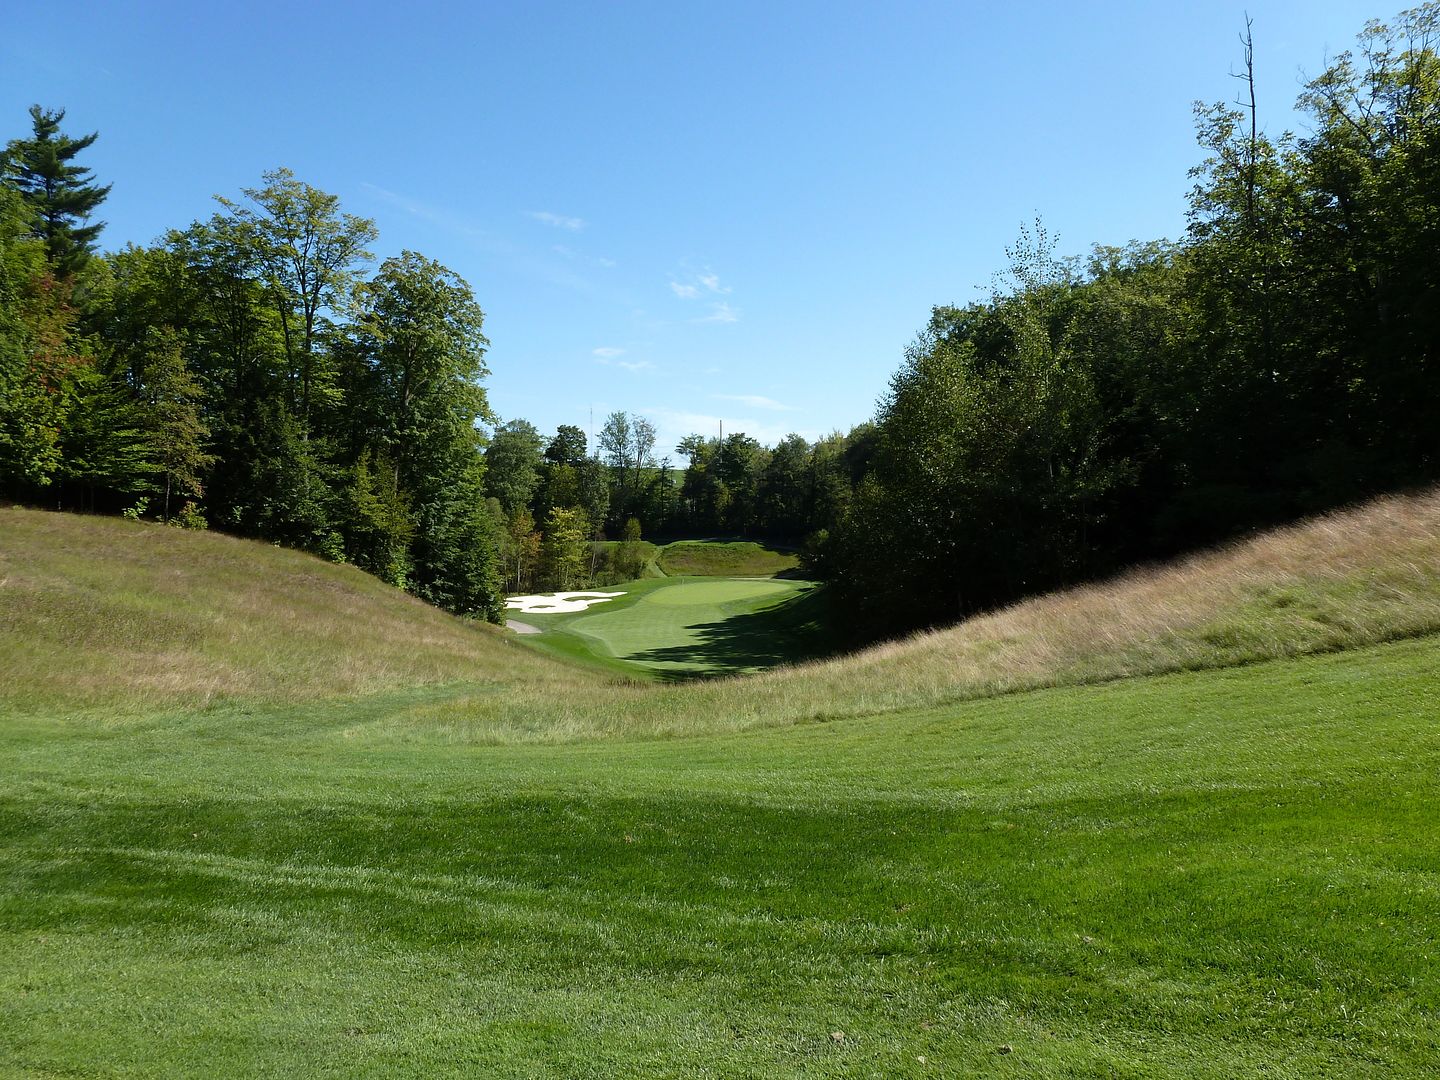
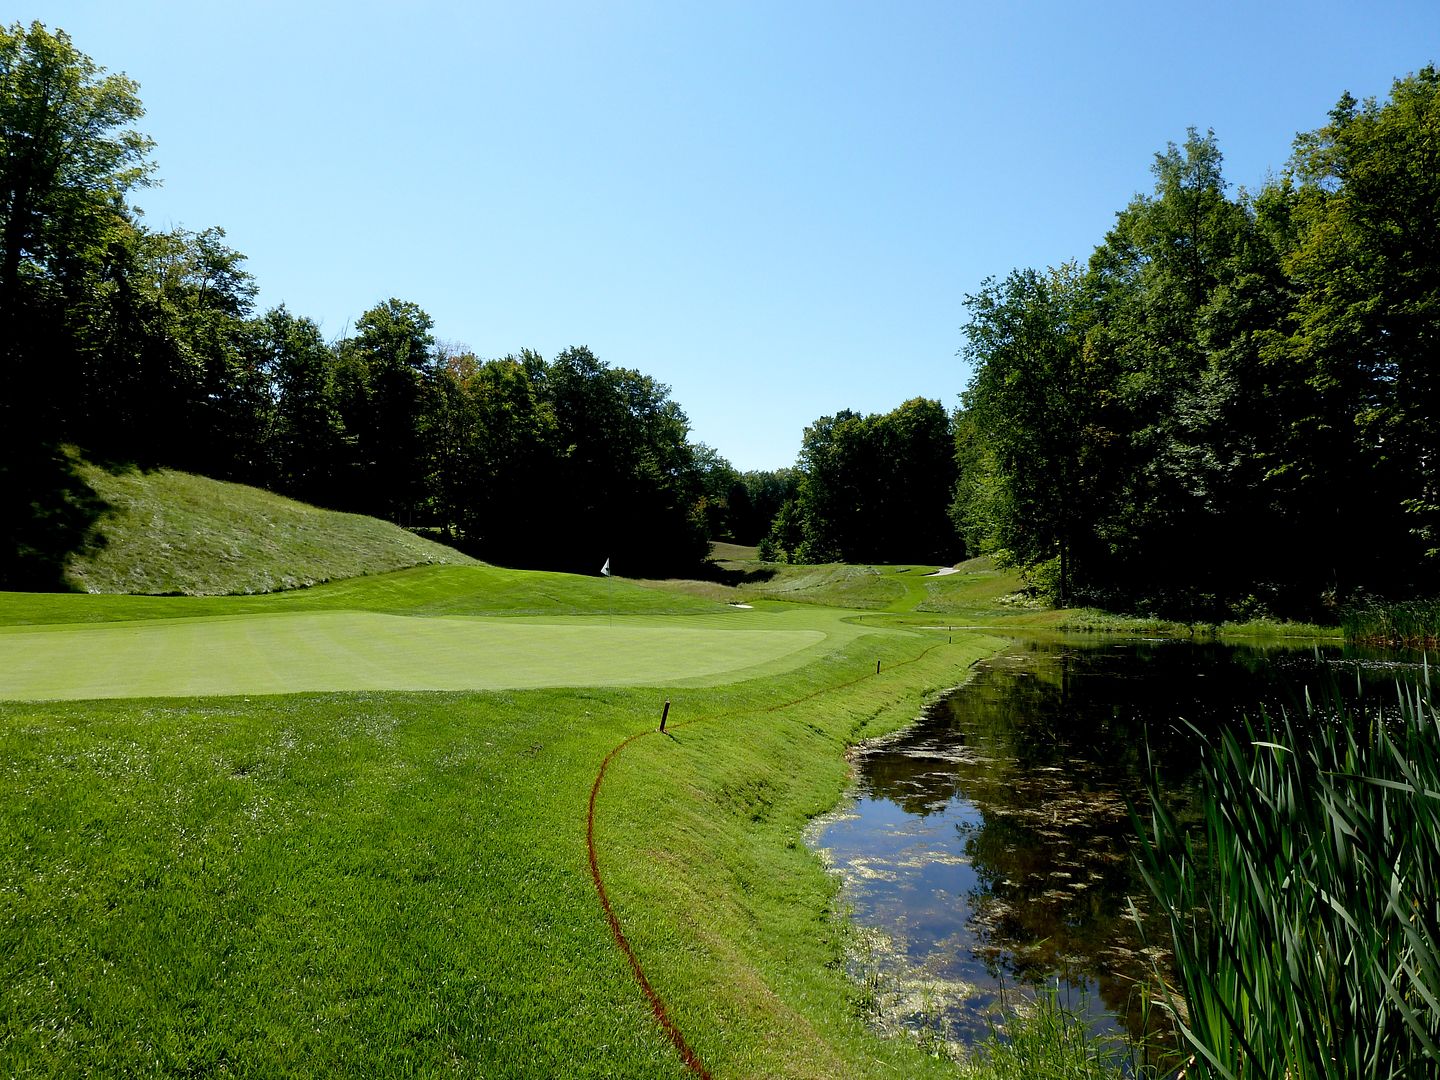
Missing in the little swale short of the green leaves a simple pitch into the slope of the green.
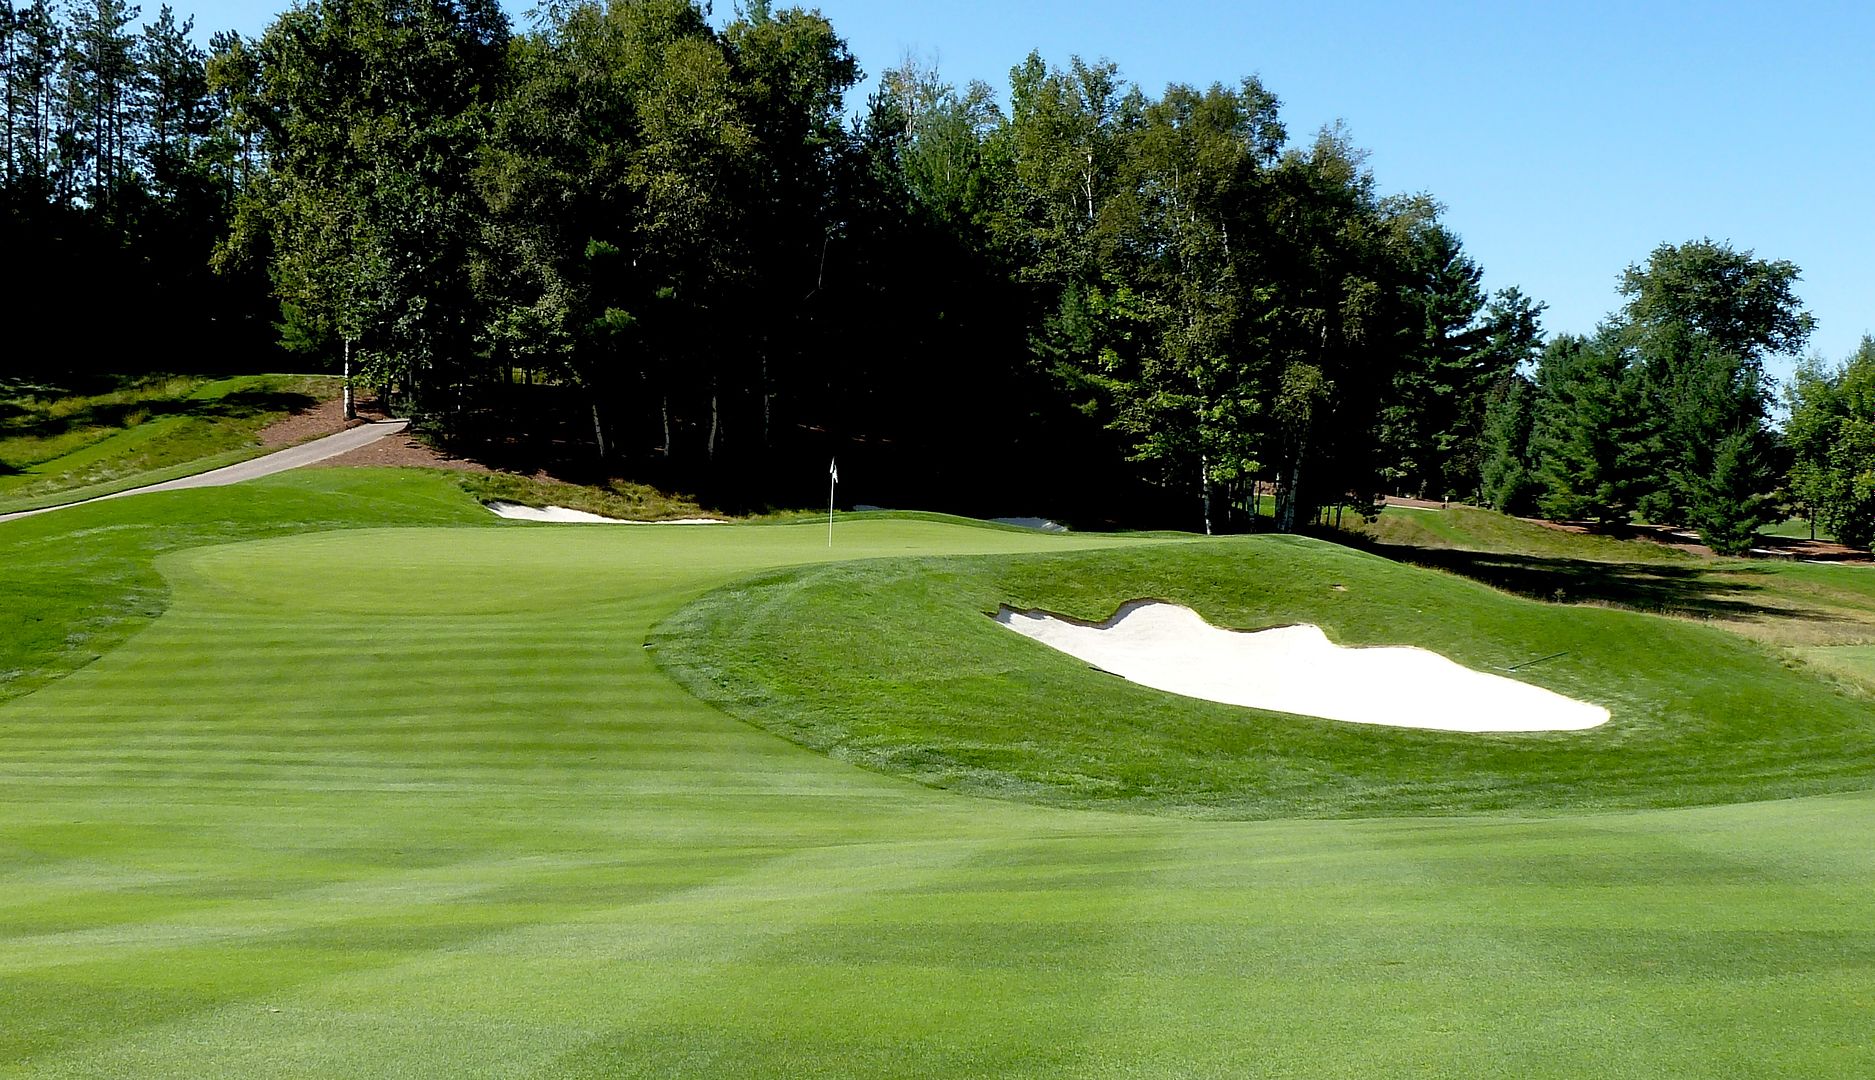 |
| Short of the 3rd Green - Note the False-Front |
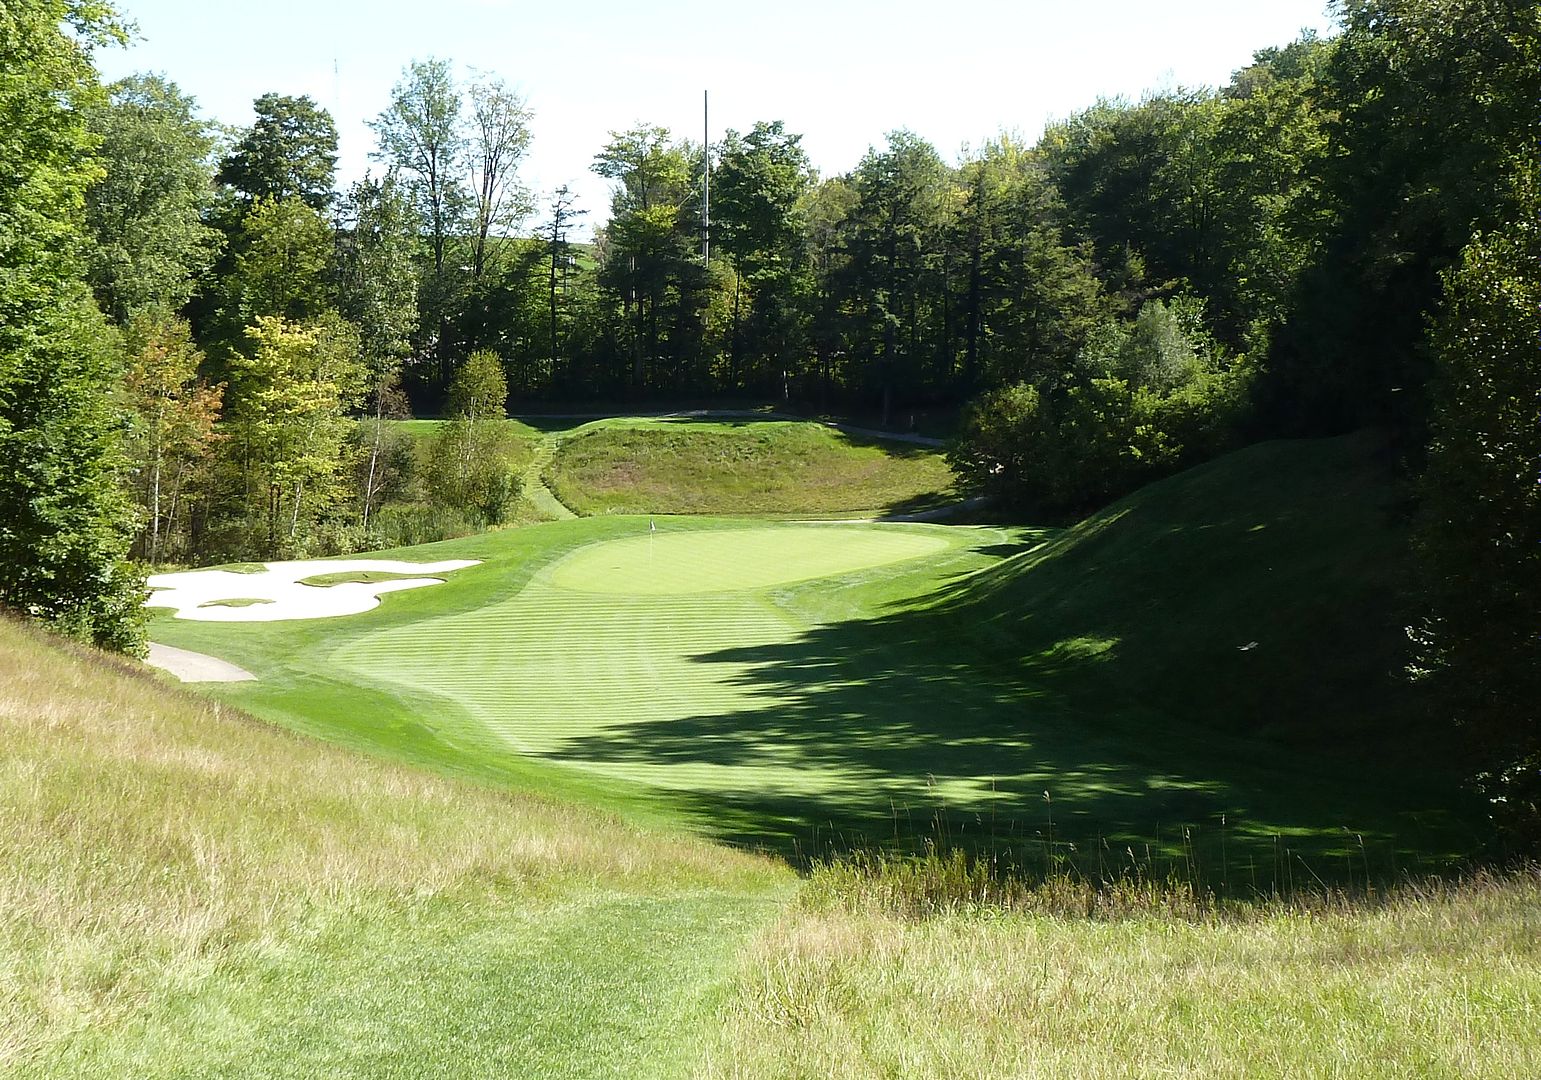
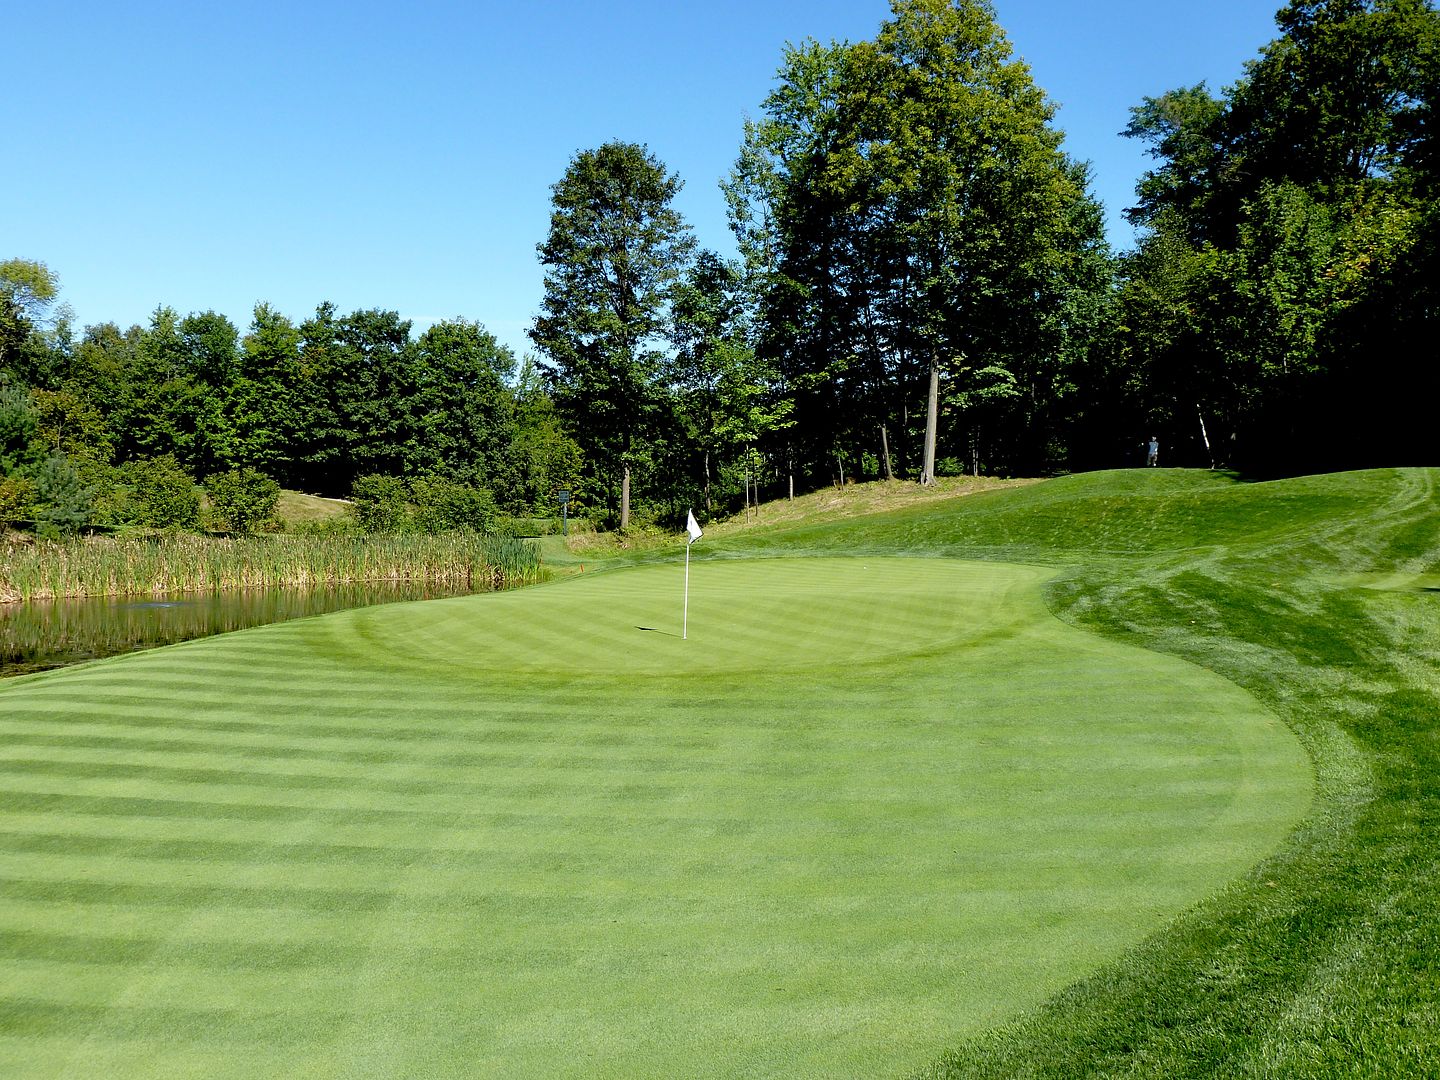
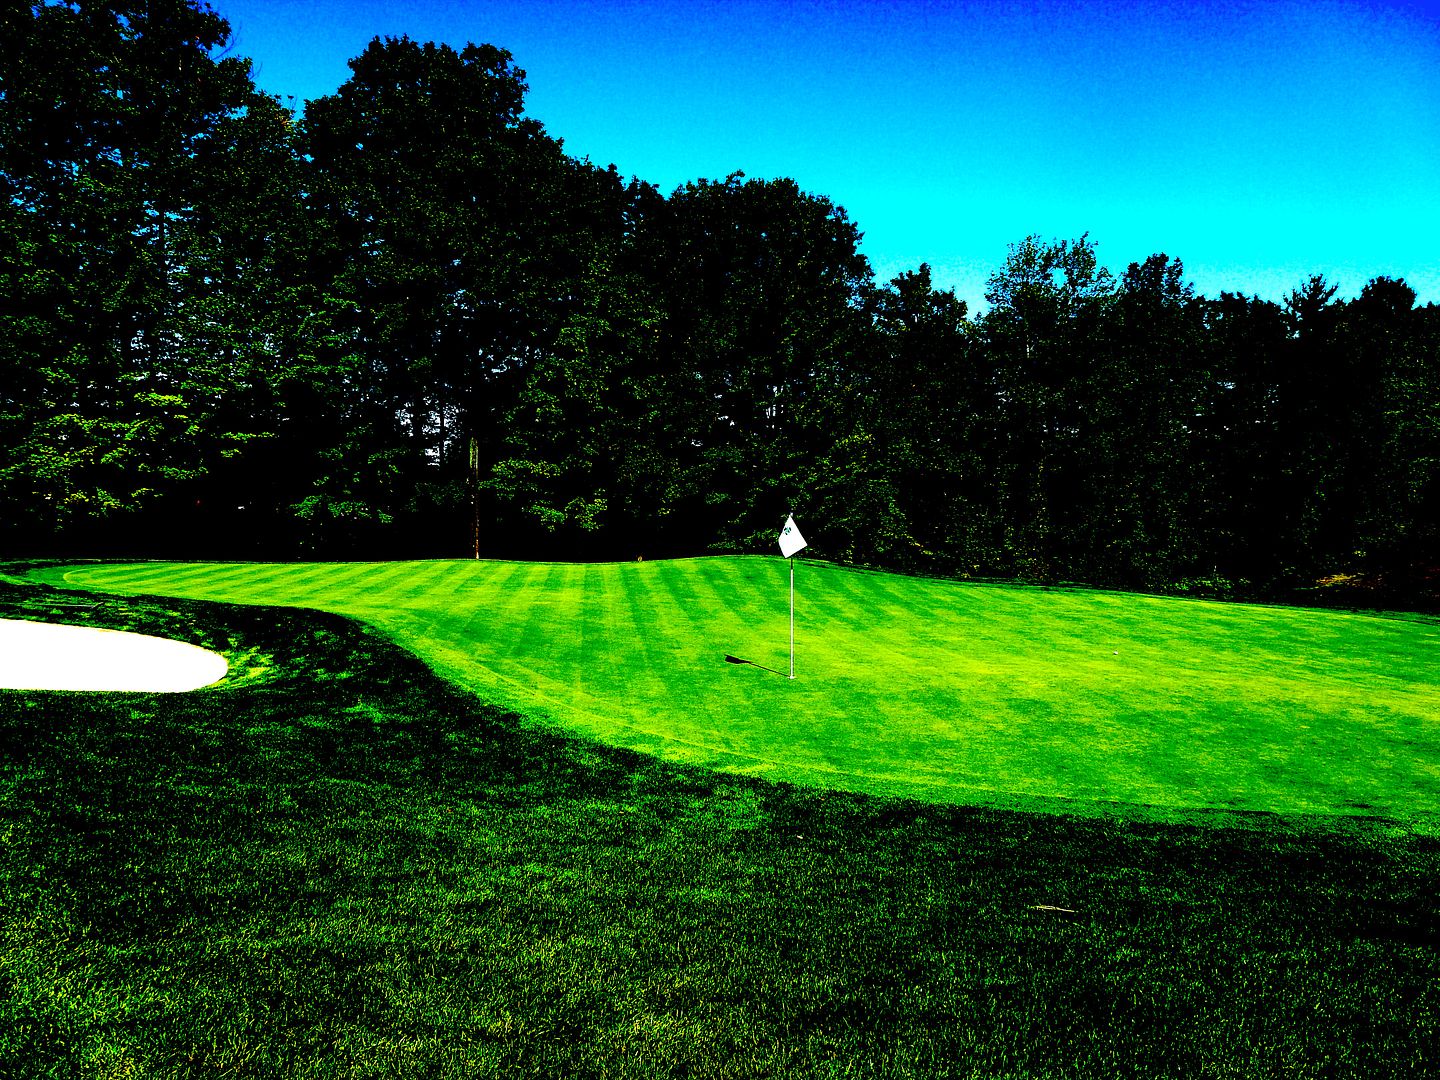
Finding the 3rd green is no easy task, but the job is not done yet. The green slopes considerably from back-right to front-left, and most disconcerting is the hump on the green just over the deep fronting bunker that can serve to kick very good shots into a very bad spot over the green.
 |
| 3rd Green |
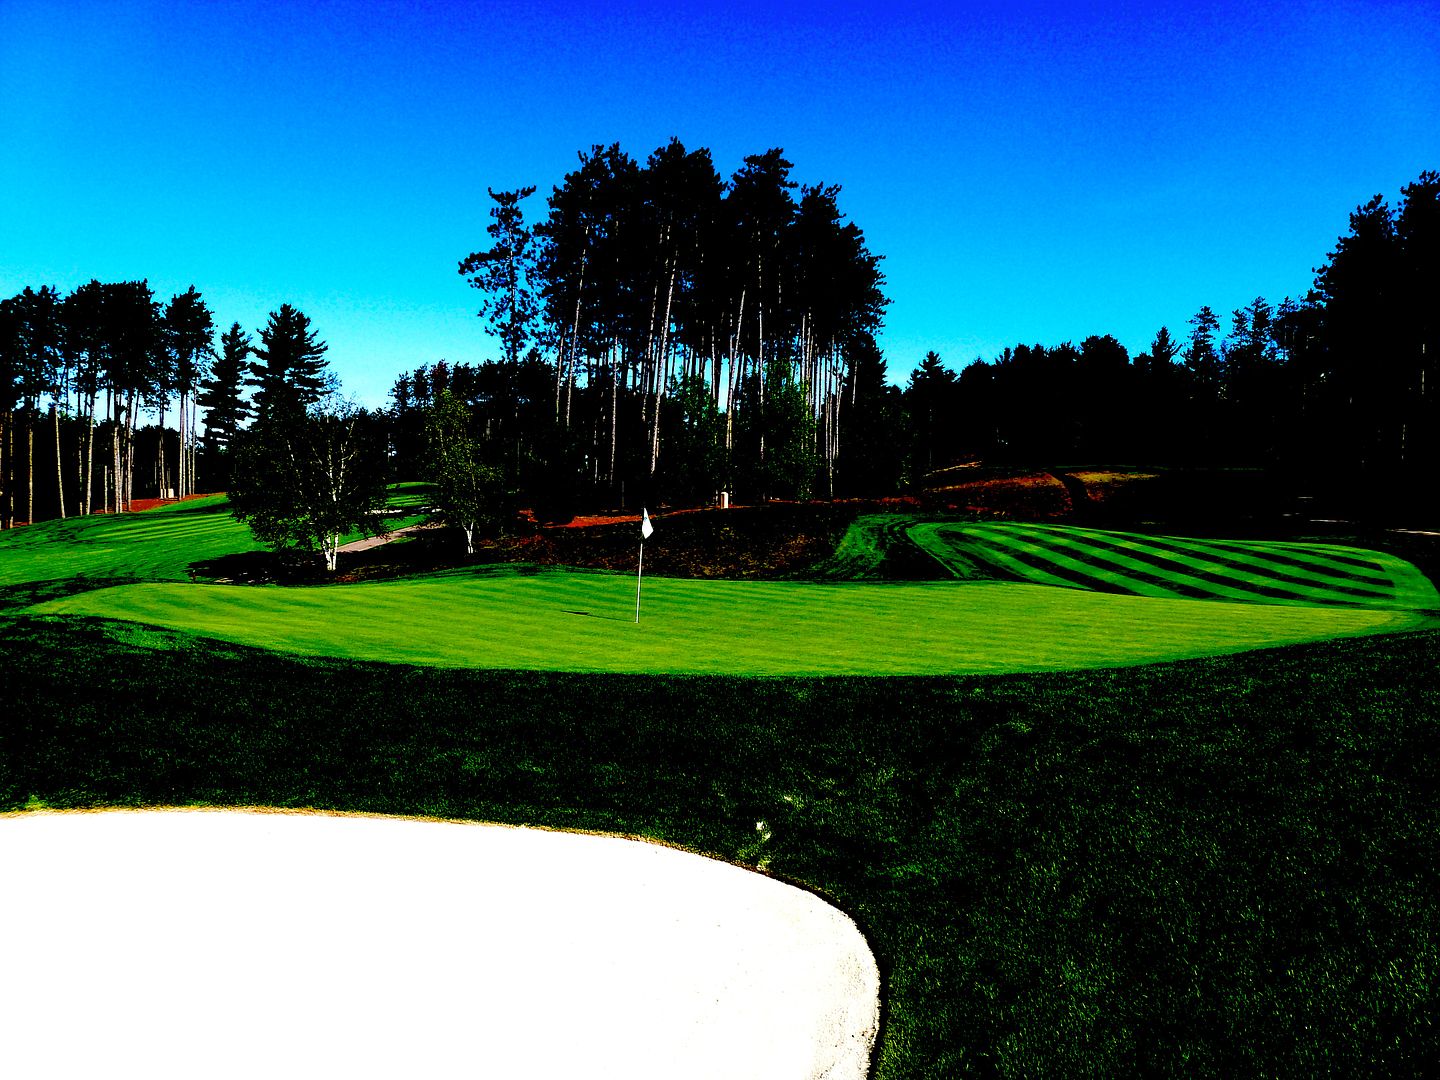 |
| 3rd Green Highlighting Contouring |
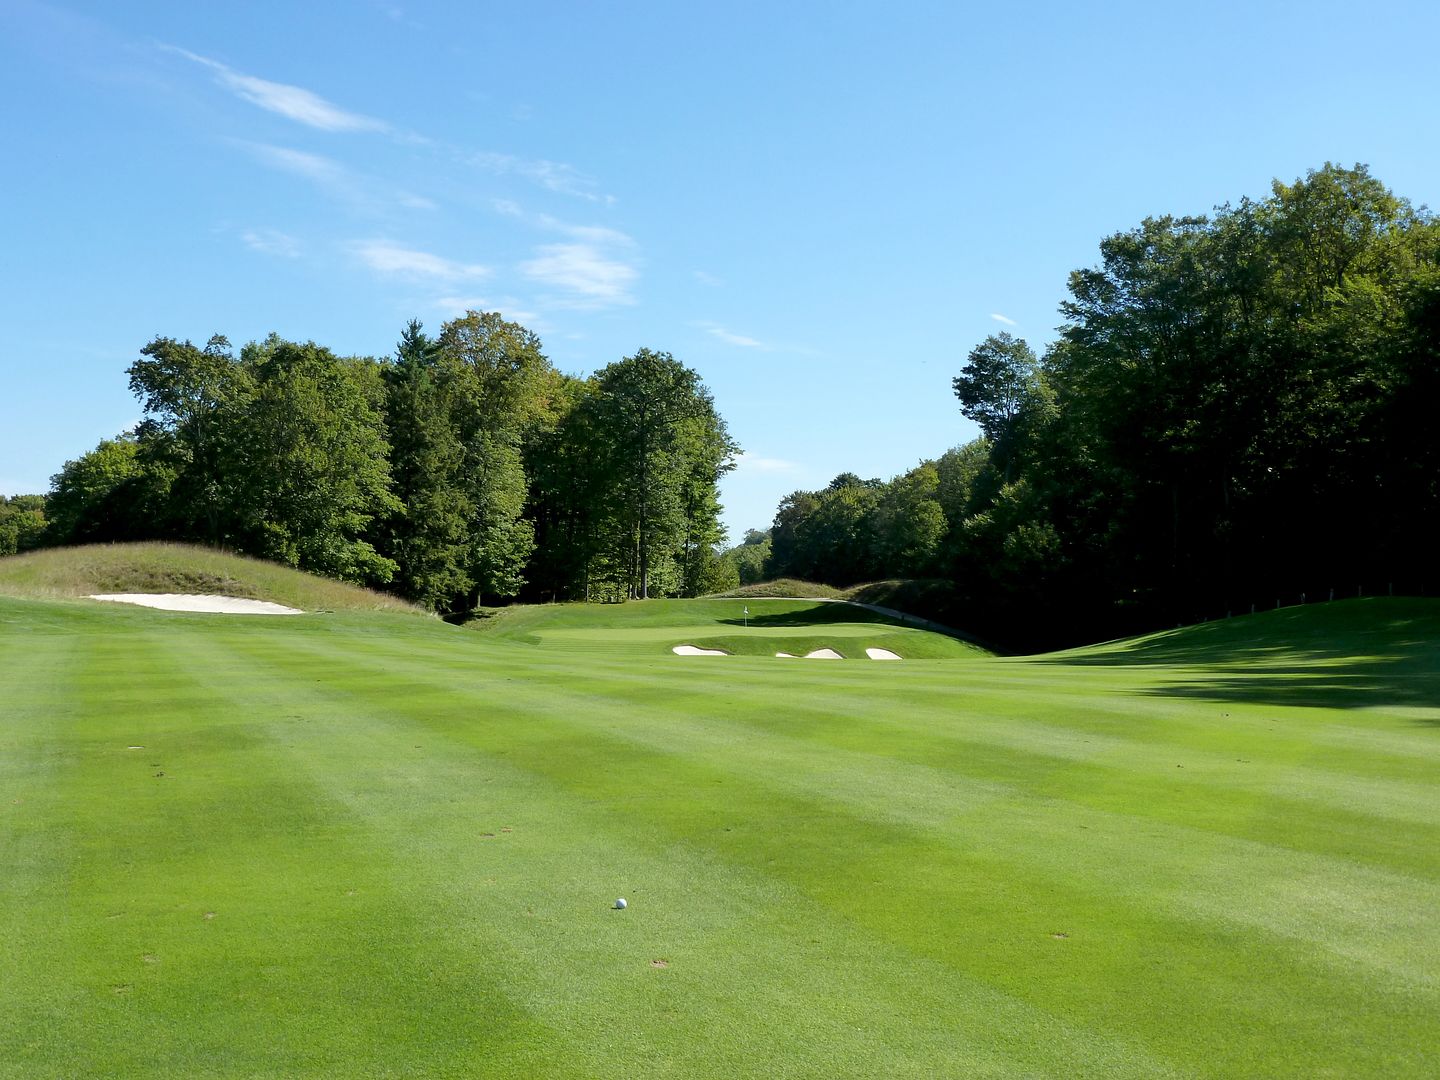
Hole 4: Par 5, 573 Yards
The first of a very strong set of par-5s that require the golfer to plan his route to the hole. The 4th is a classic up then down par-5, with the green completely hidden from view until the golfer crests the hill to play his approach to the green. Even though there is plenty of corridor width, the tee shot is intimidating as thick woods guard both sides of the fairway. Bunkers are benched into the hill short of the fairway, which adds visual appeal, but ultimately adds no strategic interest.
 |
| 4th Tee |
The tee shot dictates decision-making on the second shot, which requires a shot to crest the hill to have a look at the green. The duo of fairway bunkers lay some 150 yards short of the green. After a good tee shot, most players will have at least 170 yards to carry the bunkers. Of course, the option of threading the needle between the bunkers is available to the fool-hearty!
 |
| An Intimidating 2nd Shot at the 4th |
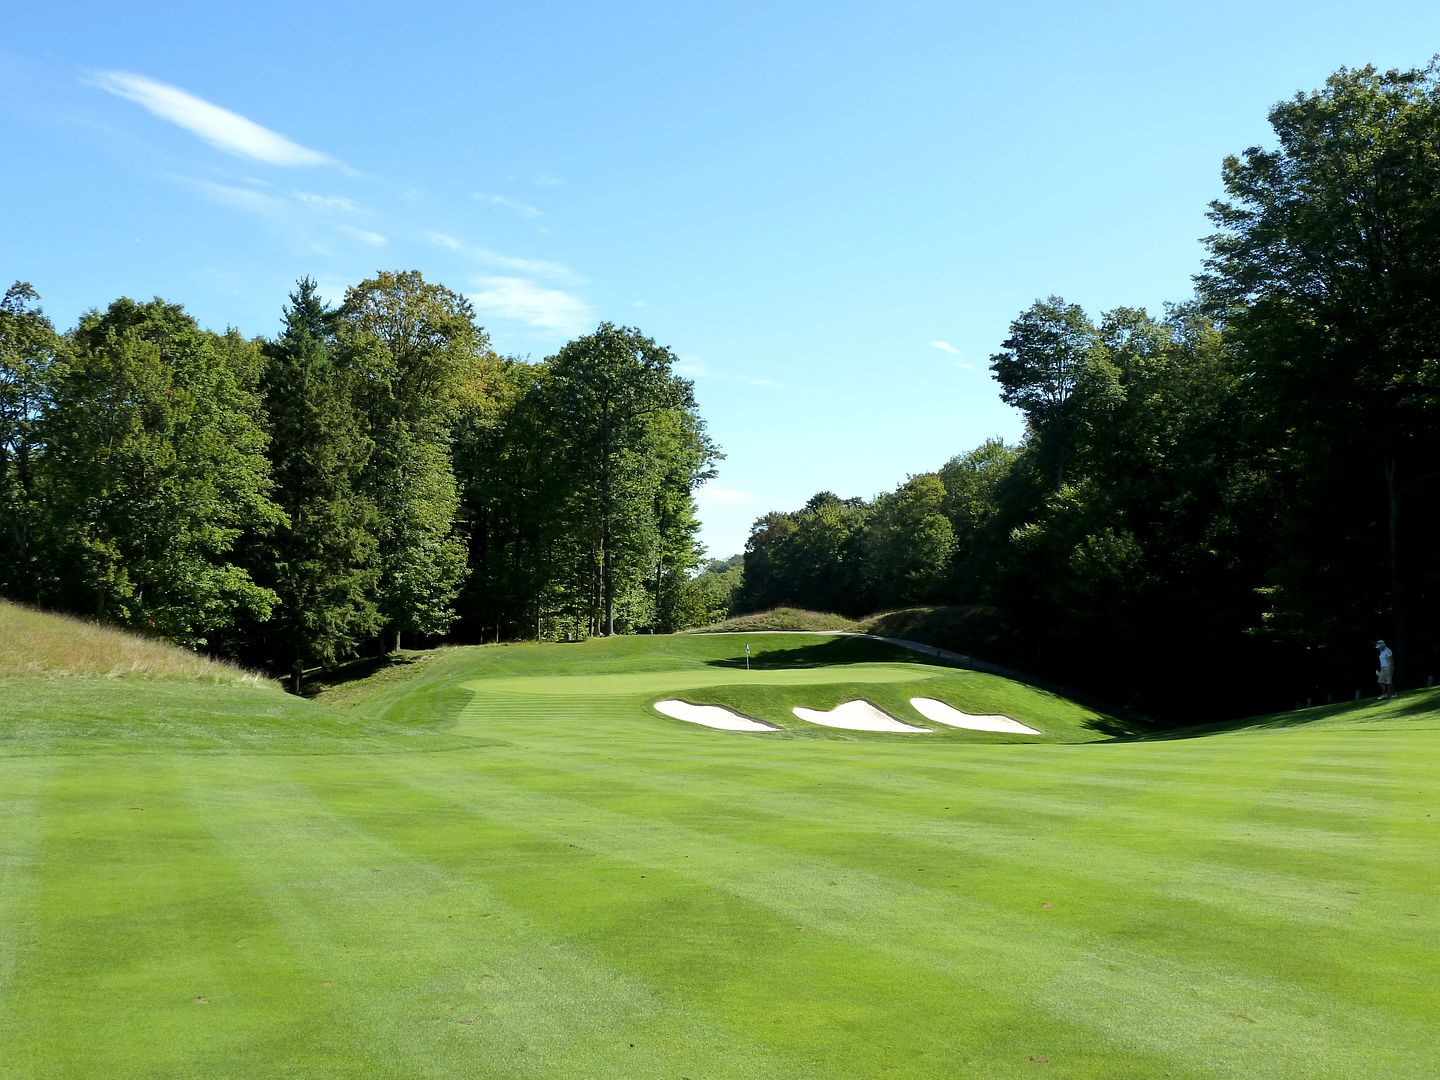
Upon cresting the hill, the golfer is given his first glimpse of the green, which sits naturally in a hollow below the grade of the fairway.
 |
| Approach from 130 Yards |
It is not until the golfer gets to within 100 yards of the green is the depth of the greenside bunkering revealed. Given the shallowness of the green and the penalty for missing short, laying up to wedge distance (as opposed to farther away) is of significant value.
 |
| Approach from 100 Yards |
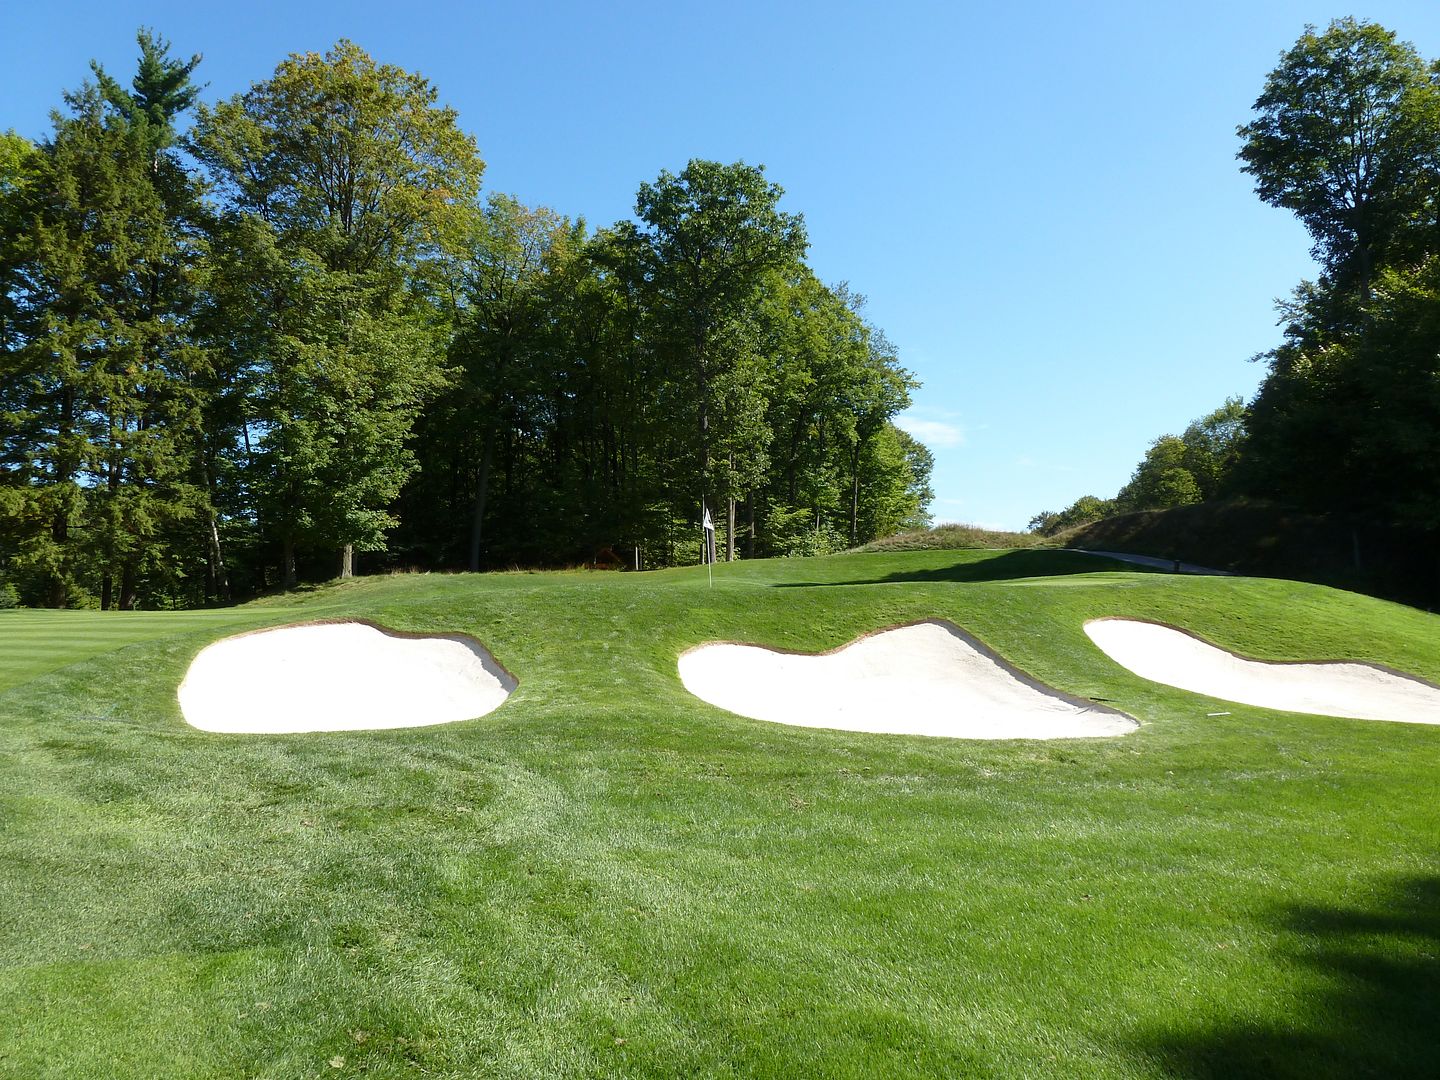 |
| Deep Greenside Bunkering |
This picture, unfortunately, fails to capture the undulation in the 4th green. The small back portion of the green is fairly flat, while the portion of the green close to the bunkers is fairly undulating.
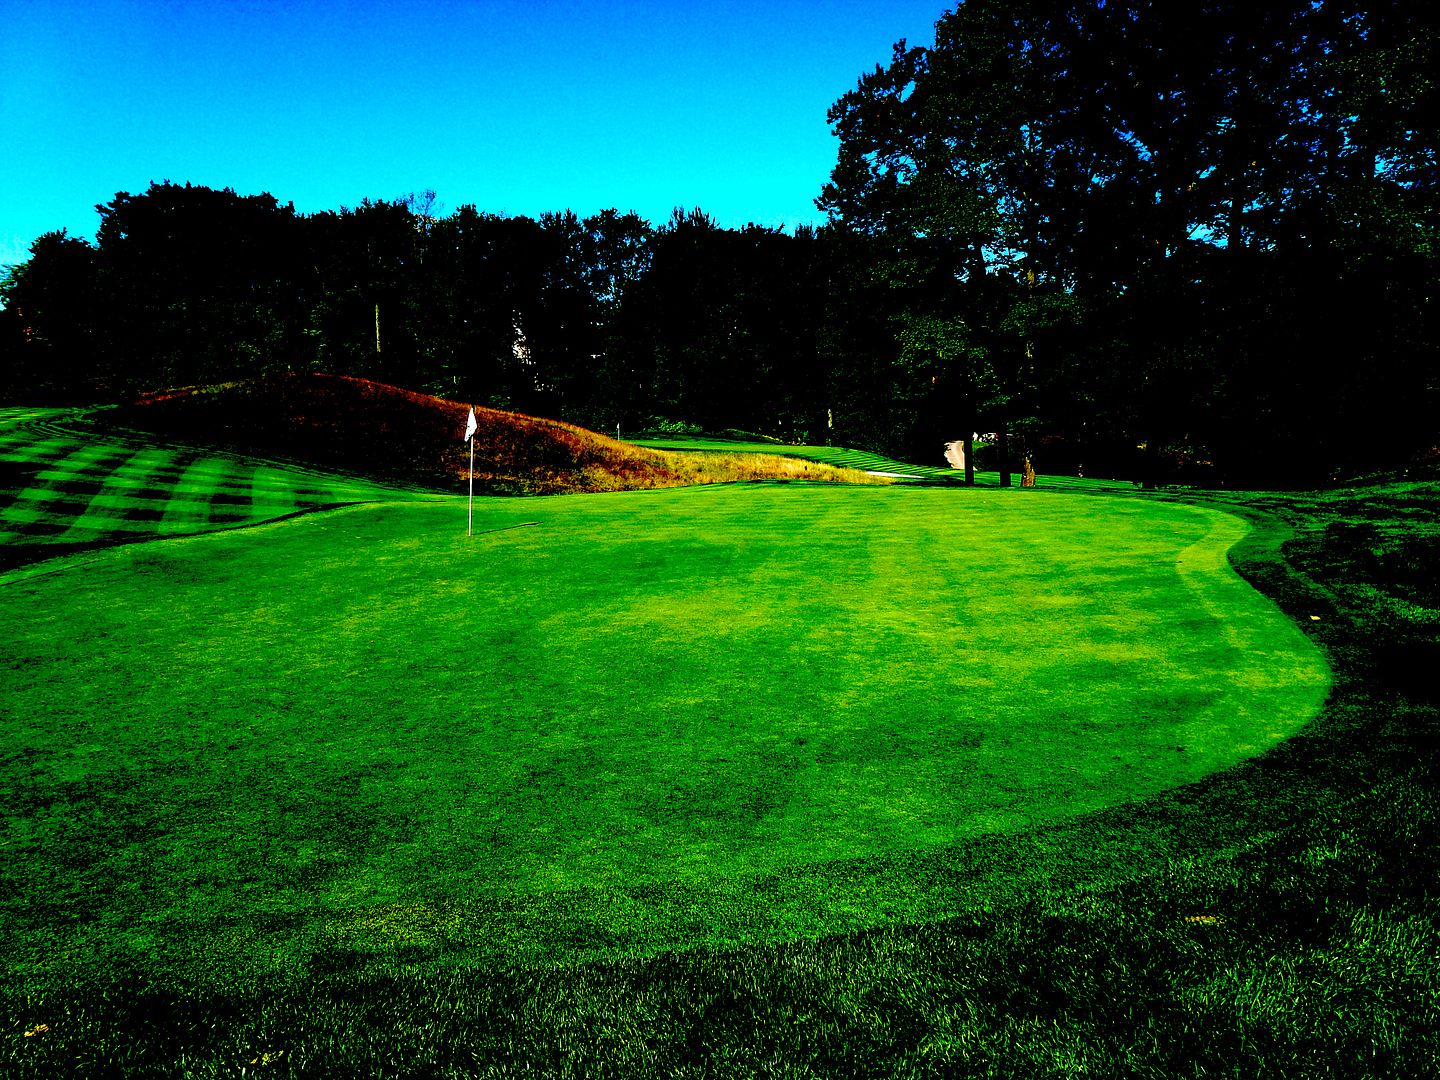 |
| 4th Green |
 |
| 4th from Behind |
Hole 5: Par 4, 433 Yards
The 5th is the best par-4 on the golf course, and is one of the very best in all of Ontario. The 5th is a wonderfully natural hole, that looks like it was just laying there waiting to be found by Bob Cupp. Large-scale mounding heaves back-and-forth as the golfer approaches the canted fairway. Bunkering benched naturally into the hill on the left penalizes shots bailed-out too far. Just like the 4th, the green is completely hidden from the tee.
The 5th calls for a fade off the tee and a draw into the green. The fairway ends about 140 yards short of the green (290 from the tee) so it is just a 3W or less for the longer hitters.
 |
| 5th Tee |
The approach to the 5th is played significantly downhill to a green that sits comfortably next to a huge mound right of the green.
 |
| 5th Approach |
Using the mound right of the green is not always advisable. On occasion, balls have been known to bounce off the hill and onto the green, but equally often balls will stay on the hill leaving a very awkward lie, and even less frequently balls will carom off the hill and traverse the length of the green to the rough on the other side.
 |
| 5th Approach - Zoomed In |
 |
| 5th from Behind |
Hole 8: Par 3, 165 Yards
The 8th is a very clever short par-3, demanding nothing less than perfection from the golfer. The green is open in front and the widest area is the fringe short of the green. Water lays just feet off the left of the green. The bunker that dominates the visual from the tee is 15 yards short of the green and should not impact the playing of the hole -- but it does hide the right portion of the green. A massive ridge separates the front 1/3 of the green from the back 2/3. Shots played to the wrong side of the ridge, especially long of the ridge to a front pin, leave a nearly impossible two-putt.
 |
| 8th Tee |
 |
| 8th Over Bunker -- Lots of Width over Bunker |
 |
| 8th from Behind |
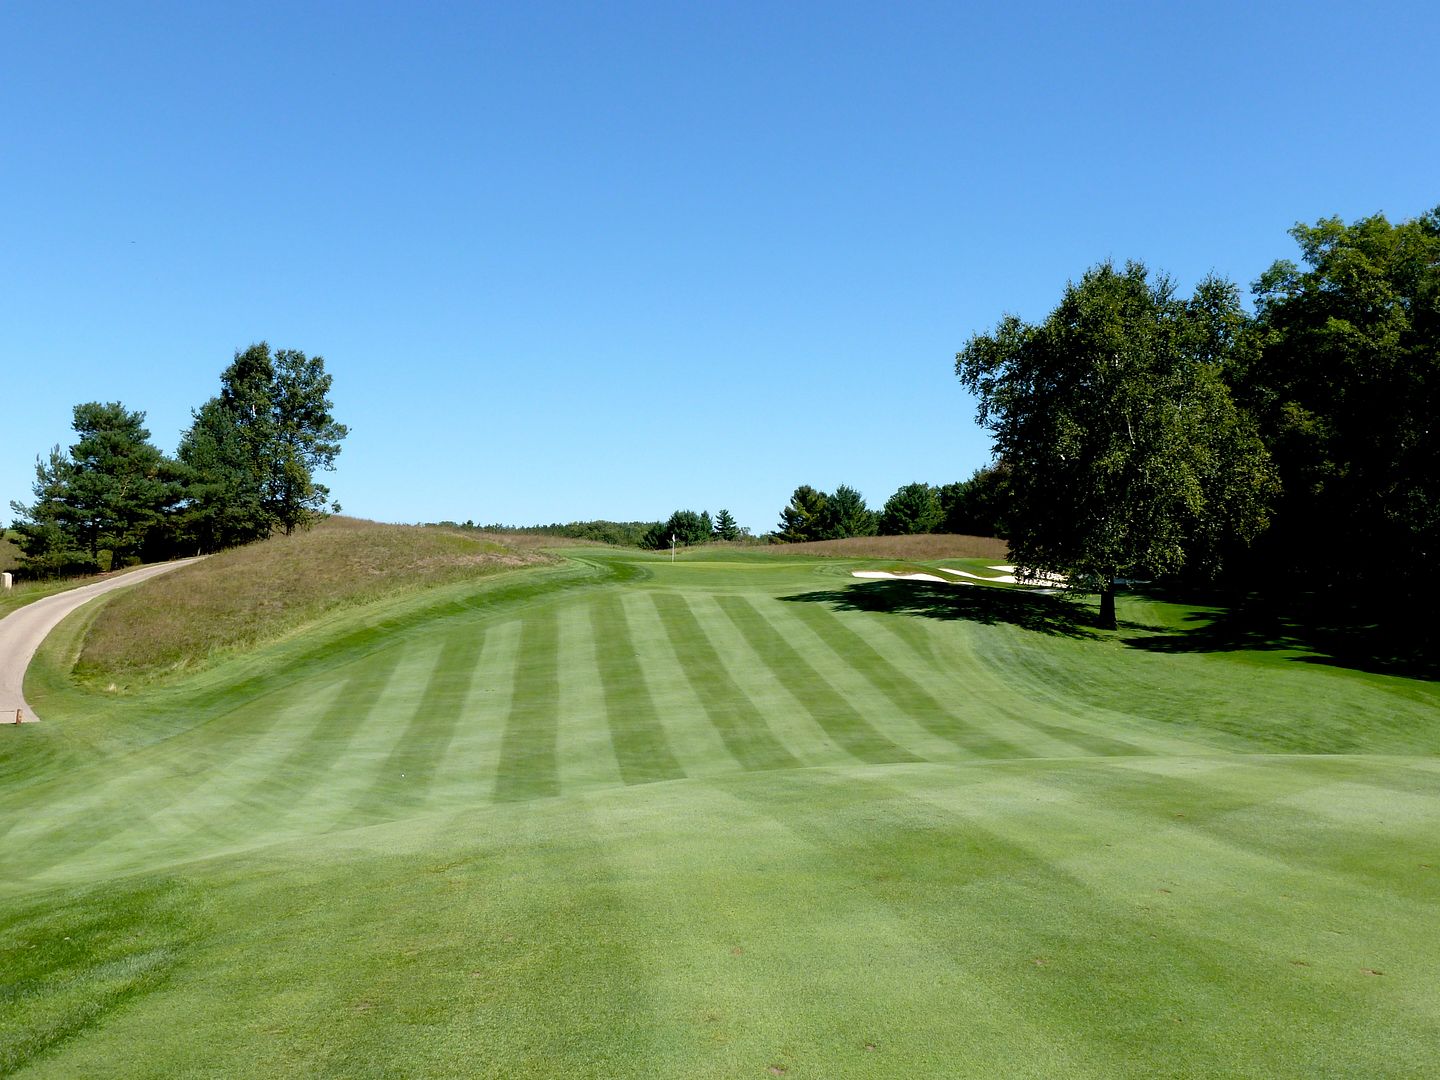
Hole 9: Par 4, 394 Yards
The 9th is yet another up then down hole with a green that is blind from the tee (notice the theme? can't see the green from the tee on 4, 5, 6, 7 and 9 on the front nine alone). The bunkering on the left is eye-candy as it should not be in play and a well-struck tee shot will crest the hill. Longer hitters should beware as tee shots longer than 260 will leave an awkward downhill stance to an uphill green.
 |
| 9th Tee |
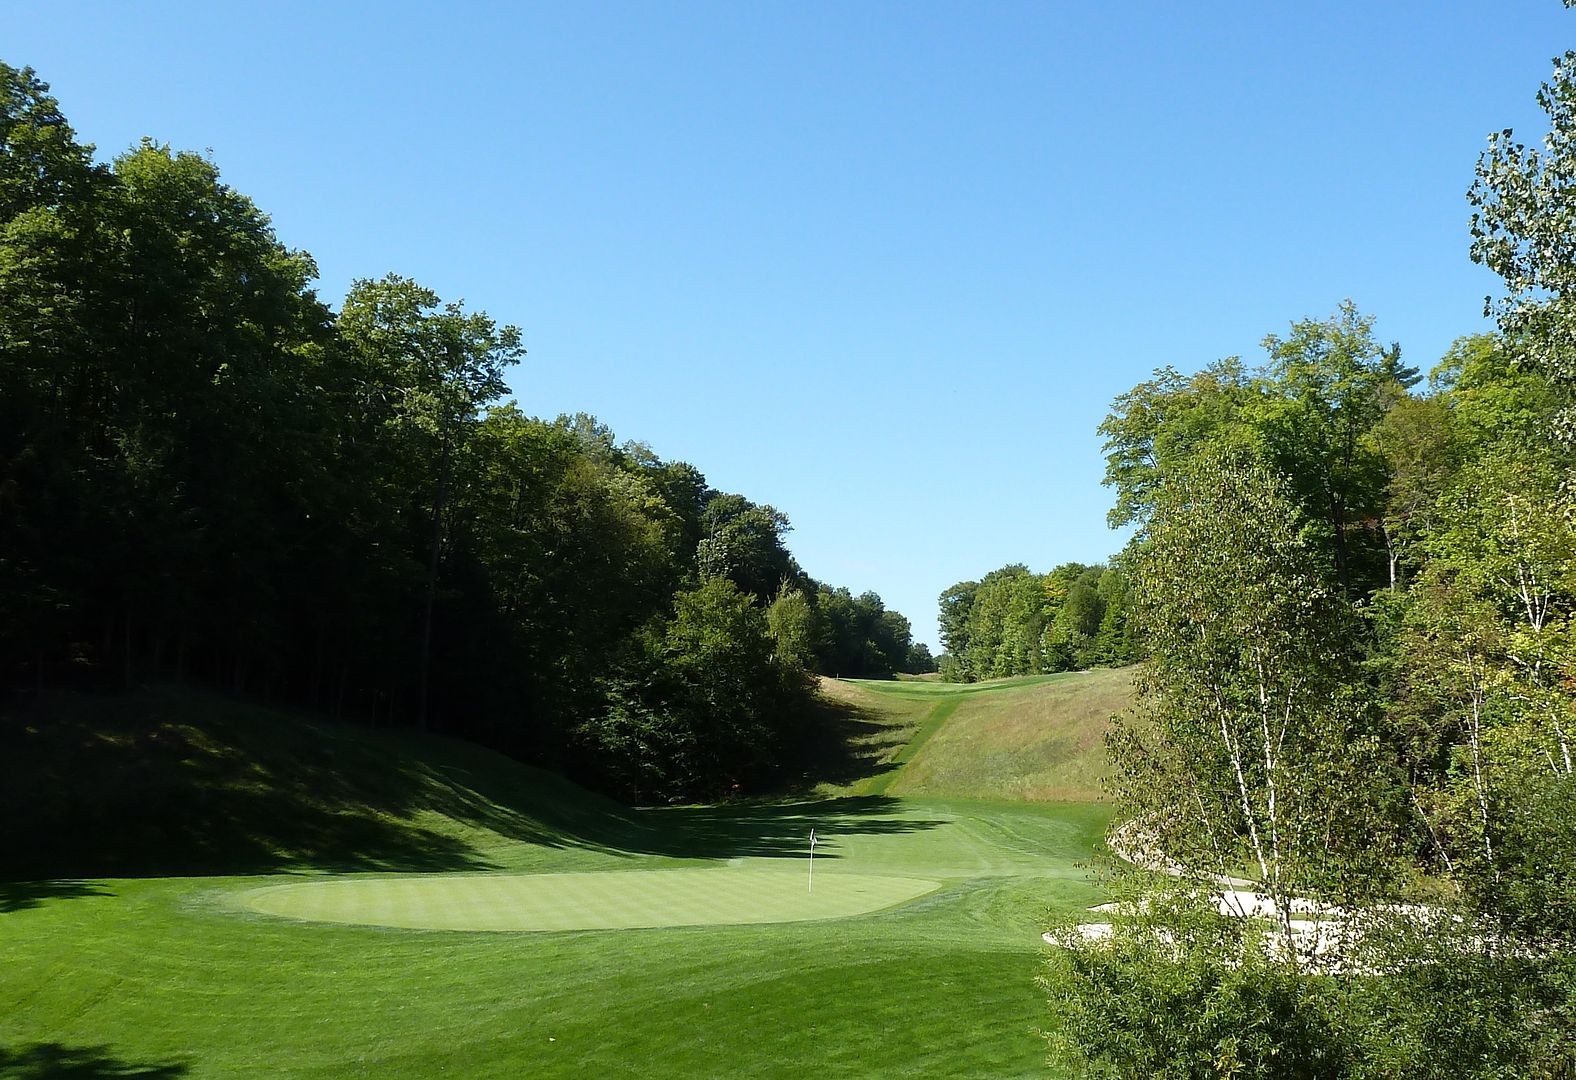
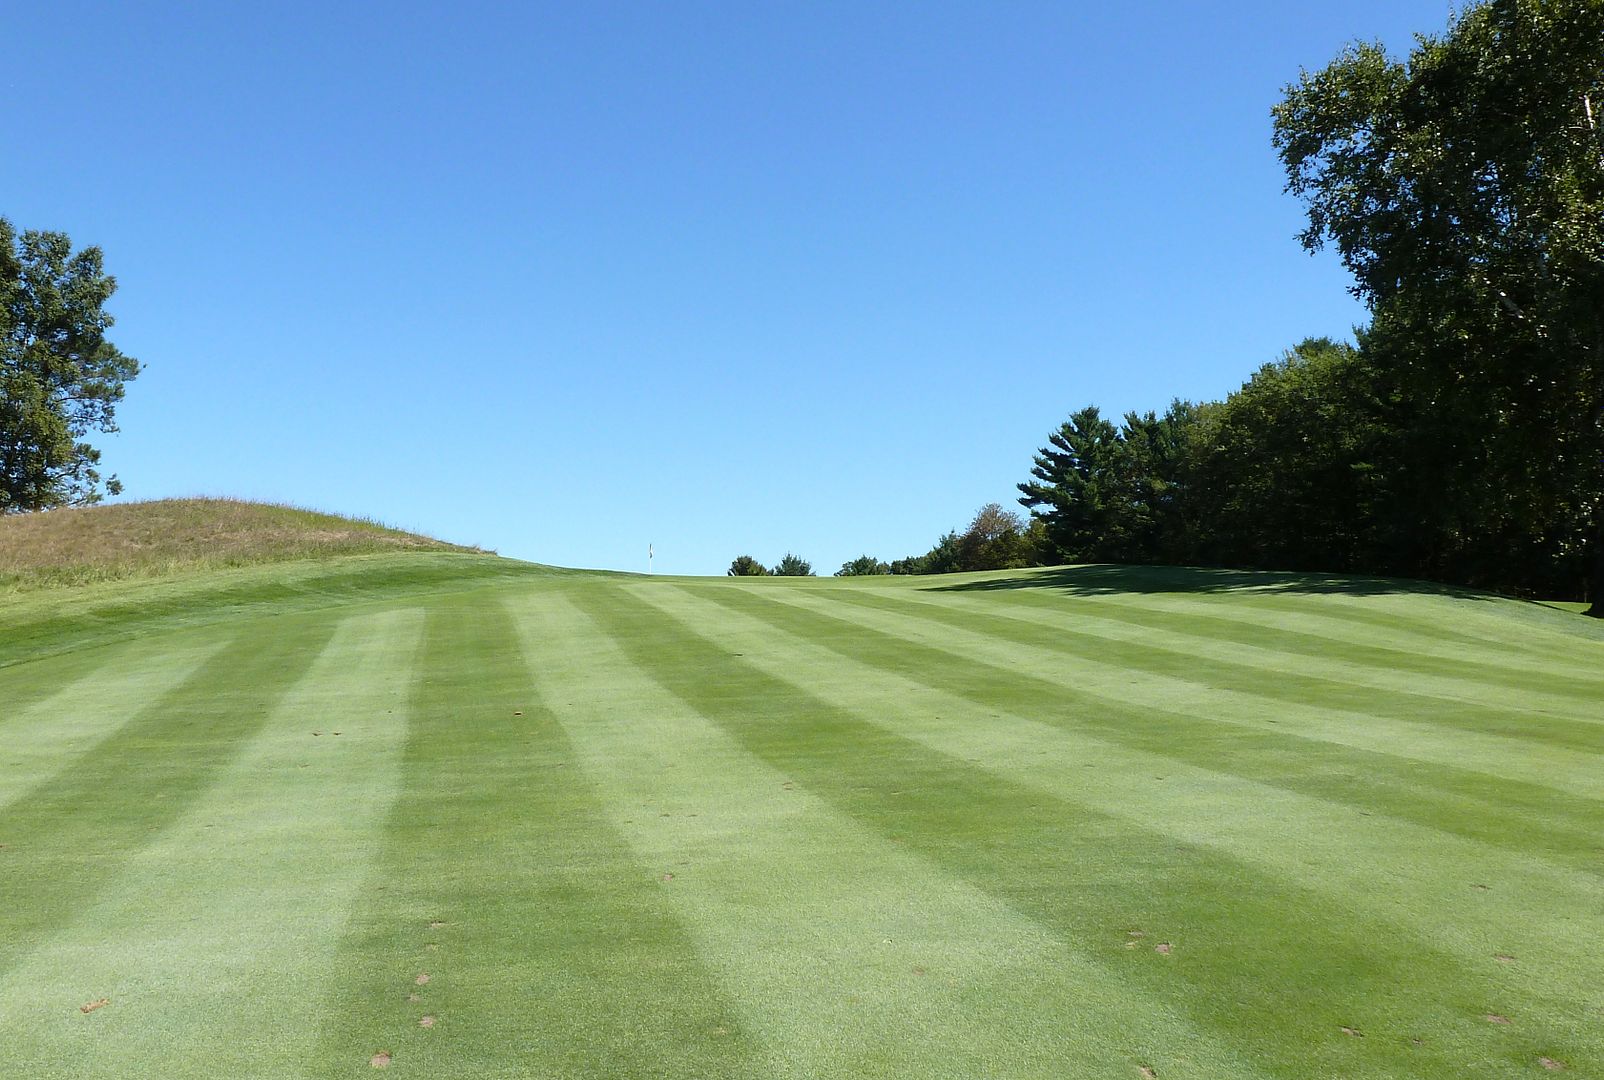
The approach to the 9th is played over a gully to an amazing green. The green is protected by very deep bunkers set-back from the green leaving a very difficult recovery. The bunkers short of the green are bad, but finding the bunker over the green is worse -- find that bunker and it is almost impossible to find the green from there.
 |
| 9th Approach |
The green is protected by one of the largest false-fronts I have ever seen. Land on the front edge of the green and your ball will roll 50 yards down the fairway to the bottom of the gully.
 |
| A Huge False-Front on the 9th |
The 9th green is WILD. Phenomenally shaped and with really interesting internal contours. Most pins are placed on the left portion of the green, which is ostensibly easier to access, but is protected by the false-front, and has a tiny pinnable shelf in the back portion.
 |
| 9th Green from Left |
The back portion of the green requires a carry over the deep front greenside bunkers. Shots landing on the front portion of the green to a back pin leave an almost impossible putt over a large ridge that bisects the green.
 |
| 9th Green from Behind |
 |
| 9th from Behind |
Hole 10: Par 5, 586 Yards
After a 100 ft walk from 9th green to the 10th tee, it is amazing to see the transformation from tree-lined parkland golf to the wide open vista of links-like golf. Another blind tee shot. The ideal tee-ball will challenge the bunkers on the right to find a huge speed-slot. Despite the length on the scorecard, this hole (with a favorable wind) is reachable in two.
 |
| 10th Tee |
After the wide-open feel of the tee shot, the remainder of the 10th is contained; carved through hills left and right, there is little room to miss. Most golfers will lay-up short of the pond, leaving a wedge into the green.
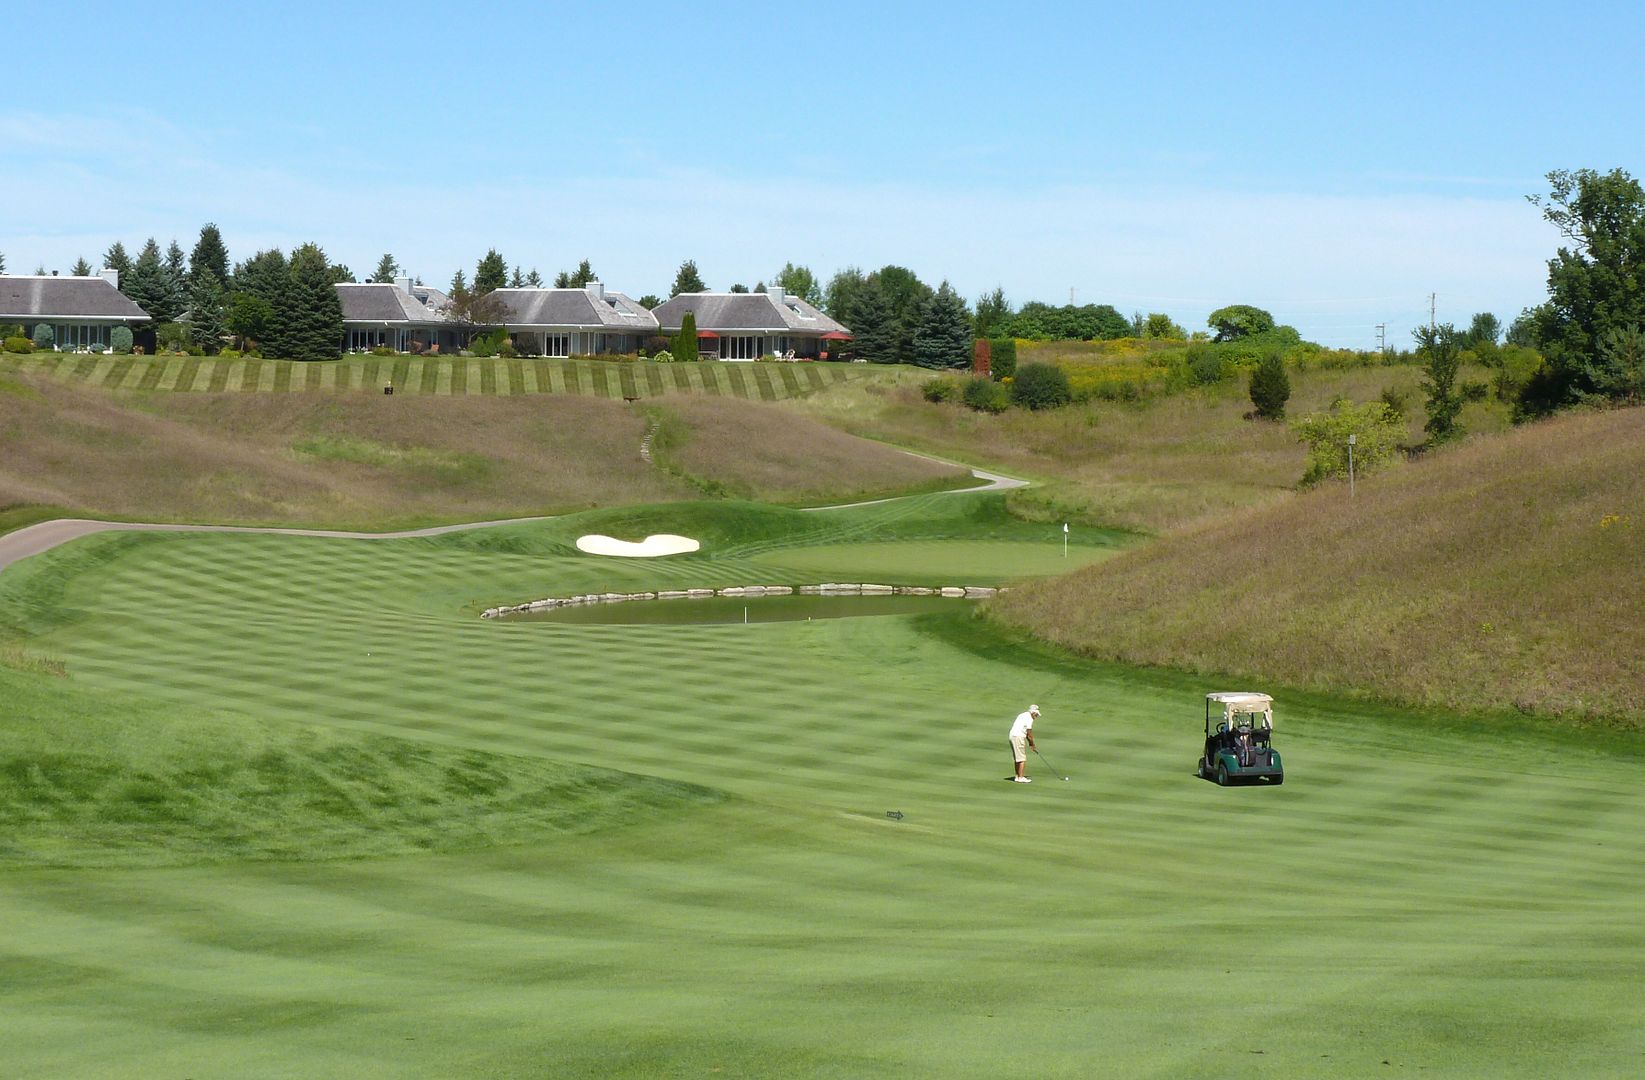 |
| 10th Second Shot |
The approach to the 10th is played over a small pond. Even though the green is quite large, the scale of the hill behind the green and closeness of the fronting pond make it feel quite small. Also, of note, is the ground-game option for those unable (or unwilling) to carry the lake on the approach.
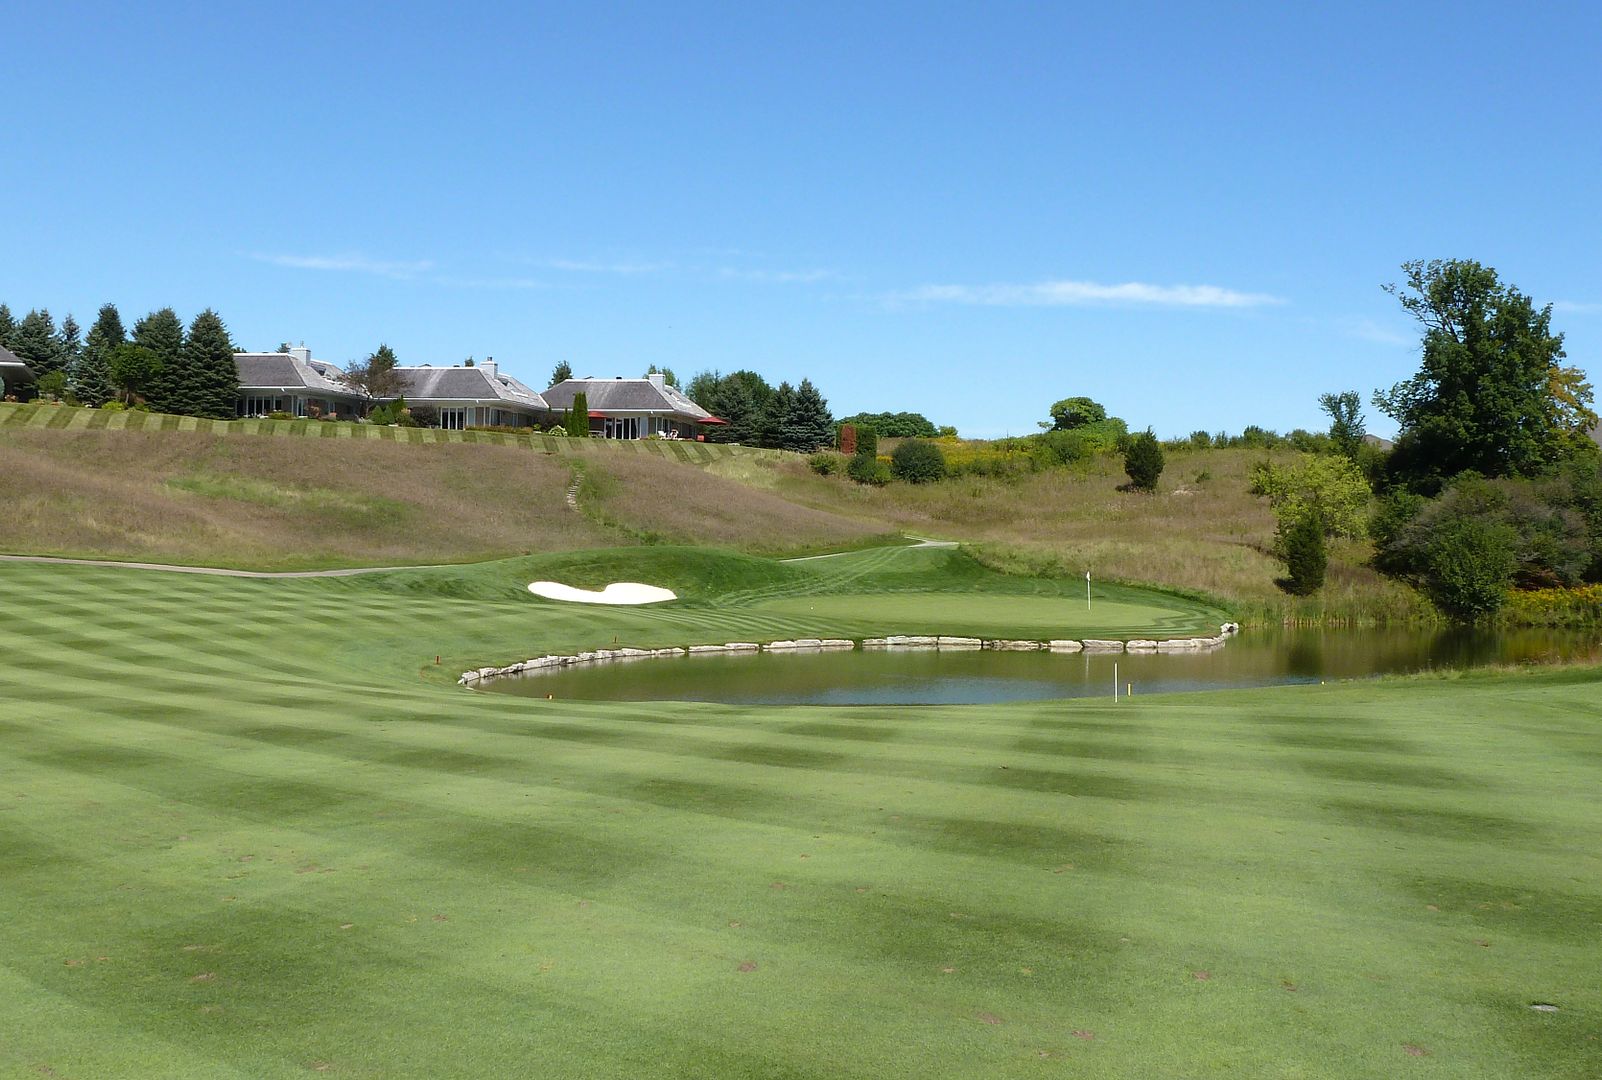 |
| 10th Approach |
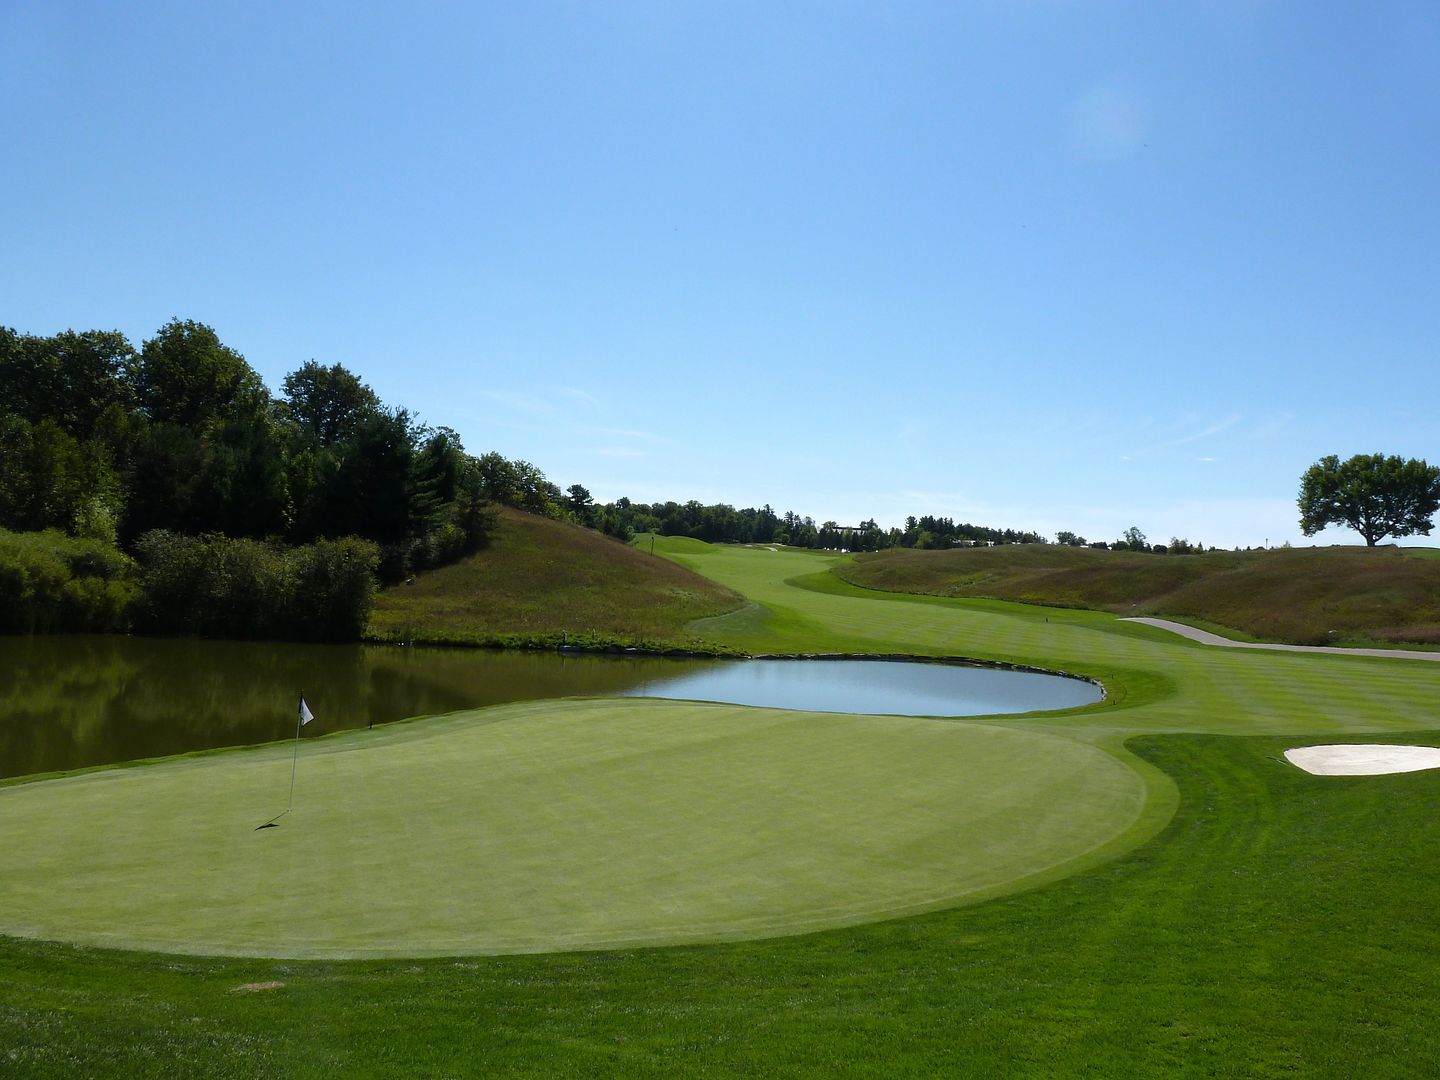 |
| 10th from Behind |
Hole 11: Par 3, 173 Yards
The 11th is a really cool par-3 with another very natural feeling greensite. The green is deep, but very narrow and located at the bottom of a small bowl. Again, the bunkering is deep and setback from the green making it more difficult to find, but really difficult to recover from.
 |
| 11th Tee |
 |
| Large Scale Bunkering on the 11th |
There is a MASSIVE bailout to the right of the green. Honestly, this features confused me. I understand that missing left is bad, so it's OK to have a bailout right, and it should be difficult to recover from there (and it certainly is), but I have no idea why the bailout need be 50 YARDS WIDE!? I am open to ideas!
 |
| HUGE Bailout Right of 11th Green |
The green has a false front making the first 1/4 of the green unpinnable. A ridge runs across the green 2/3 way back, and the back 1/3 of the green slopes away from the tee. This is an awesome green on a very good hole.
 |
| 11th Green from Right |
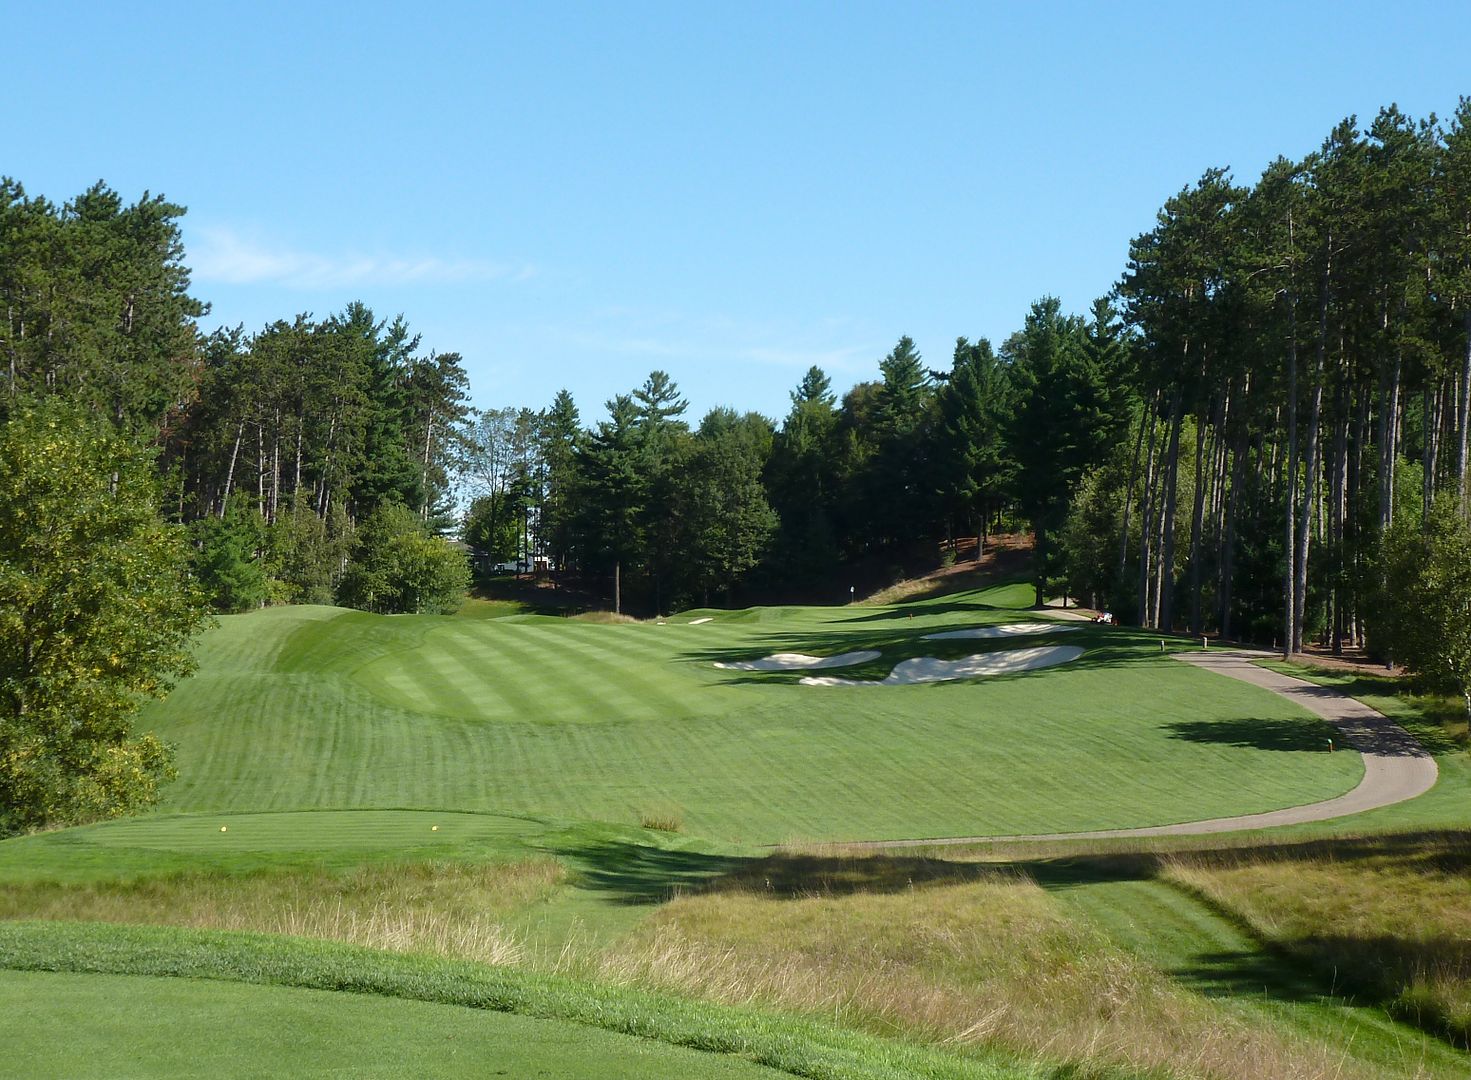
Hole 15: Par 5, 580 Yards
The 15th is a really good split-fairway par-5. The easier and more obvious route is to the right, around the bunkers. But, there is also fairway over the two bunkers farthest to the left in the picture below. It is about 225 yards to carry from the member's tee. The alternate fairway is fairly narrow and at an angle to the tee, making it very difficult to find, but if successful, the golfer will have 240 yards or less for a second shot, versus the 300+ yard second he would have if playing to the right.
 |
| 15th Tee |
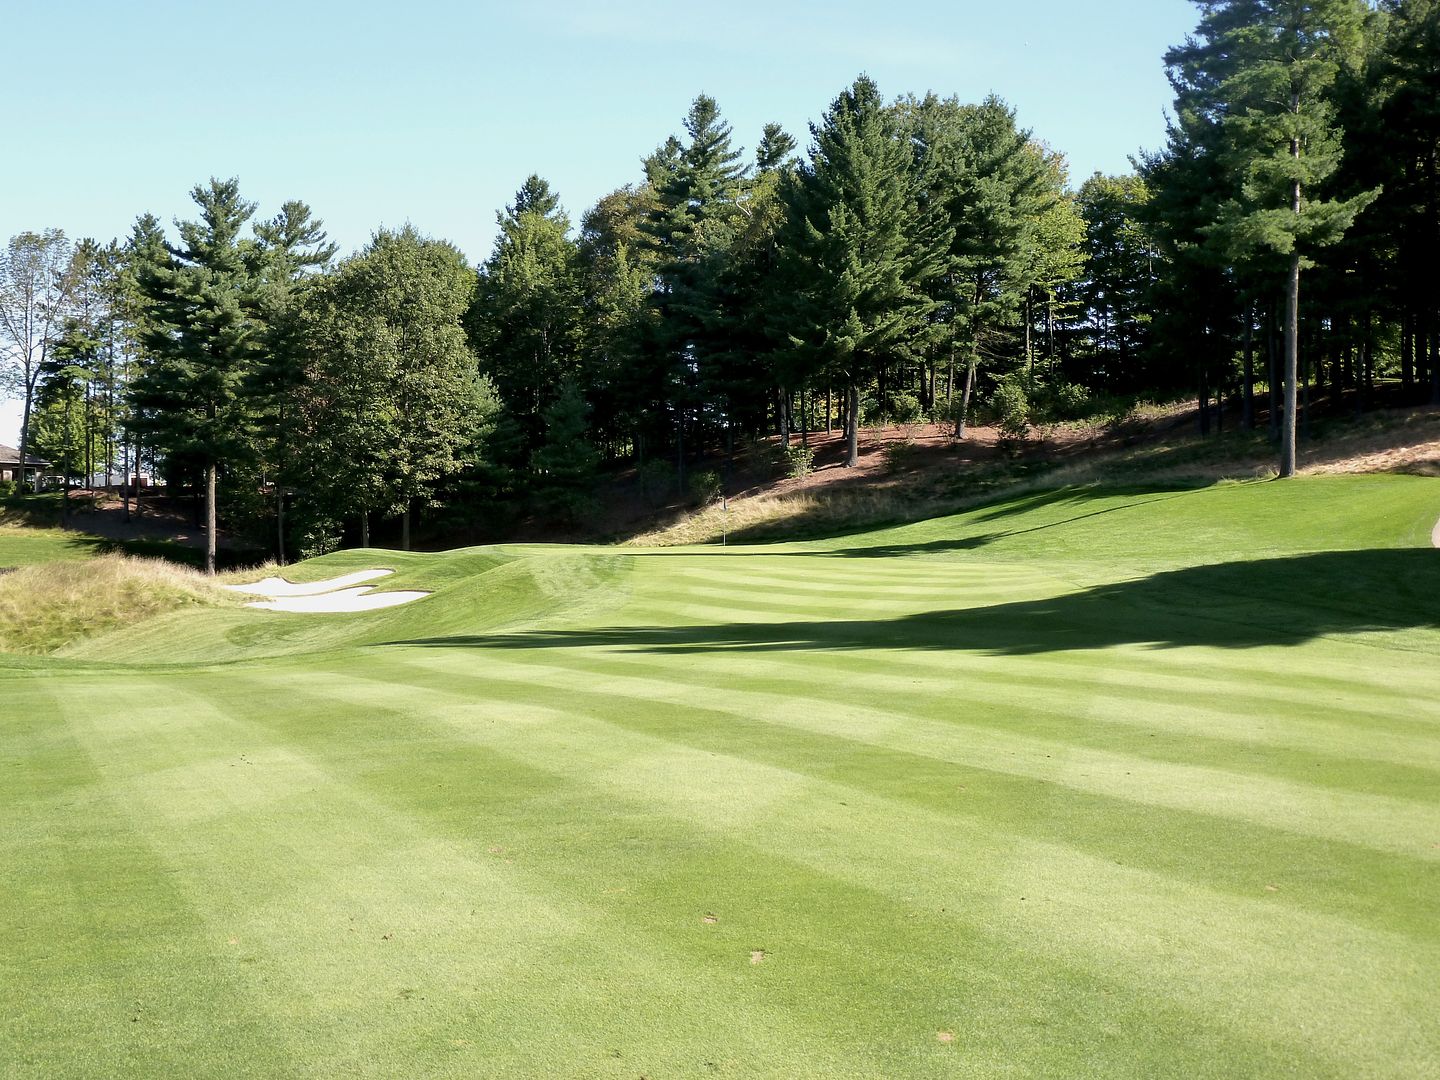
If laying-up, one has the choice of laying up to the top of the hill, leaving a flatter lie, a better view of the green and an only slightly uphill approach.
 |
| 15th Approach from 150 Yards |
Alternatively, the golfer can lay-up to the bottom of the hill leaving a very uphill approach to a really cool skyline green. From here it is very difficult to judge distance, so beware the false-front!
 |
| 15th Approach from 75 Yards |
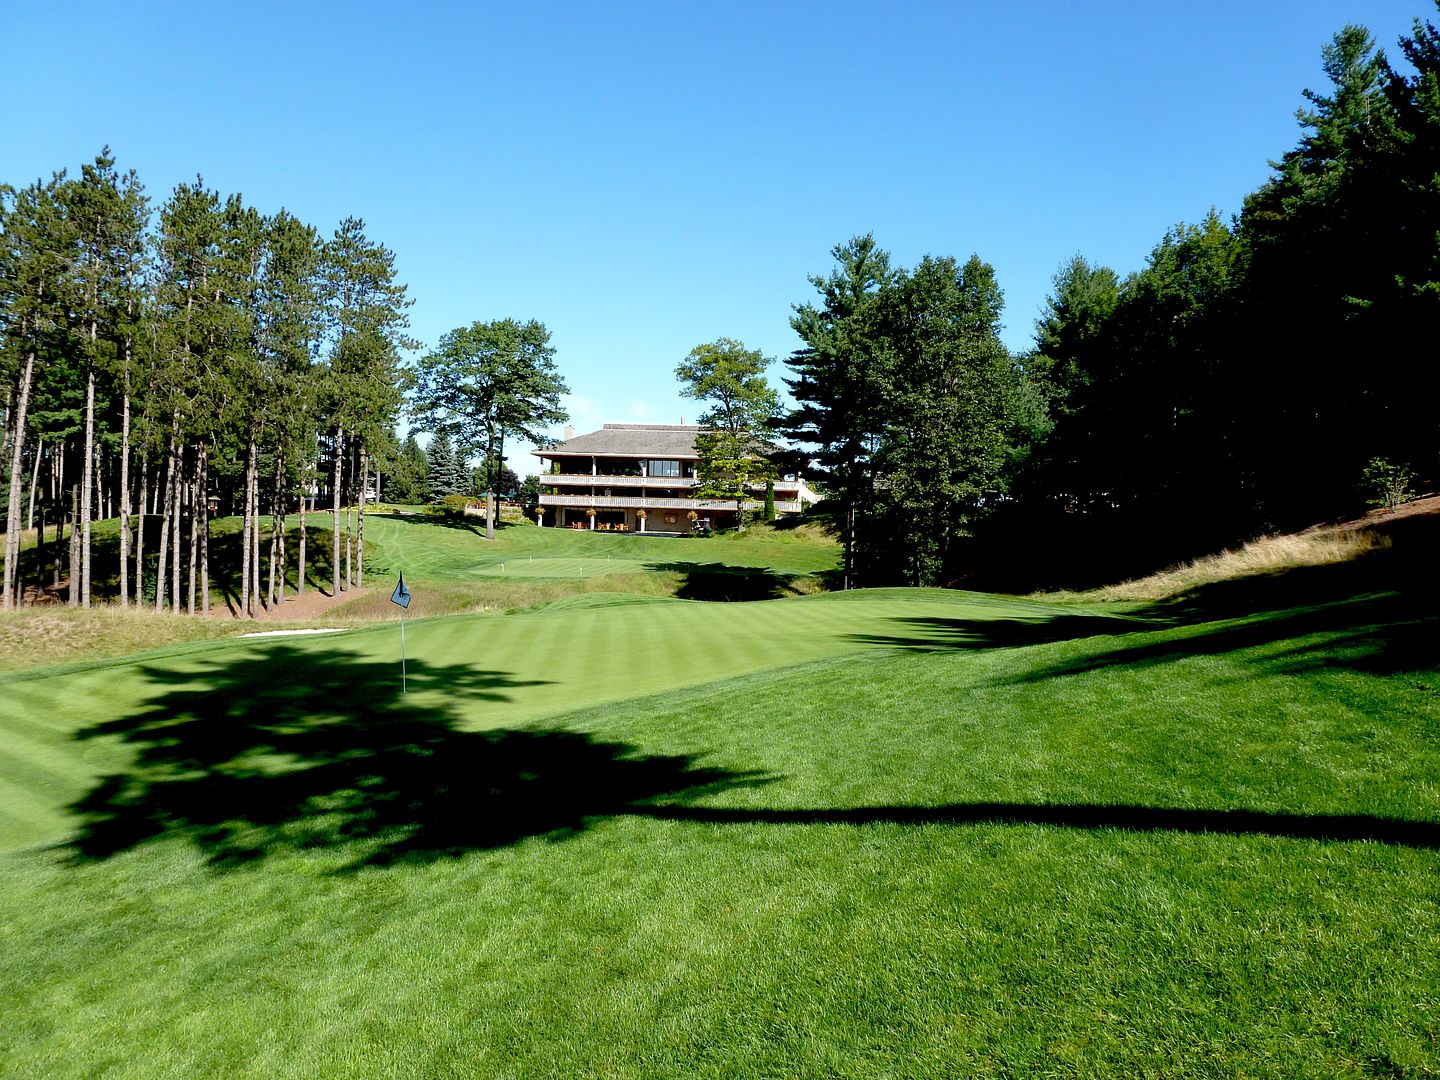
The 15th green is the most tilted on the course. The green slopes significantly from back-to-front. Putting from long of the pin is very difficult and the golfer risks putting off the green and down the false-front. There's nothing more embarrassing than having to put your putter away and having to reach for your wedge...!
 |
| 15th Green from Left |
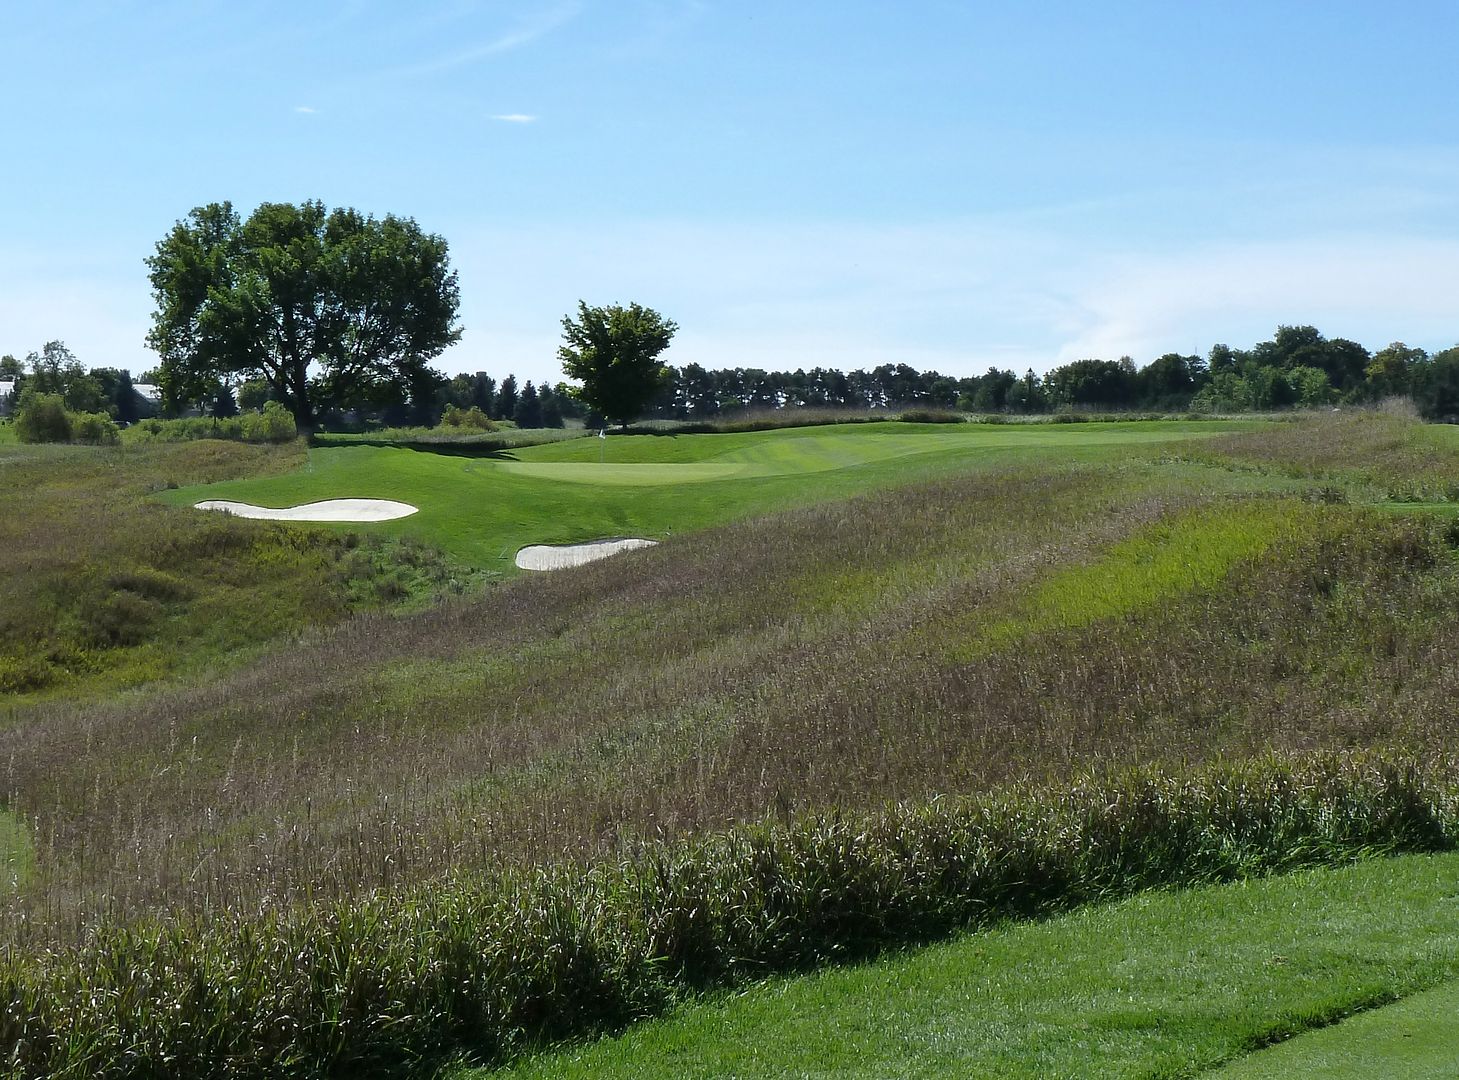
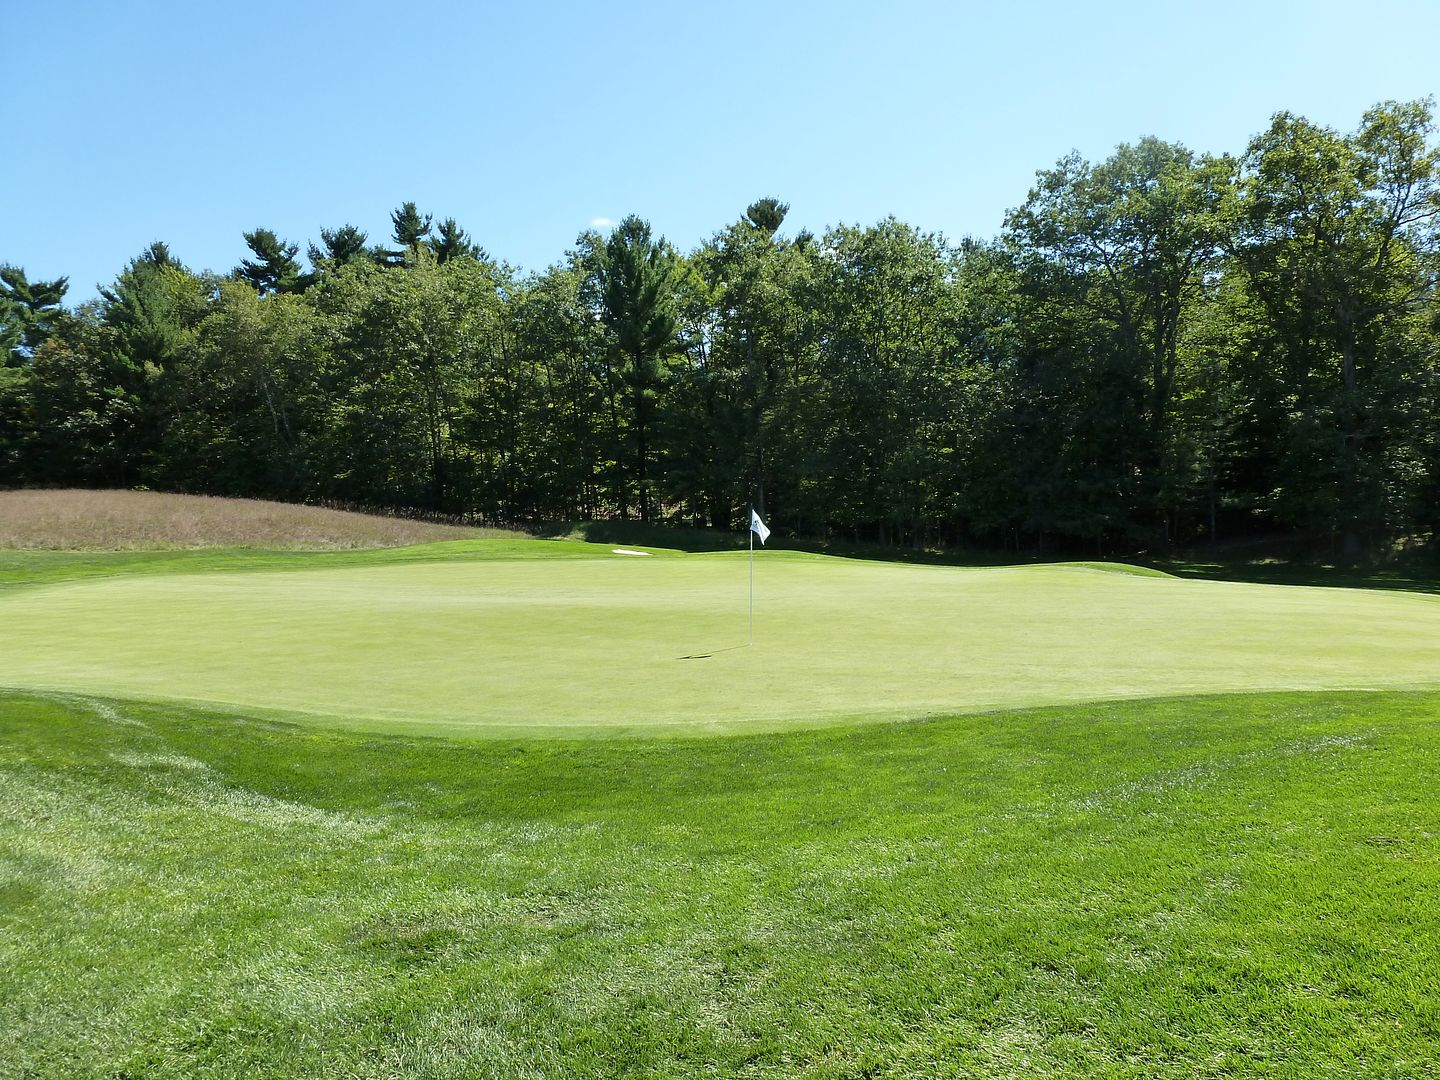
Hole 16: Par 3, 223 Yards
This is one of those holes that make you say "wow" as soon as you step on the tee. The 16th is one of the best long par-3s in the country. This is another hole that looks like it was just found on the terrain. There is 60 yards of bailout to the left of the green and yet the golfer's eye is drawn to the pin and the bunkers on the right and the thrill of the Hero Shot.
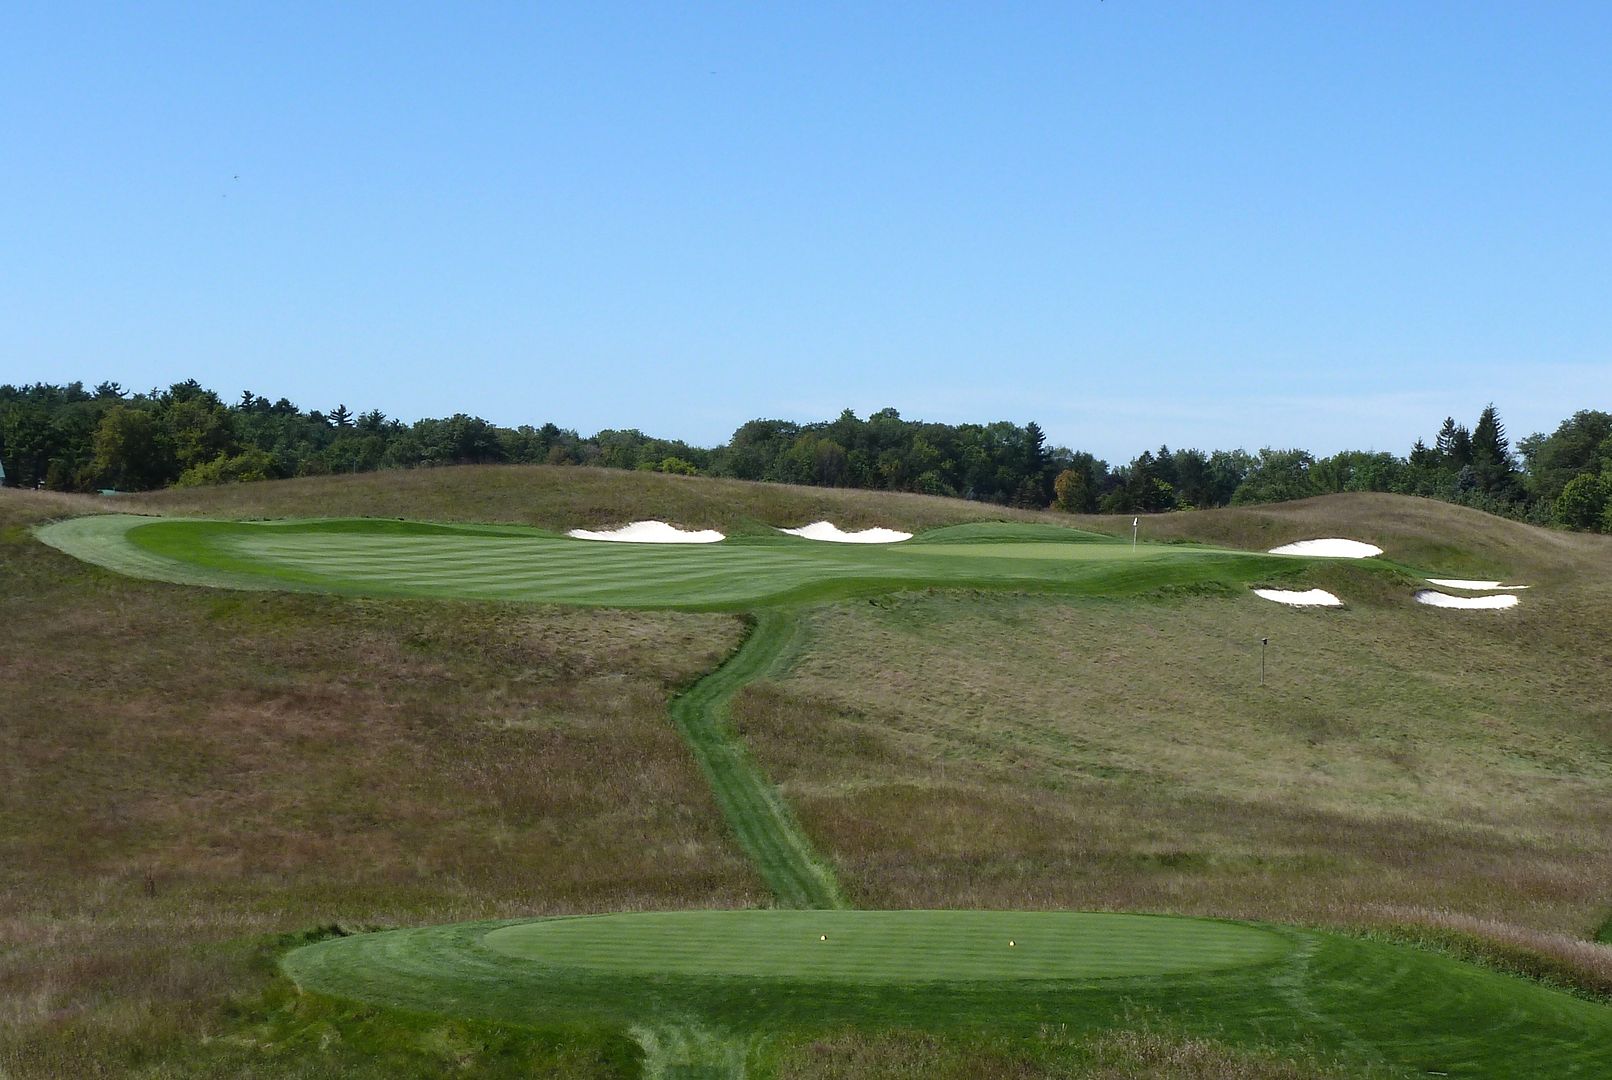 |
| 16th Tee |
The forward tees, while shorter, are completely blind and may just be more difficult than the back tees...
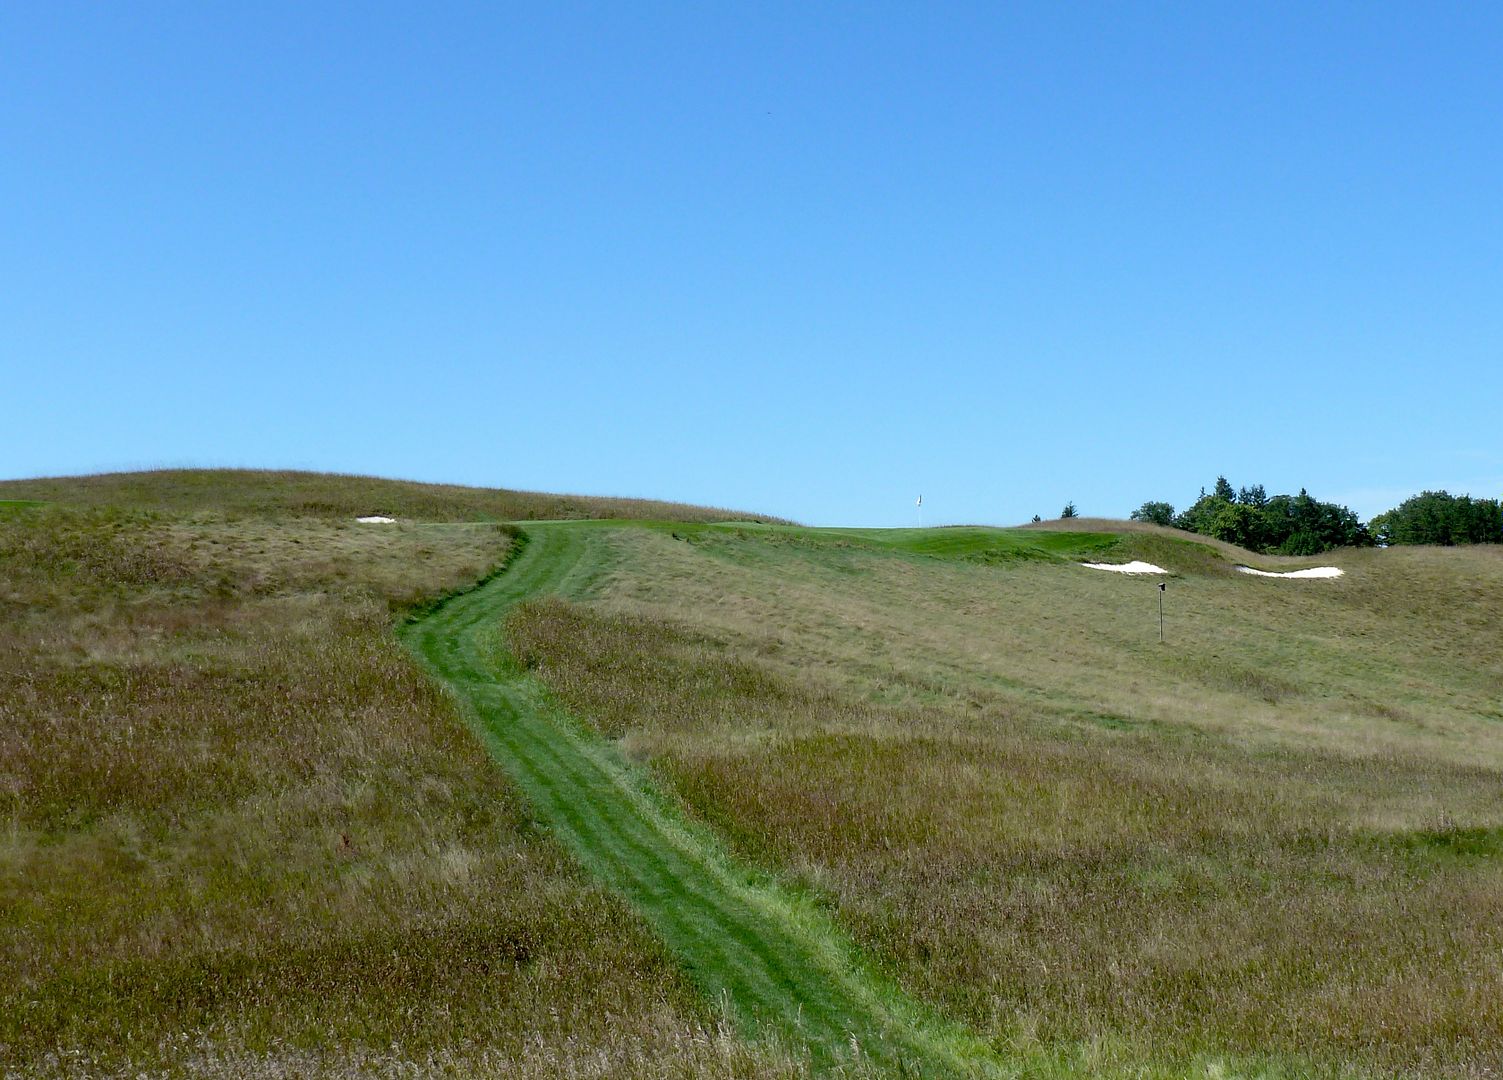 |
| 16th Forward Tees -- Nice Skyline Green from Here! |
With a strong left-to-right crosswind, it is easy to miss short-right. But, missing there is bad...
 |
| Right of 16th Green (yep, that's my ball, oops!) |
 |
| 16th from Behind |
Beacon Hall is one of the very best modern golf courses in Canada. Picking holes for this review was very difficult, as almost every hole on the course is worthy of study. What holes are your favorites?

No comments:
Post a Comment