 Pinehurst Resort (No. 2)
 Pinehurst, North Carolina, United States
Architects: Donald Ross (1907-1931); Jack Nicklaus (1986); Rees Jones (1987); Restoration by Bill Coore and Ben Crenshaw (2011)
7,485 Yards, Par 70
Rating/Slope: 76.0/137
My Quick Review: The once tired Pinehurst No.2 has been revived by the clever Coore/Crenshaw restoration and once again must be considered among the world's elite layouts.
Scorecard Information

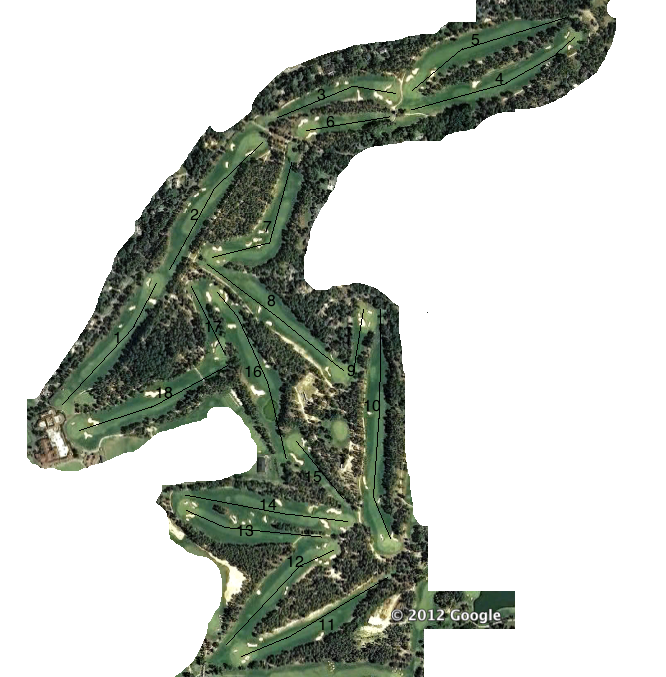
The Routing - NB: this is pre-restoration
All Yardages and Photos from Blue Tees unless otherwise indicated.
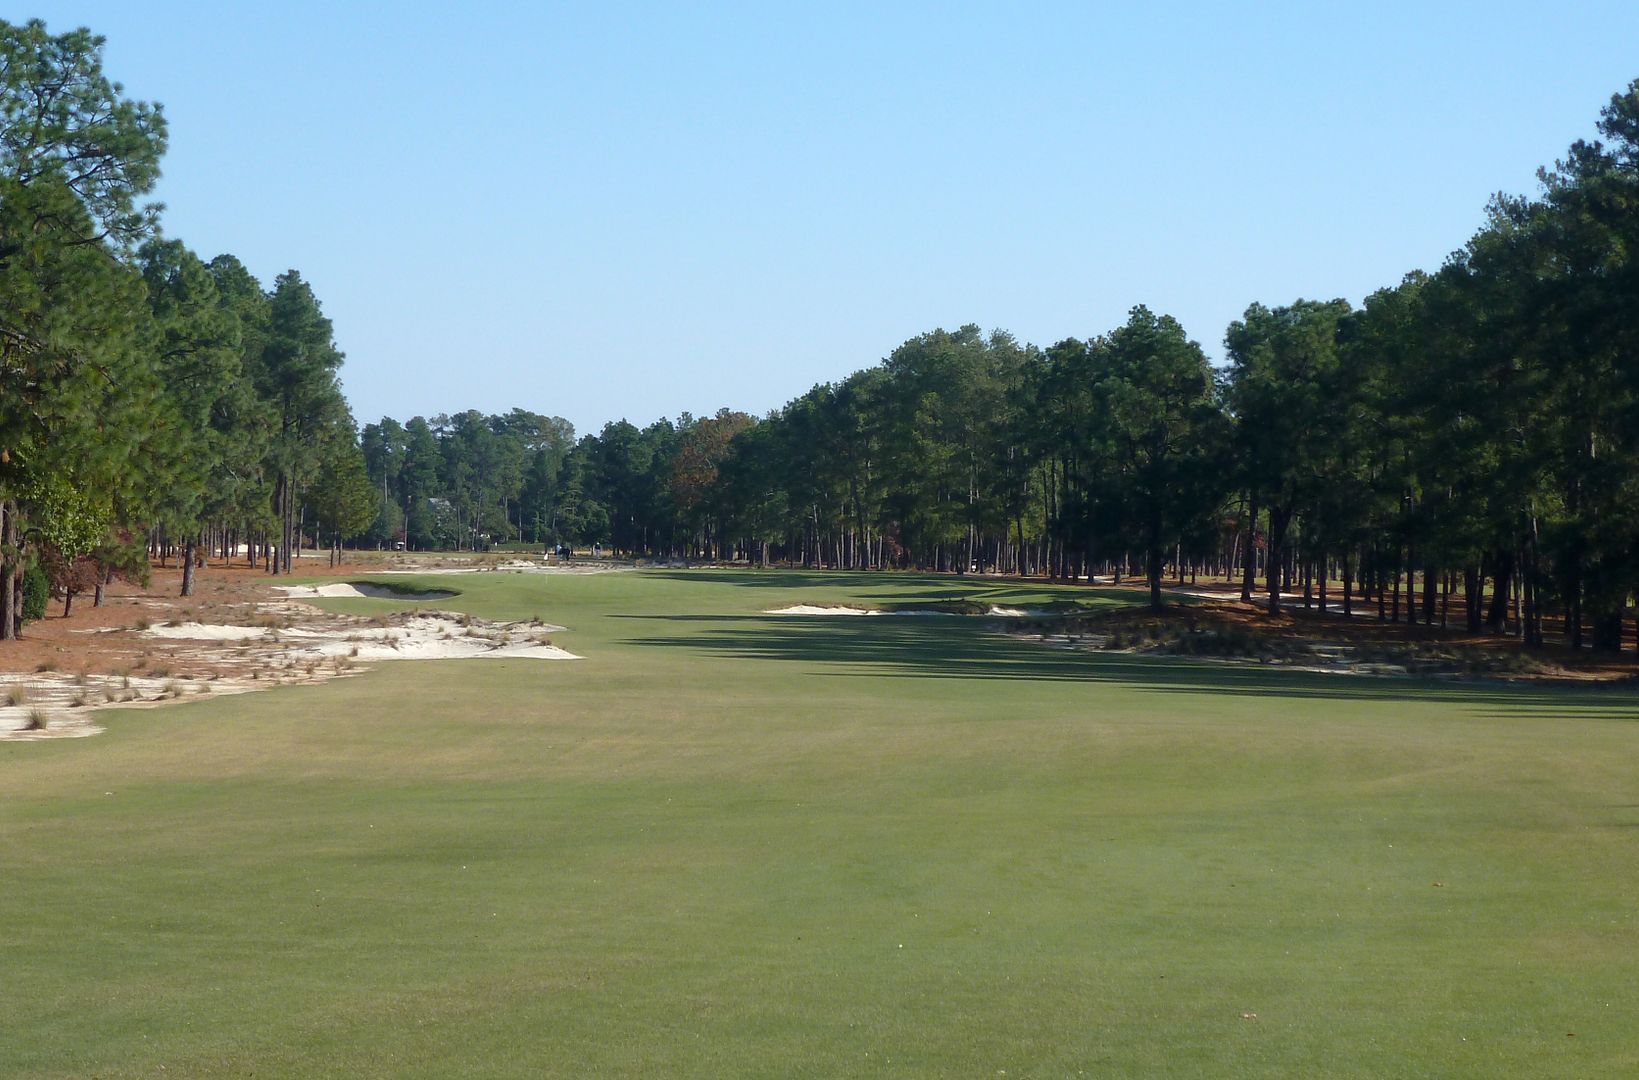
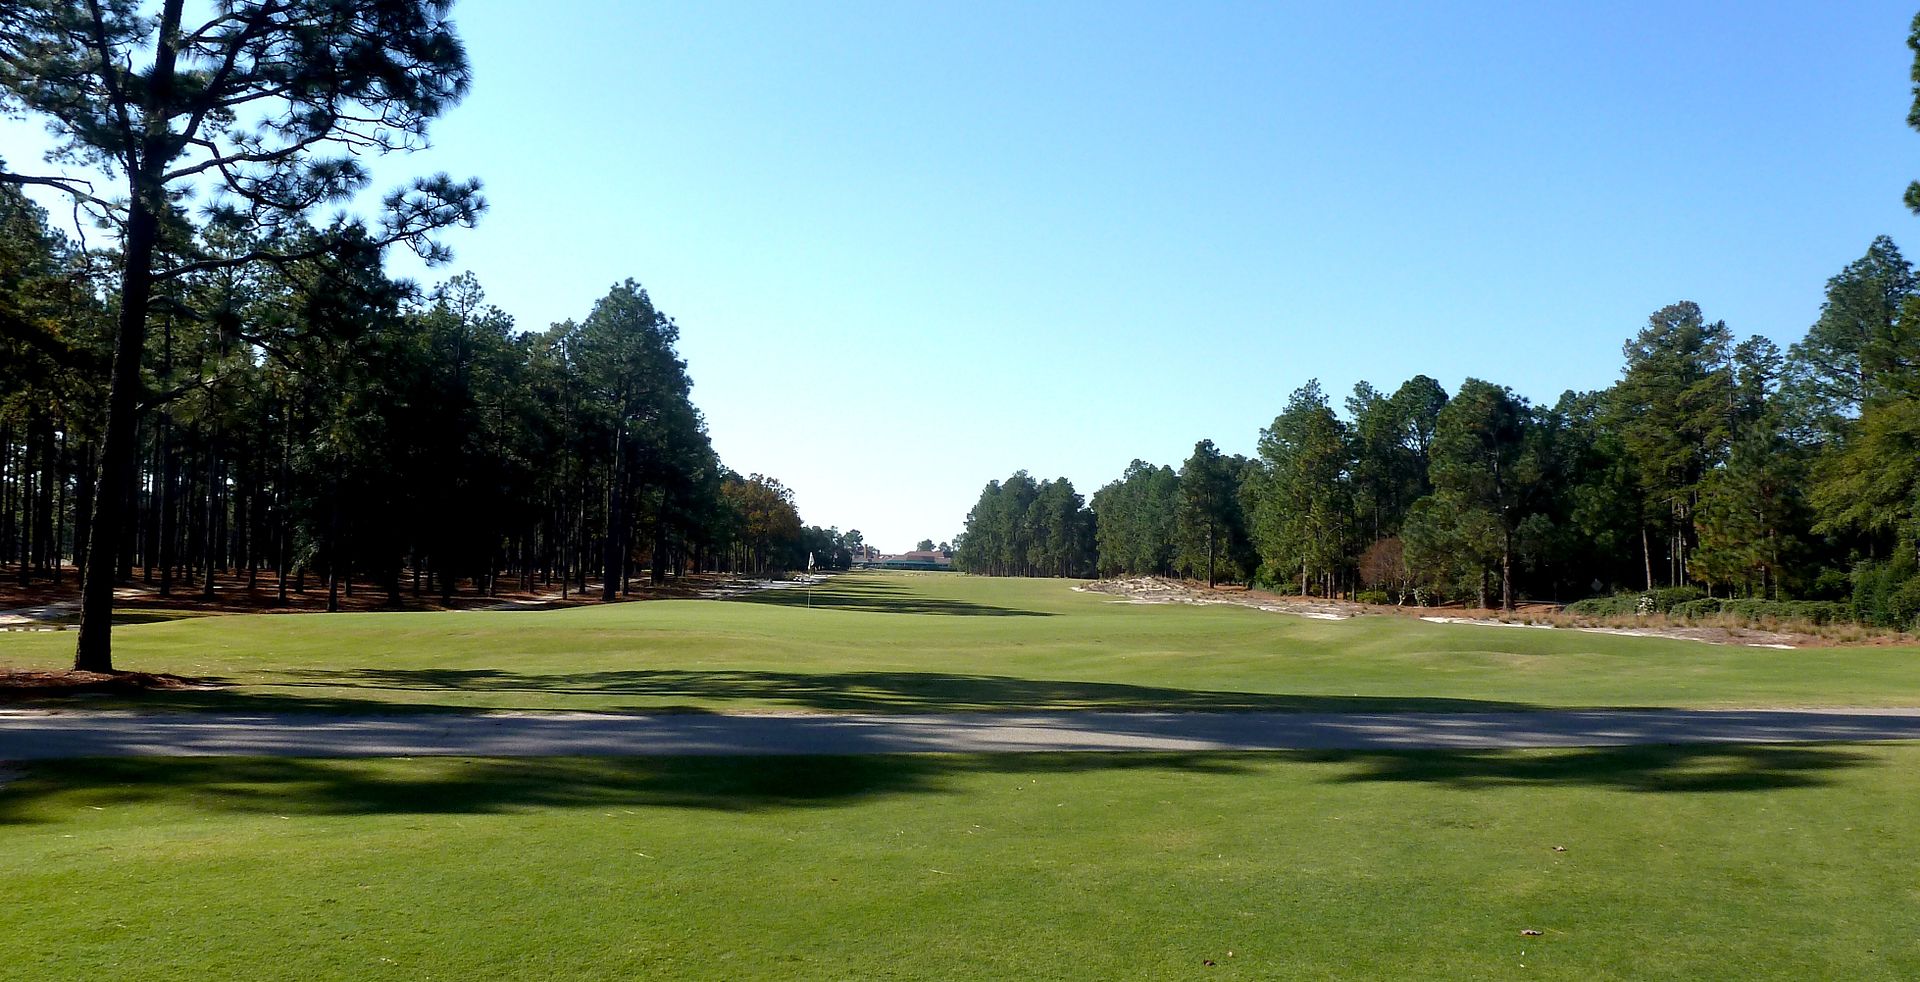
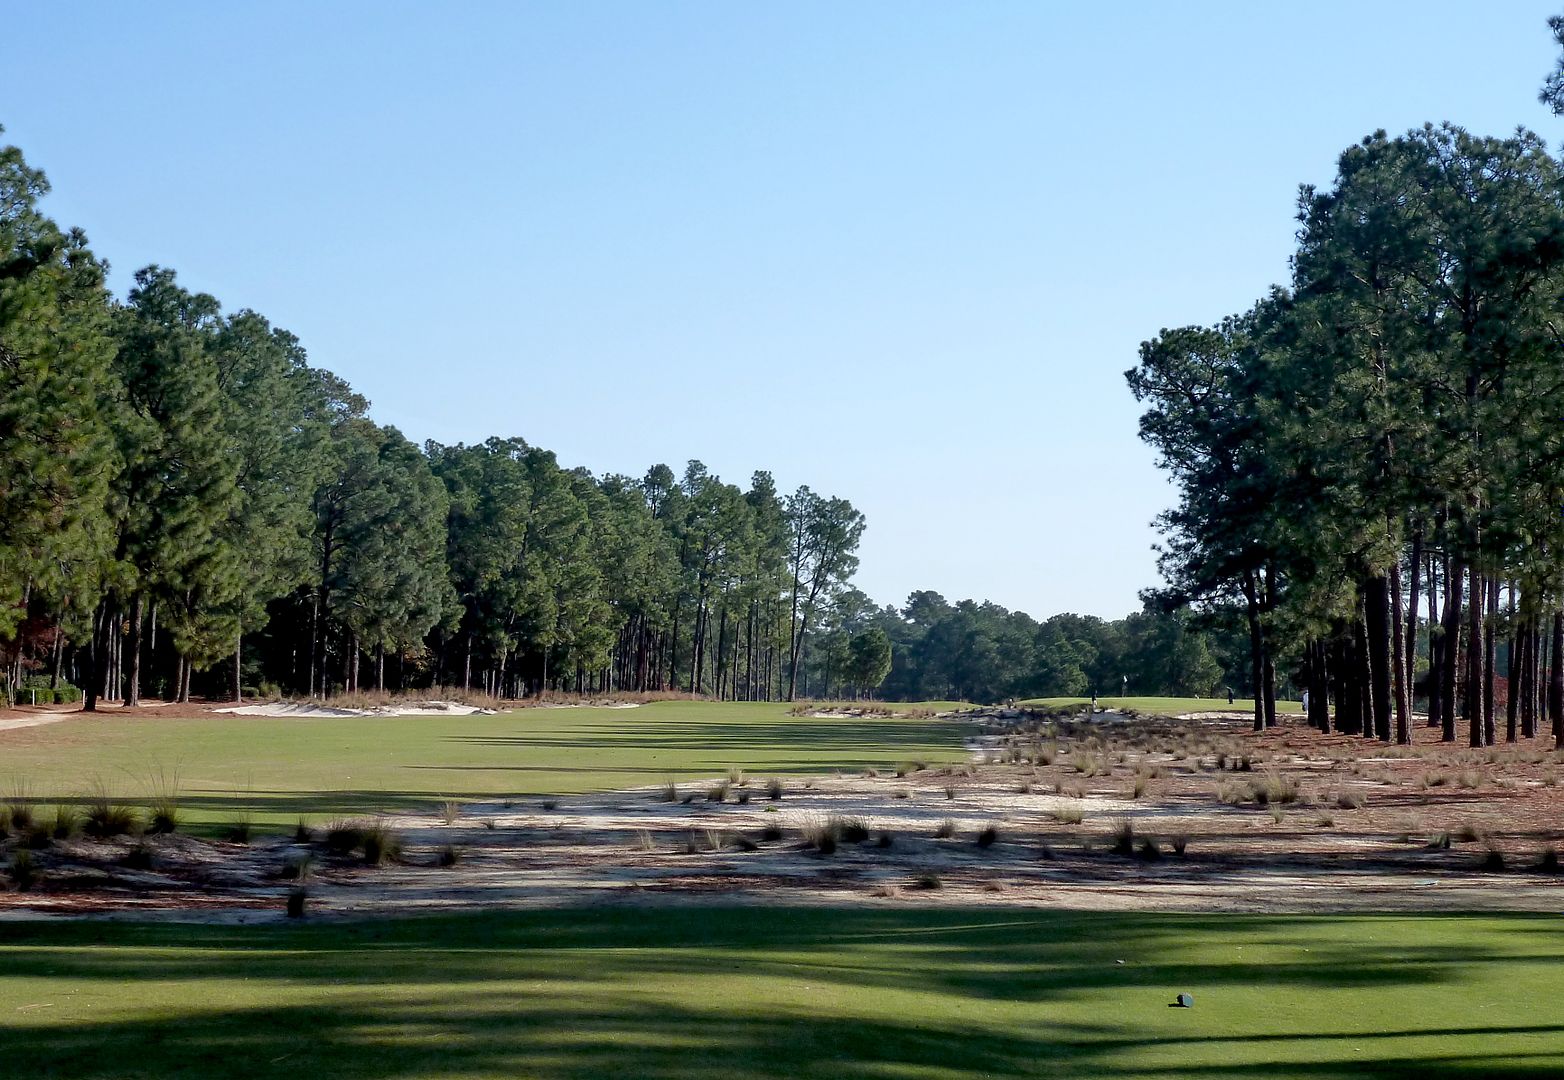
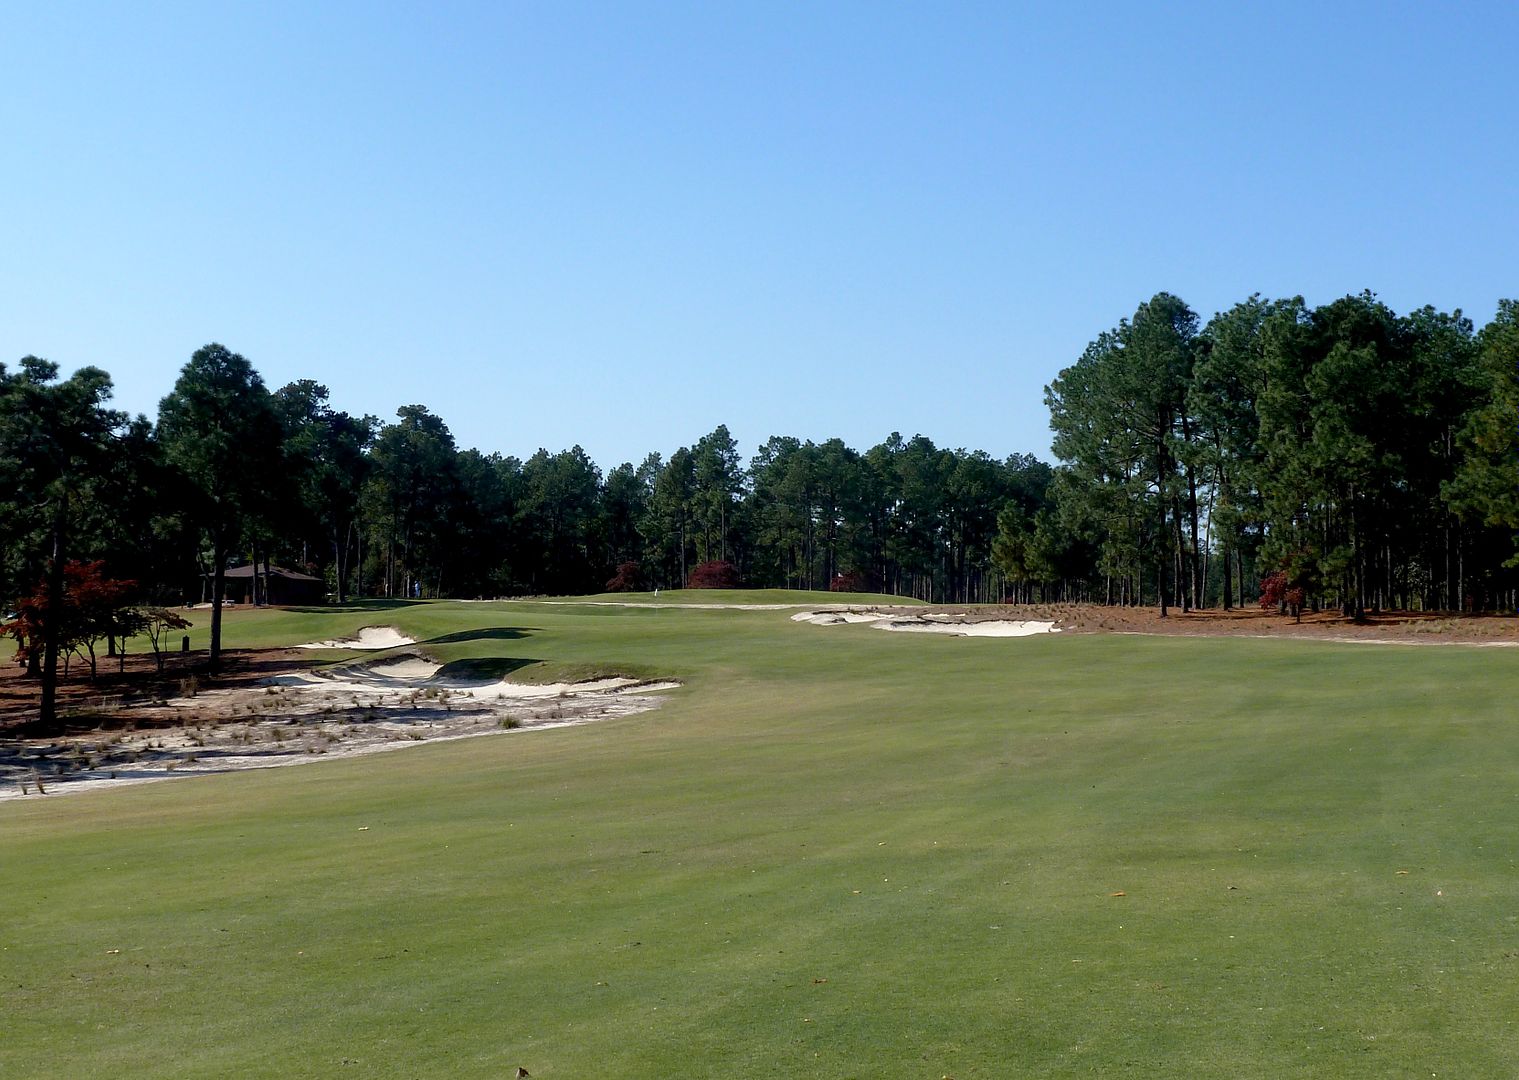
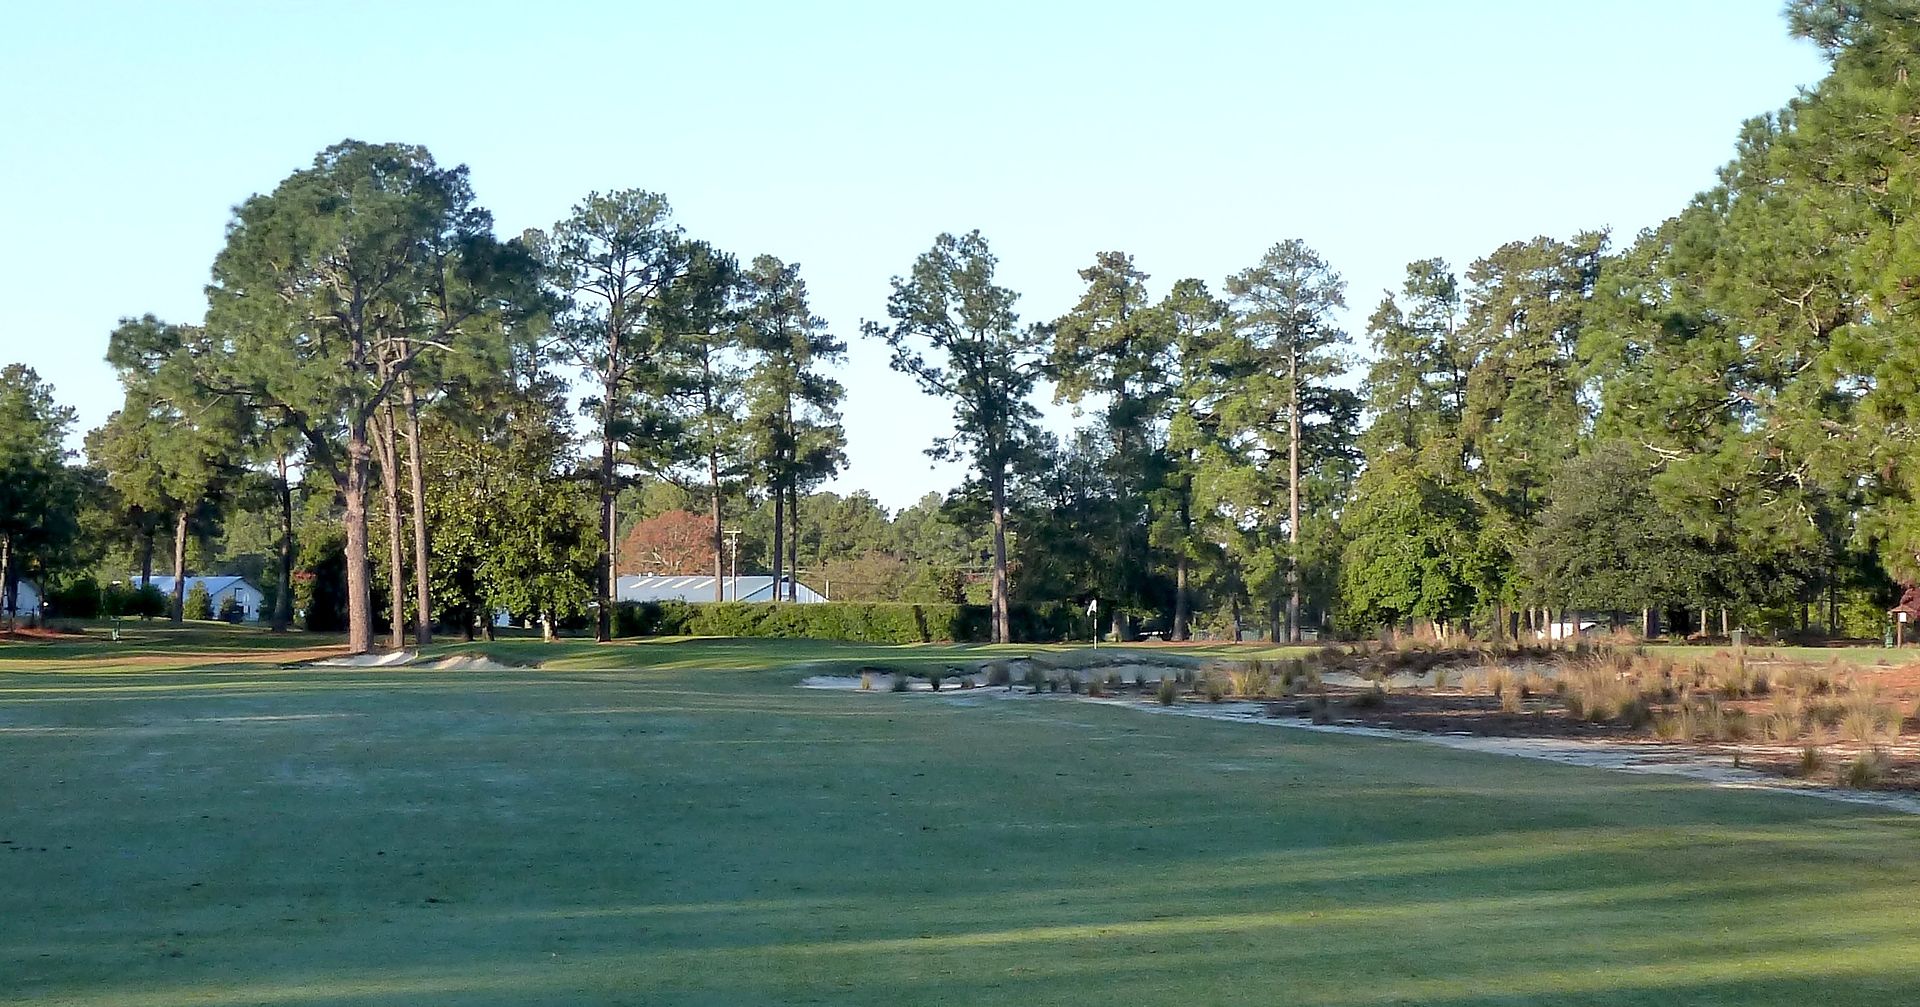
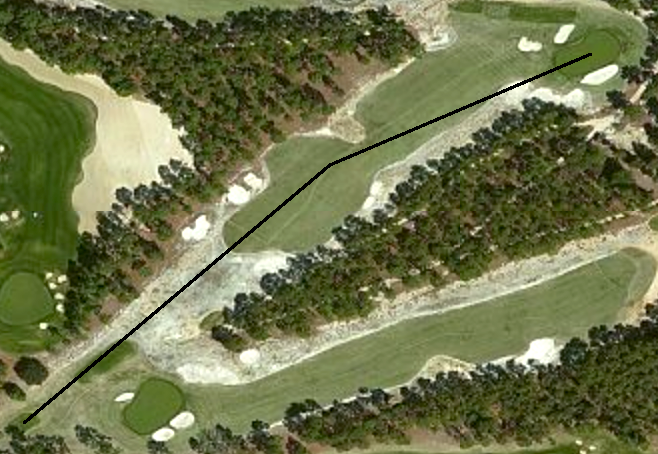
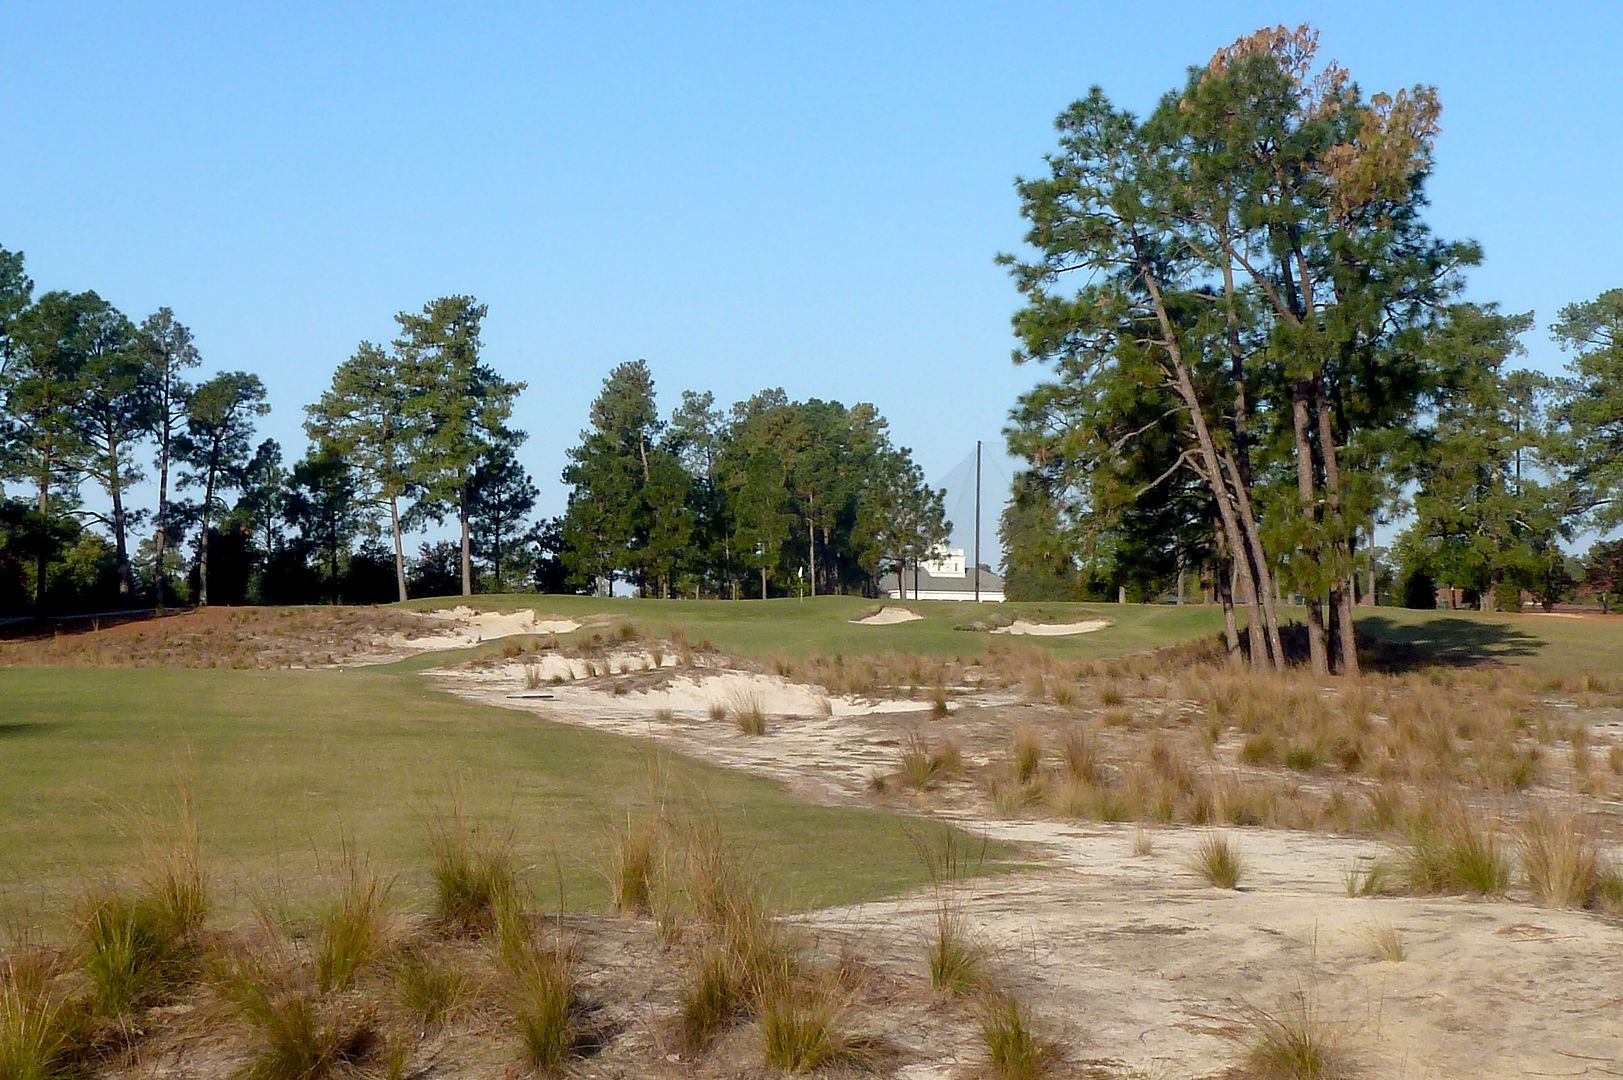
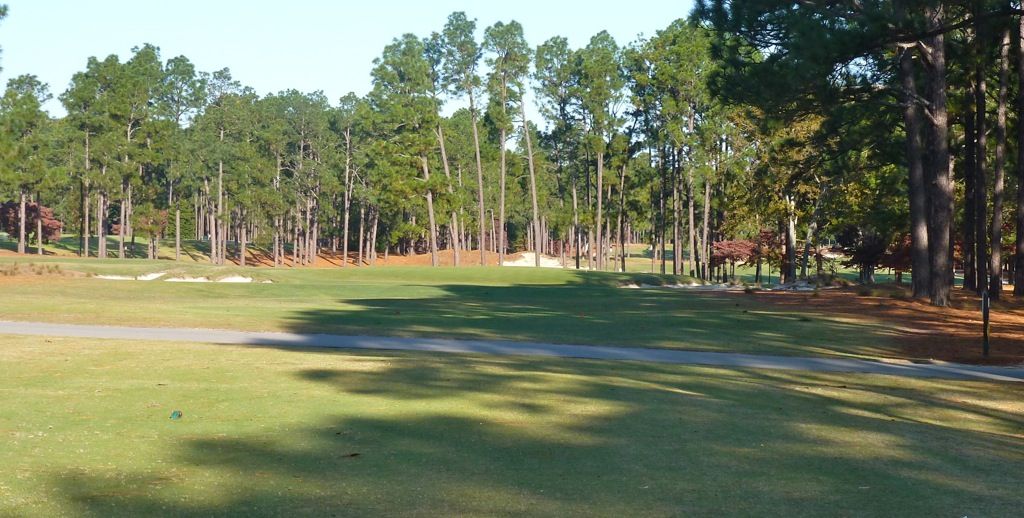
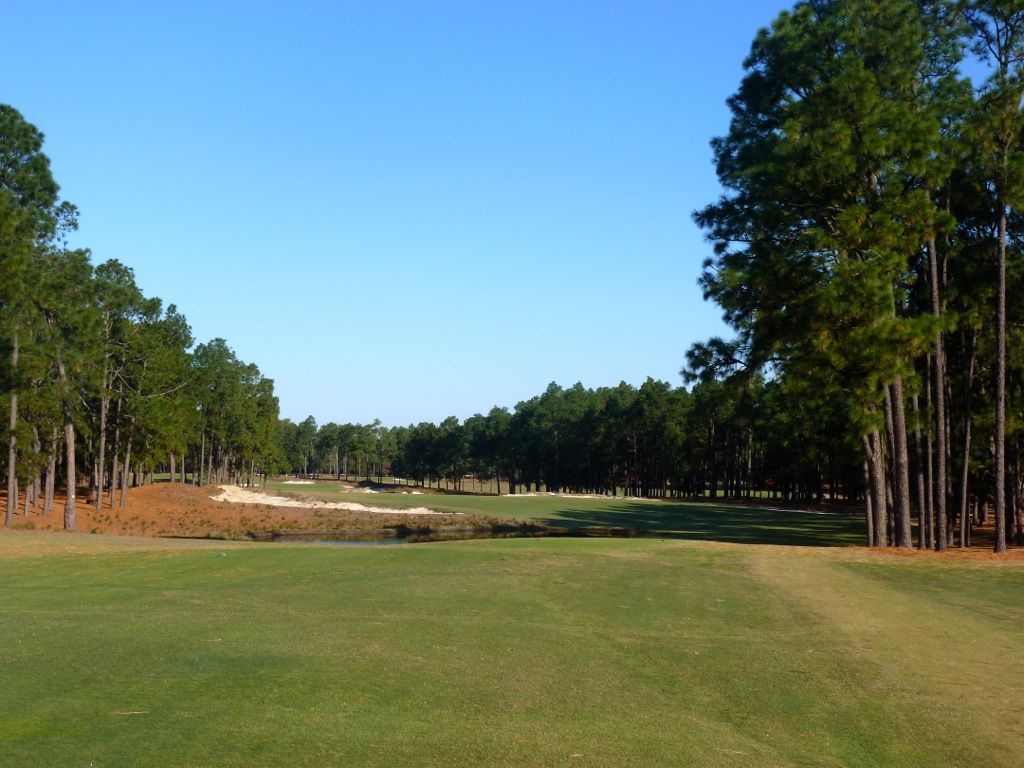
Hole 1: Par 4, 391 Yards
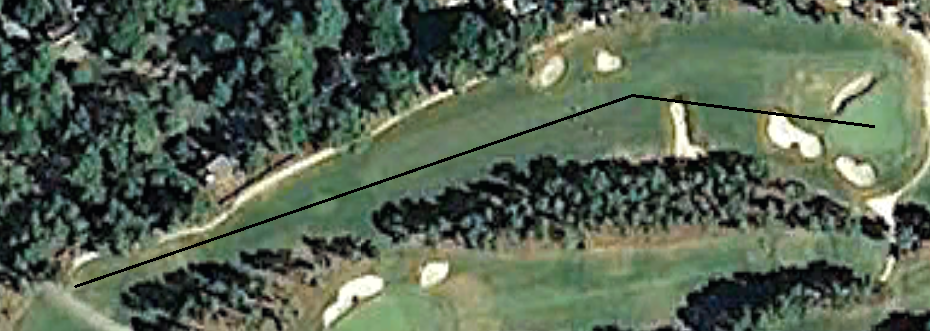
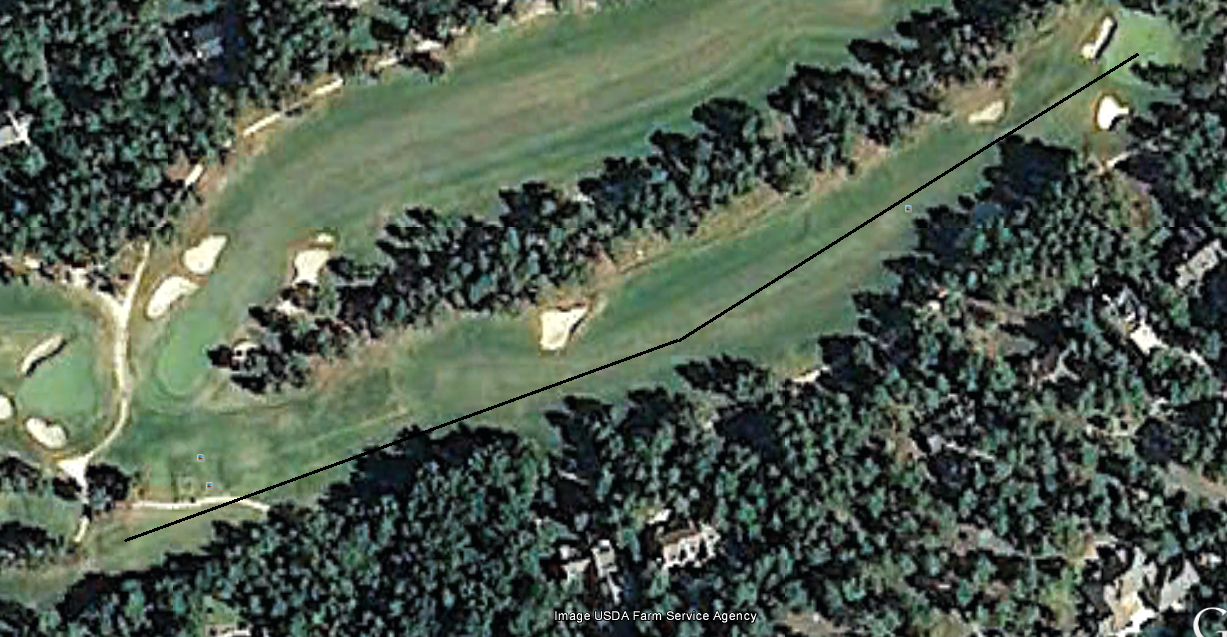
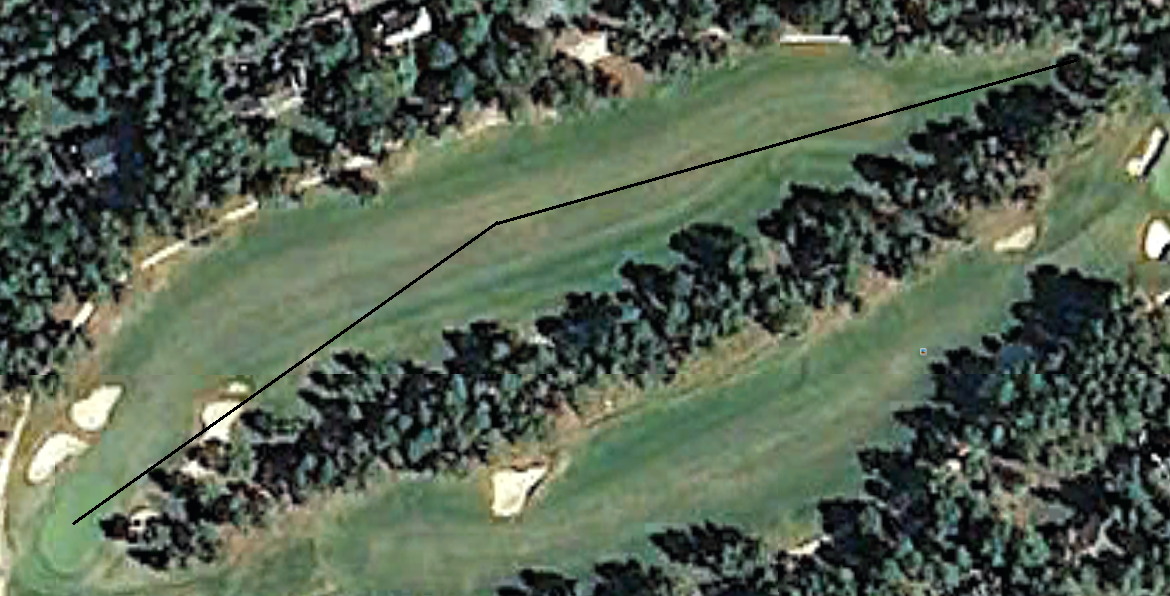
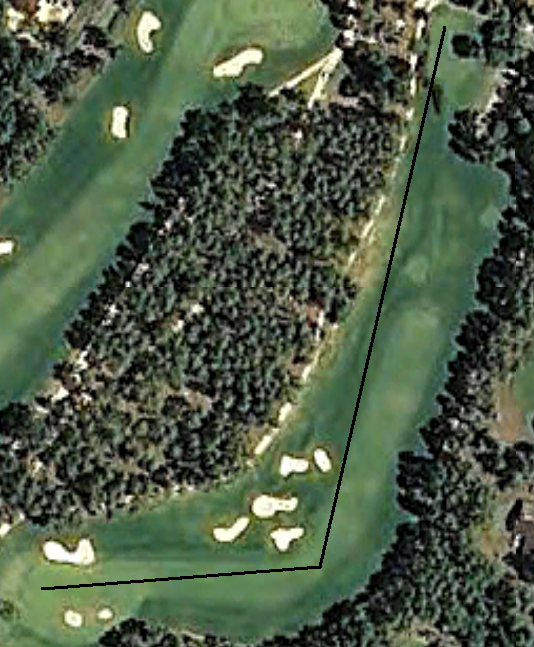
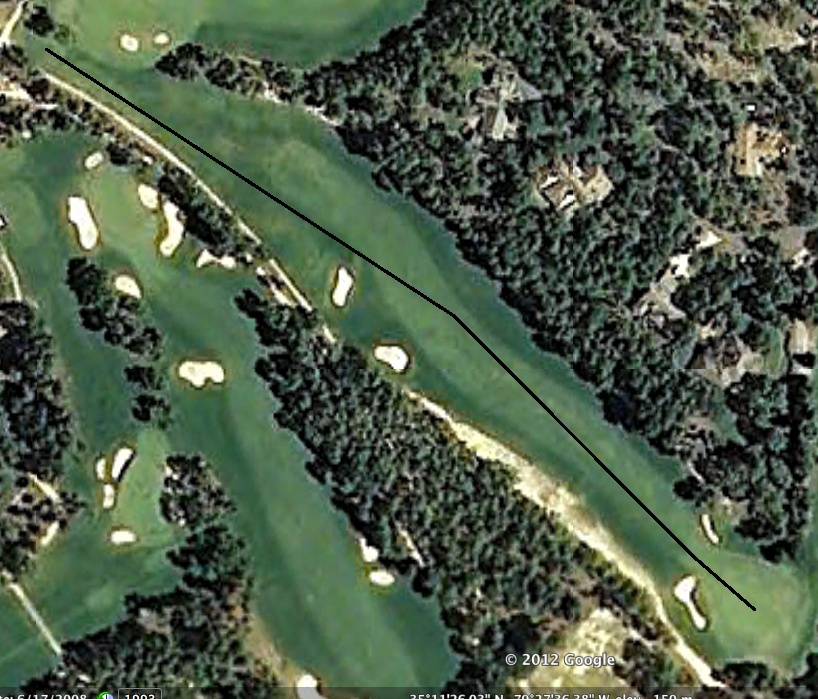
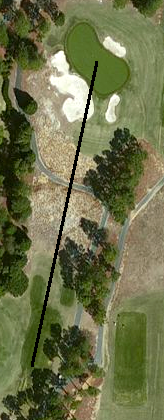
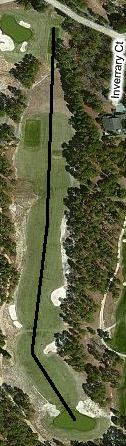
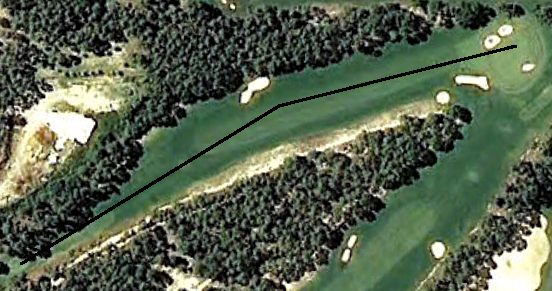
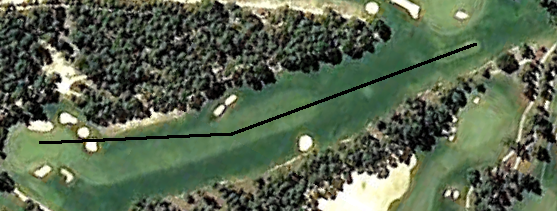
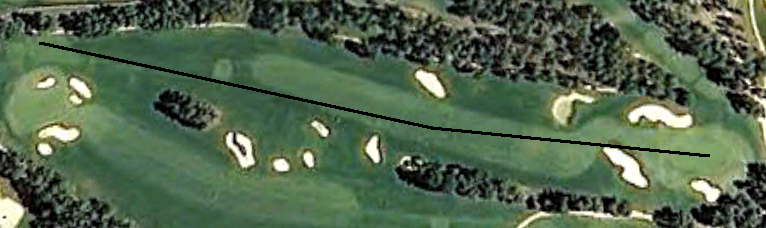
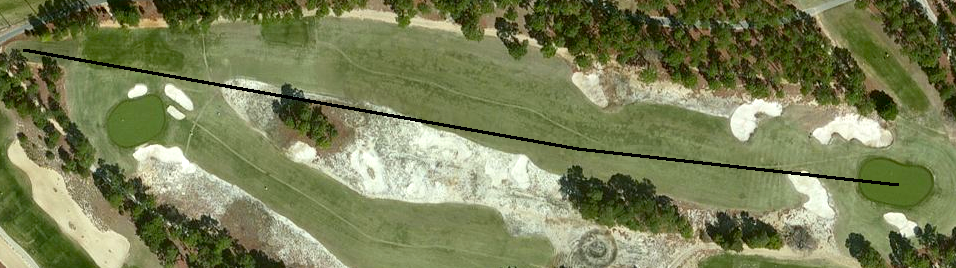
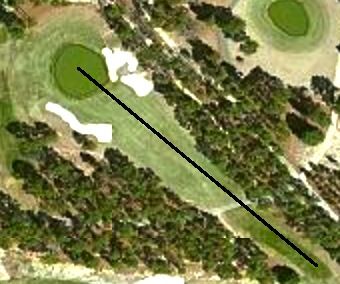
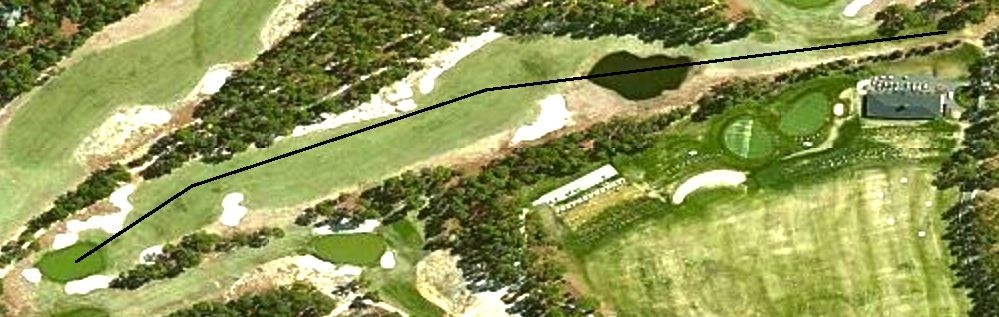
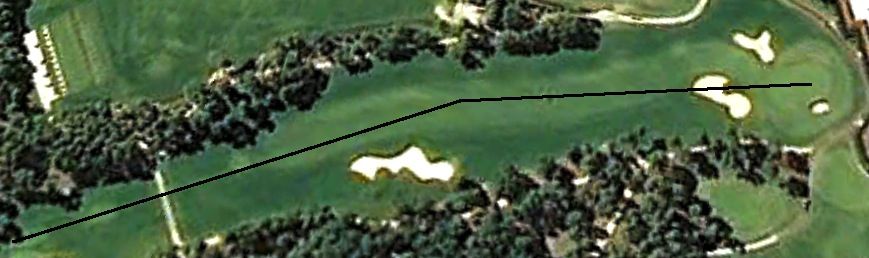
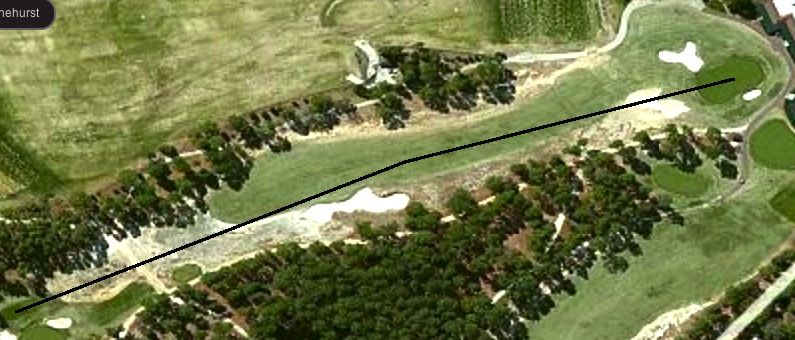
2008 Aerial:
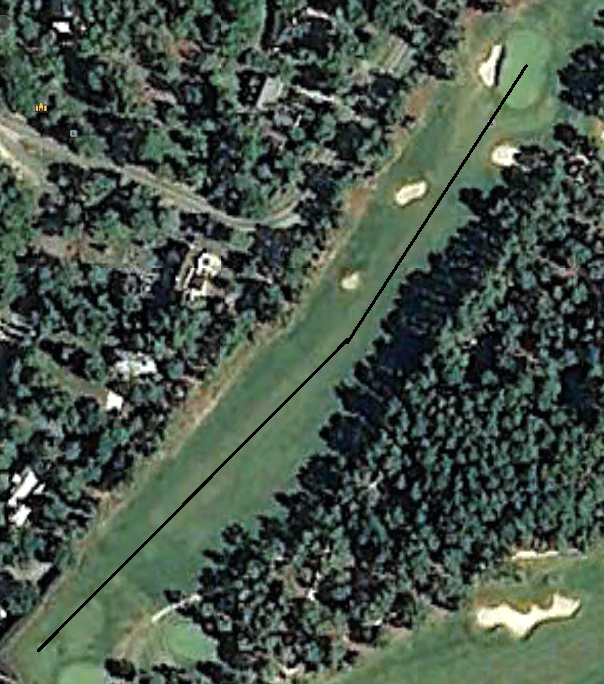
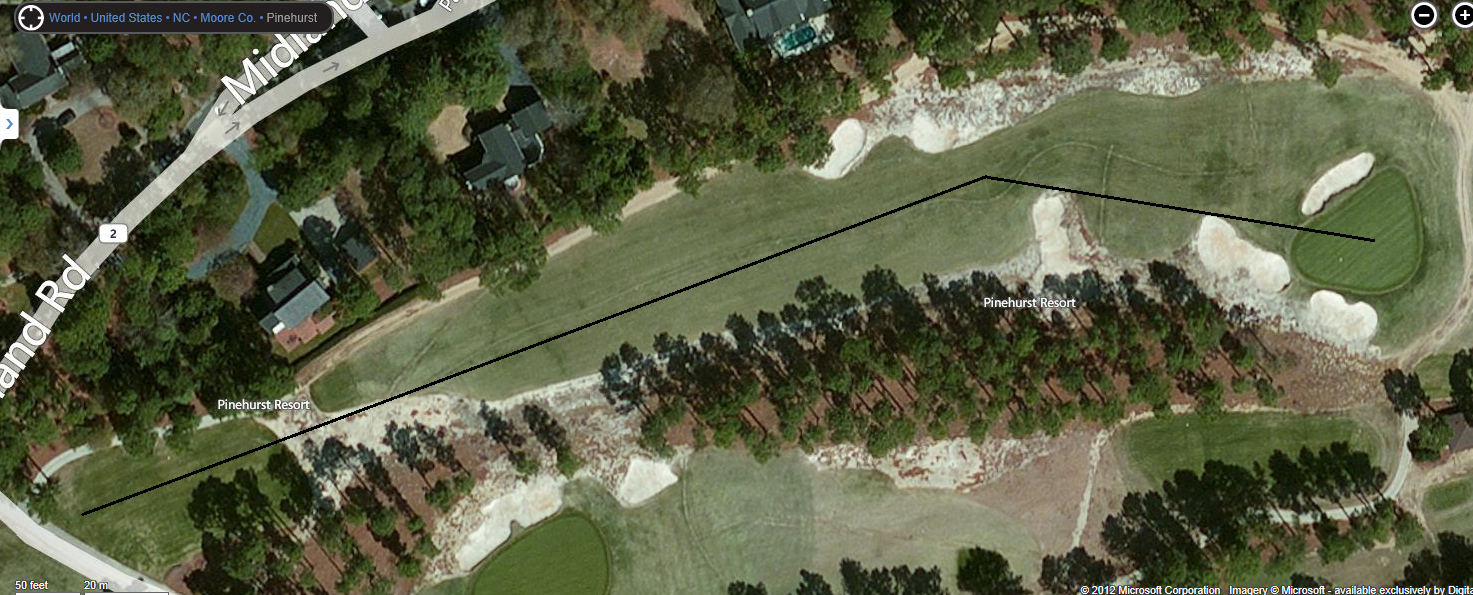
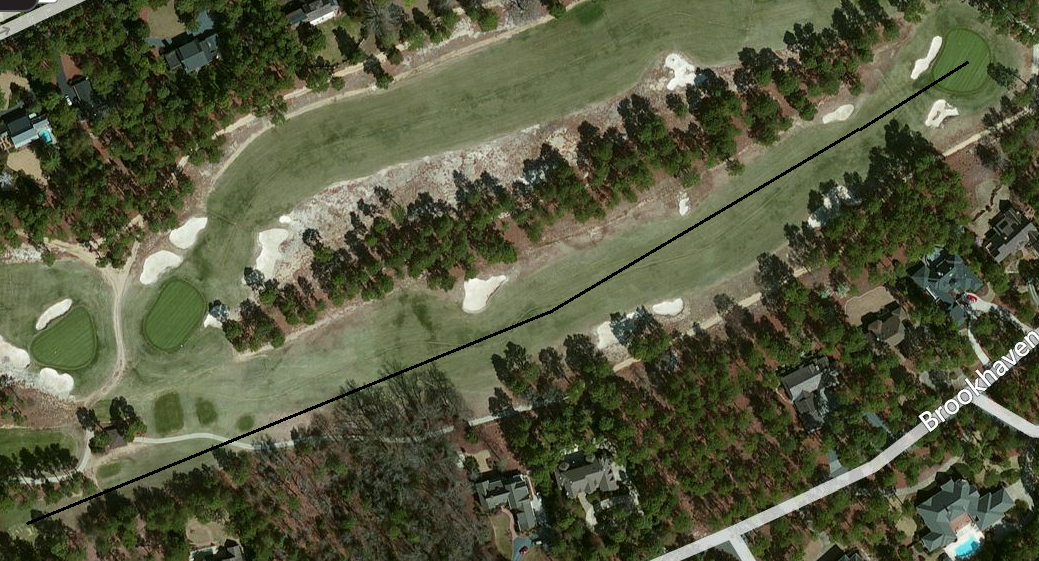
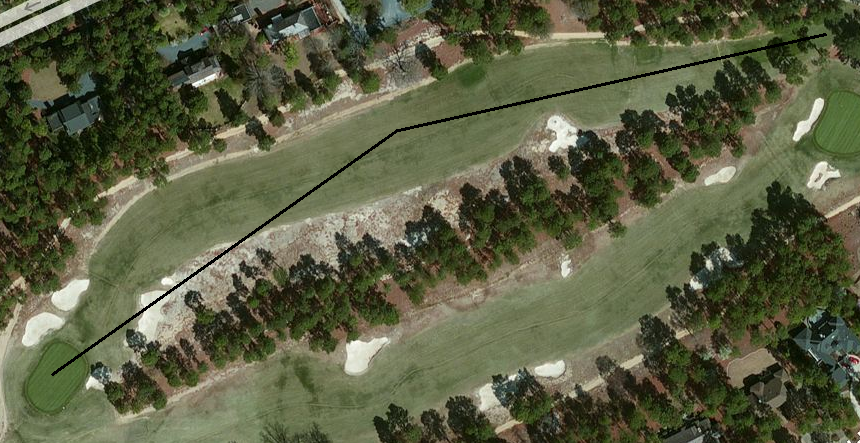
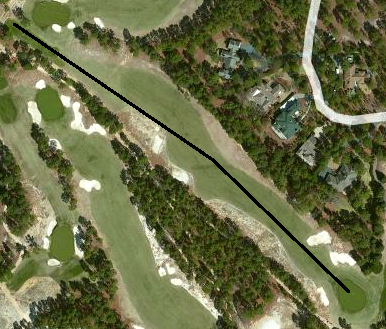
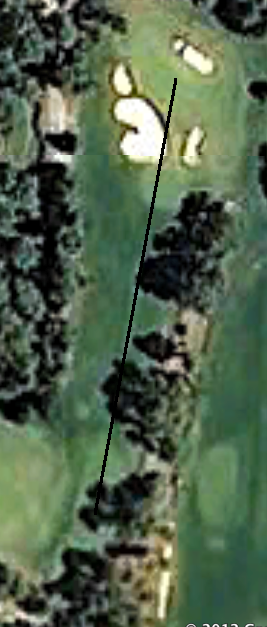
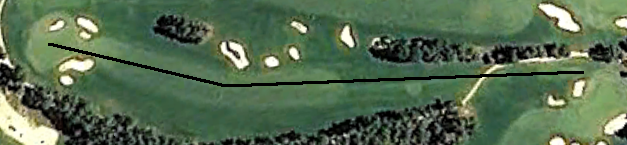
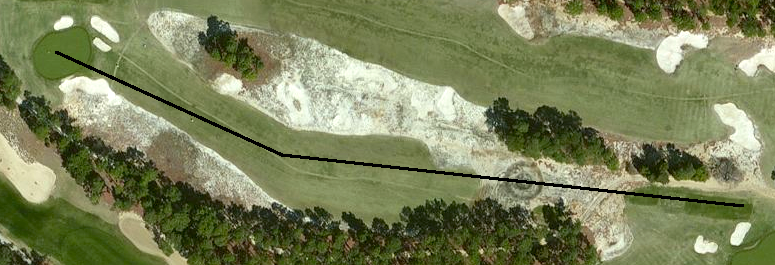
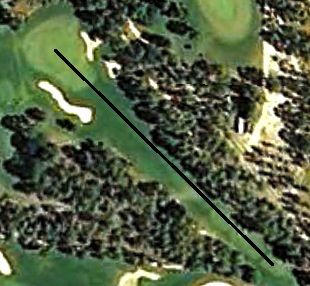
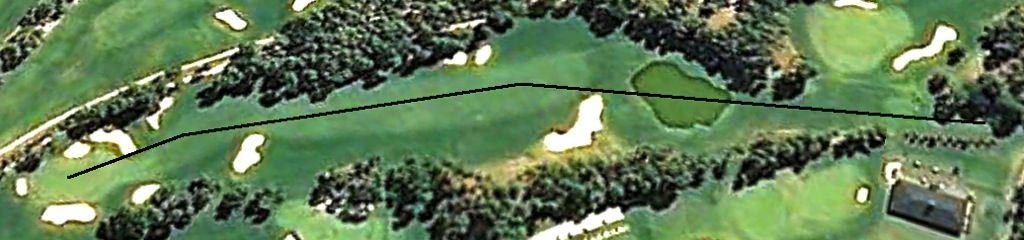
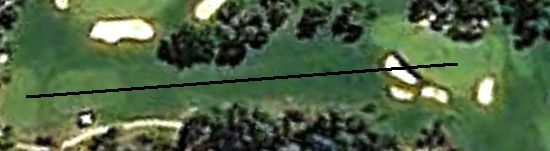
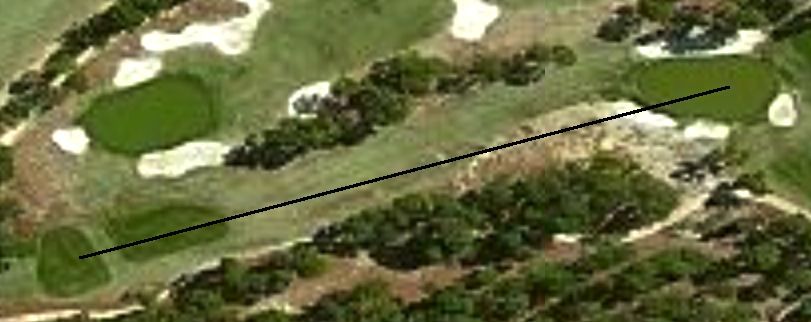
2011 Aerial:
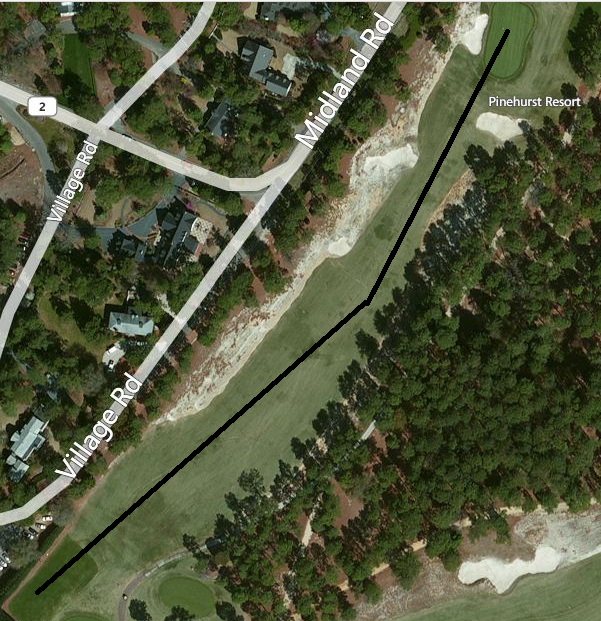
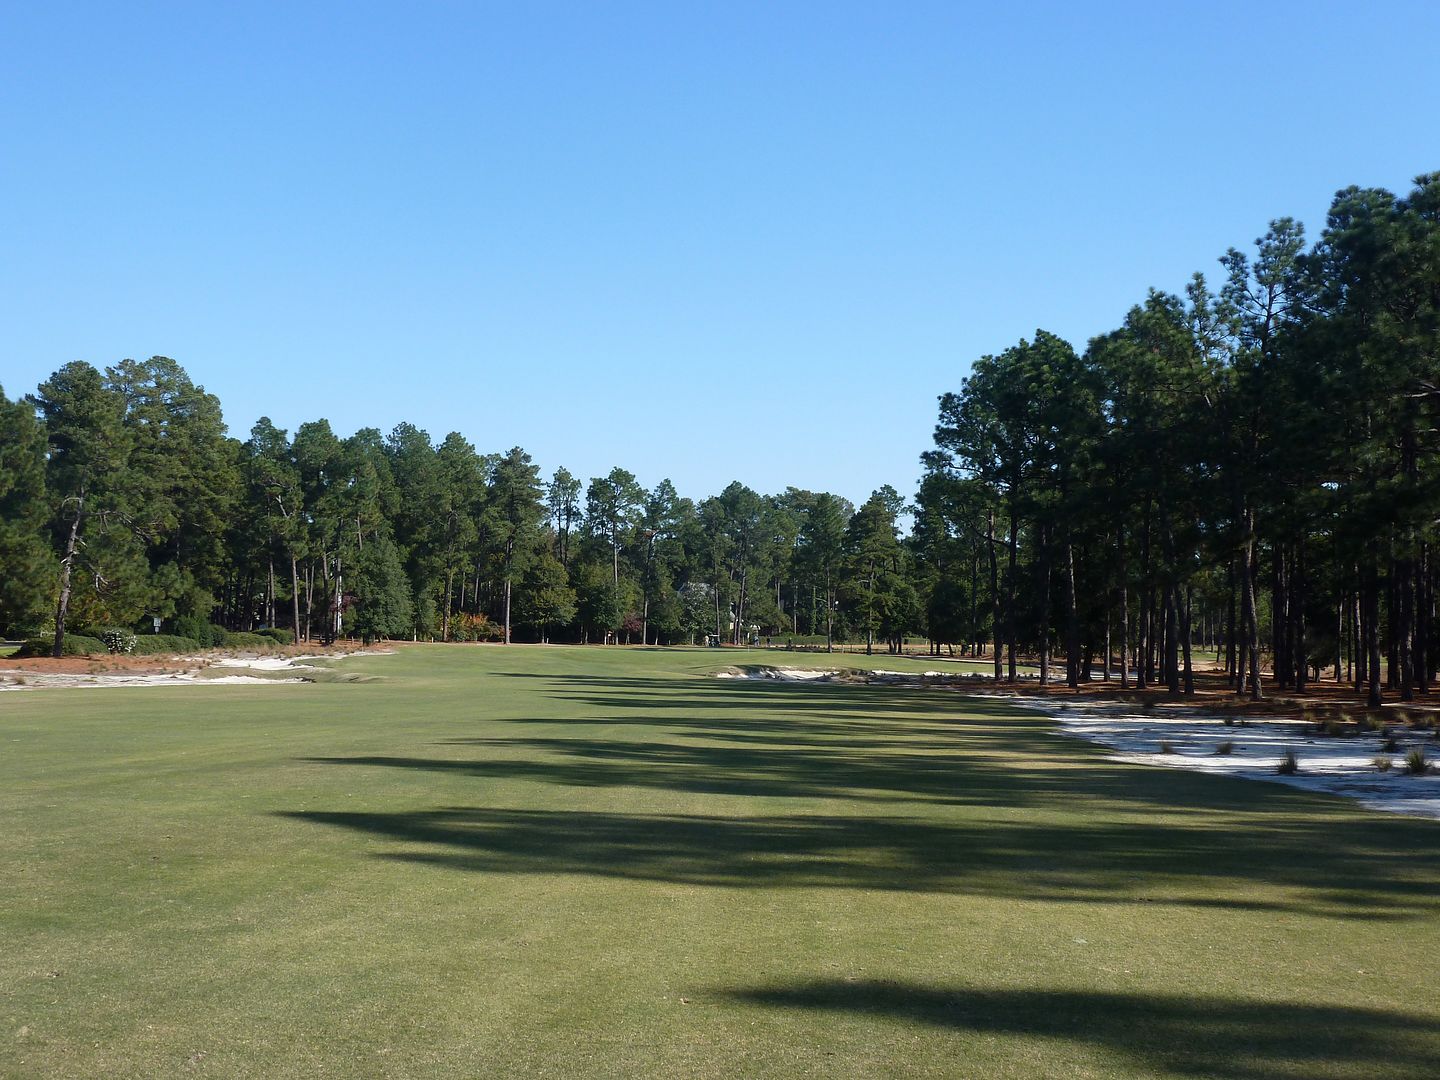
To anyone that has played Pinehurst No. 2 prior to the restoration, it is amazing to see the transformation. The tee shot at the first was previously one that required little thought, but a very accurate tee ball to find the strip of fairway guarded by rough on each side.
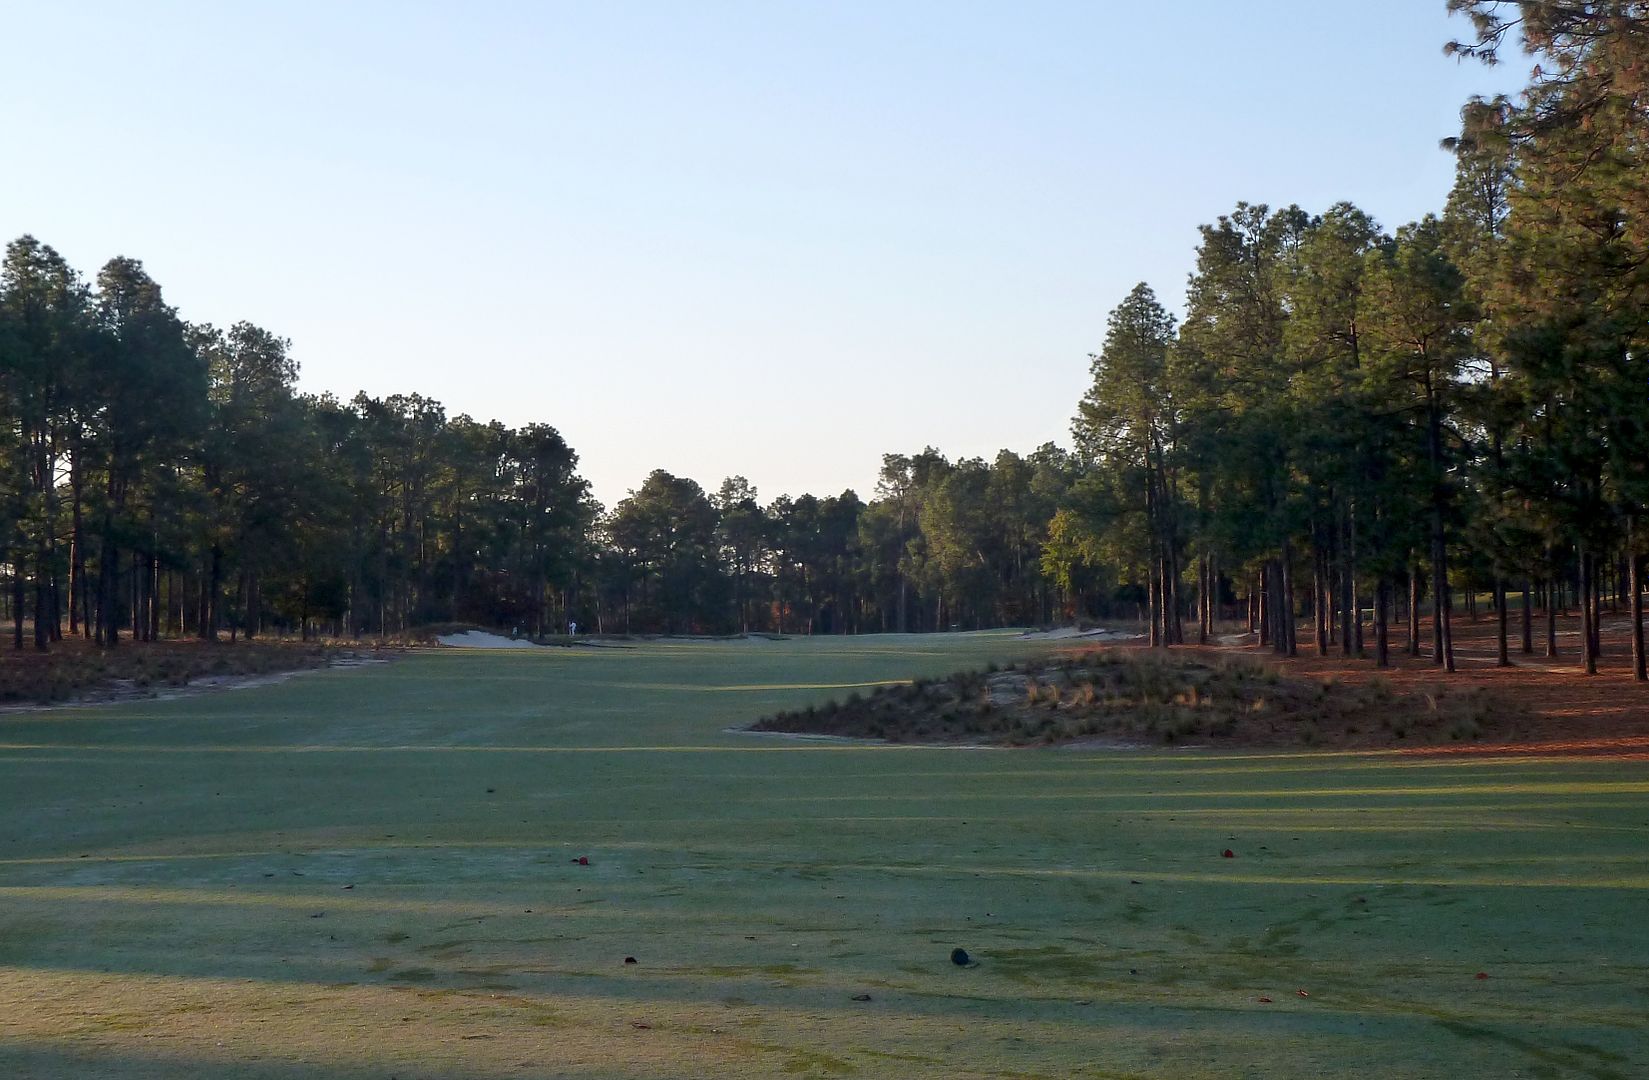
The tee shot at 1st is now very much a gentle handshake, with lots of width. Firm and fast conditioning means that less than driver off the 1st tee is a reasonable option even for the shorter-hitter.
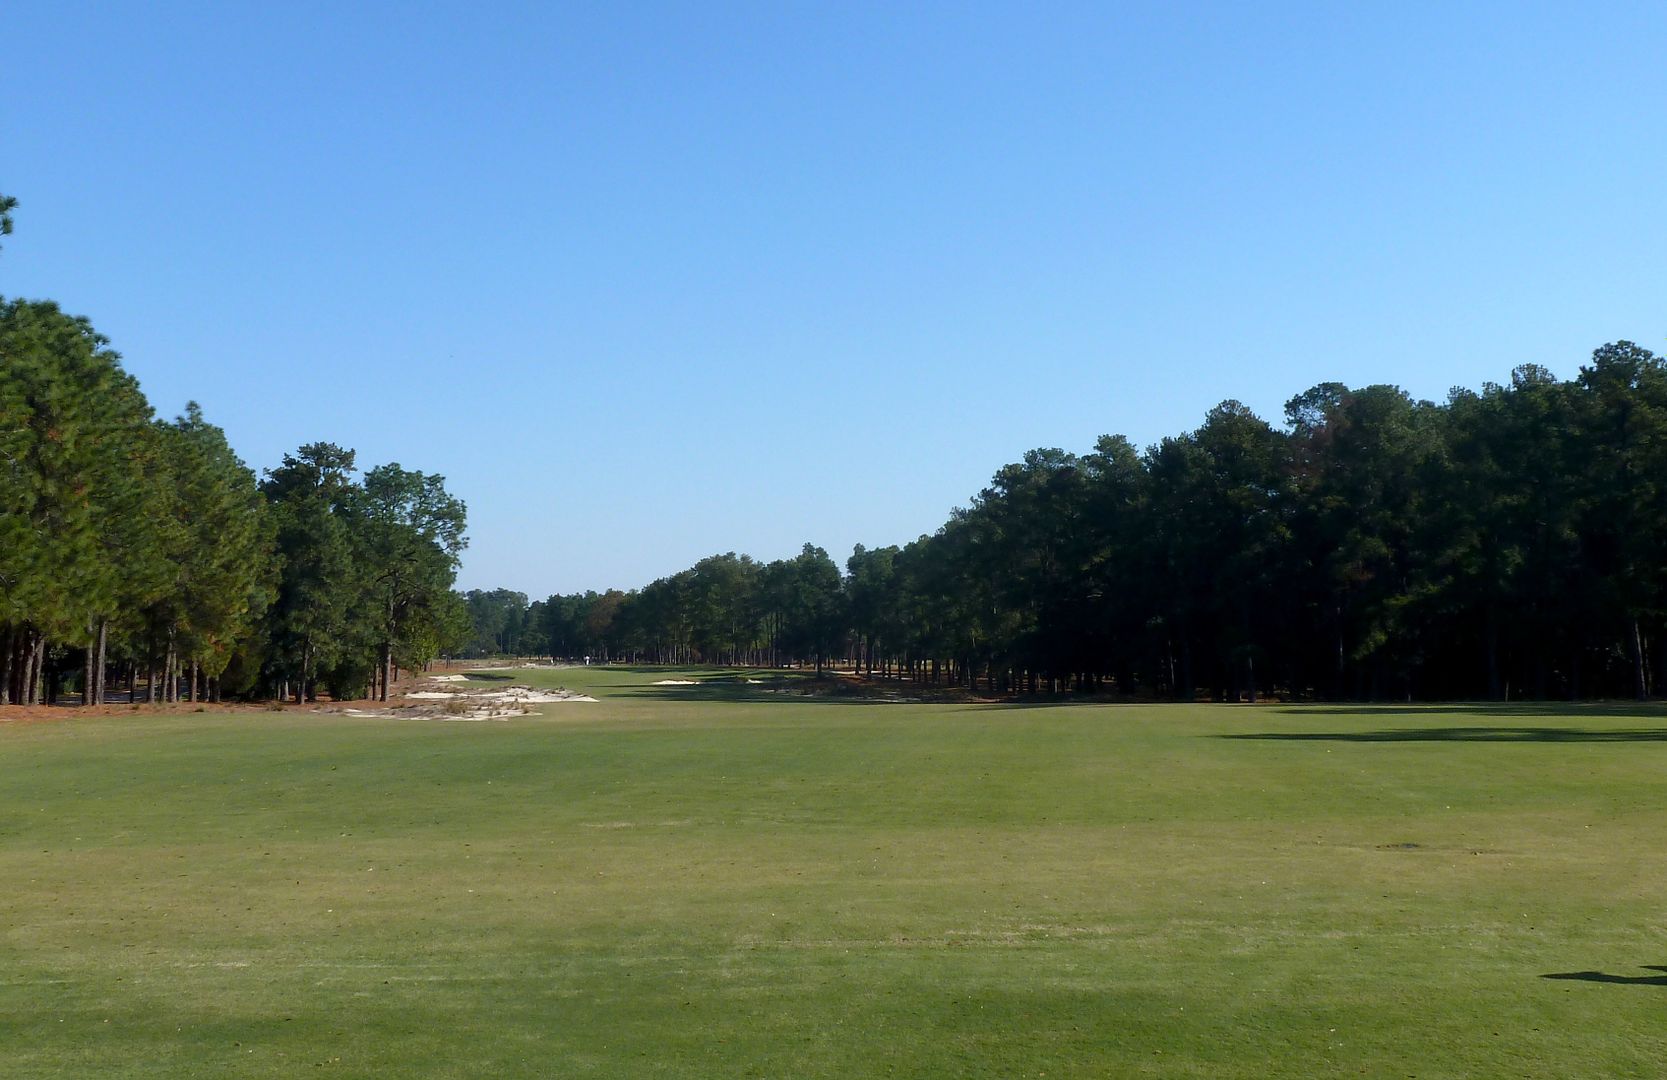

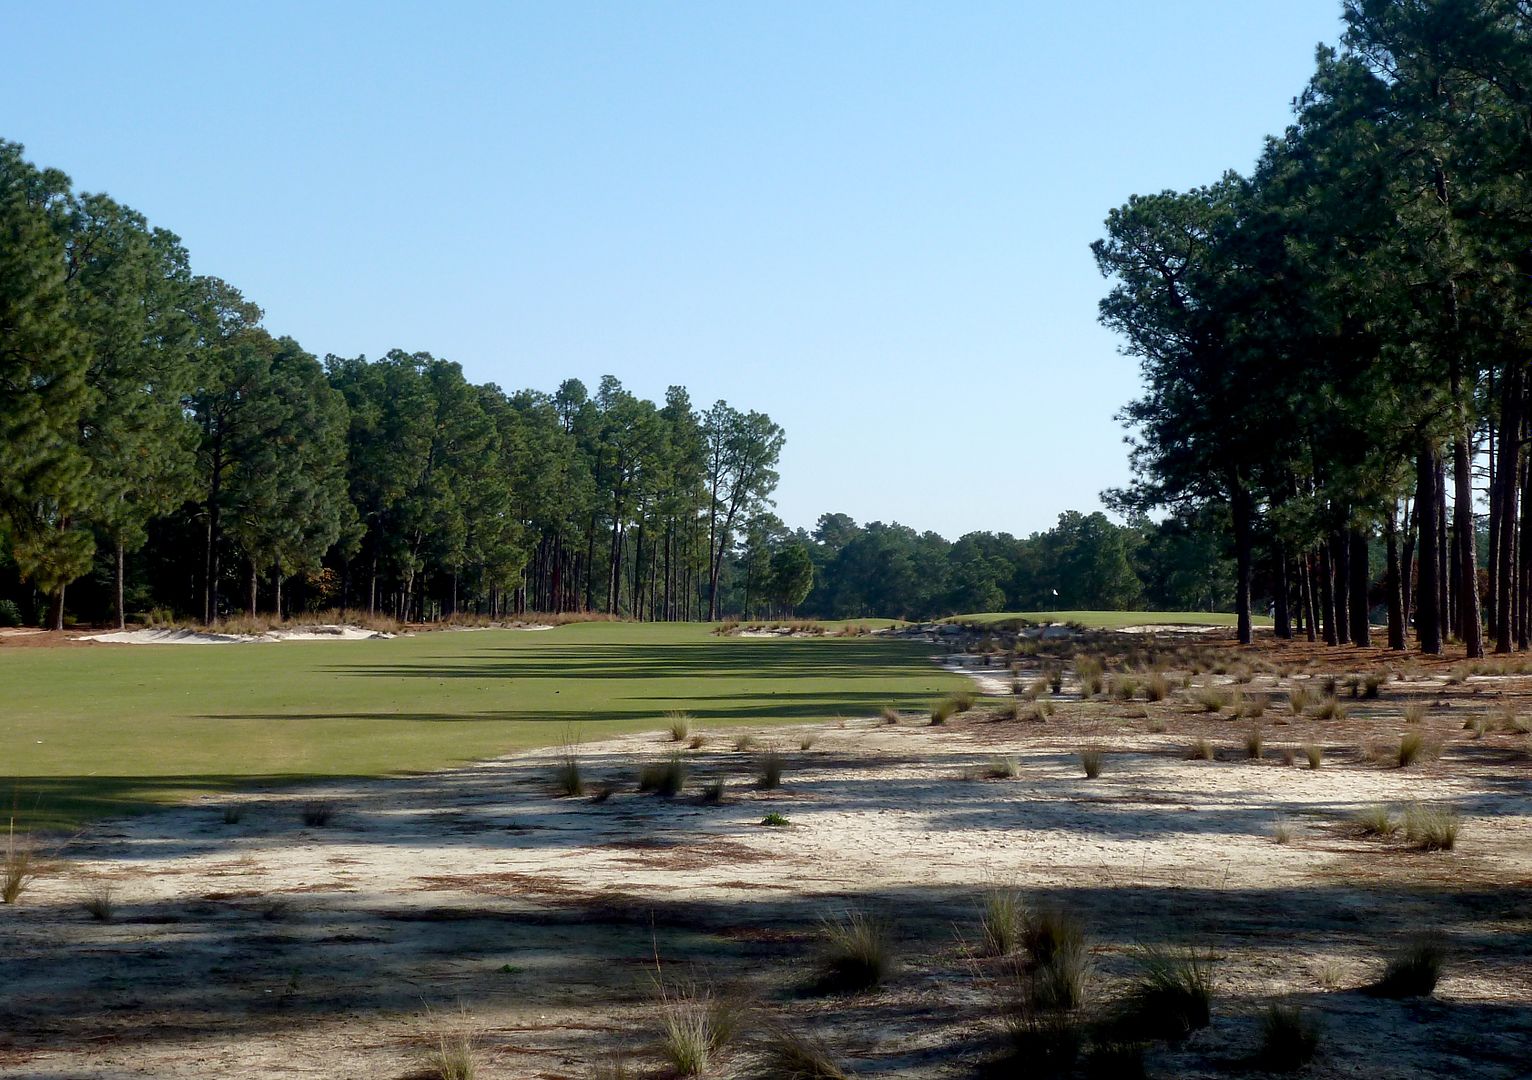
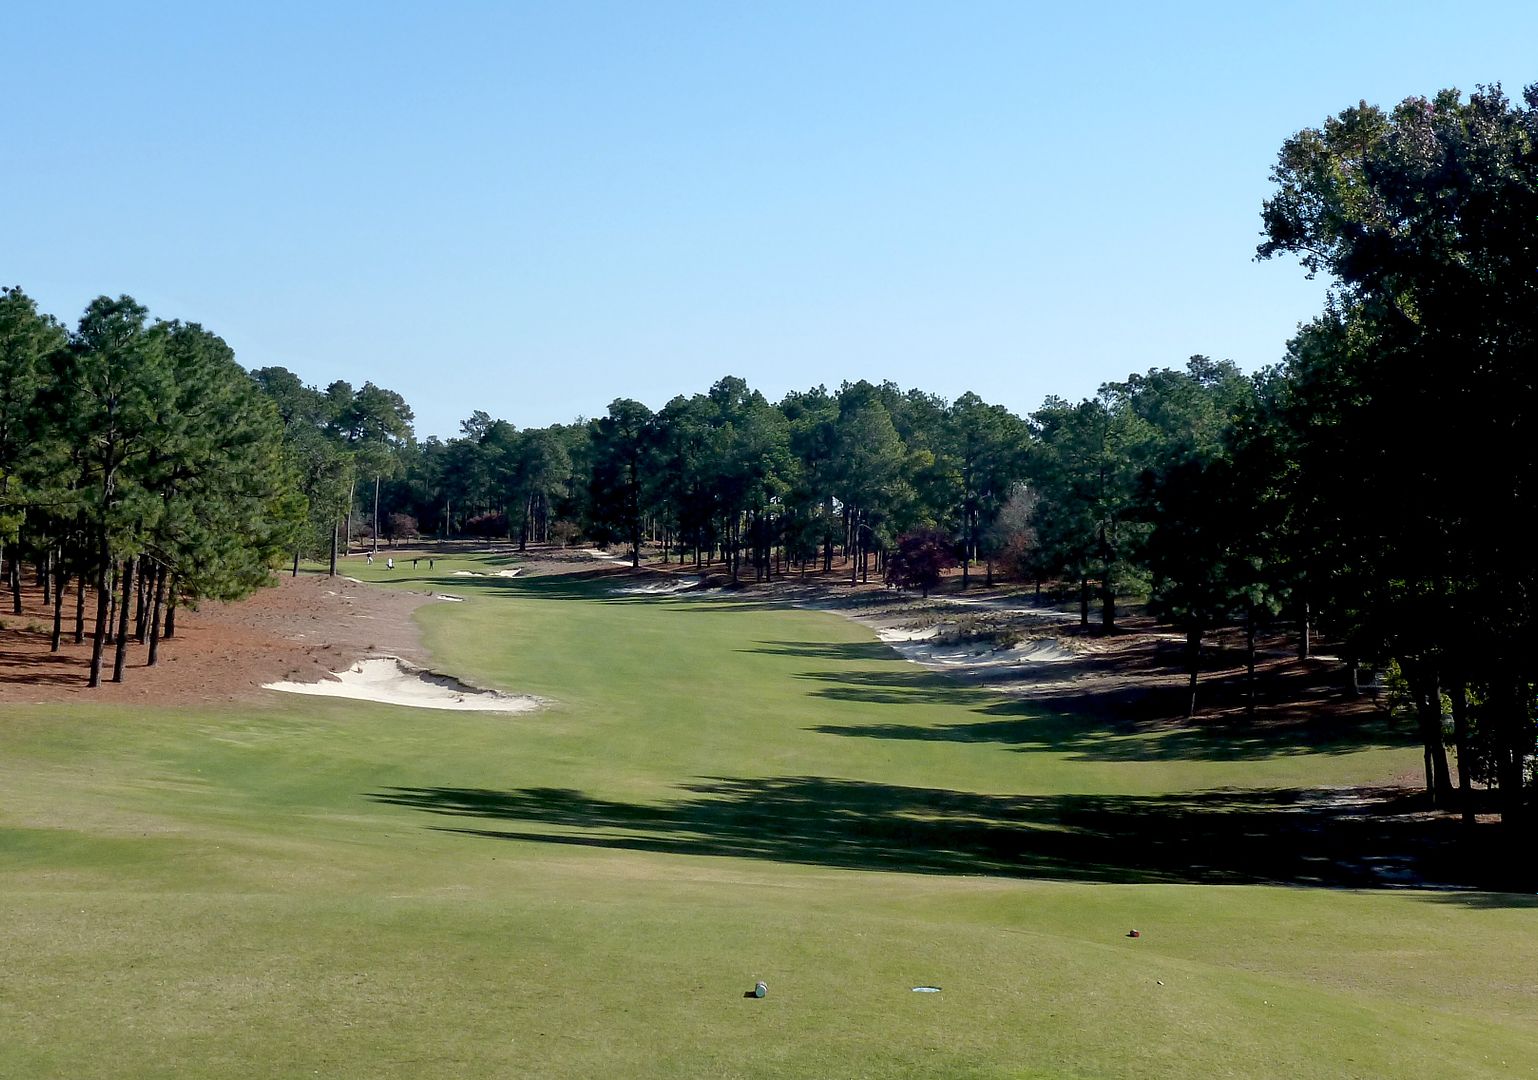
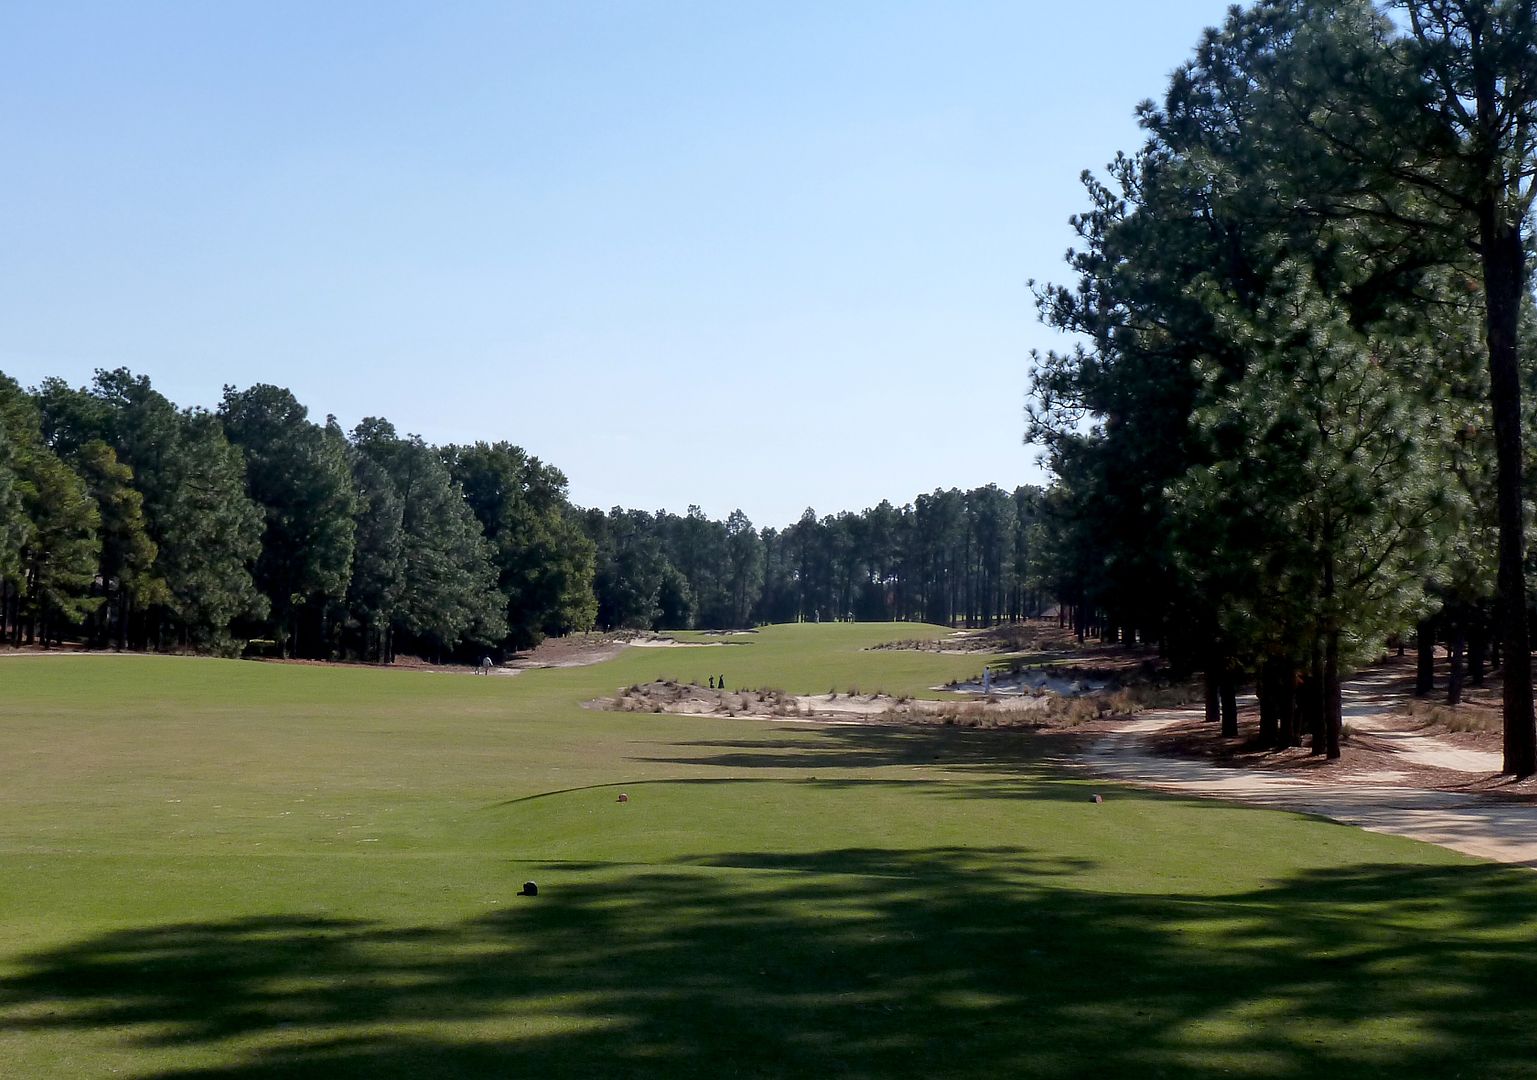
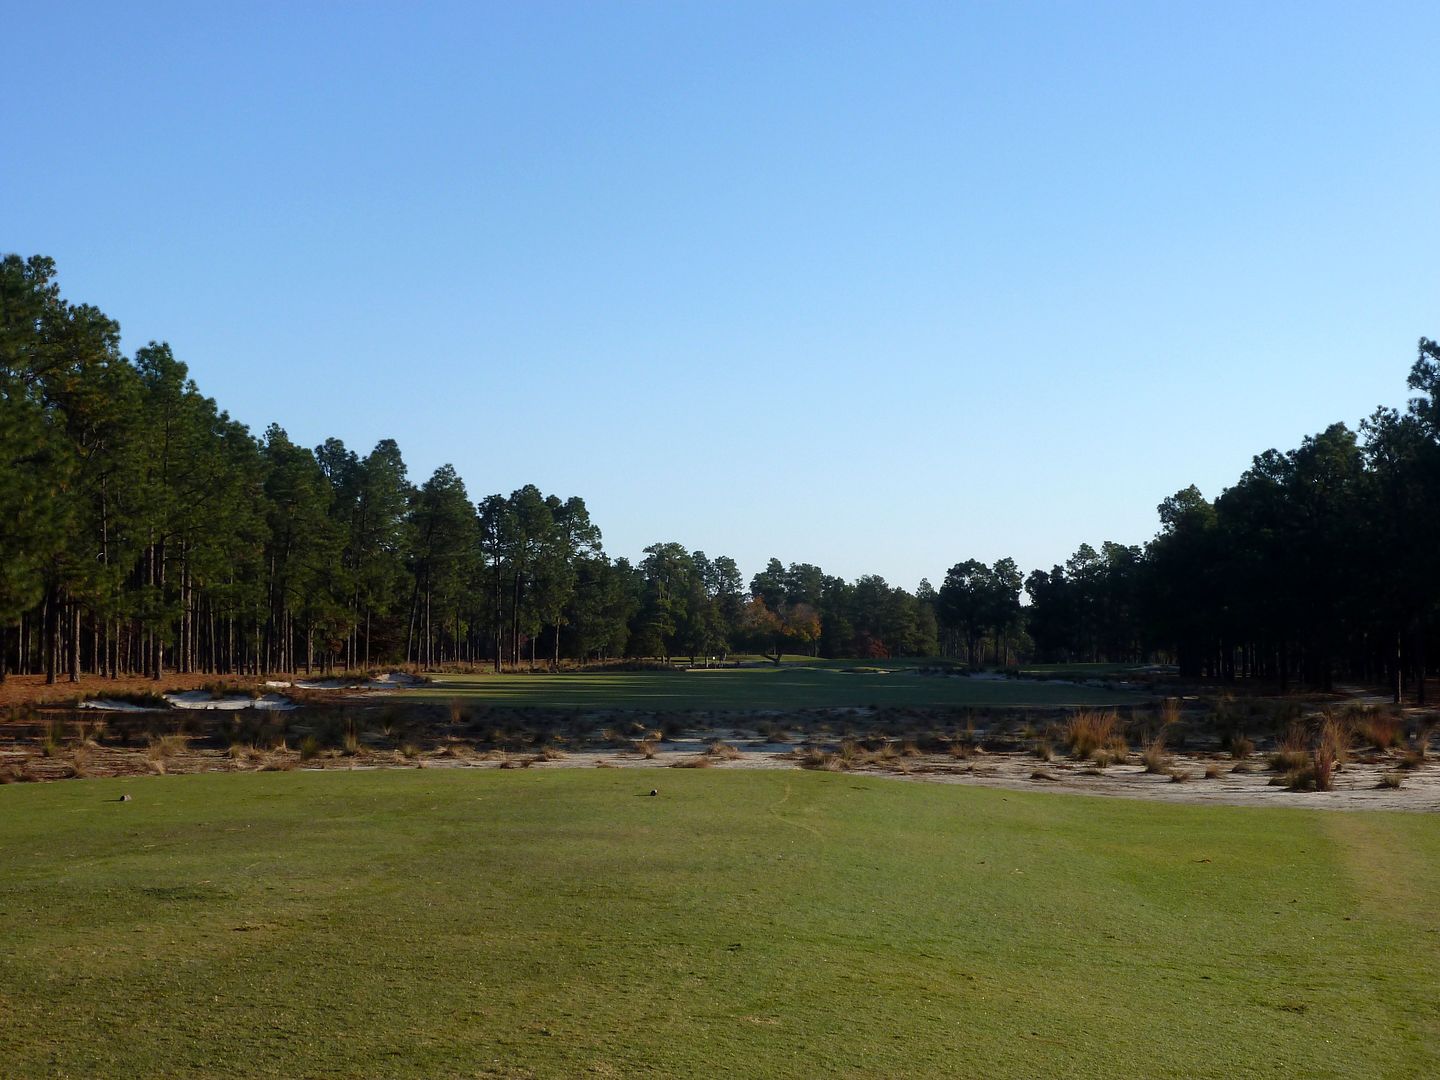
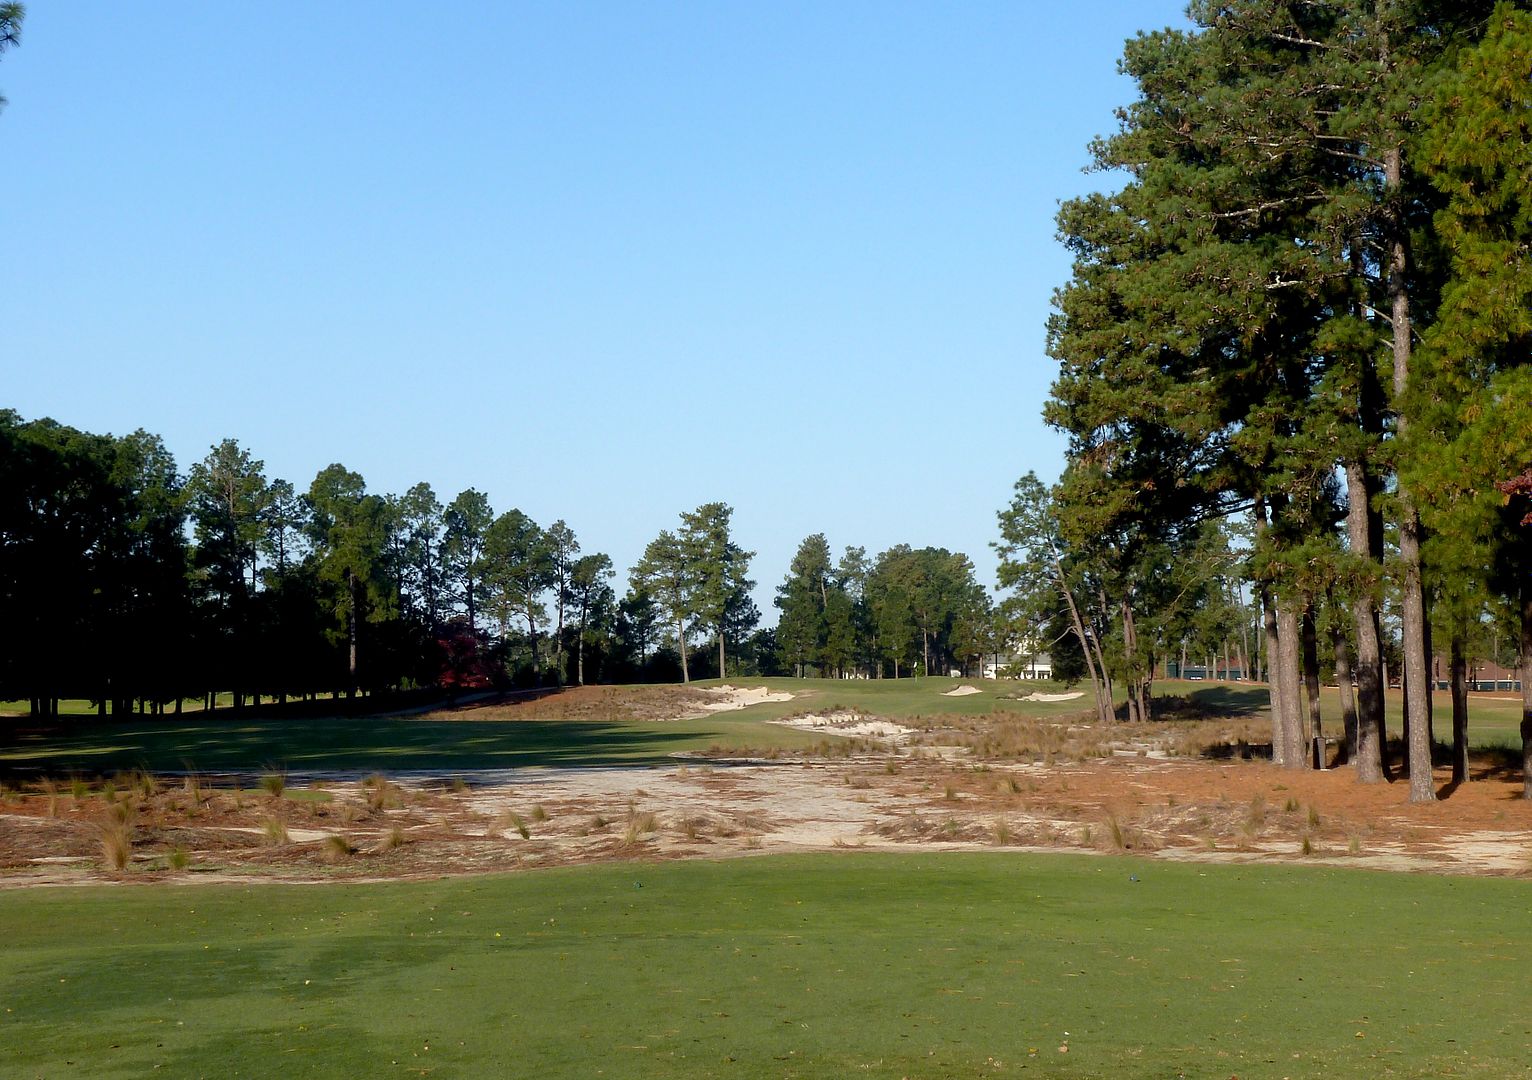
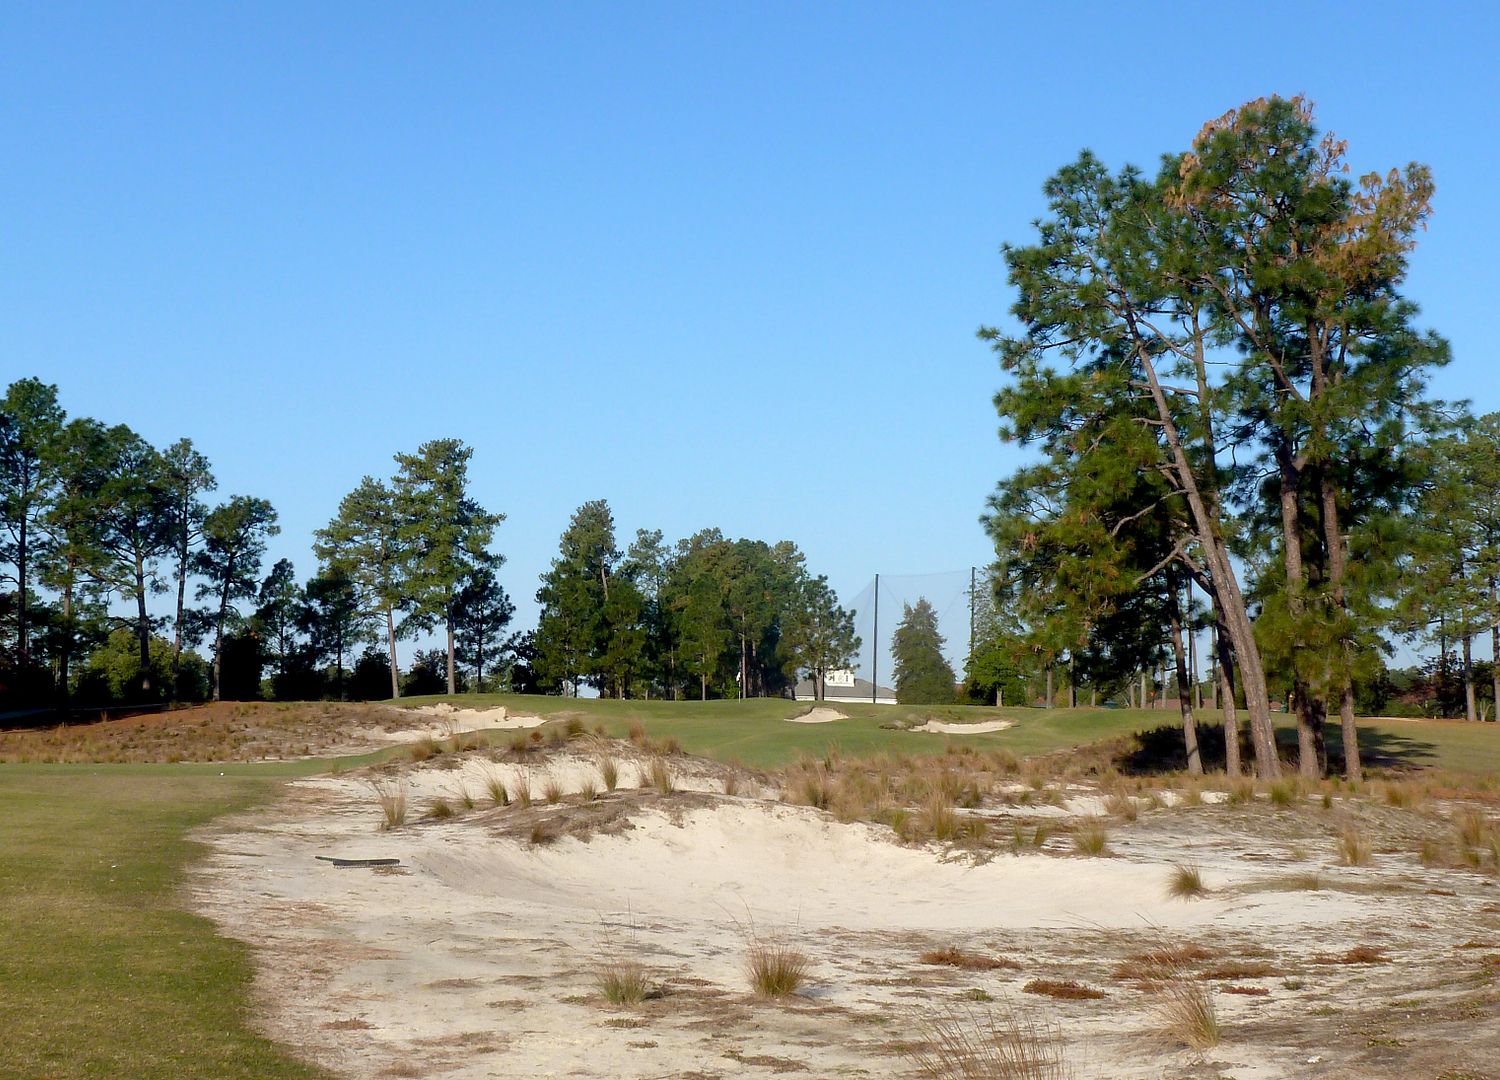
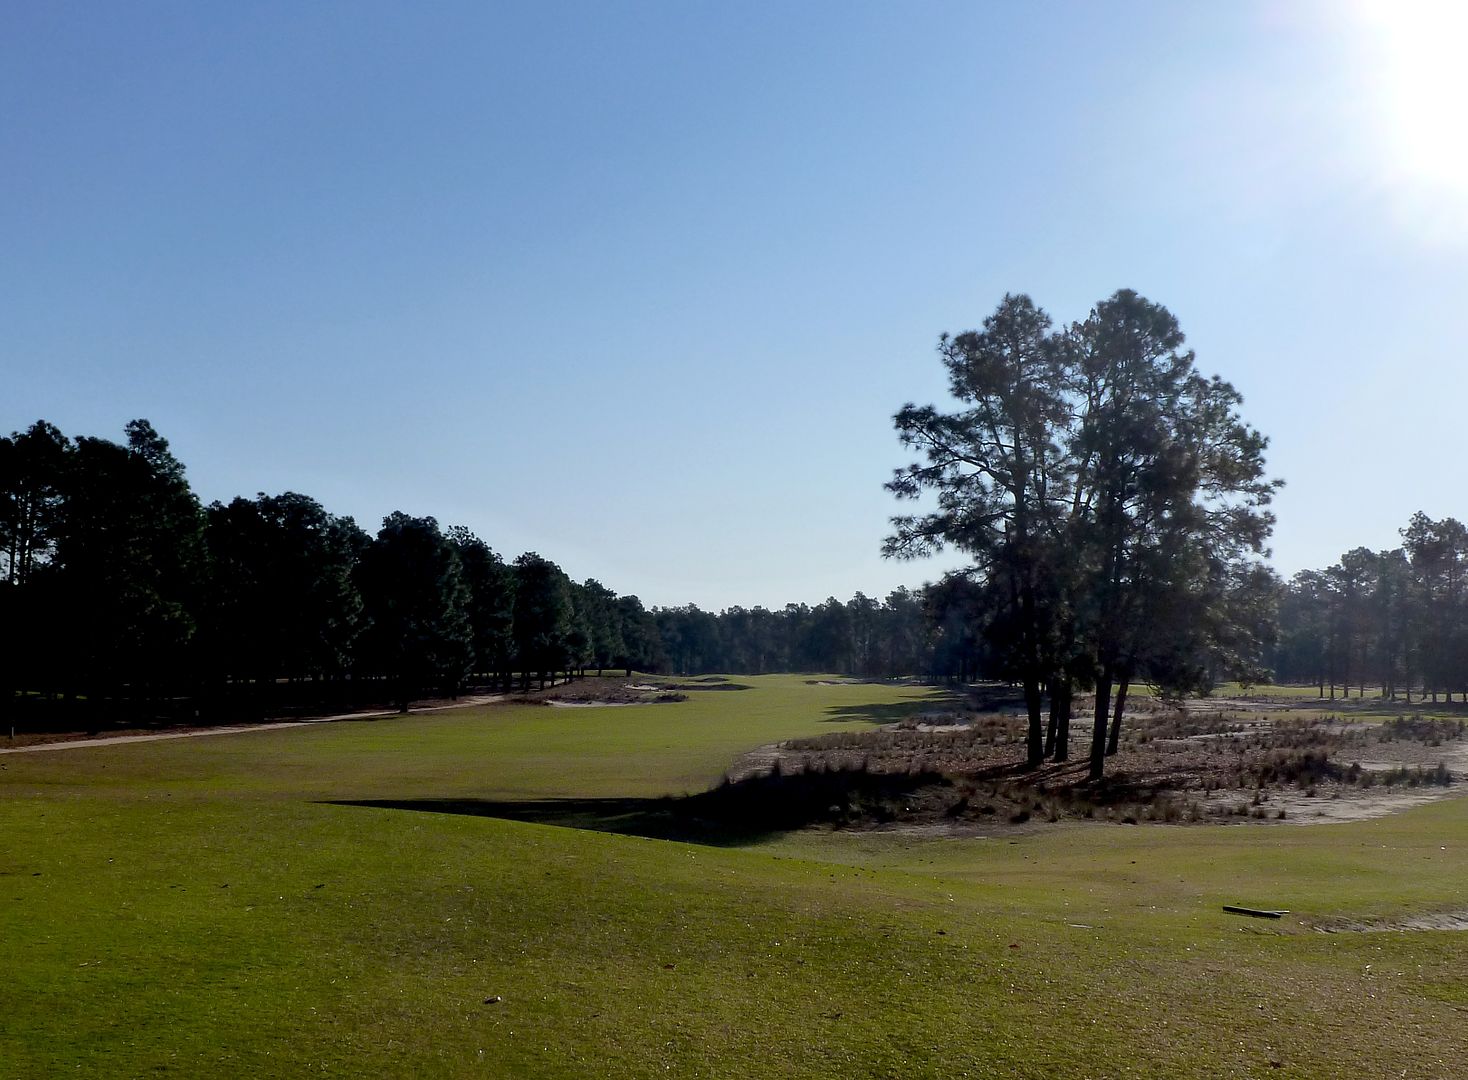
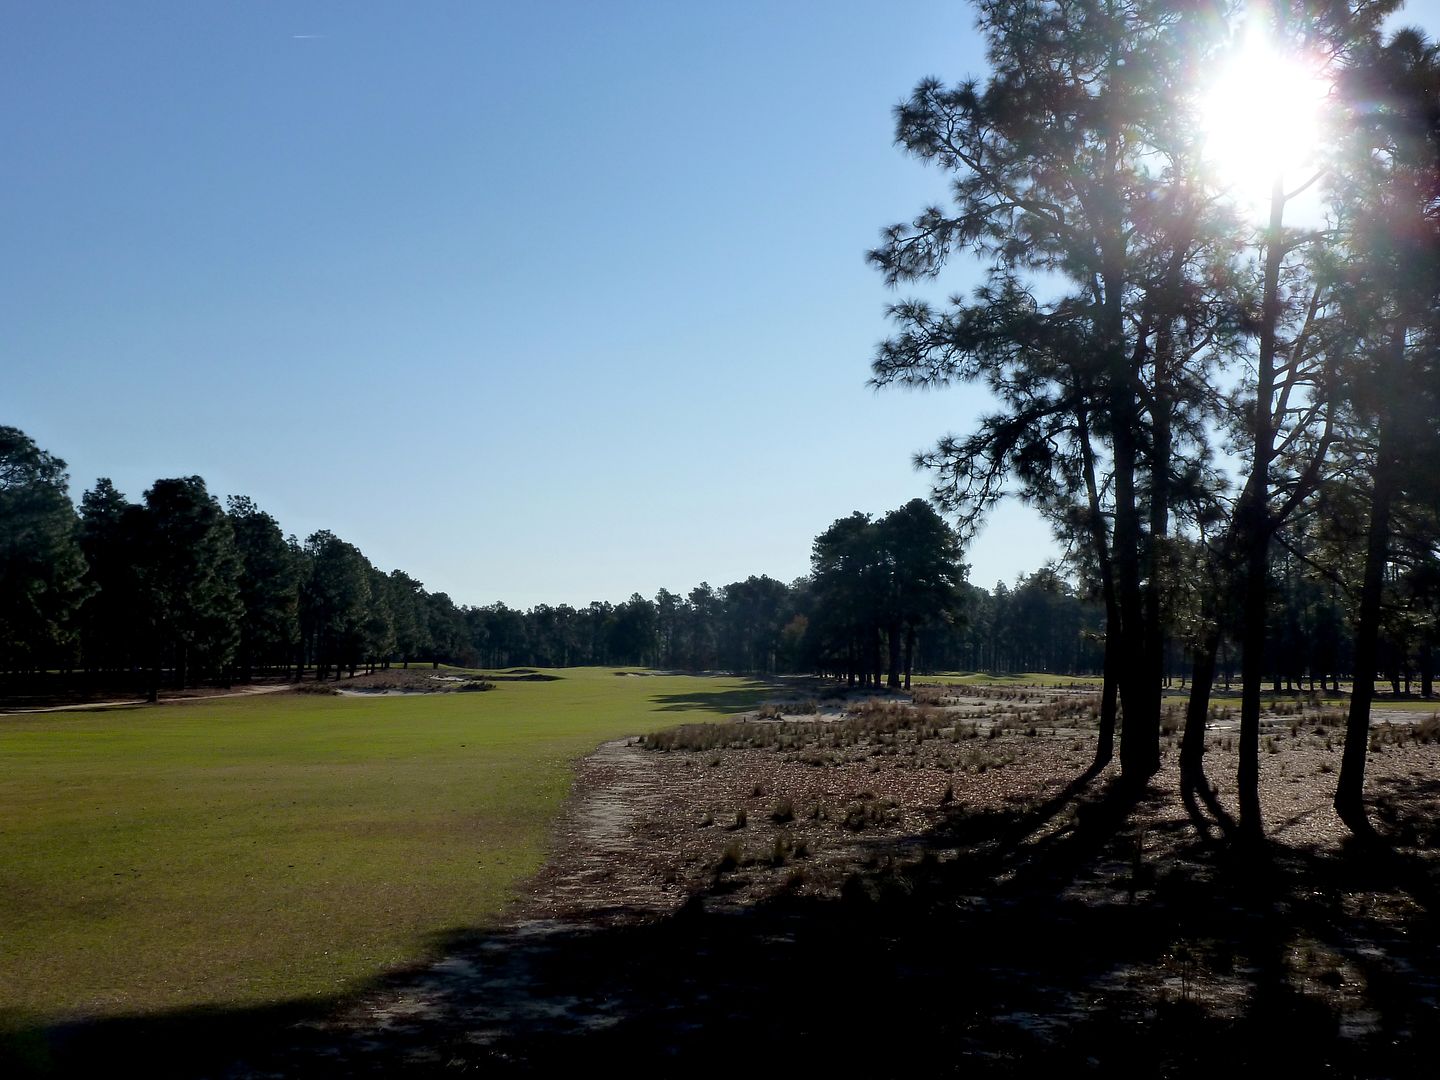
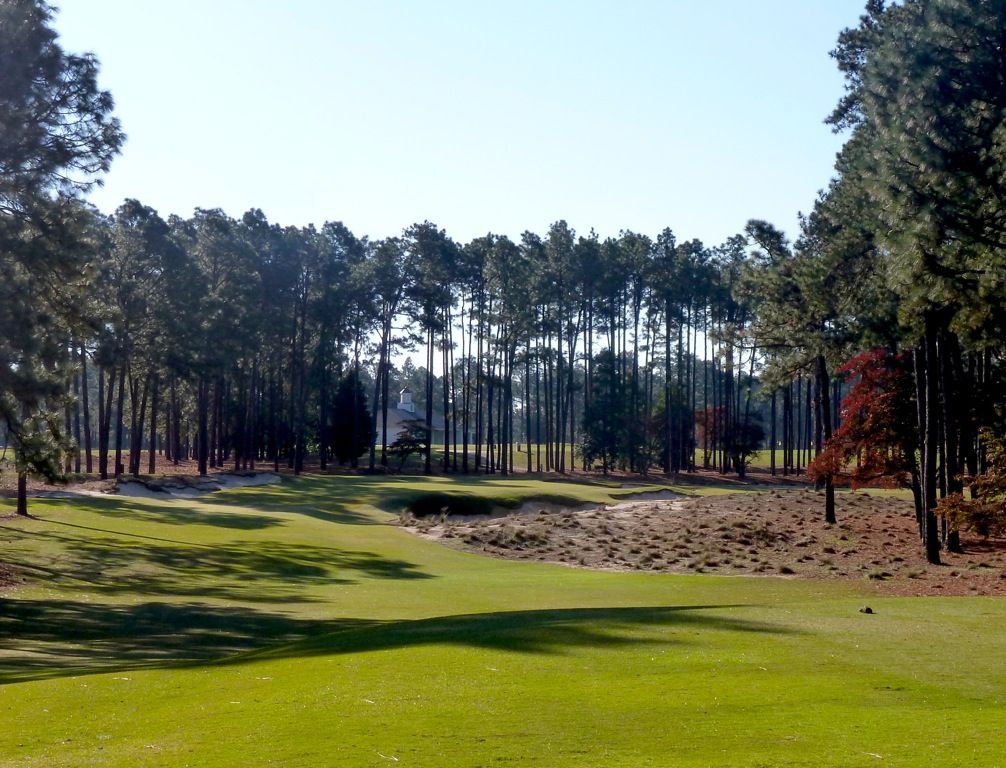
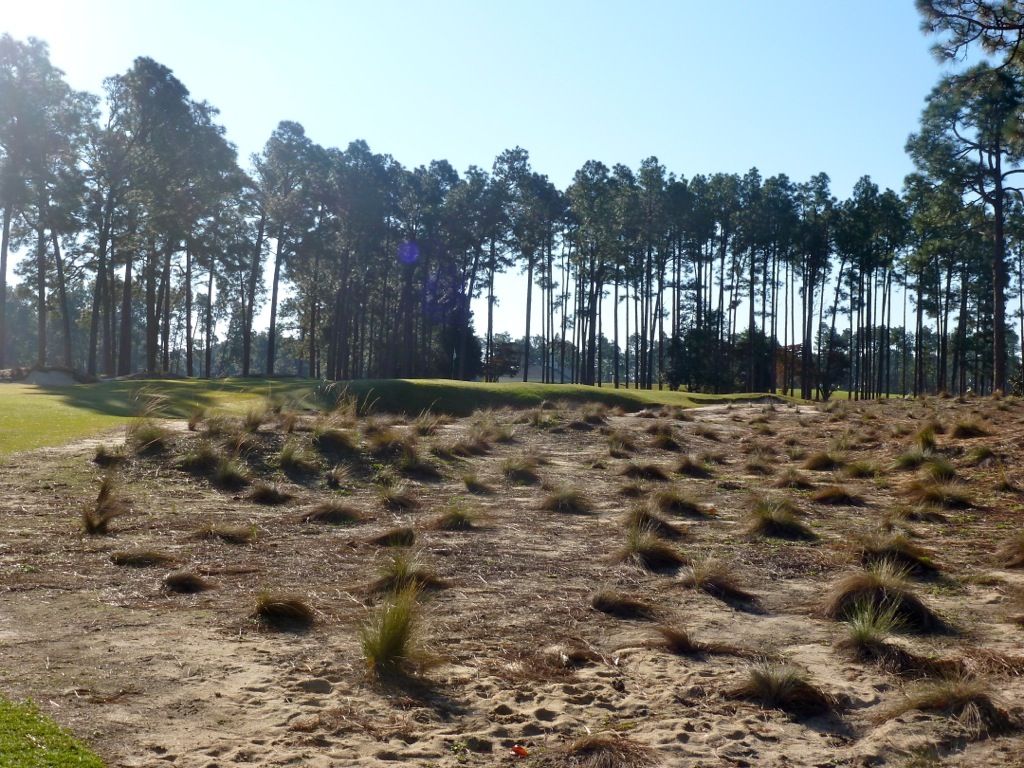
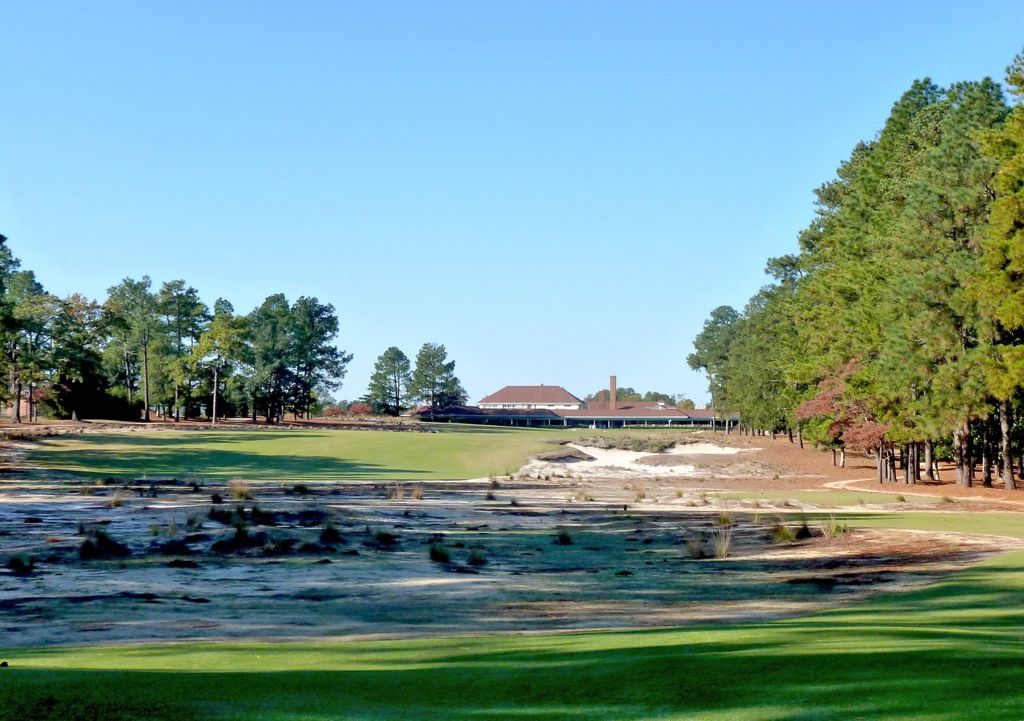
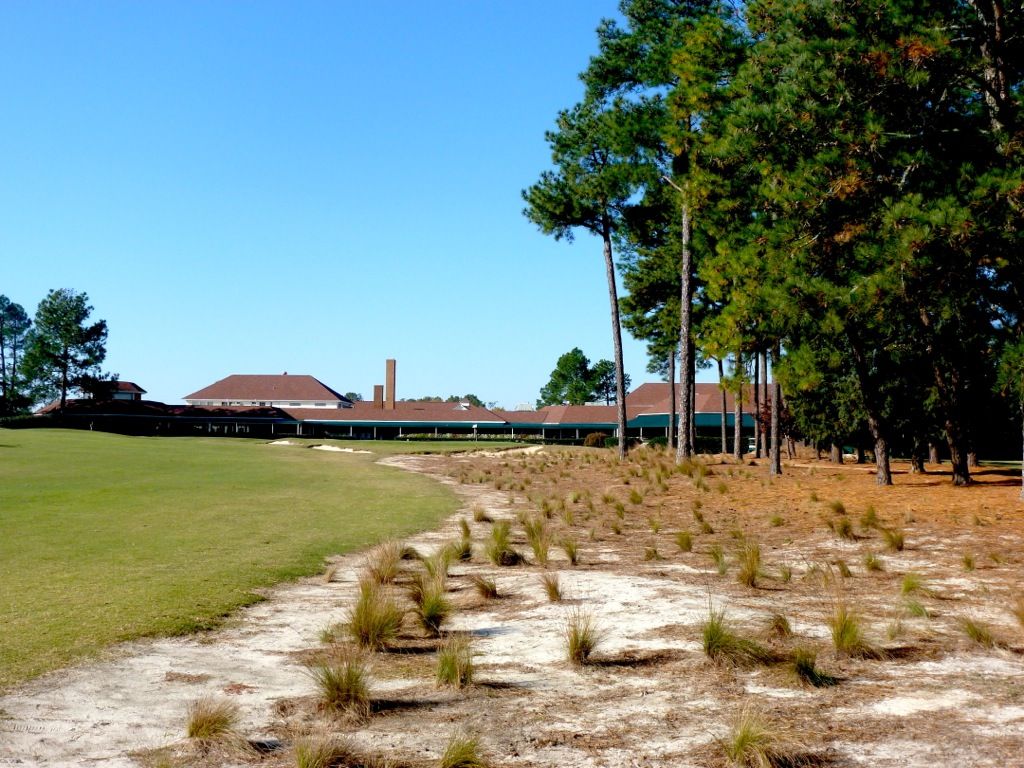
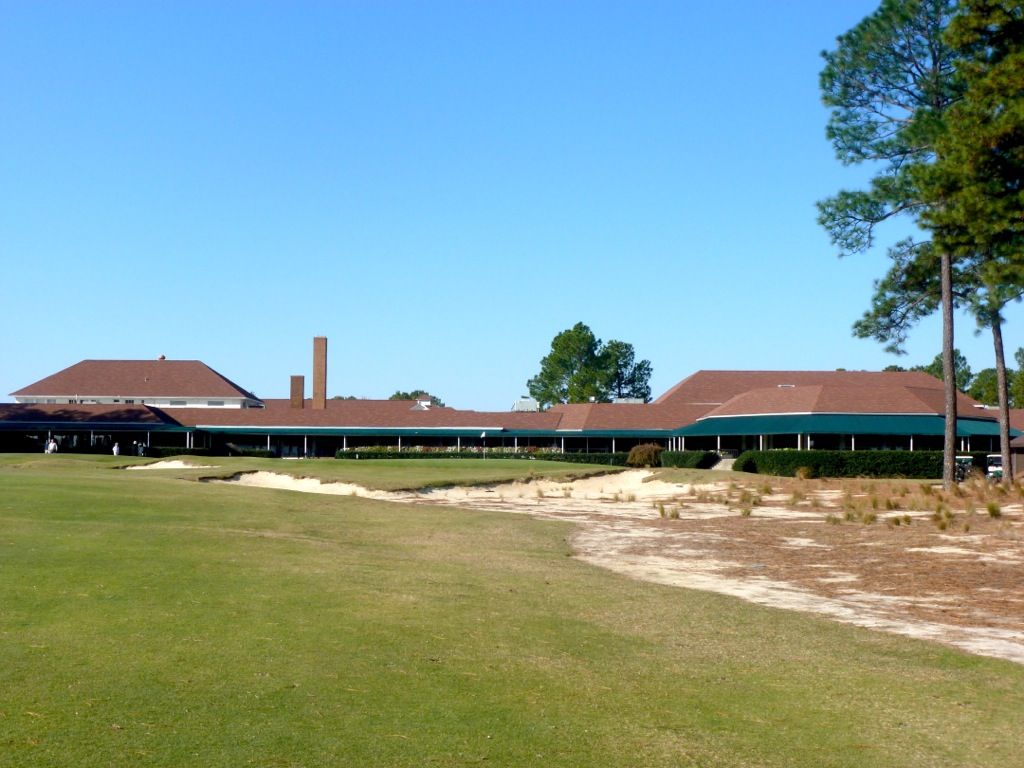
The view from a tee shot that lays back from all of the natural area down the left (about 150 yards out). From here one gets their first good look at the natural area, which seamlessly meshes with the fairway. No rough here to slow down an errant shot before it finds the native.
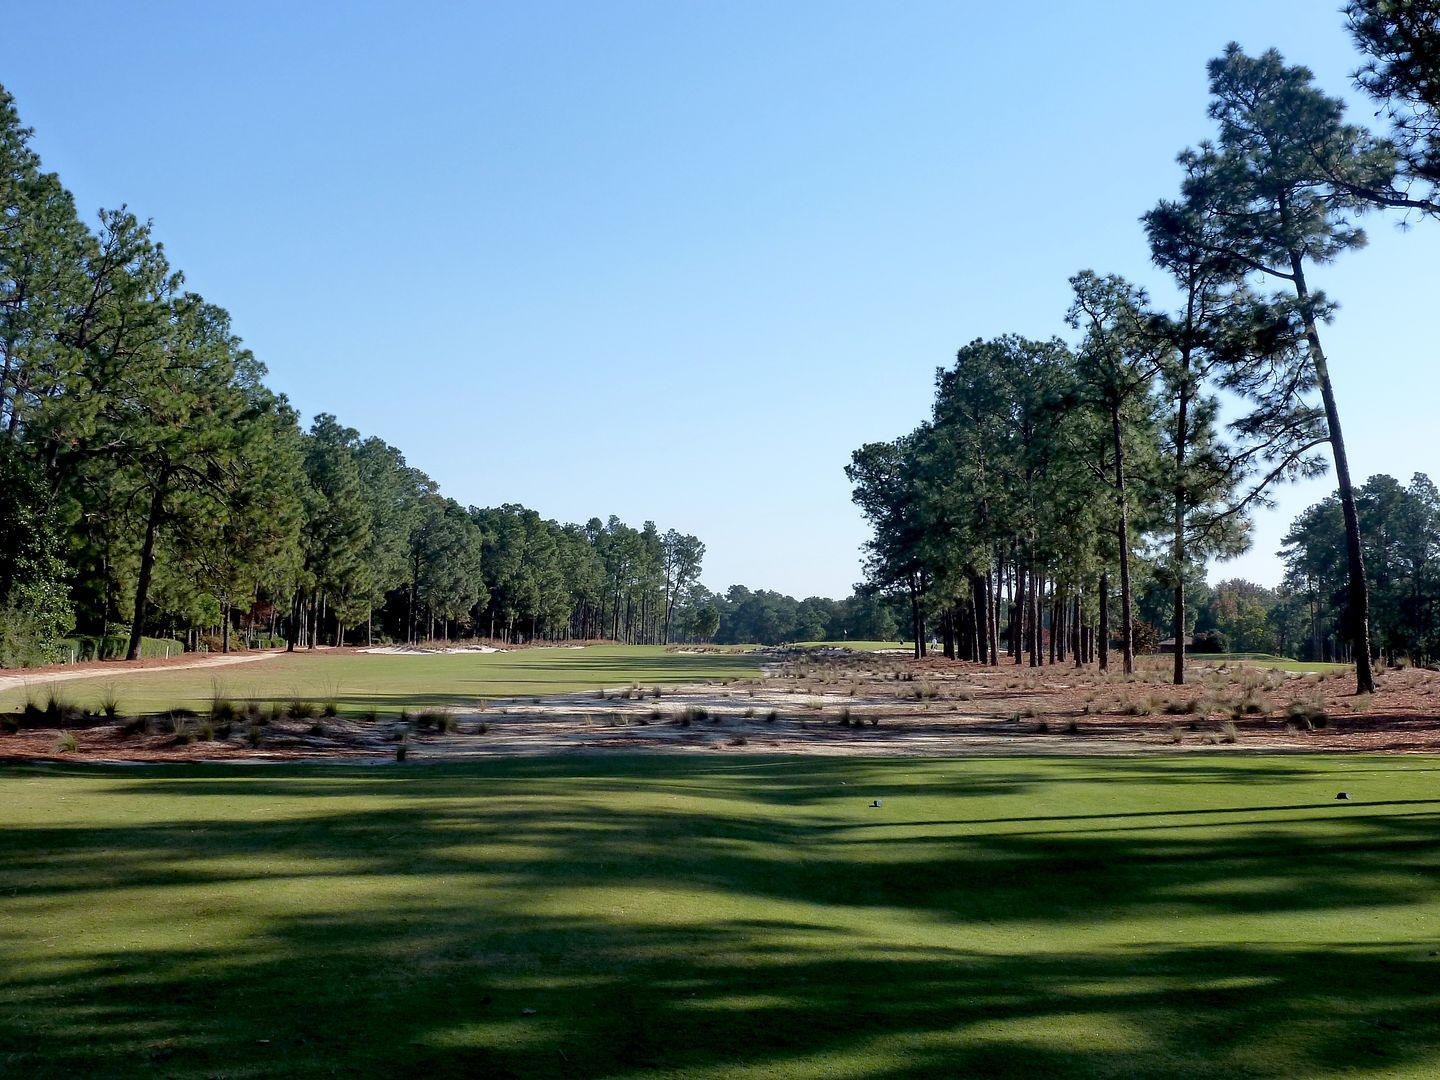
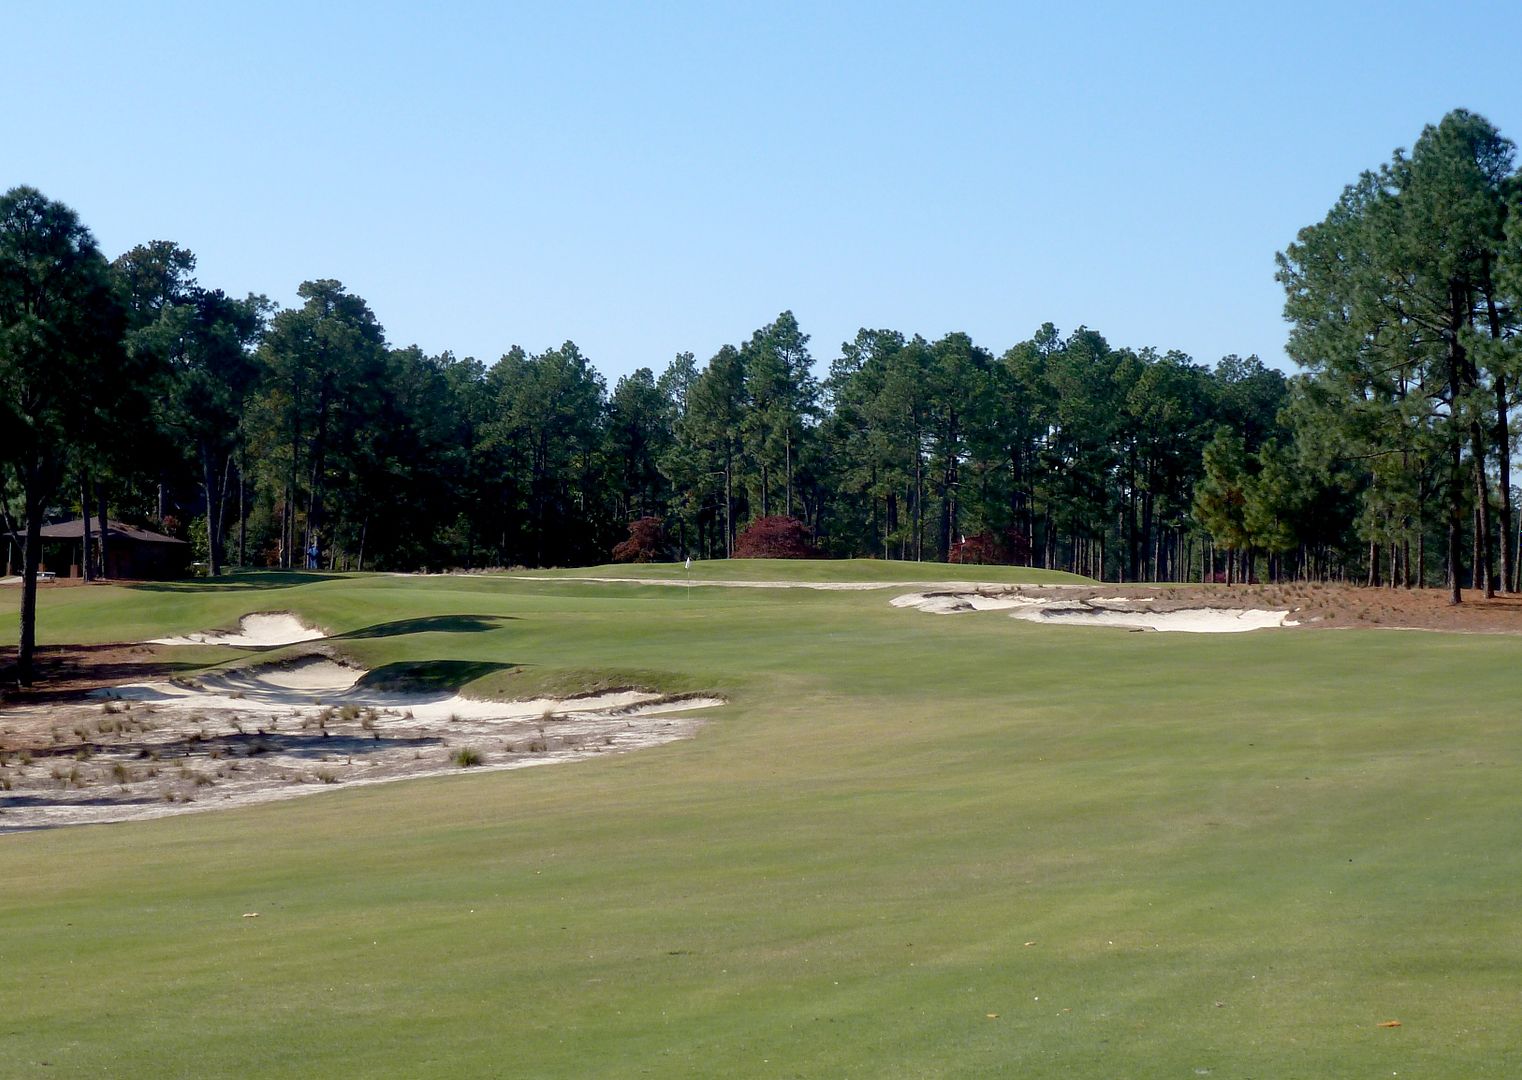
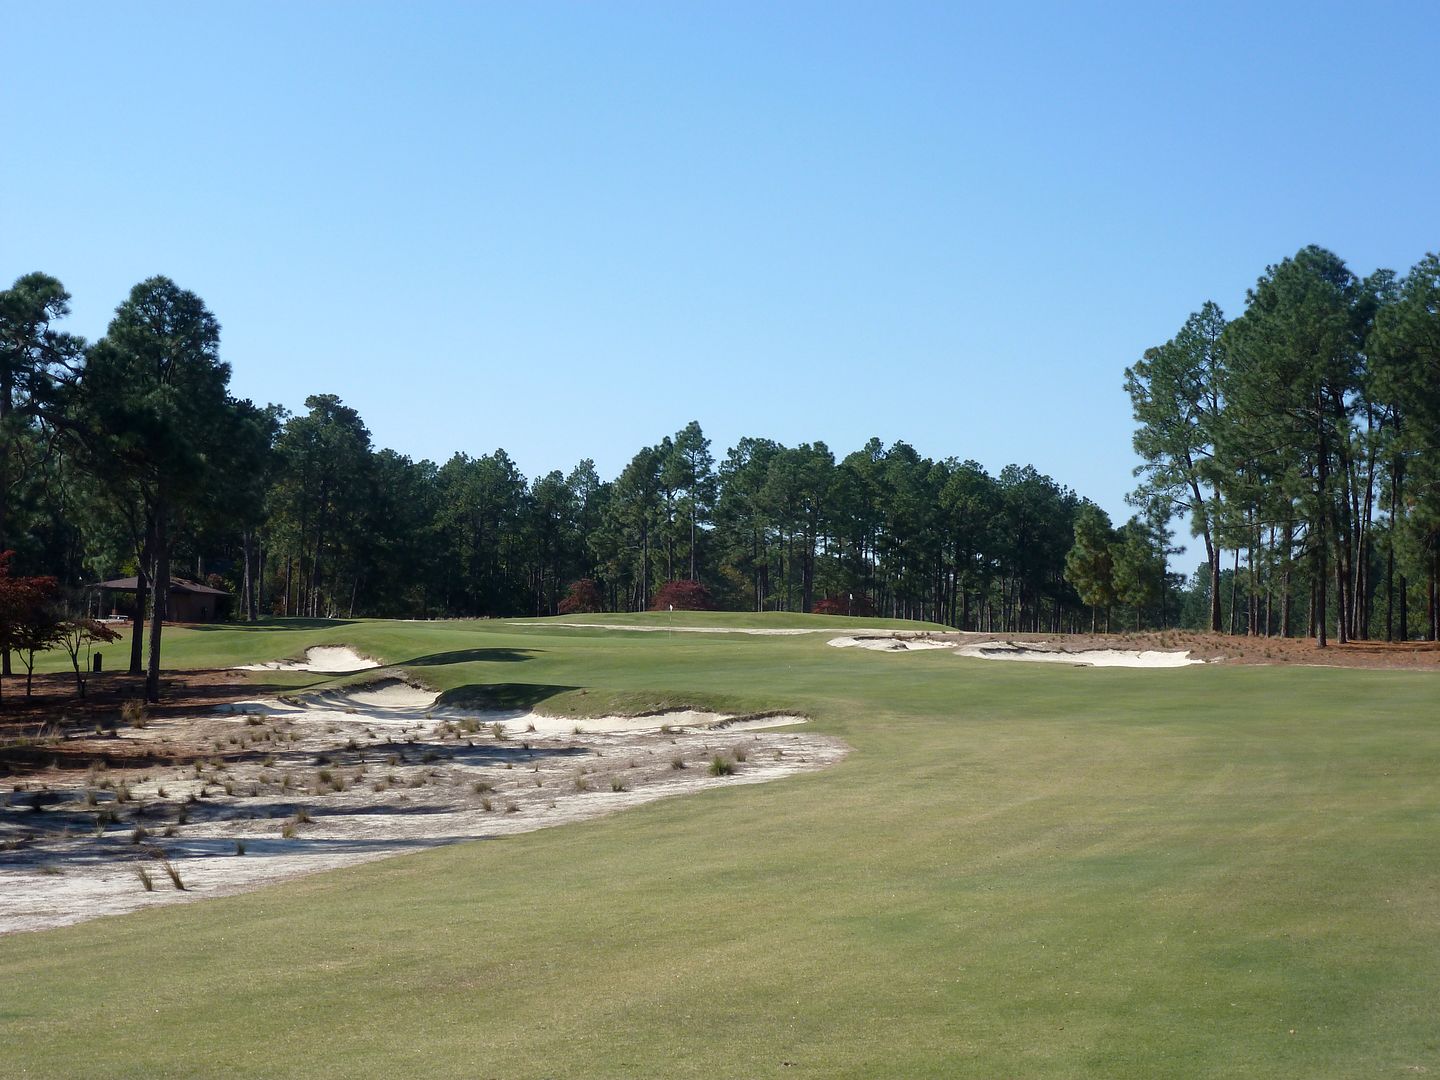
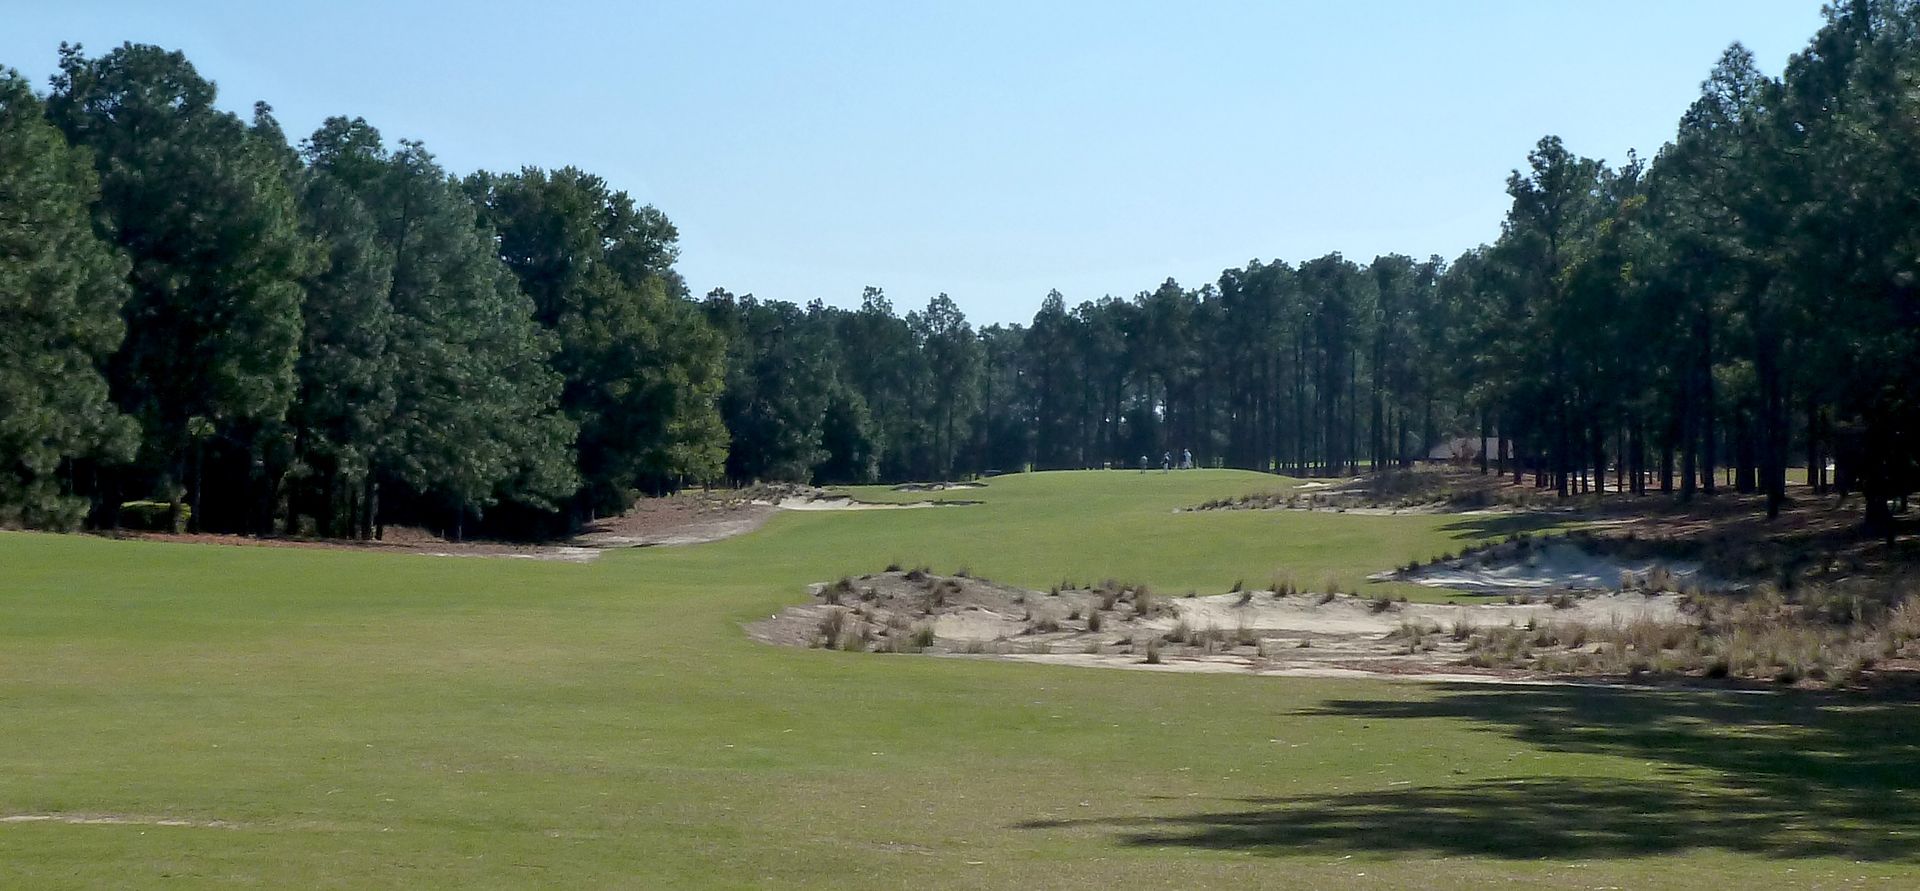
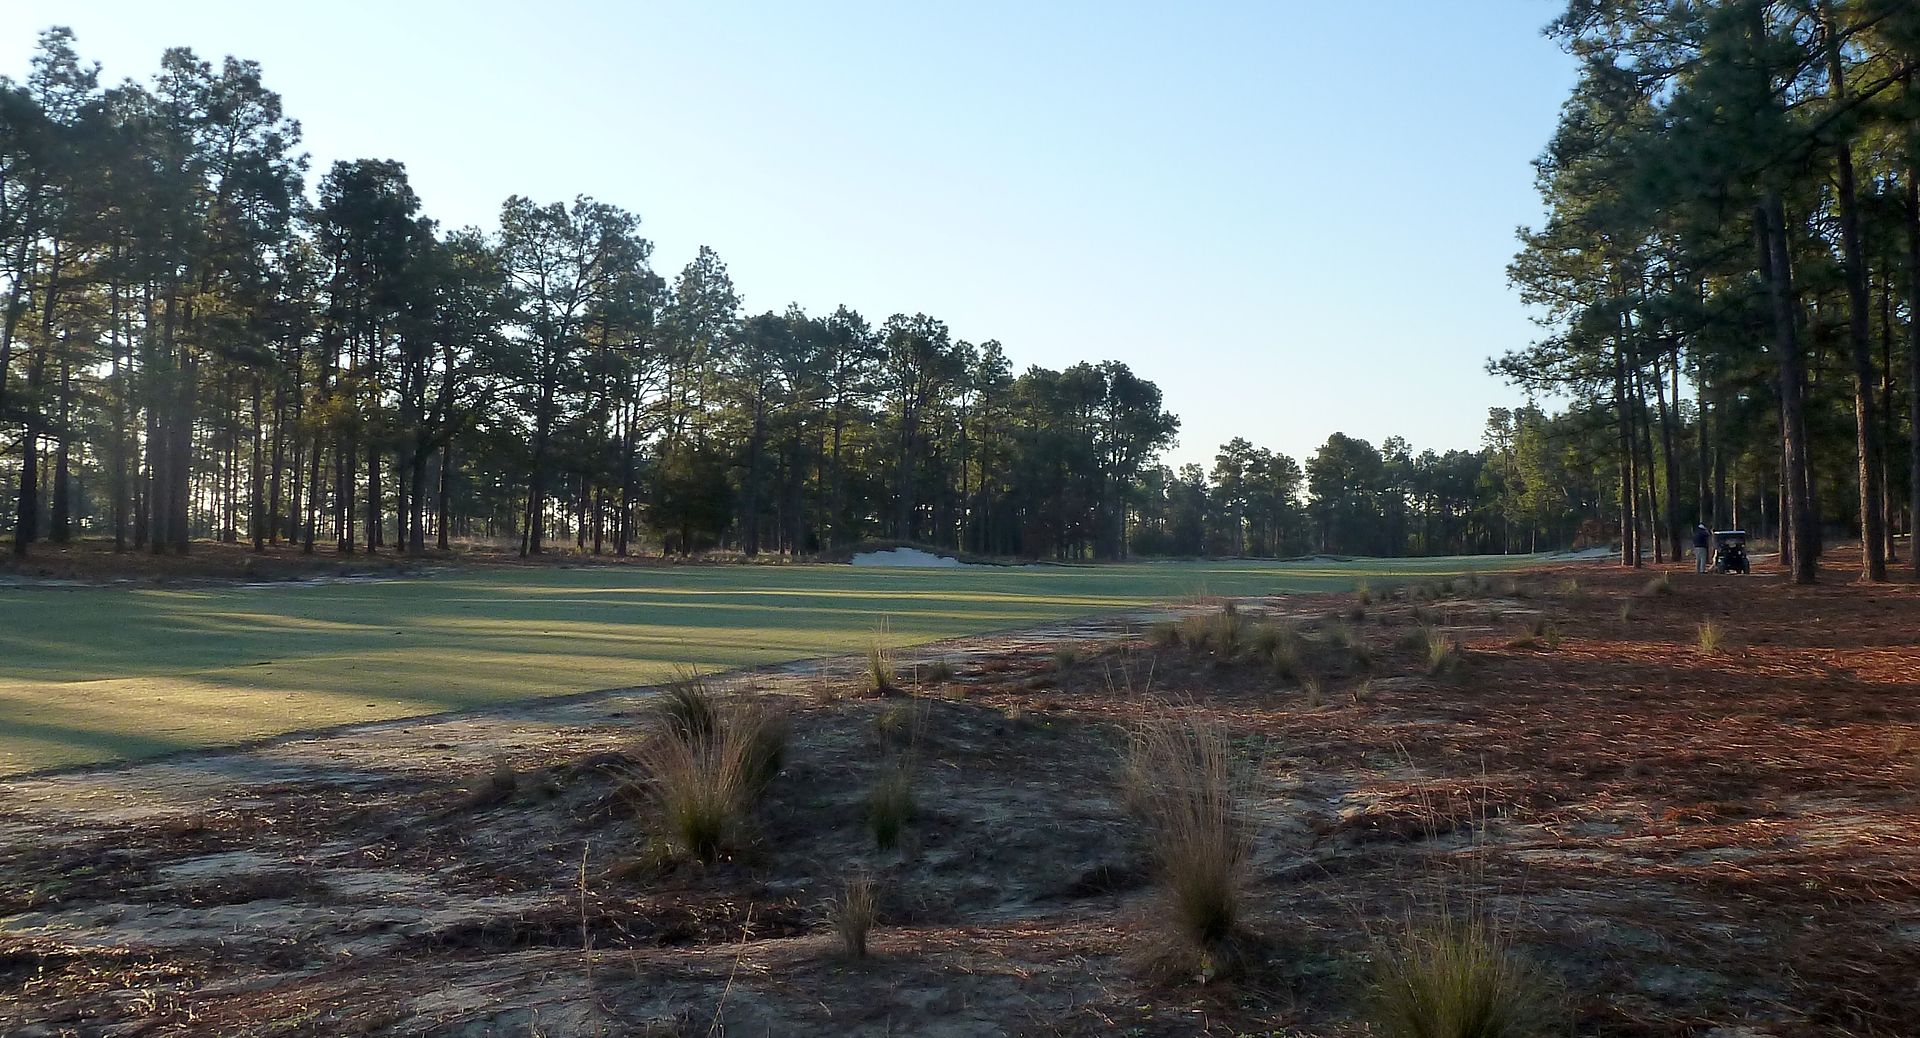
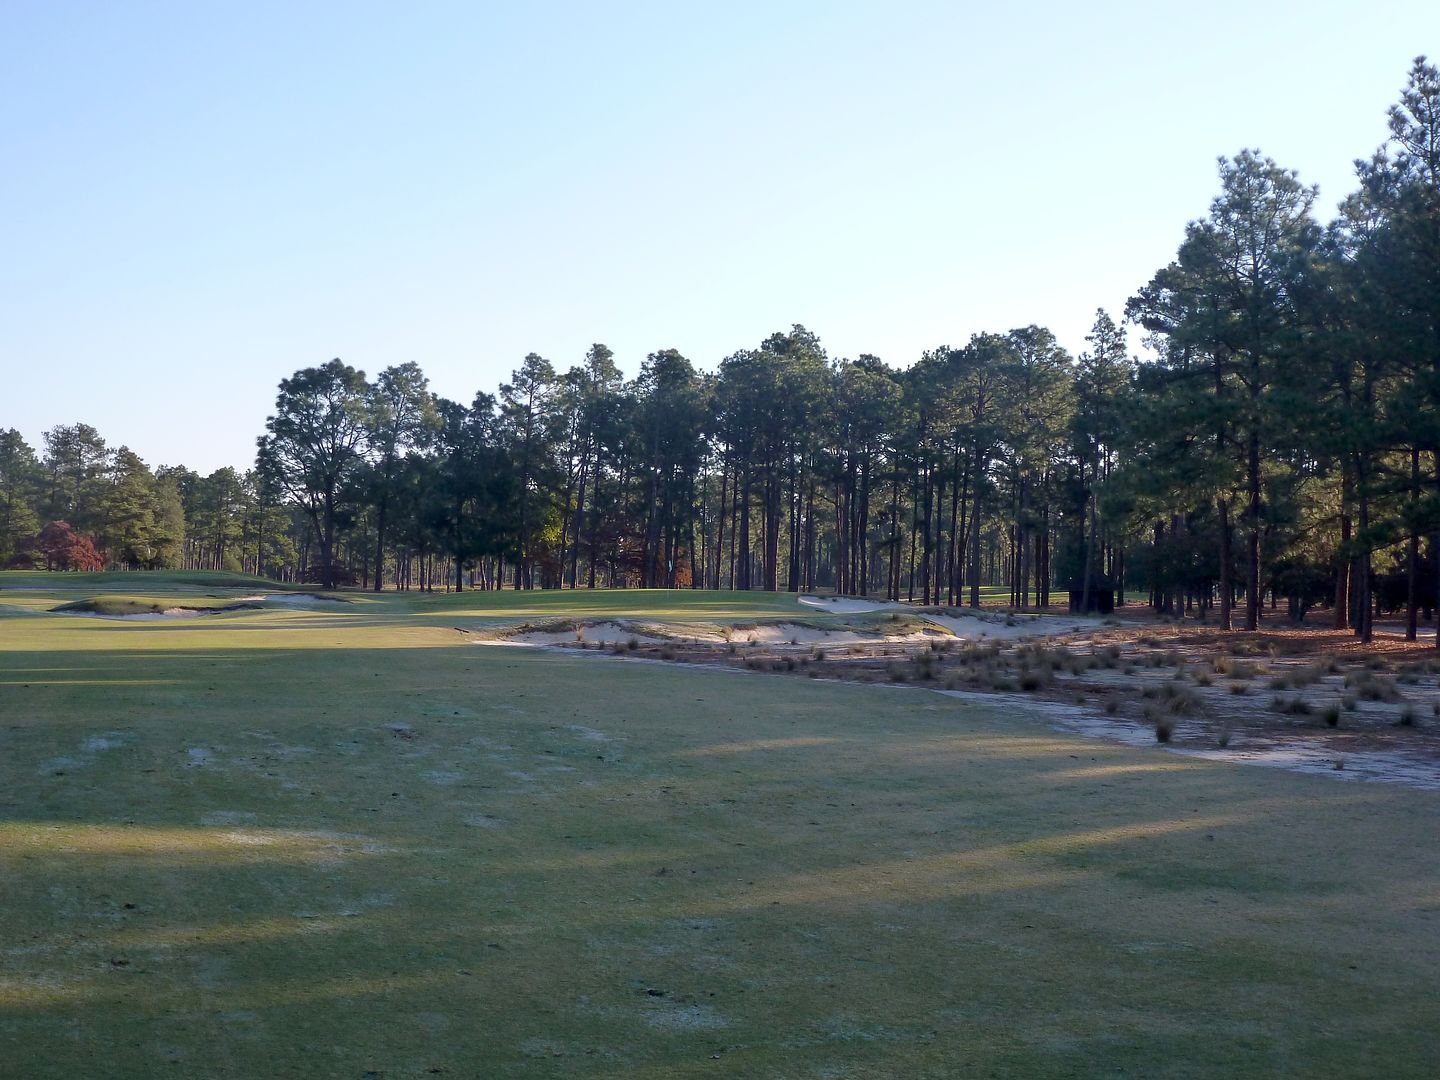
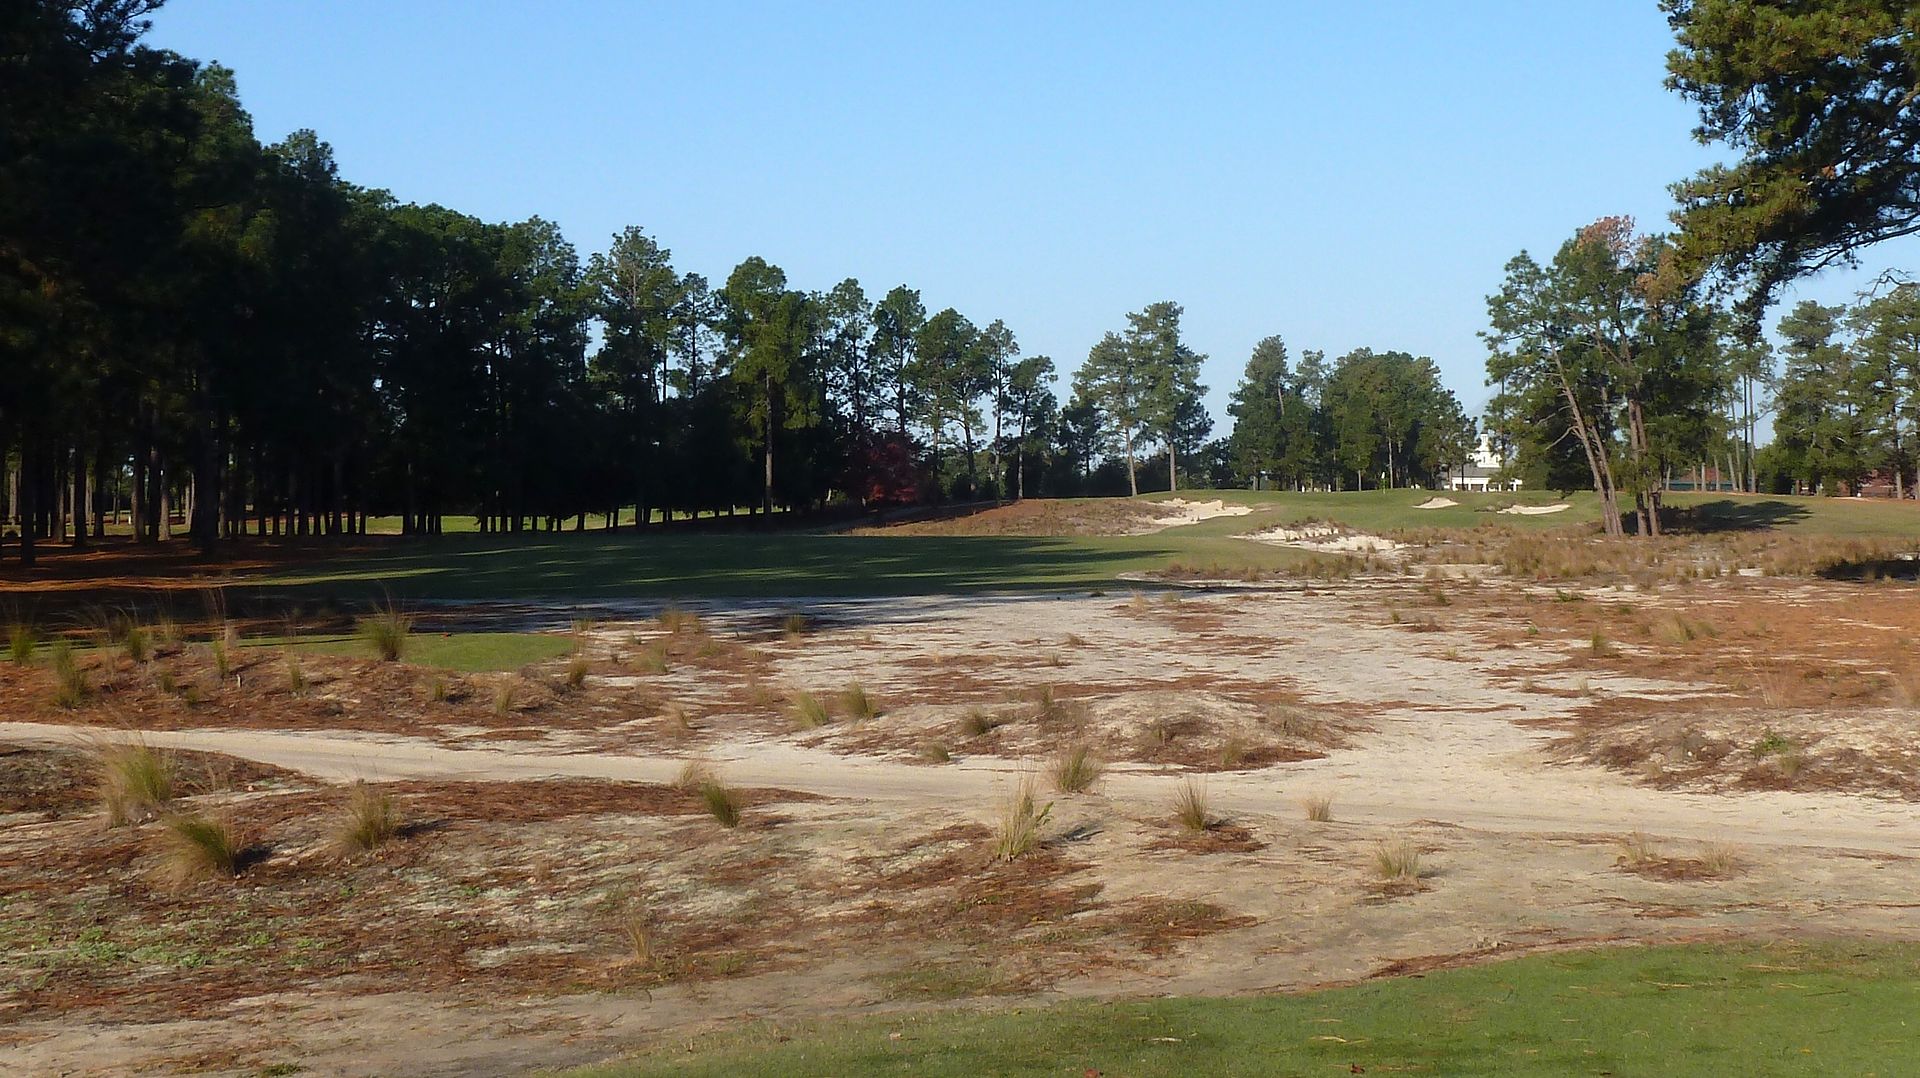
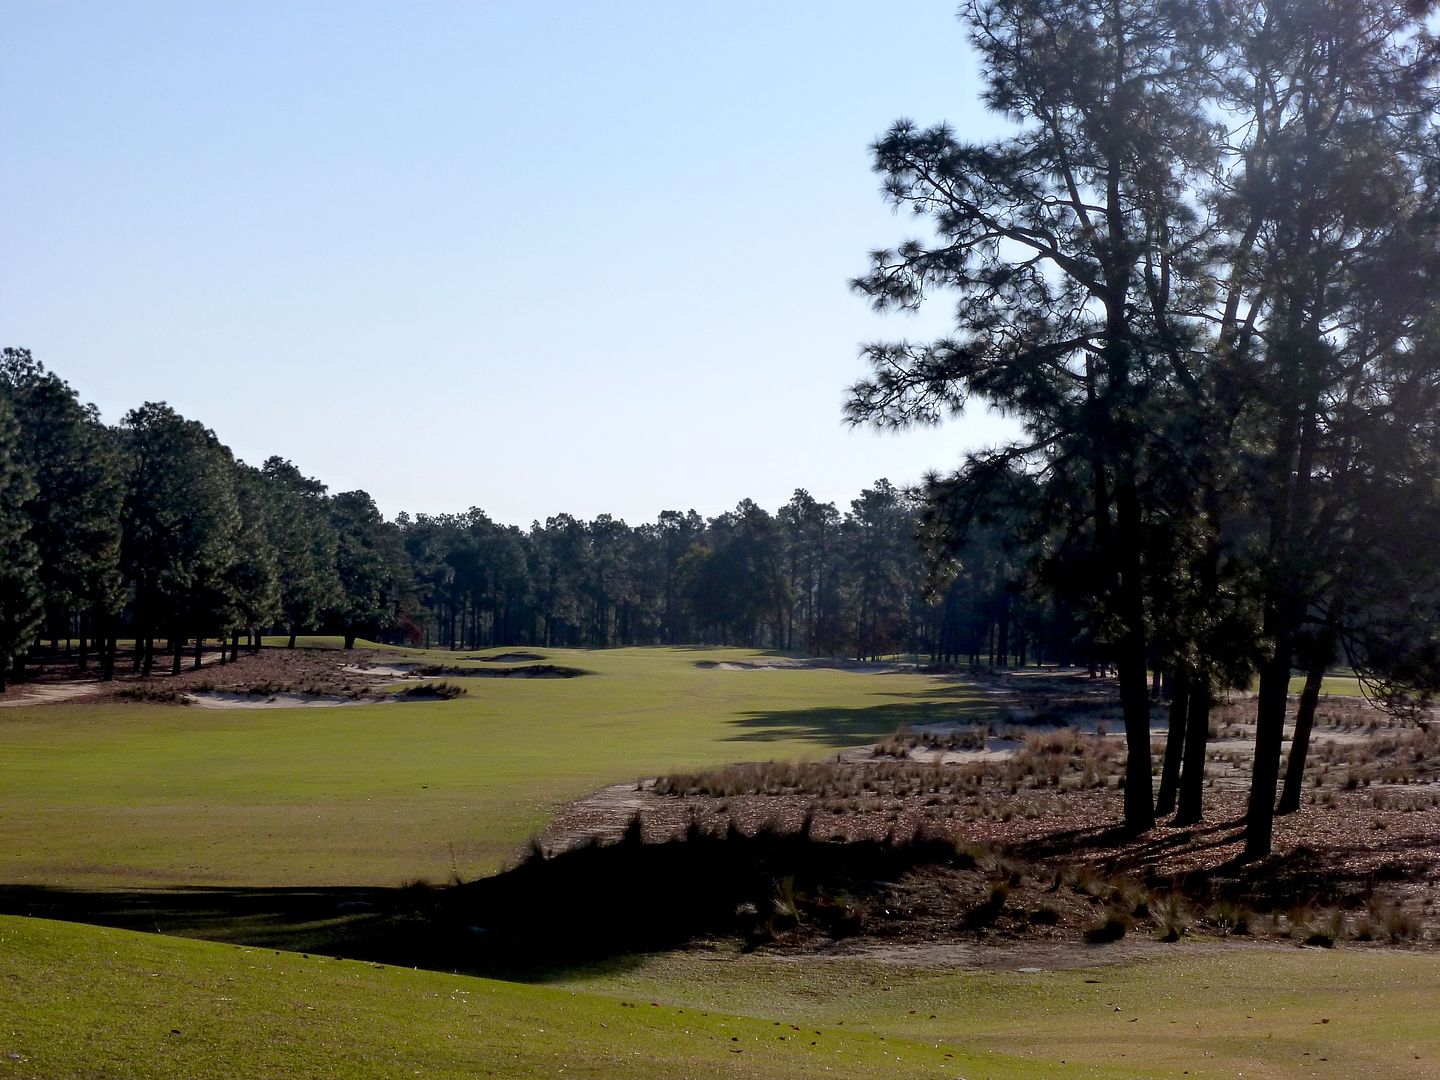
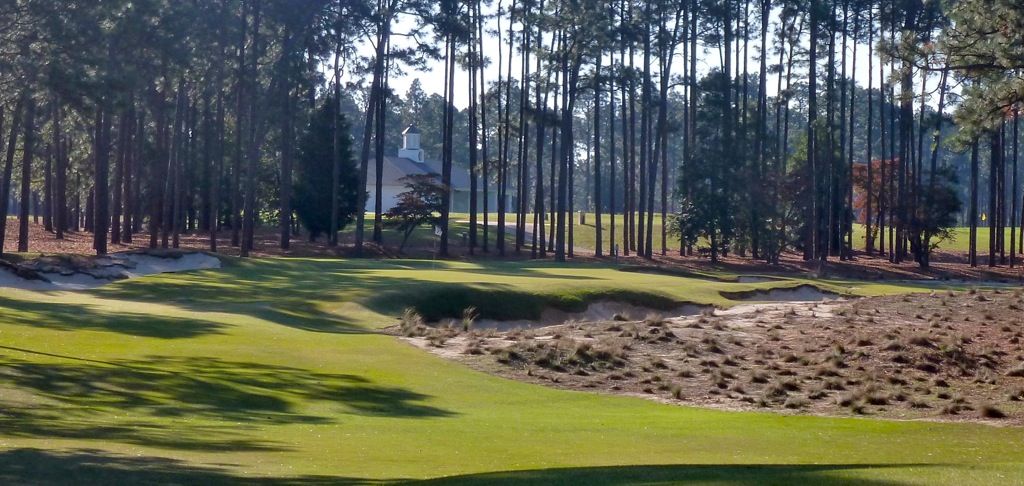
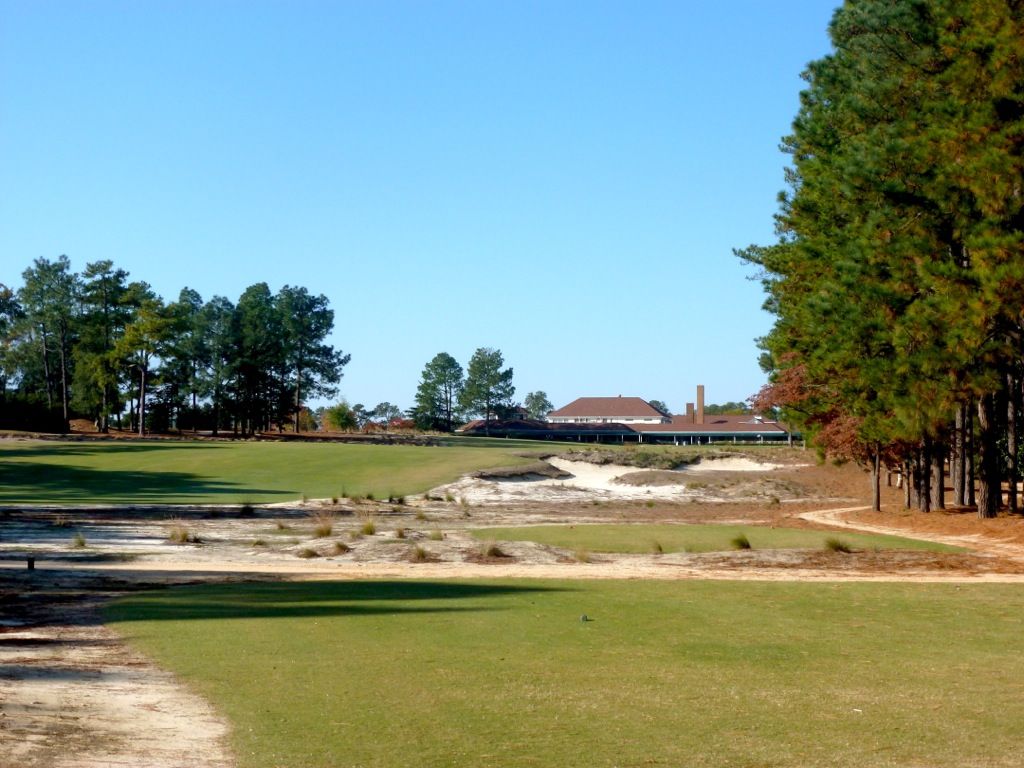
As the golfer gets nearer the 1st green, the width of the DZ becomes narrower. Few golfers will choose to drive the ball past this location (120 yards from the green), which would require the golfer challenge the natural area on both sides.
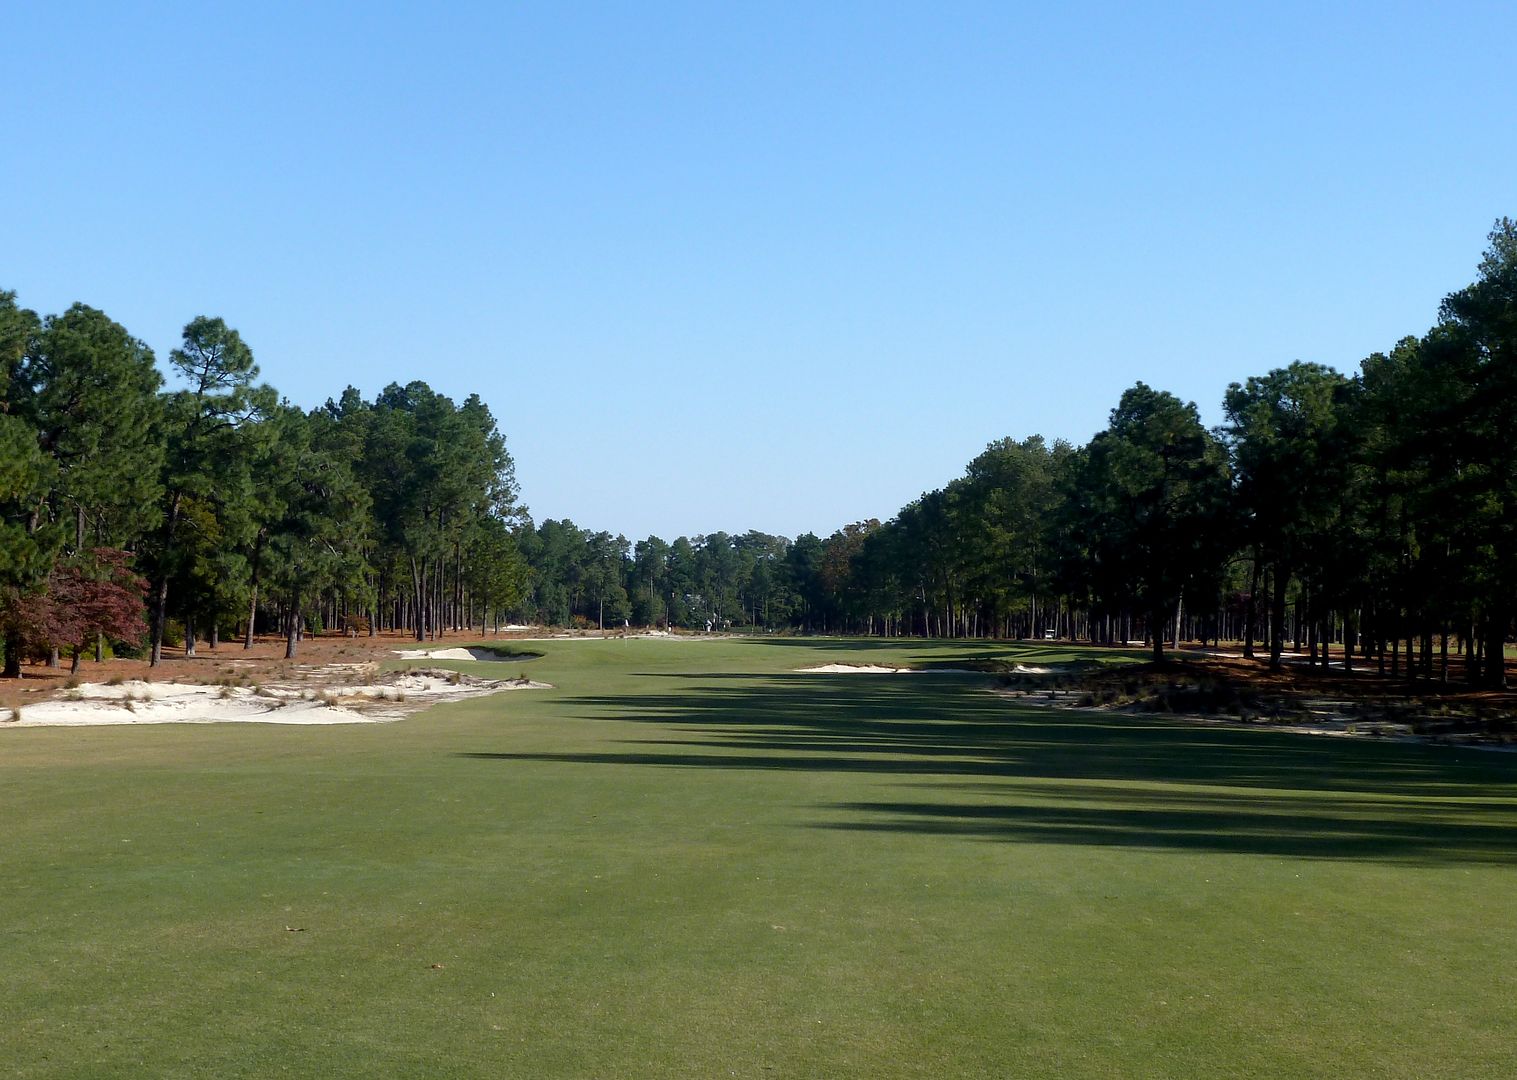
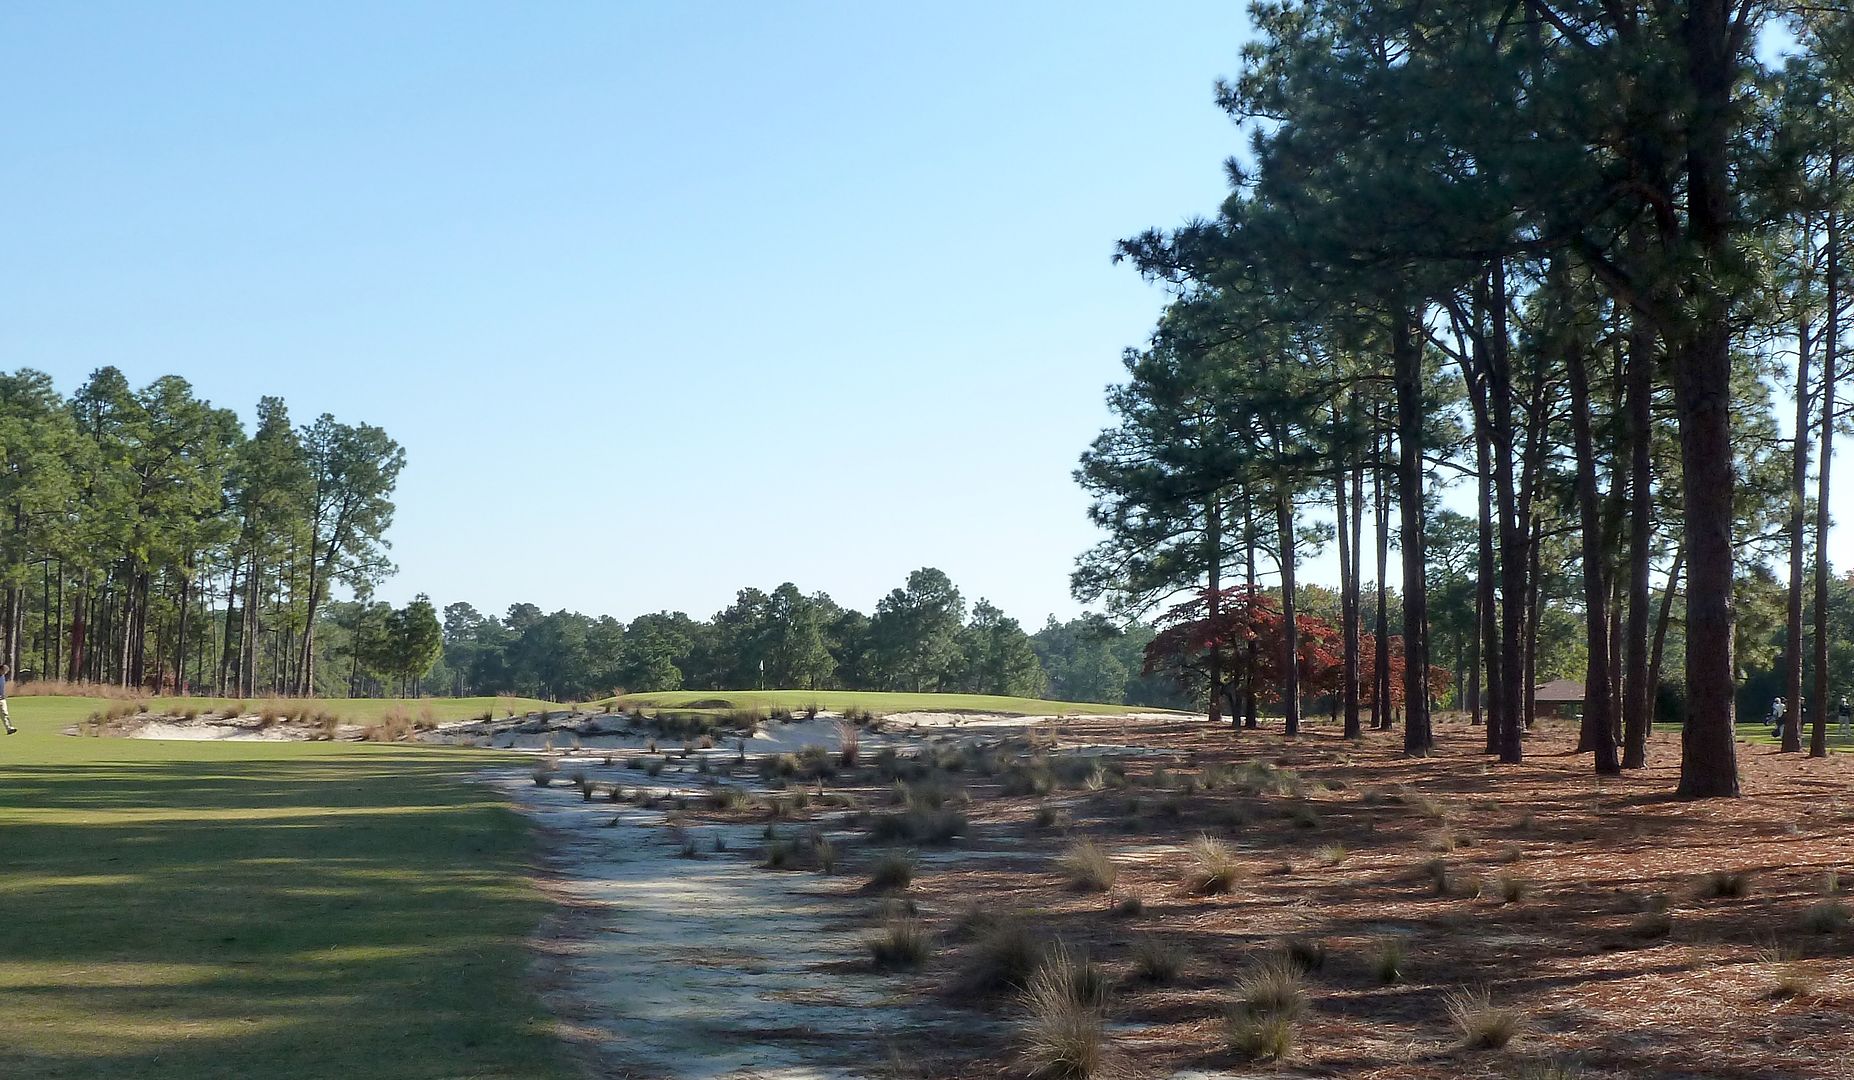
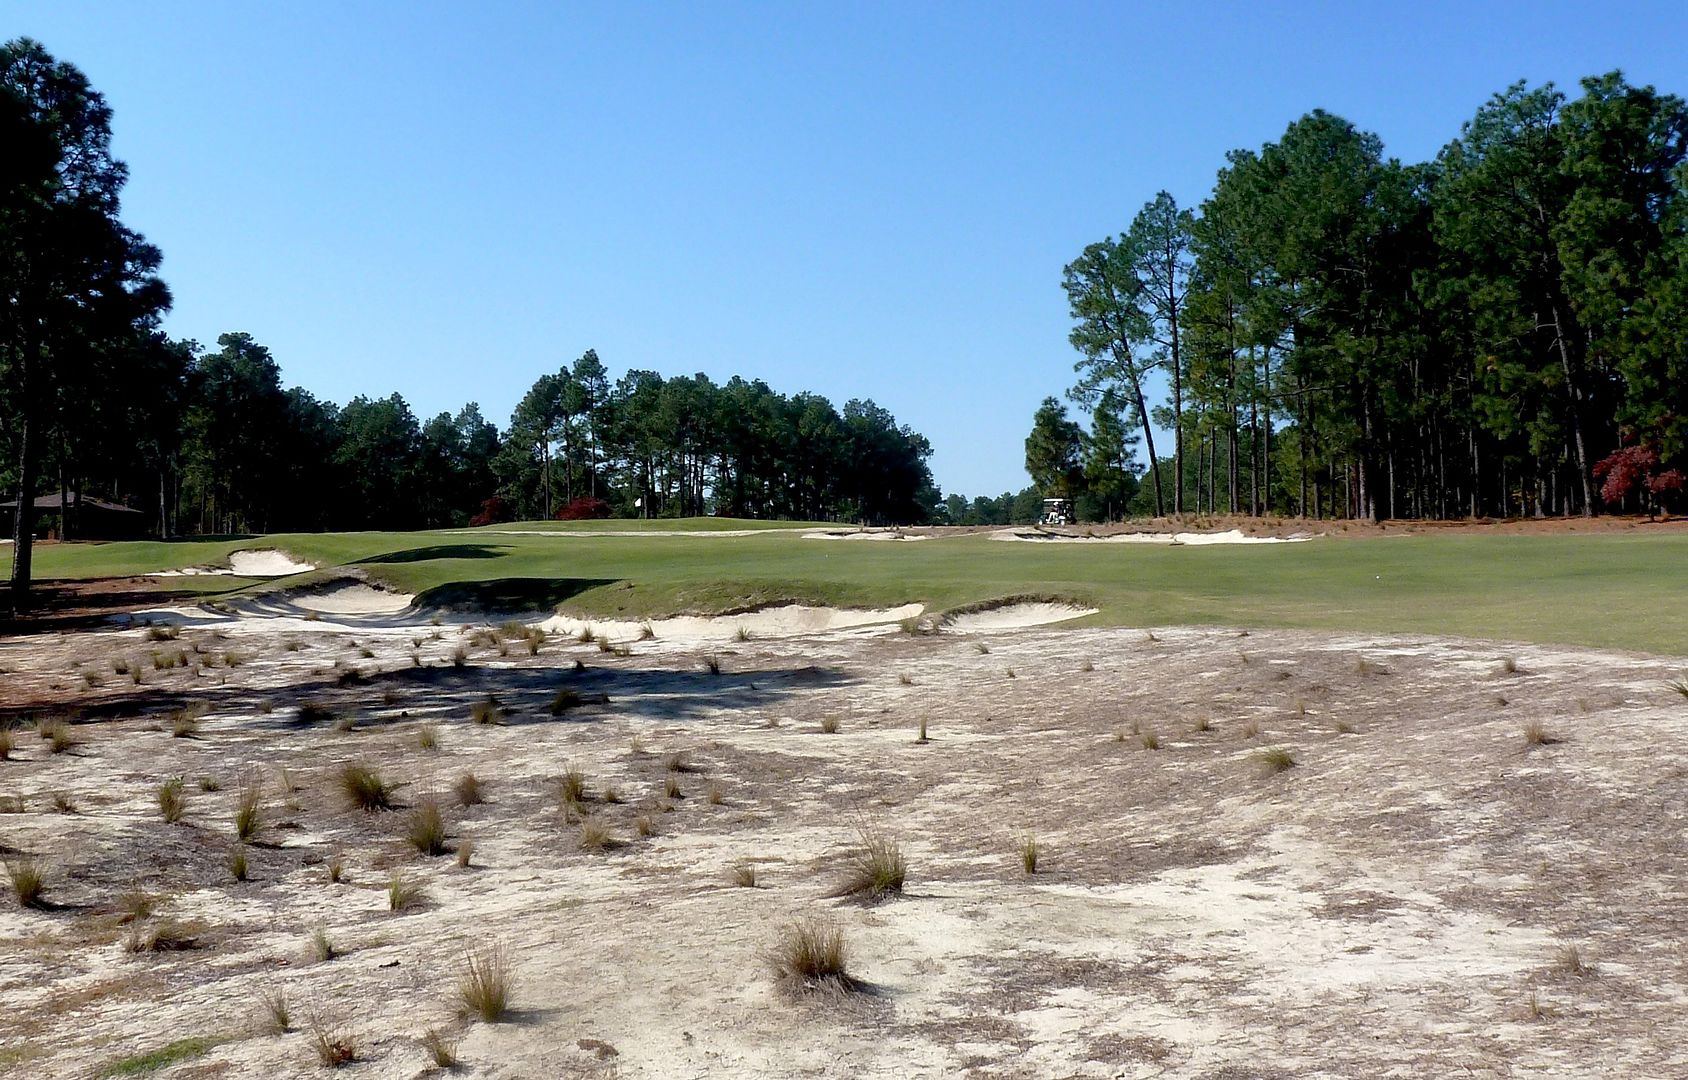
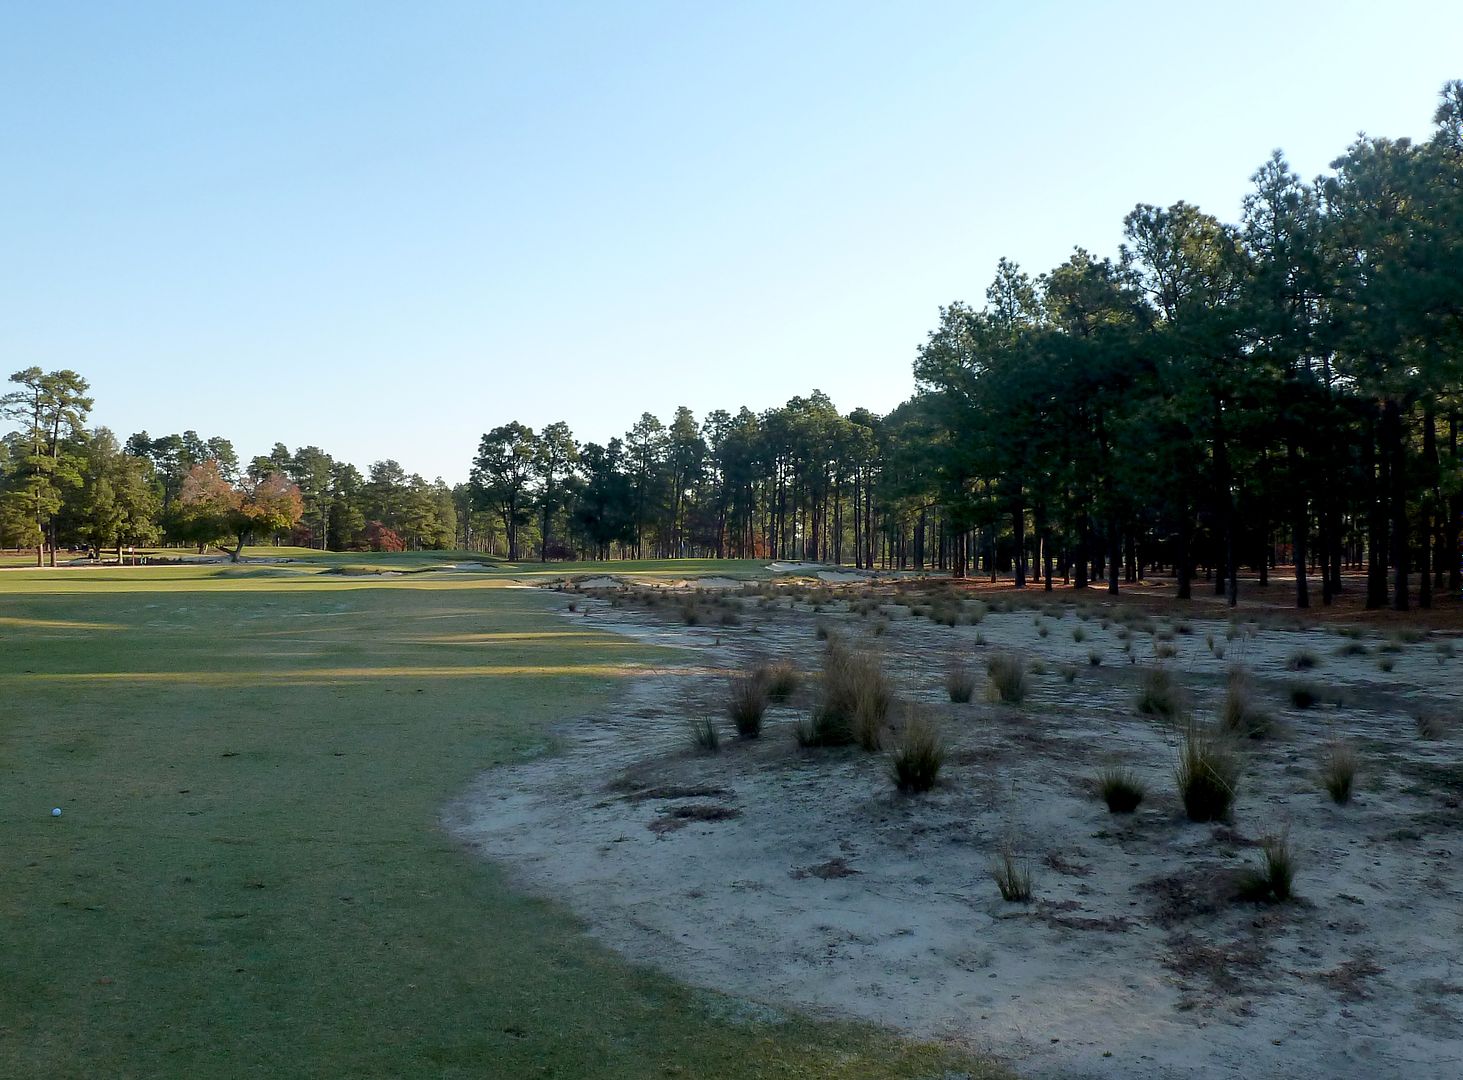
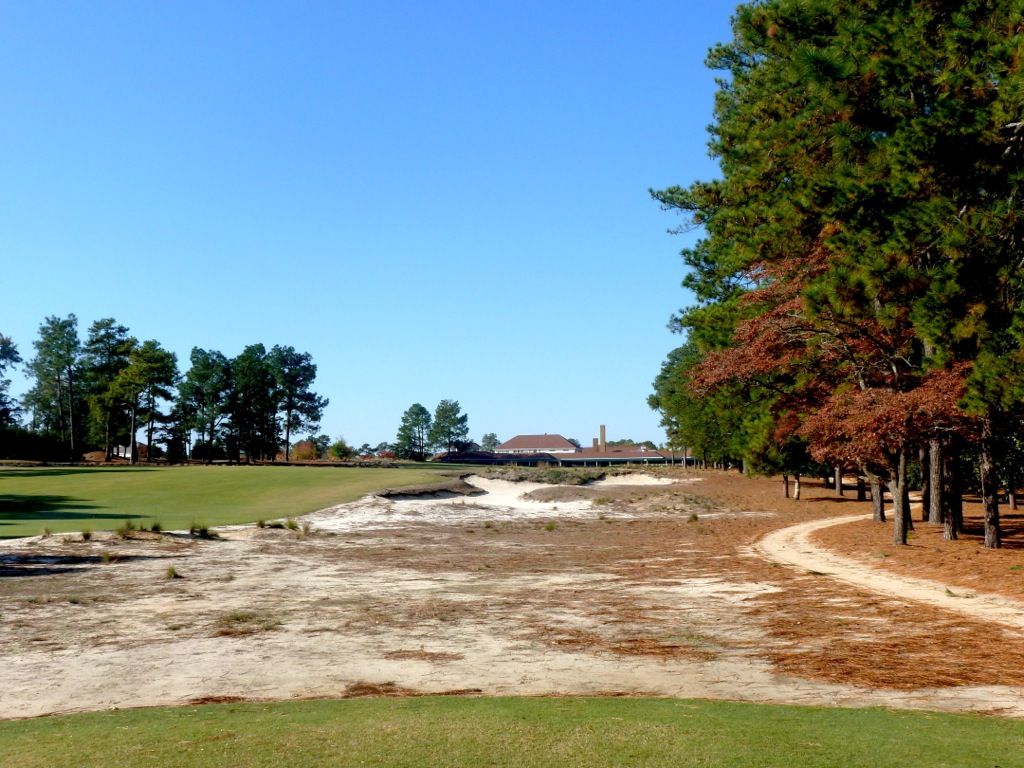
Only the brave or the stupid will drive to this point just steps from the natural area and 70 yards from the putting surface.

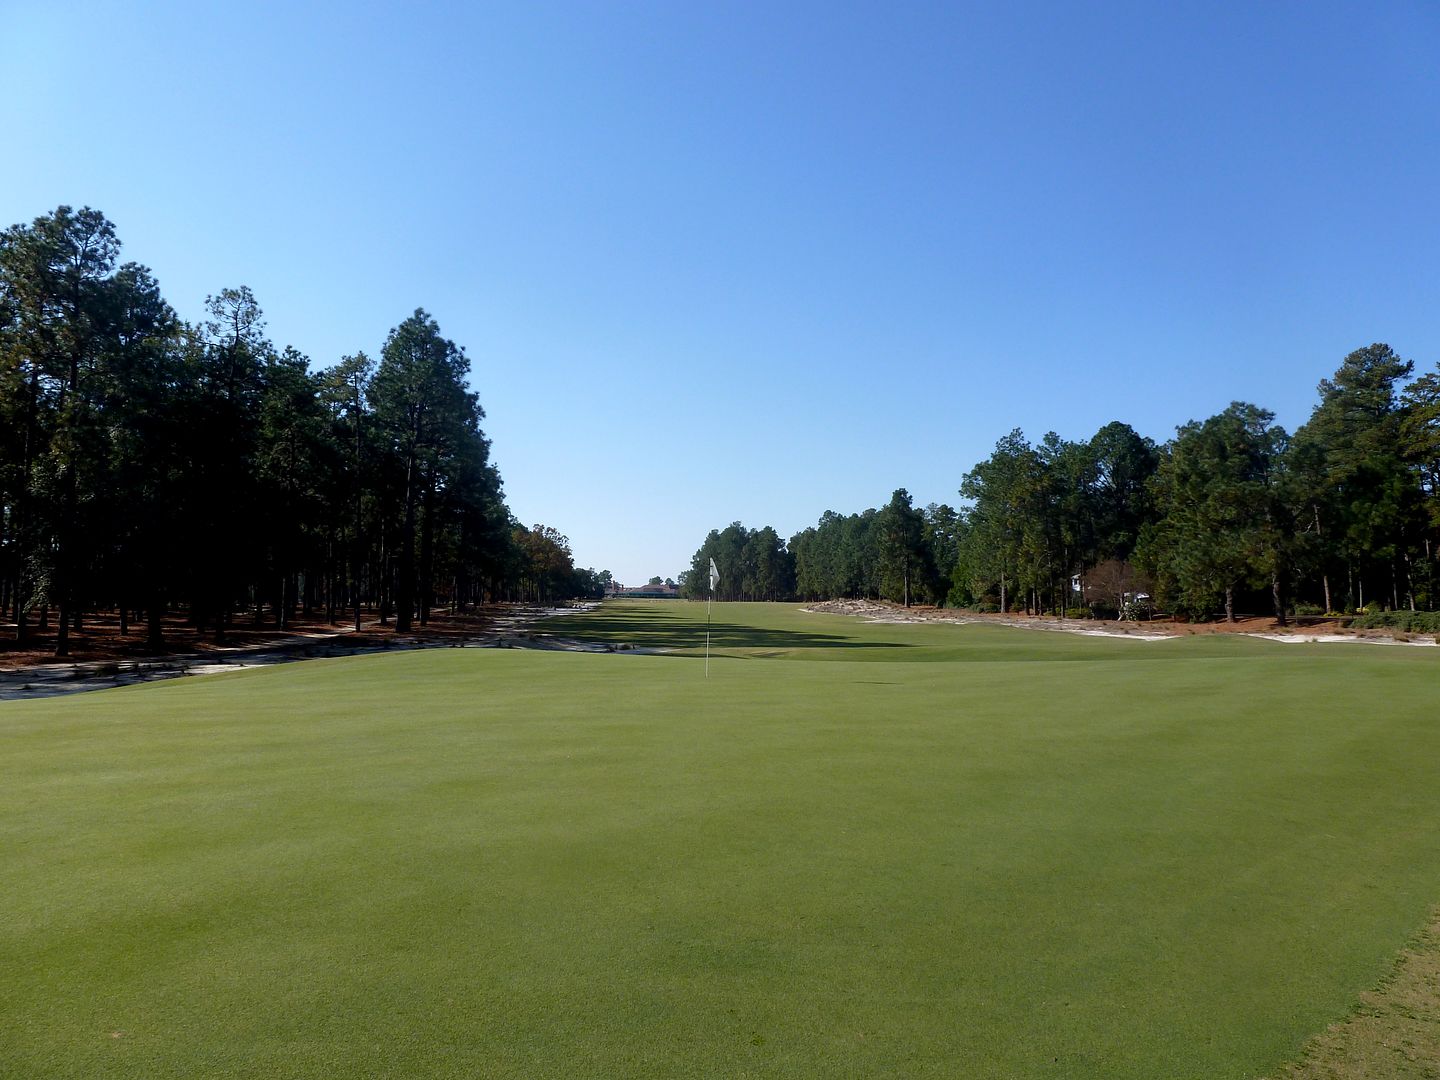
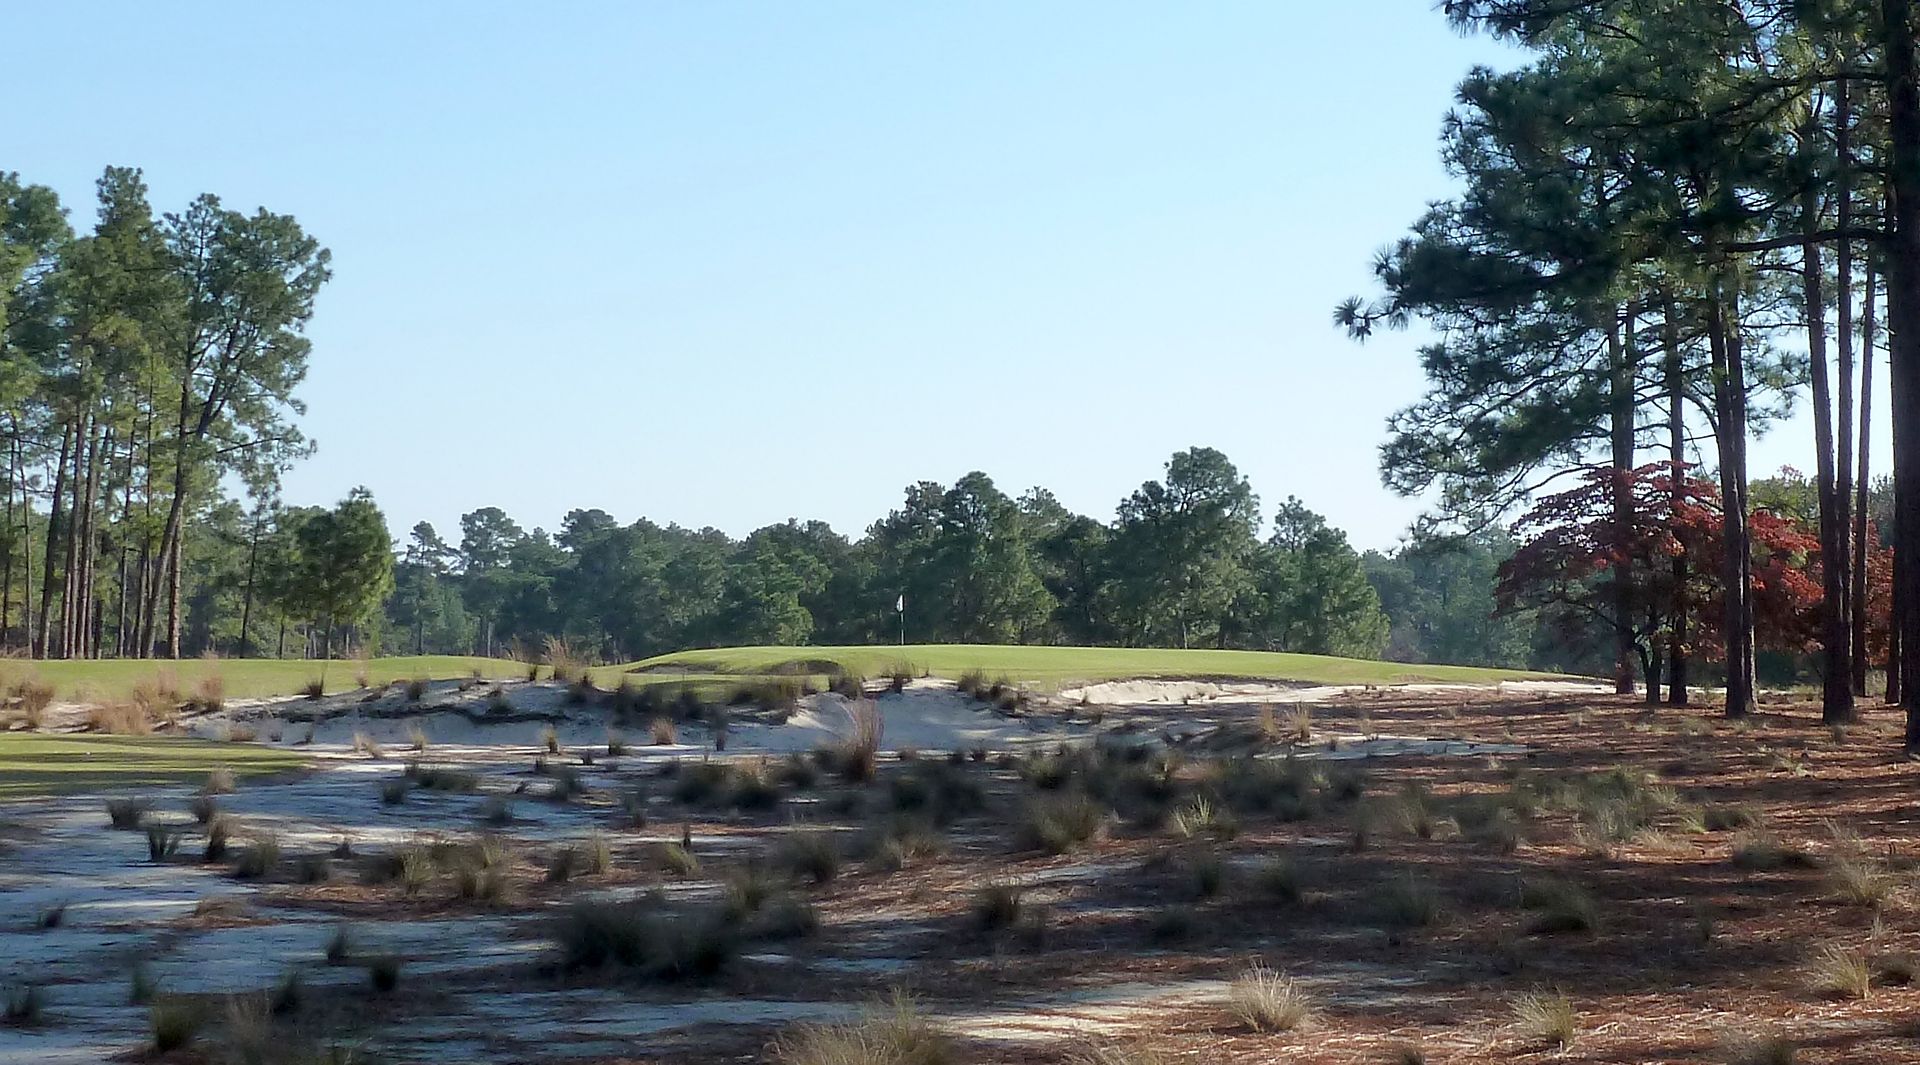
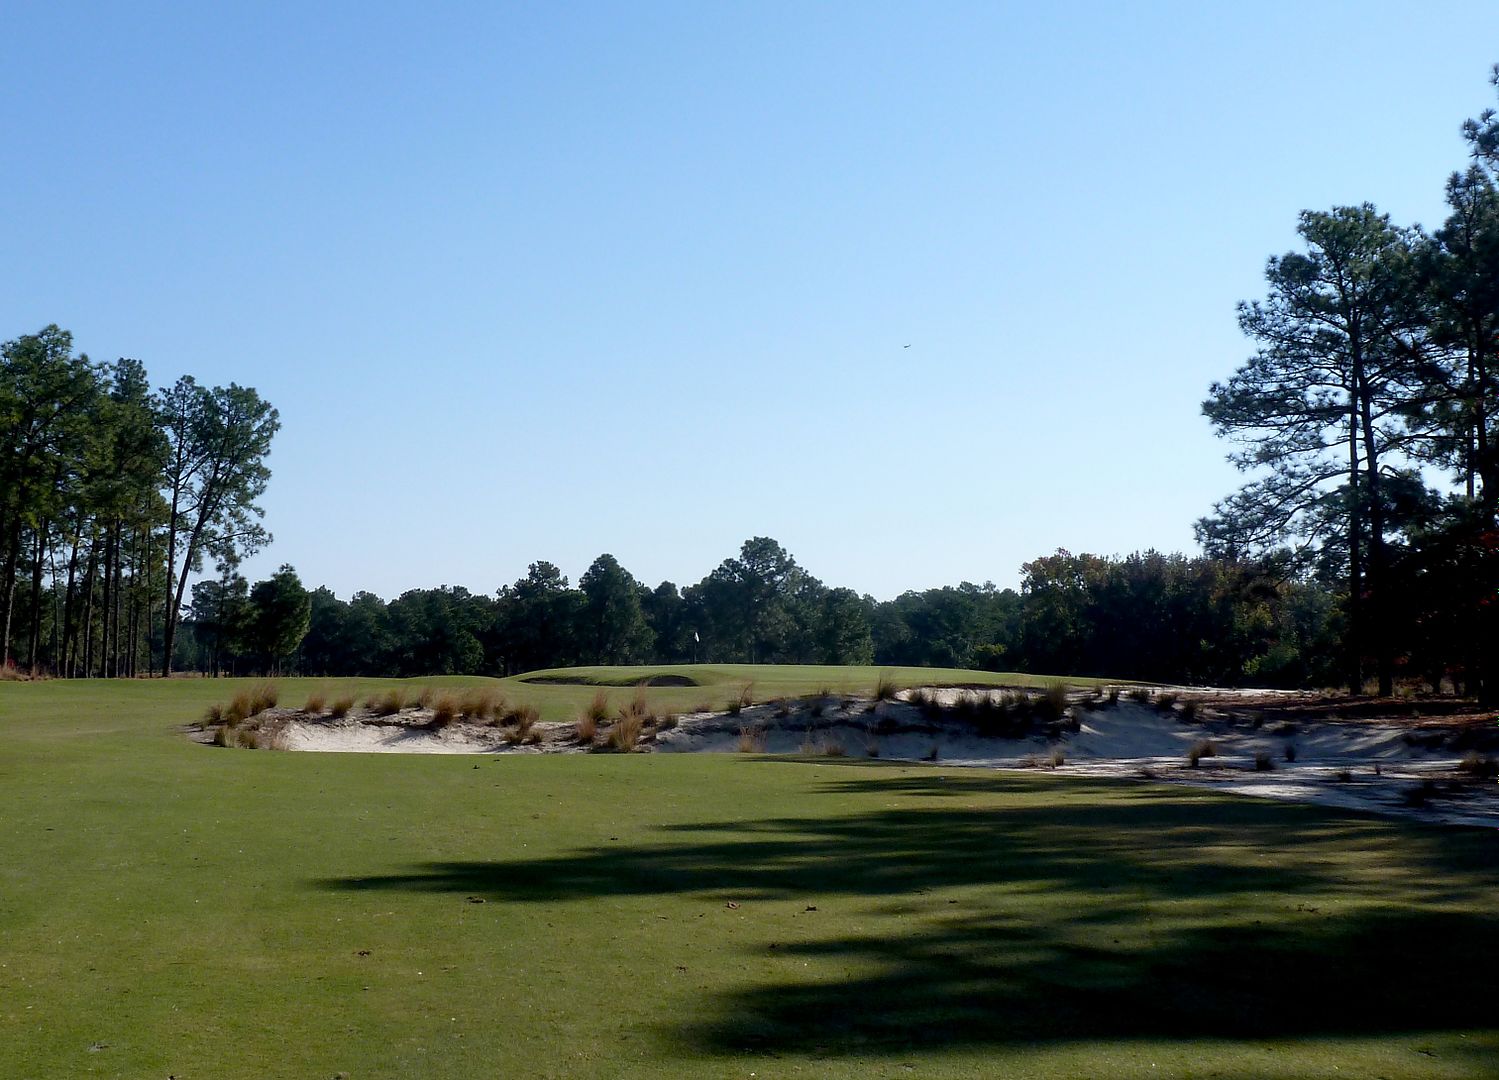
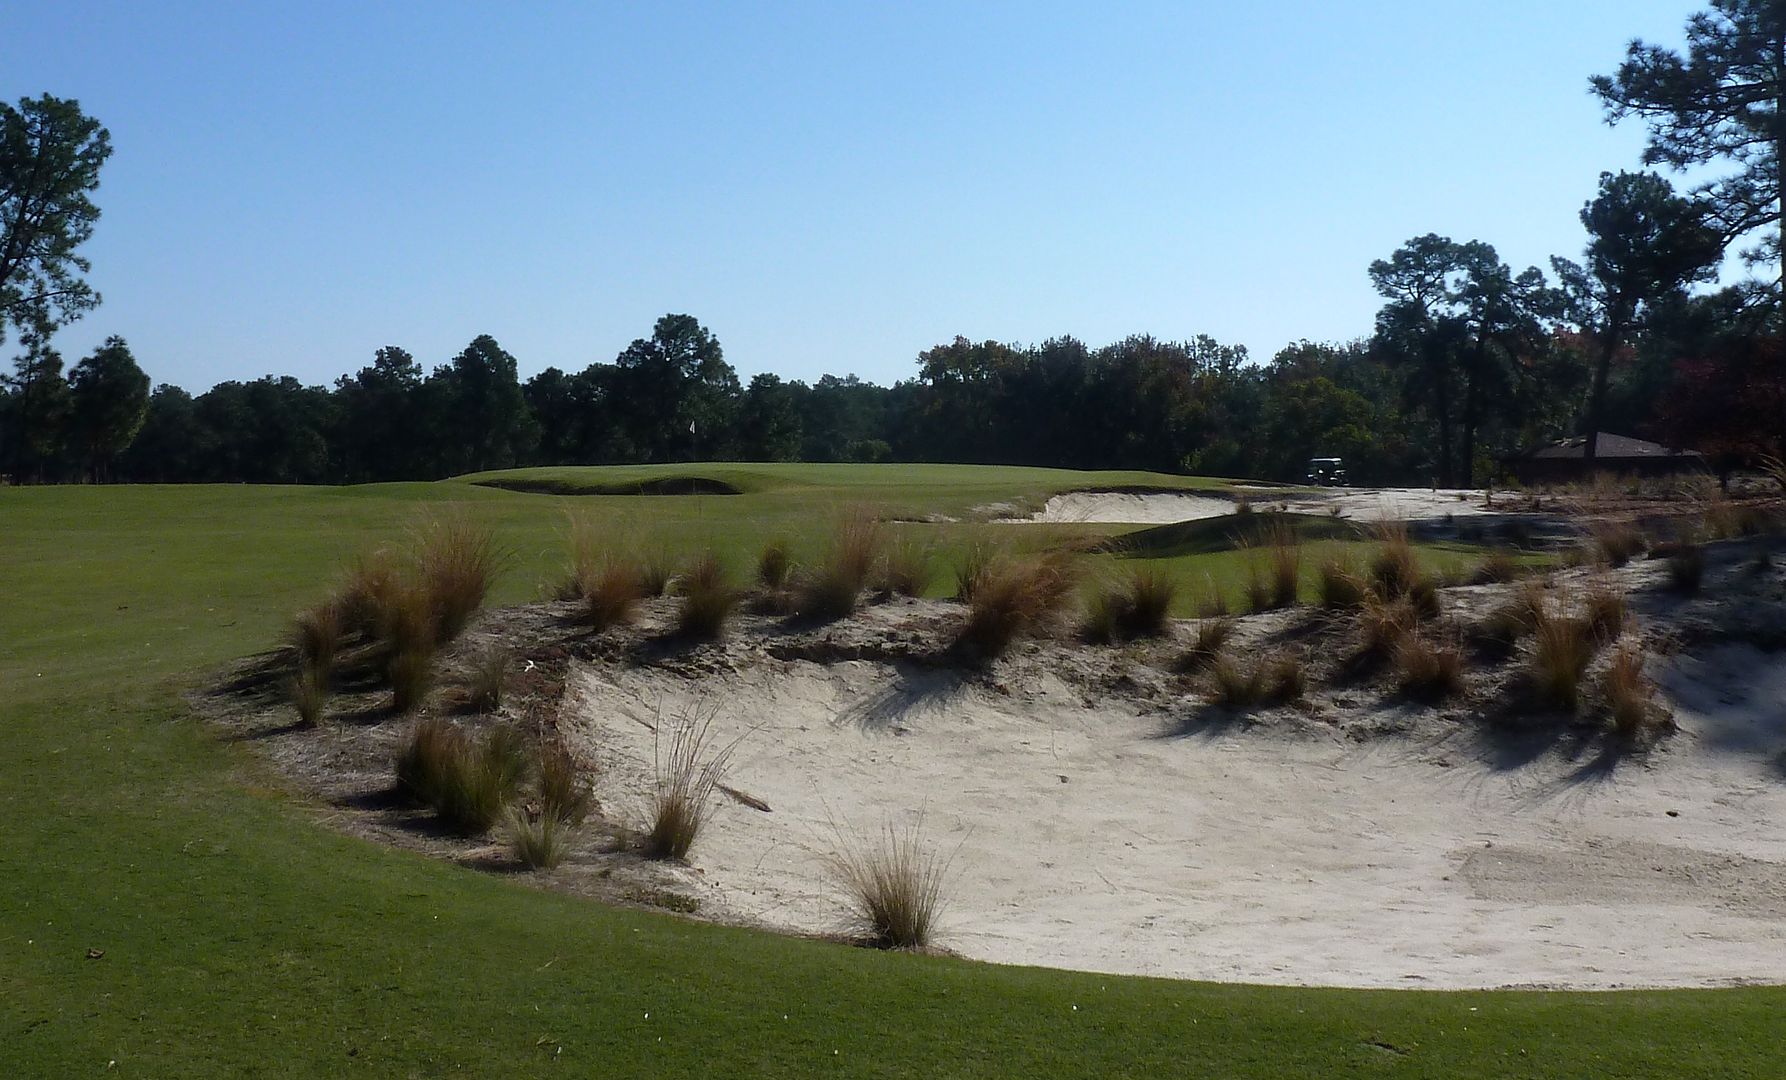
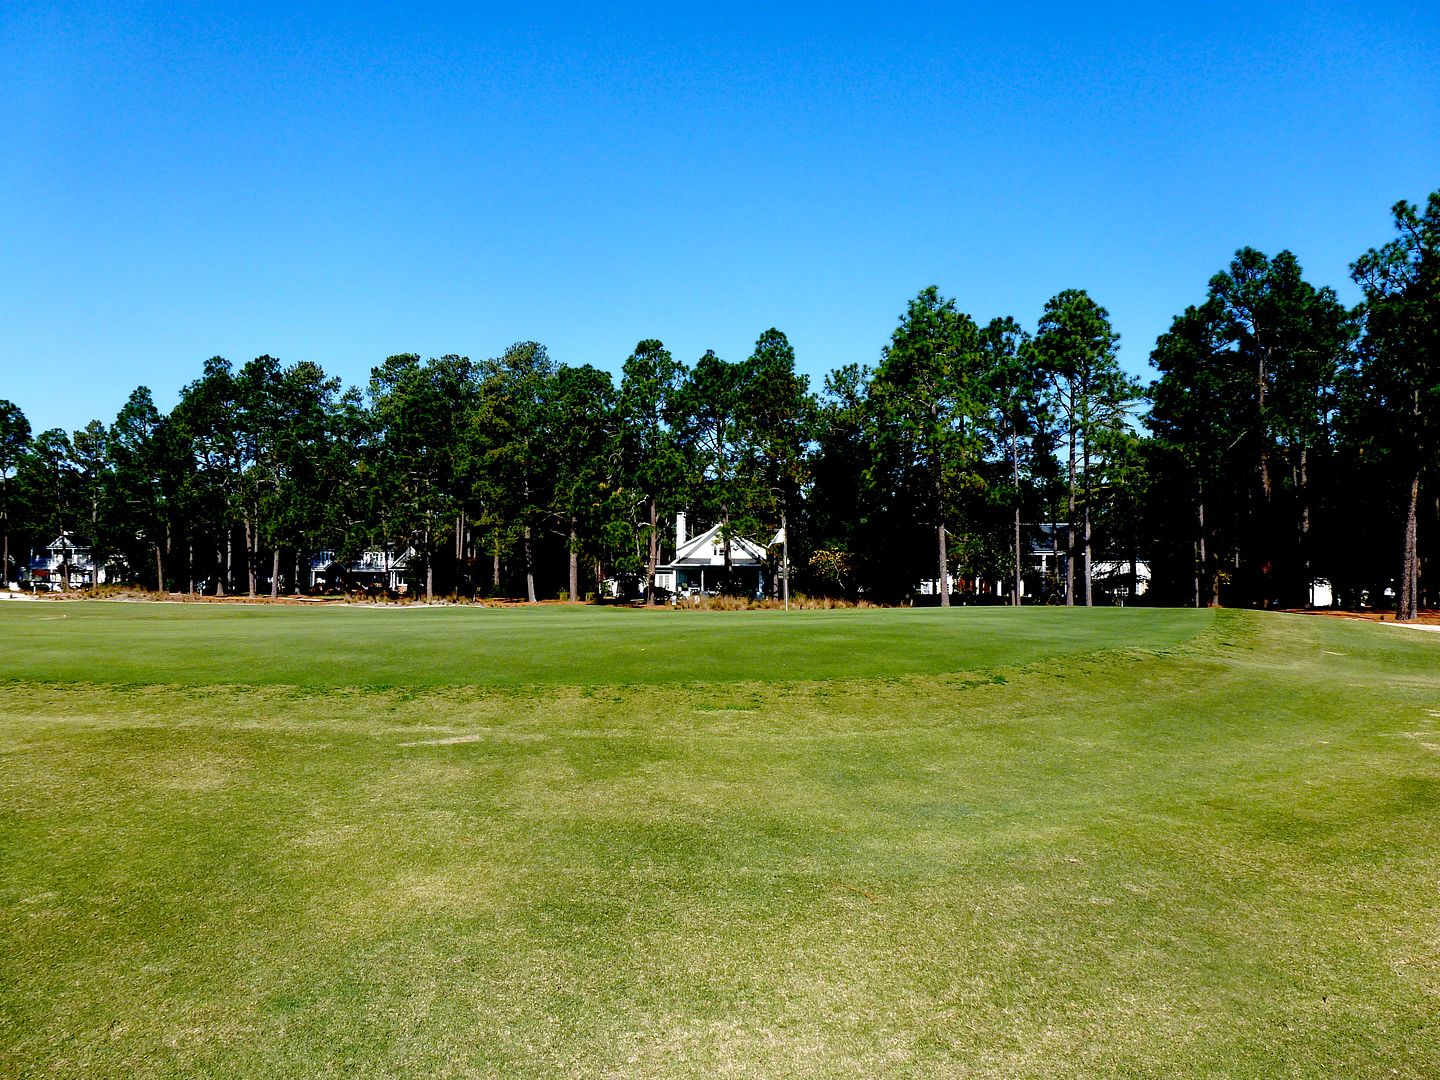
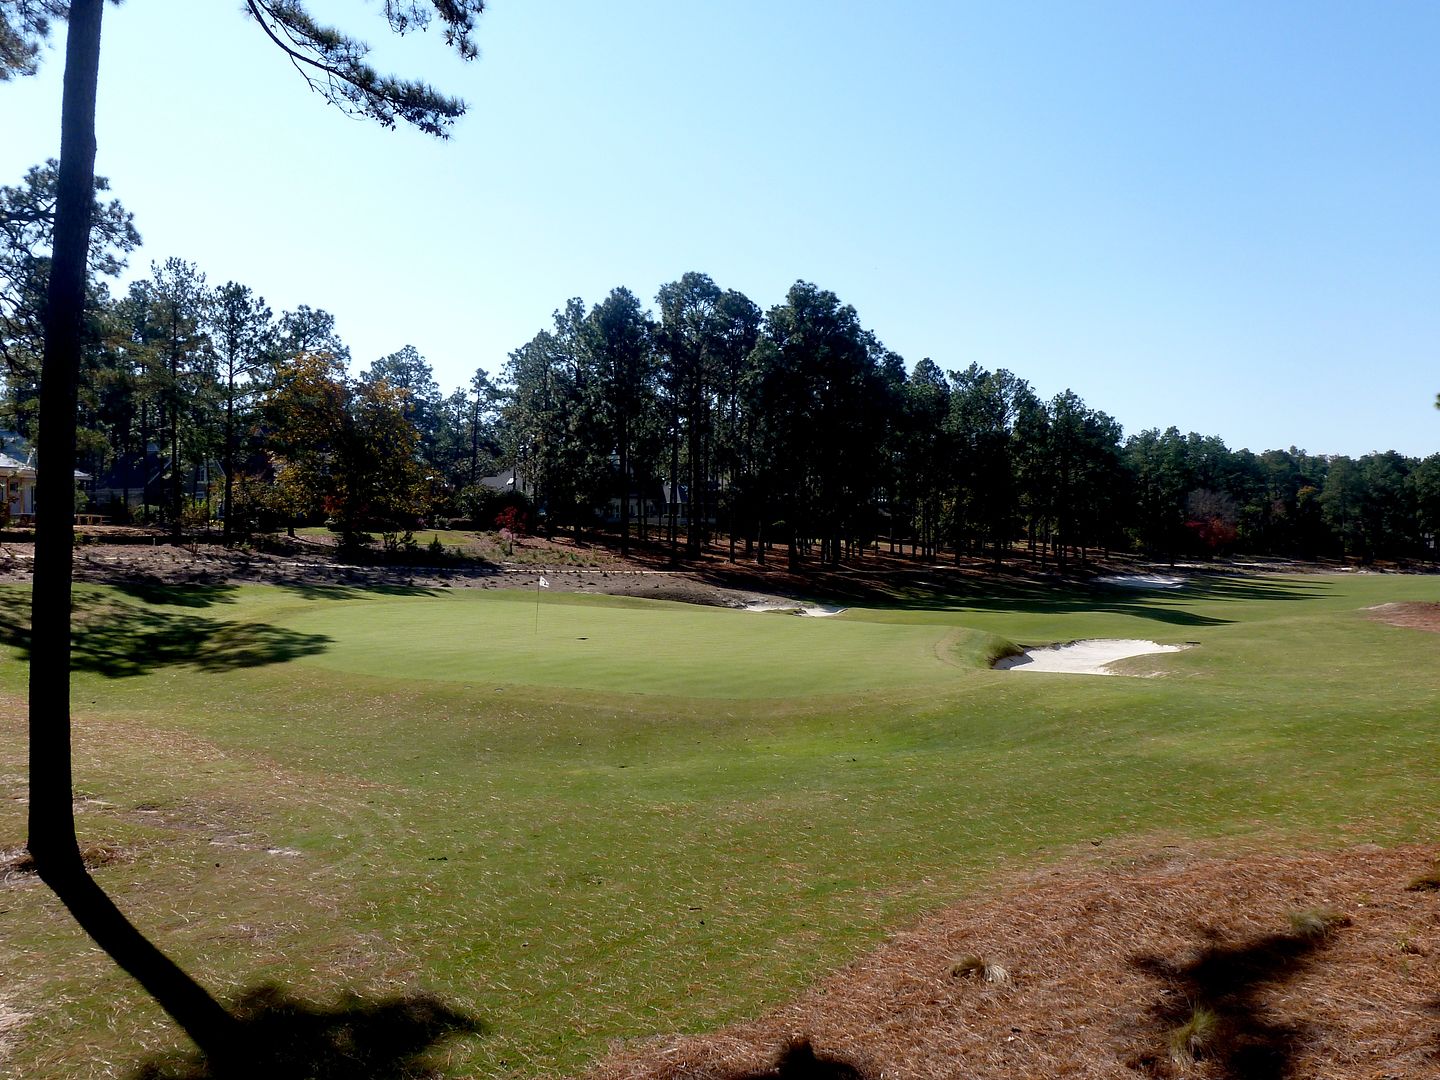
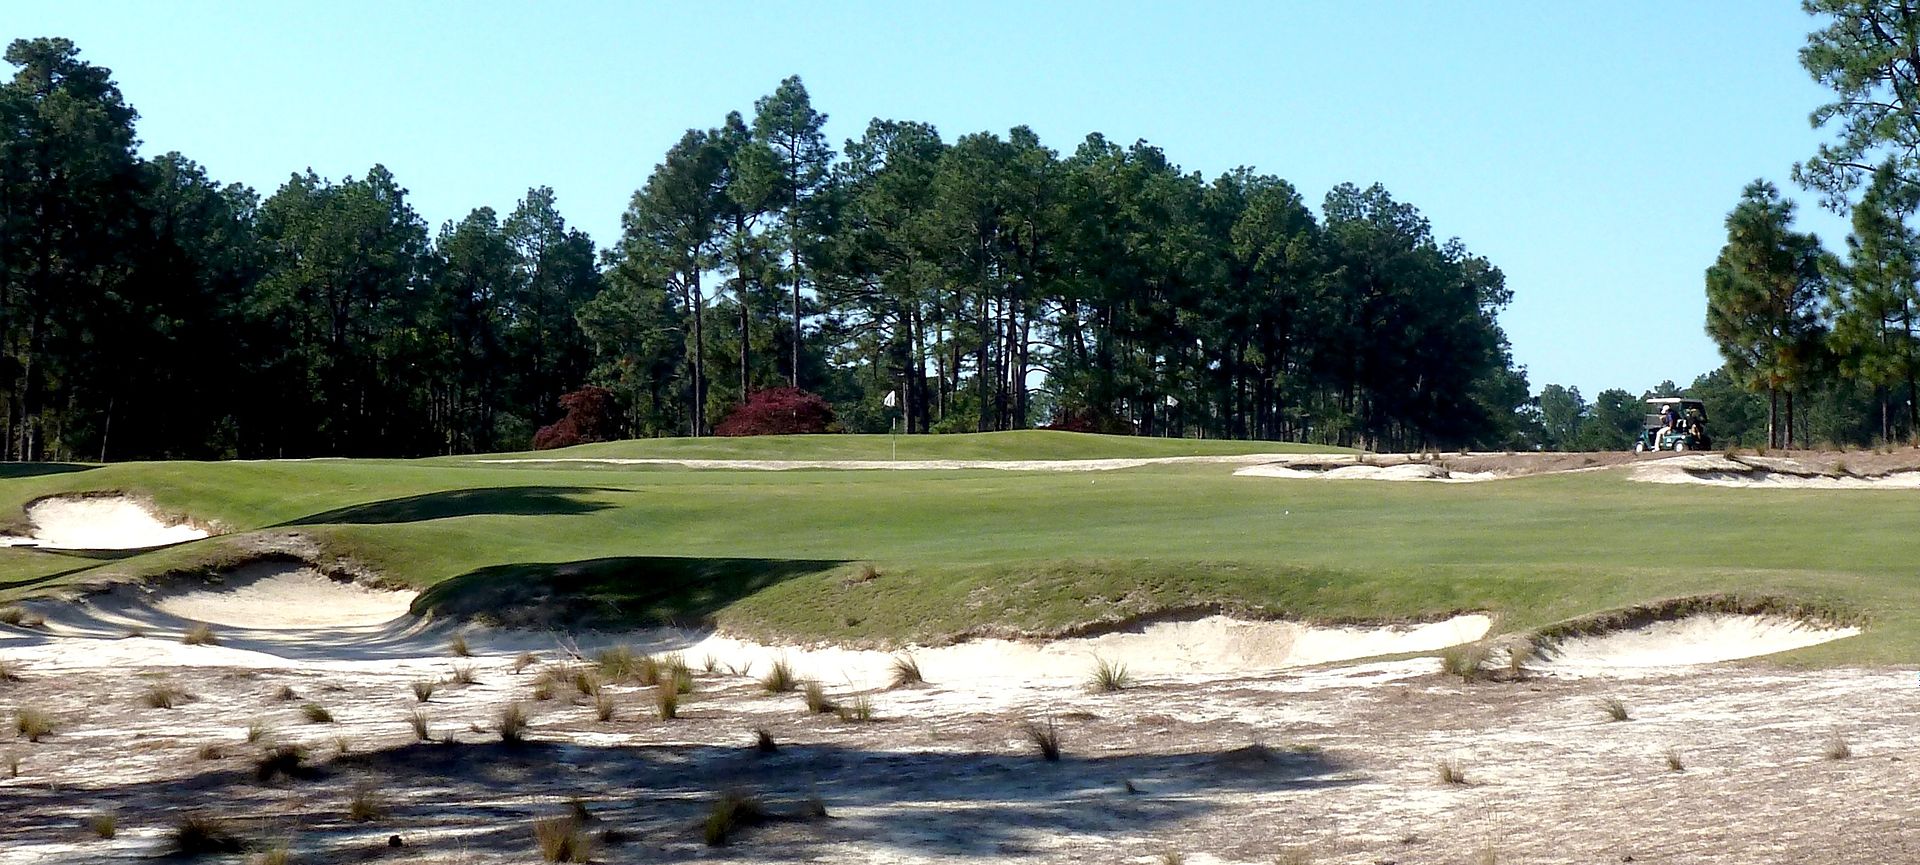
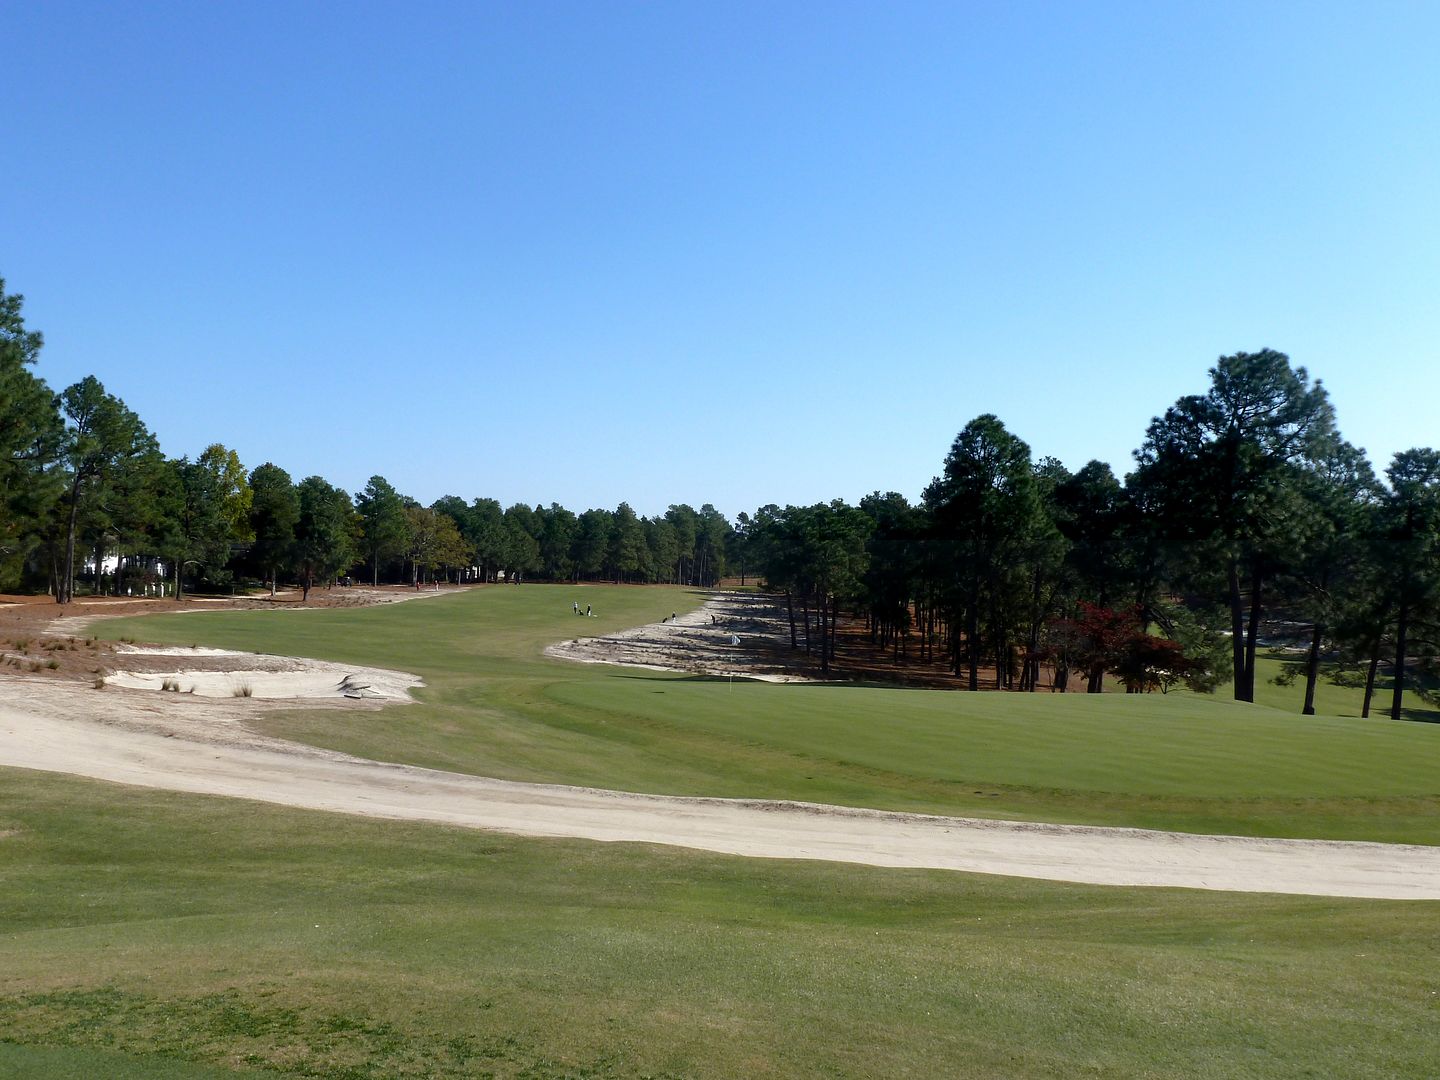
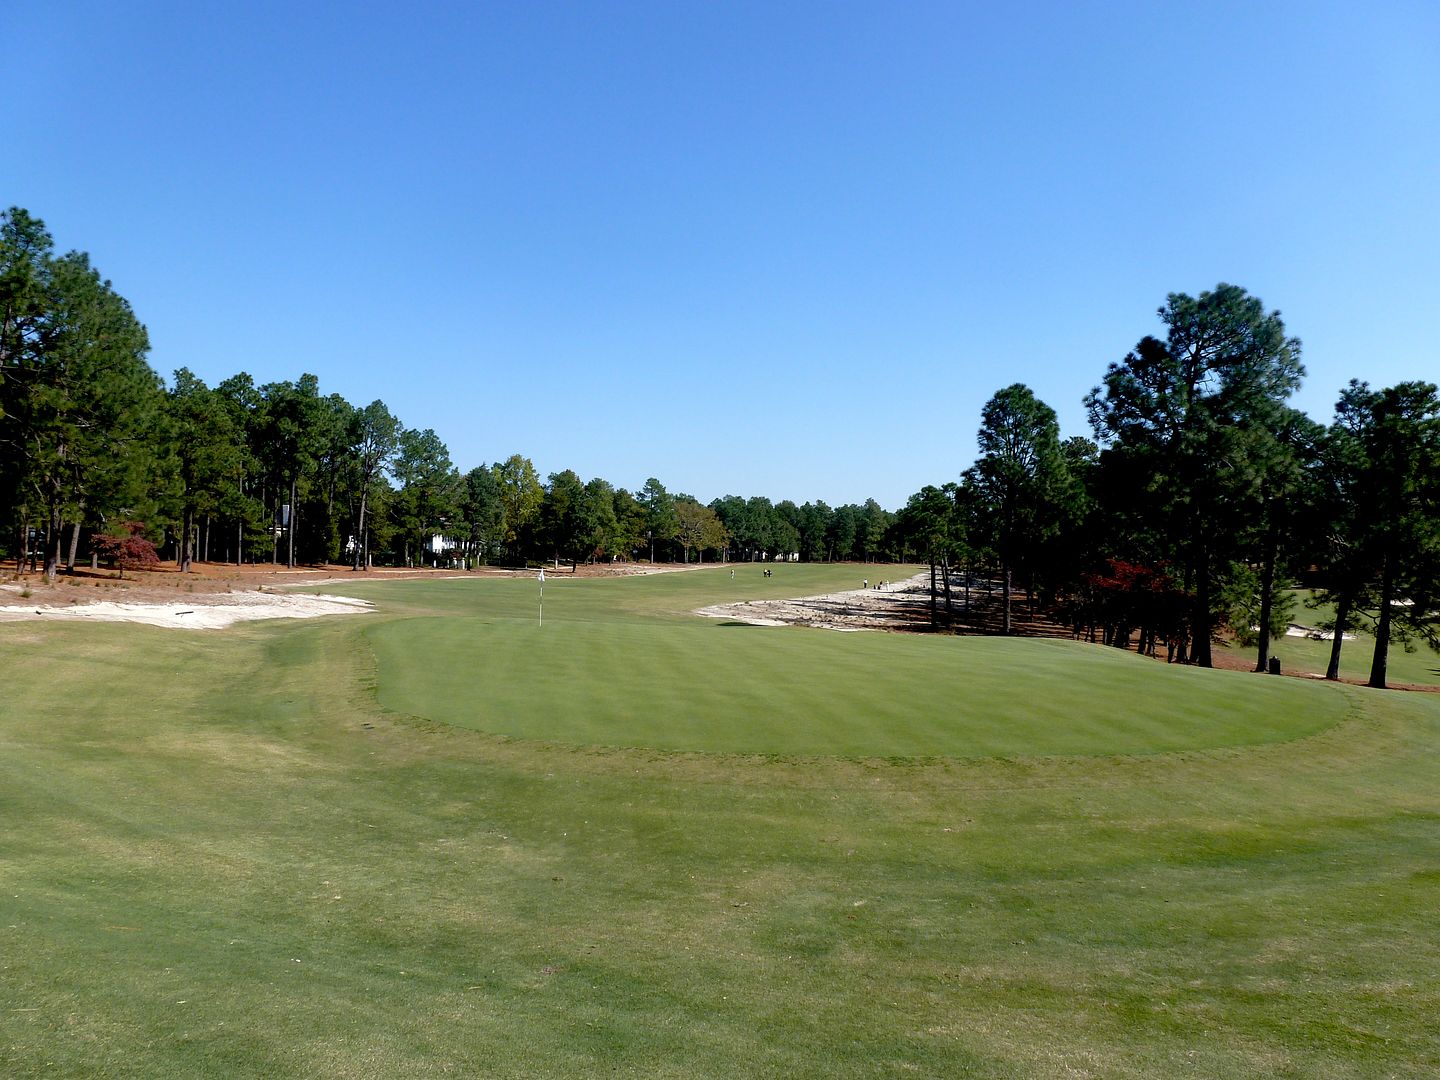
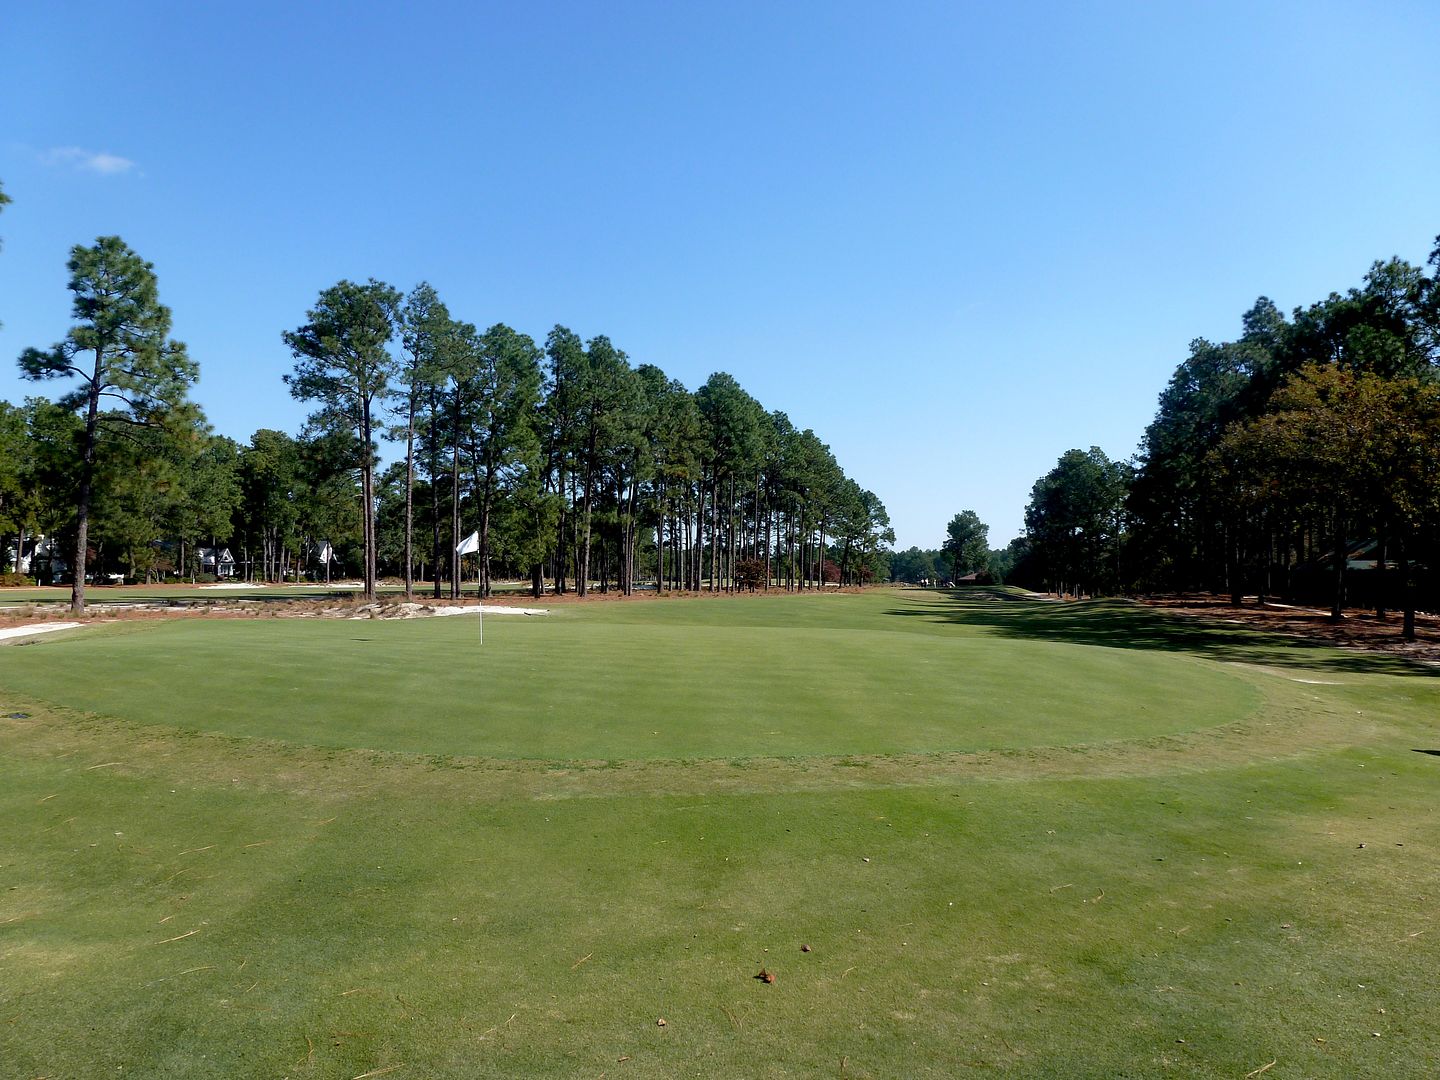
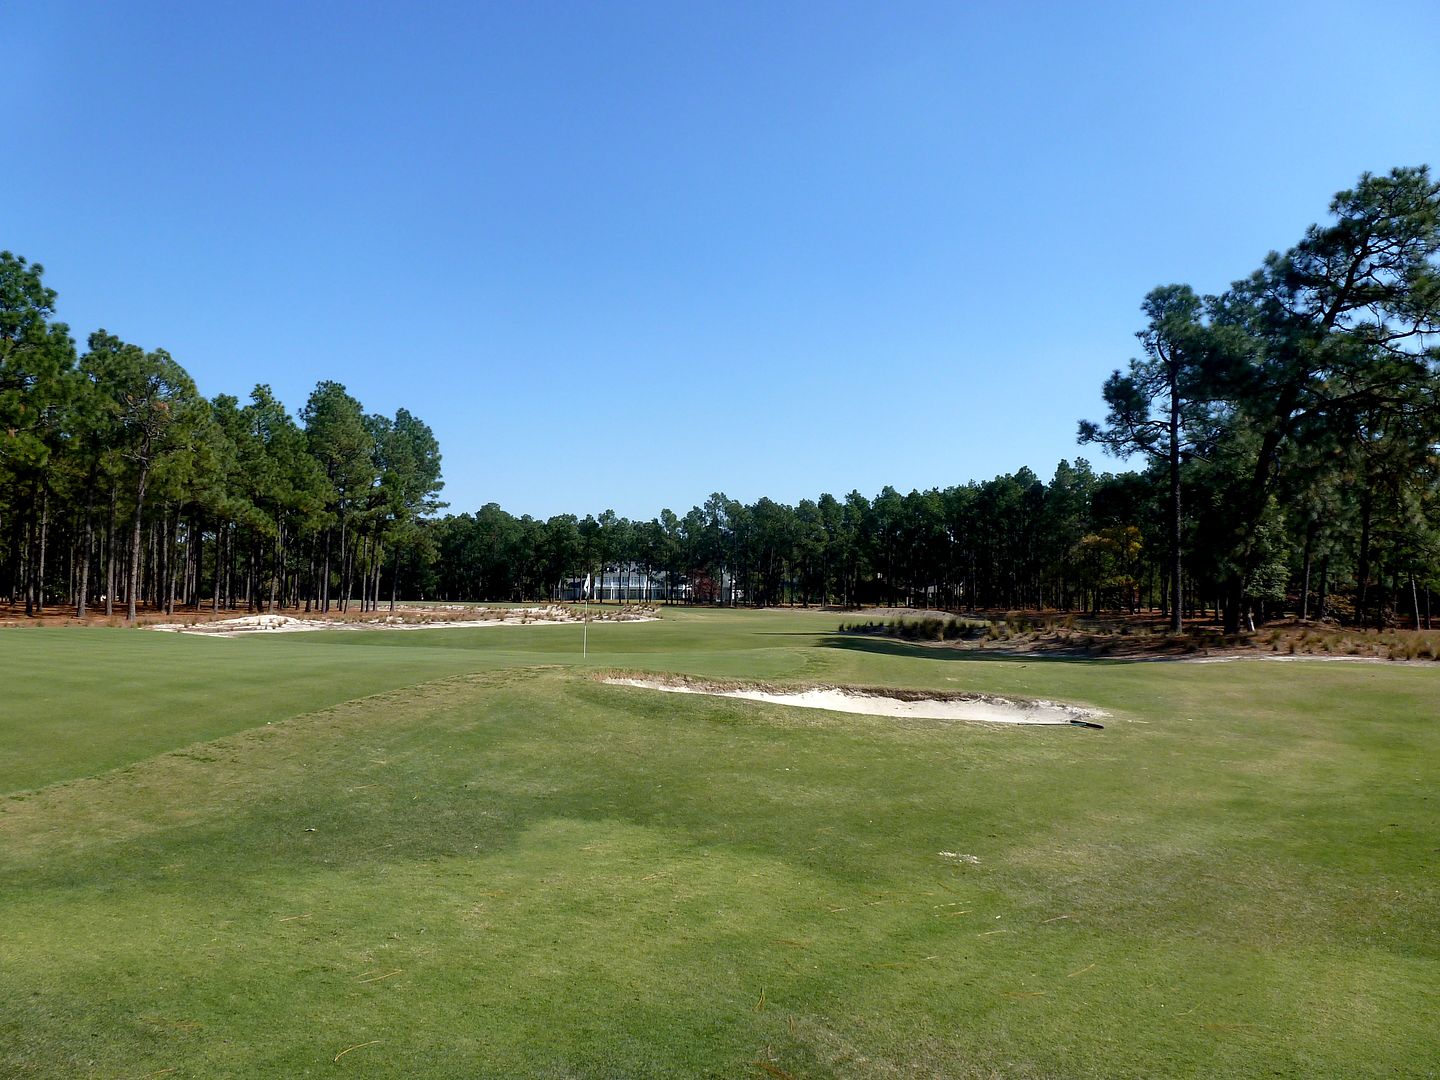
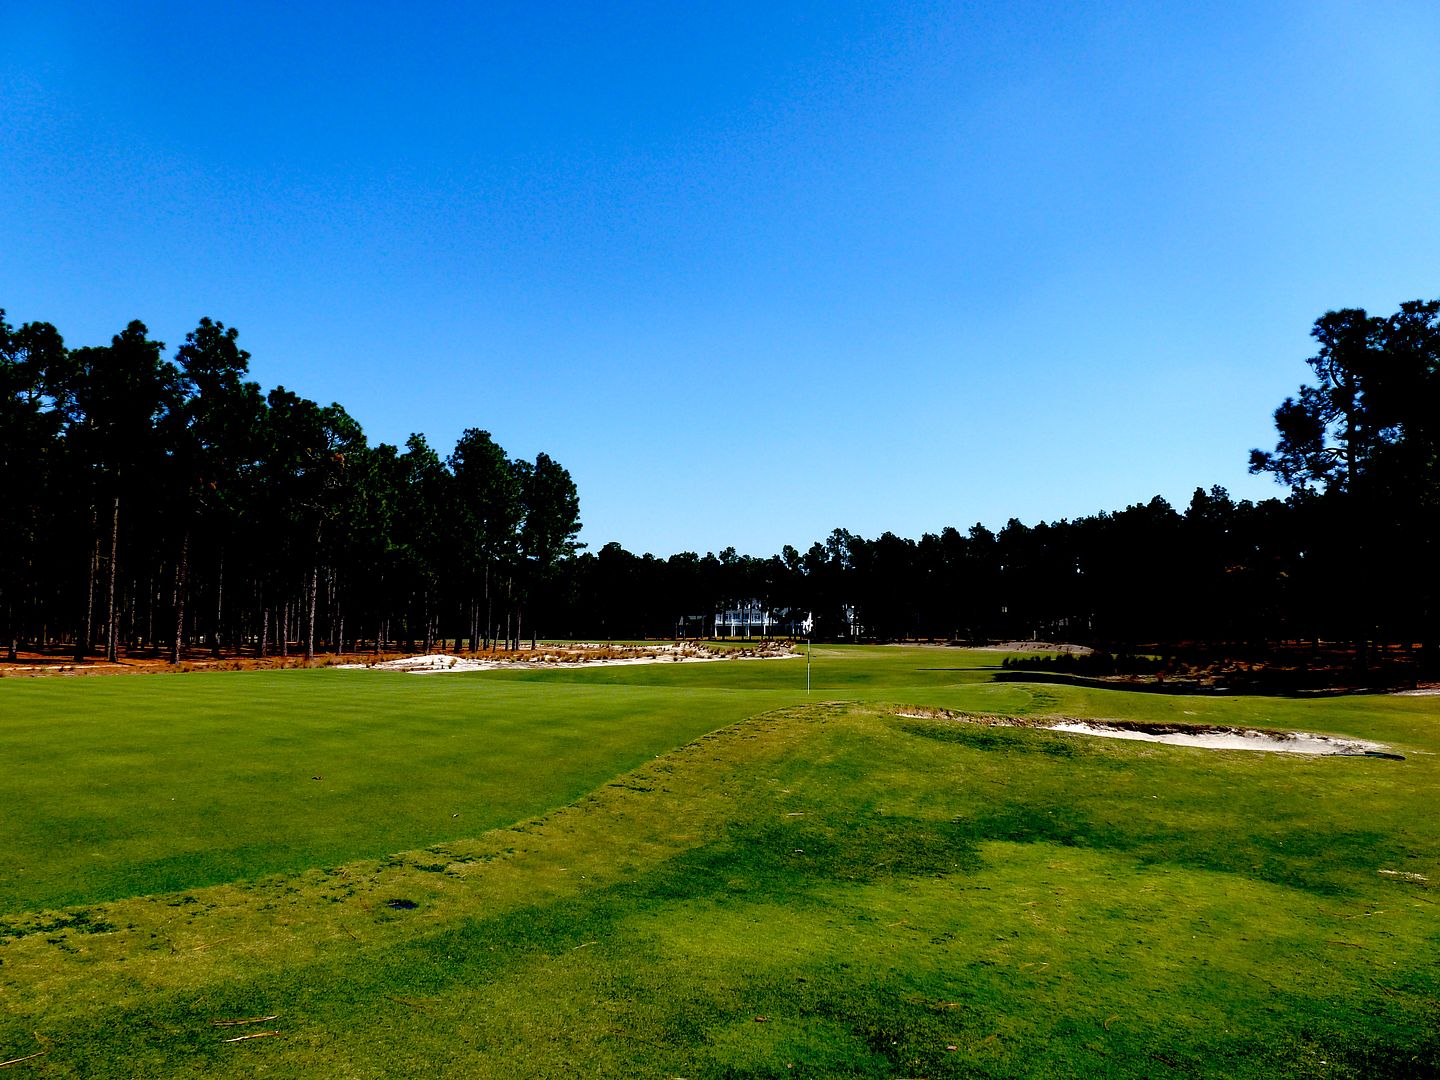
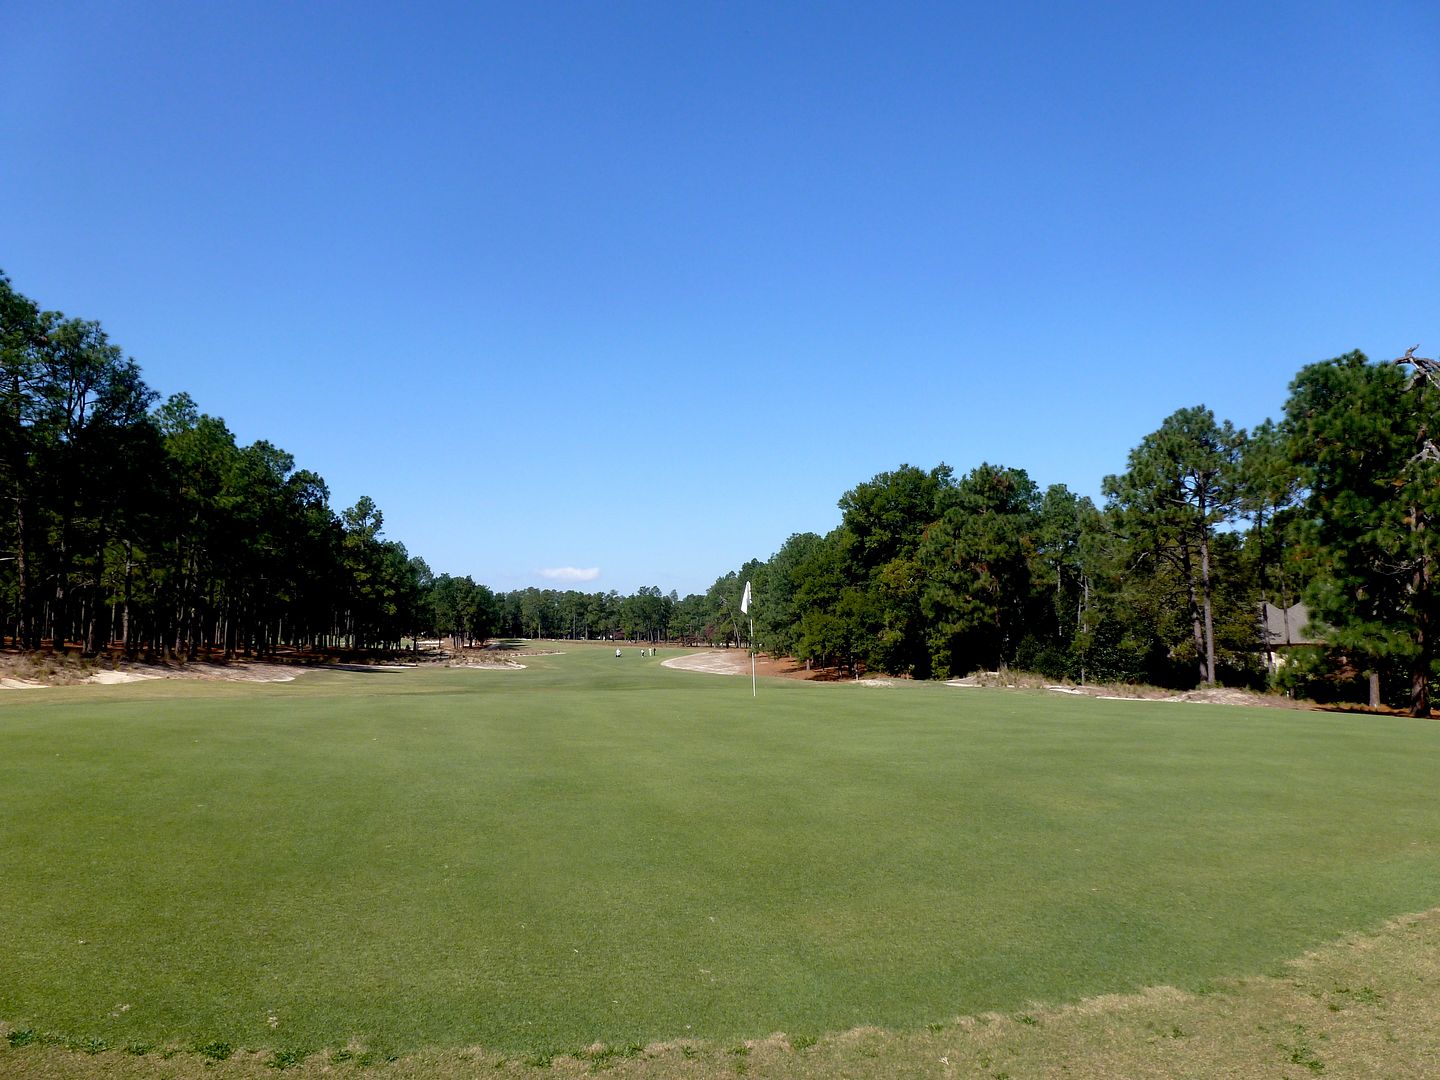
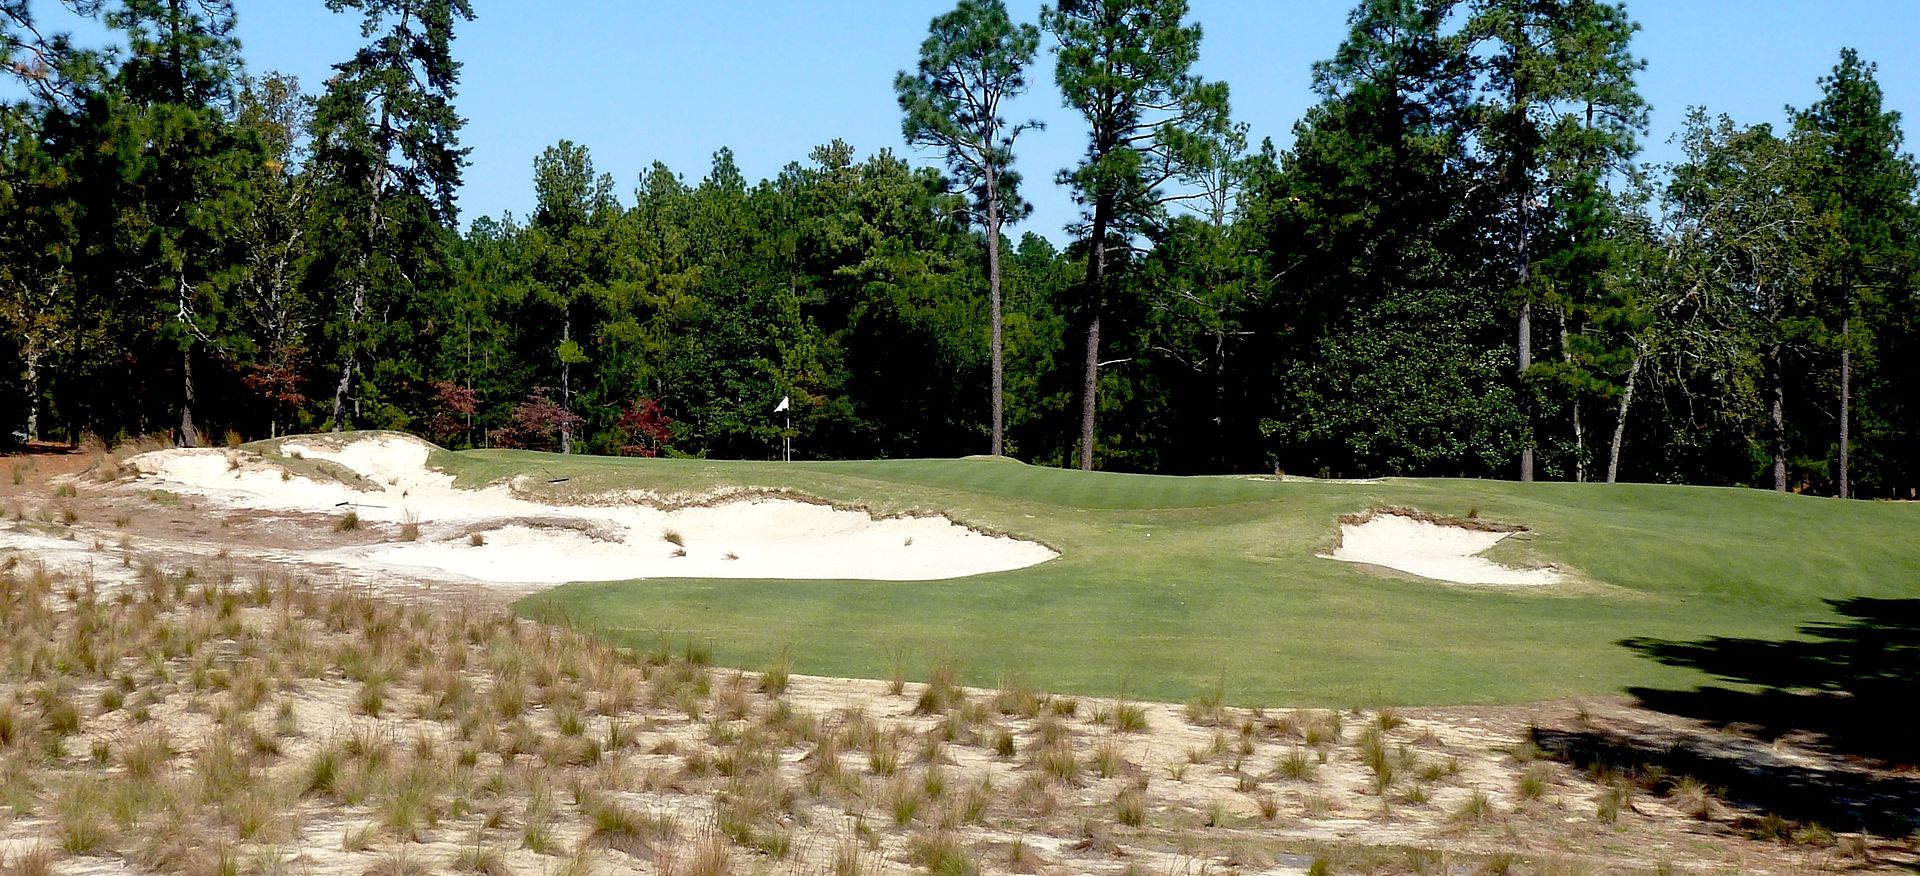
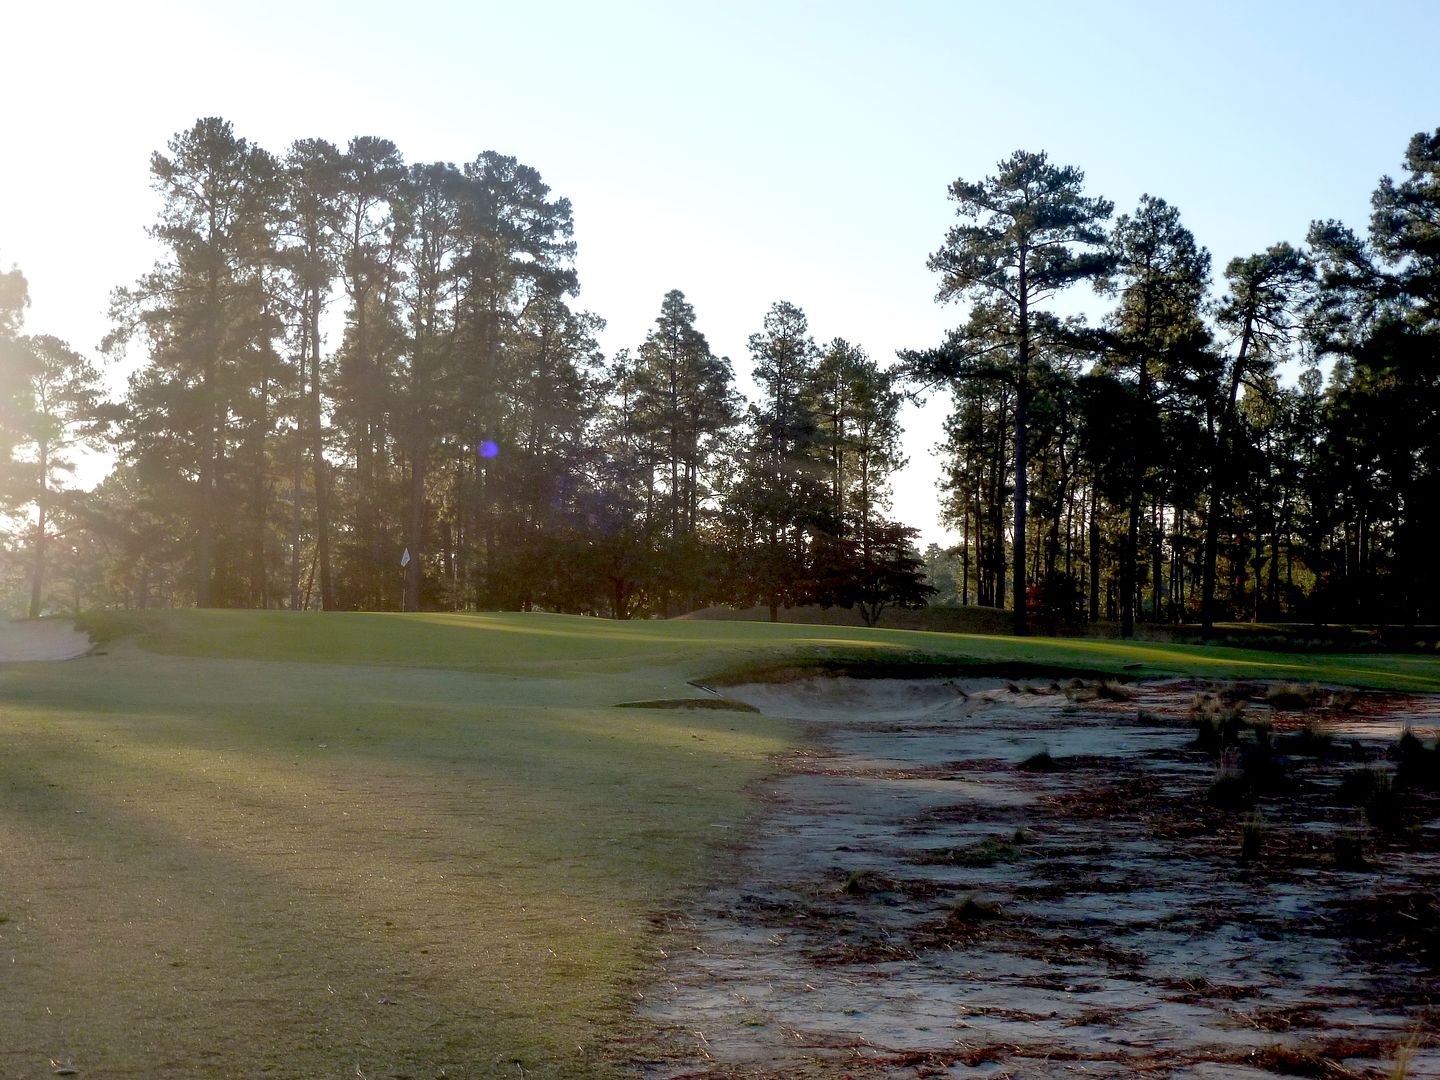
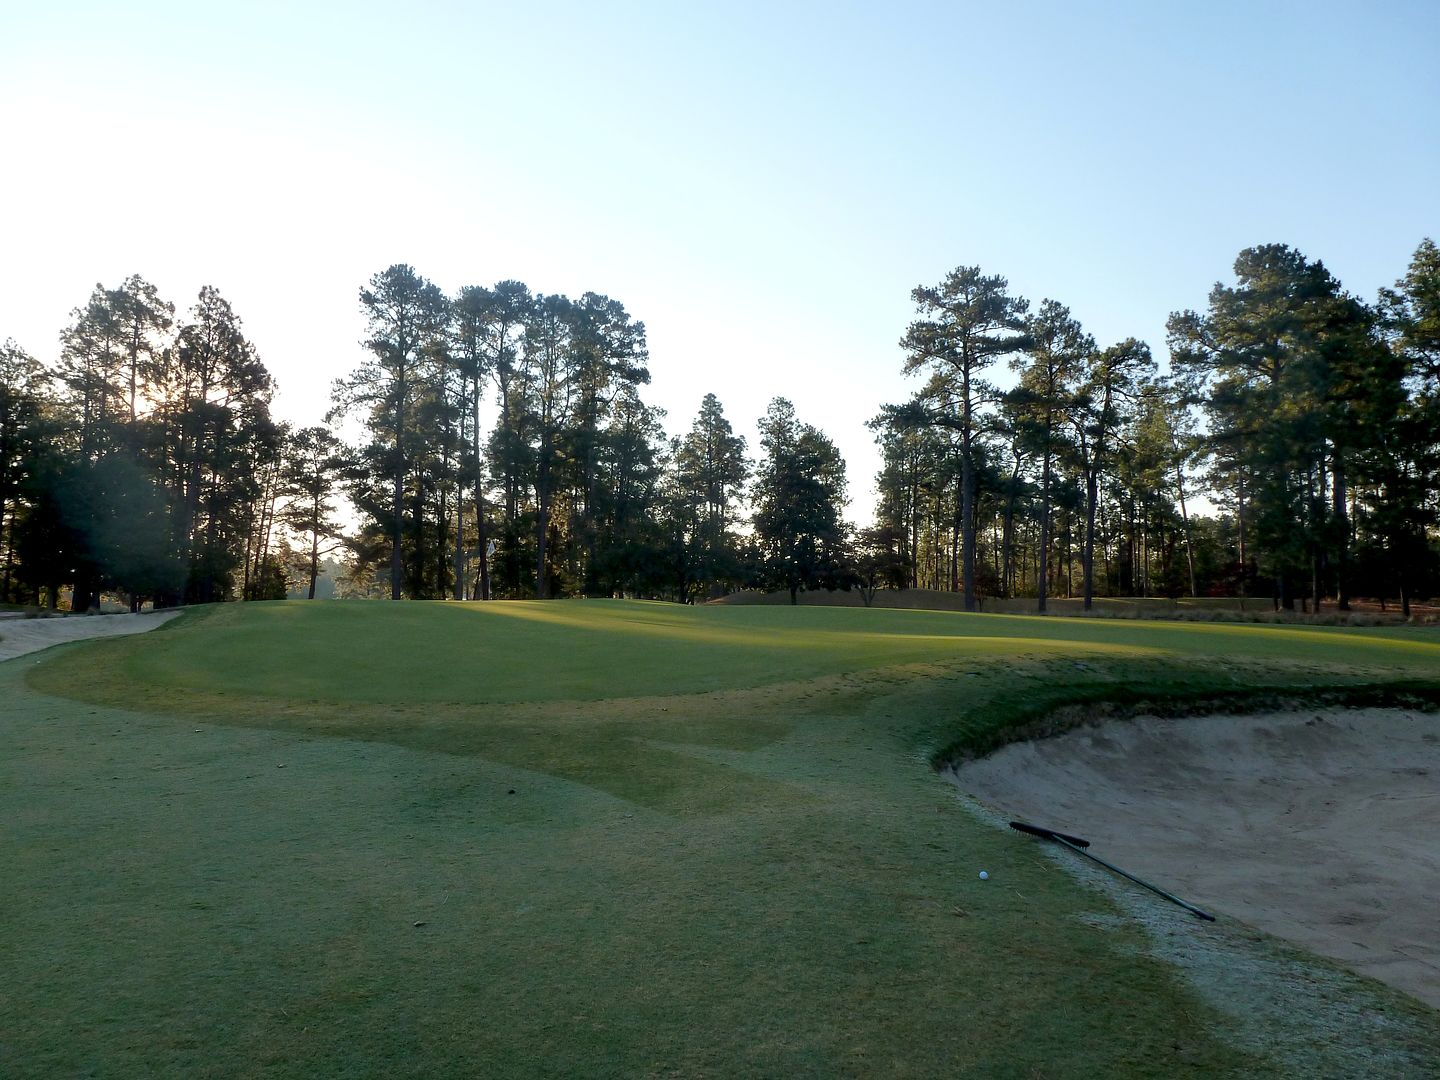
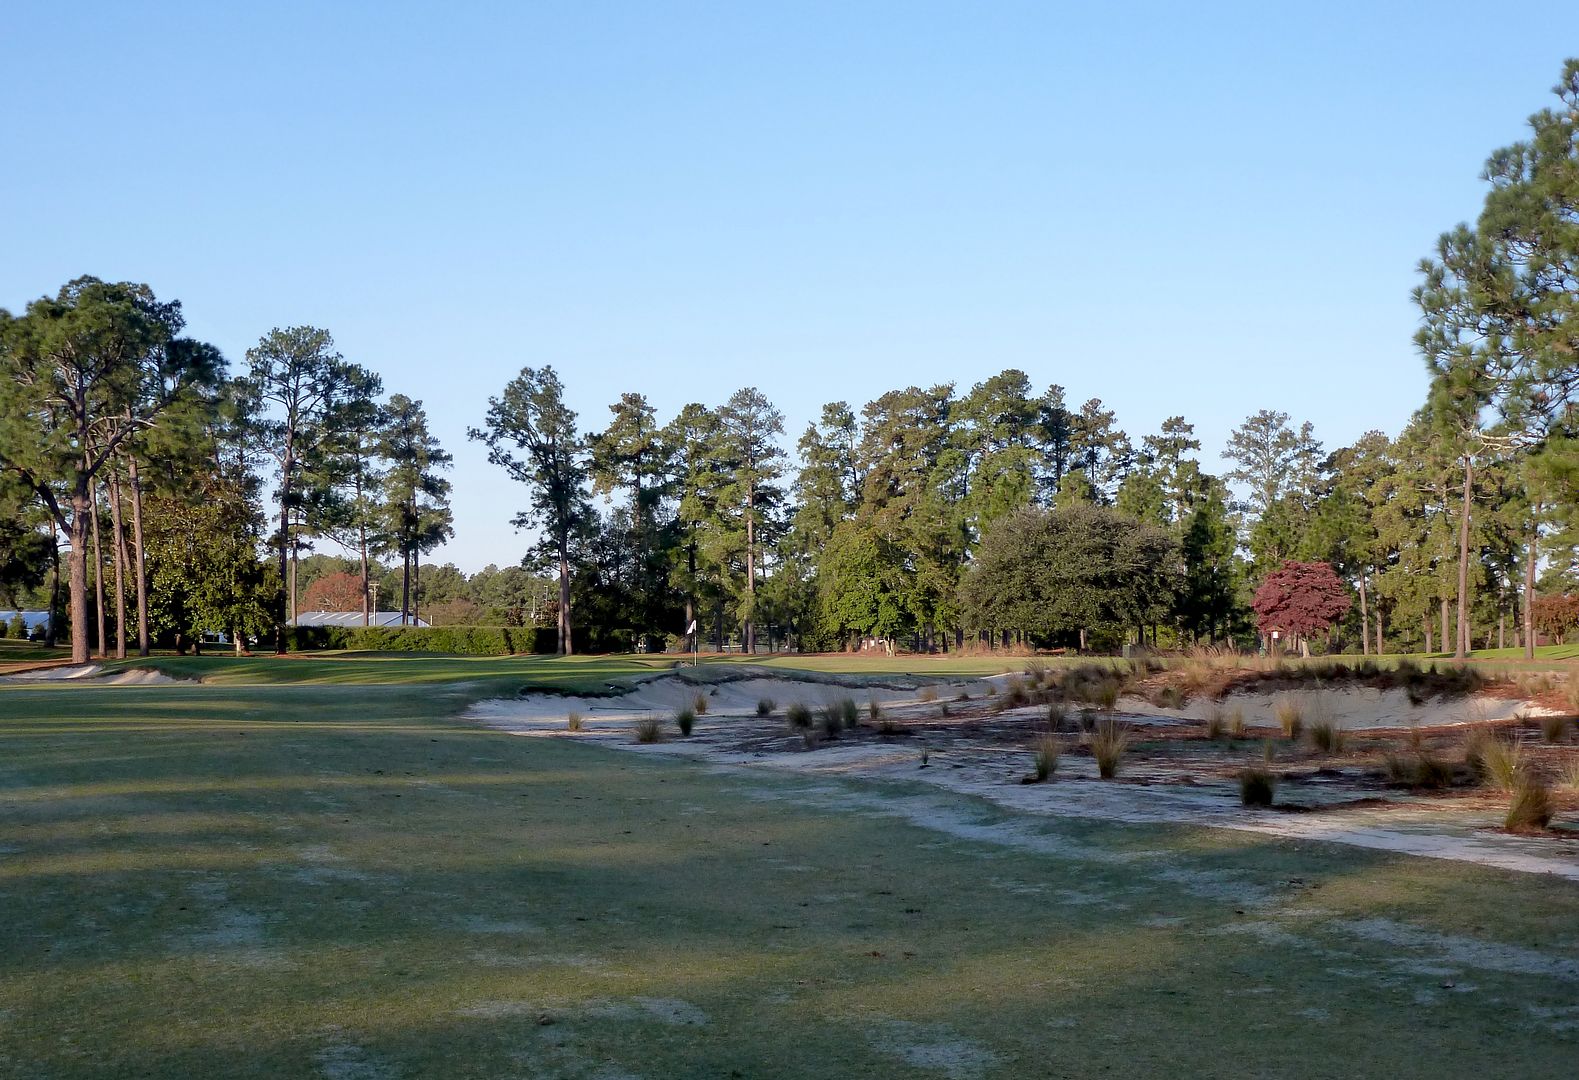
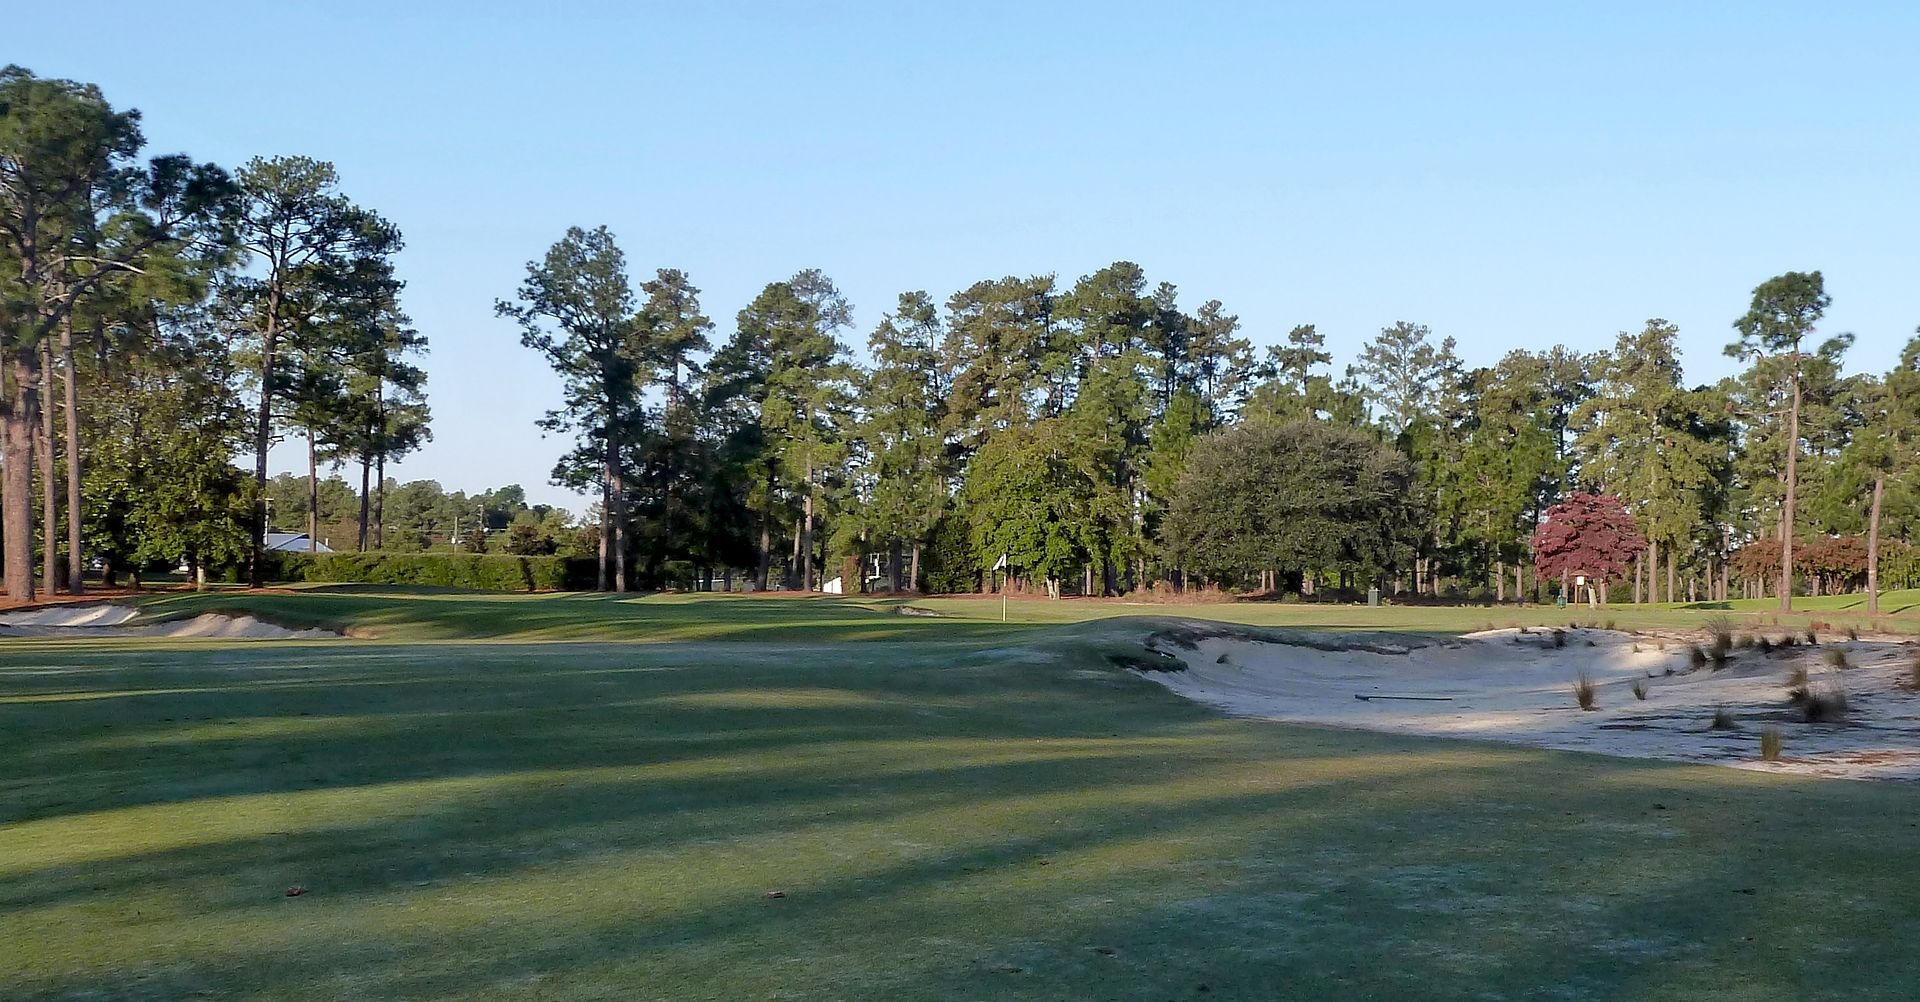
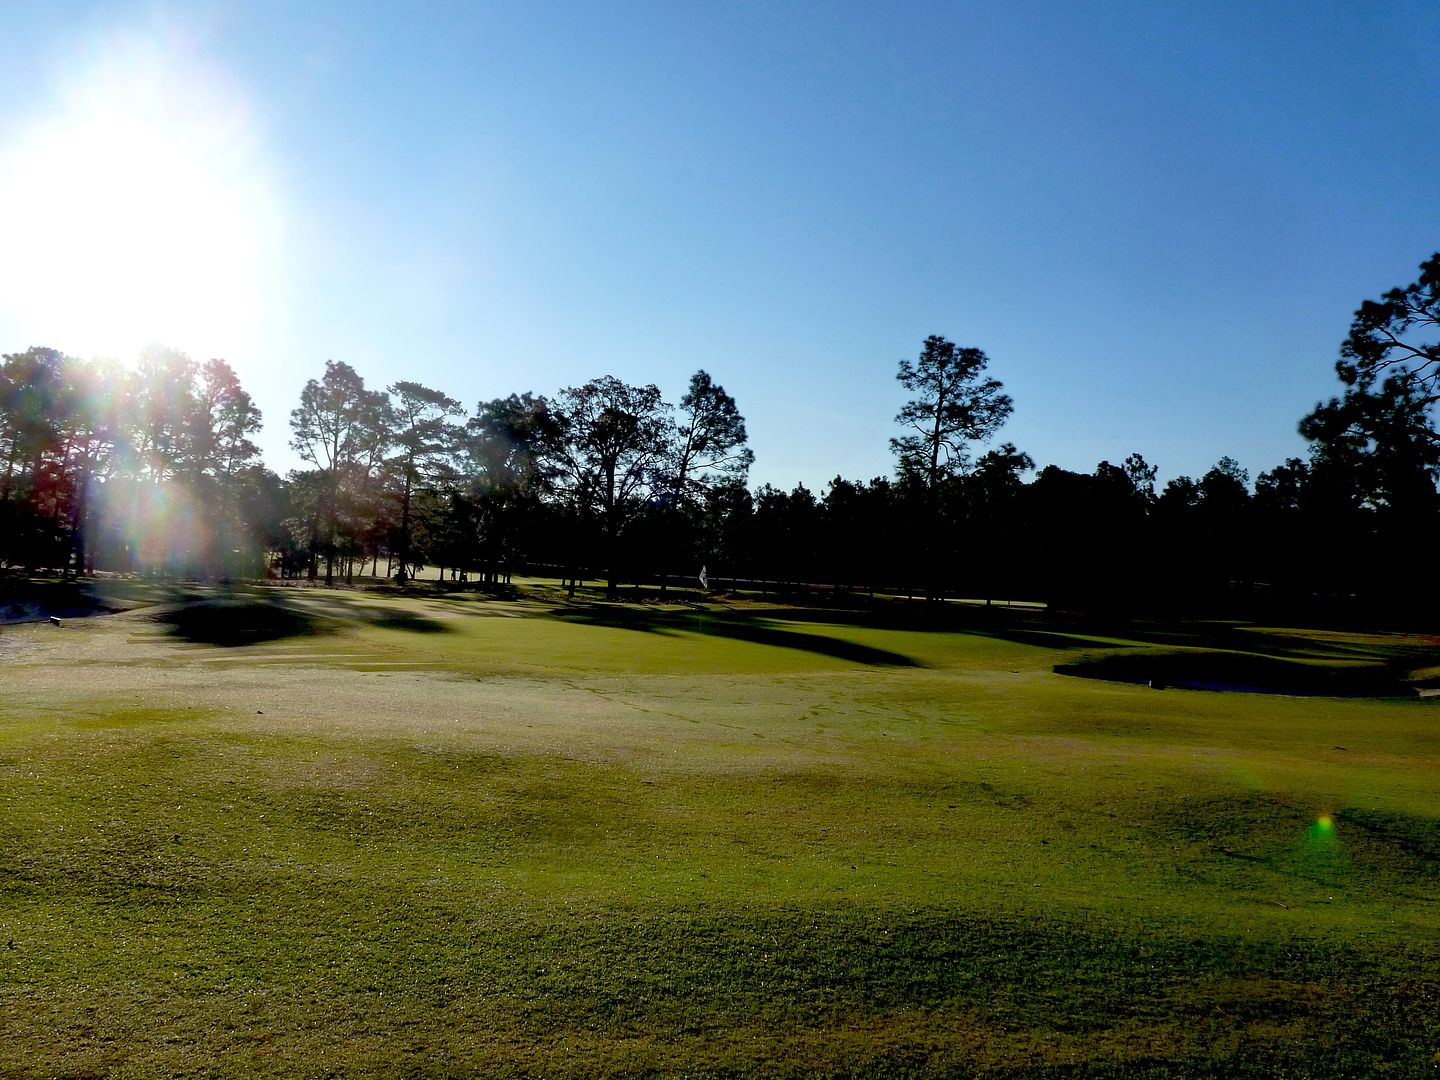
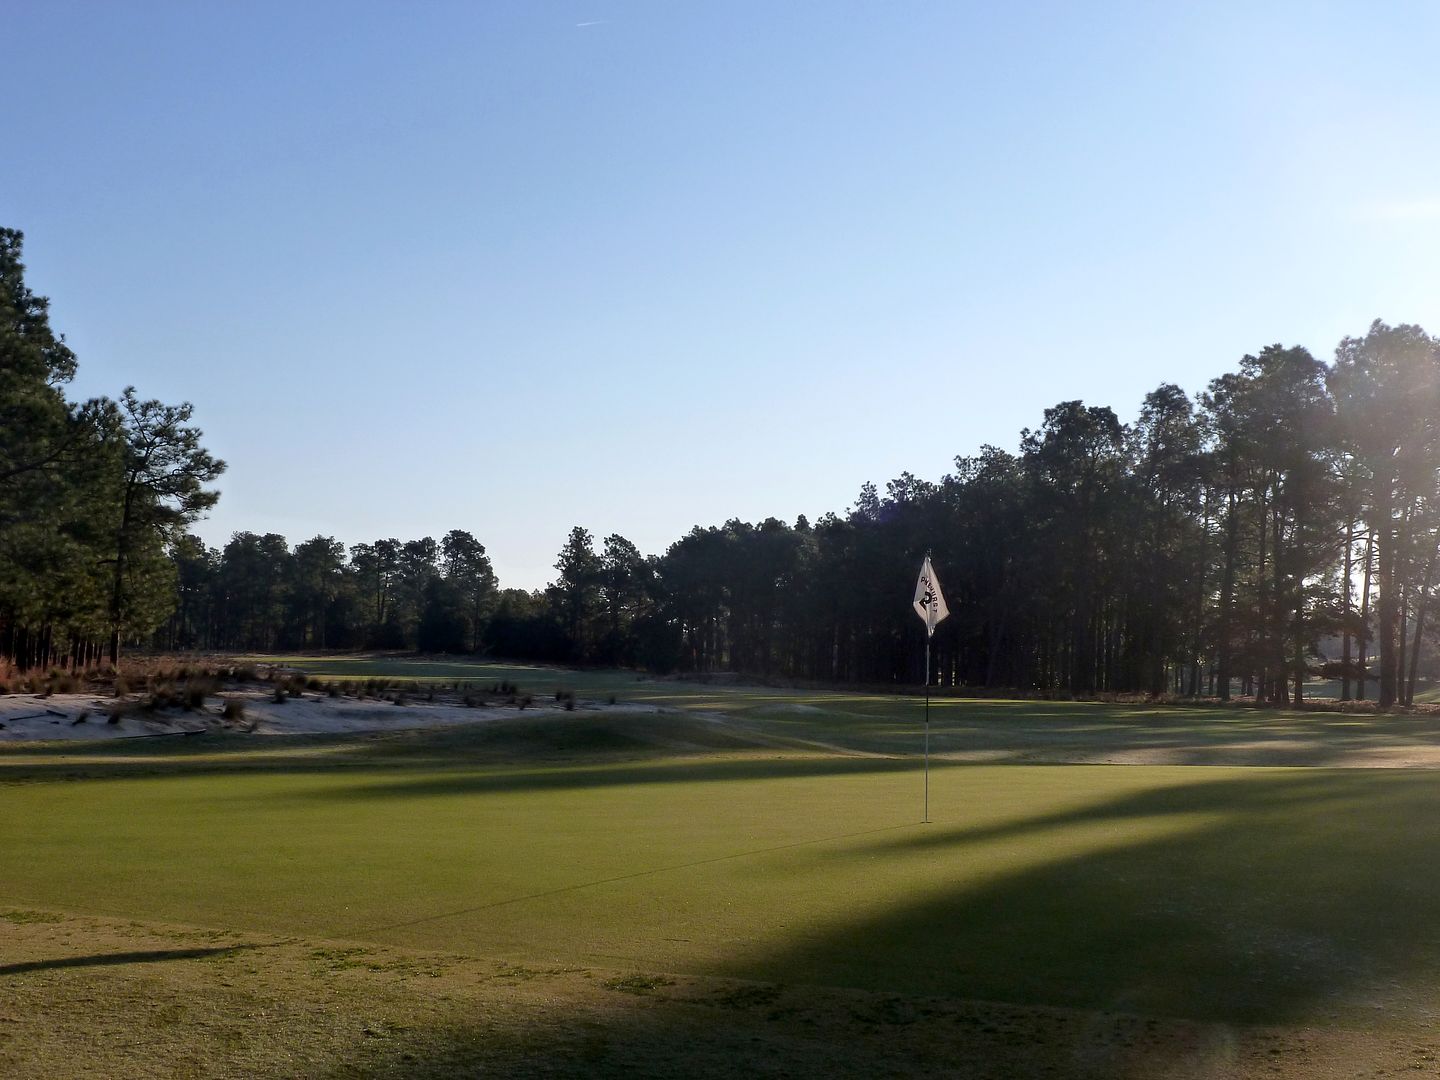
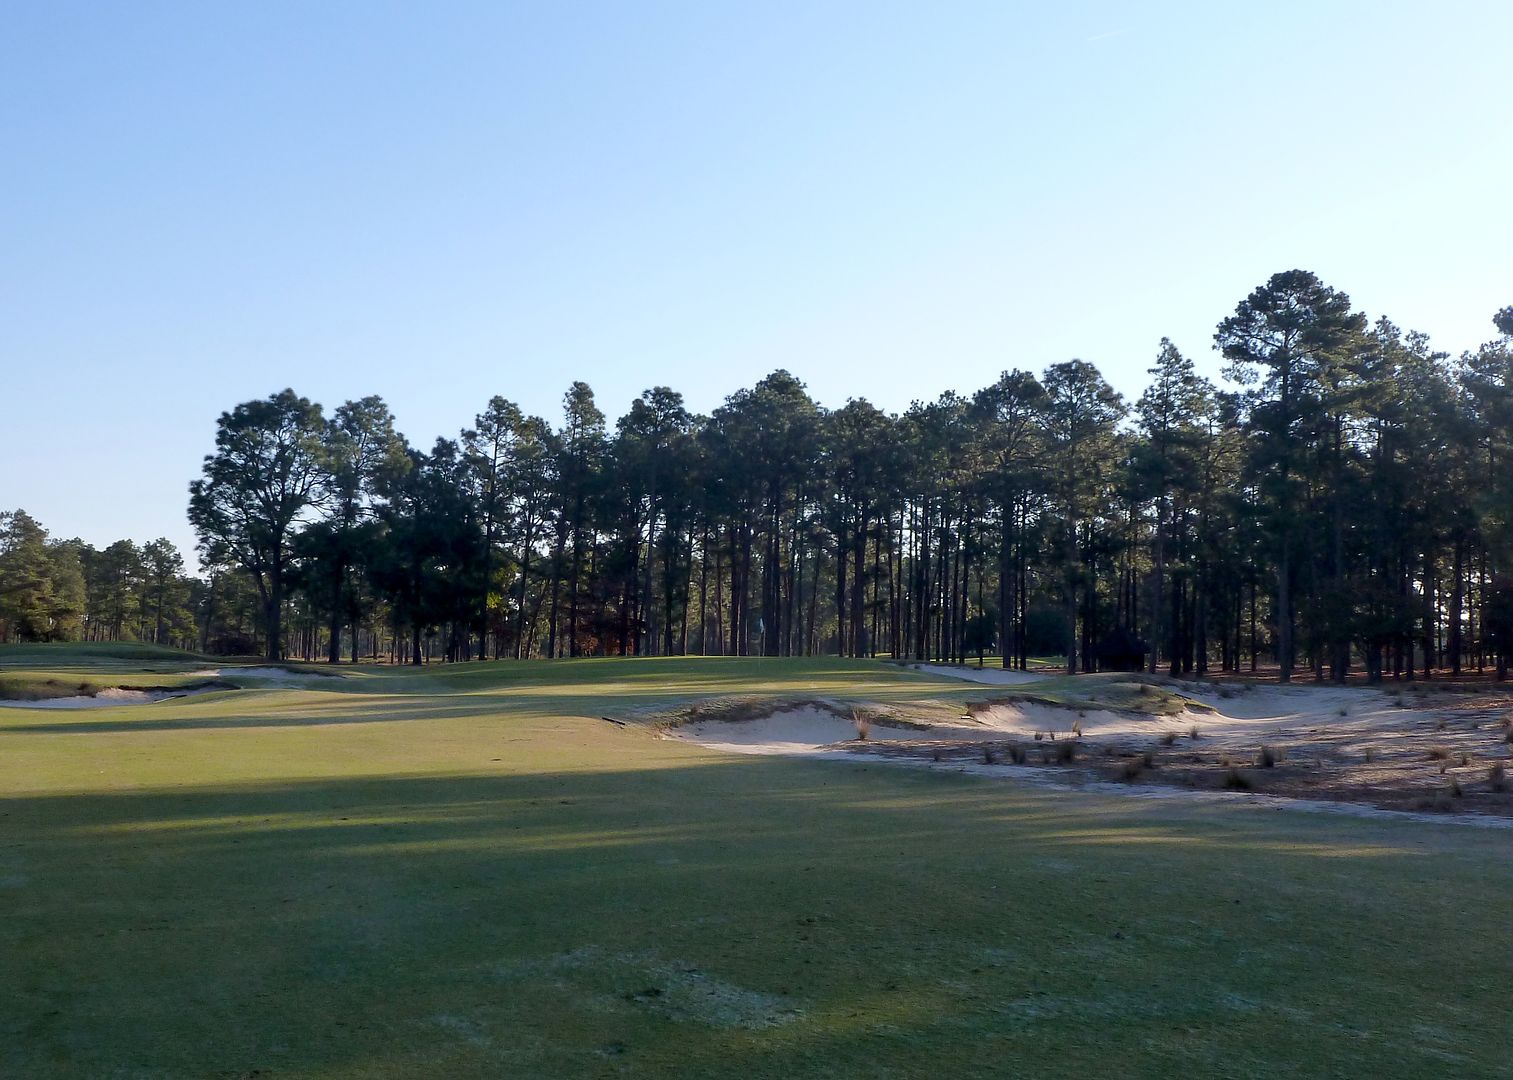
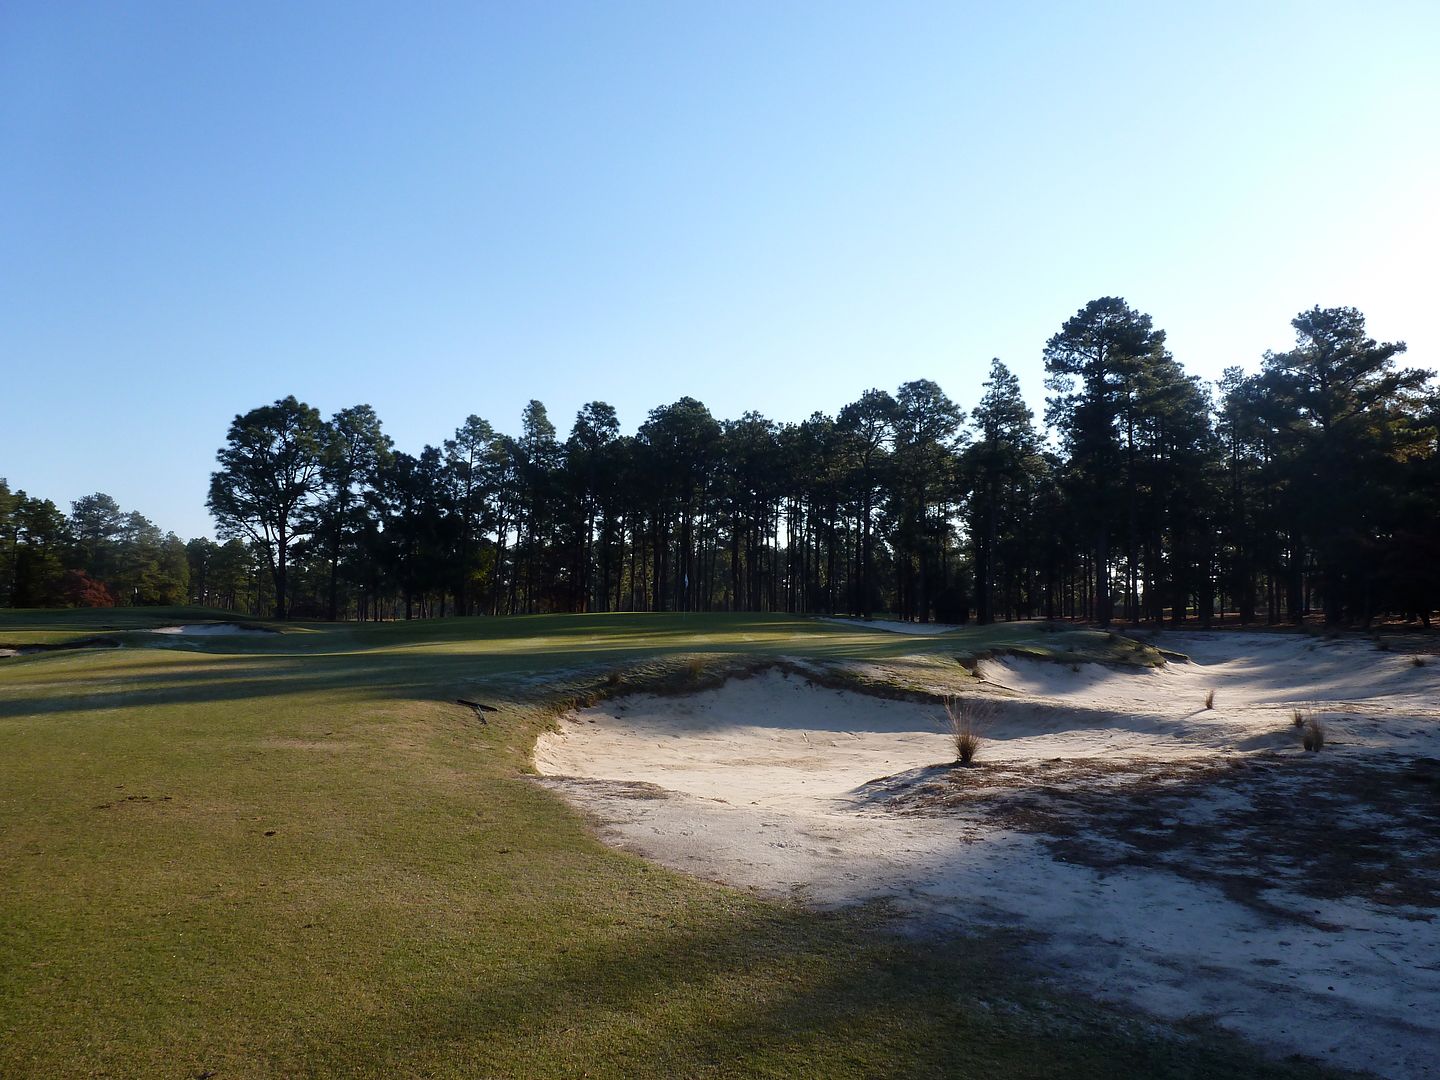
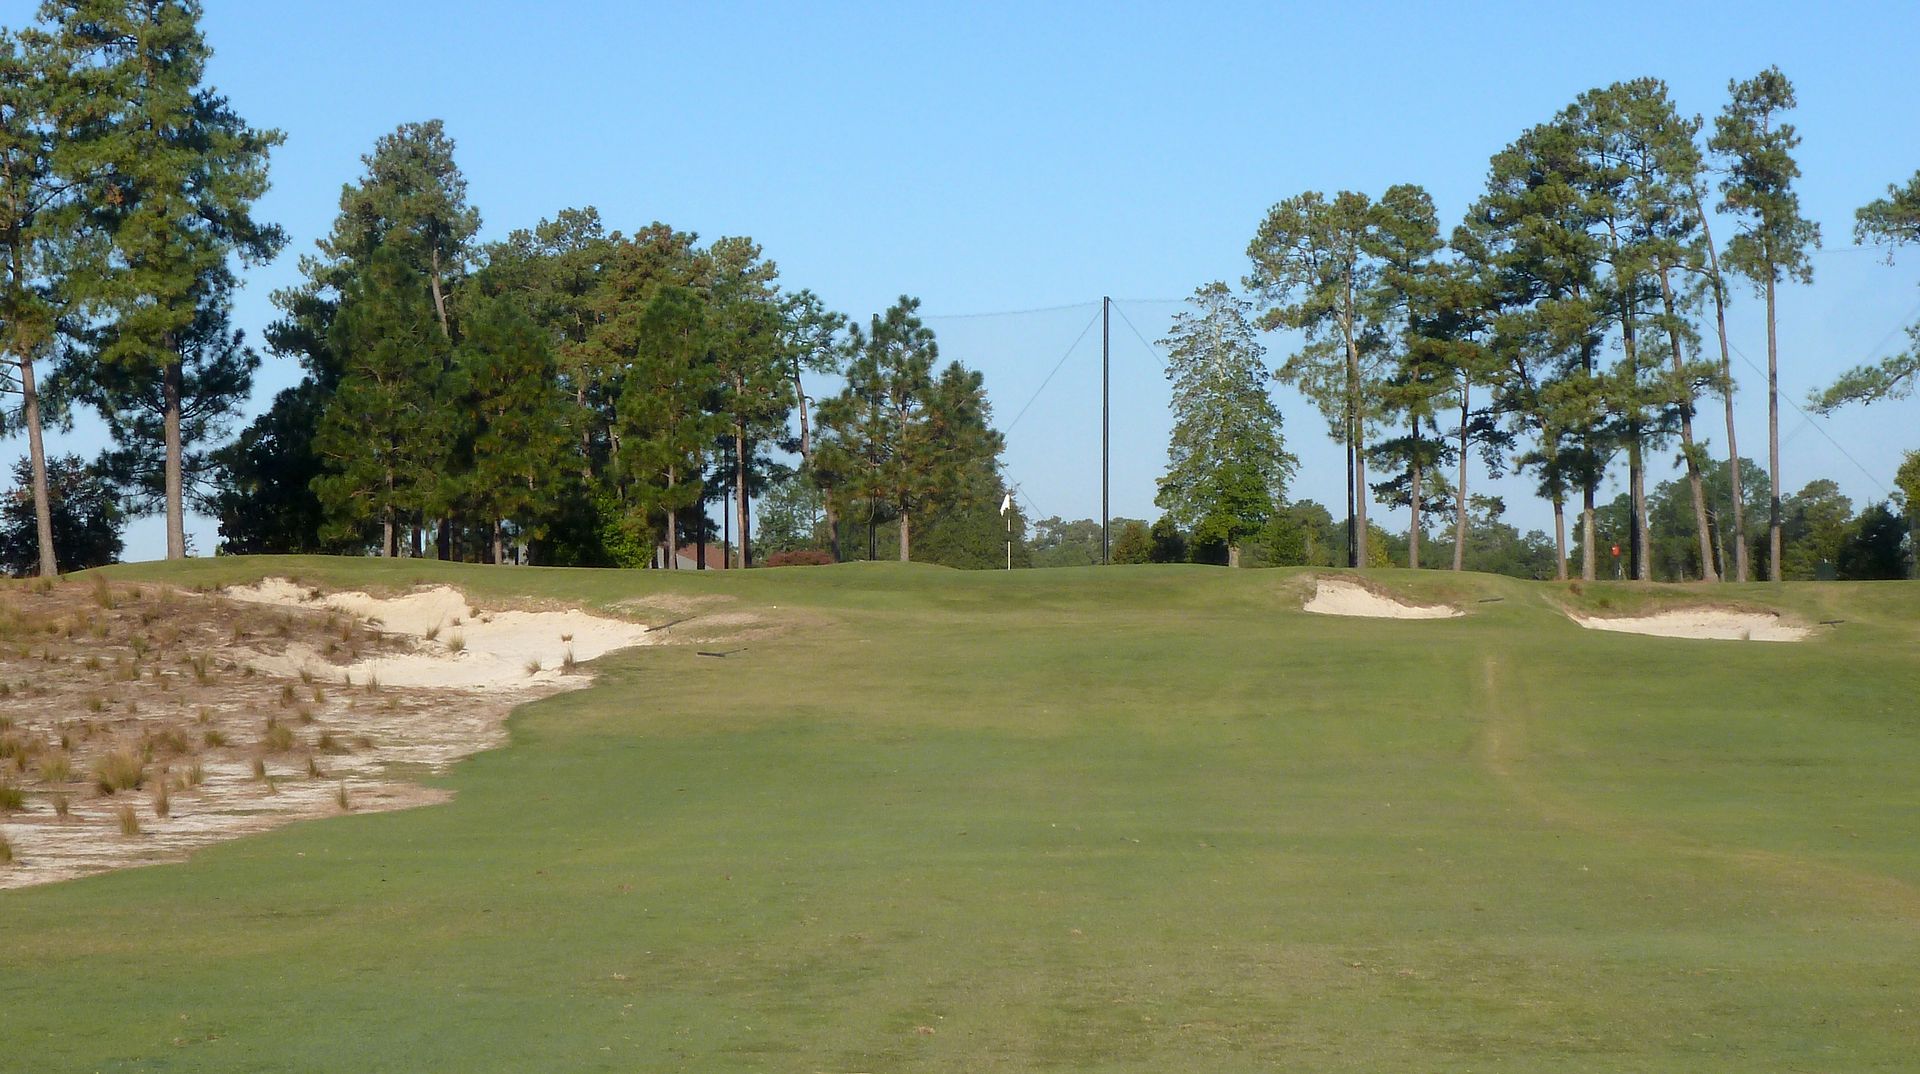
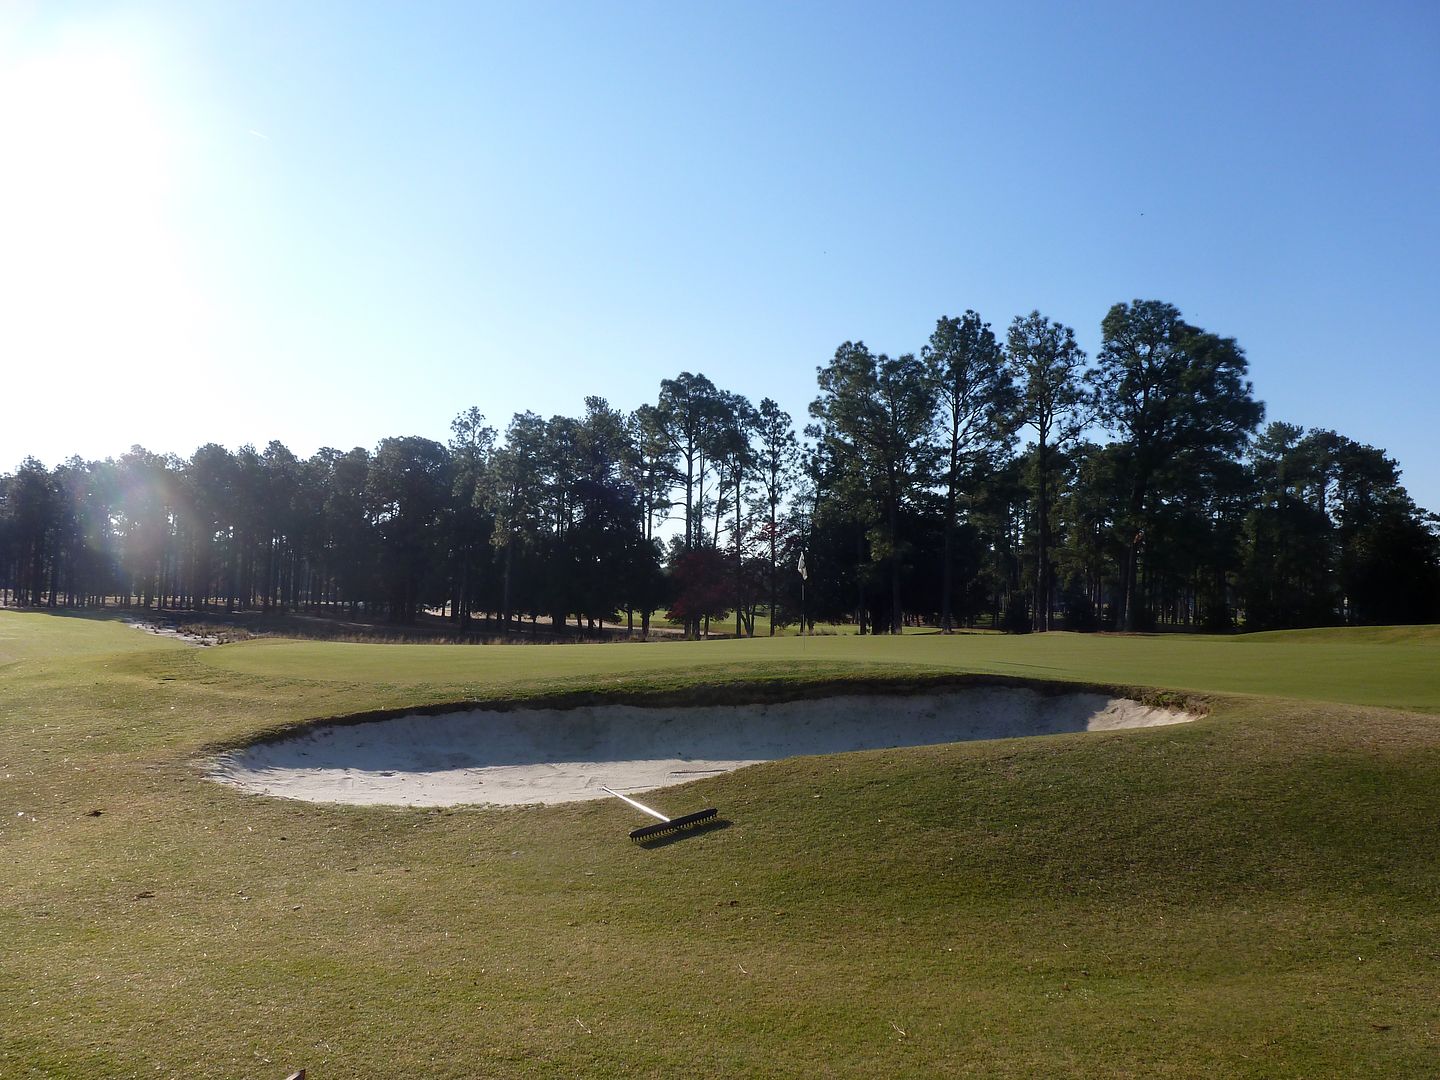
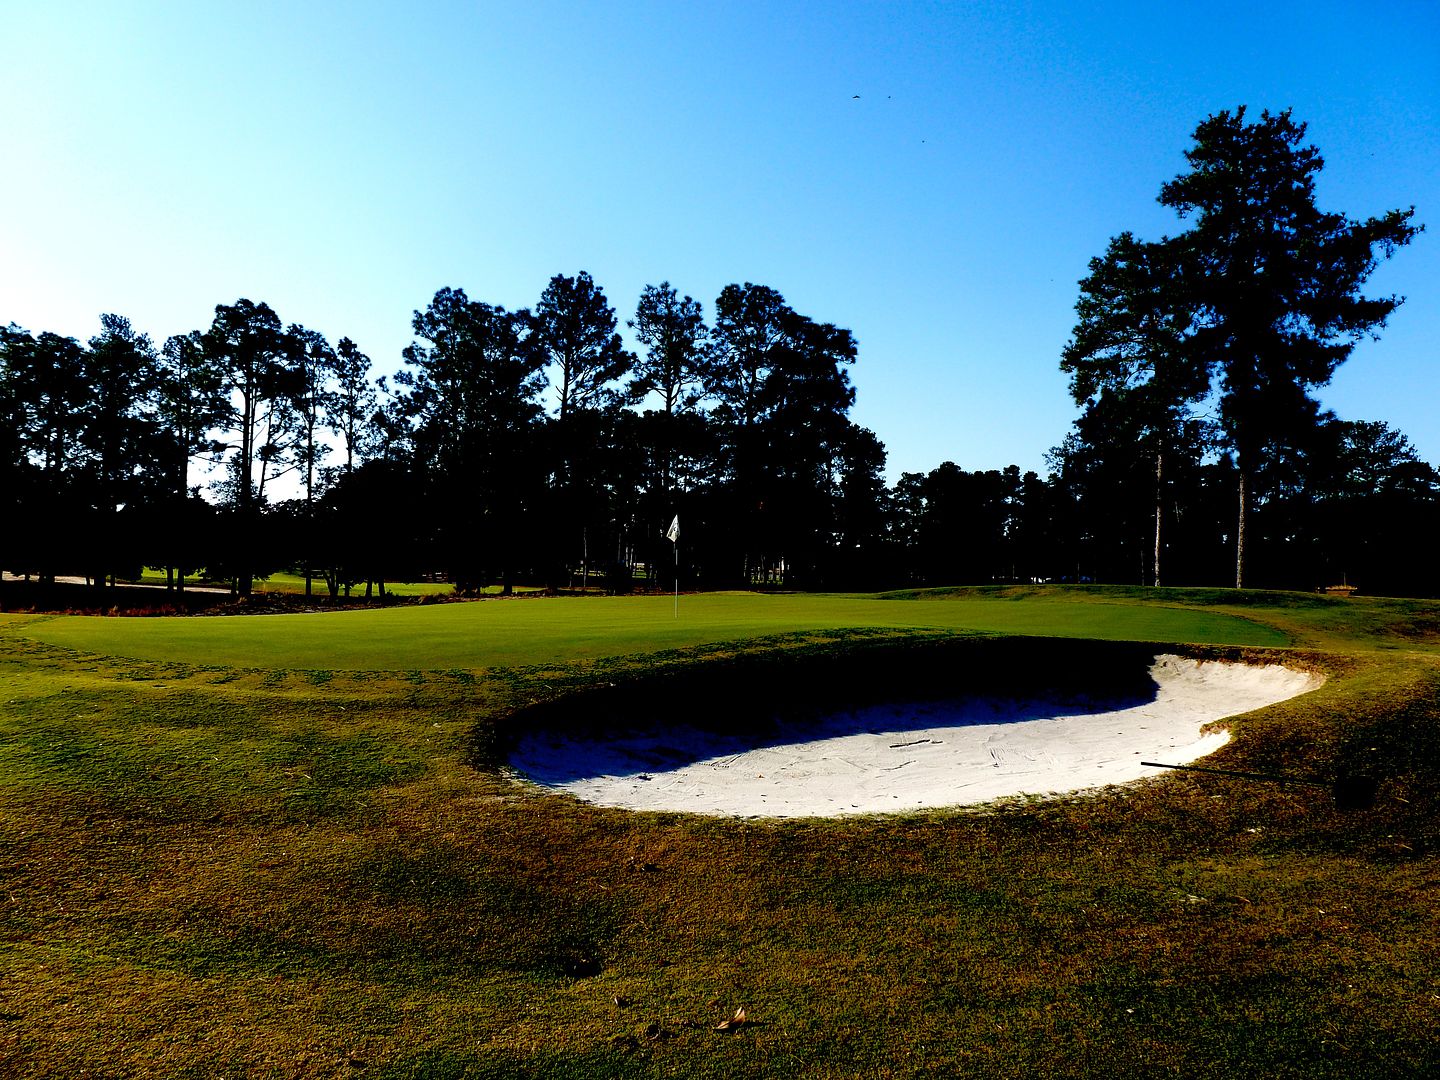
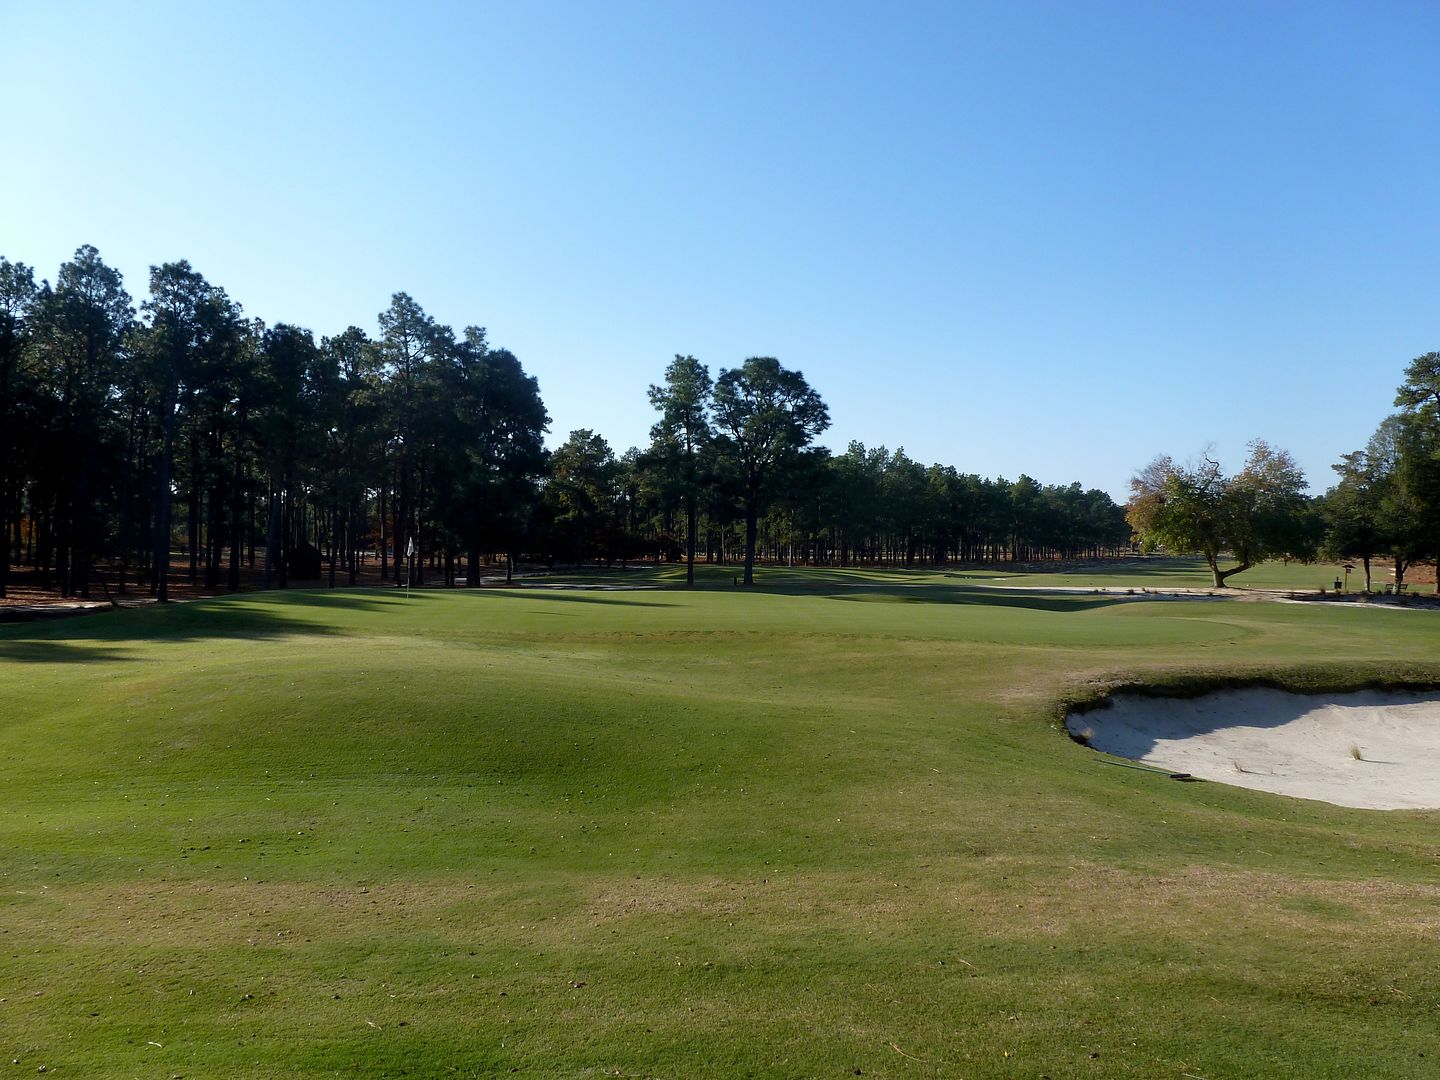
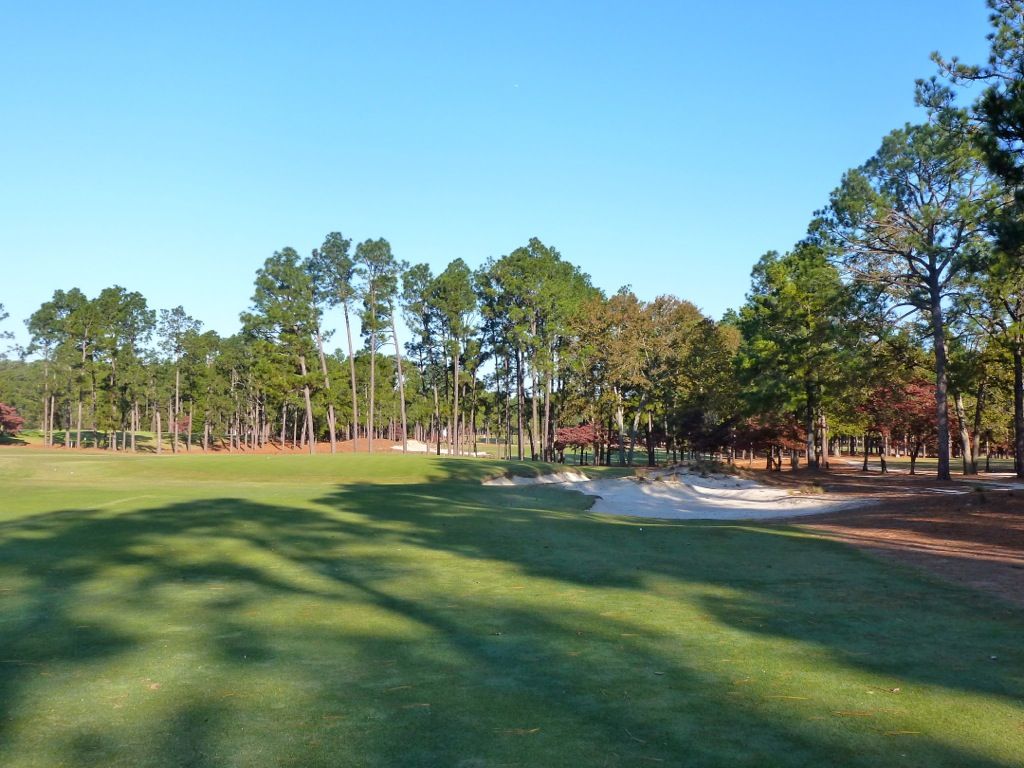
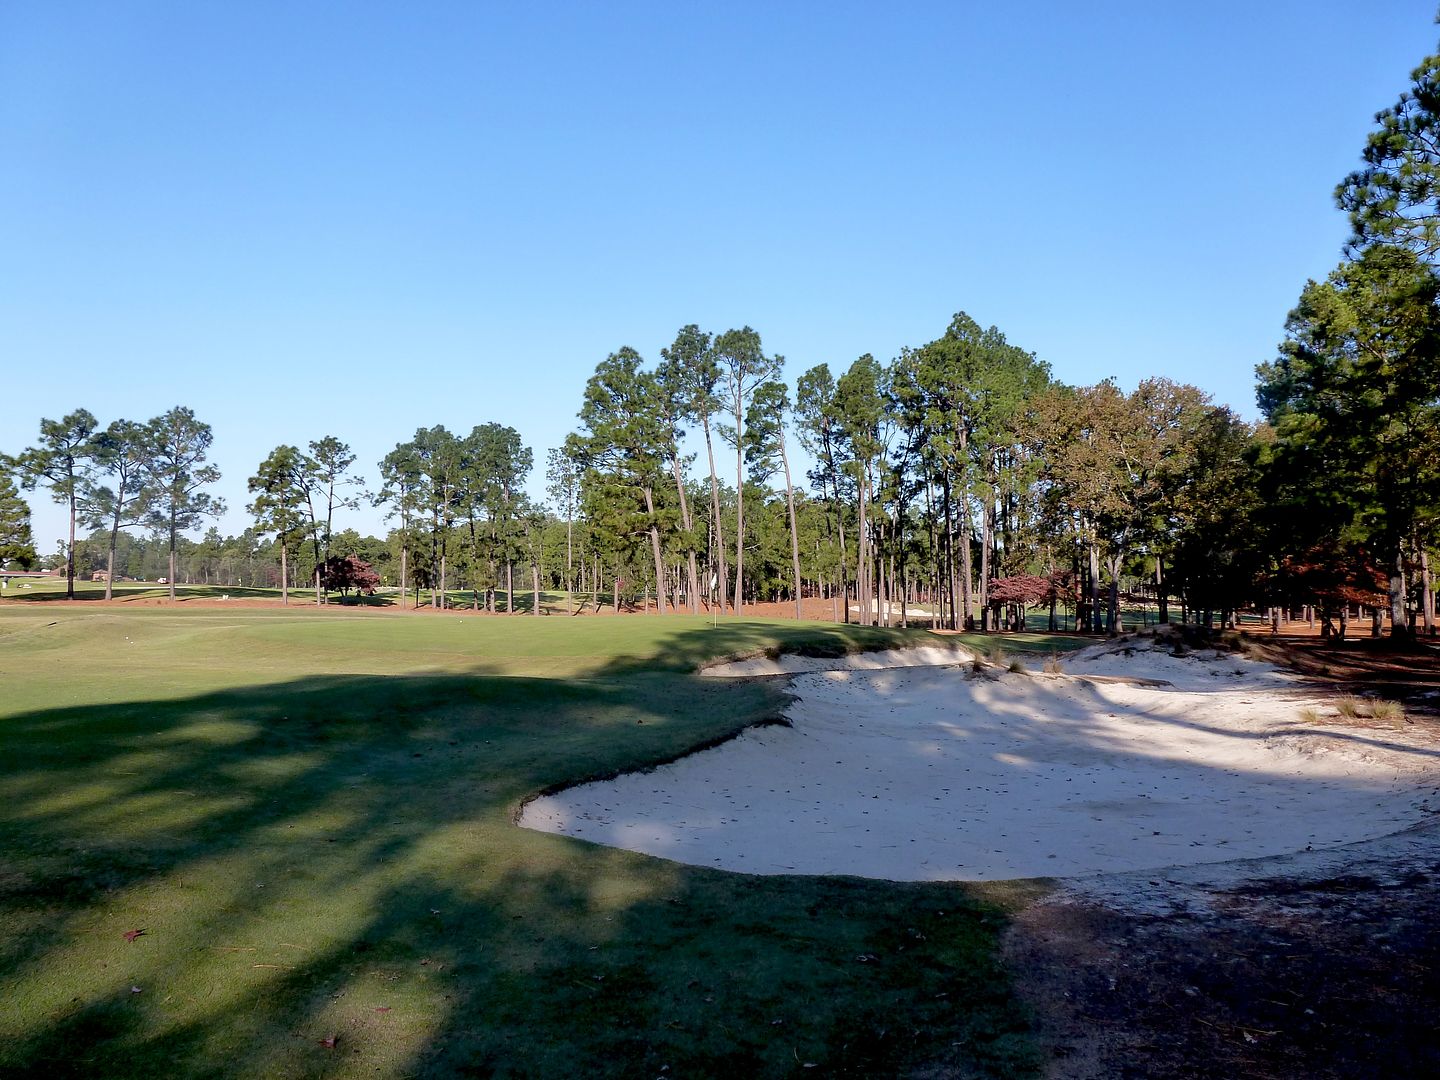
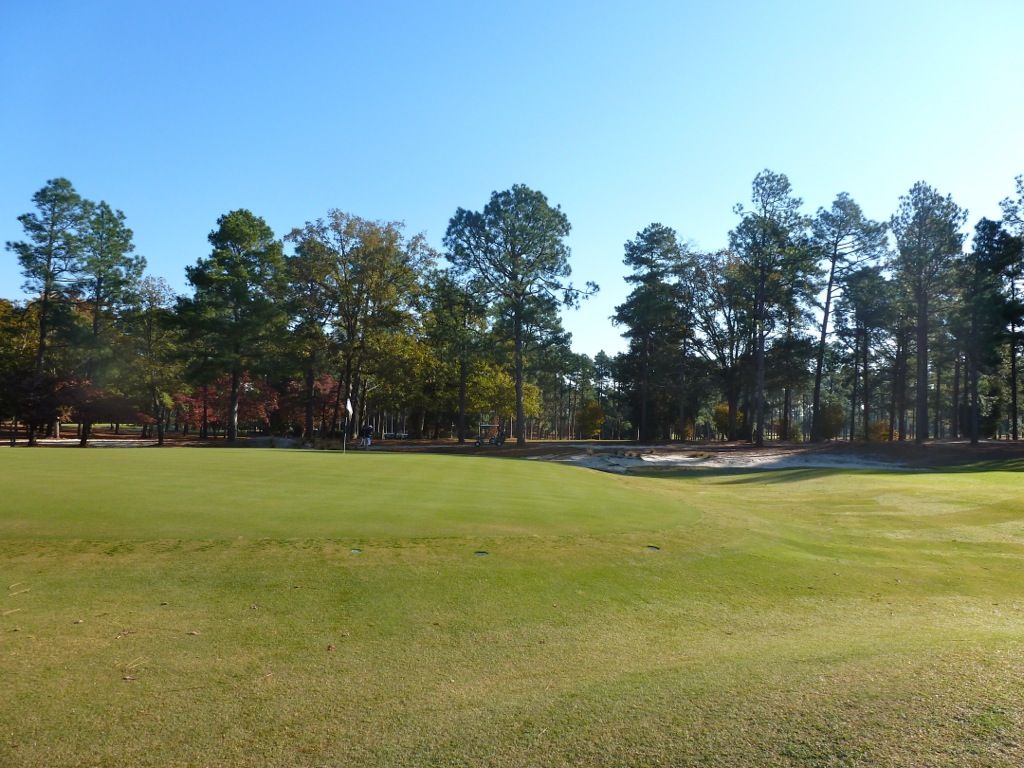
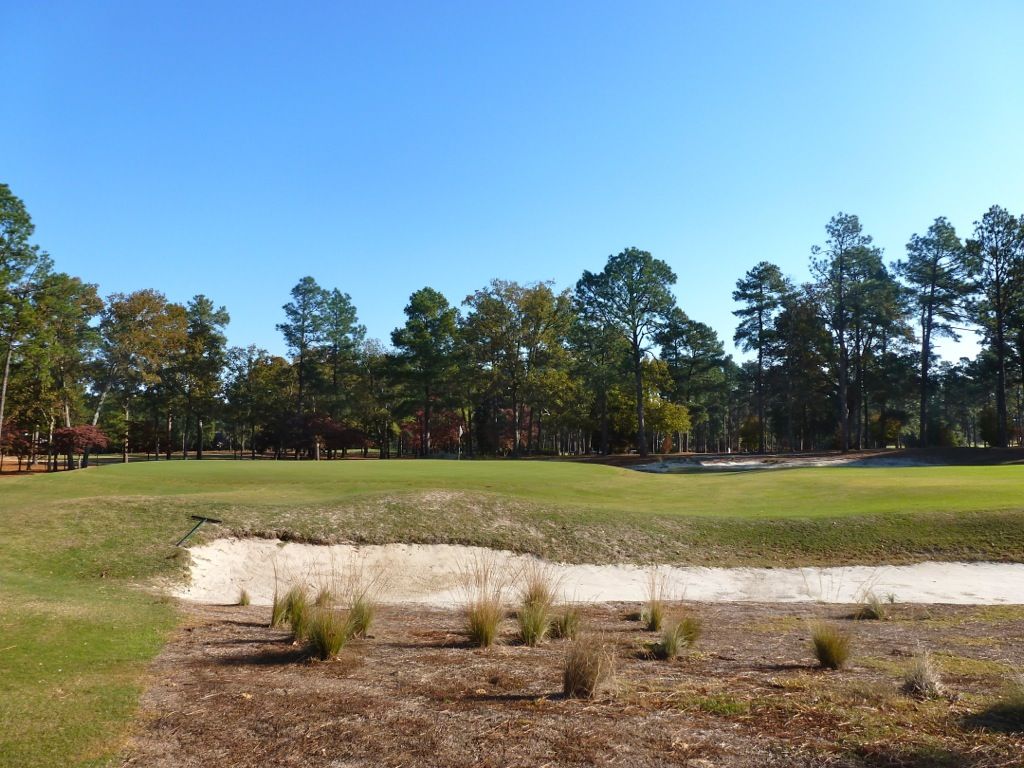
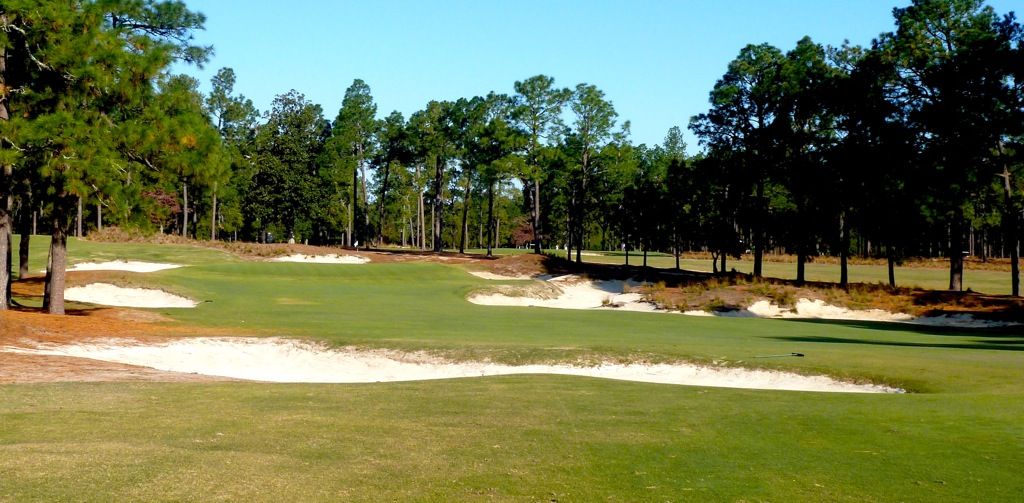
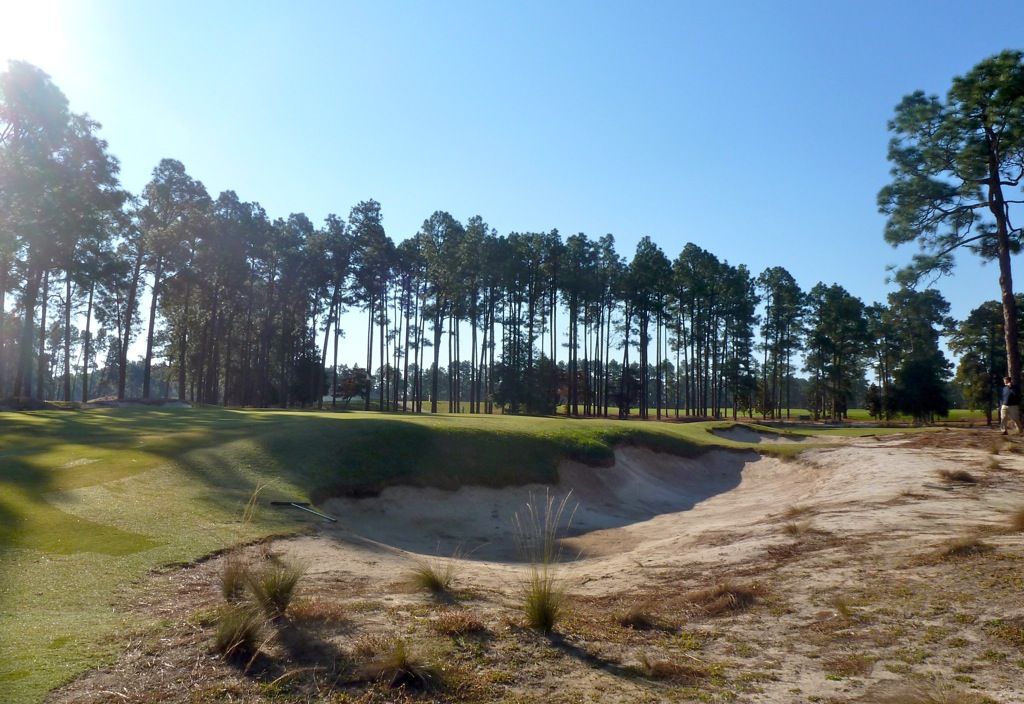
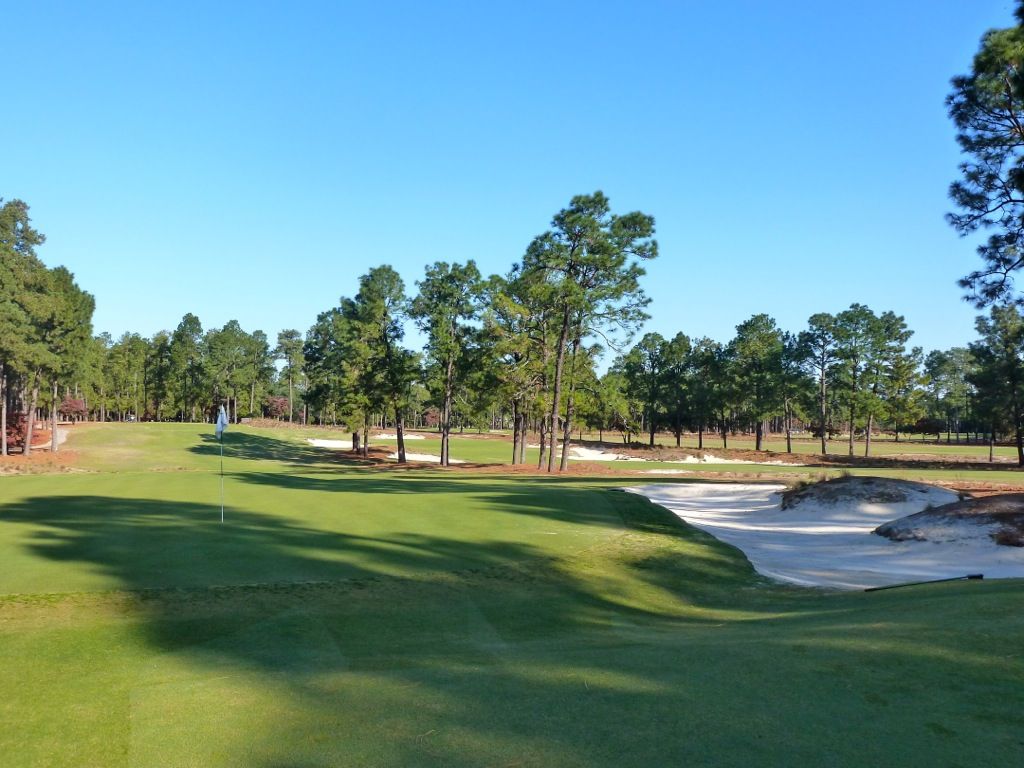
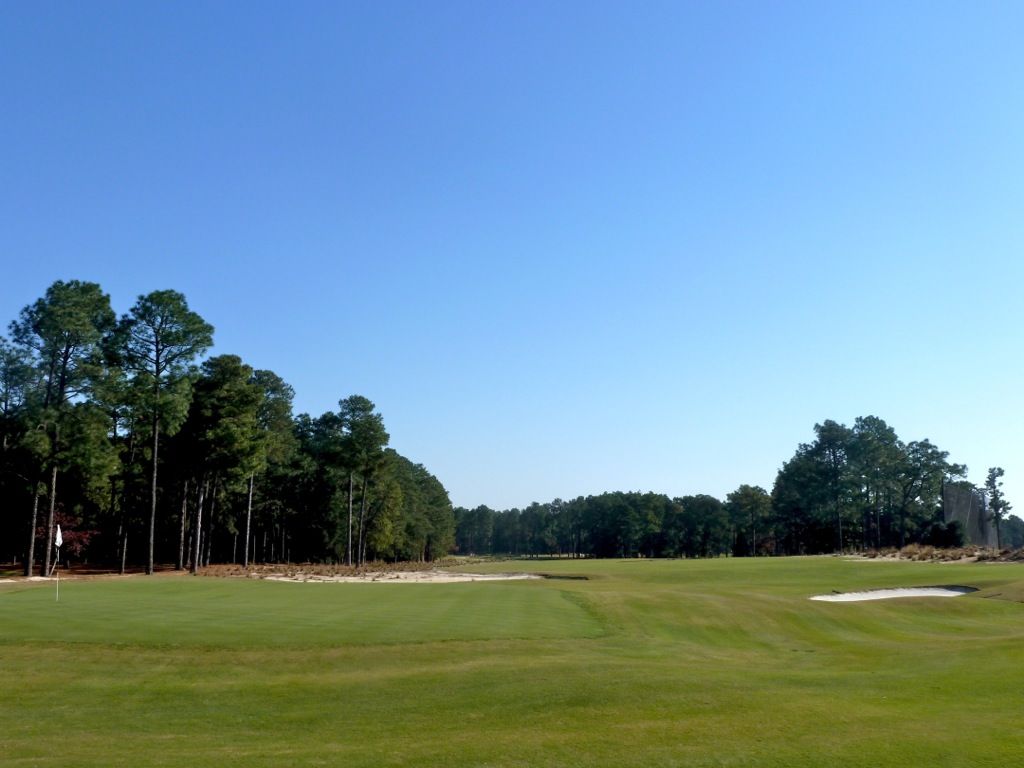
A first look at one of the famed turtlebacked (reverse-saucer) greens at Pinehurst no. 2. While the tee shot may have been simple, hitting the green is not. A green that lays at a diagonal to the fairway, with a false-front and two-edges that bleed into green-side bunkering. While the green side bunkers look like bad spots to be, missing long or right and having to play down the slope of the green, is much worse.
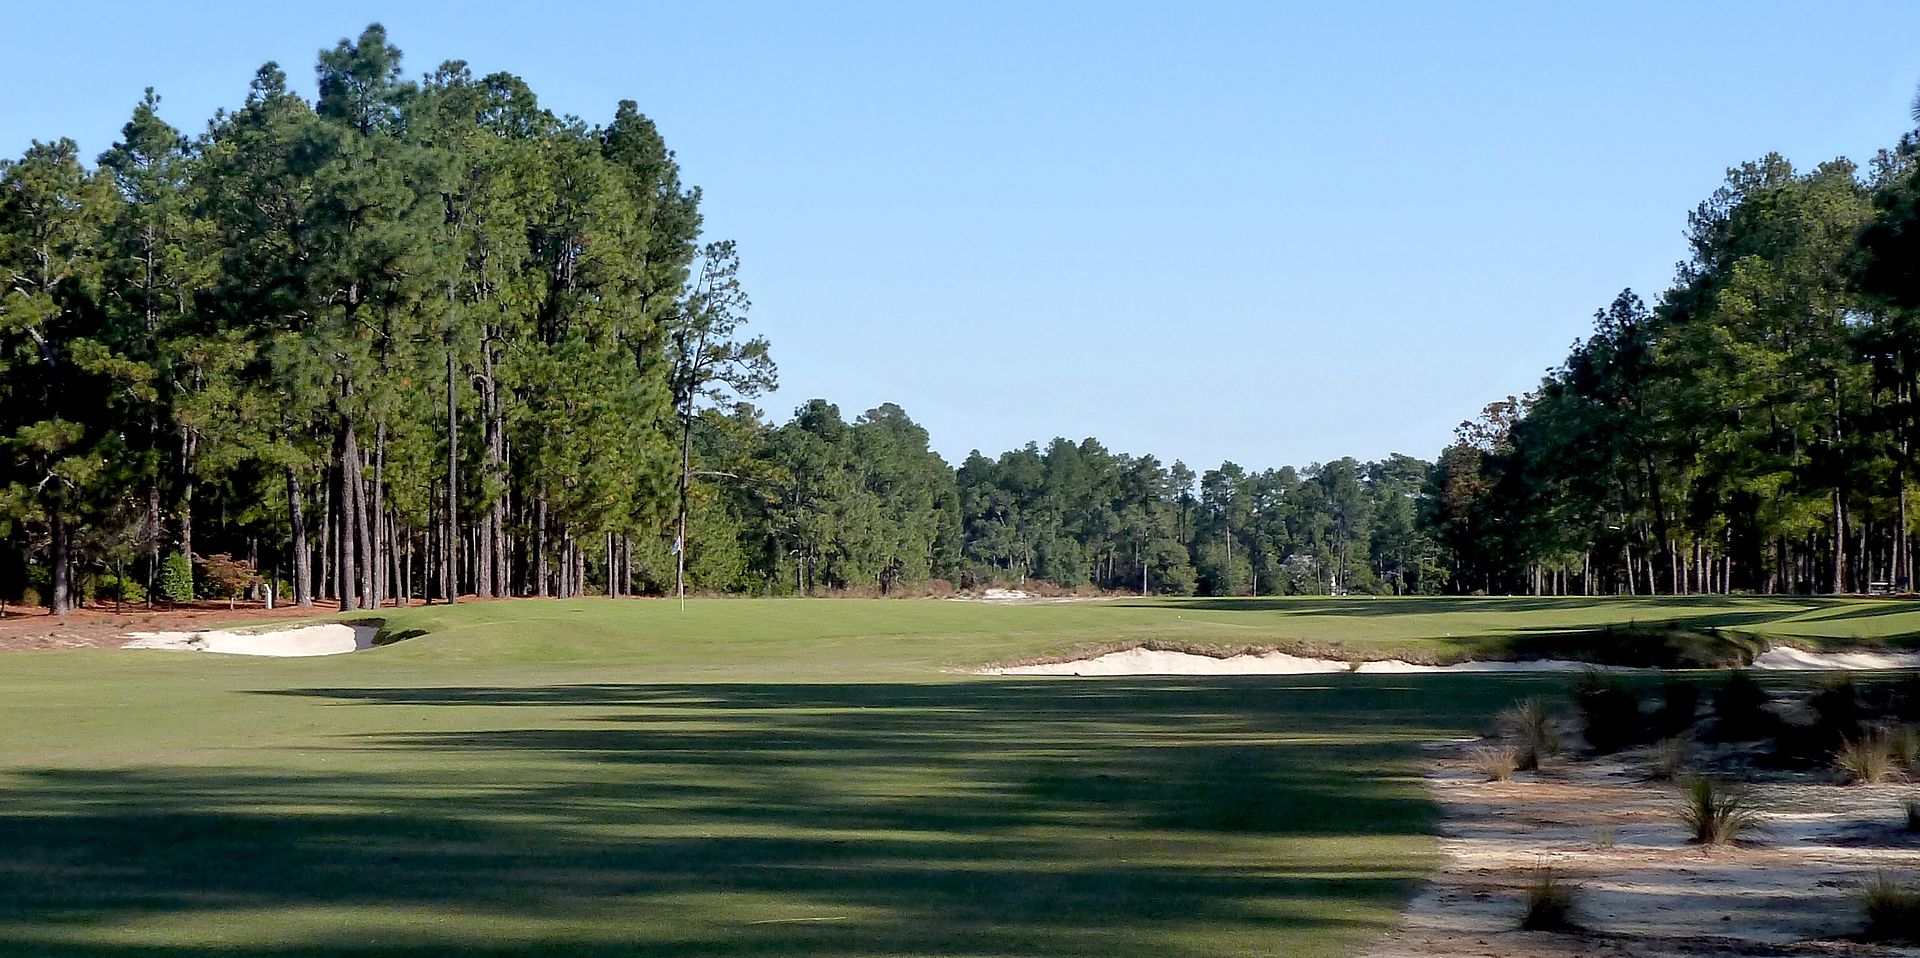
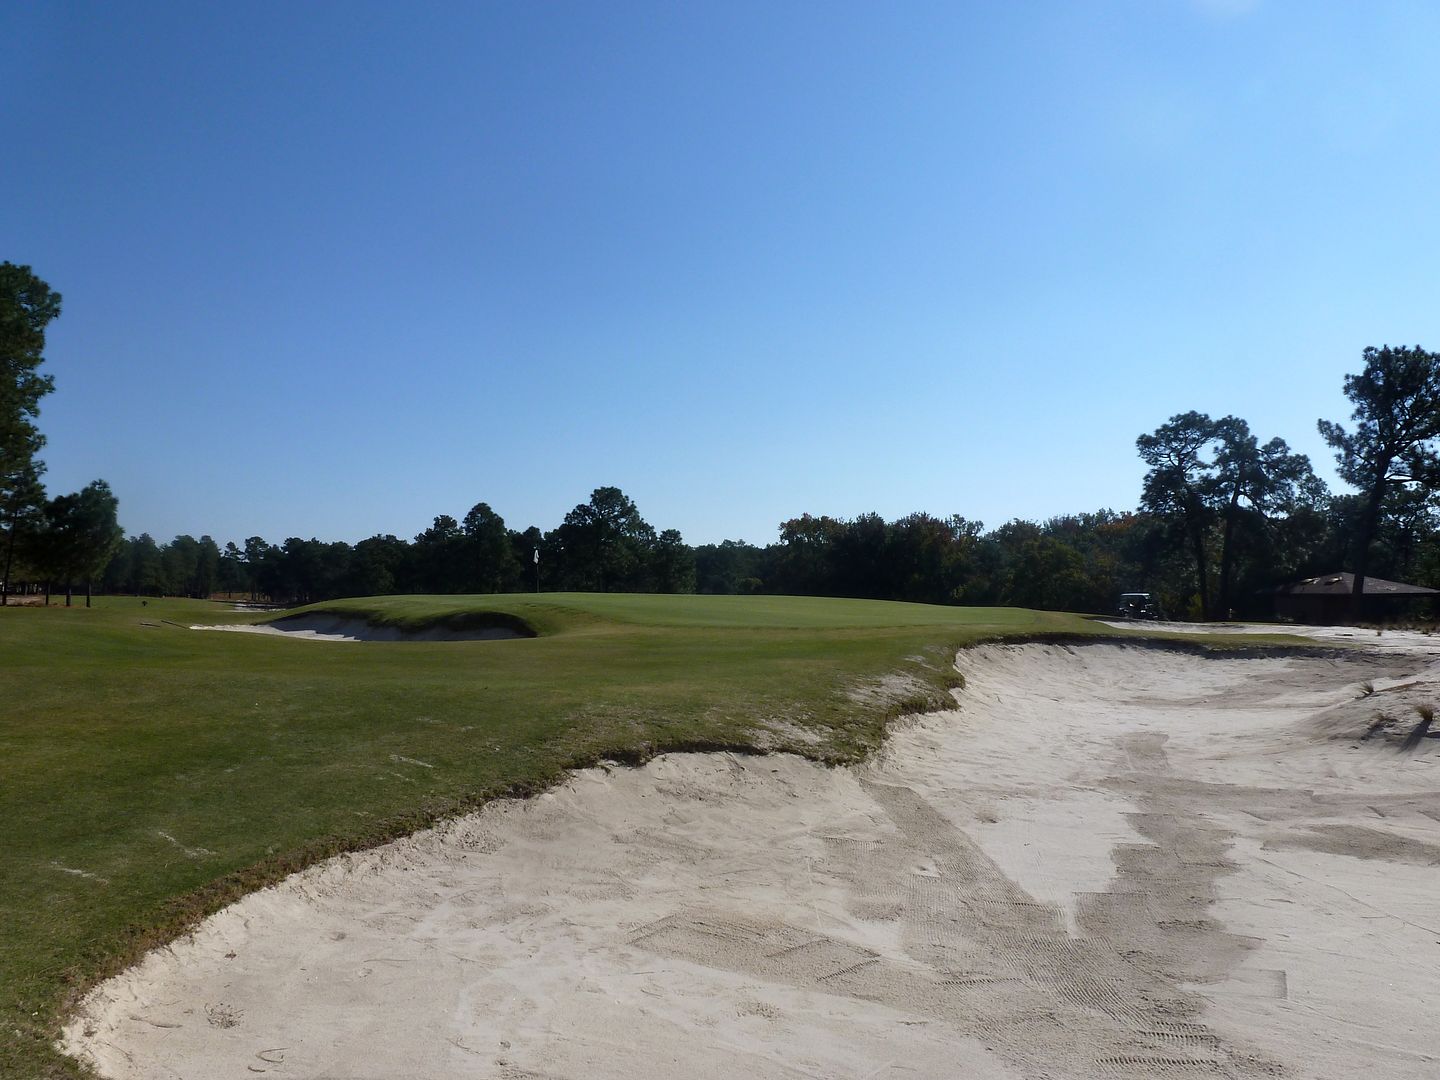
Shots missed long or right will find these collection areas. Recovery from here is near impossible and chipping off the front or side of the green is just as like as having the ball return to one's feet. So much for a gentle handshake.
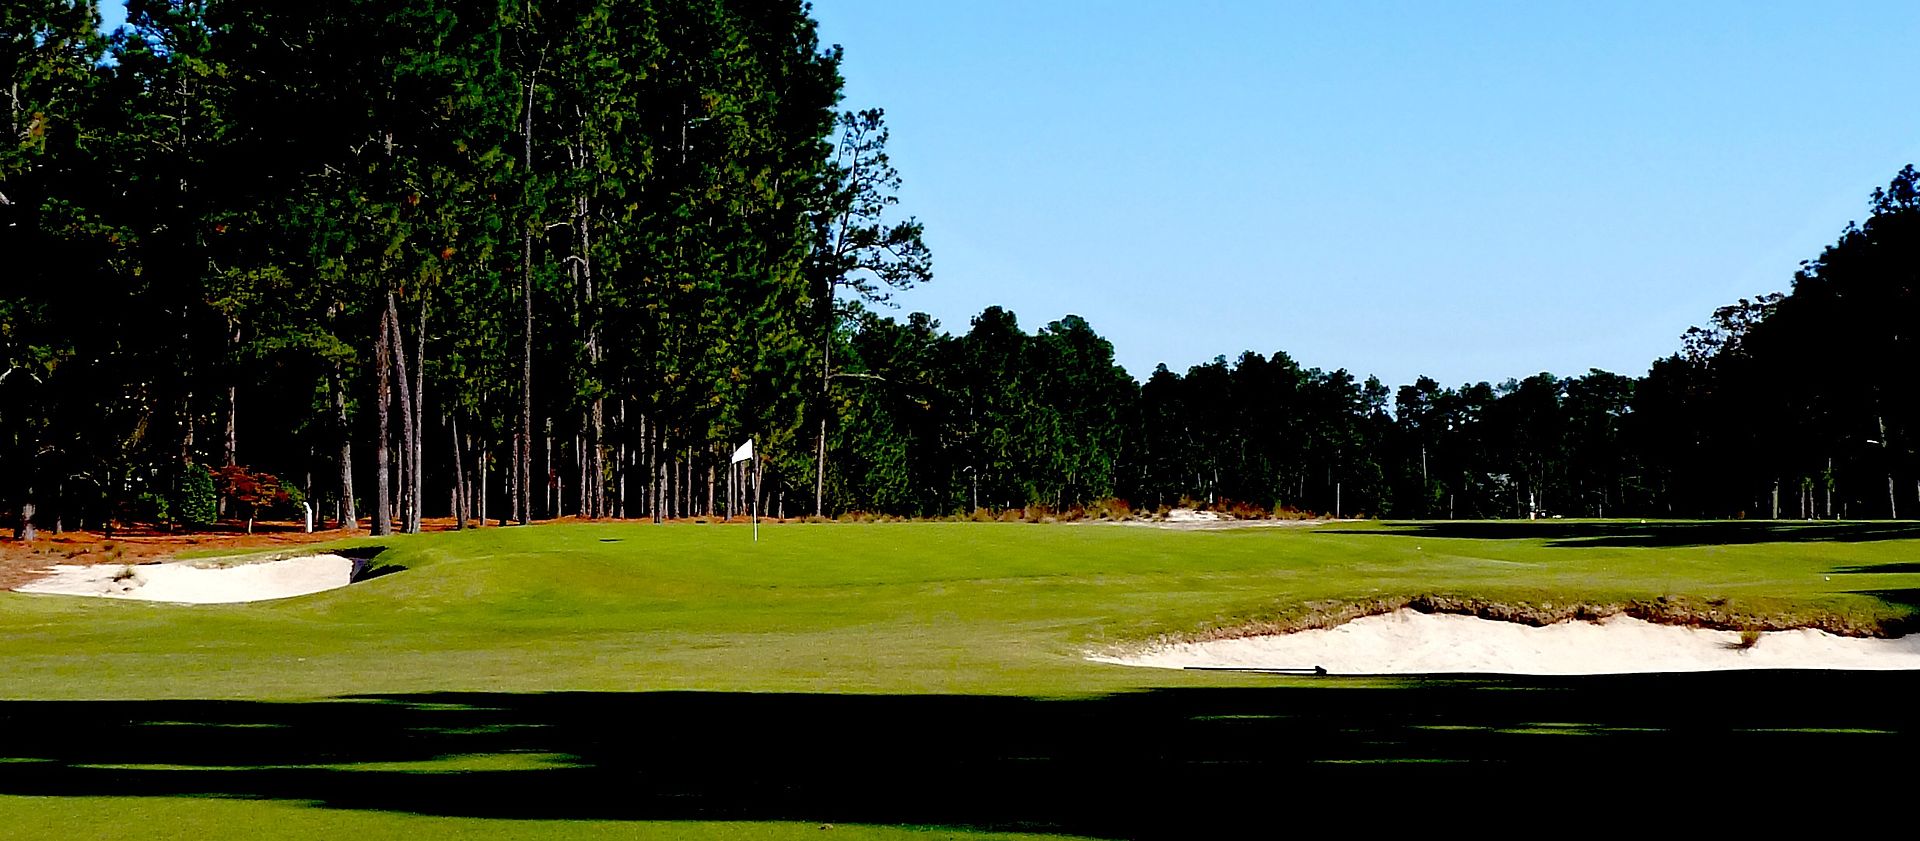
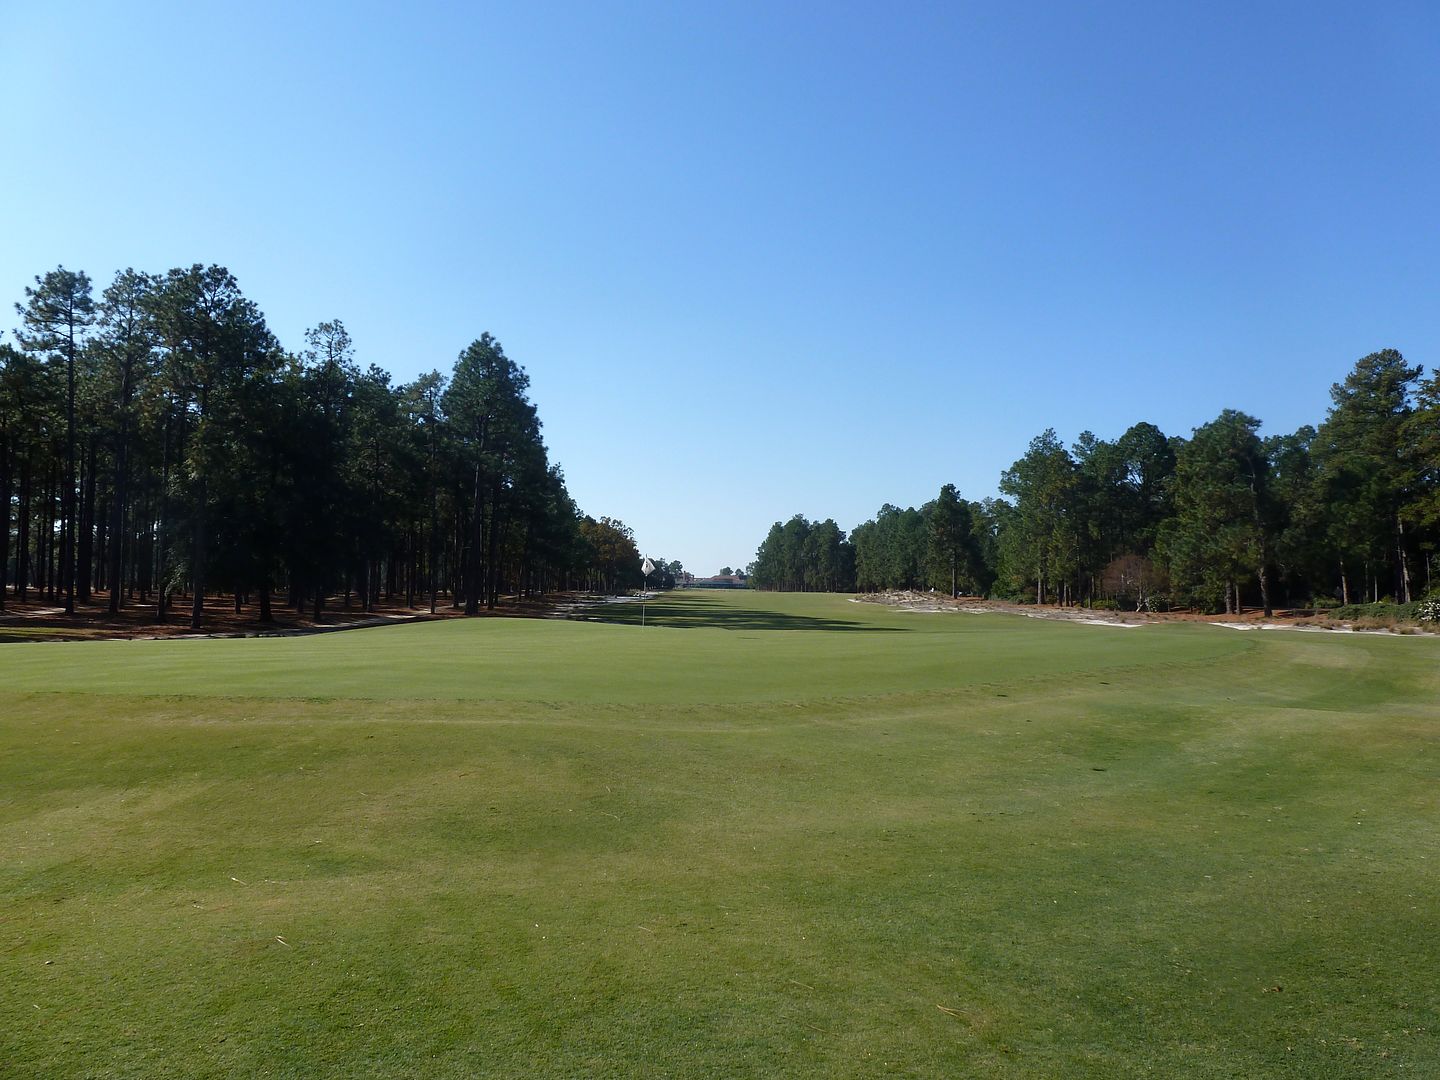
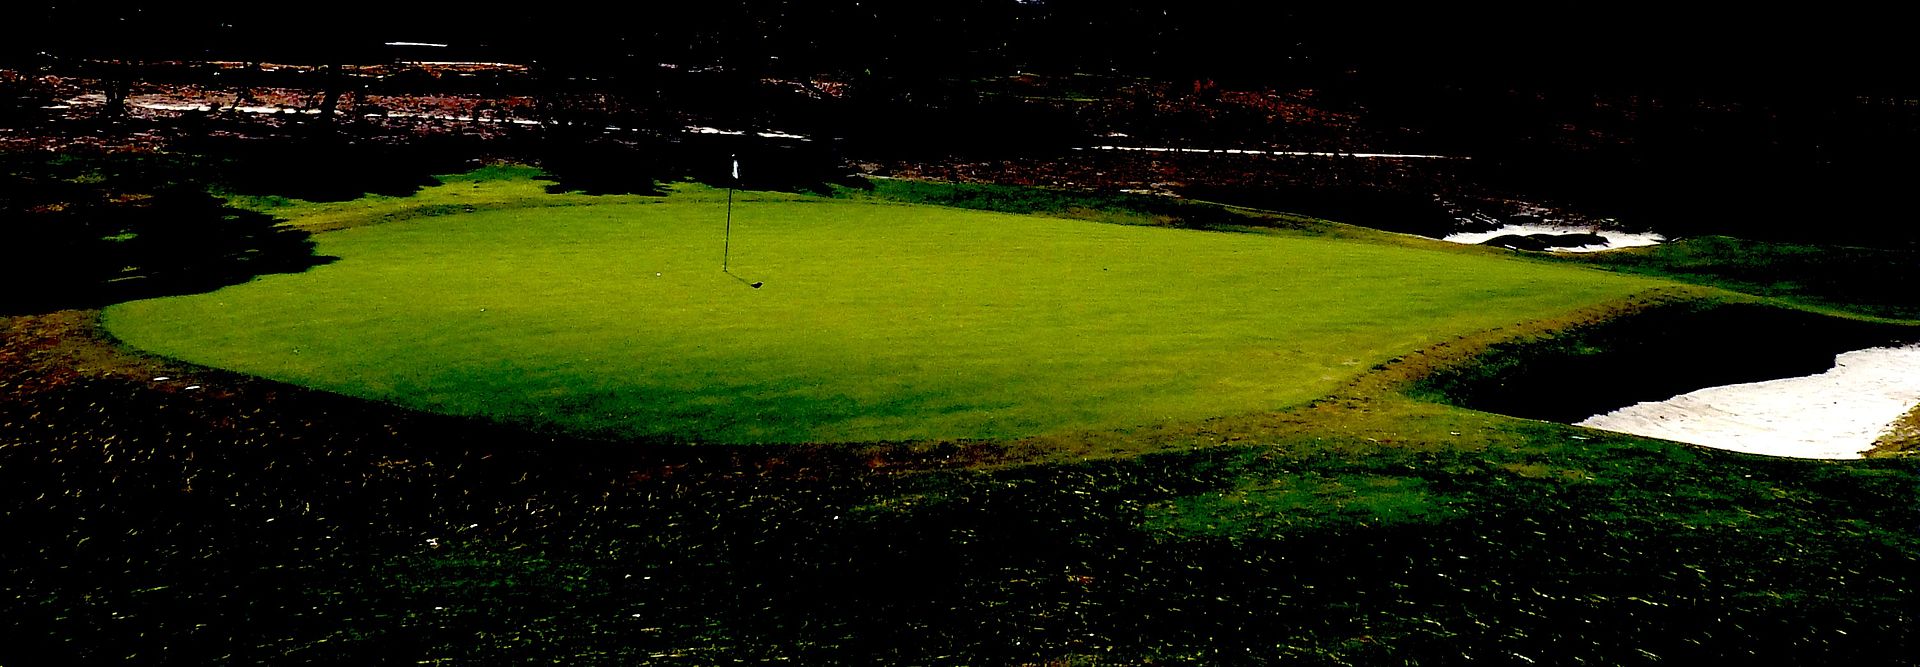
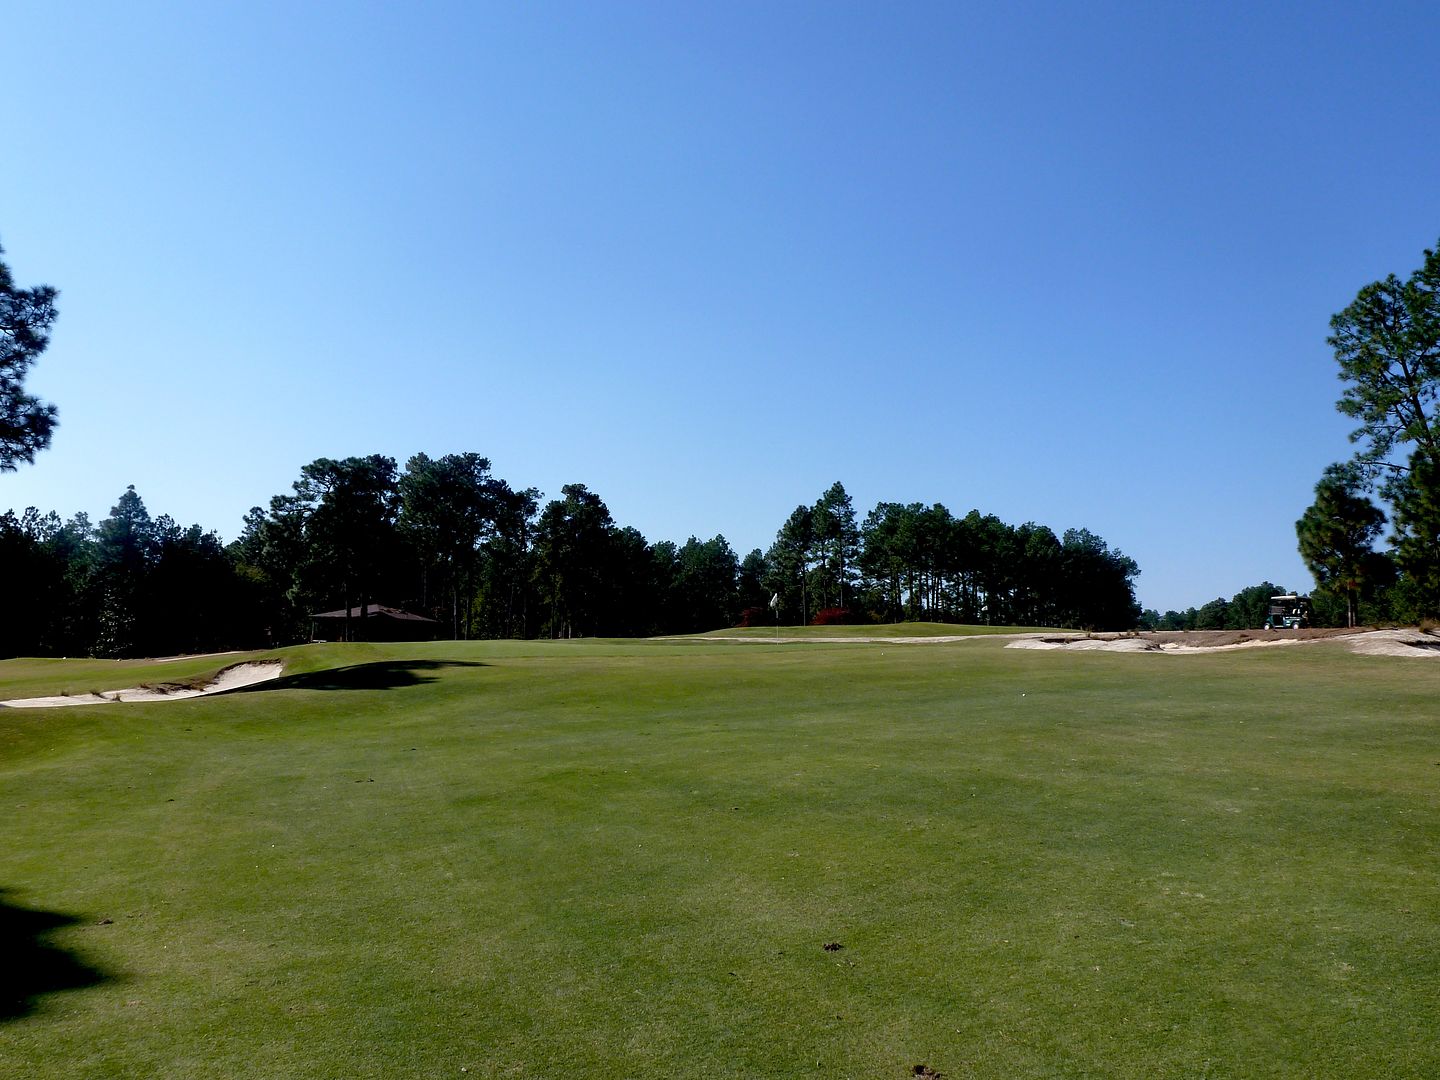
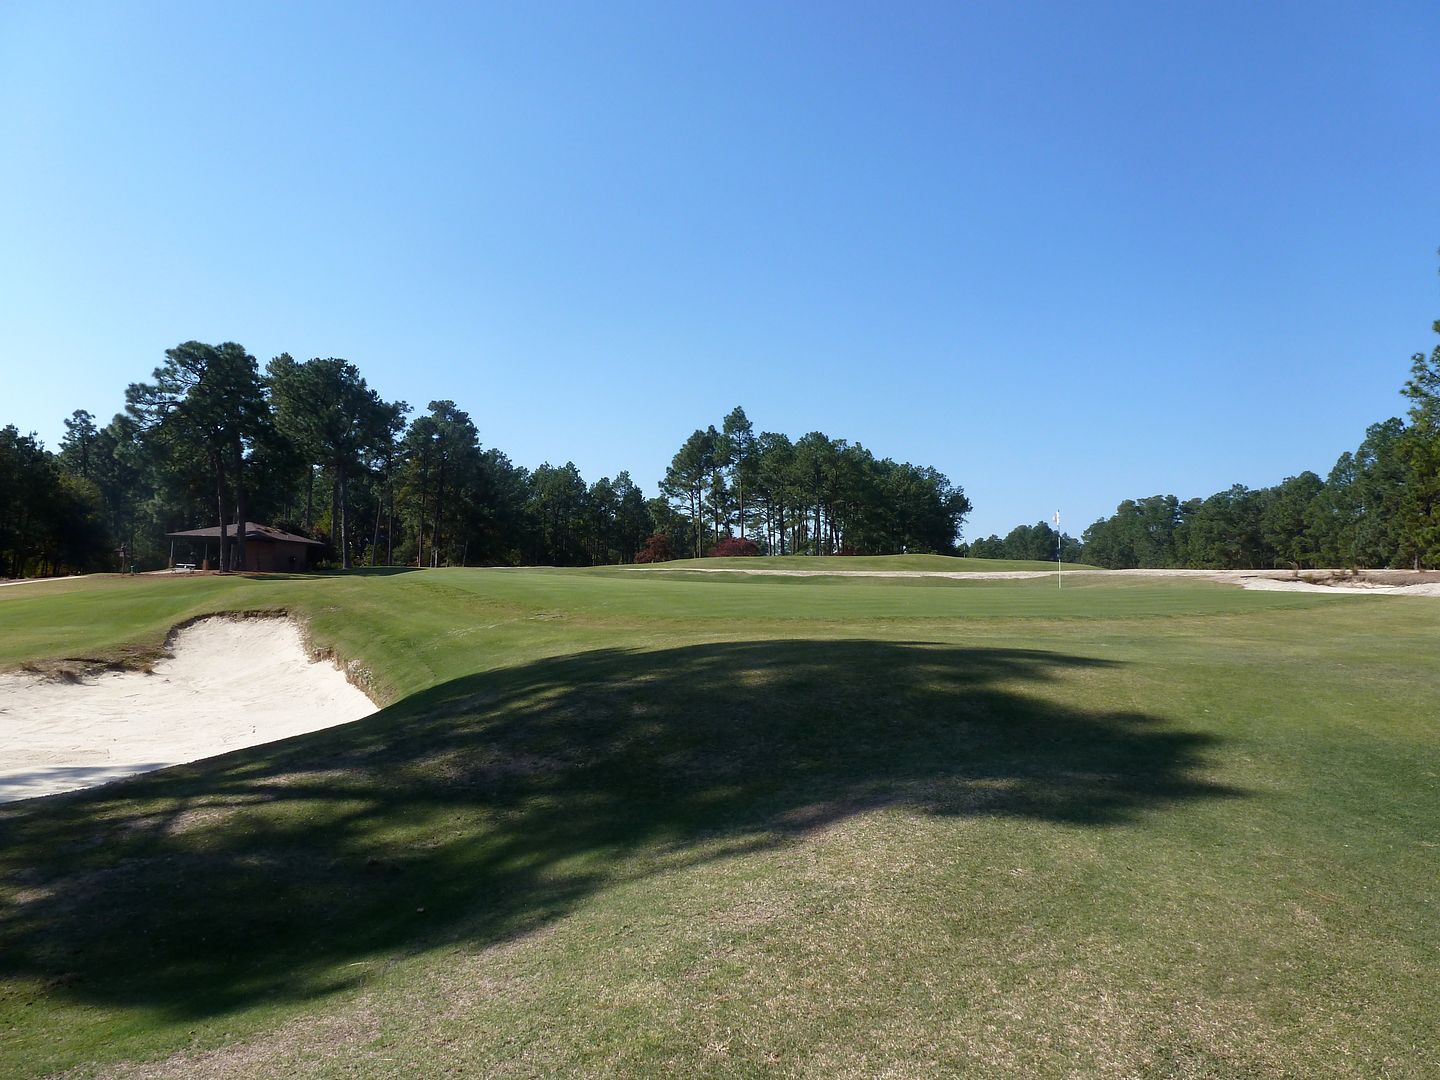
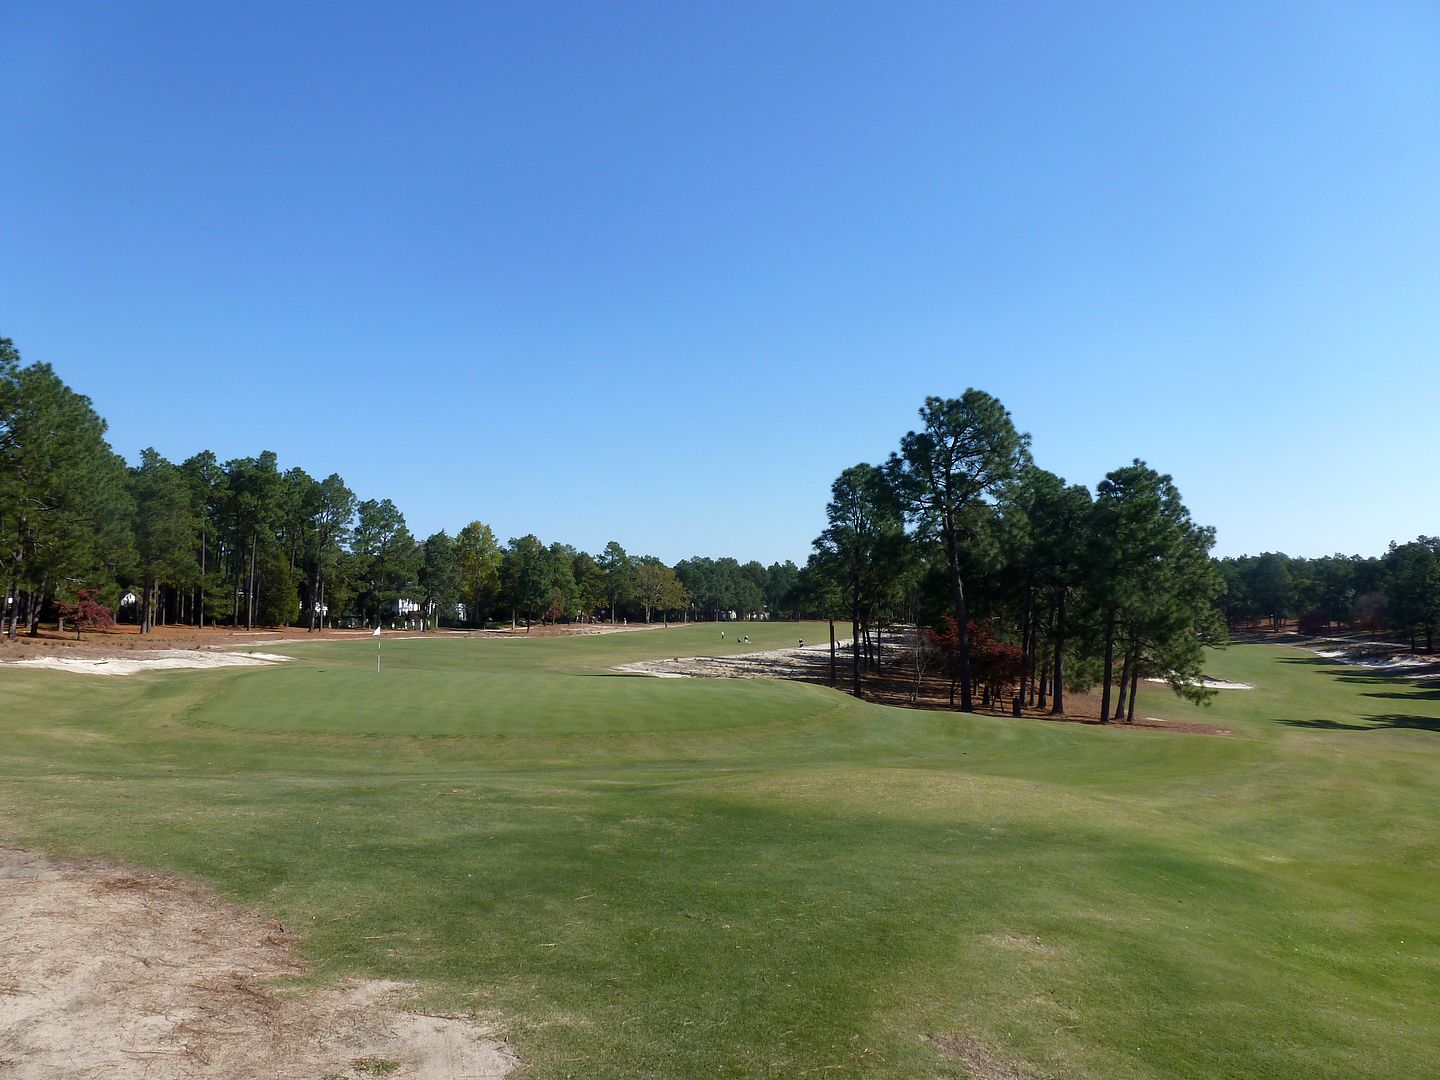
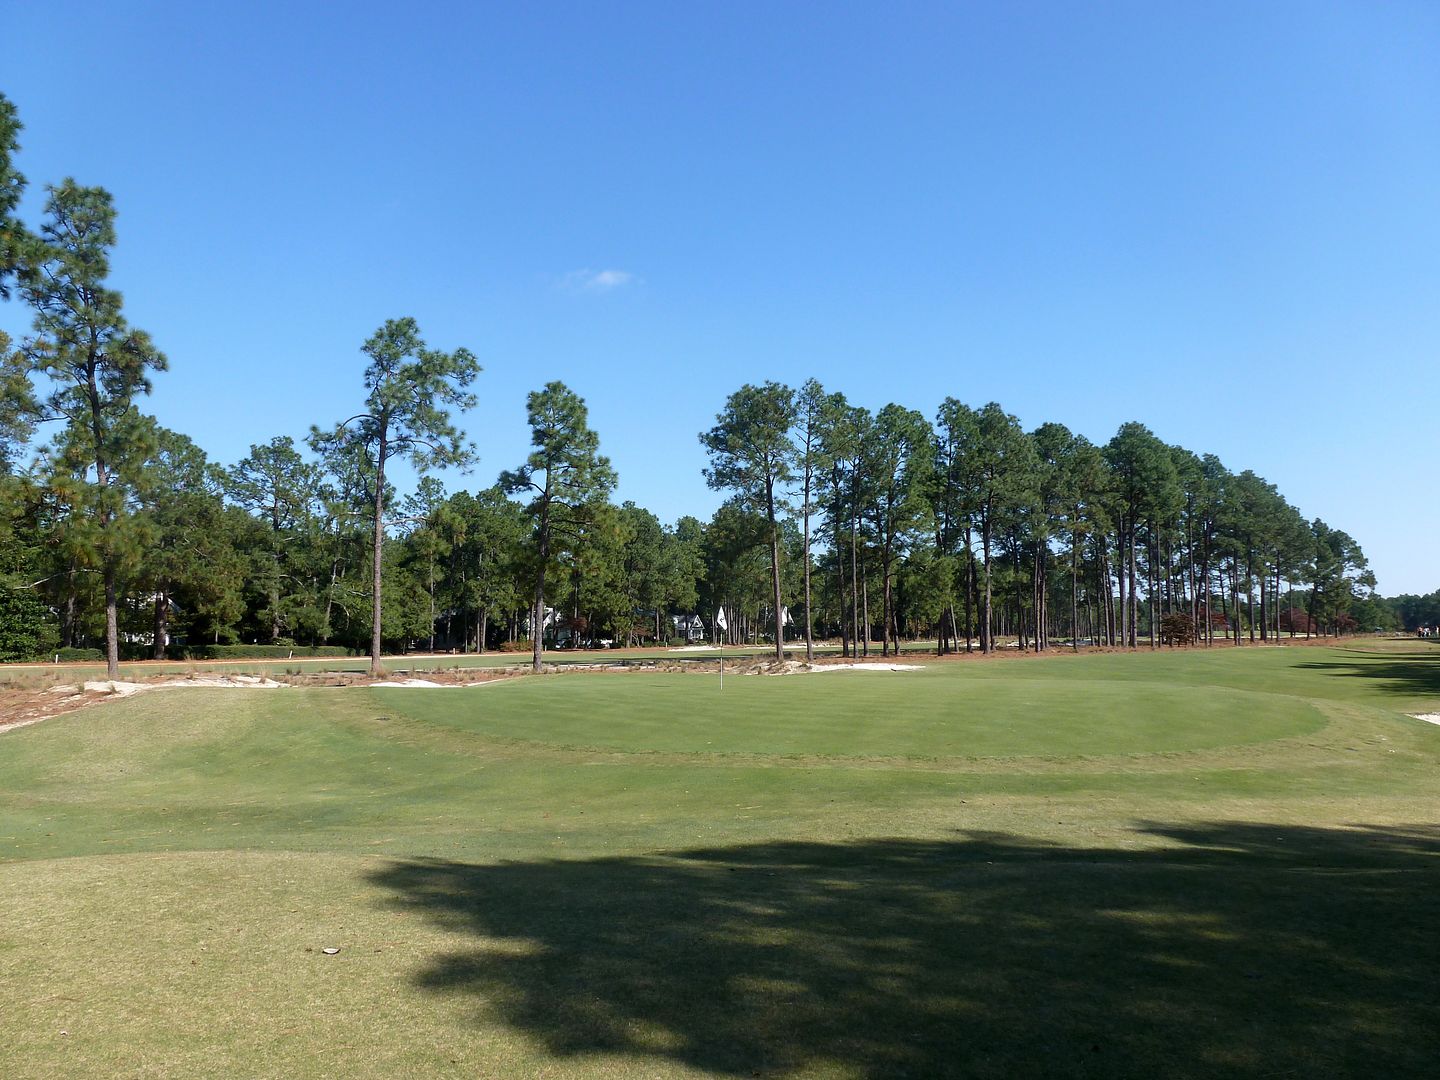
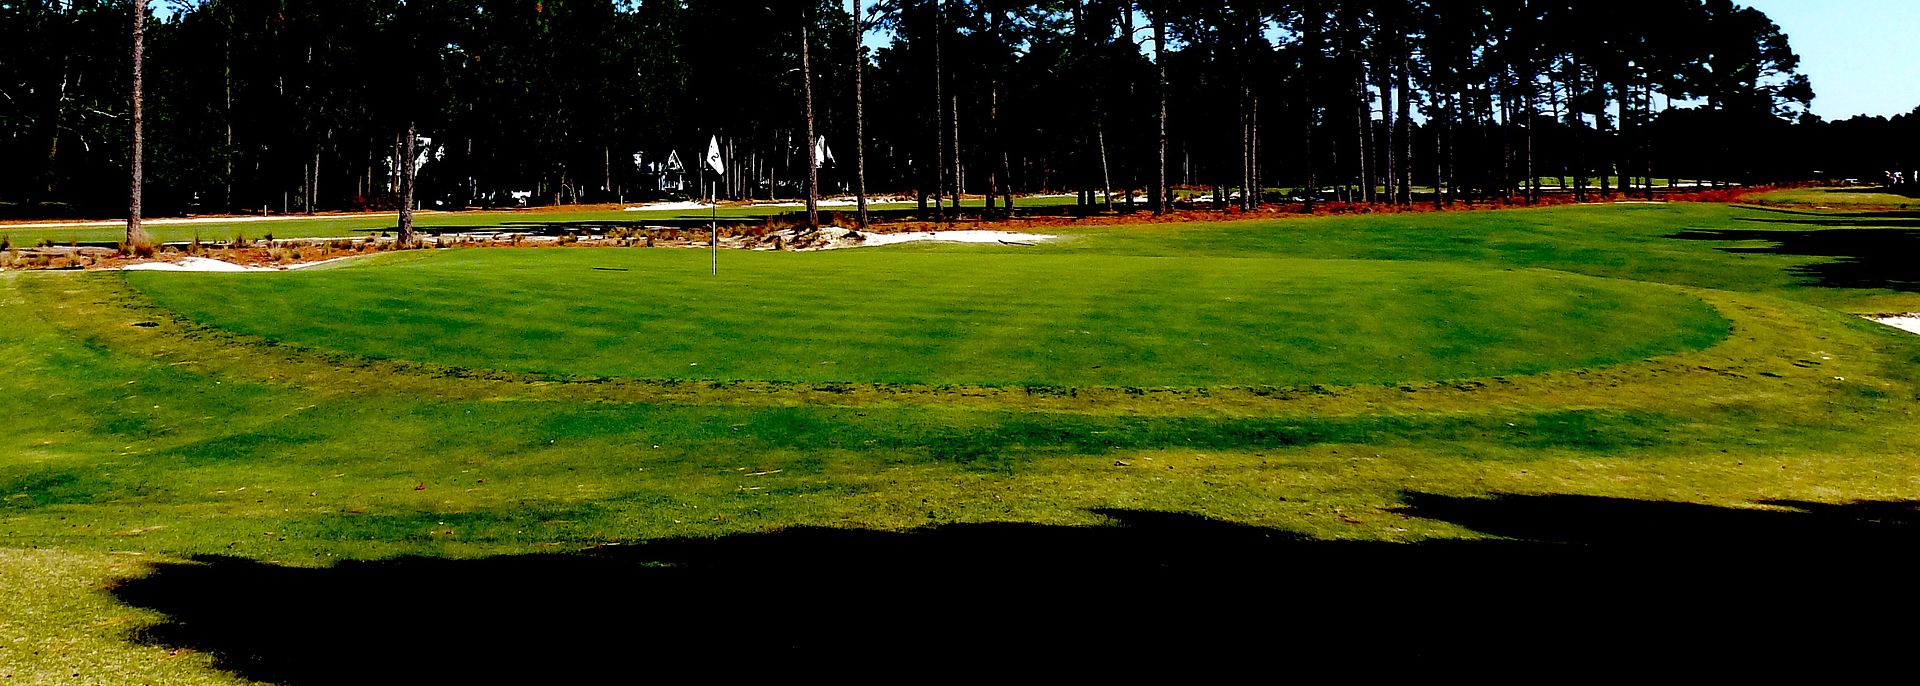
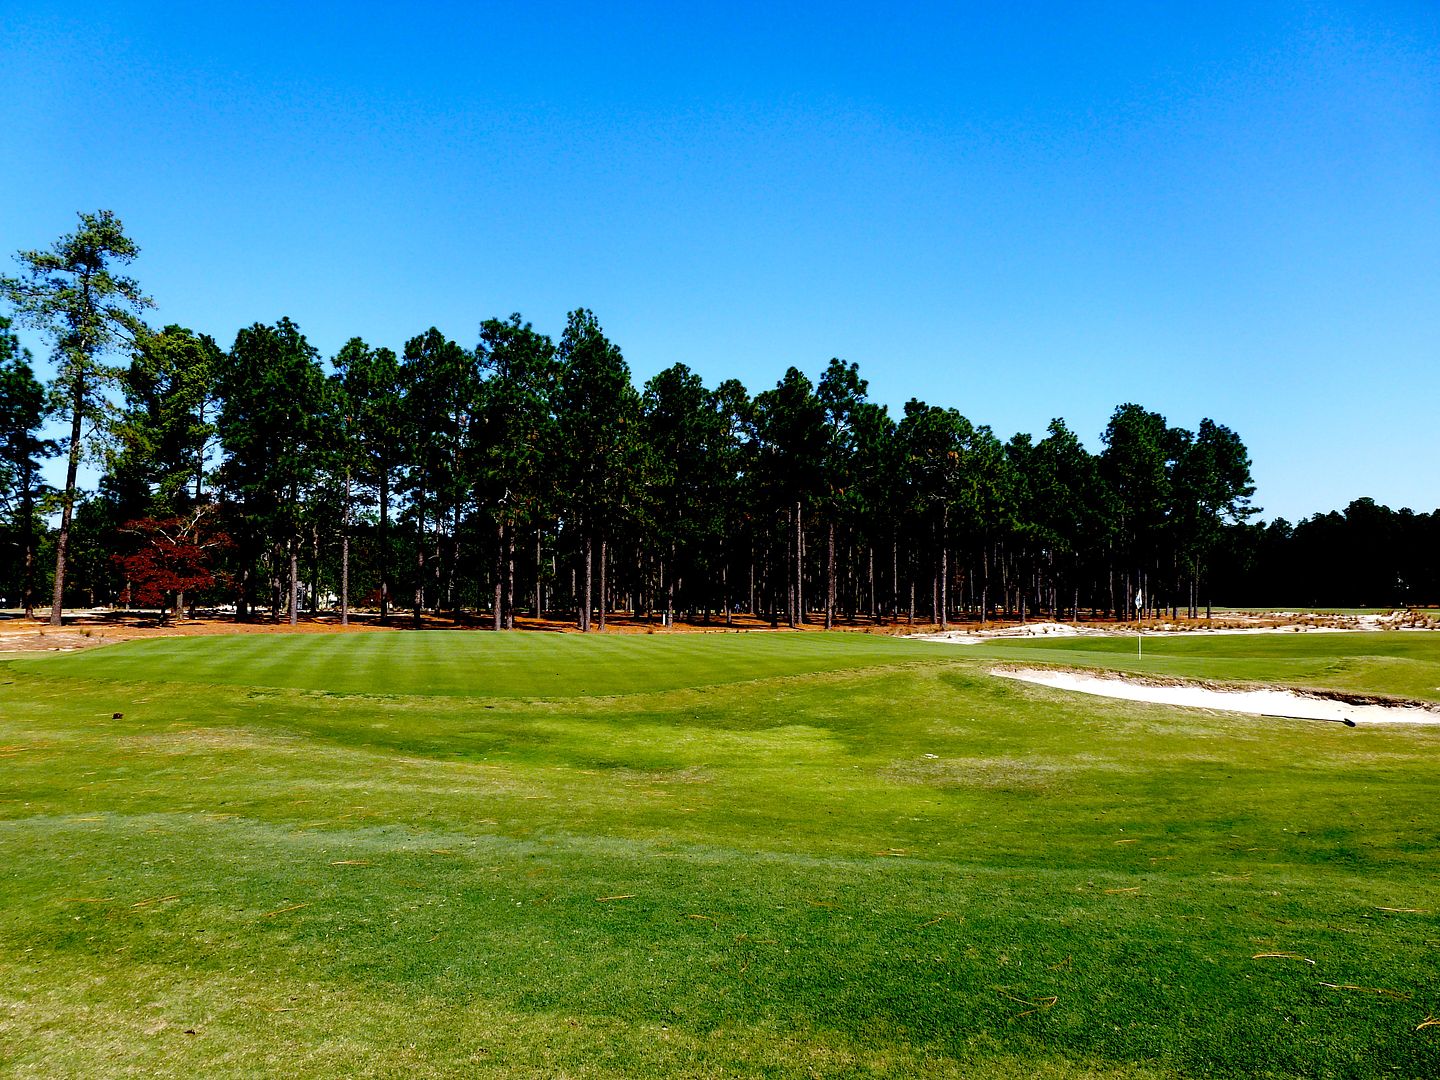
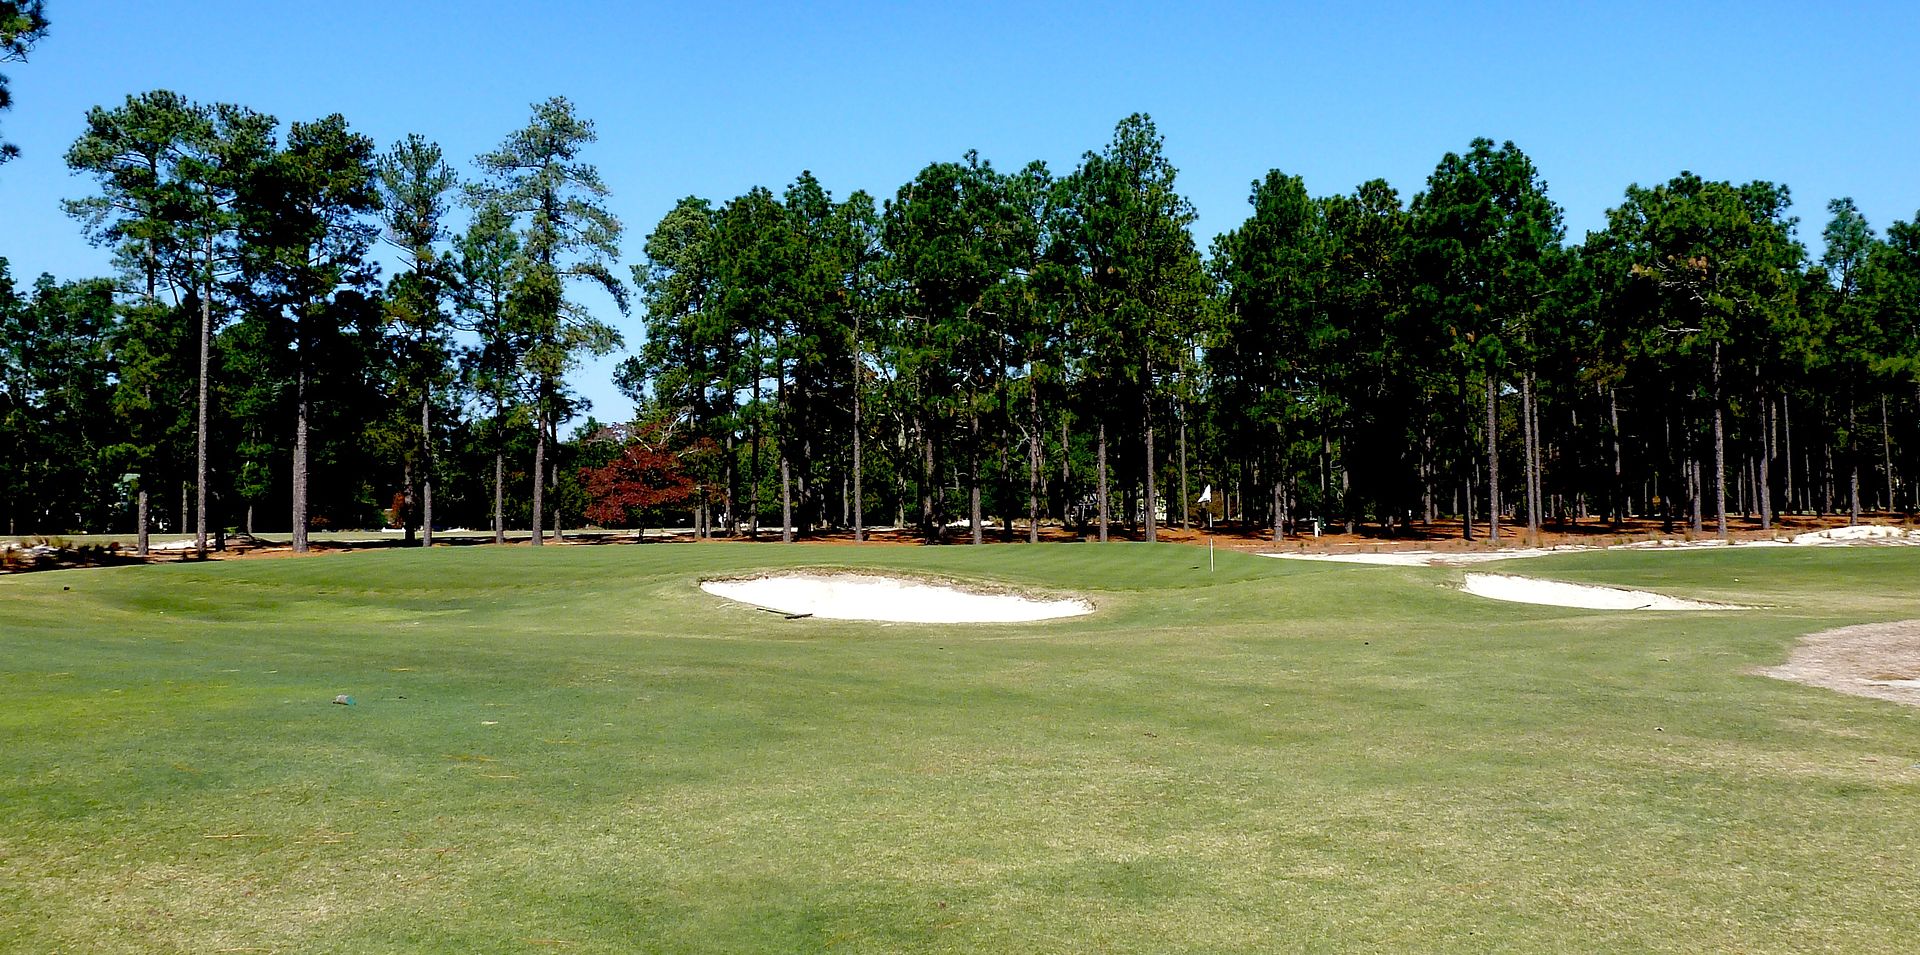
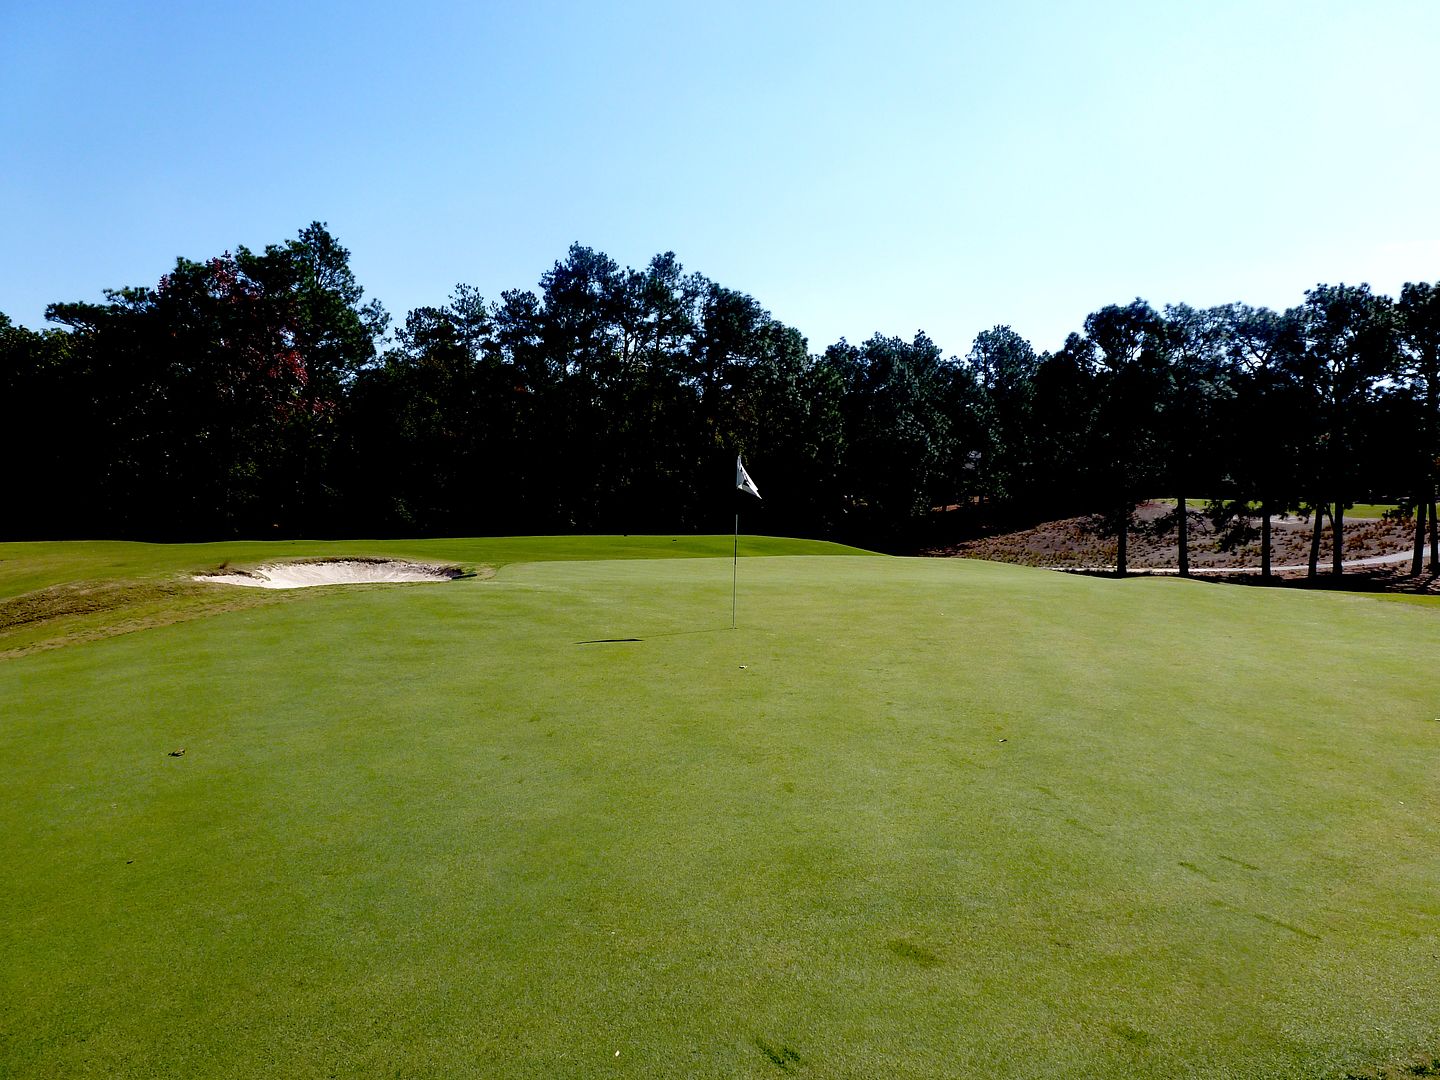
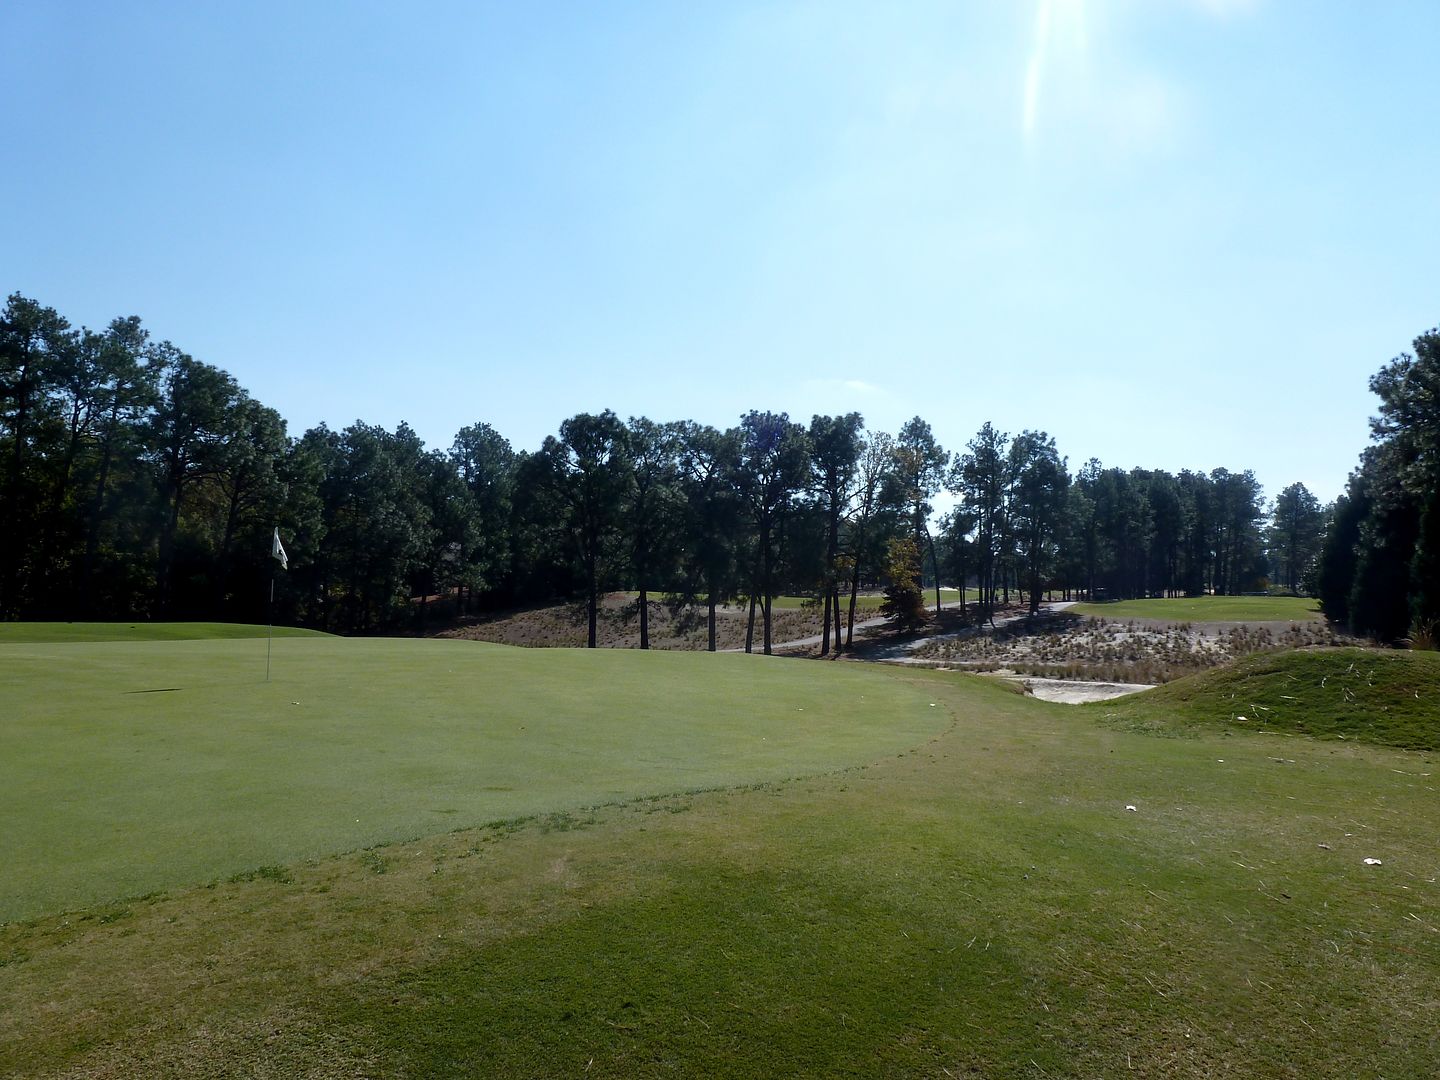
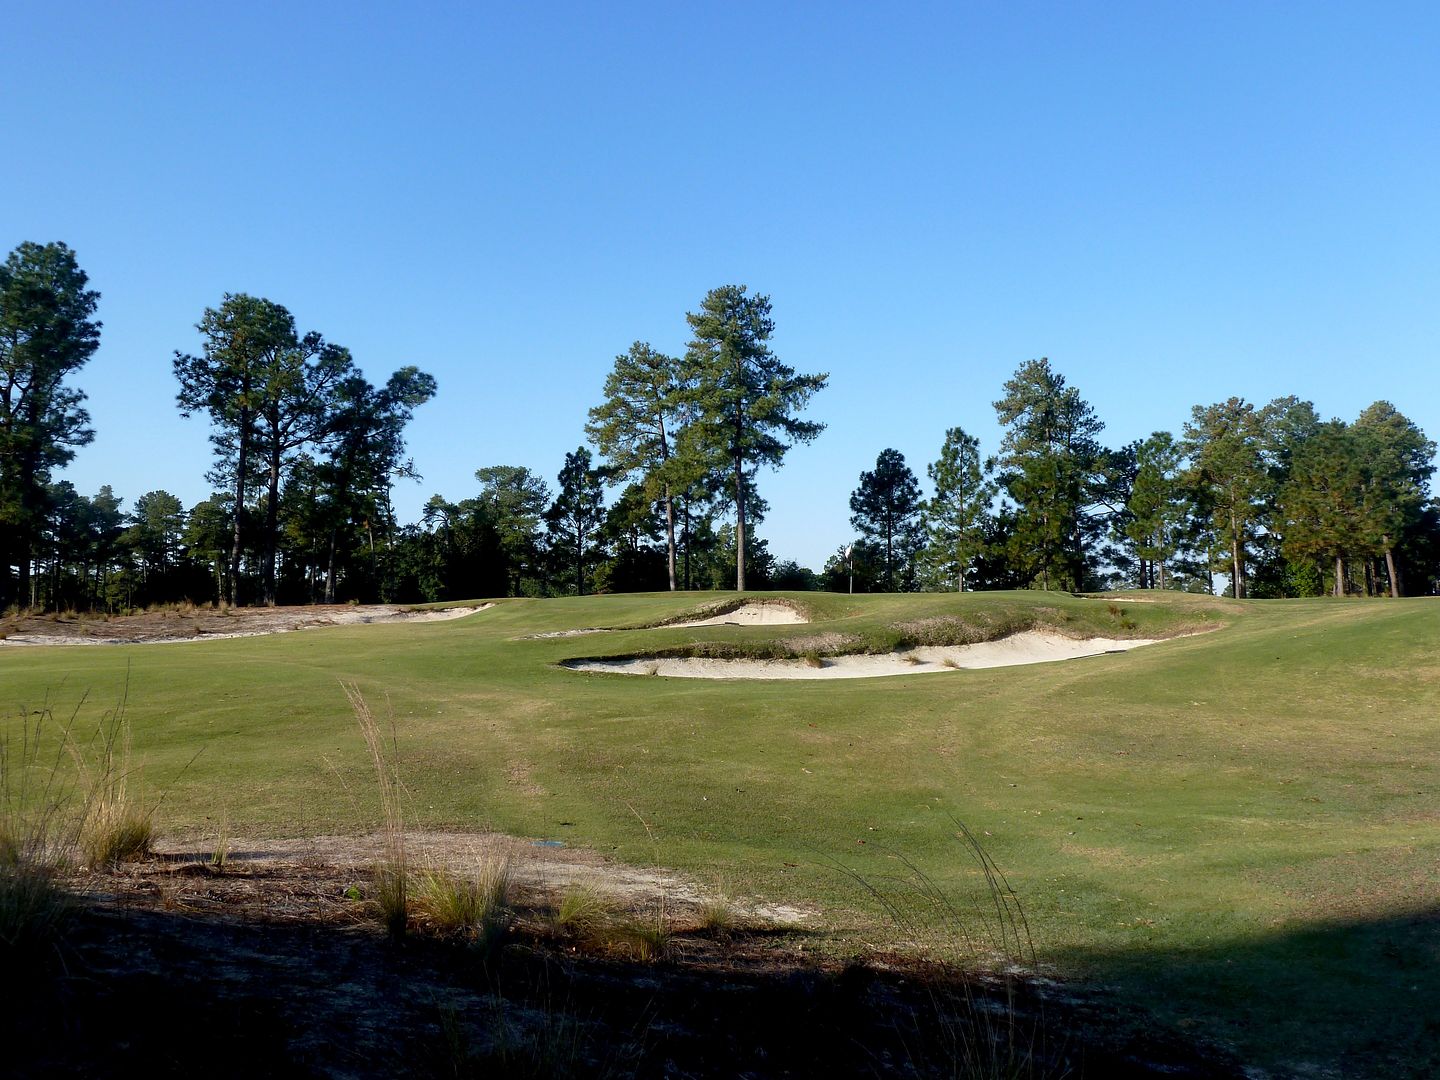
Green from right:
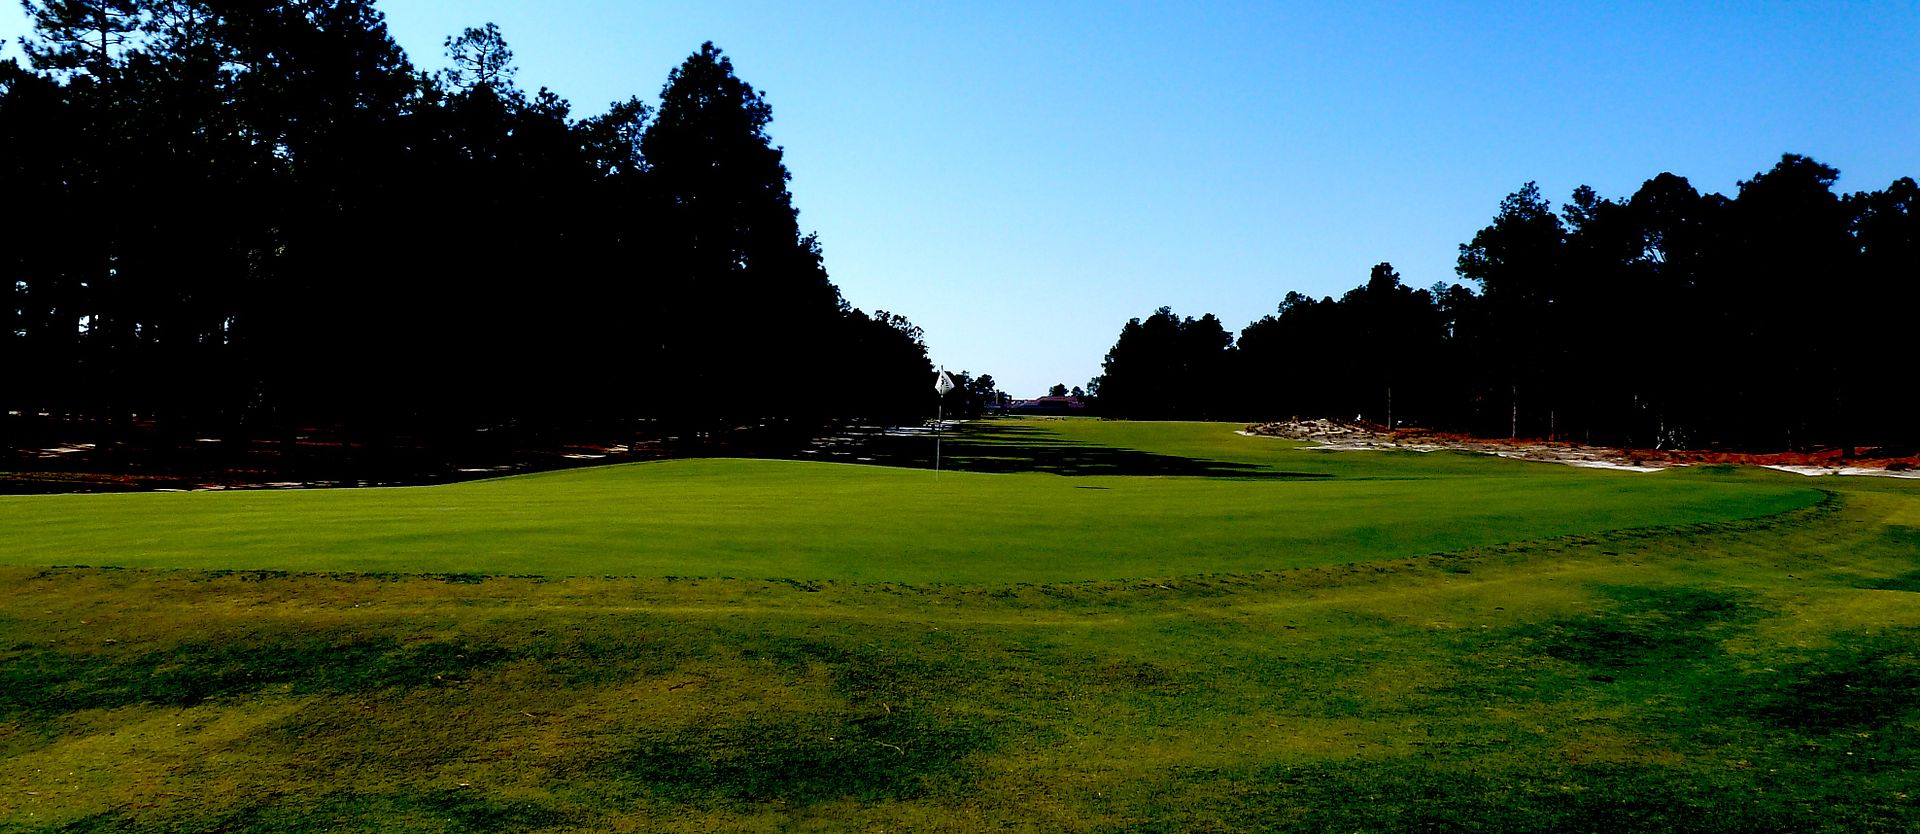
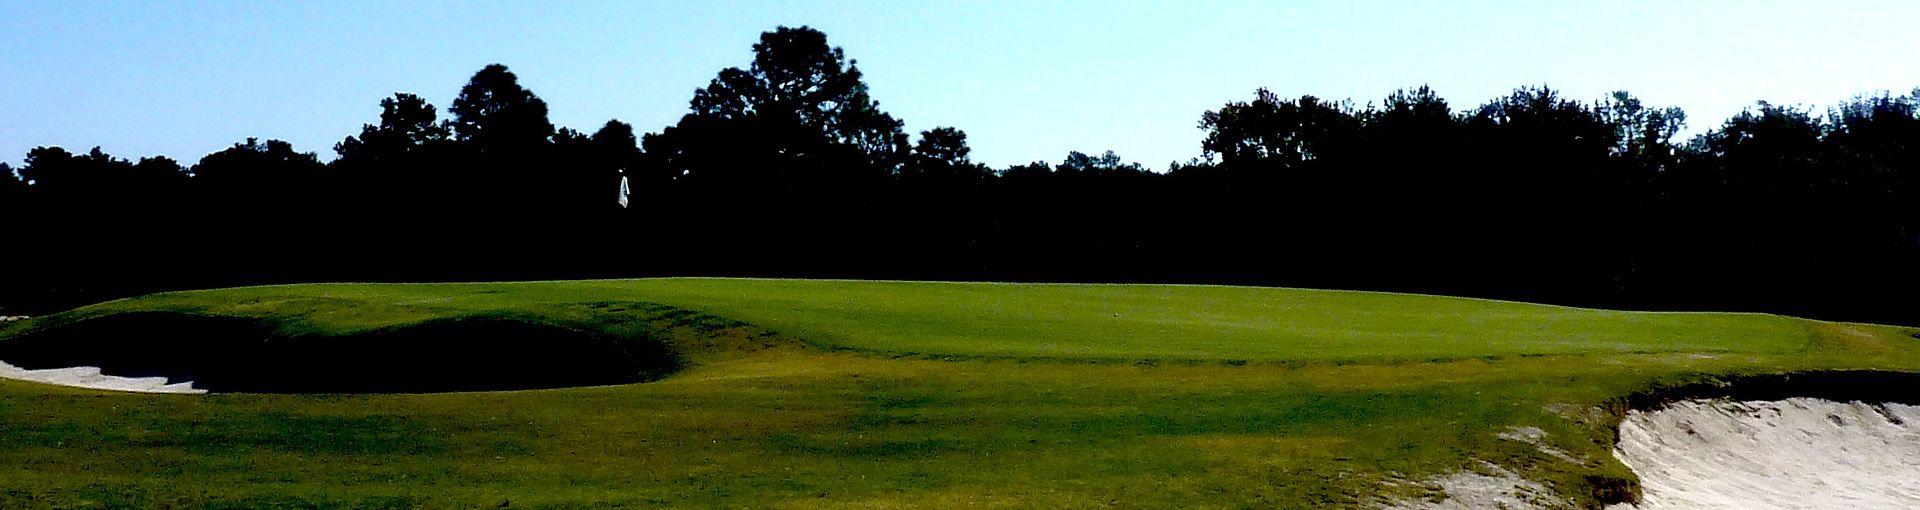
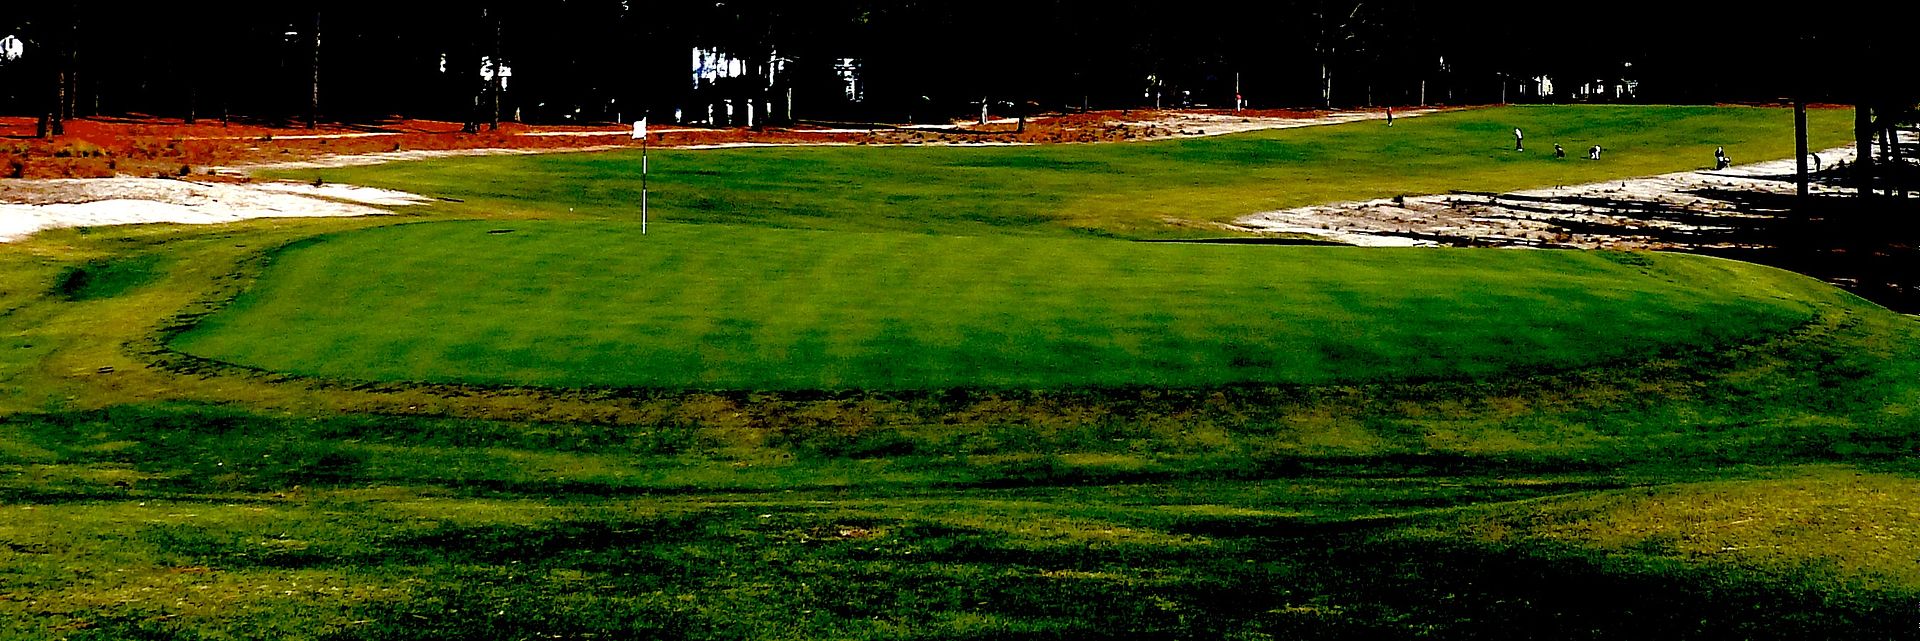
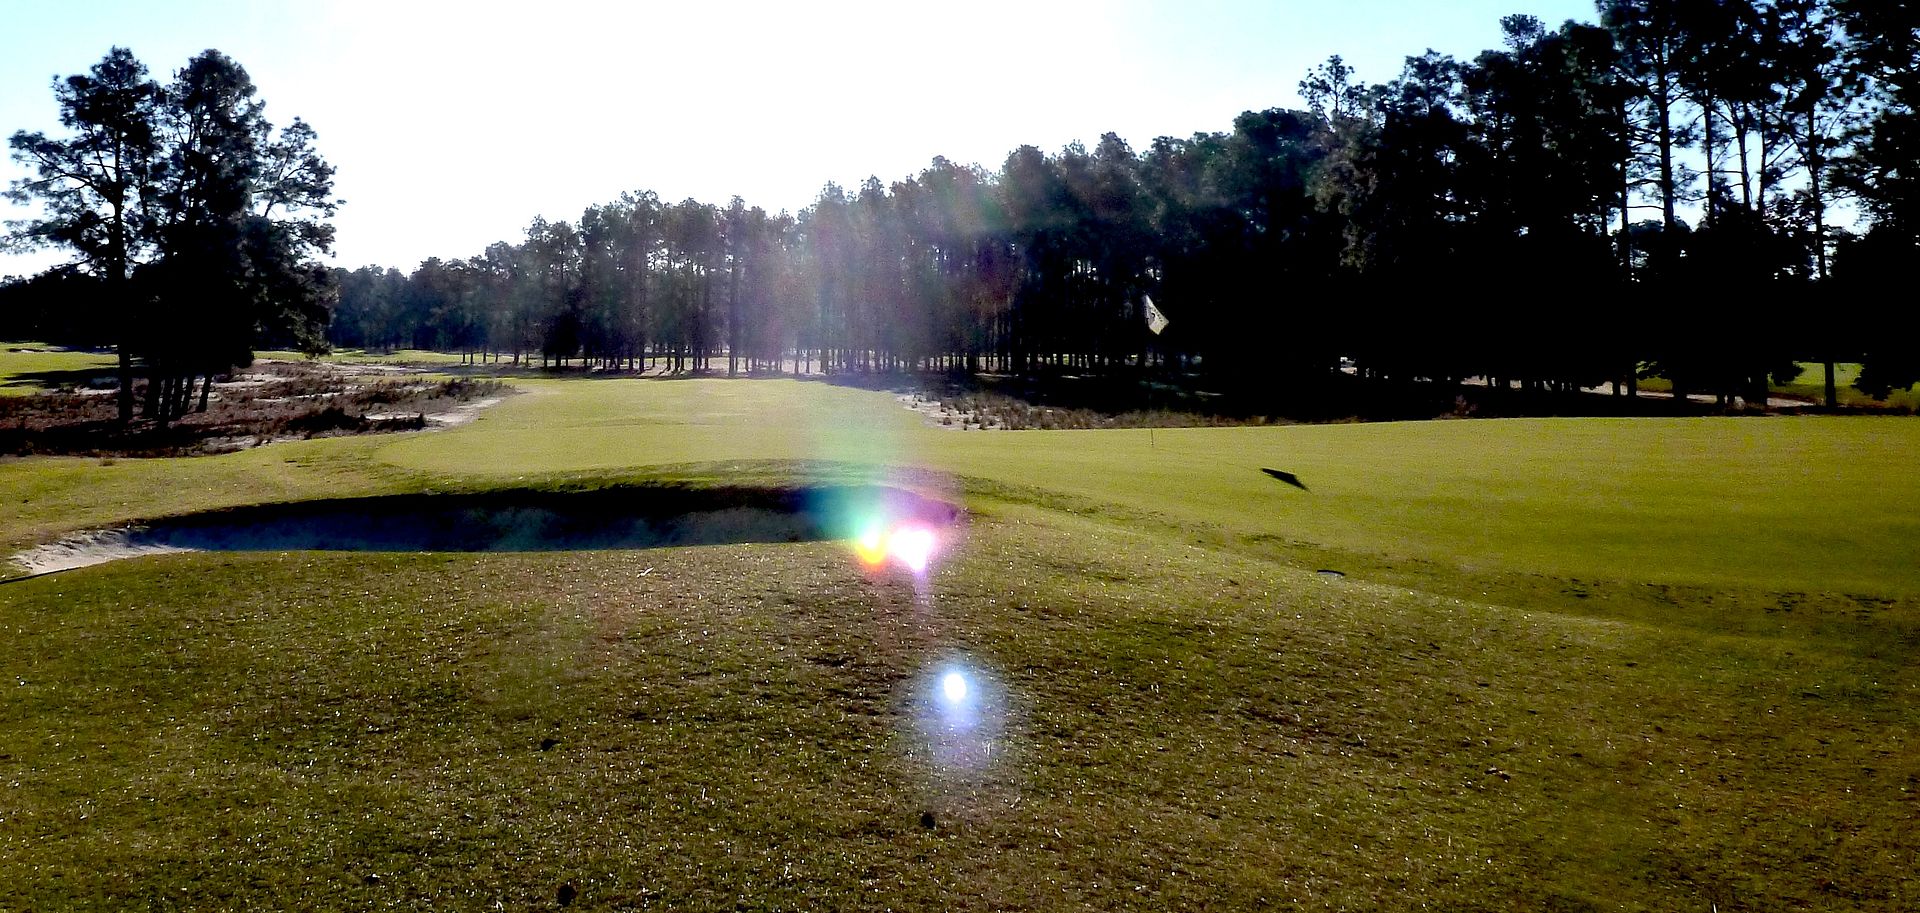
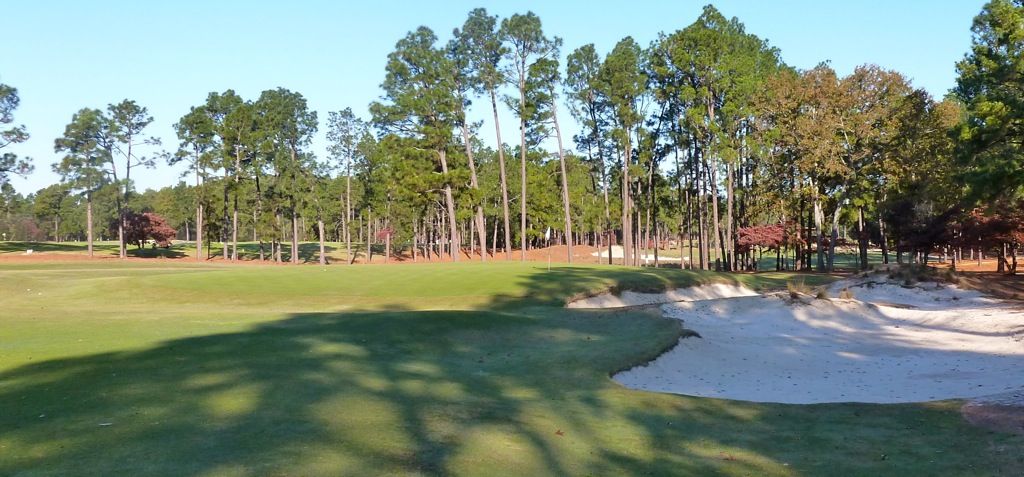
Green from 2nd Tee:
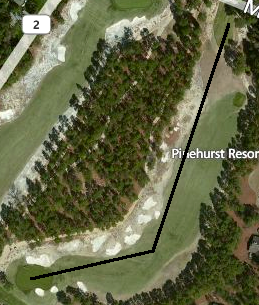
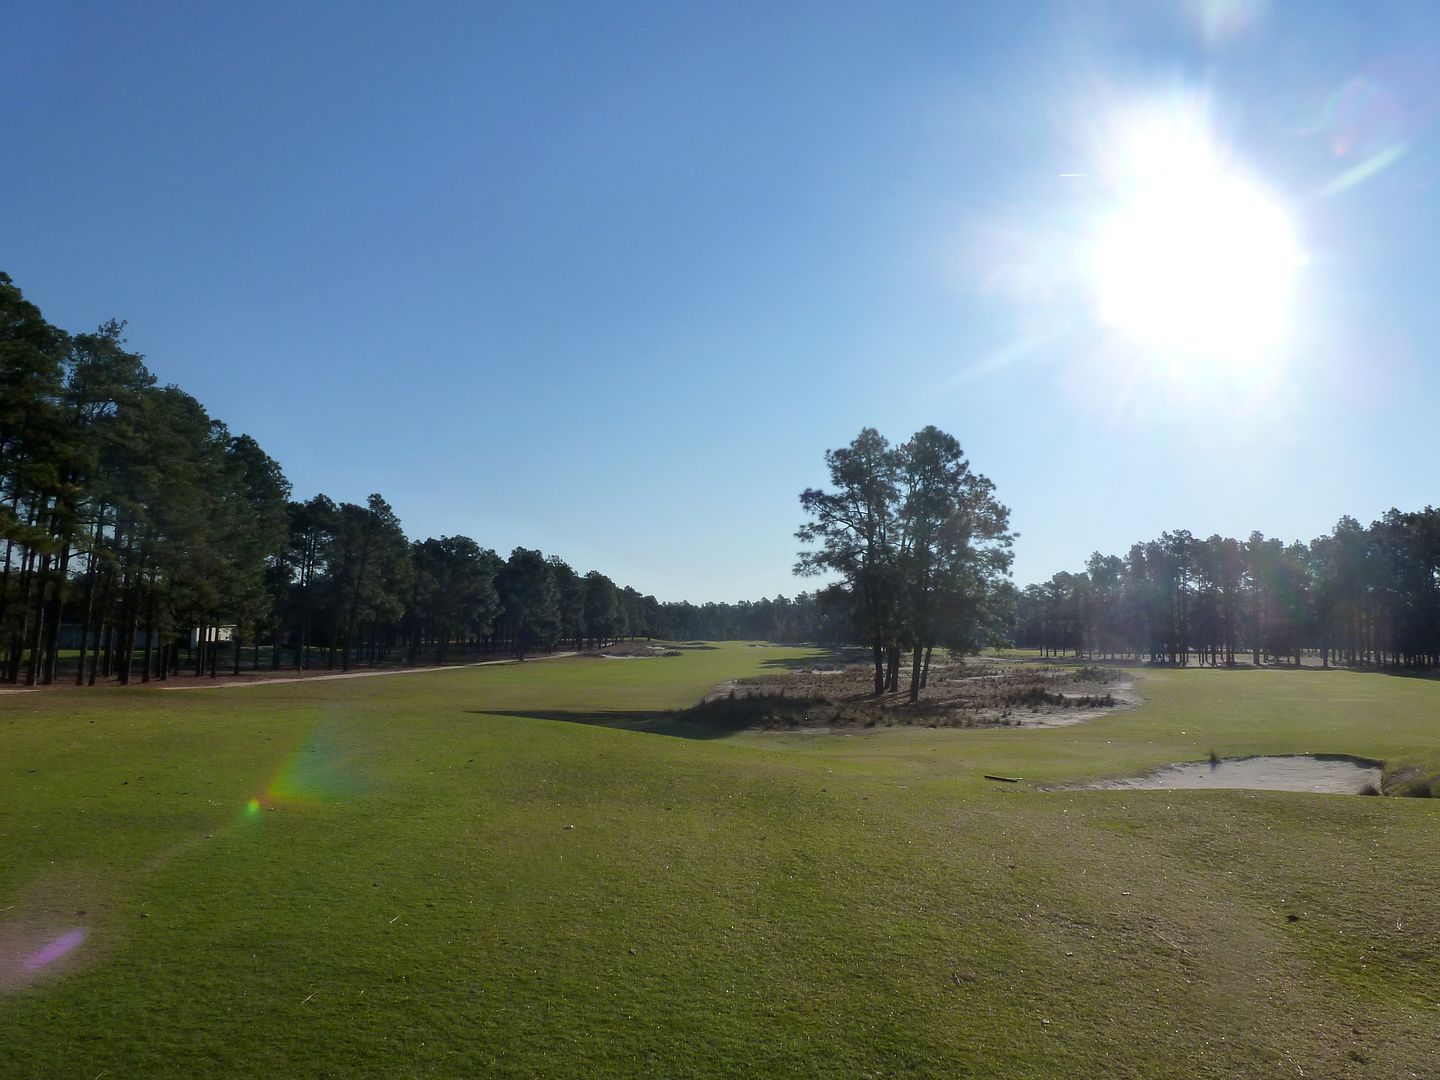
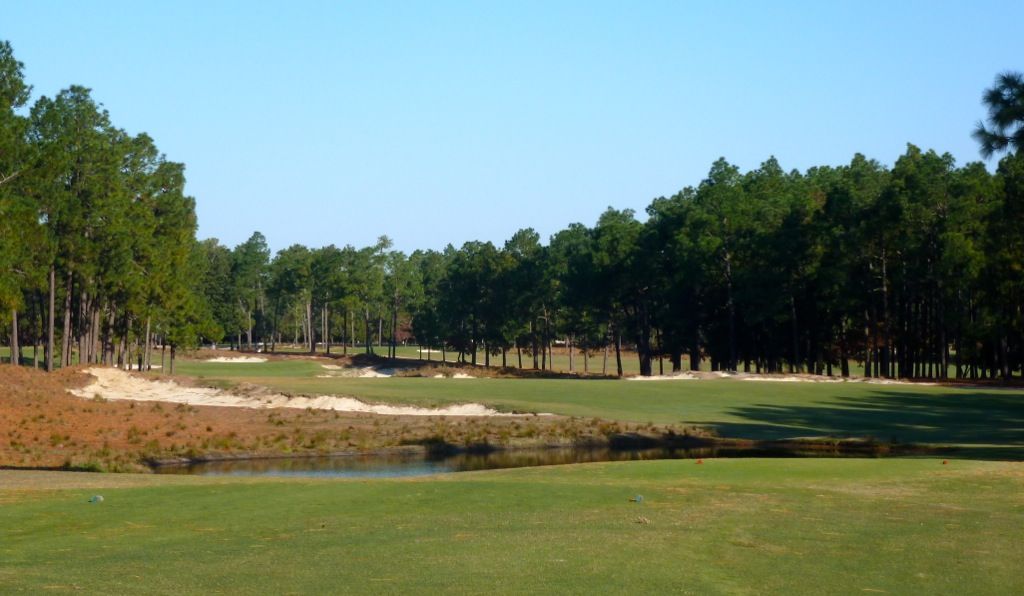
Hole 2: Par 4, 438 Yards
2008 Aerial:
2011 Aerial:
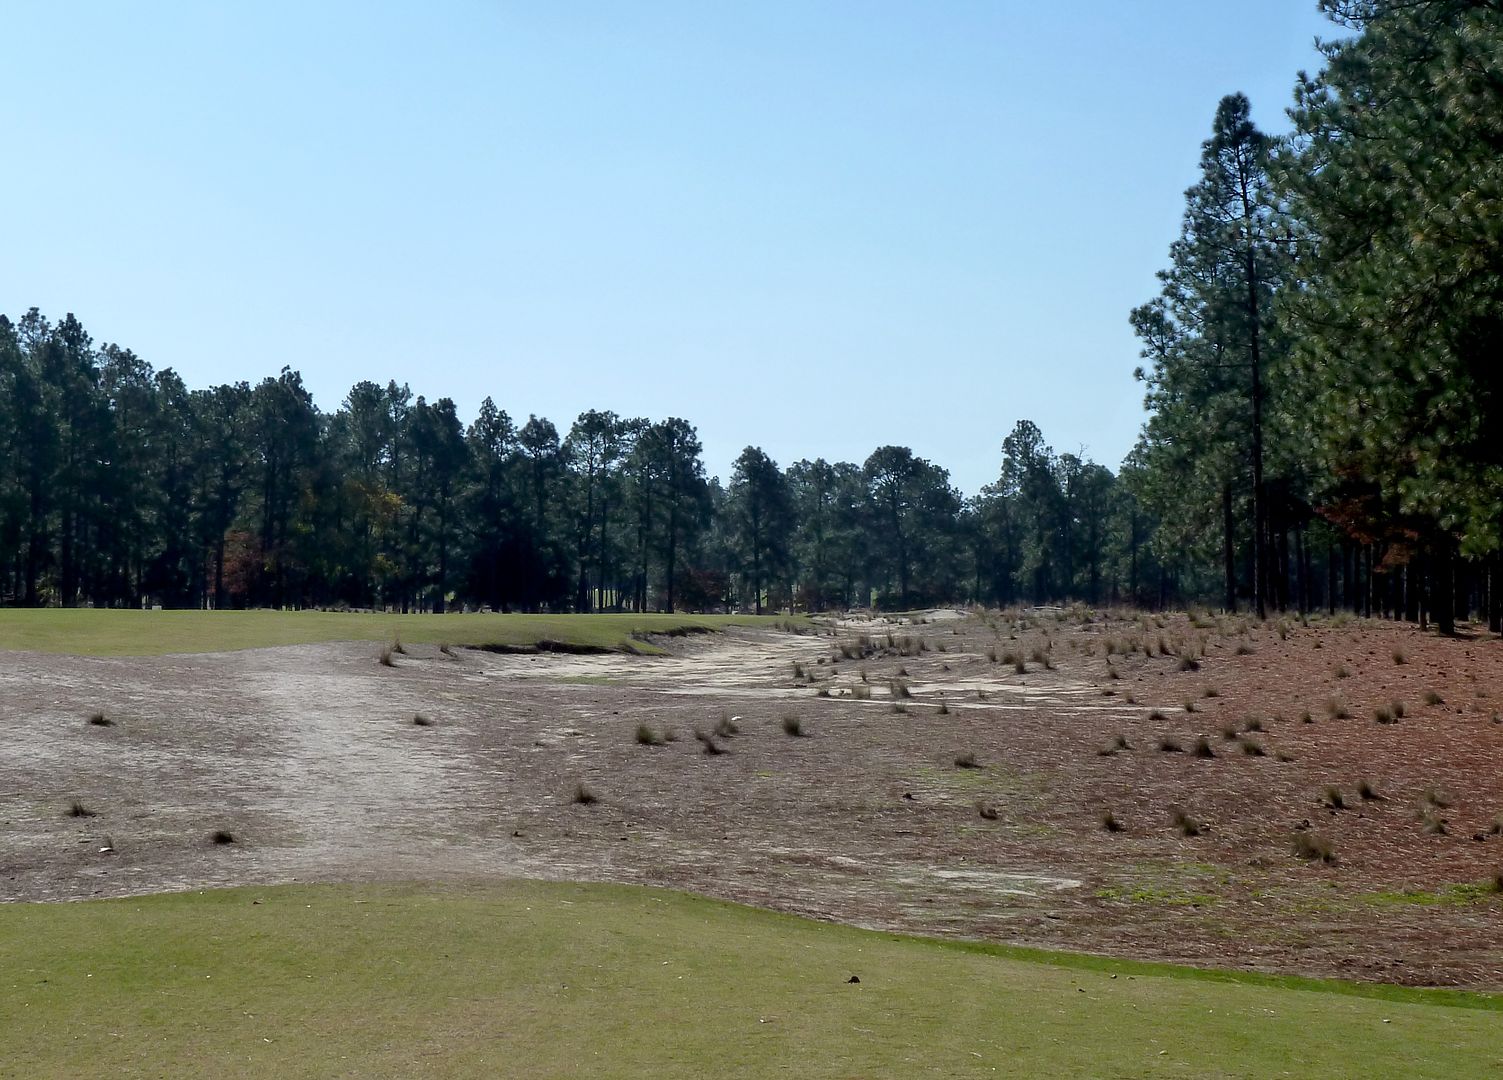
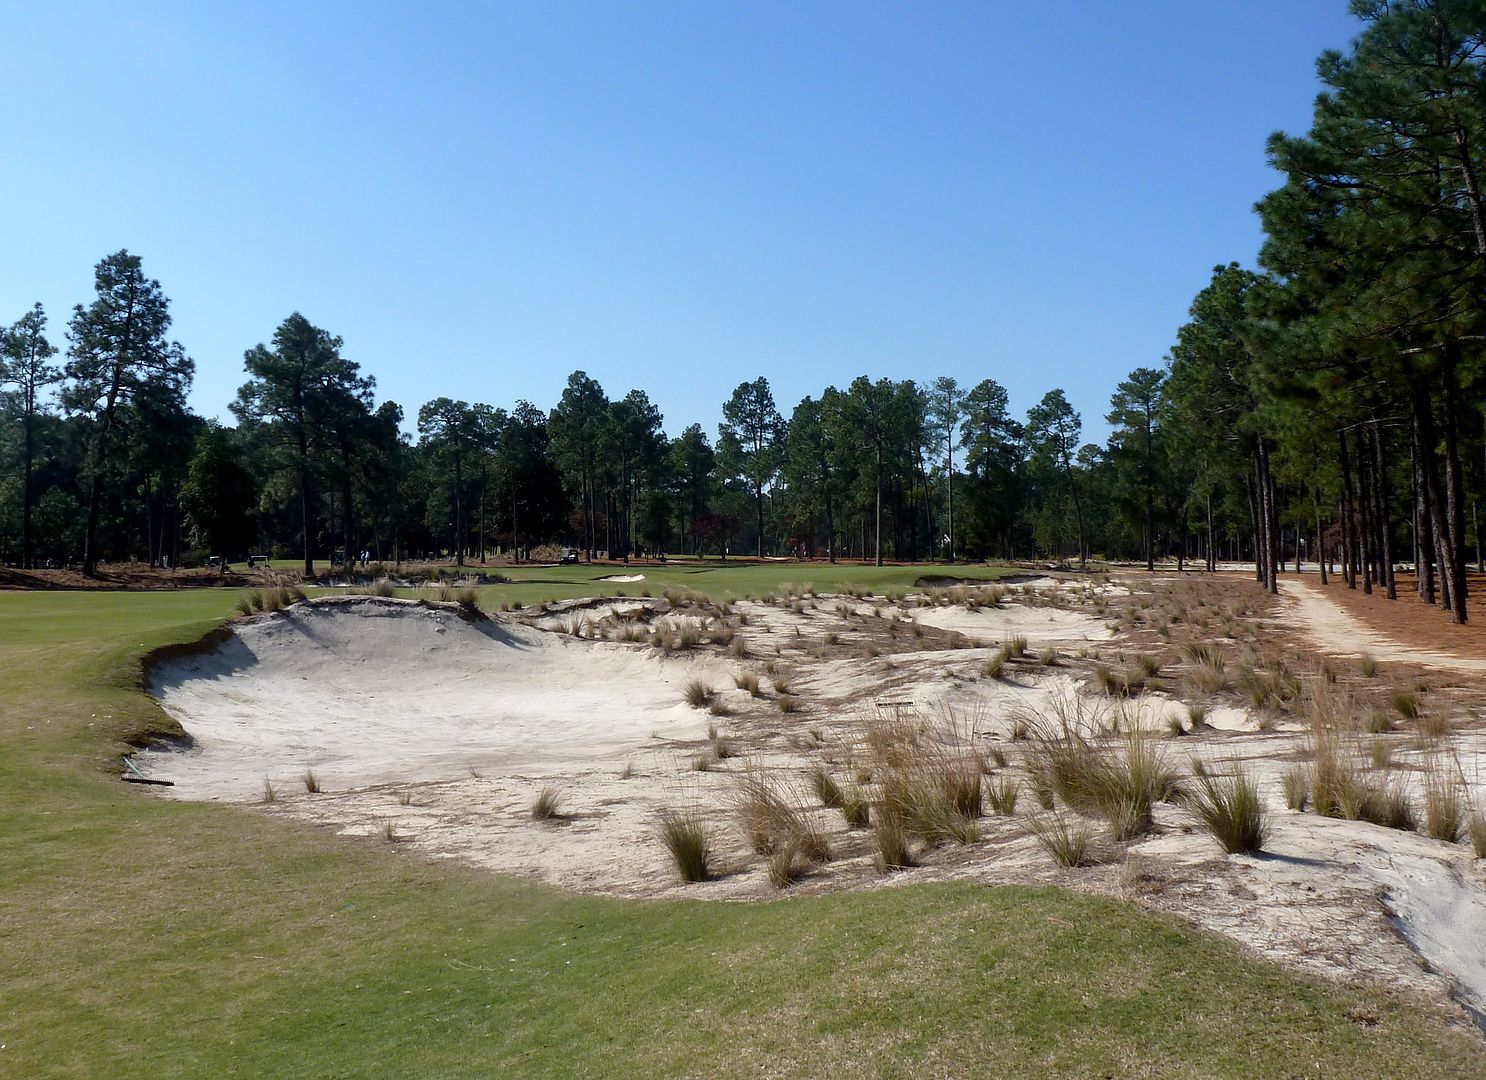
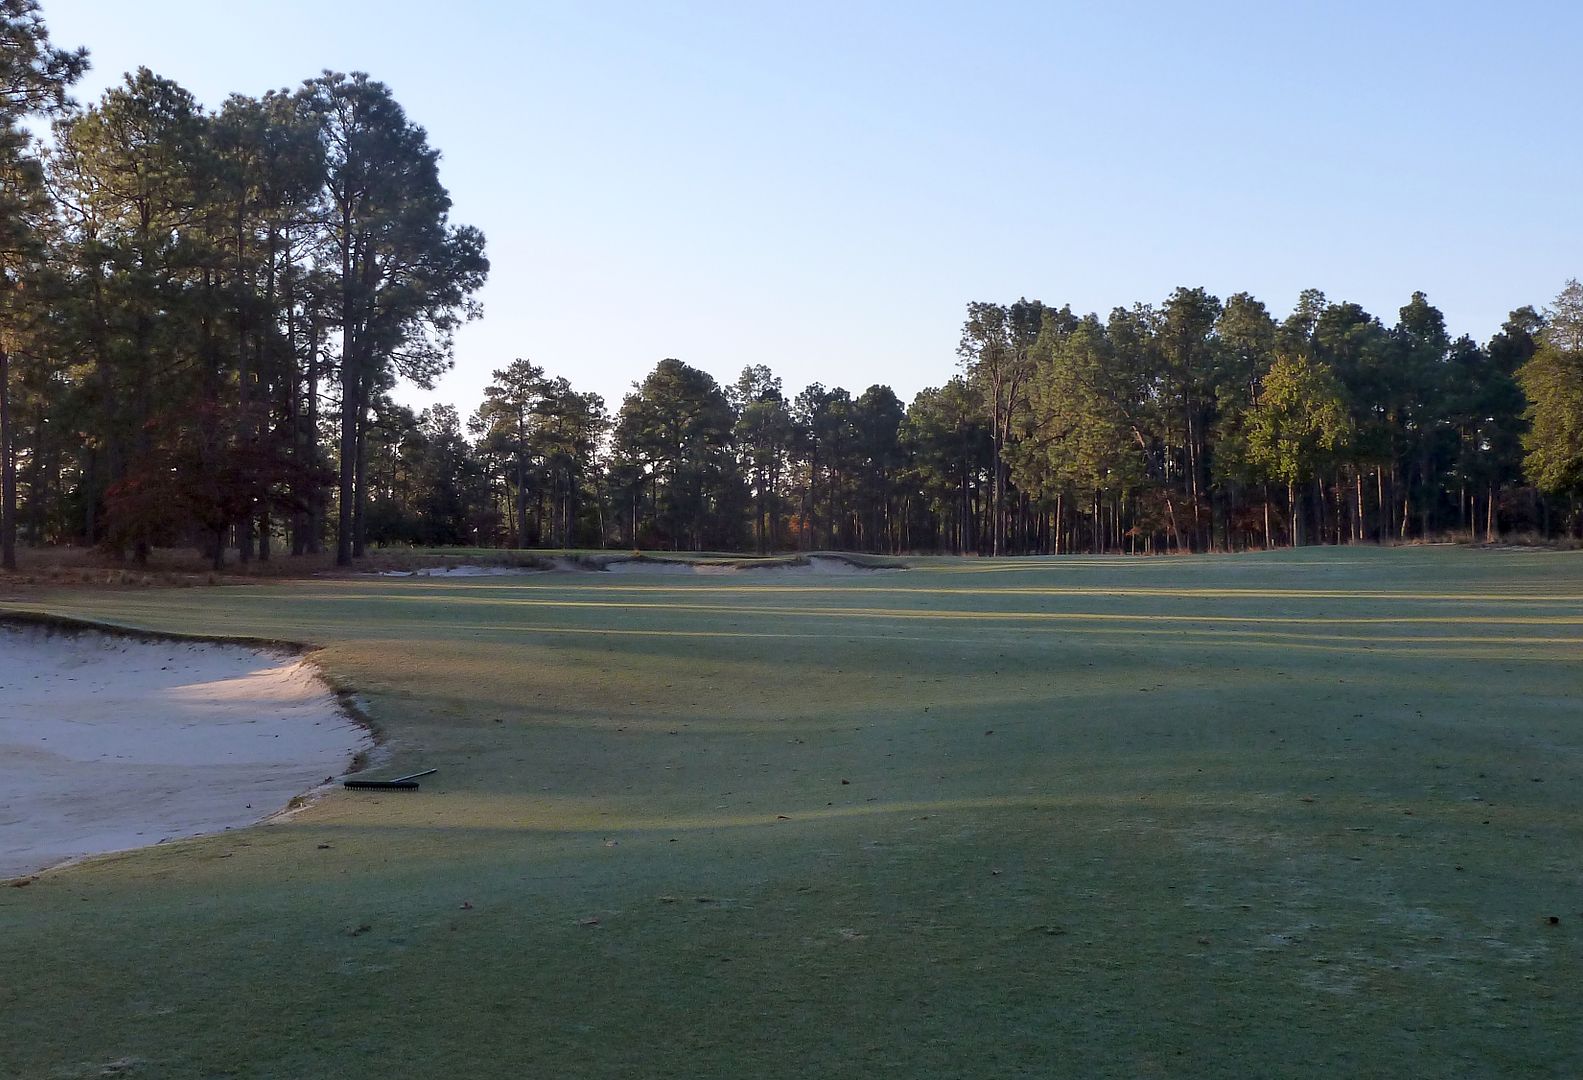
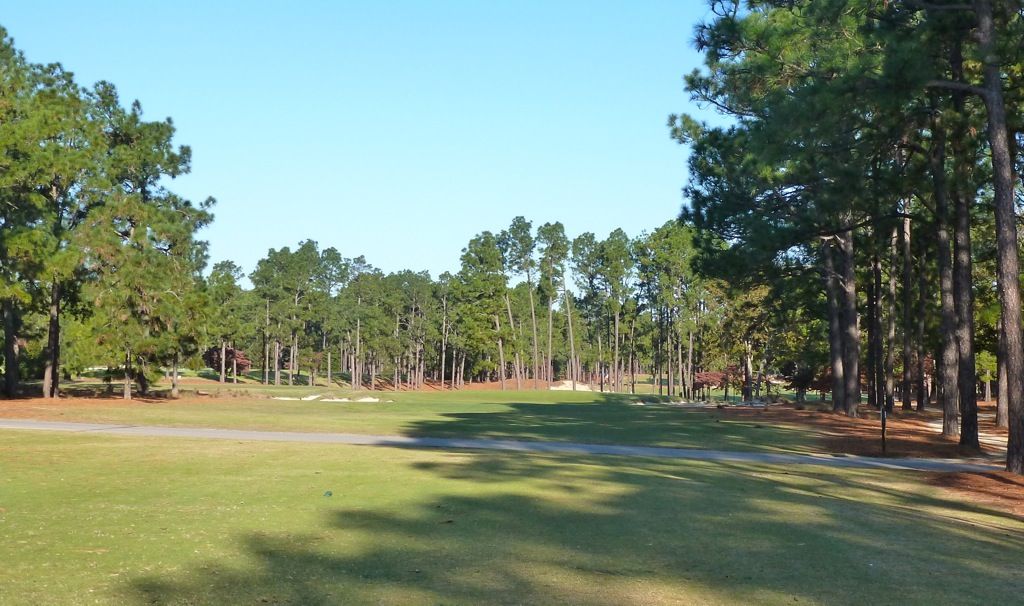
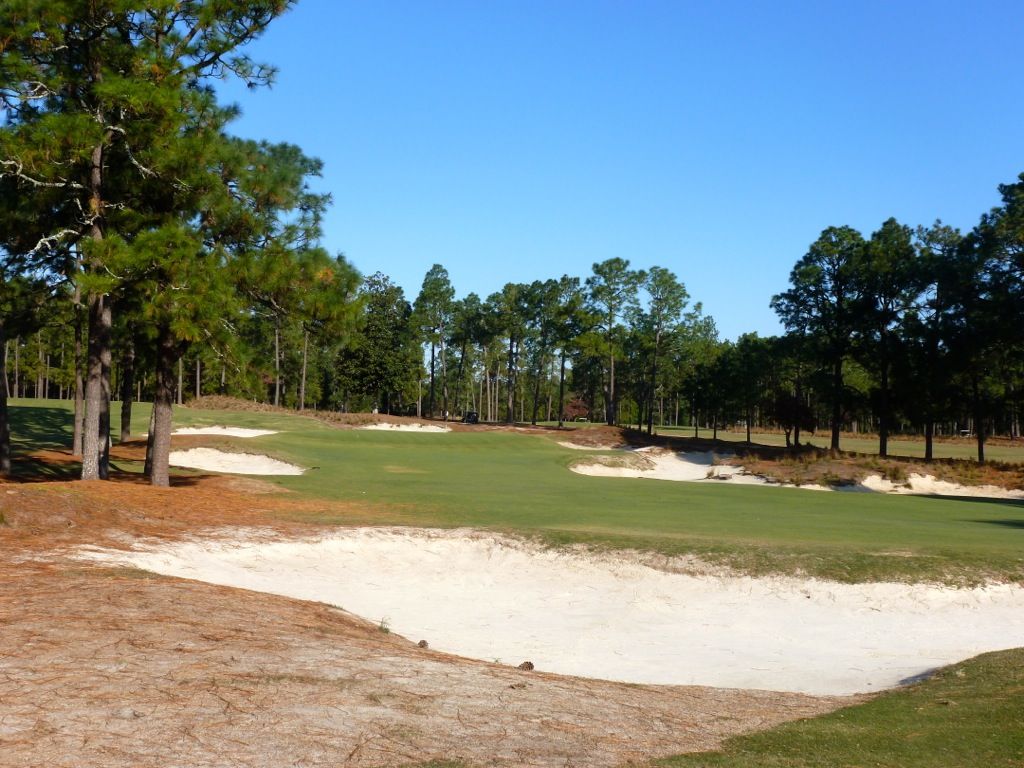
Another fairly wide tee shot for those willing to lay-back off the tee. The duo of bunkers down the left side protect the ideal line into the green, but can serve as aiming bunkers if the golfer is willing to leave a 200-yard approach. It is 235 to reach the first bunker and 265 to get past the second bunker.
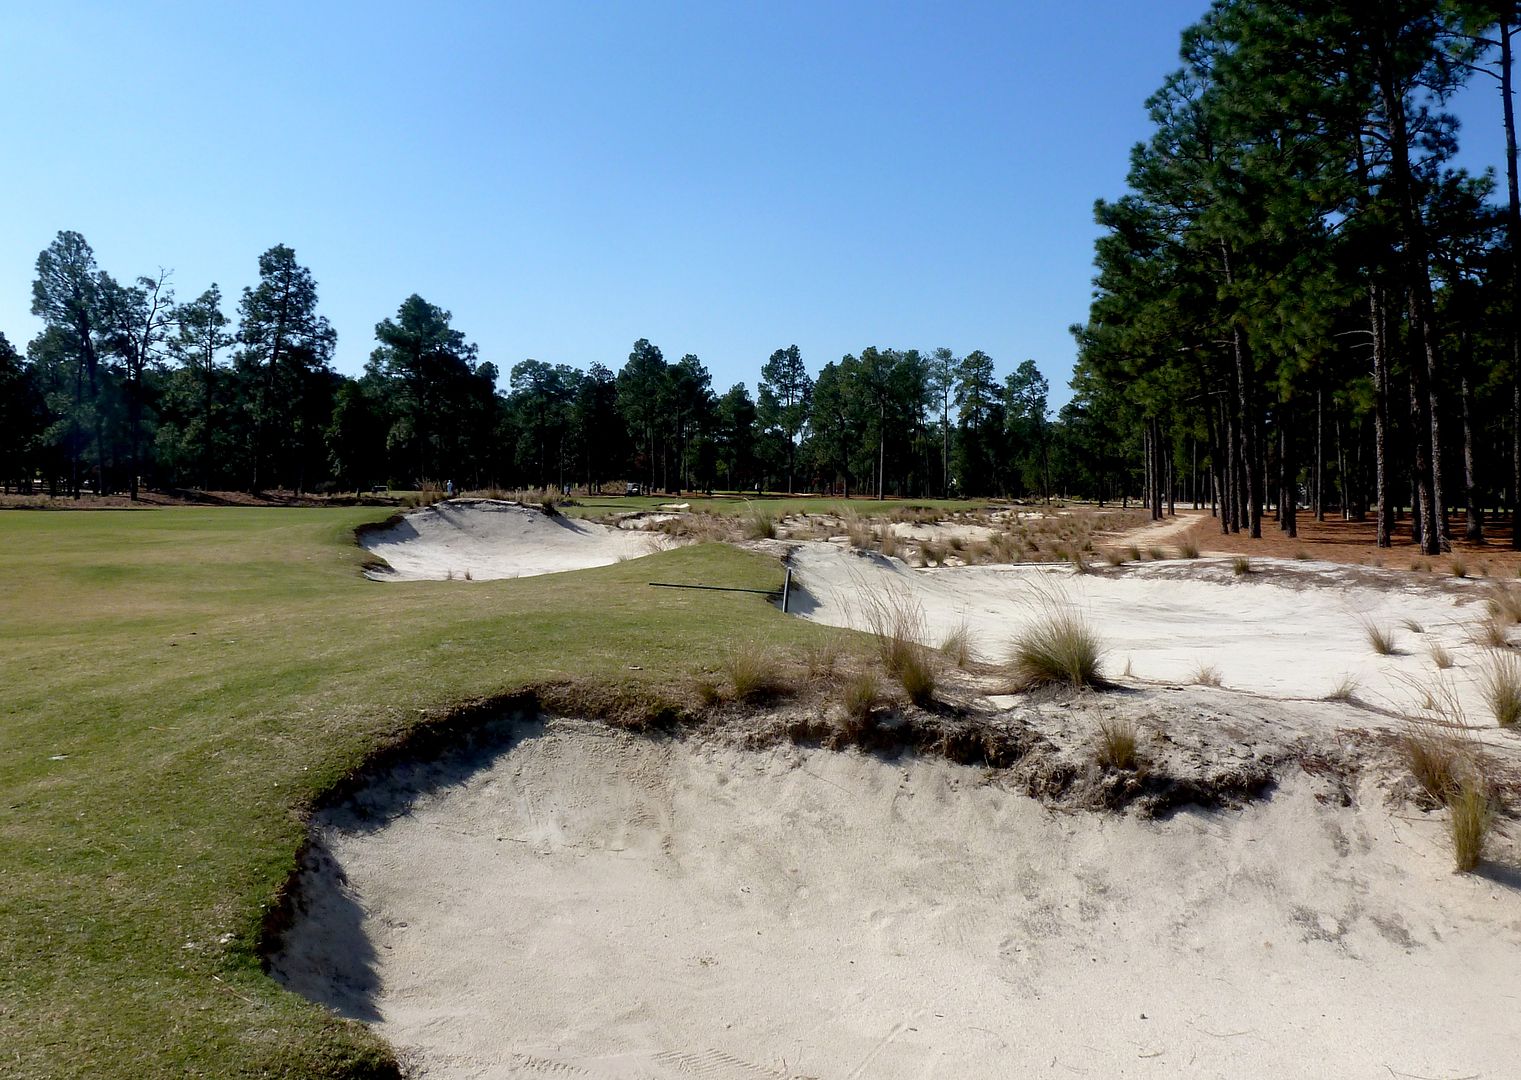
Golfers wanting to leave a shorter approach will want to challenge the right side, but flashing in the waste area makes it very difficult to gauge the line on which fairway ends and natural area begins.
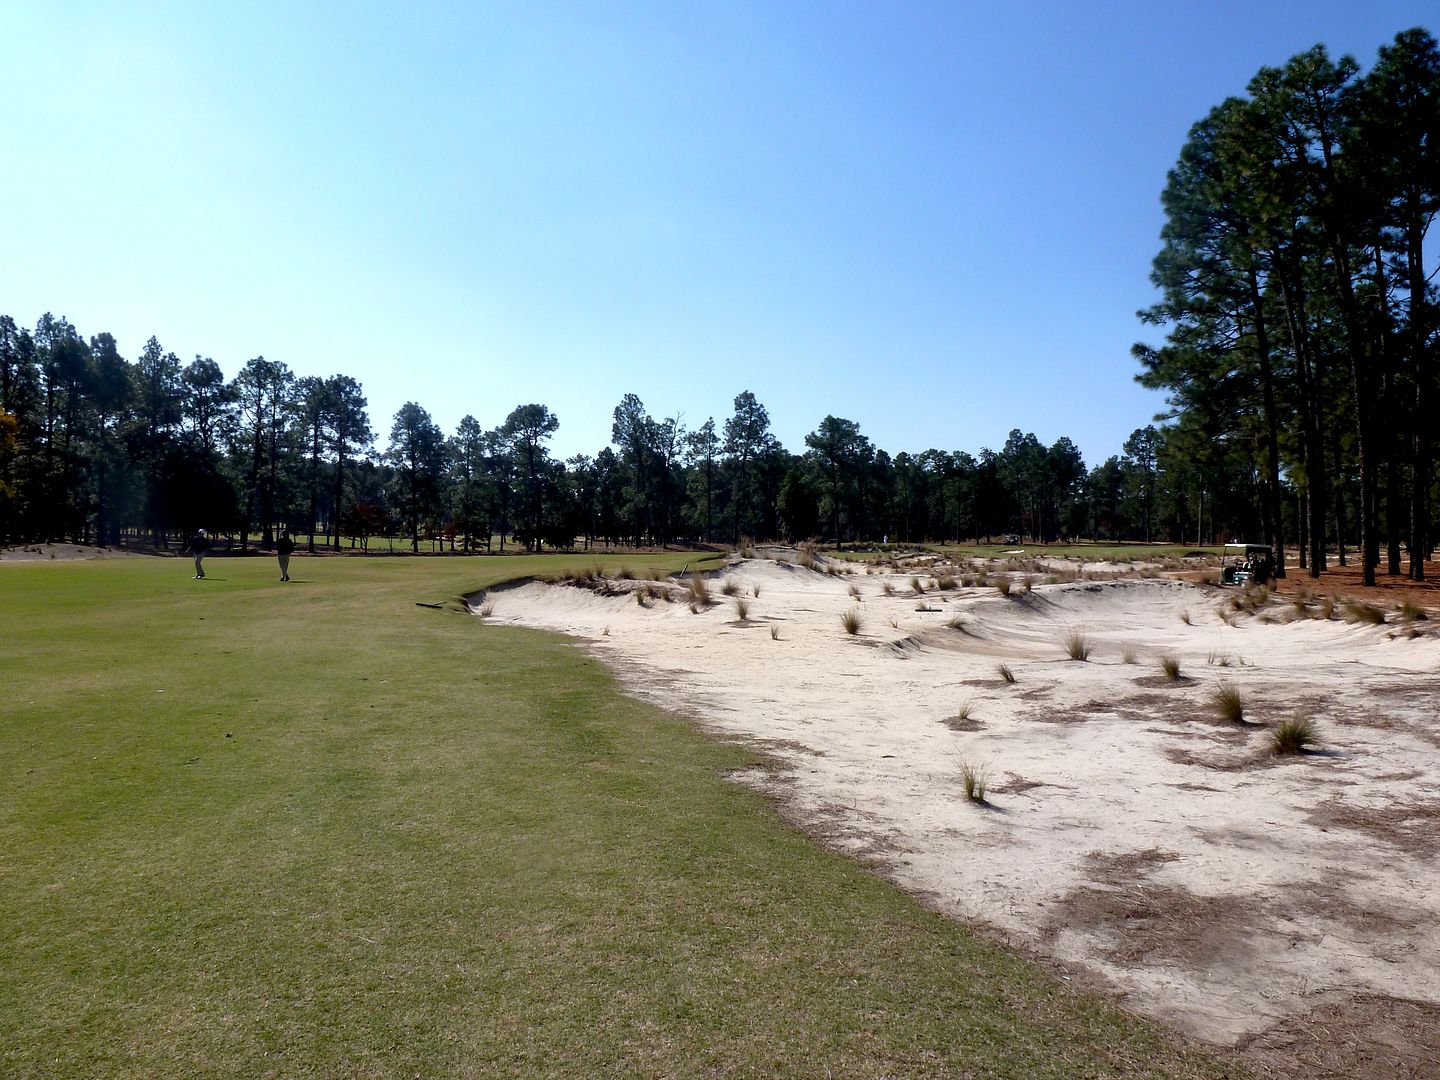
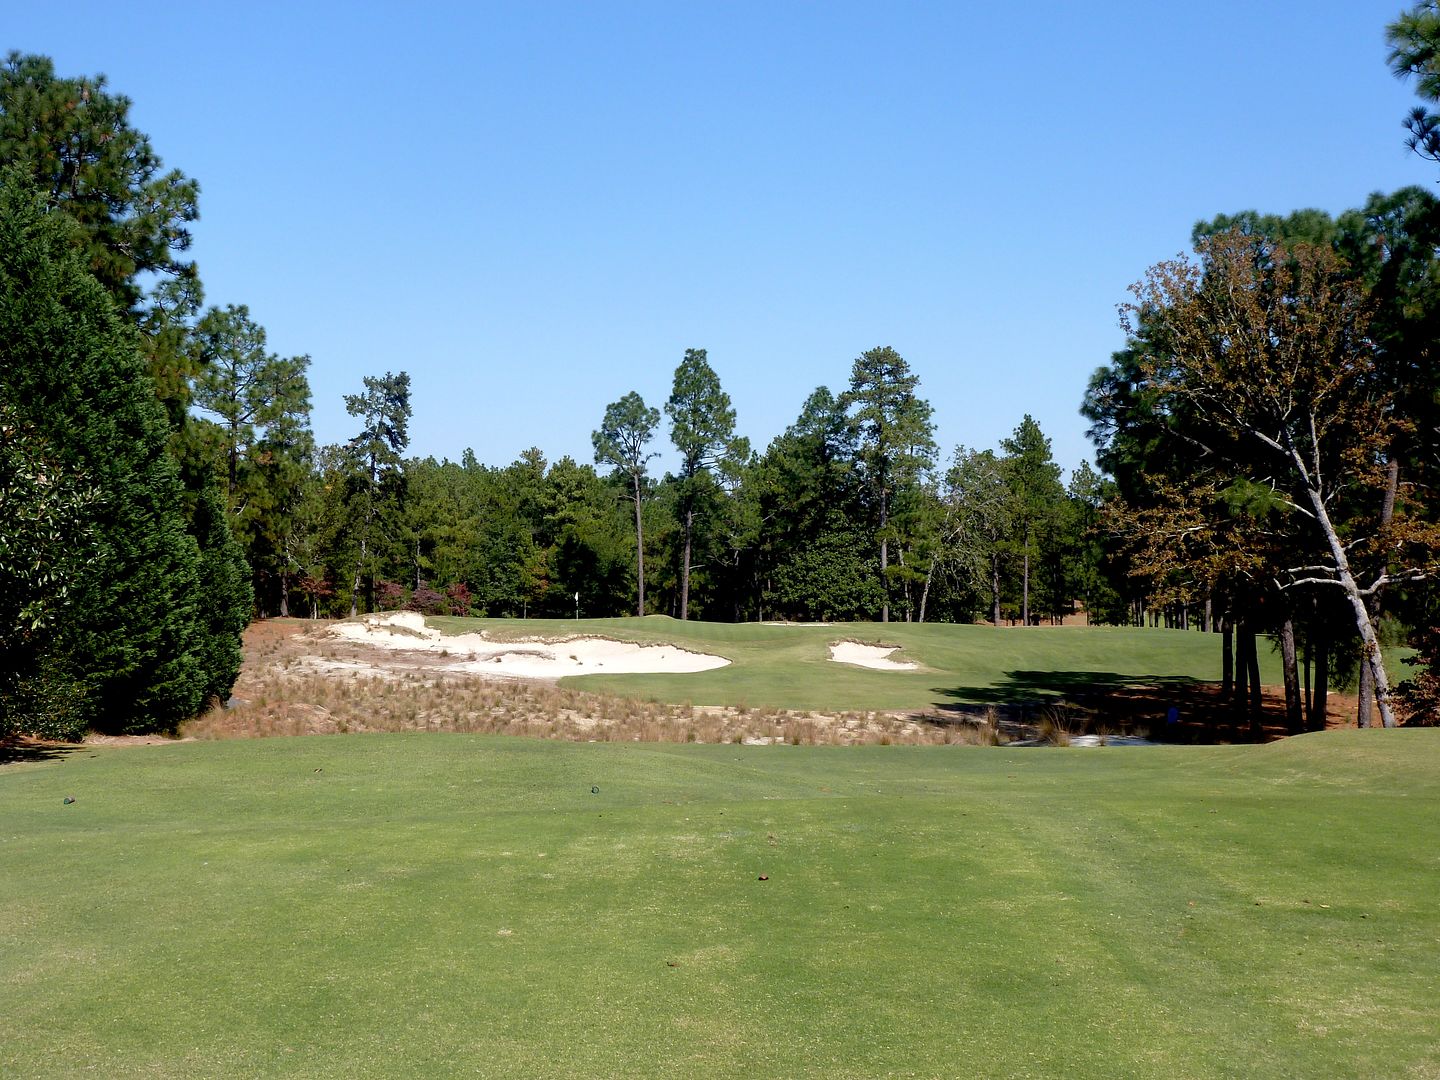
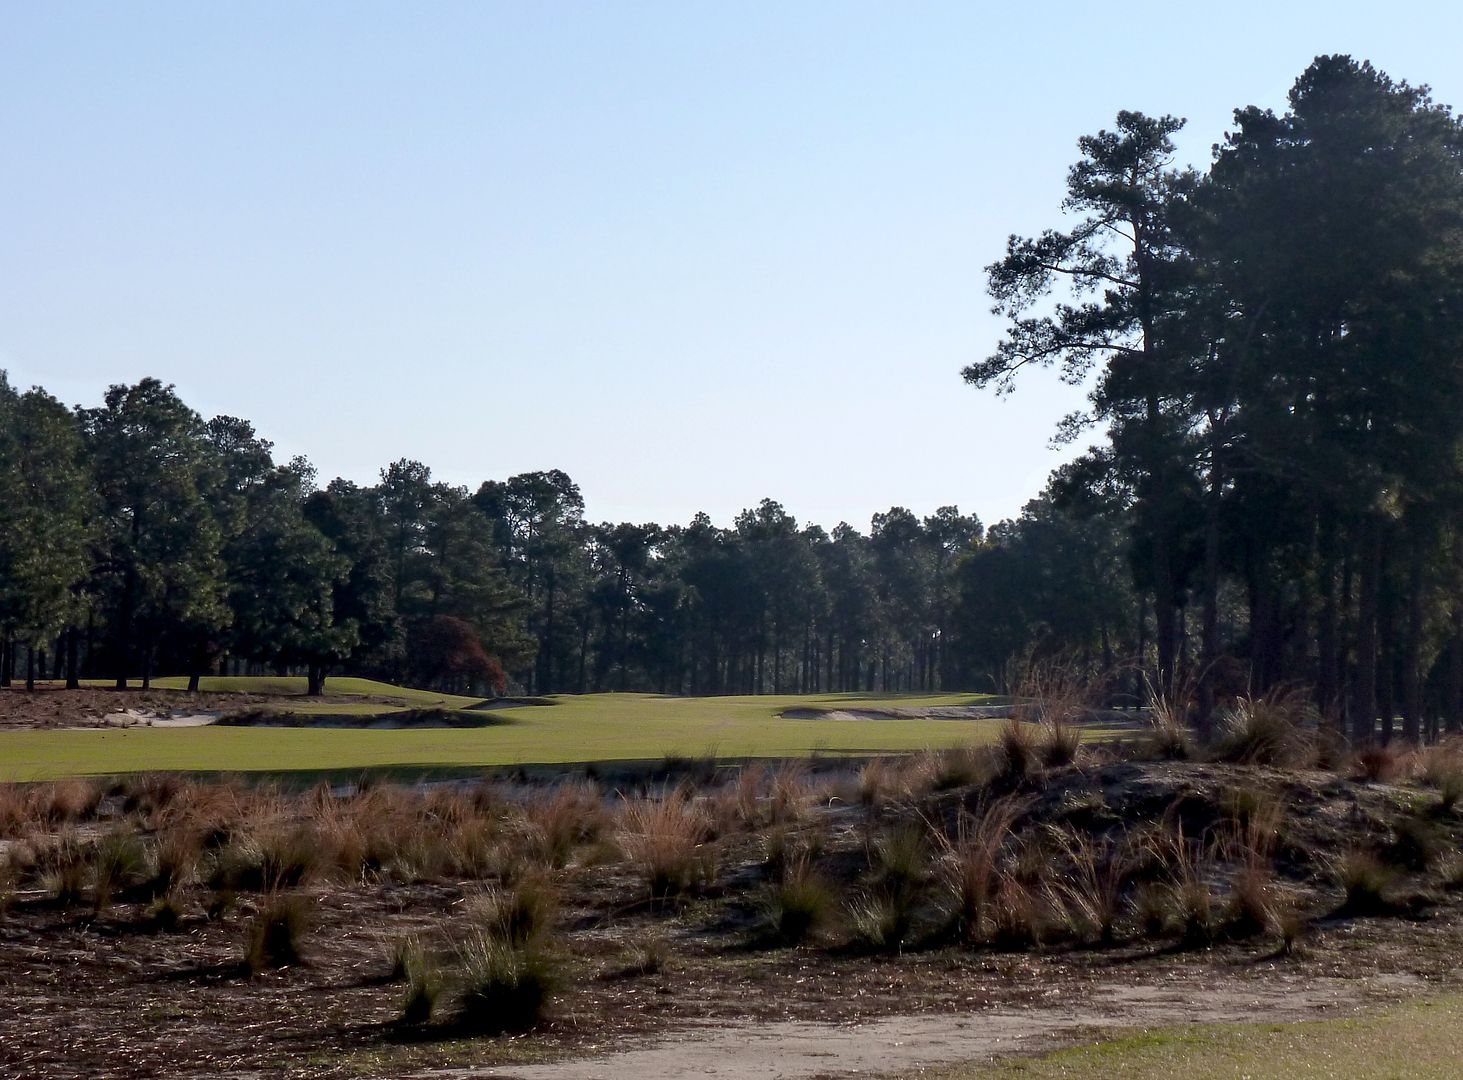
While the approach from the right may be shorter, it is clearly the more difficult angle. From here the approach must carry the natural area that juts in front of the green...

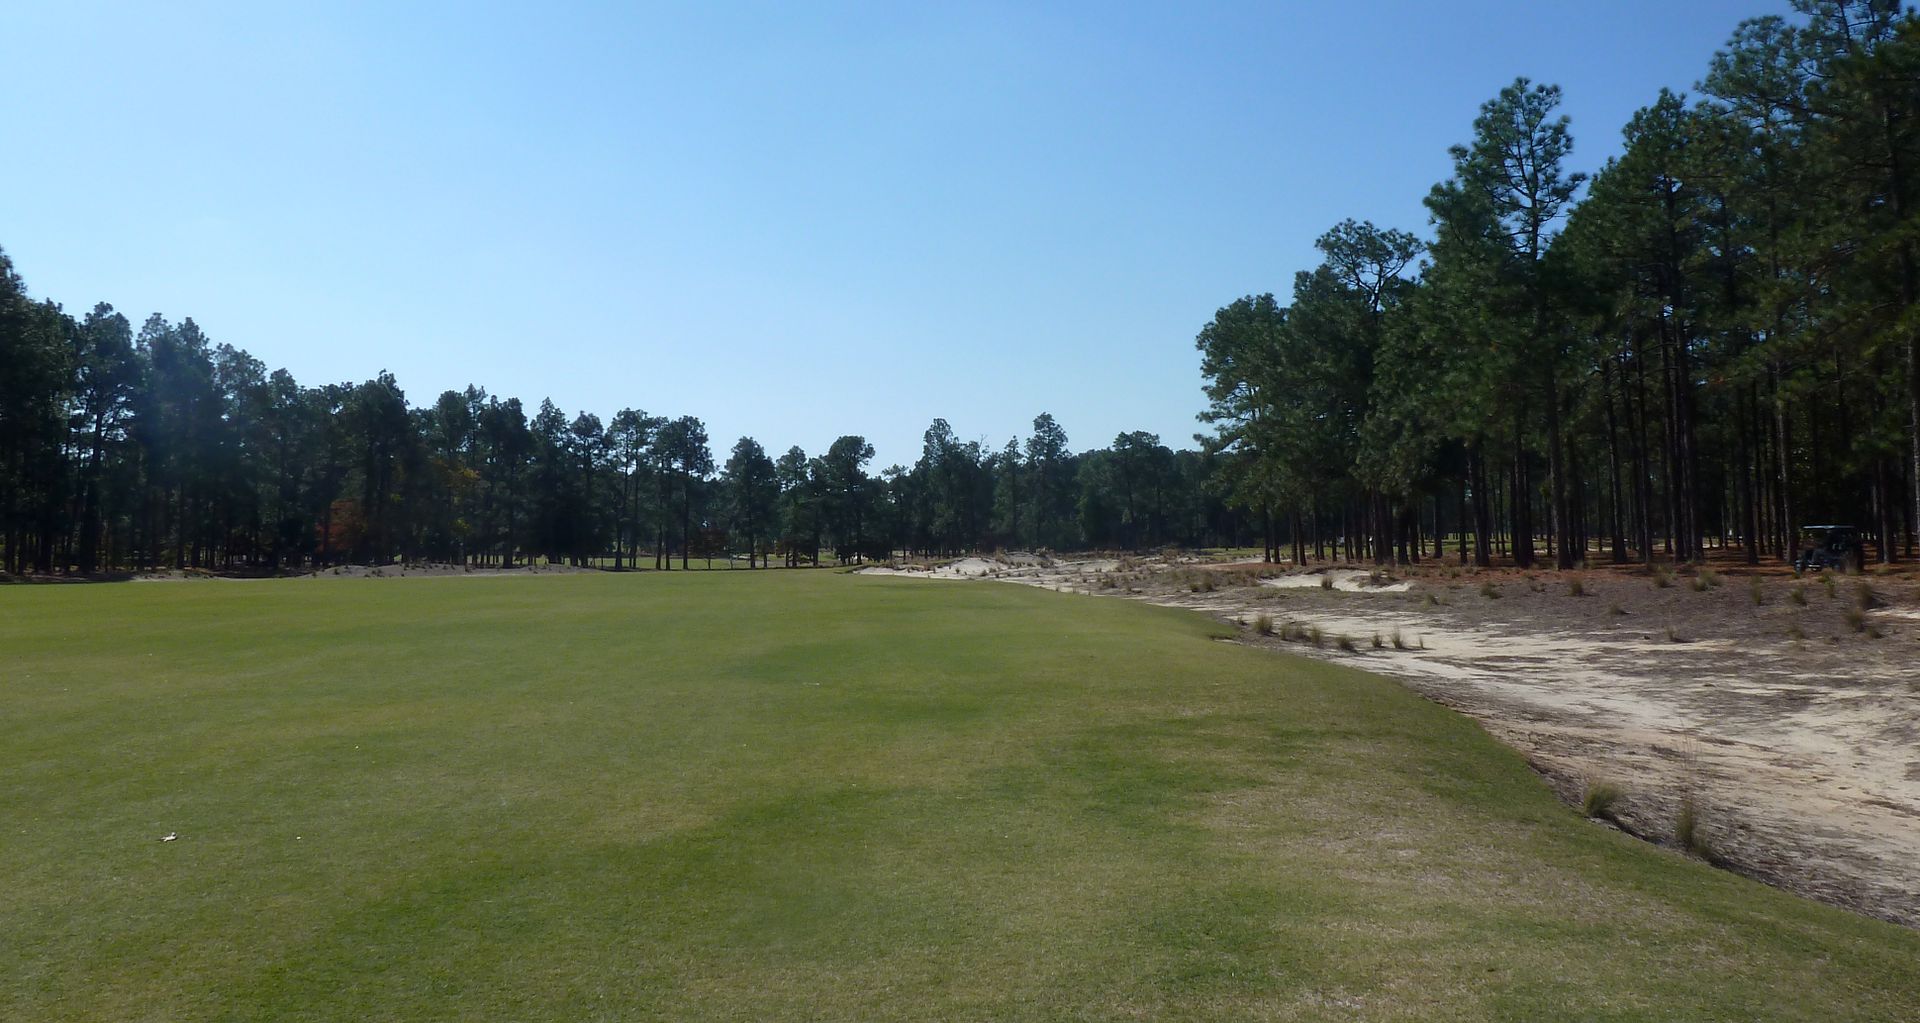
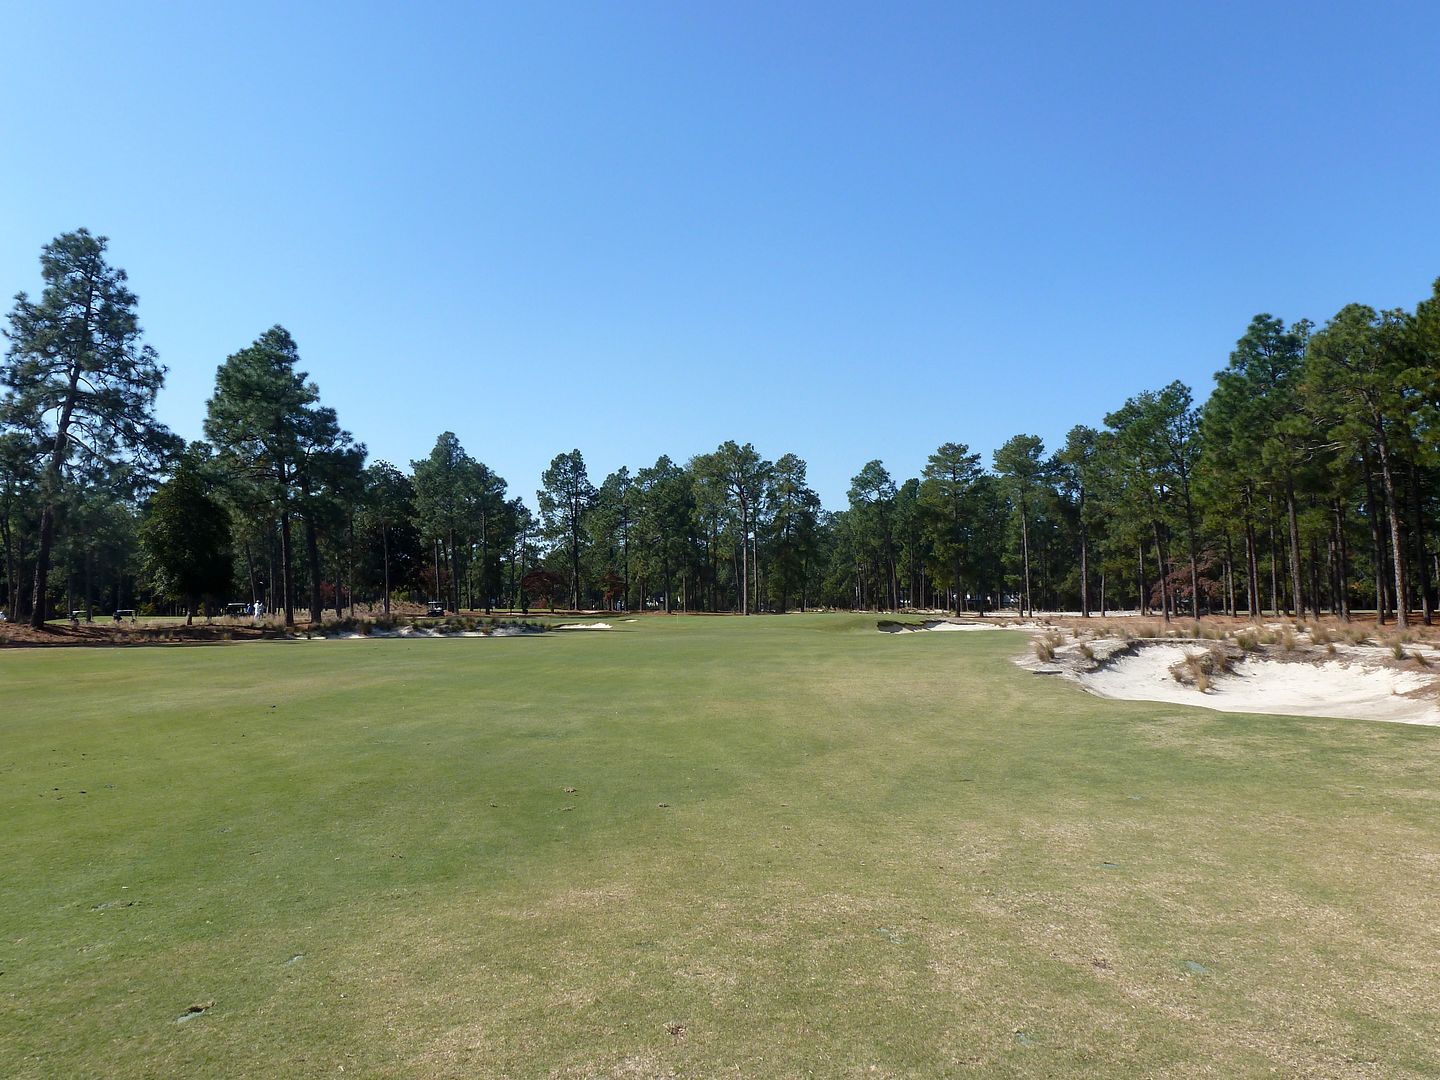
As the approach is played from farther left, the golfer need not carry the natural area on the second shot...
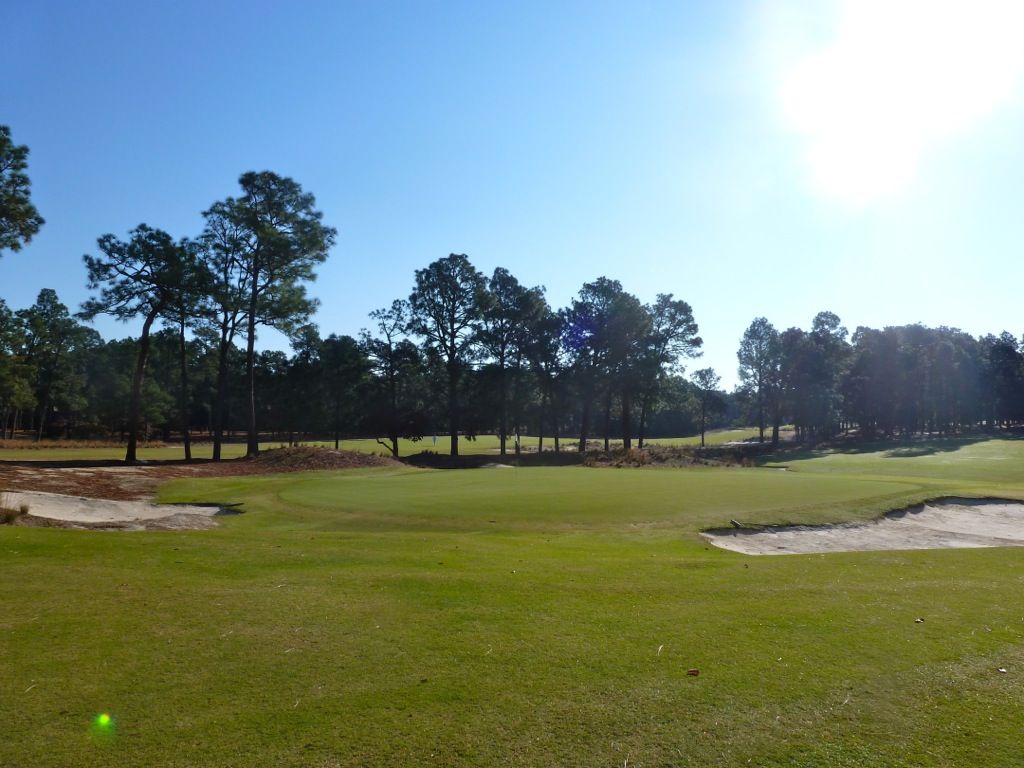
And the approach is played to a green that lays head-on, rather than on a 45 degree angle to the fairway...

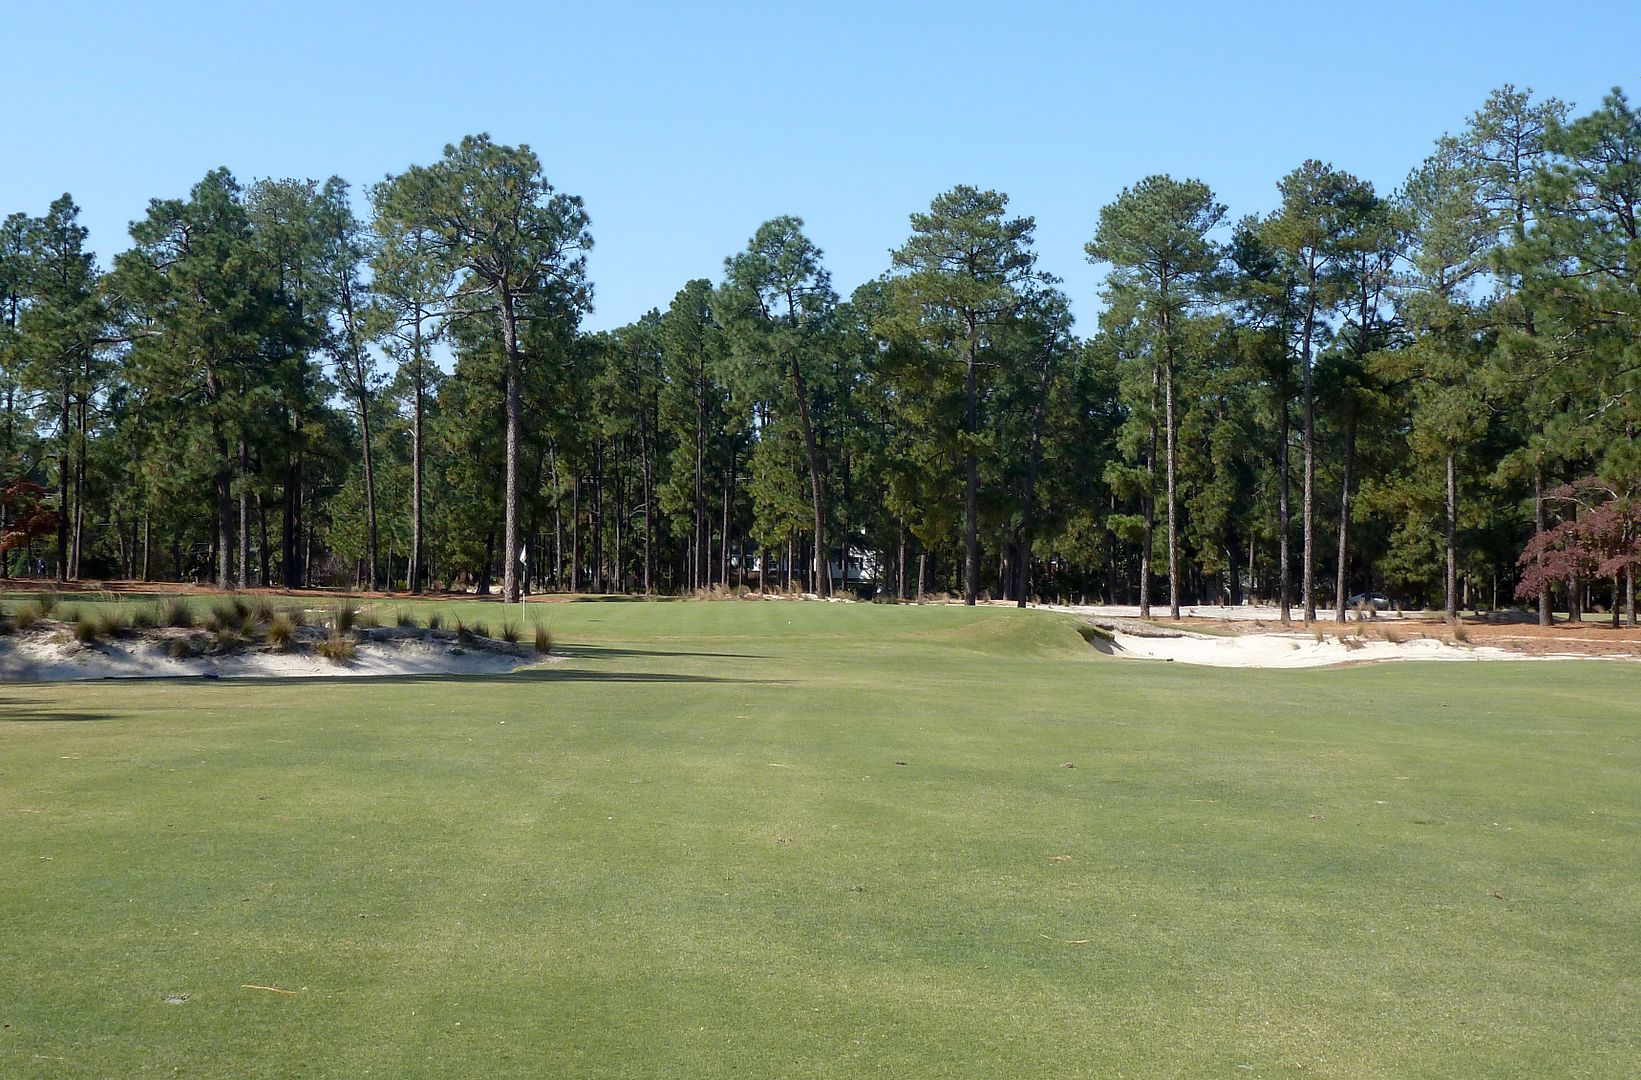
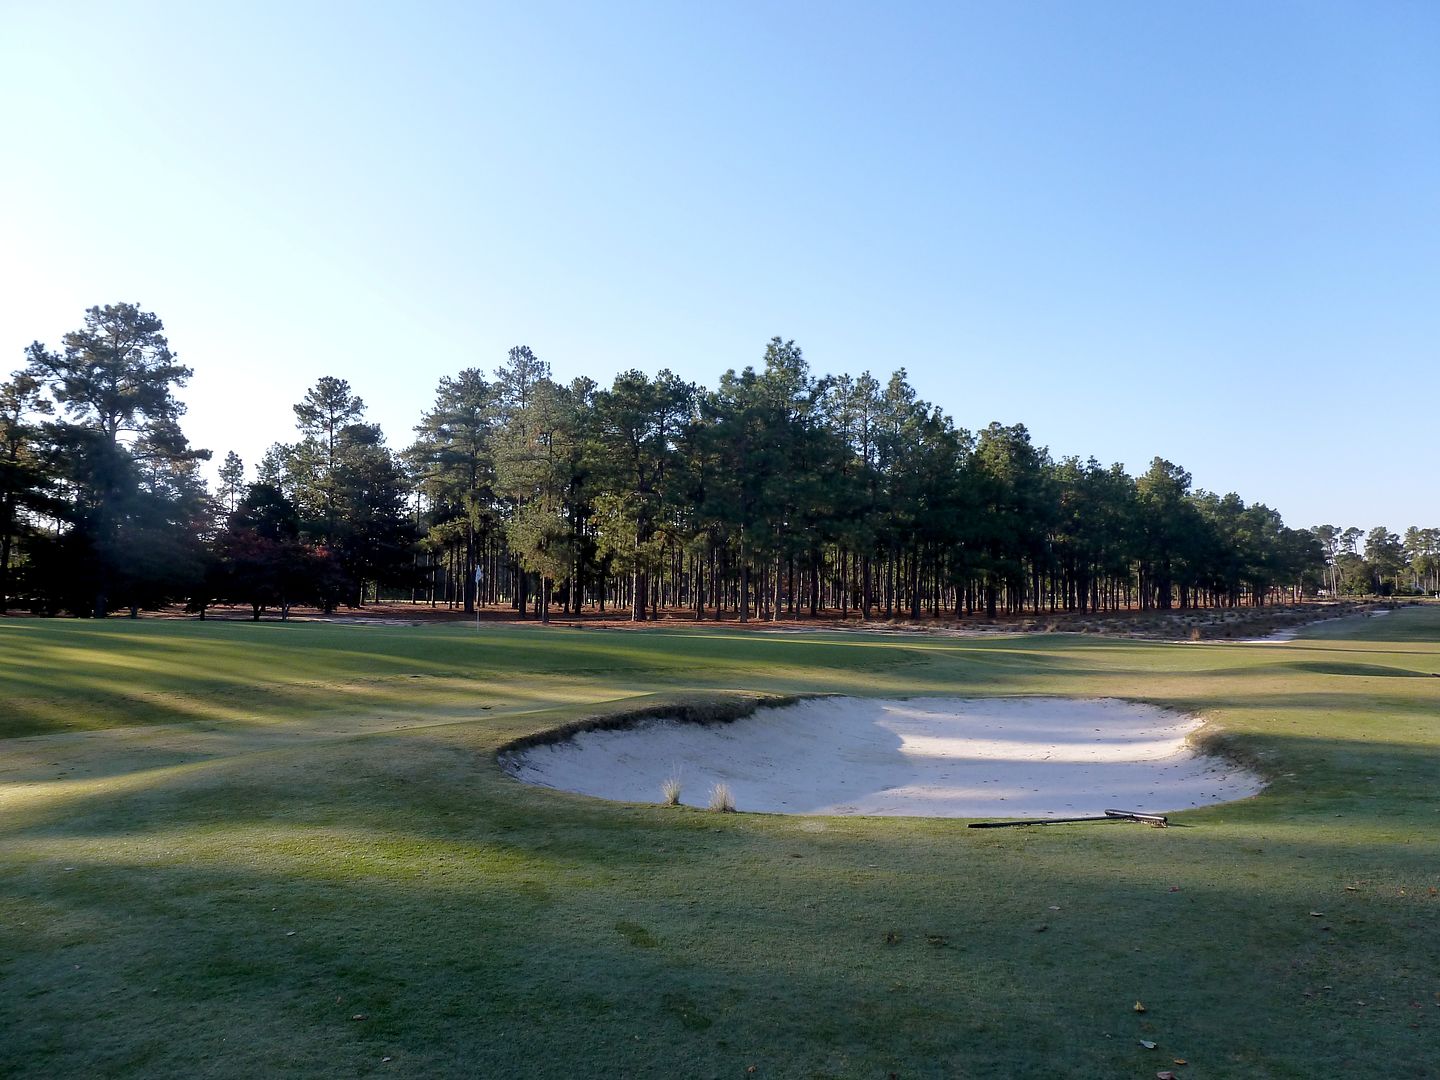
While the green has the P2 trademark turtleback, this one is made even more difficult because of large humps on its left and right edges:
The green from behind:
Lots of fairway grass around this green... shots missing the green can travel a long way before coming to a stop!
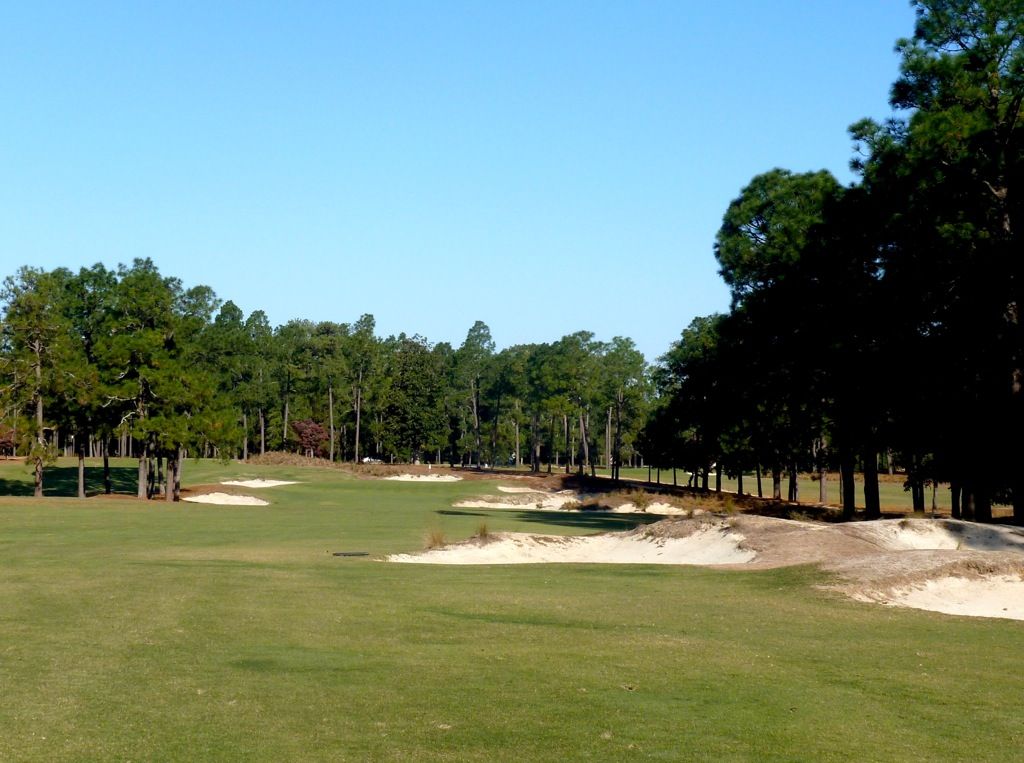
Hole 3: Par 4, 350 Yards
2008 Aerial:
2011 Aerial:
The tee shot at the 3rd will be a lay-up for most. It is about 240 yards to reach the bunker that splits the fairway width in half, and 270 yards to carry it. The bunkers up the left, while deep and penal, will help the hookers among us by catching quick hooks before they travel too far into the woods, or worse, OB.
Tee View:
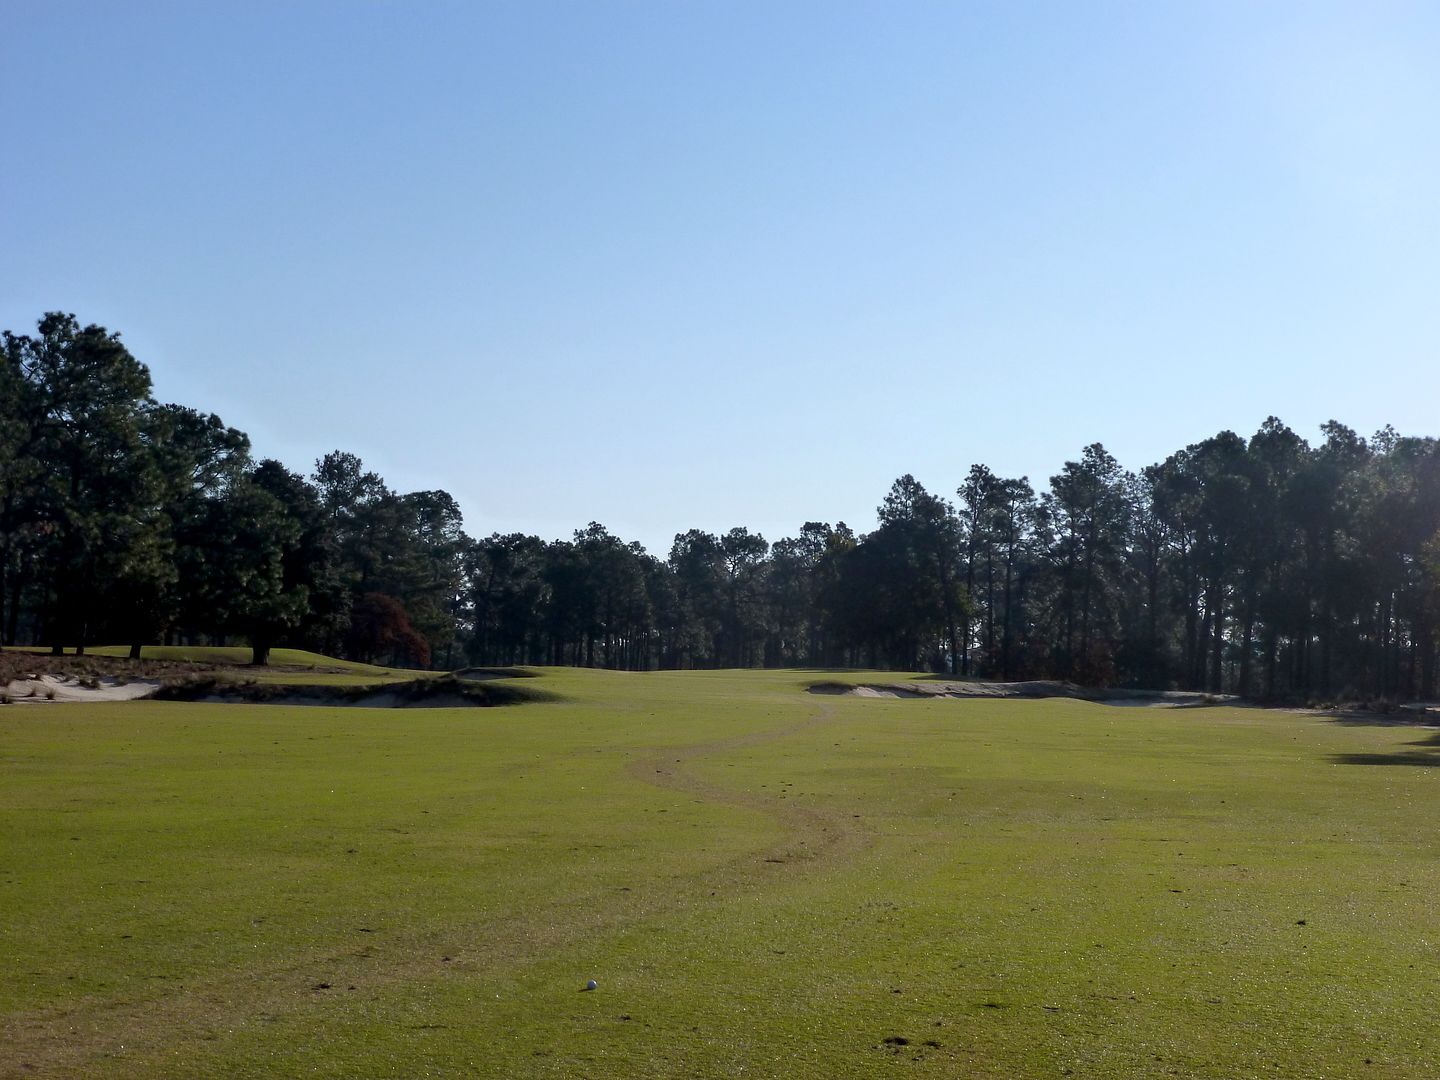
From Start of Fairway:
The ideal line into the green is from the right (here seen from the right rough). Flashing of the bunker face, combined with bunkering short of the green makes depth perception a real problem.
Approach from centre of the fairway:
The Cross-Bunker (85 yards short of green):
Nearly impossible to see from the fairway, this bunker extends into the centre of the fairway, 20 yards short of the green:
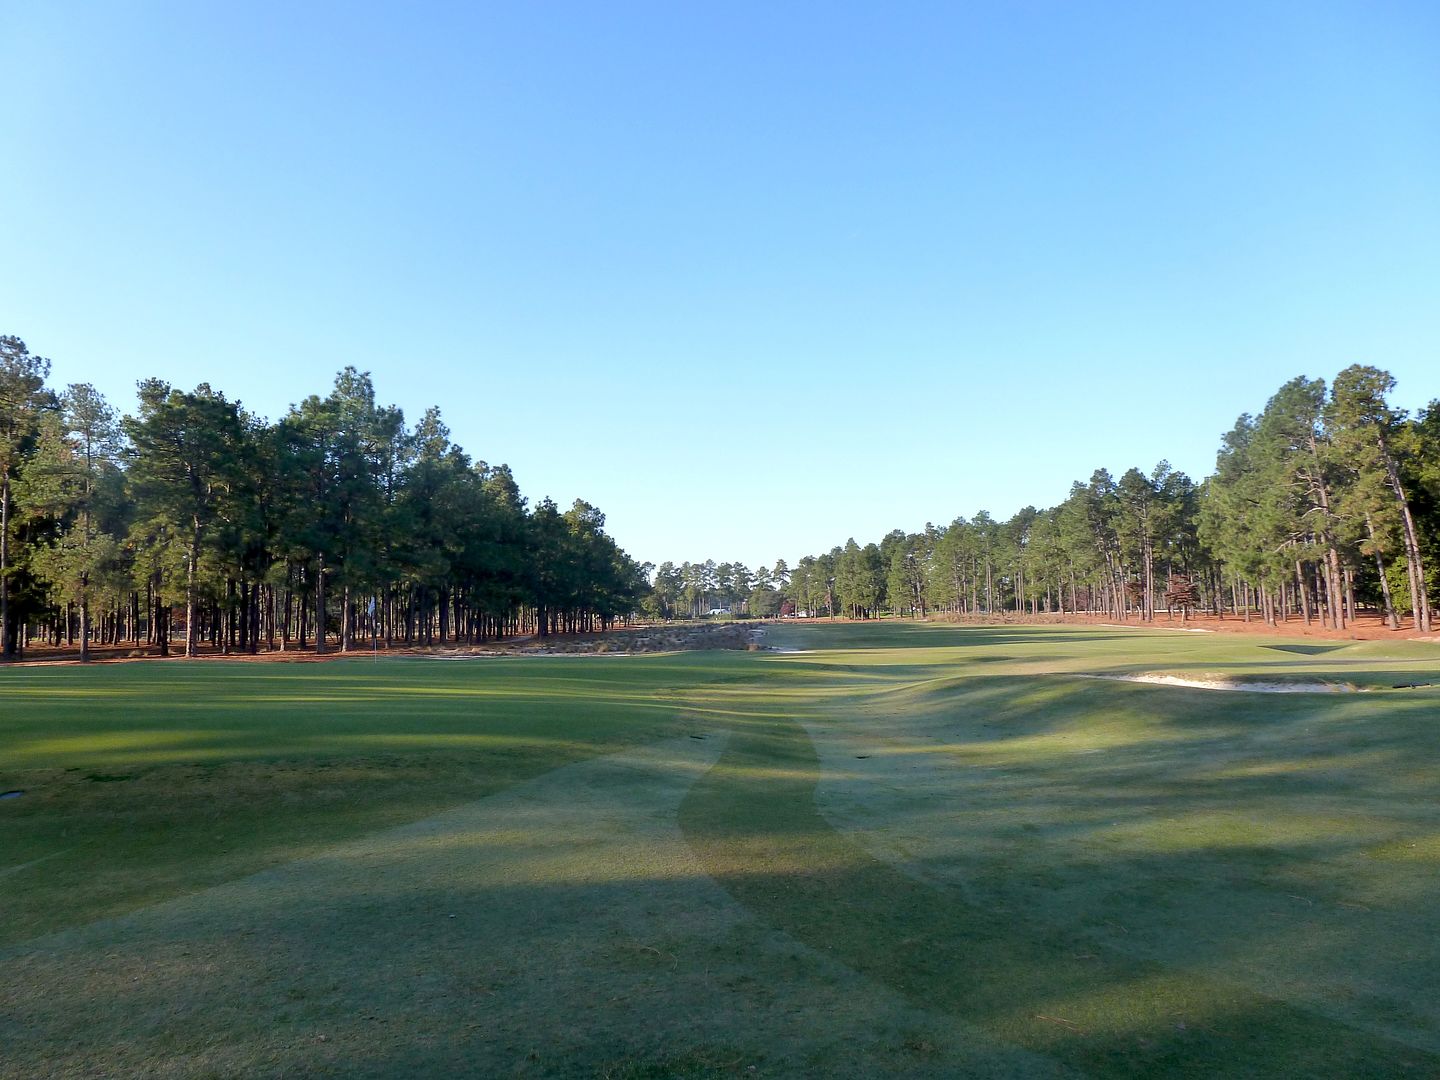
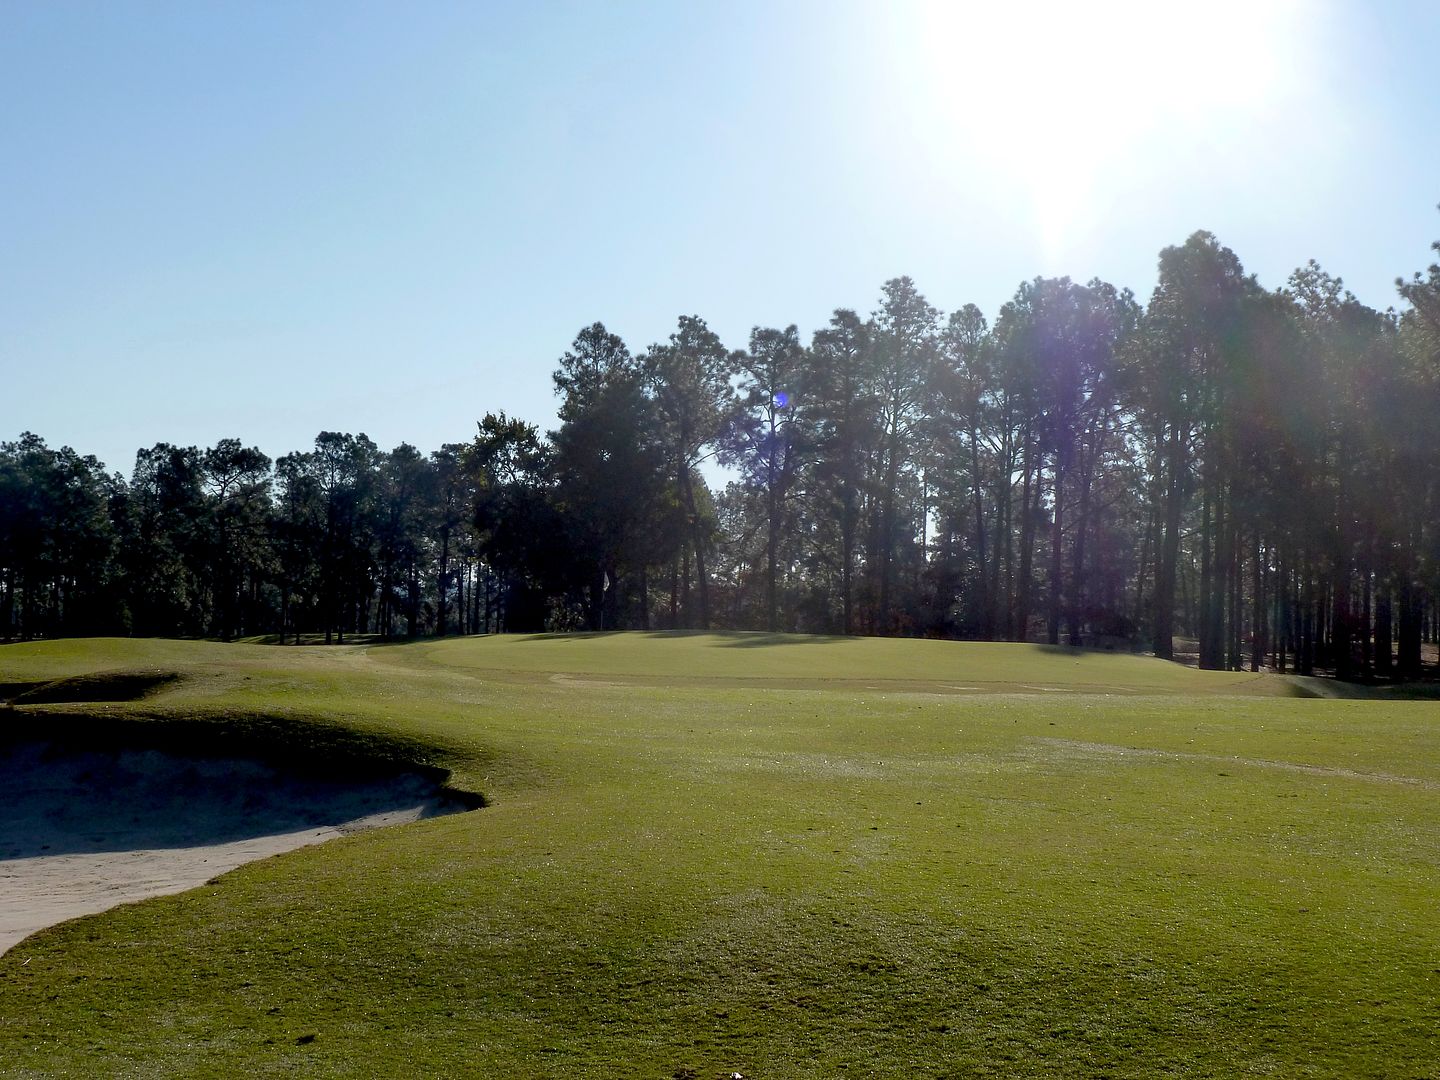
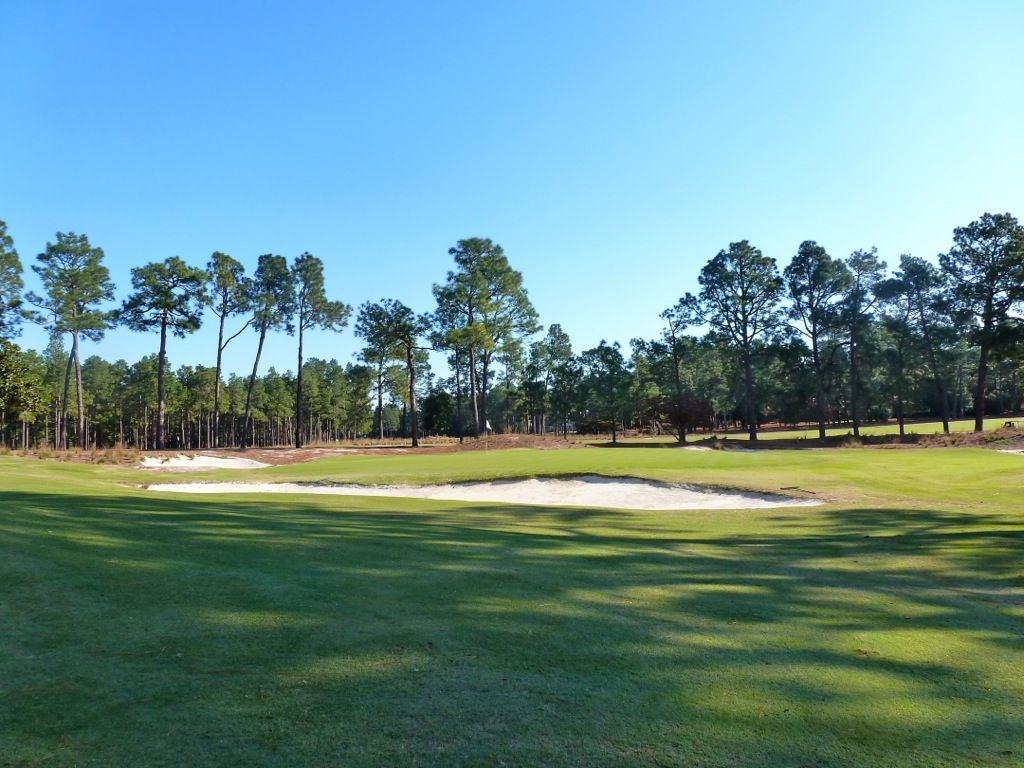
Green as seen from fairway:
Like at the 2nd, there is nothing but fairway grass long/right of the green. The slopes at the 3rd are more severe and shots that land right or long of the green will not stop until they are a very long way away. Another benign looking hole where the golfer can walk away with 6.
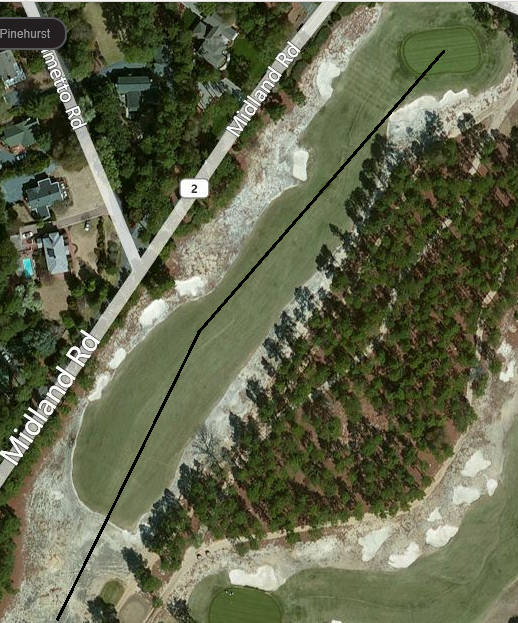
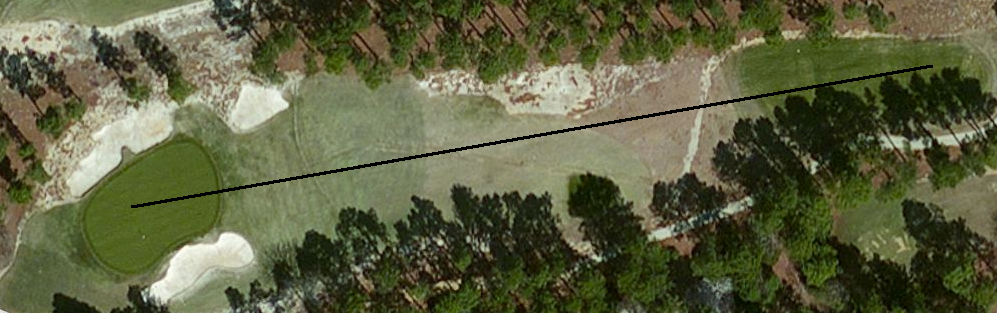
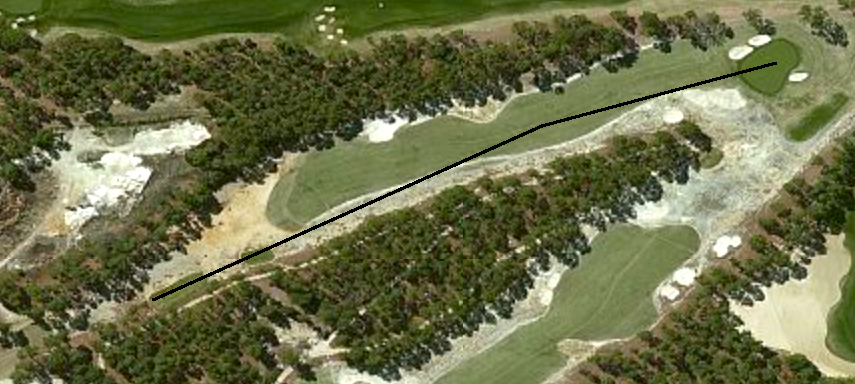
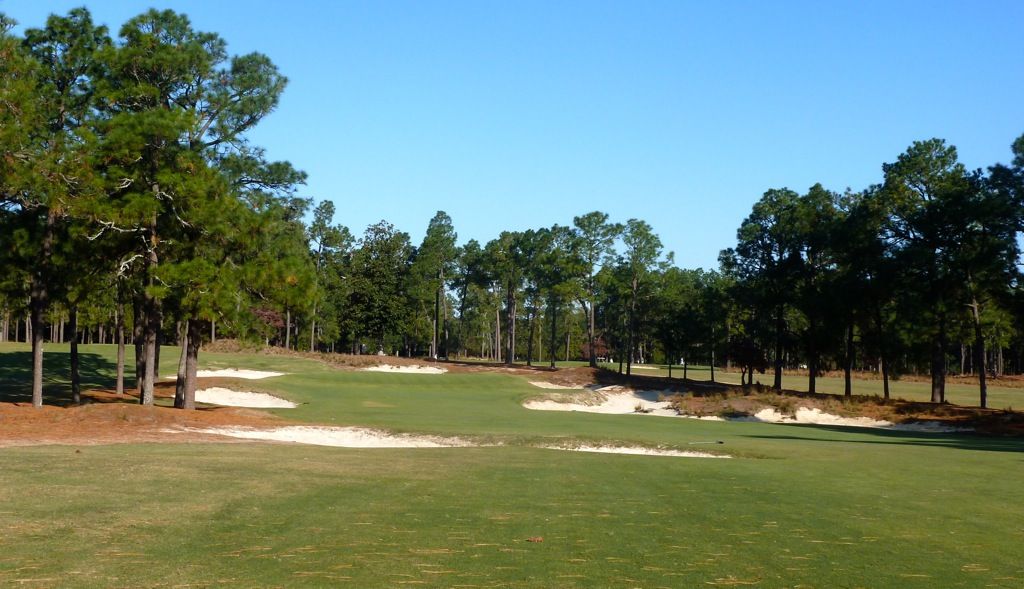
Hole 4: Par 5, 507 Yards [Reportedly will play as a par-4 in the US Open]
2008 Aerial:
2011 Aerial:
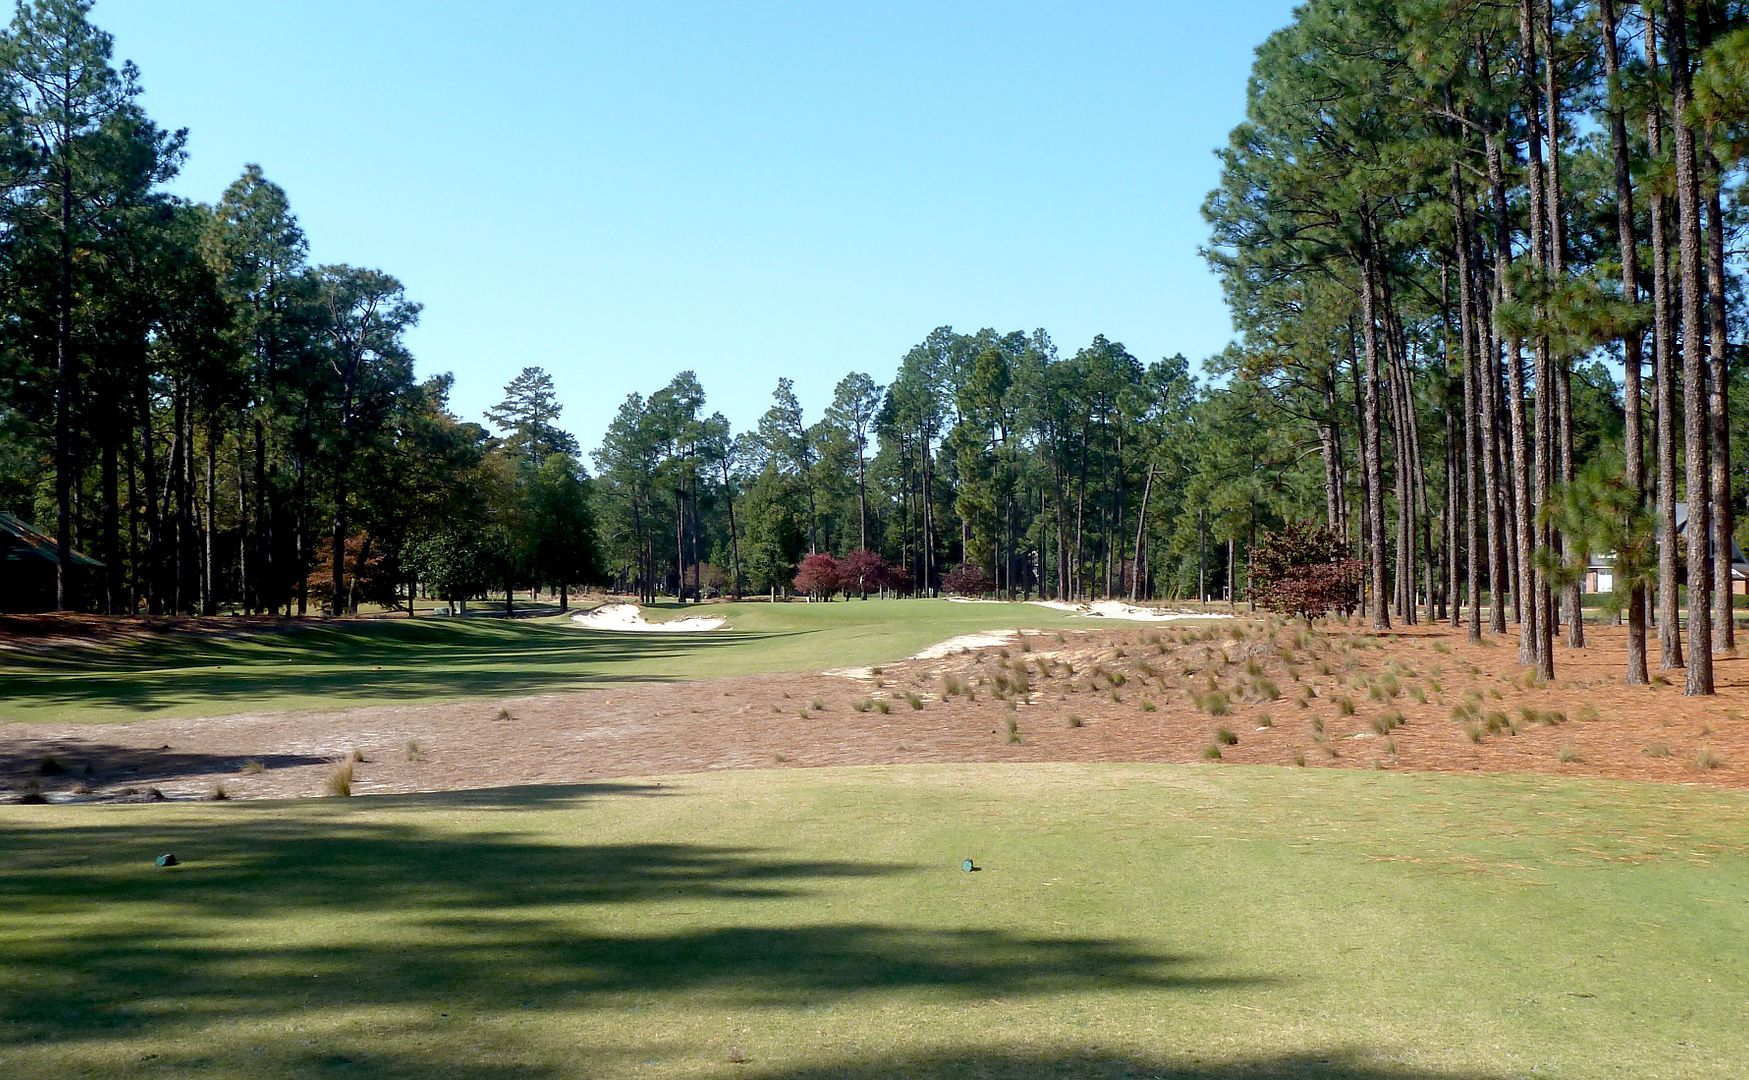
The slope of the 4th fairway, from left-to-right is significant, though this is not so easily detected when standing on the elevated tee. It is 235 yards to carry the bunker on the left, and golfers will want to challenge it, as tee shots landing anywhere right of centre have a good chance of kicking into the fairway bunkers lining the right side of the fairway (about 250 to reach).
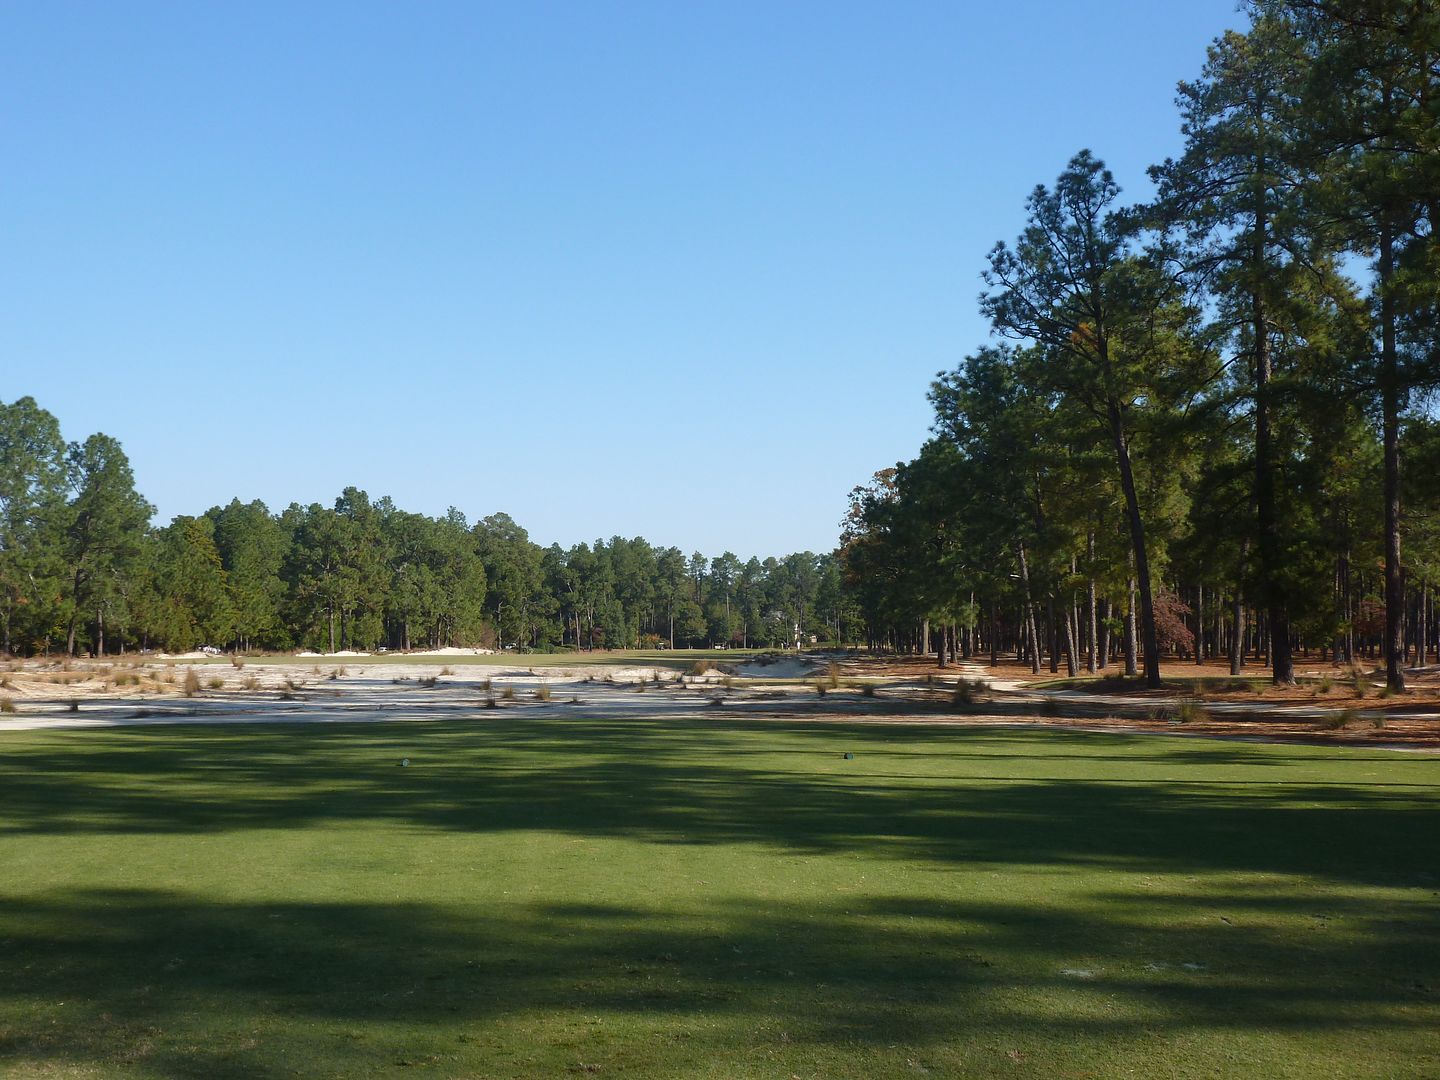
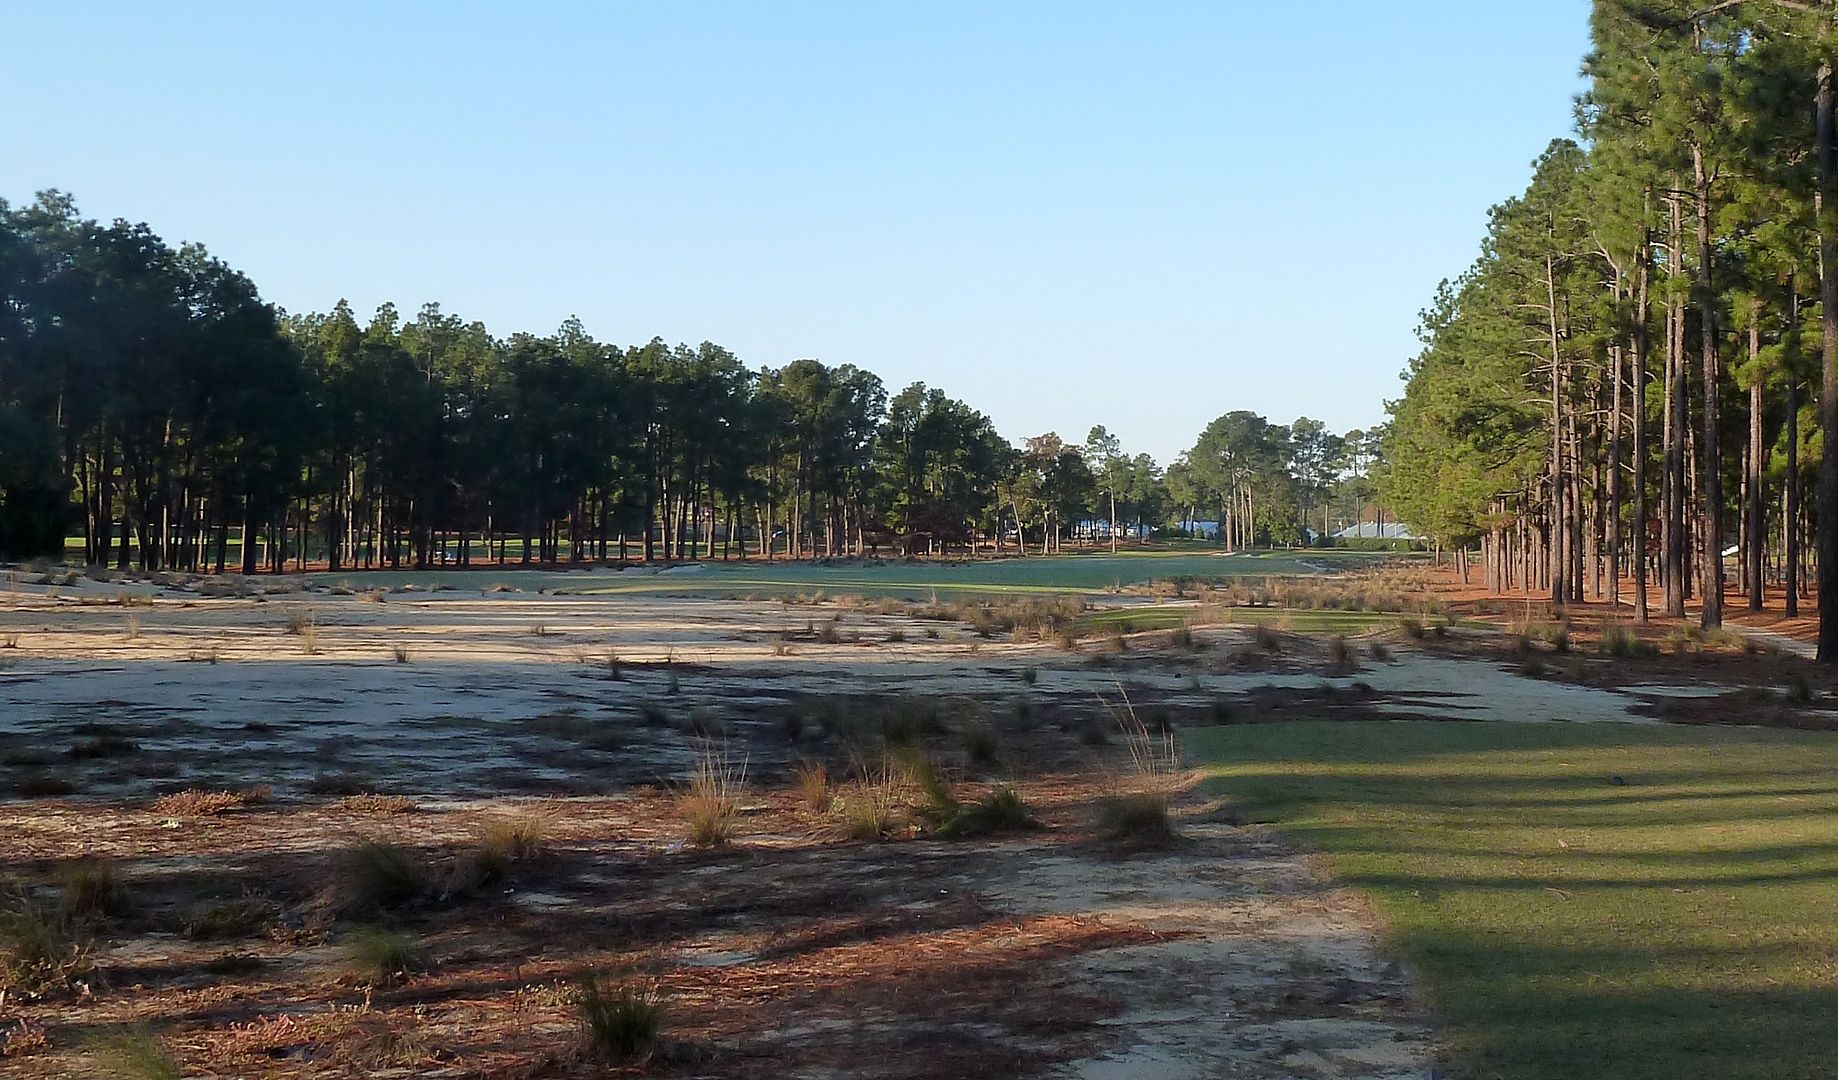
Tee View:
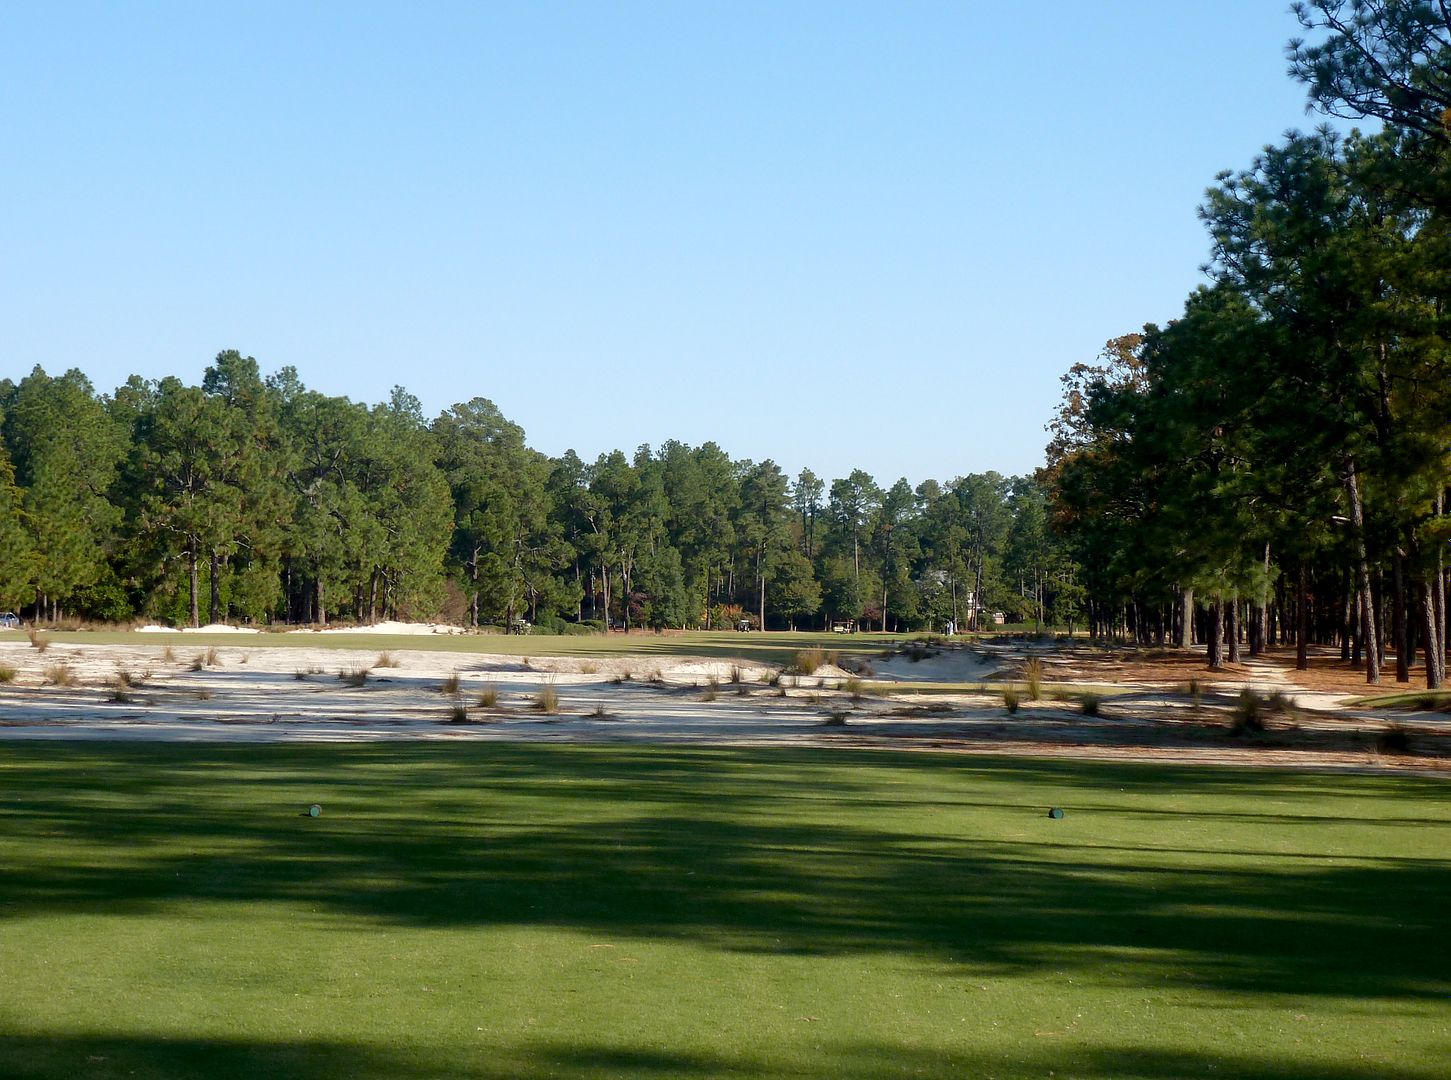
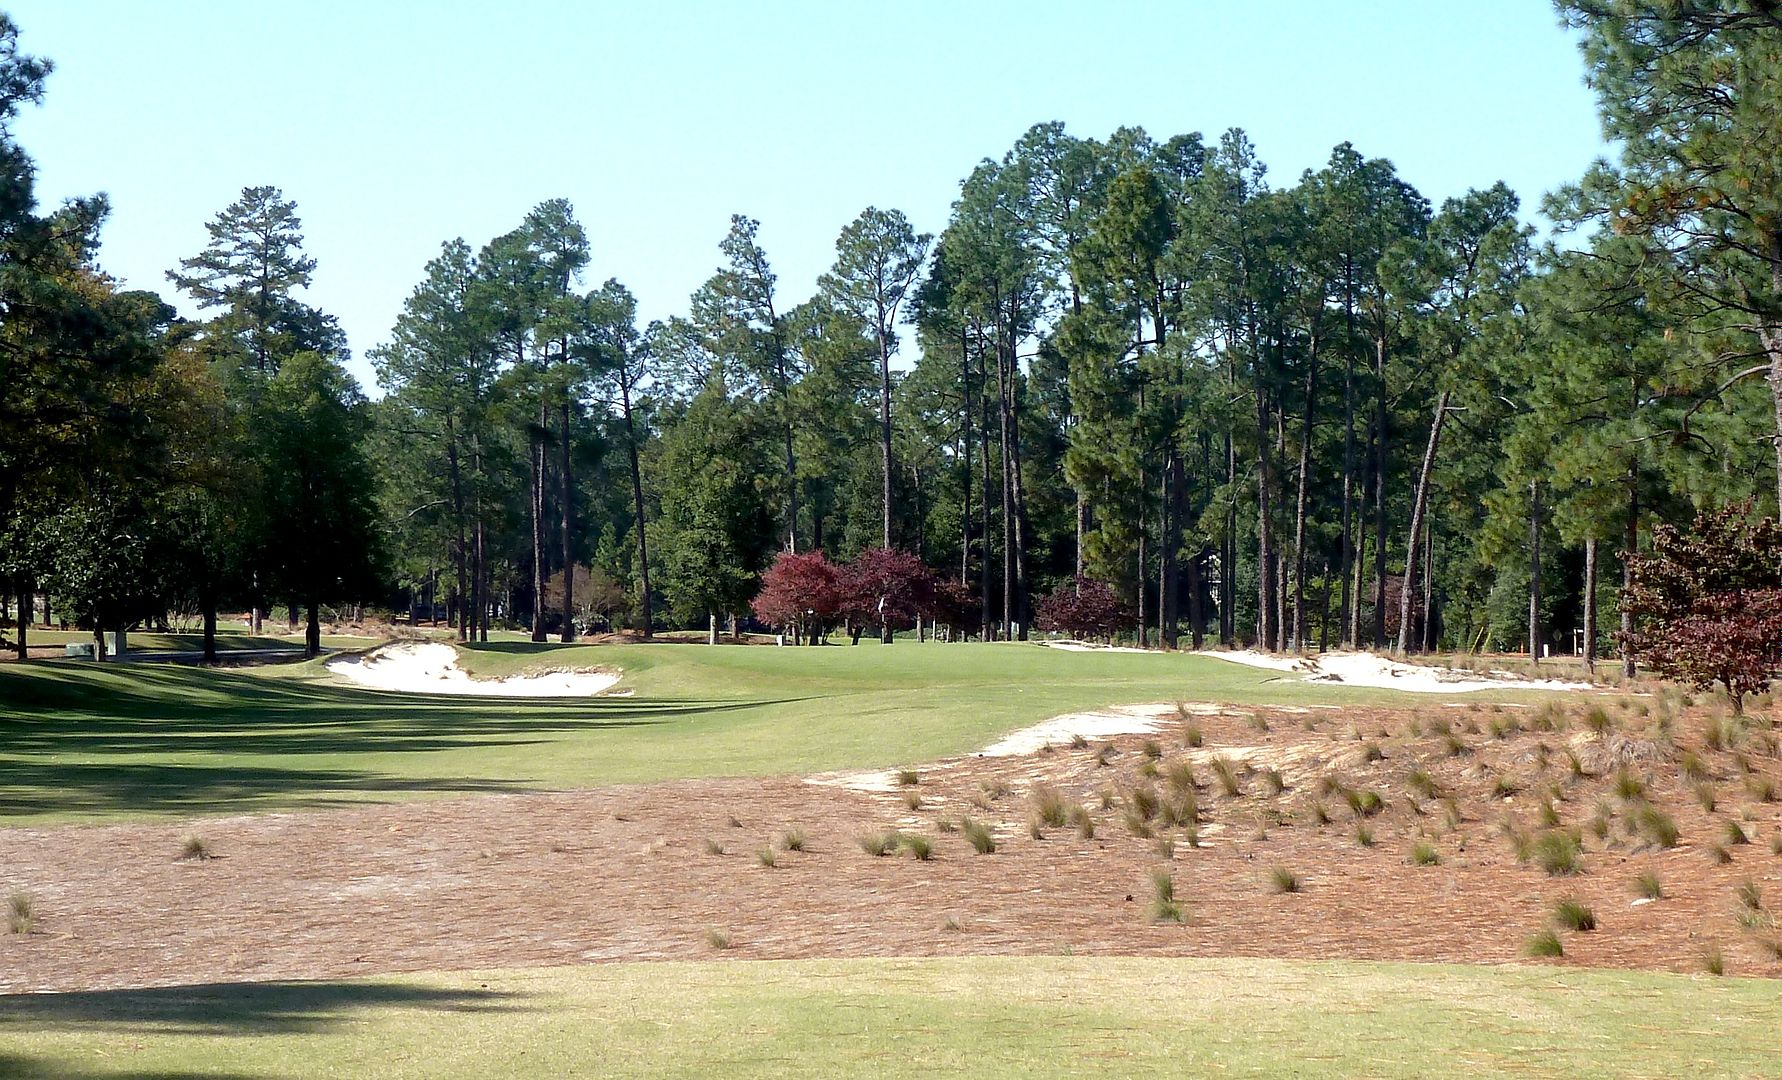
Once the golfer descends to the fairway from the elevated tee, he can more easily see the cant of the 4th fairway:

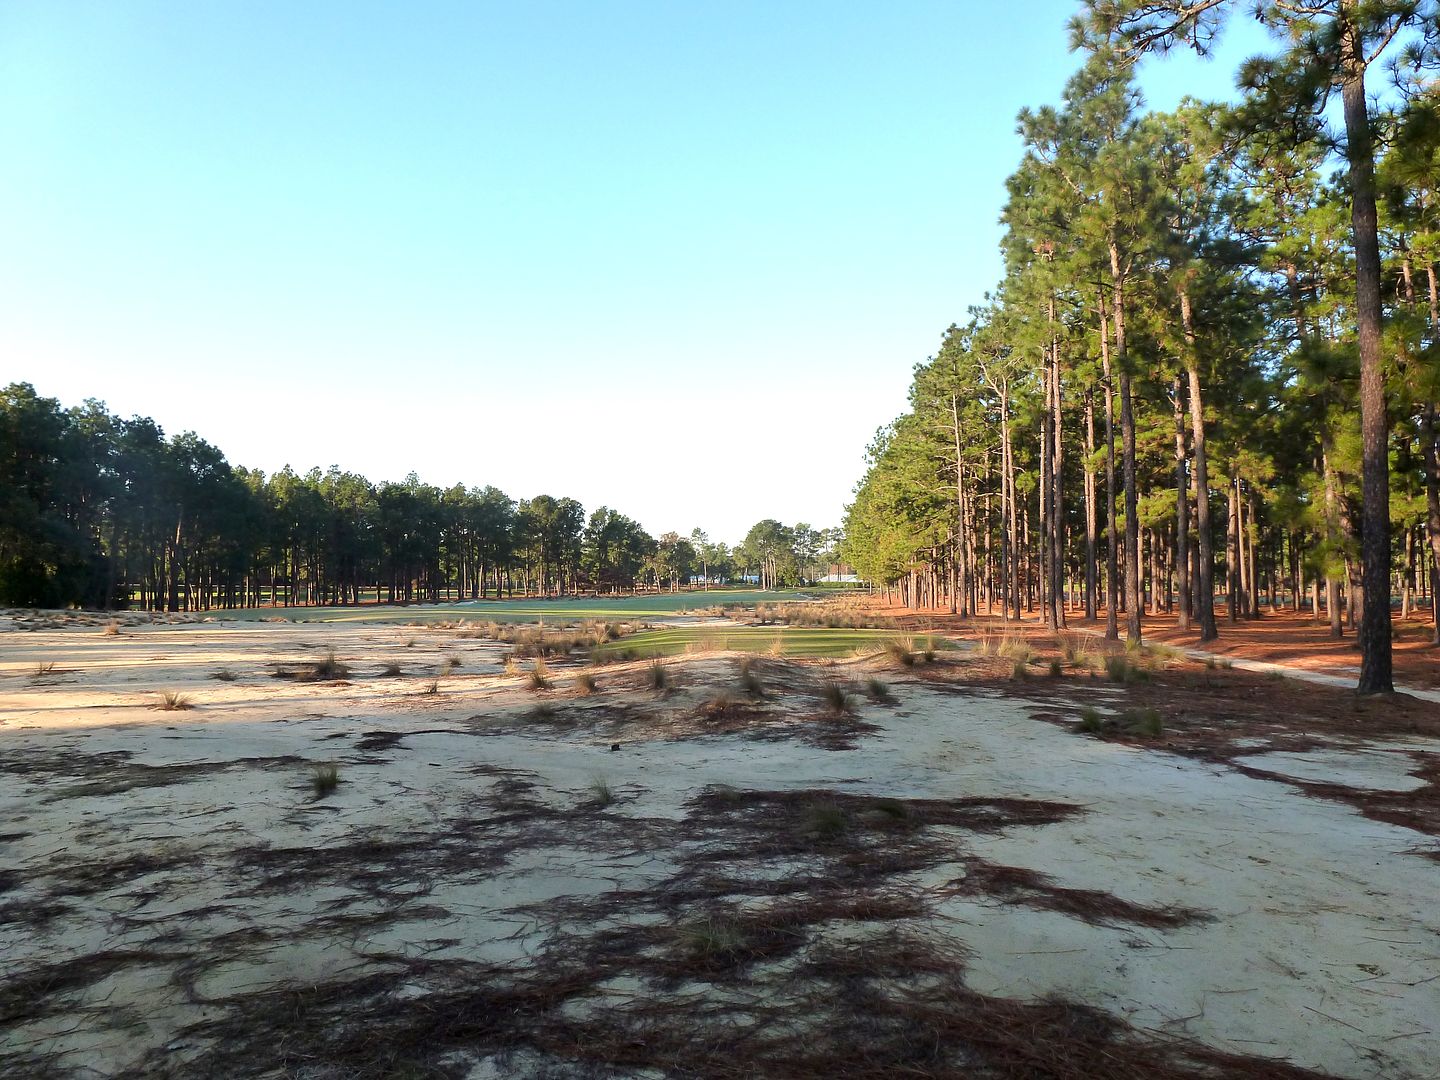
And again the slope of the fairway is obvious as seen from the low-point at the right edge of the fairway:
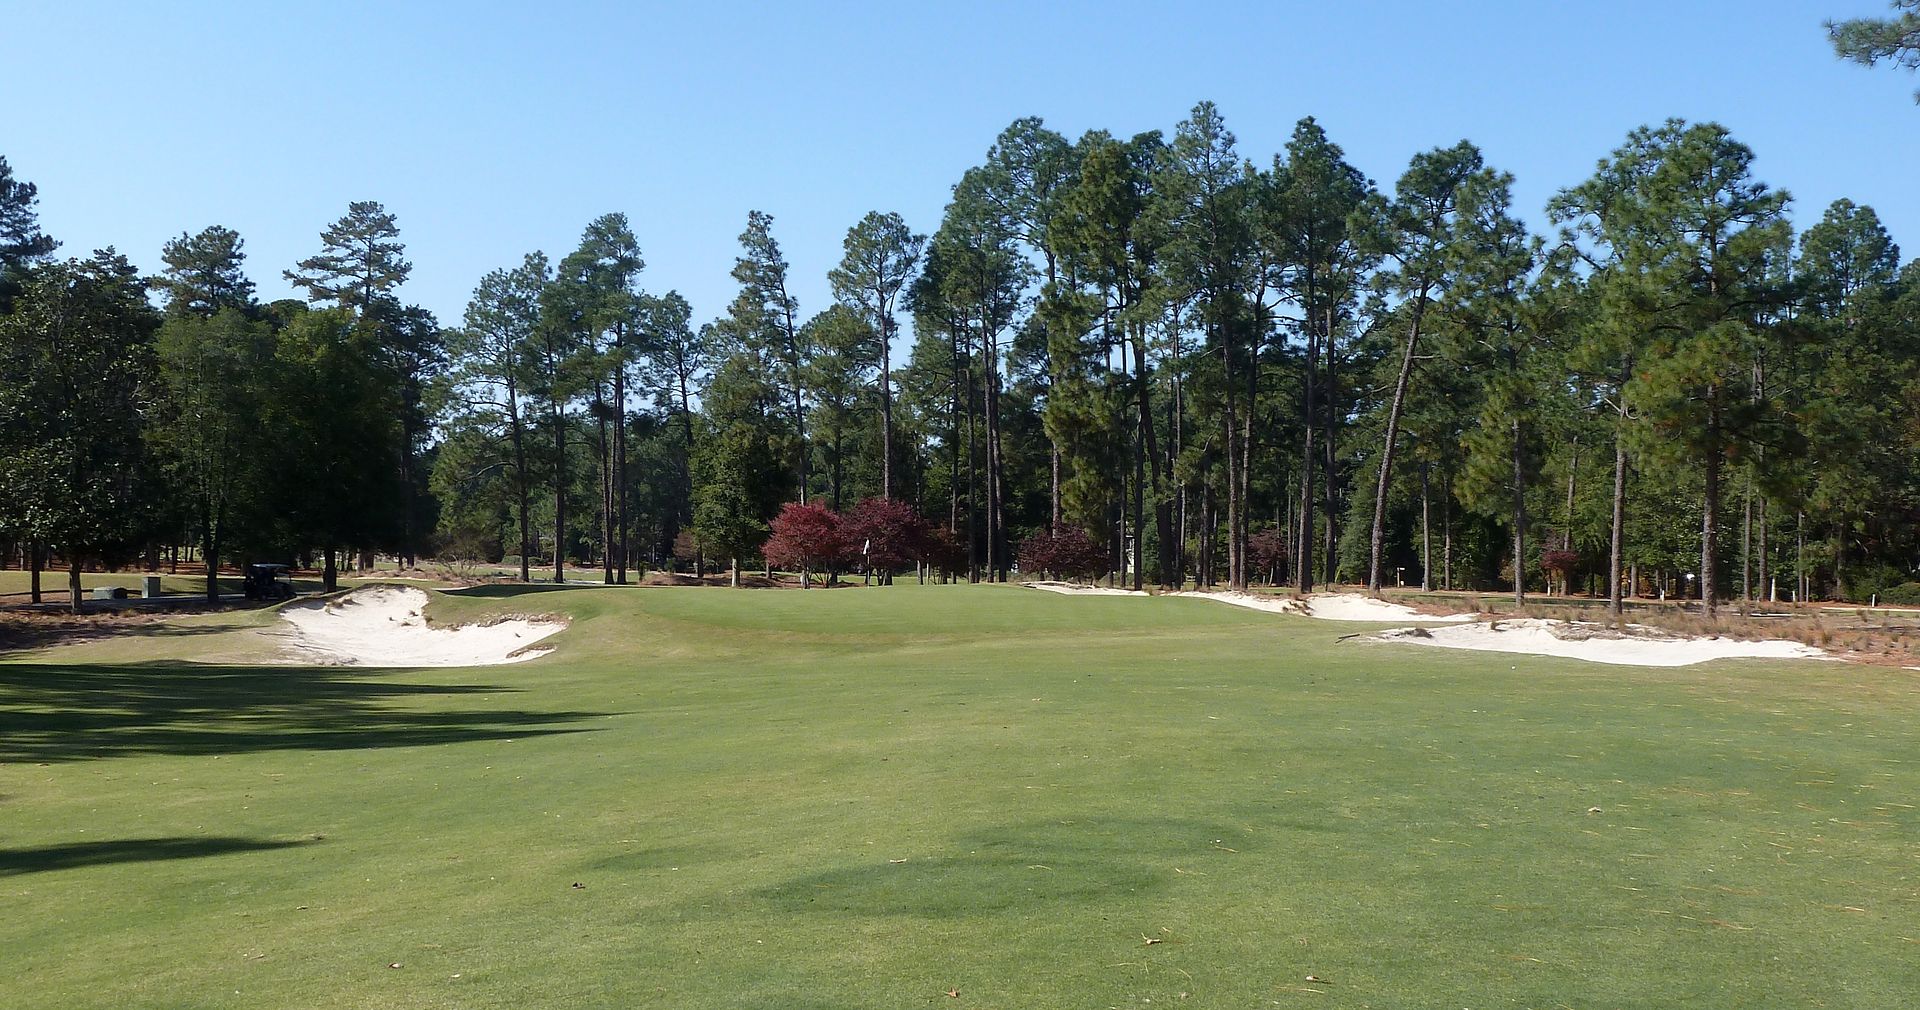
The green will be reachable in two for many, rendering a duo of staggered bunkers 100 yards (right) and 70 yards (left) largely out-of-play. However, golfers that miss the fairway with their tee ball have a difficult lay-up.
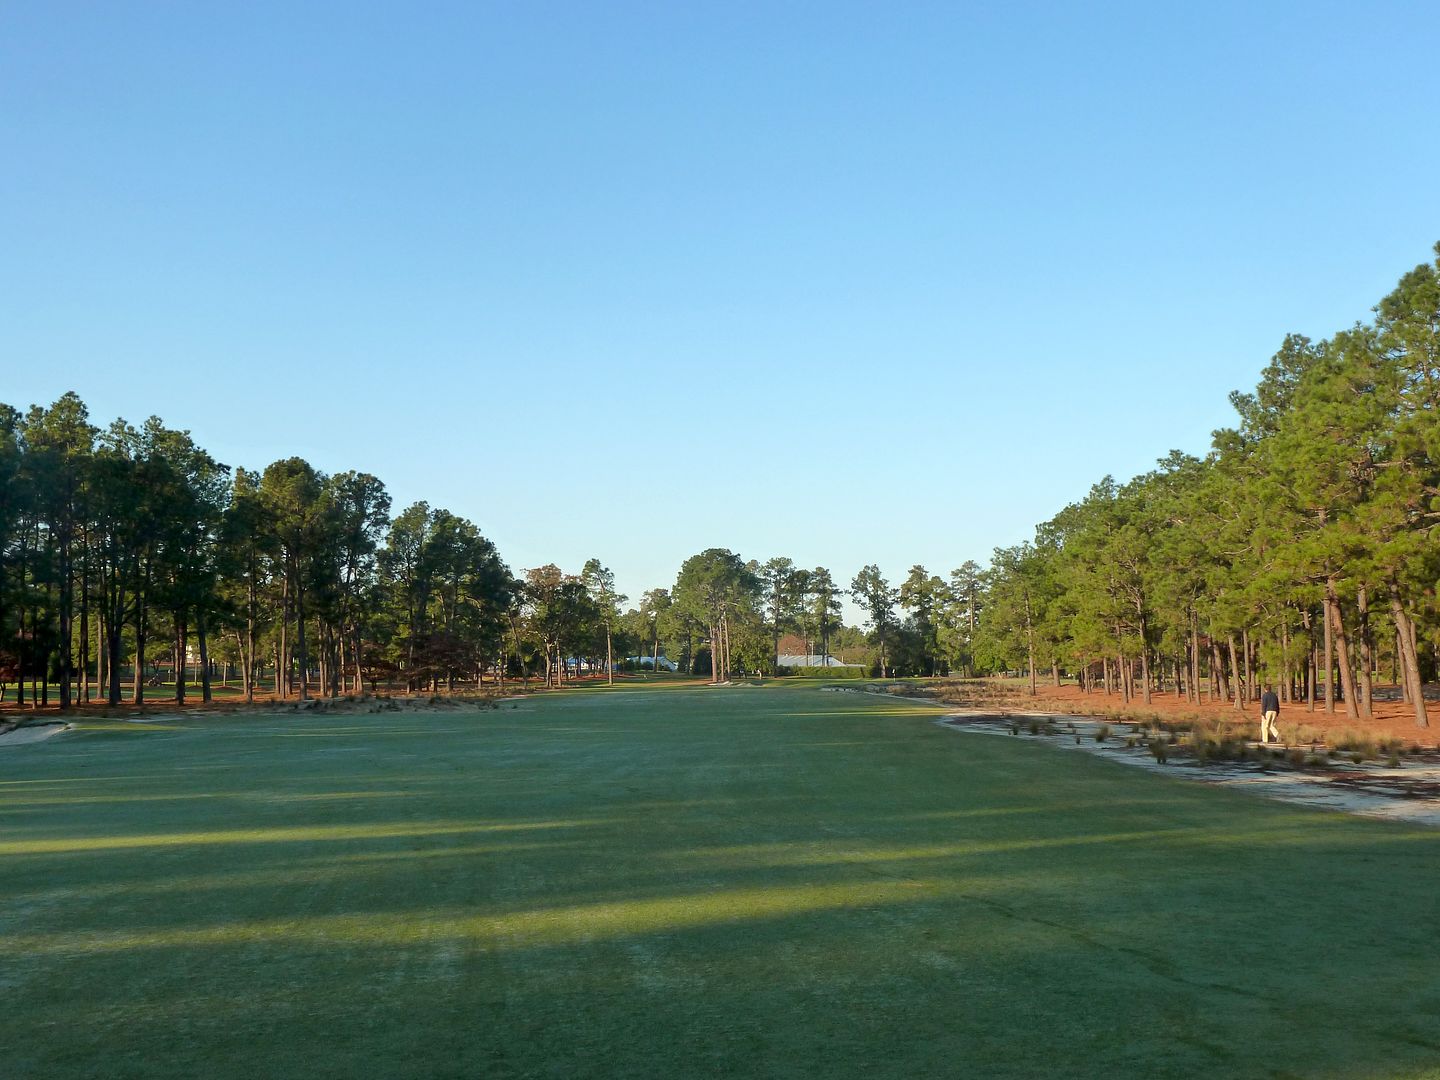
The 2nd shot as seen from the right fairway bunker:
Approach from 70 yards out:
Green as seen from 5th tee:
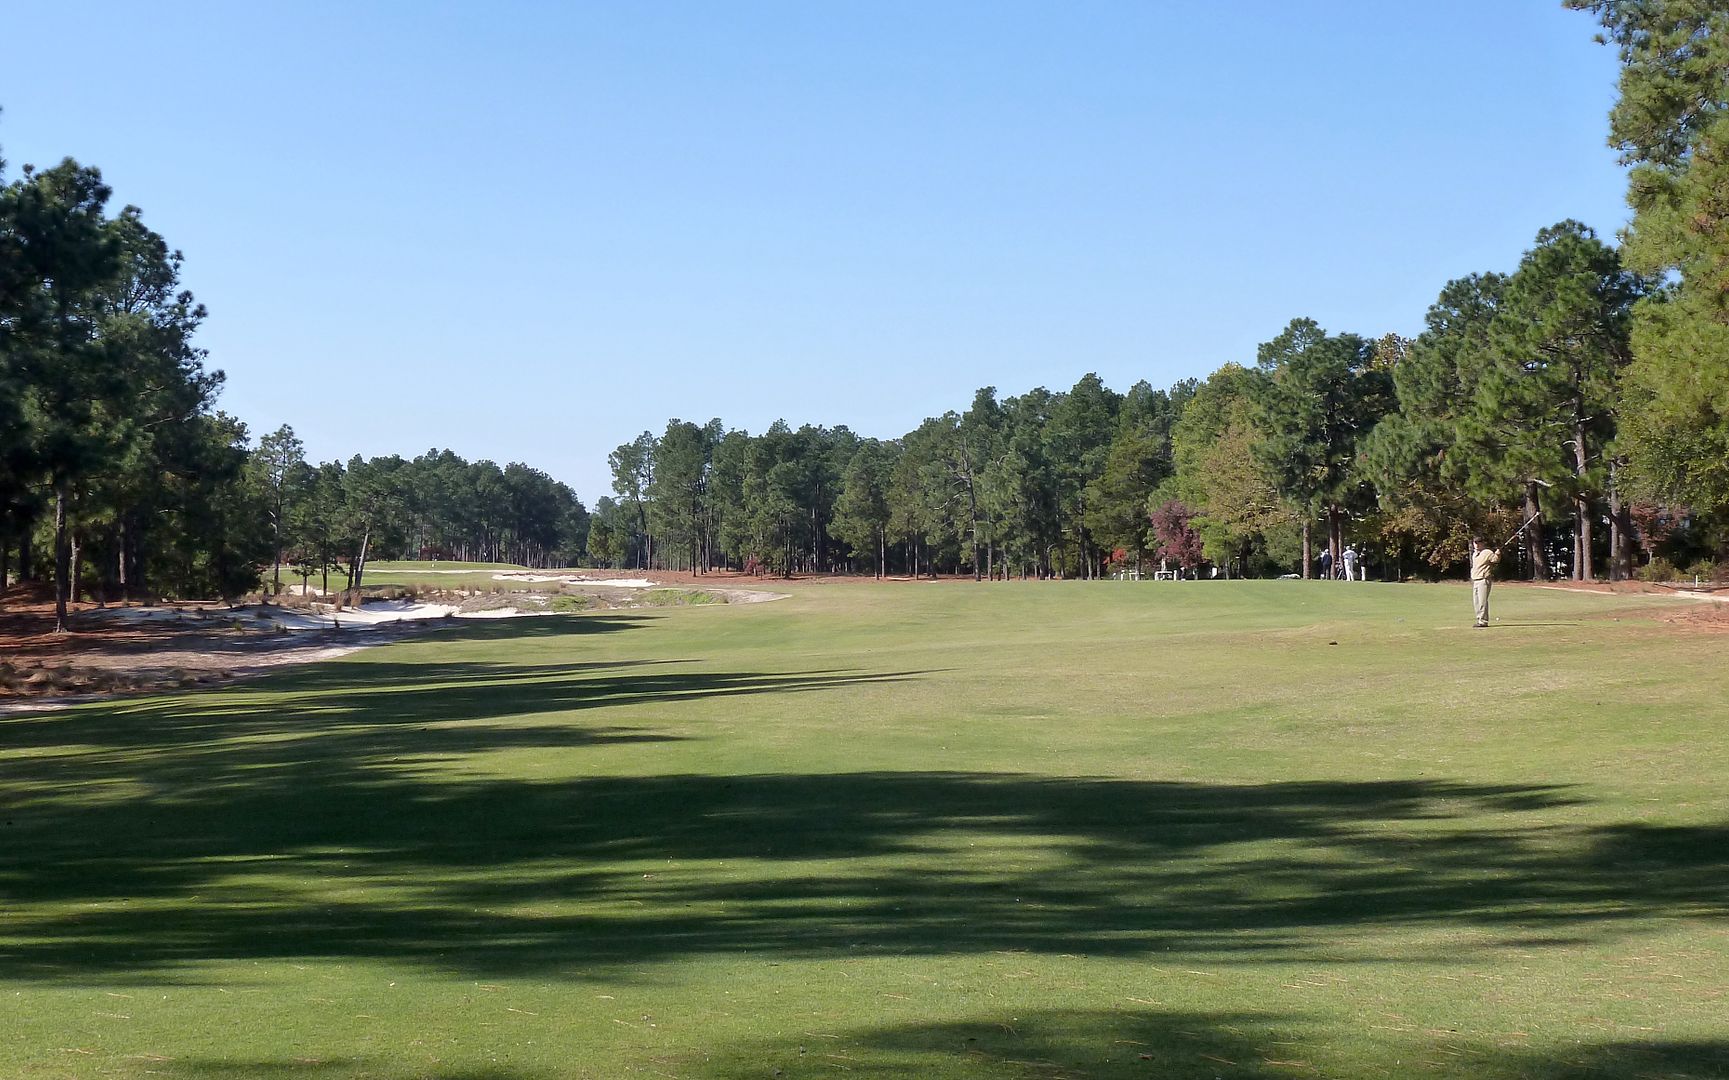
Hole 5: Par 4, 436 Yards
2008 Aerial:
2011 Aerial:
A top-shot bunker and a peak in the fairway hide the severely tilted driving zone. While the fairway has ample width, its blind nature, and knowing the difficulty of the second shot that awaits, the golfer may be tempted to eek a few extra yards out of the drive and also a missed fairway.
Missing this fairway right is bad -- the green will likely be out-of-reach.
Missing the fairway left is worse -- from this angle, and playing from the scrub, the green is basically unhittable.
View from the tee:
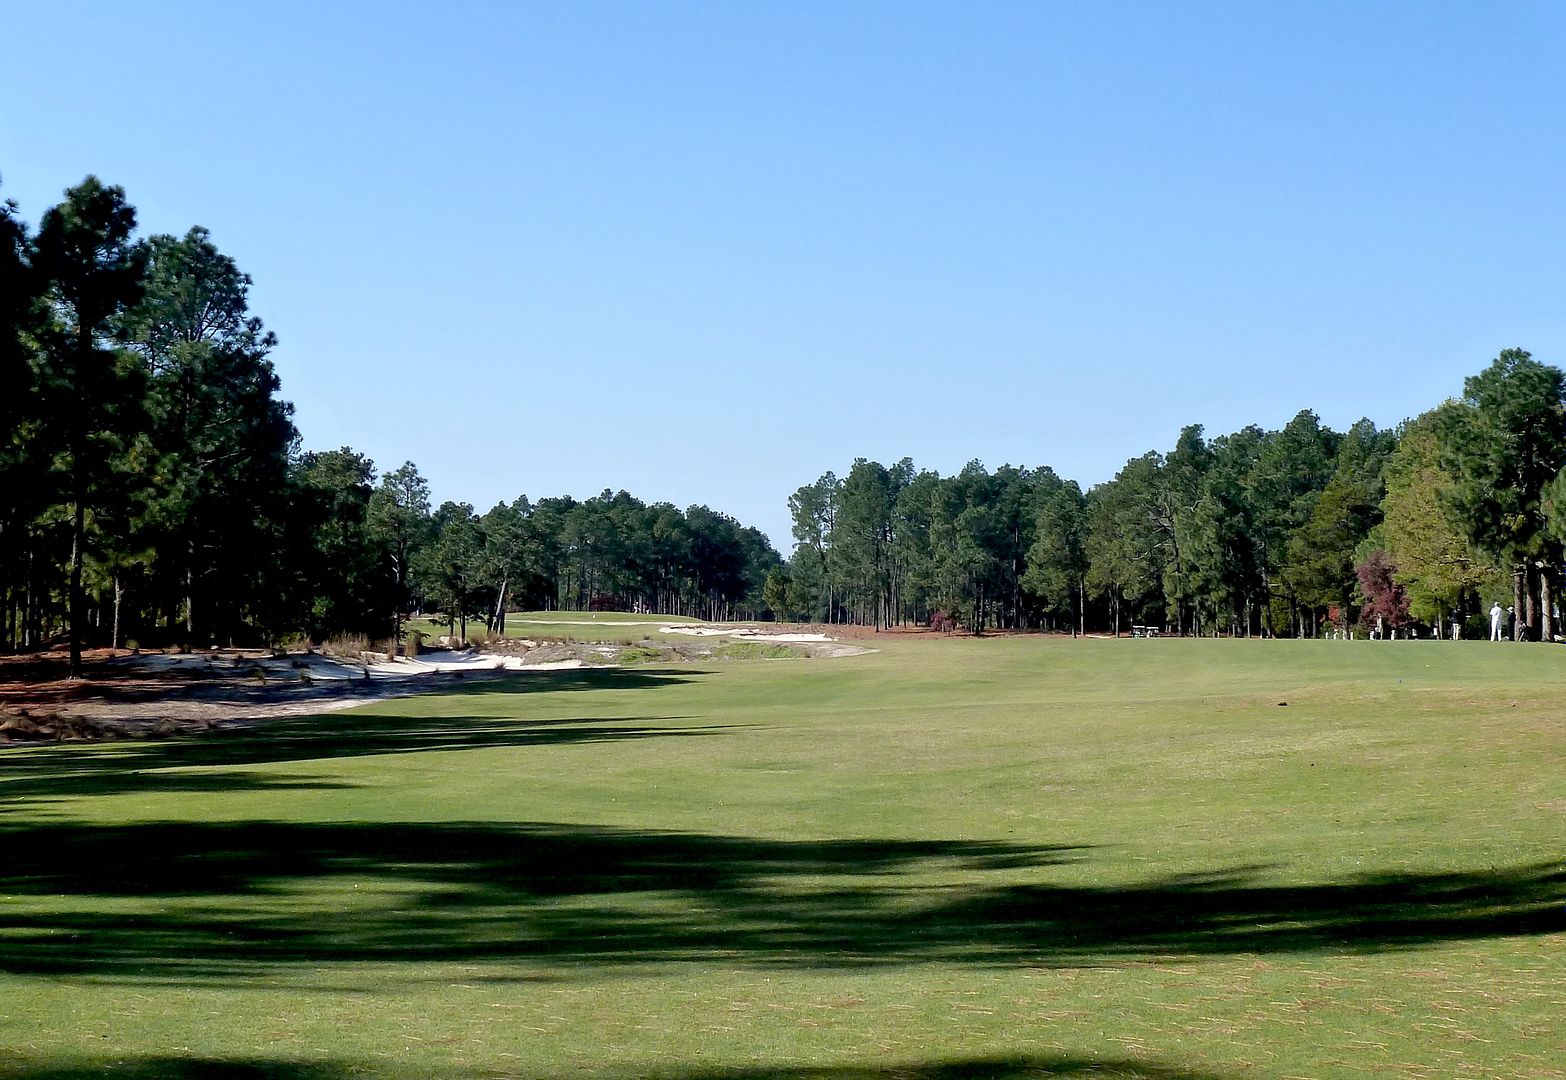
Once the golfer crests the hill, the leftward tilt of the fairway becomes obvious. A flat area on the left side prevents will struck tee-shots from ending up in the scrub area.
Easily the most difficult approach at Pinehurst No. 2. With a huge false-front short, a menacing bunker to the left and an even deeper fall-off long-left, there is nowhere to miss [anything right of the green will be played down the slope of the green and nearly impossible]. From Ran's Review: Nothing within seven paces of the perimeter of the green allows for a cup, such is the manner in which this green slopes away on all sides.
Clever golfers will run the ball onto the green from the right-side, understanding that missing short-right is the only acceptable miss. As Johnny Miller would say, from short of the green you make 5, option 4.
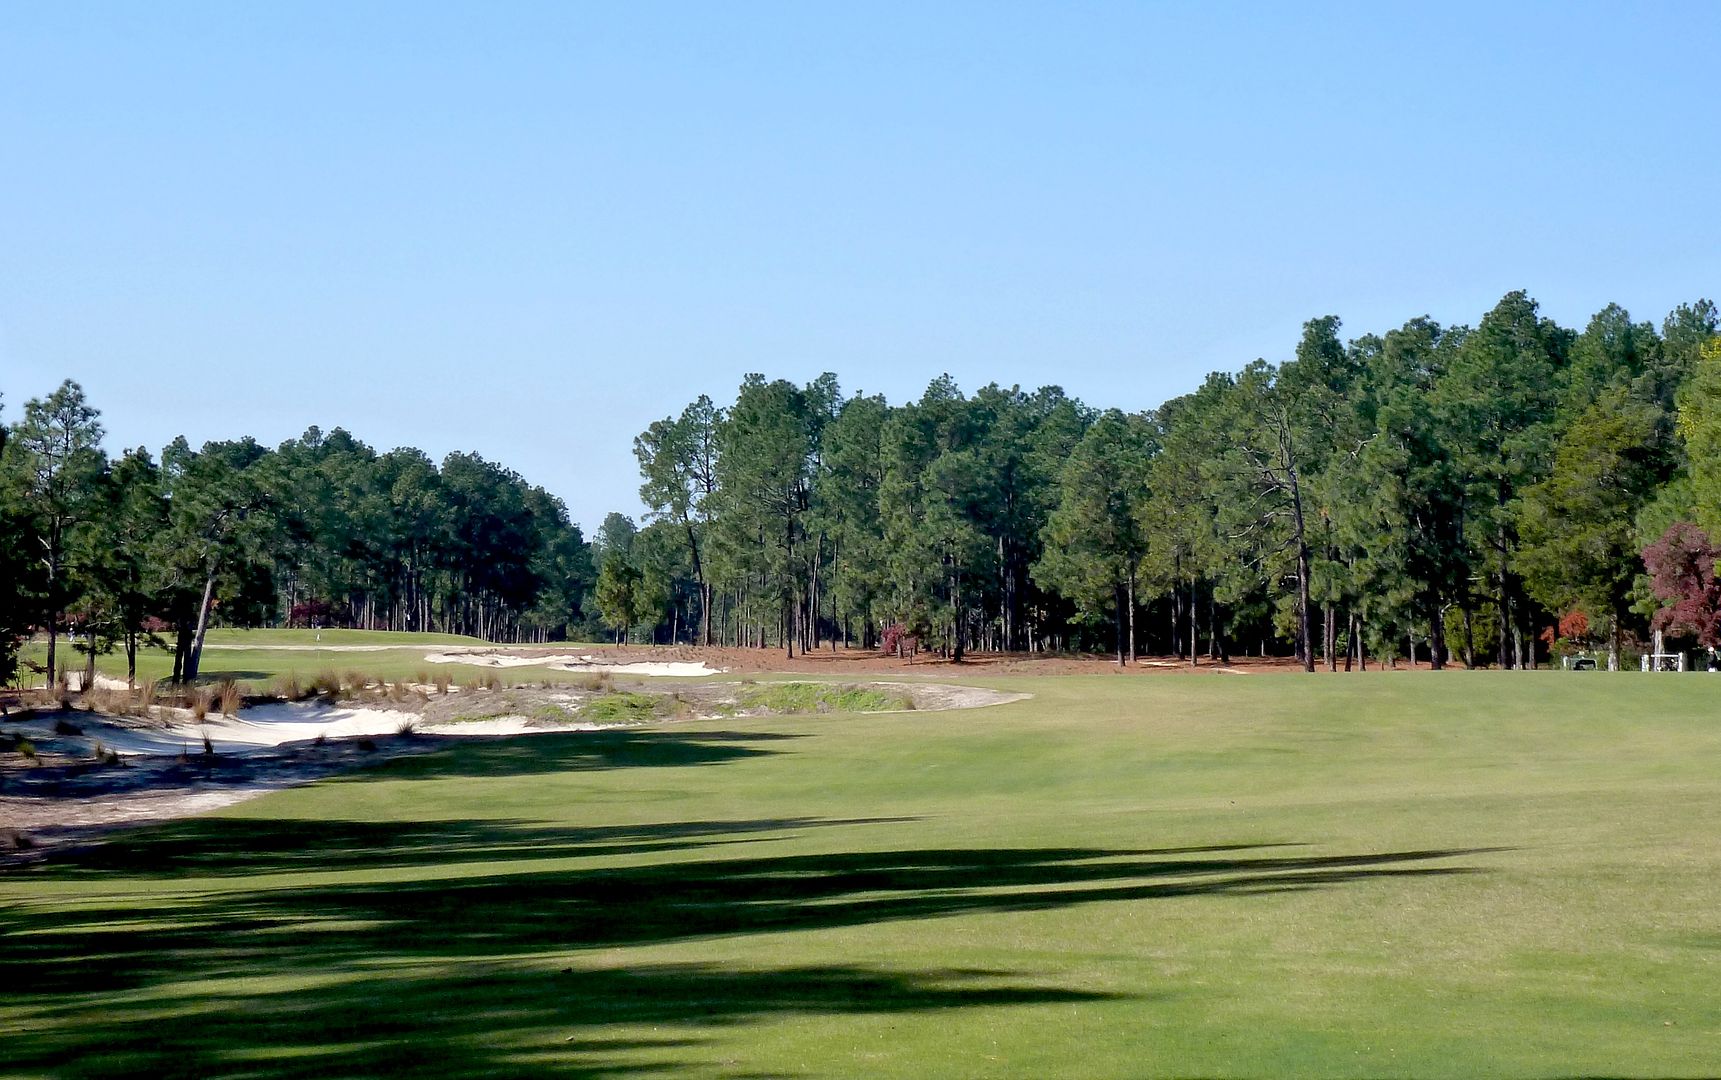
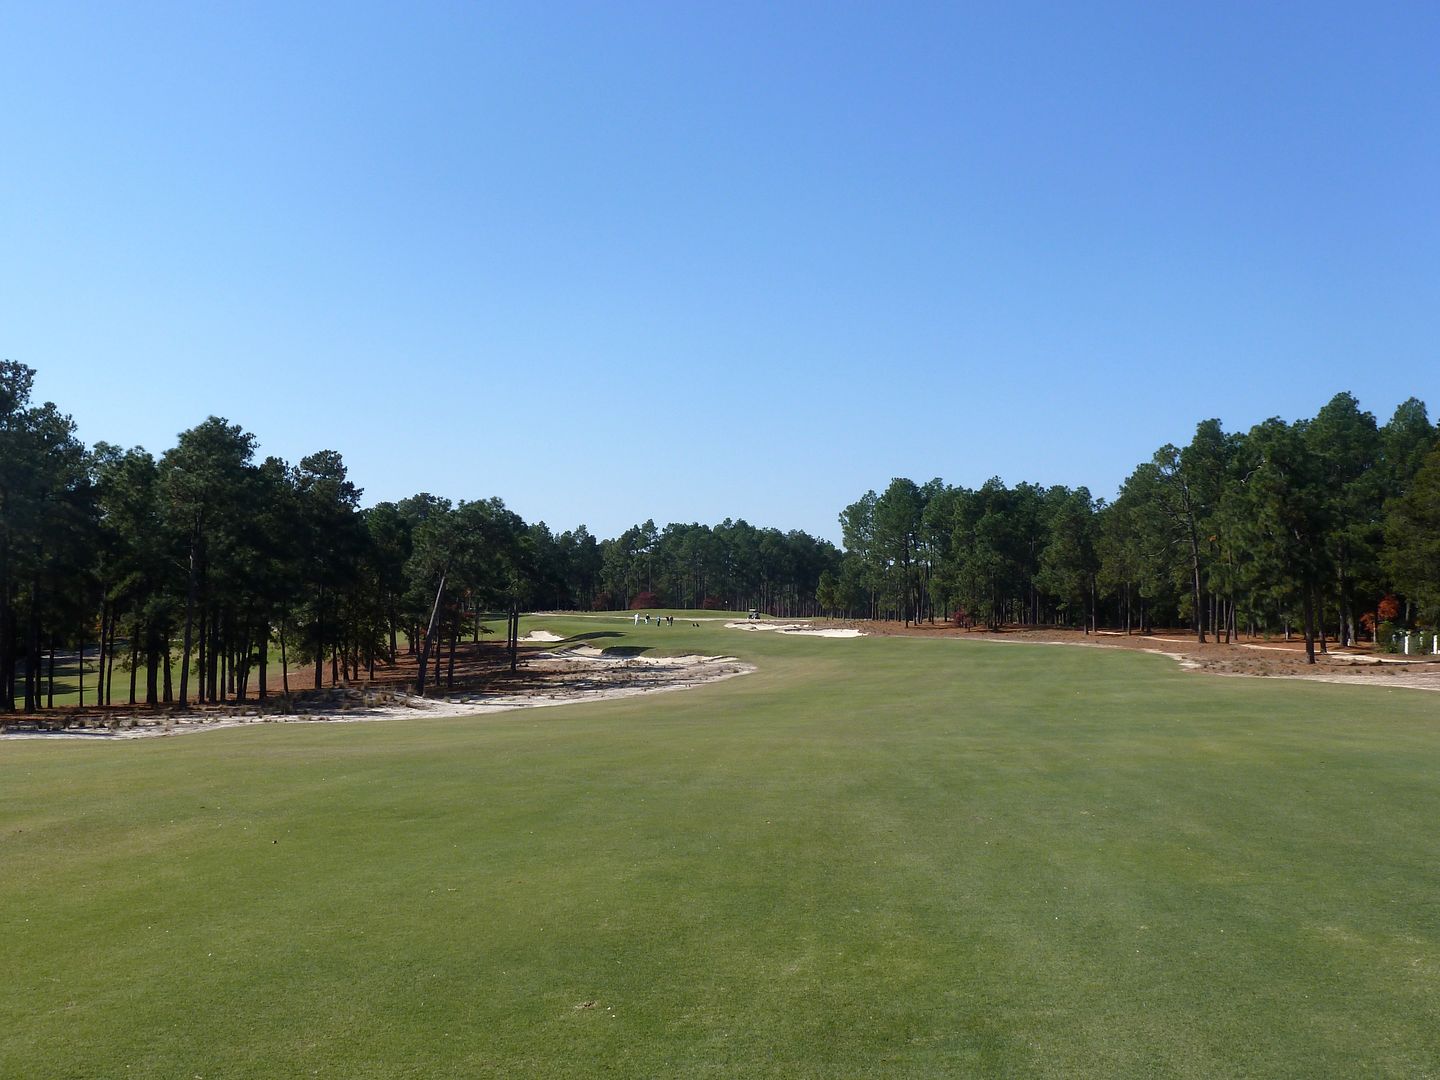
Approach from the centre of the fairway:
Approach from the left side of the fairway:
Approach from the scrub on the left:
From just short of green: Note the slopes that will collect balls toward the bunker.
A couple of looks from over the green: Note the fall-off to the left of the green
Hole 6: Par 3, 204 Yards
2008 Aerial:

2011 Aerial:
Probably a hole that few think of as a standout hole, but the 6th is one of the most difficult holes on the golf course. While it is a long hole, it seems innocuous from the tee, but a deep collection area short of the green and a deeper collection area over the green make up-and-downs very difficult.
Tee View:
From 50 Yards short of green: Note how everything funnels toward the low-point/collection area.
From just over back edge:
From 7th Tee: Note collection area over green.
Green. Much like the 5th green, anything near the edge of the green has no hope of staying on. Effectively a very small putting surface (and a very small target to hit from 200 yards+).
Hole 7: Par 4, 402 Yards
2008 Aerial:
2011 Aerial:
The series of bunkers on the right and a fairway that appears to fall-away and narrow to the left, creates a tremendous desire in the golfer to try and cut the corner. It's very difficult to pick the correct line and the carry quickly gets much longer as the golfer takes a more aggressive line from the tee.
It is 240 yards to carry the first bunkers on the right, 275 yards to carry the next set, and for those very few that are able to carry everything (about 290 yards), the most important number may be that it is 320 yards through the fairway.
Tee View:
View from start of fairway:
Those not wanting the challenge the carry will do well to play as close to the scrub area as possible. The view after an ideal lay-up tee shot:
And a couple more looks at the scrub area and the approach from the right side of the fairway from about 150 yards out:
Lots of width available for those able to carry the first set of fairway bunkers. The view from about 120 yards out in the centre of the fairway:
And for those able to take it over everything (or for those who pitched out after finding the fairway bunkers), they will have a pitch from about 70 yards that looks like this:
The bunker in the forefront of this picture is a great use of visual deception. From the left side of the fairway (the bail-out) side, this bunker looks like it is right in front of the green. From the right-side it is clear that there is plenty of turf between bunker and green.

Looking at the green from back-left, it is clear that this green has more internal contouring than many at P2. A ridge runs across the green 1/3 the way back.
Green from left:
Green from next hole shows a lovely tie-in to the 8th tee:
Hole 8: Par 5, 469 Yards
2008 Aerial:
2011 Aerial:
A huge difference here between pre and post renovation. Note the two fairway bunkers to the right, which previous were islands in a sea of rough to the right. Now these same bunkers are just off the edge of the fairway, protecting the ideal line into the green. Also note the addition of two bunkers short/left of the green.
Like the fairway on holes 4 and 5, the fairway on the 8th is severely canted, this one from right-to-left. It is a very short par-5, but one must hug the right side with their tee shot if they hope to find the fairway. Scrub area and fairway bunkers protect the ideal line.
Tee View:

From just short of fairway:
After a well-struck tee shot, most golfers will play their second from a large bowl in the fairway, between 180 and 210 yards from the green. Playing uphill, the second shot is partially blind and the intrusion of the duo of fairway bunkers short-left of the green into the fairway is very difficult to see. However, most golfers, noting the presence of the bunkers on the left, will play out to the right -- this is a big mistake on number 8.
Approach from 180:
If the golfer is forced to lay-up, he will do well to lay-up on the left side of the fairway. The approach from the right, as pictured below, plays with the slope of the green and is very difficult to control.

Following the natural flow of the land, the 8th green has quite a significant leftward tilt. Missing the green to the right leaves a nearly difficult recovery -- think missing Augusta National's 8th to the right, humps and all, and having the green slope significantly away.
Green as seen from fairway:

From back of green:
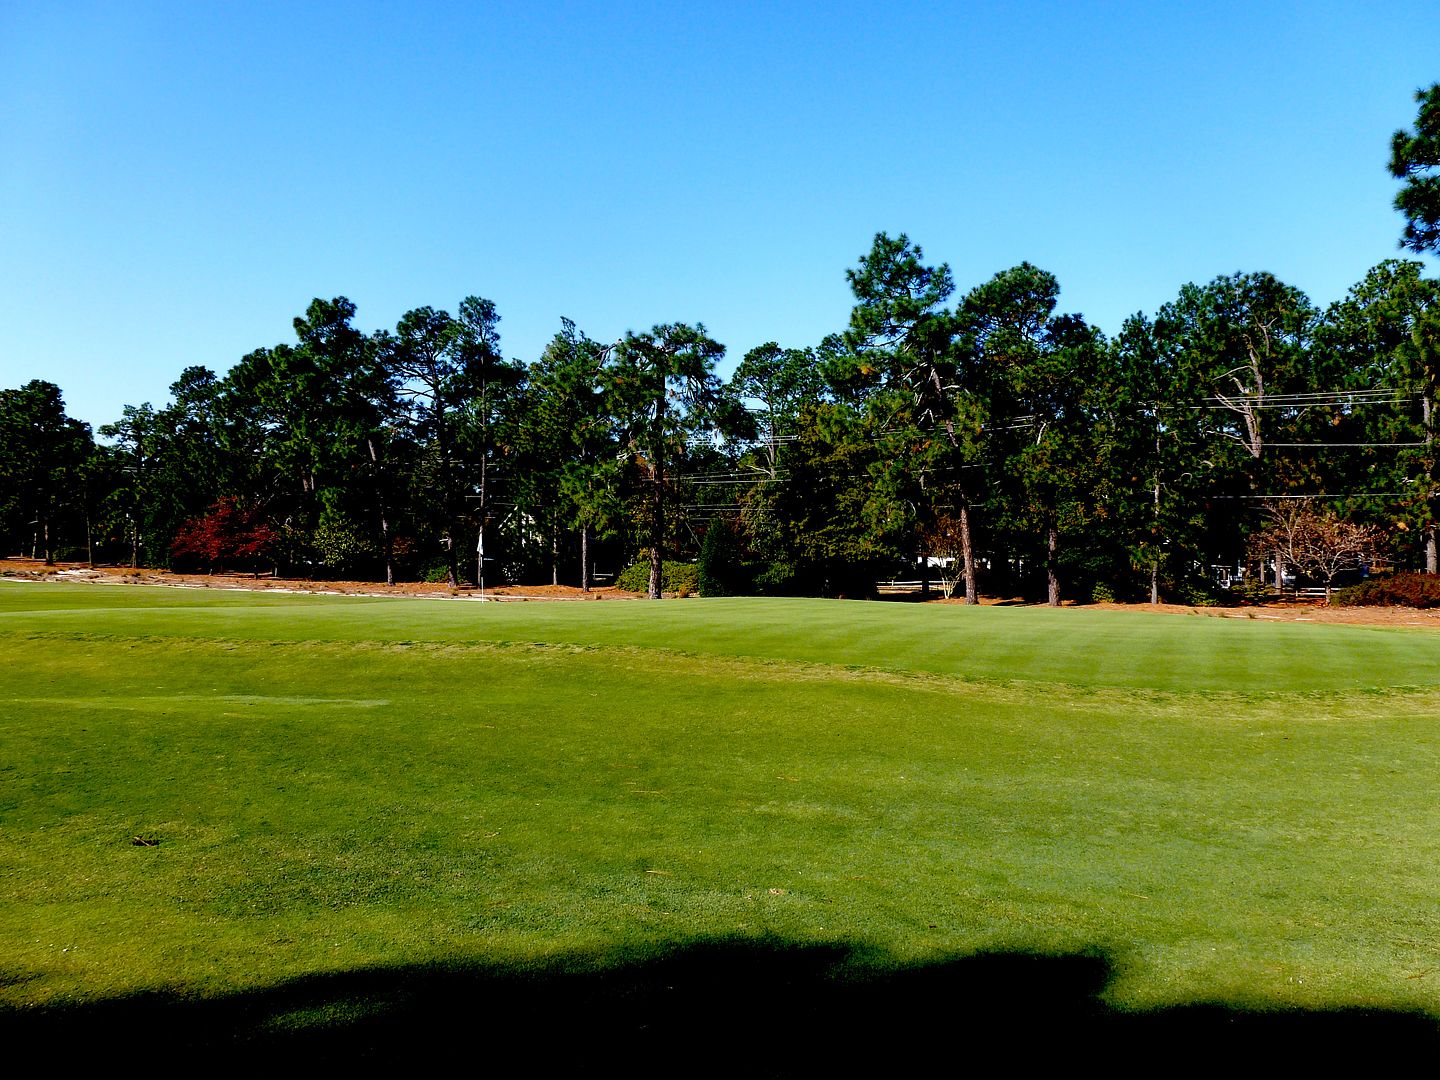
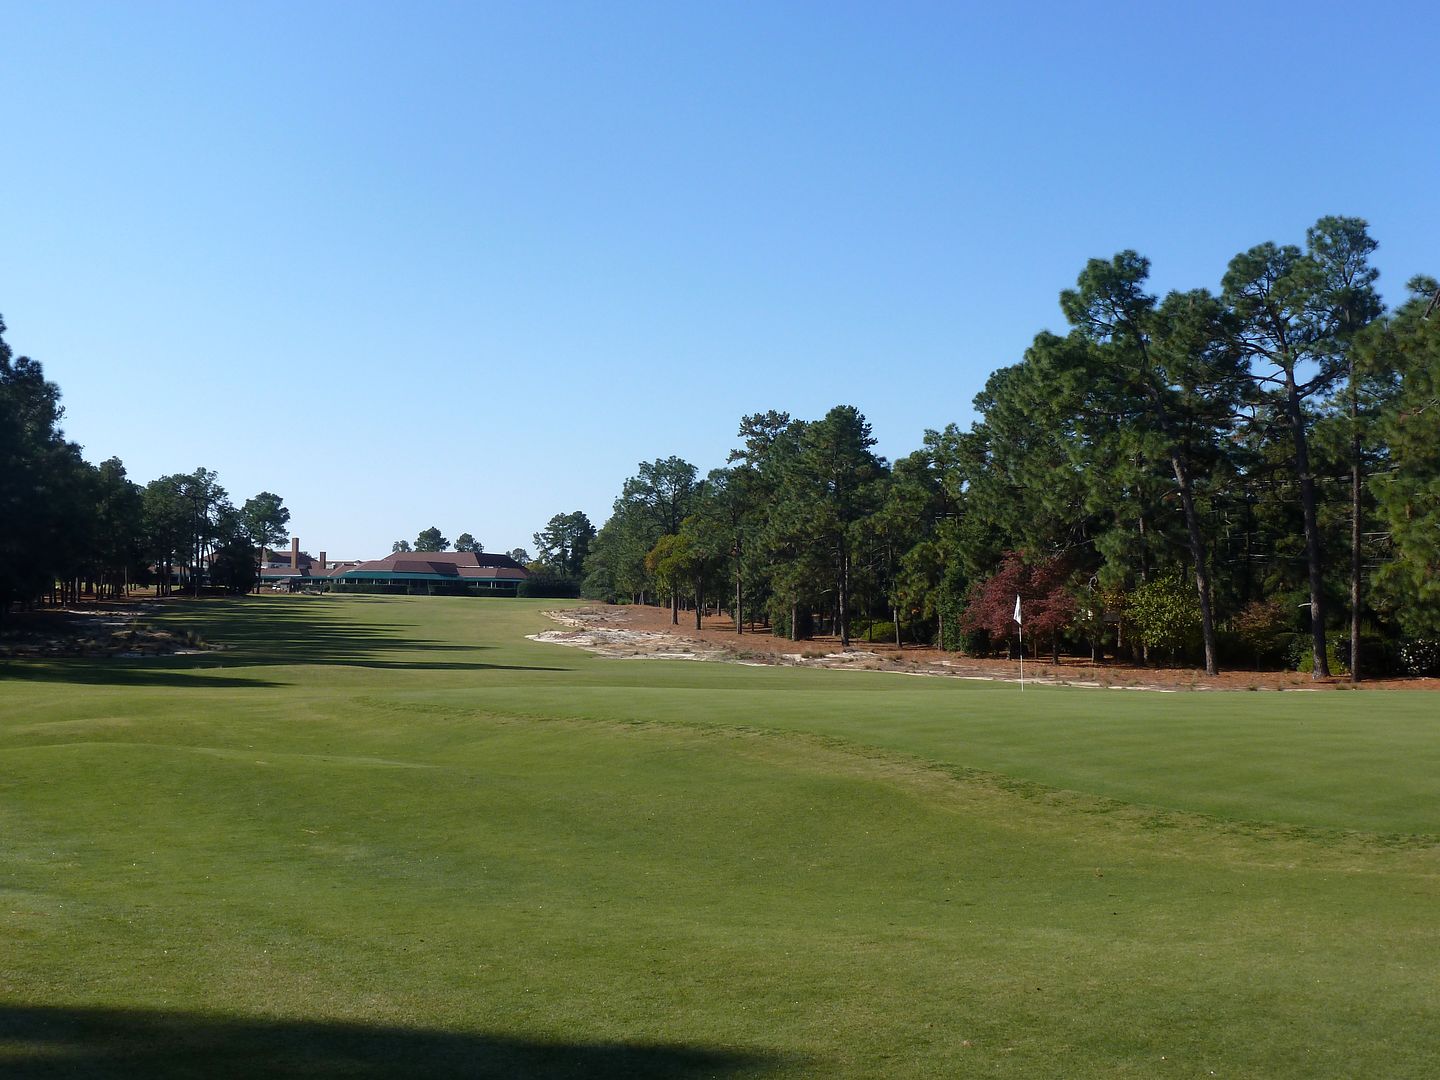
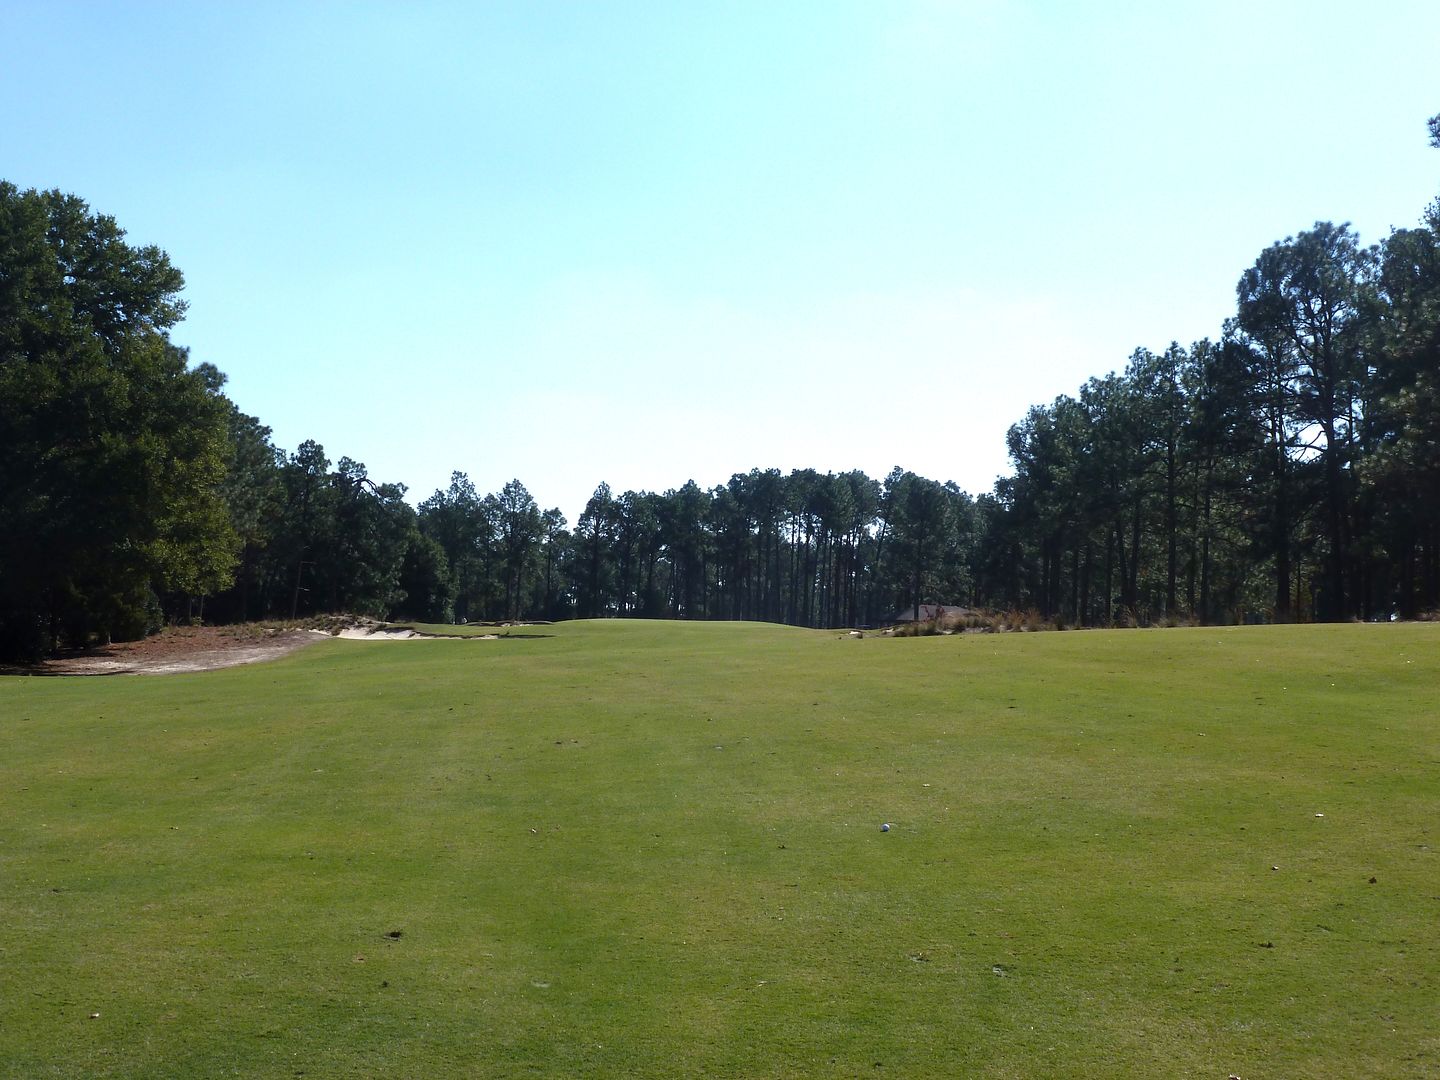
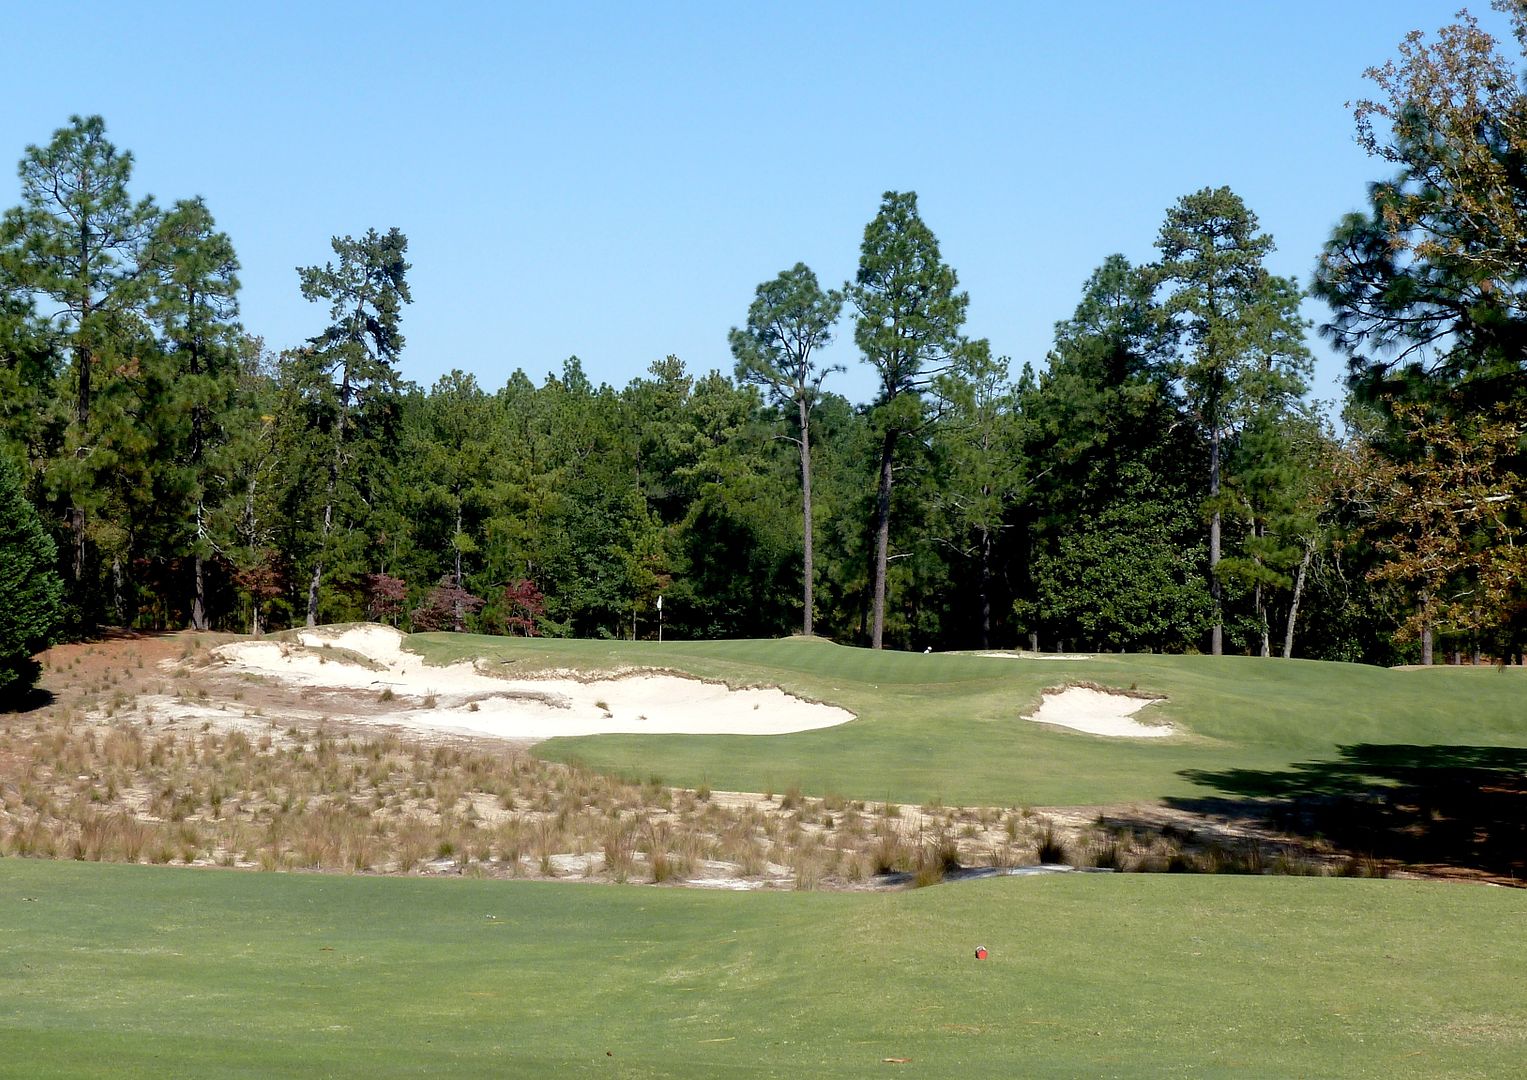
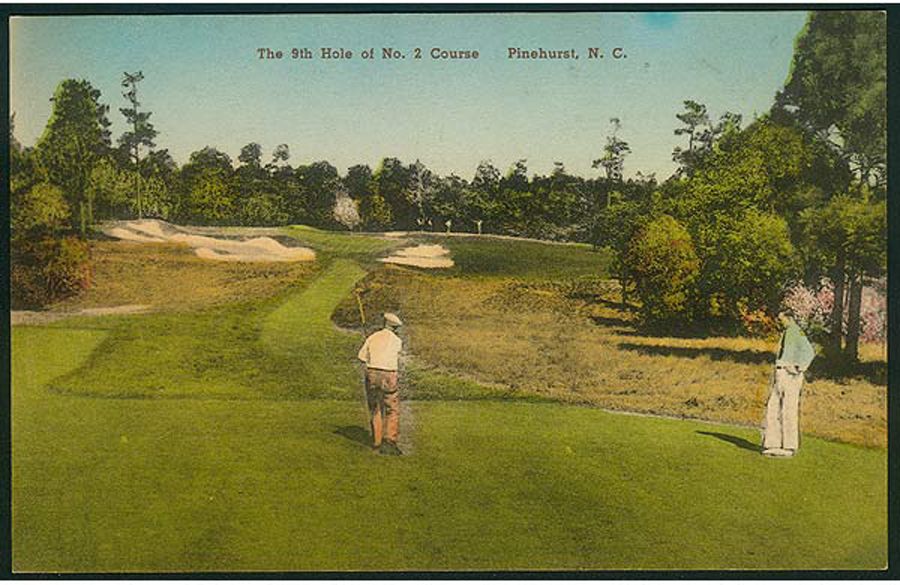
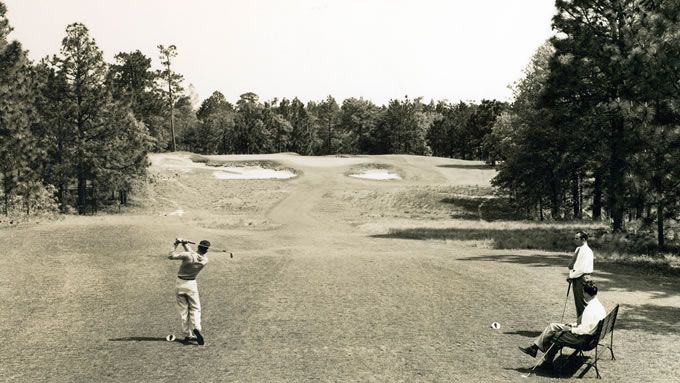
Hole 9: Par 3, 176 Yards
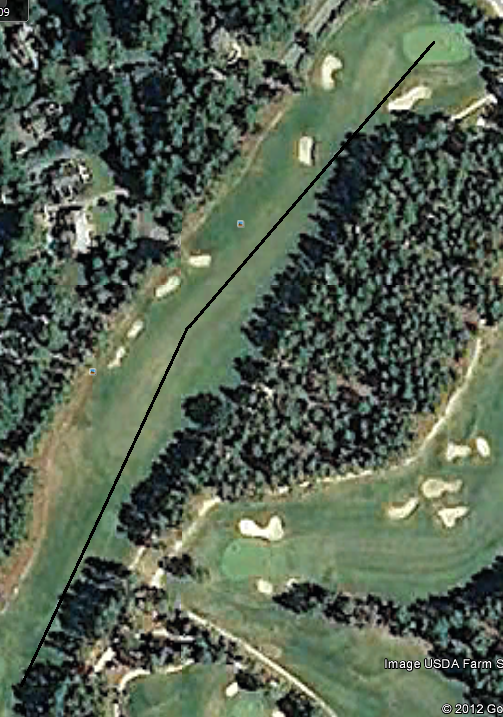
2008 Aerial:
2011 Aerial:
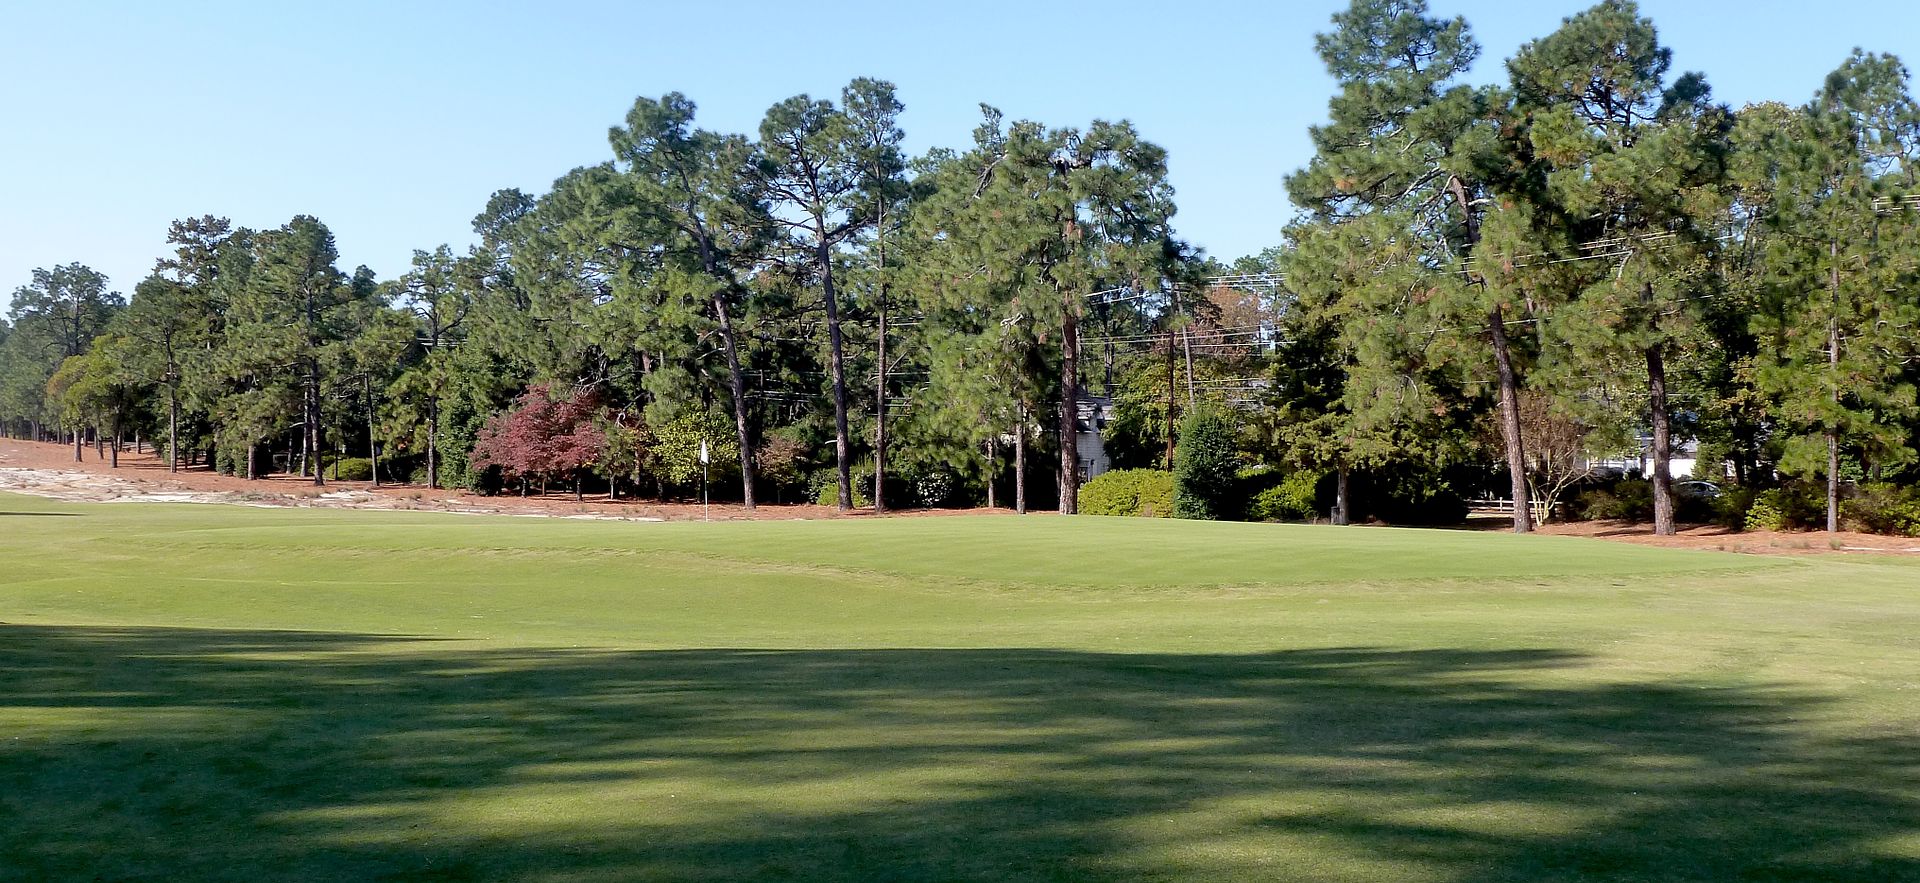
Though the short-ish yardage would indicate that this is a birdie hole, the 9th green is one of the smallest greens on the golf course and is arguably the most well-guarded. Very deep bunkers located short-right, short-left, left, and long will penalize any shot that misses the green.
The green lays at almost a 45-degree angle to the tee, sloping generally from back-left to front-right. A severe ridge runs across the narrow 'waist' portion of the green, separating the front-right portion of the green from the back-left portion. Front-right pins are very accessible, while back-left pins located on a very small piece of green, are nearly impossible to access -- shots must carry the deep fronting bunker and stop very quickly to avoid caroming off the back of the green.
Tee View:
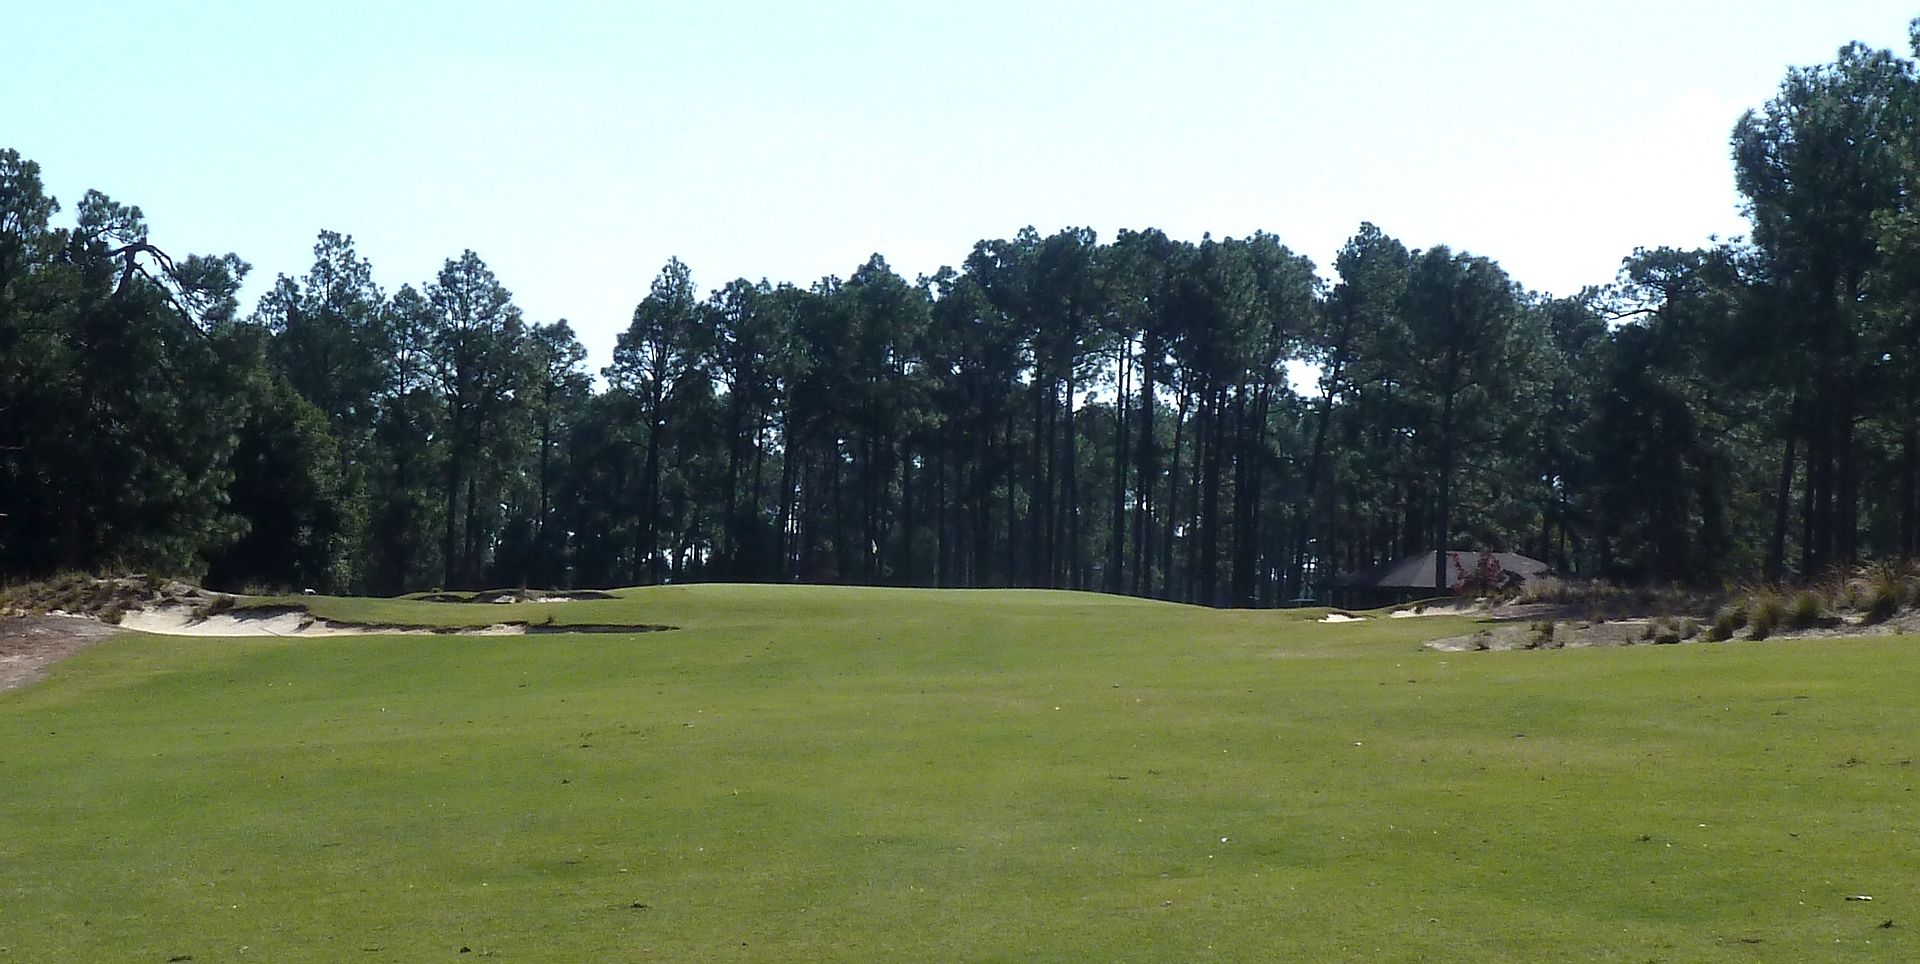
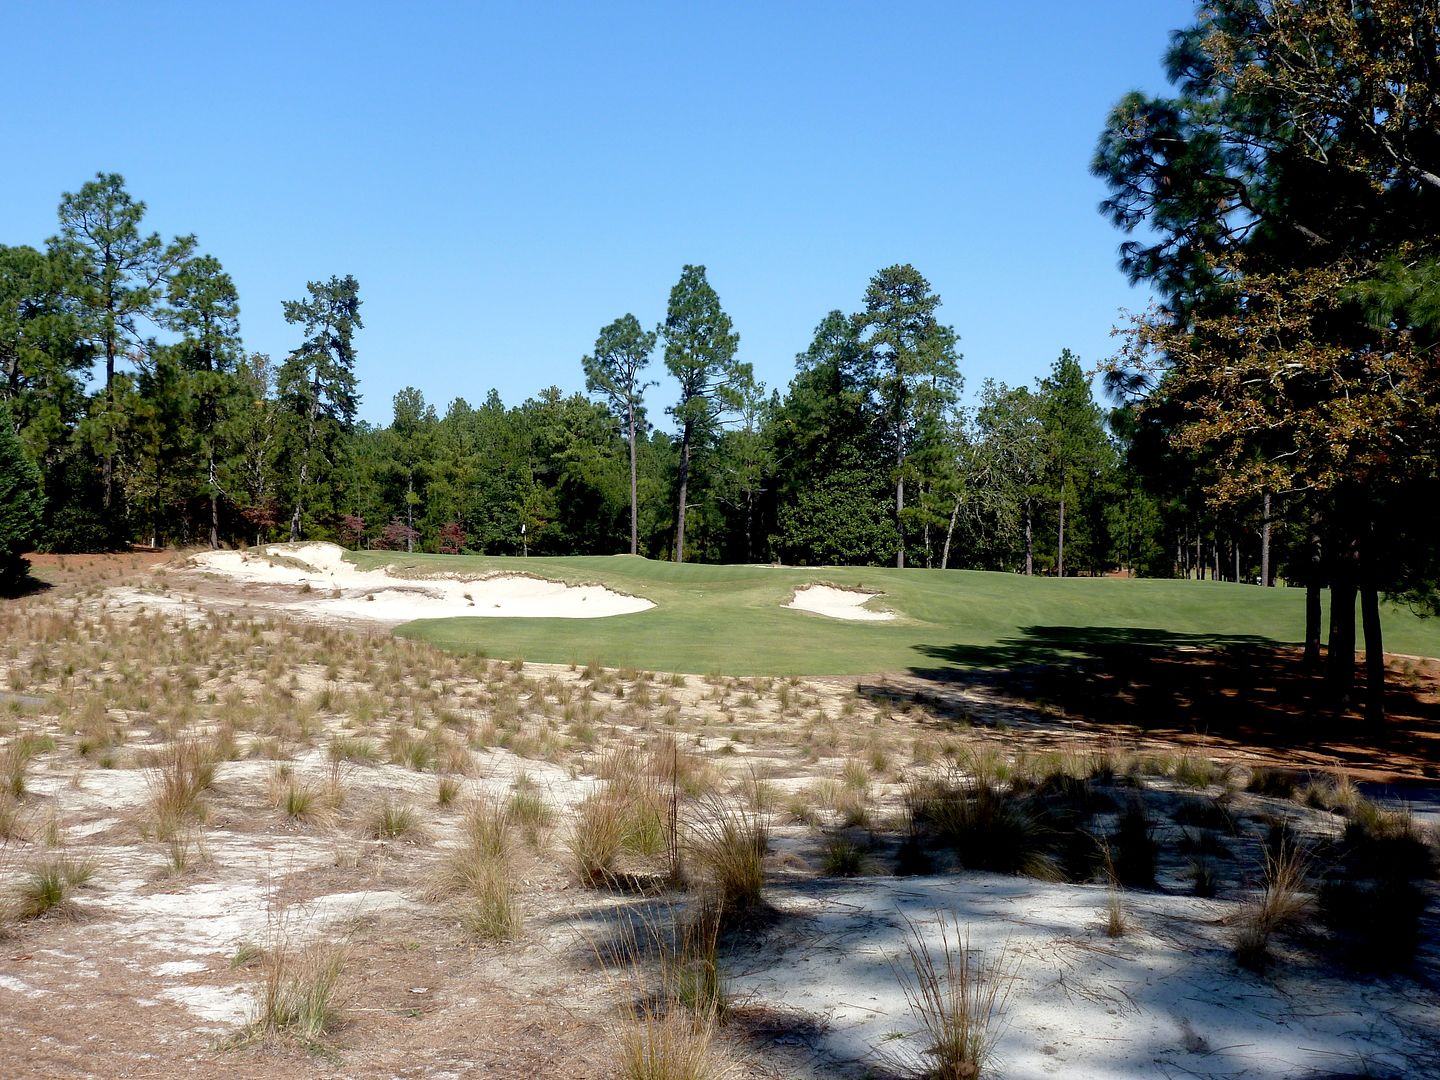
From Short of Green: From here it is easy to see the difference in elevation from back-left to front-right.
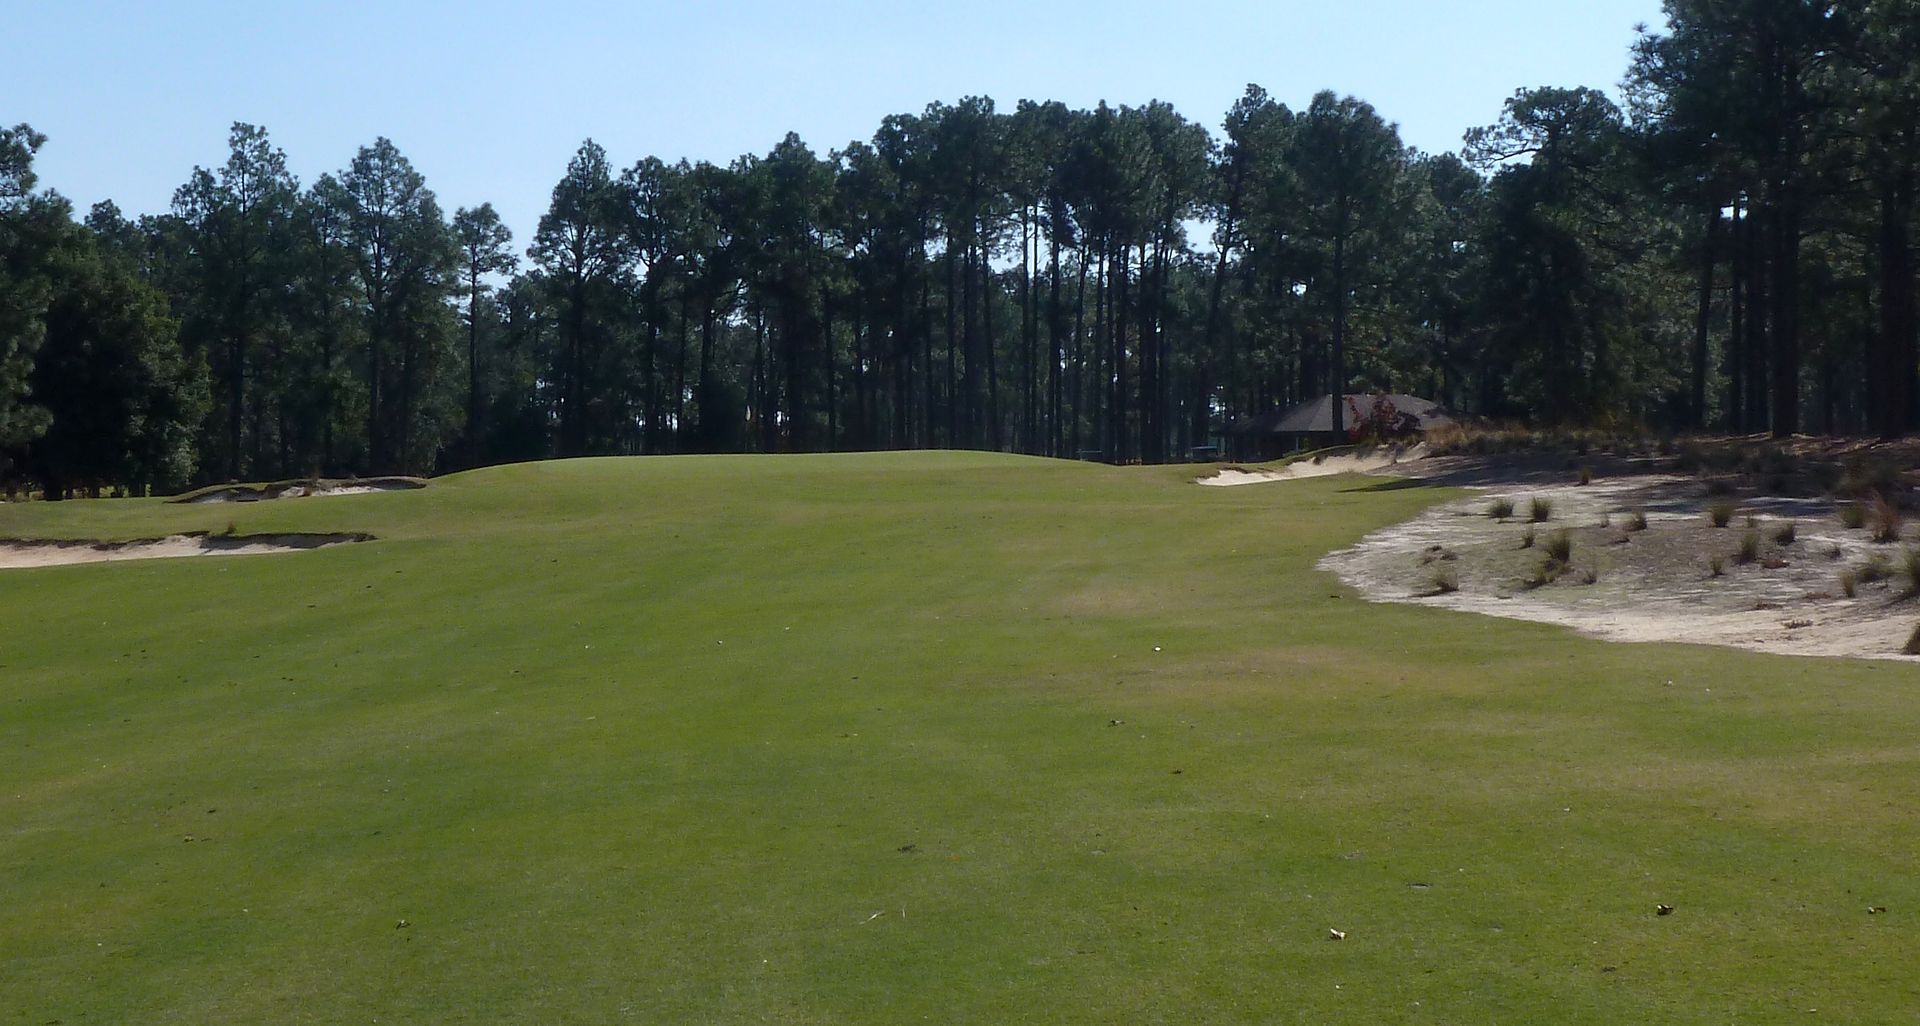
Green from Left:
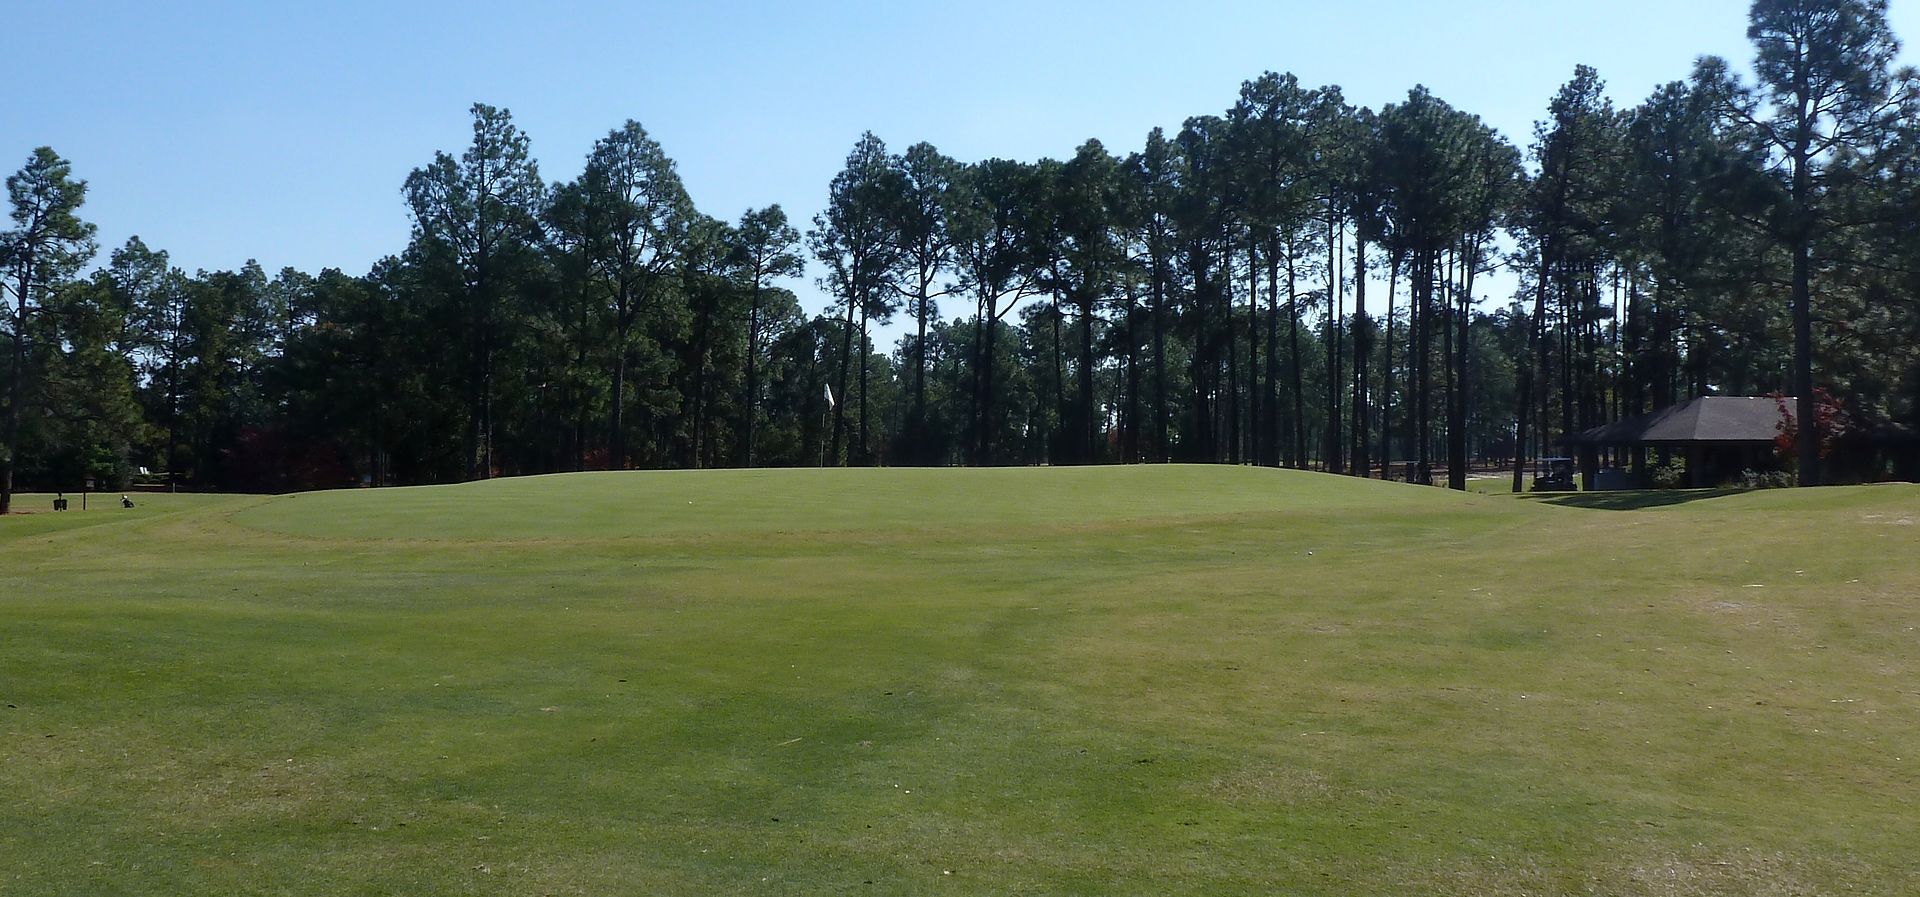
Green from Back-Left:
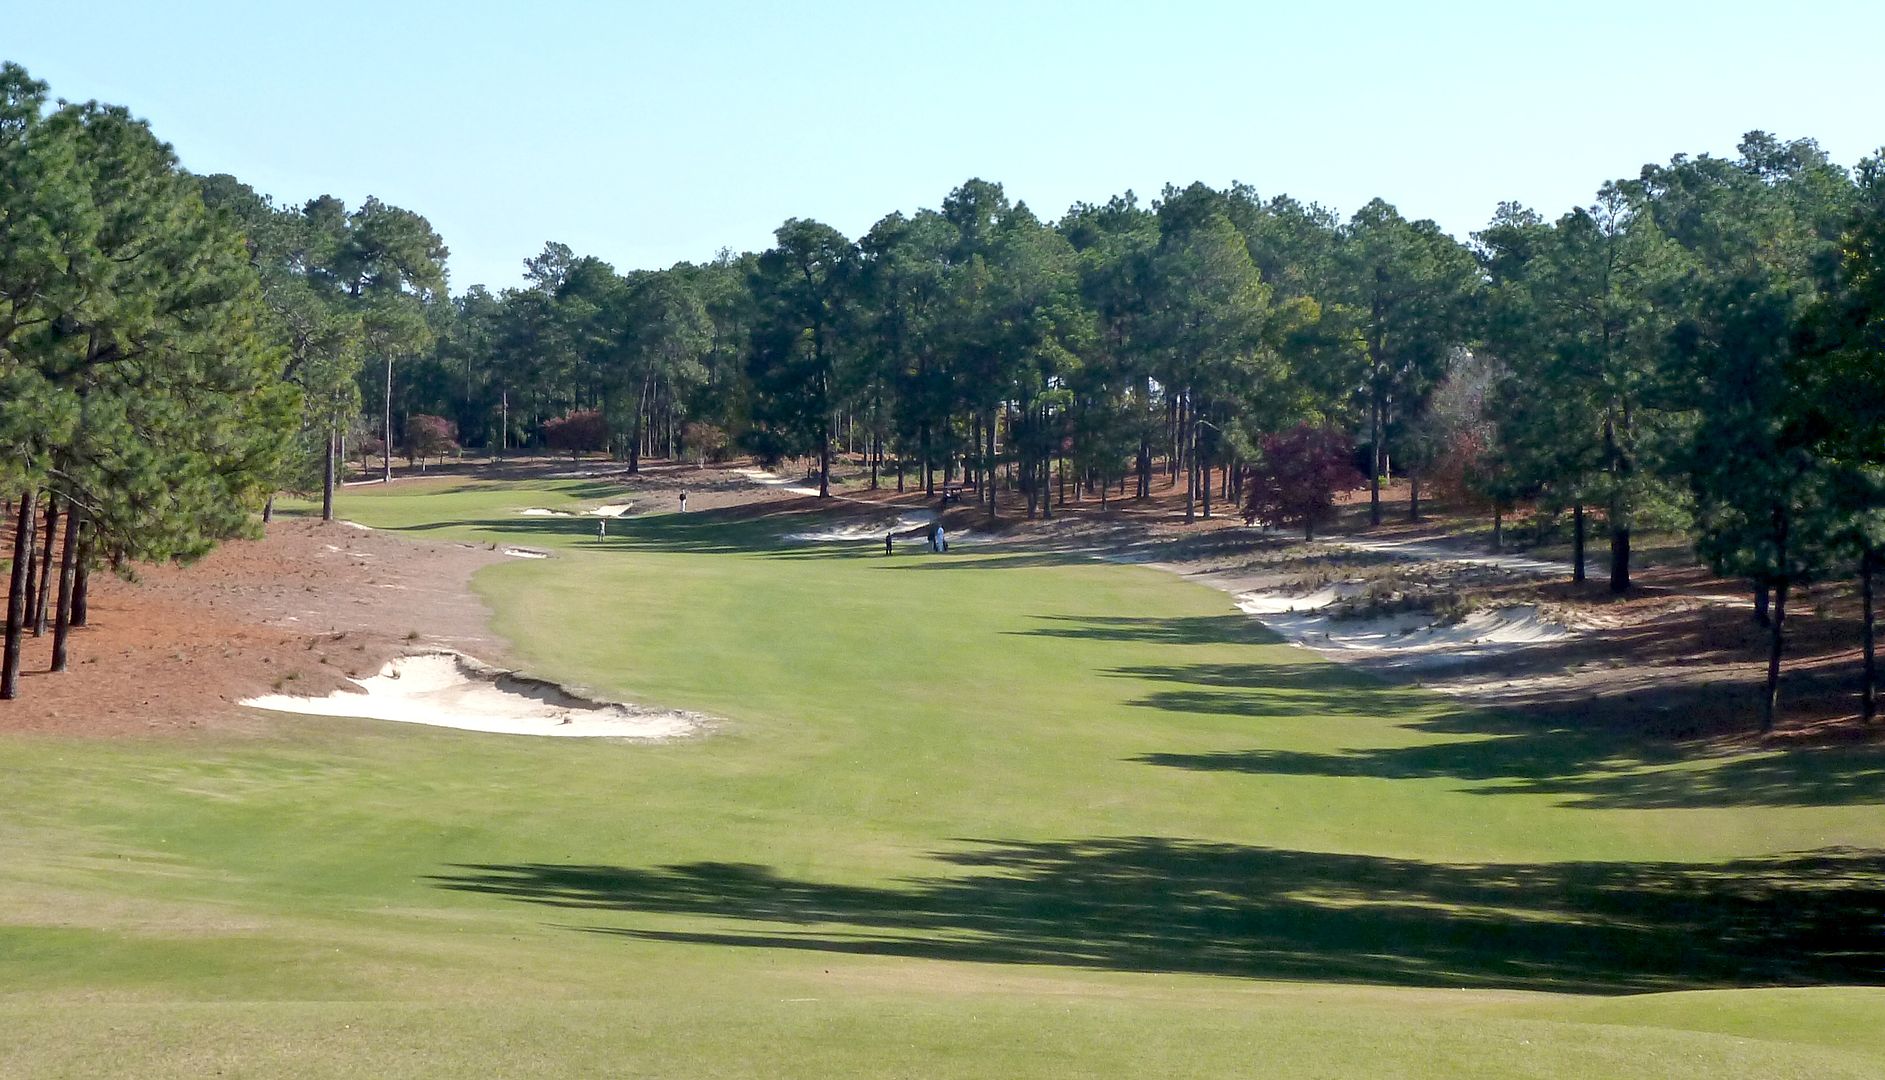
Hole 10: Par 5, 580 Yards [Tees were on the White Tee Box at 455 Yards]
2008 Aerial:

2011 Aerial:
If someone has a current picture of the back-tee view, please post/IM me as I'd like to add it to the tour
From the back tee, the tee shot must carry a gully to reach the uphill and semi-blind fairway. OB left and waste area right make this one of the most demanding tee shots on the golf course. The fairway narrows and jogs left about 250 yards from the blue tee. The fairway bunker on the left, at 280 yards uphill to reach from the blue tee, is more about visual intimidation than anything.
View from the white tee:
From Short of Fairway:
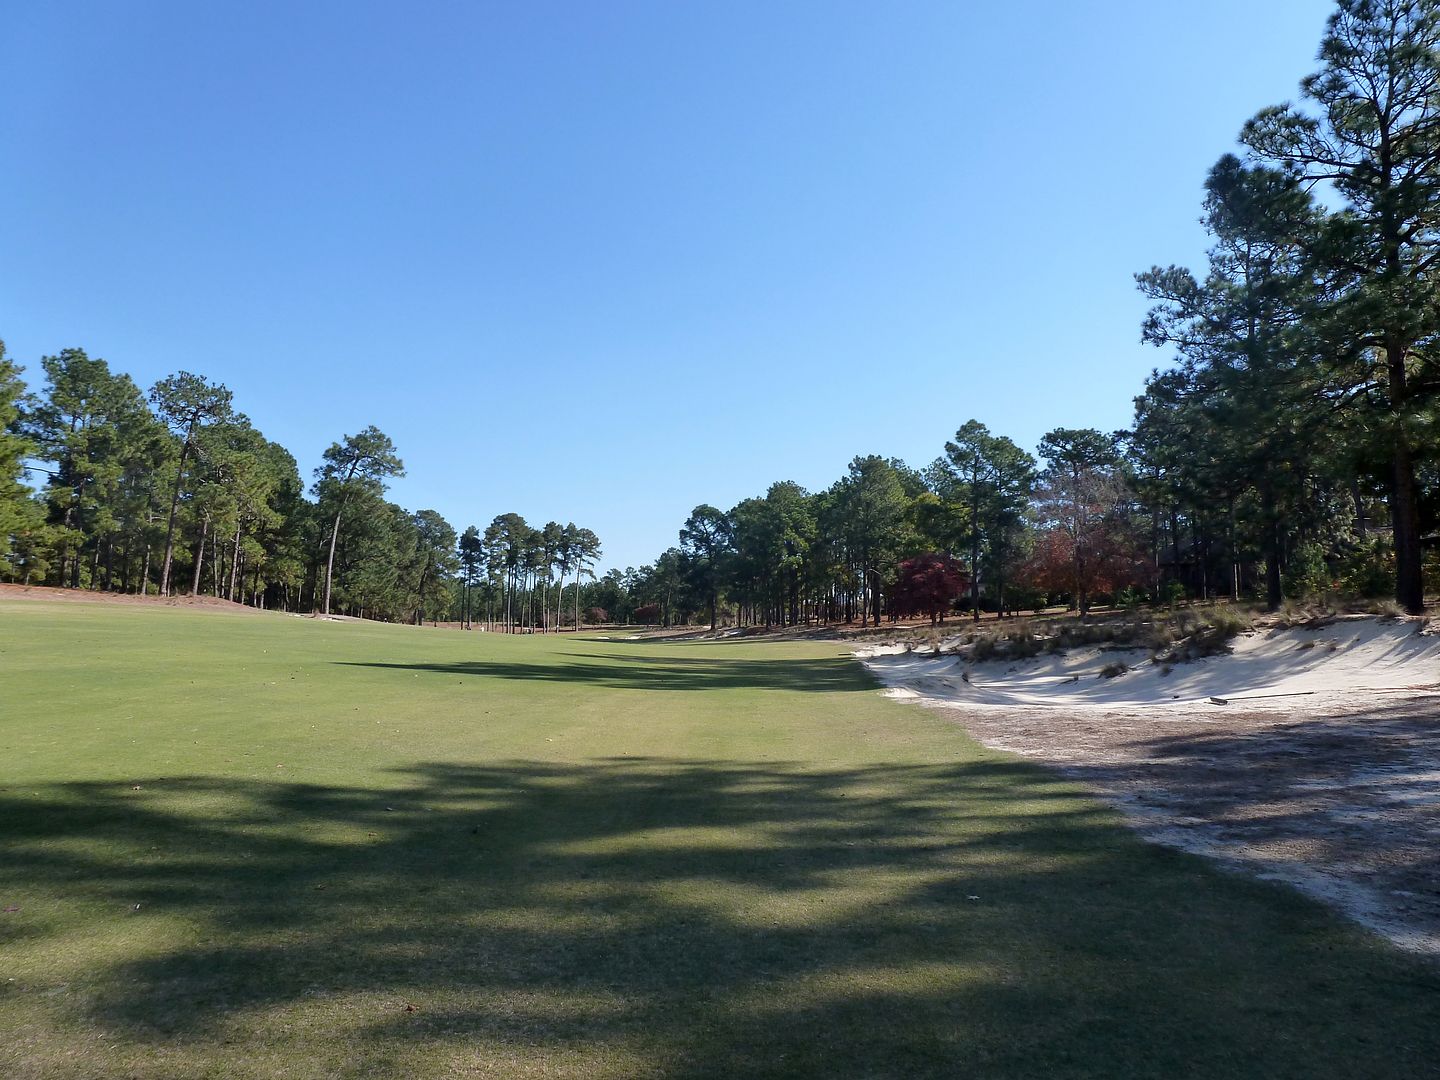
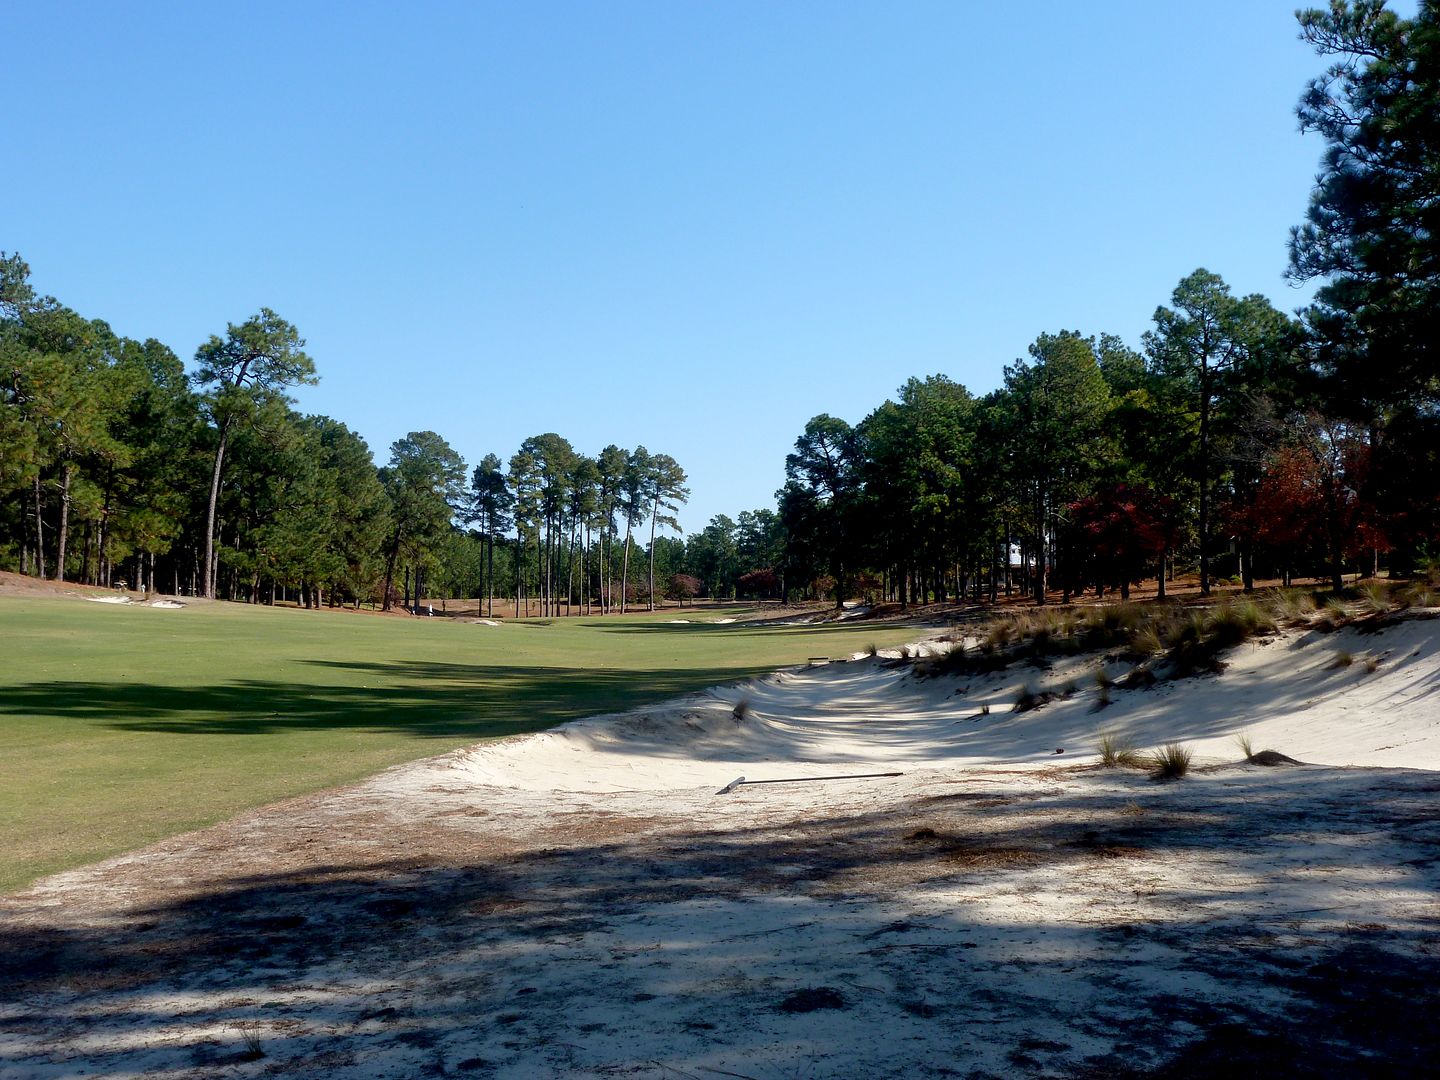
The 10th will be a 3-shot hole for almost everyone. 3 bunkers, staggered left, then right, then left, dot the lay-up area between 200 and 100 yards short of the green.
Playing from the moved up tees, this 2nd shot is played from near the first of those 3 bunkers, just over 200 yards from the green:
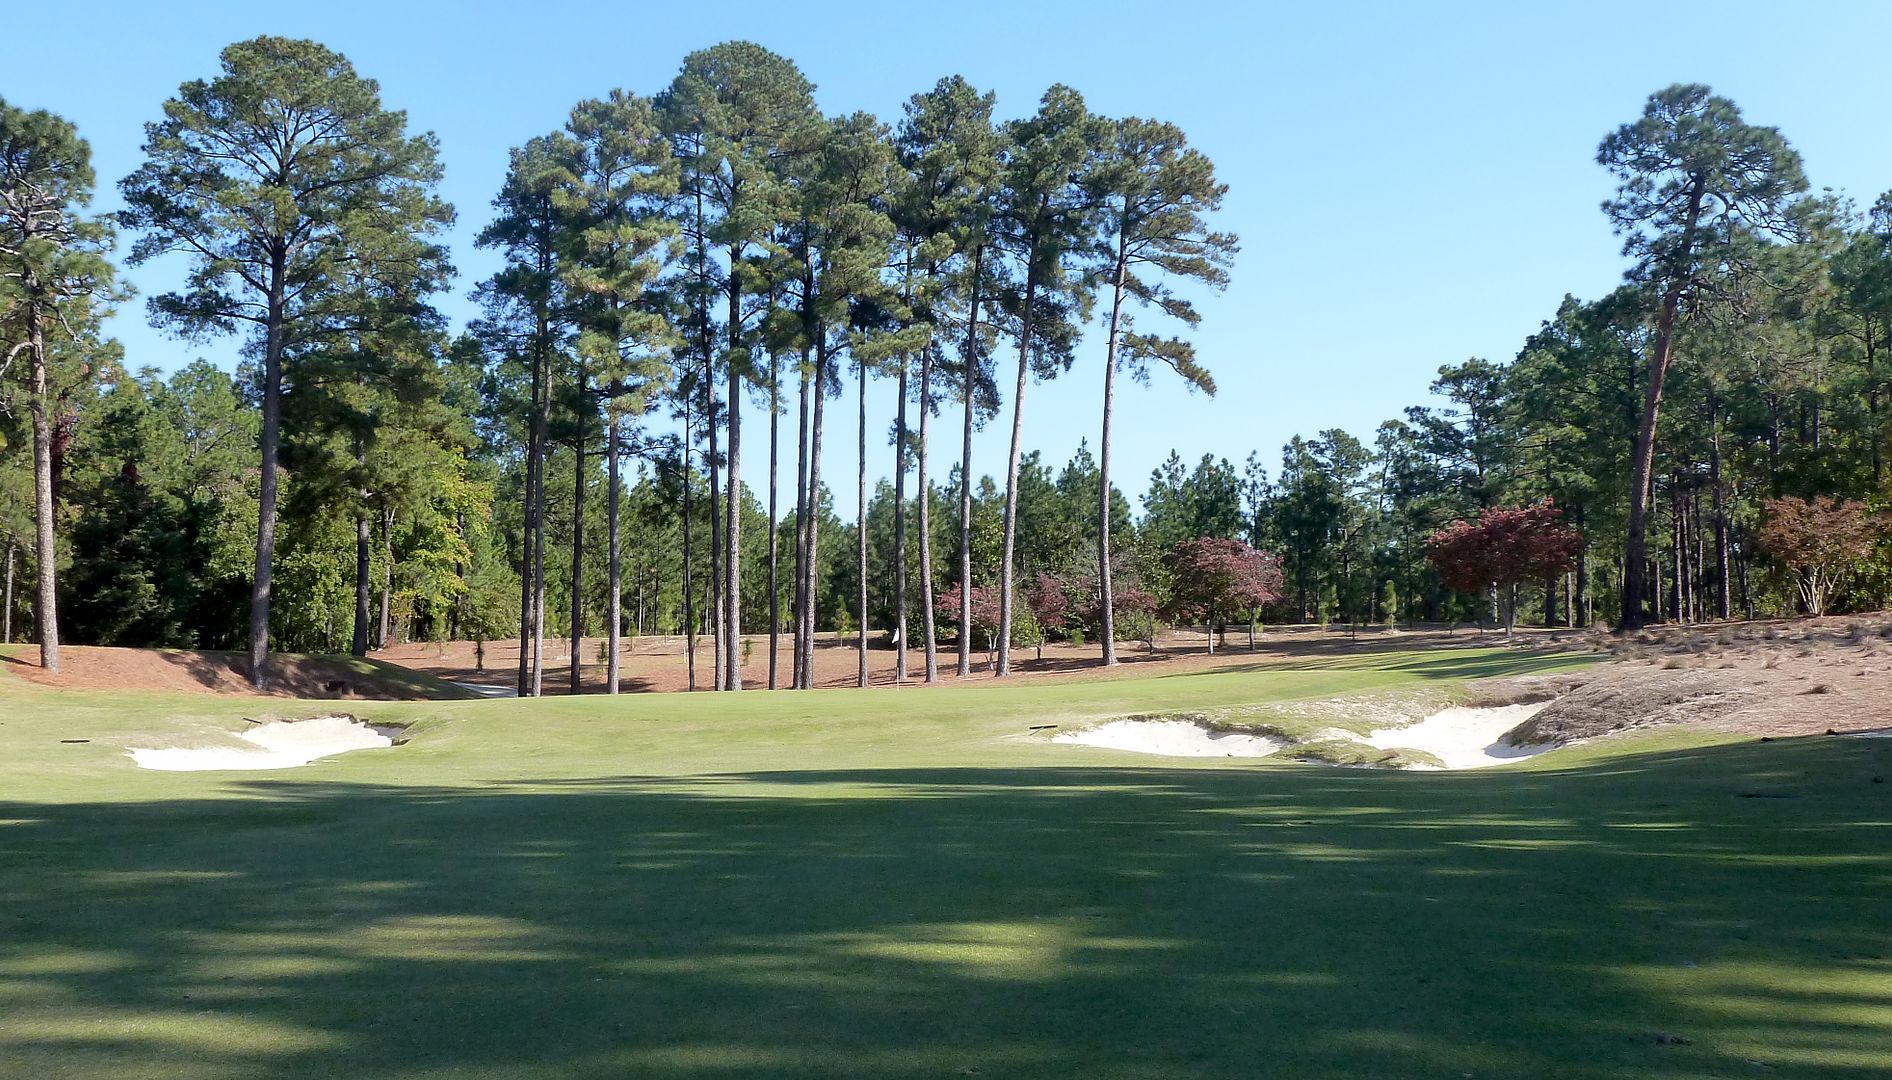
From Short of Green:
And from Behind:
Hole 11: Par 4, 453 Yards
2008 Aerial:
2011 Aerial:
A confusing tee shot at the 11th. Unlike the previous iteration of the hole, the current 11th has plenty of width, but the golfer is left wondering whether he is best to challenge the waste area on the right, or the single fairway bunker on the left 250 yards from the tee. The ideal line is defined by the pin location, which is cleverly located to be in clear view from the tee, though hardly a focal point for all but the most perceptive golfer.
Tee View:
From Short of the Fairway one gets a good sense of the nature of the scrub area:
Plenty of fairway width on the 11th:
A view from the right side of the fairway. Clear that the right side of the fairway is not the place to be if one wants to attack a right pin. From the left side of the fairway the golfer would have the option to run the ball onto the green and toward this pin position.
A closer look at the bunker complex that guards and hides the right side of the green:
And a look at the bunker complex from the green side:
From short-left of the green one can see how approaches from the left can access right-side pin locations:
Green as seen from right...
and from behind...
And the 11th pre-restoration (Courtesy C. Buie):
Hole 12: Par 4, 418 Yards
2008 Aerial:
2011 Aerial:
The aerials show the significant change that took place on the 12th. A fairway that was once a runway, with bunkers left and right floating in the rough, is now significantly widened out to the bunker edges and expanded beyond the one on the left to reward a golfer who challenges it.
It is 229 yards to get past the bunker on the left and 293 yards to reach the area where the fairway pinches to 22 yards in width. Though it may appear as though the fairway in the DZ is narrow because of some clever visual deception, there is plenty of room.
Tee View:
What is not clear from the tee is the ideal line into the green. A tee shot down the right will leave a shorter approach, but the view of the green will be blocked-out by bunkering short of the green. Approaching from the left gives the golfer a clear view of the putting surface and the opportunity to run the ball onto the green.
Approach from right:
Short of Green:
Green from Back-Left:
Hole 13: Par 4, 375 Yards
2008 Aerial:
2011 Aerial:
One of the best holes on the course, a short par-4 that will have many walking away scratching their heads after making 5. There is plenty of room to play to the left off the tee, but from that angle the approach is longer and must be played over a deep bunker short-left of the green. The ideal line is from the right, but the fairway gets narrower and narrower as the tee ball gets longer. 240 yards from the tee, a deep bunker guards the inside of the dogleg. From here it is difficult to reach the green.
Tee View:
From start of fairway:
This picture gives a good idea of the angled right side of the fairway, that causes a narrowing of the DZ the longer the shot:
Approaches played from the right side of the fairway are ideal and should take the penal green side bunkering out of play.

Even better, tee balls that carry the bunkers on the right will leave just a (not so simple) pitch up the hill. Not many golfers will be playing their second shots from here... Third shots are likely more common.
From short-right of green shows the depth of the bunkering and the significant false-front on the 13th green:
Green from Right:
13th from Behind:
Looking down 13 and 14:
Hole 14: Par 4, 438 Yards
2008 Aerial:
2011 Aerial:
Along with the 4th, one of only two tee shots that plays significantly downhill. It is 240 yards from the tee to lay-up to the bunker on the left into the widest point of the fairway. It is 280 yards past the bunker.
While the single bunker on the left will have many golfers playing out to the right, perhaps the ideal tee shot is a lay-up down the left.
Tee View:
From short of fairway:
Fairway as seen from 13:
One of the most cleverly bunkered greens I've ever seen. Deep bunkers front the green both short-left and short-right, perhaps making the golfer take an extra club to avoid them. But these bunkers are well short of the green, and all of the trouble is pin-high or long.
Approach:
As seen from short of the green, there is plenty of room over the bunkers and missing short is not a problem.
But missing left will find a collection area with a huge hump in its centre. While recoveries from here are difficult, recoveries from the very deep run-off long are almost impossible.
Hole 15: Par 3, 183 Yards
2008 Aerial:
2011 Aerial:
A very innocuous par-3.. no scary bunkers, no OB, no hazards... but a very difficult par. The green is a plenty wide target, but the emphasis here is controlling distance. A very large false-front will send balls on the first 1/4 of the green trundling off the front. A slope at the back edge of the green will send shots just a bit long on a journey toward the 16th fairway.
Tee View:
From short-right of green:
From left:
From 16th Tee:
Hole 16: Par 5, 511 Yards
2008 Aerial:
2011 Aerial:
Check out those aerials, what an improvement in mowing lines!!
The tee shot on the 16th is over the only water hazard on the course [it shouldn't be in play] and asks the golfer to choose his line carefully as the fairway lies at a diagonal to the tee. It is 255 yards over the entire left bunker, and a trio of bunkers lay through the fairway on the right at 280 to catch those longer hitters that do not judge the angle of the tee shot correctly.
Tee View:
After successfully finding the fairway, many golfers will have a go at this short par-5 in two. Menacing bunkering guards the right side of the green, nudging the golfer left on the approach.
Approach from 240:
Approach from left from around 225:

Those laying-up will play into the bottom of a small valley. Completely hidden from view from the fairway on the 2nd shot is bunker guarding the left-side of the fairway that, unlike most bunkers at P2, does not have a flashed face, thus keeping it hidden from view. The ambiguity of the lay-up shot makes it much more difficult (and interesting).
The hidden bunker:
Approach from 115:
Green from back-left:

Green from 17th tee:
Hole 17: Par 3, 180 Yards
2008 Aerial:
2011 Aerial:
Depending on pin position, the 17th can be a final opportunity to make a birdie, or the beginning of a brutally tough finish when combined with the 18th.
Interestingly, this is the only par-3 where a left-to-right tee shot is the preference. Simple design variety is very effective.
Tee View:
Short of Green:
Green from Behind:
Hole 18: Par 4, 430 Yards
2008 Aerial:
2011 Aerial:
It's about 240 yards to carry the massive and intimidating fairway bunker on the right. Clearly the preferred line into the green is from the right alongside the fairway bunker, but bunkering short and left of the green mean that no line will have an easy approach.
Back Tee View:
White Tee View:
Approaches from the right must carry natural waste area 20 yards short of the green:
From Behind:
You started on 10, didn't you? Shadows really threw me for a loop mid way through the tour.
ReplyDelete