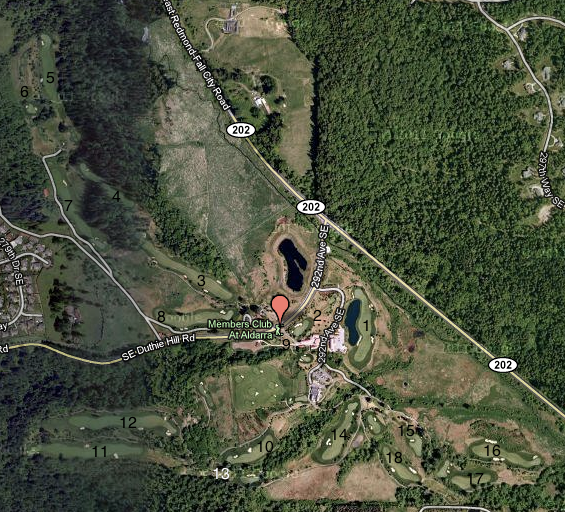
The Members Club at Aldarra
Sammammish, Washington, USA
Architect: Tom Fazio,
Par 71, 6,885 Yards
Rating/Slope: 74.0/147
My Quick Review: Varied terrain, the boldest Fazio greens I've seen and a great set of par-4s make this a must-play in the Seattle area.
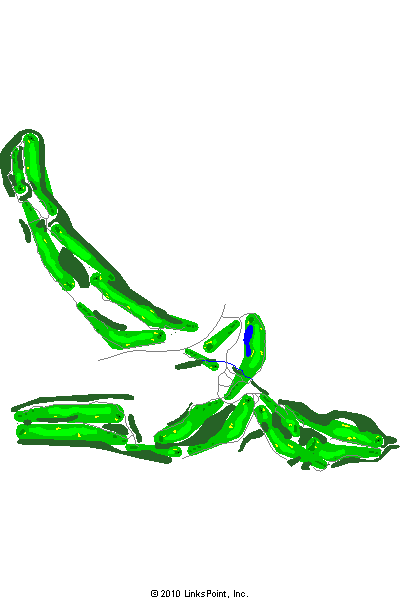
The Routing
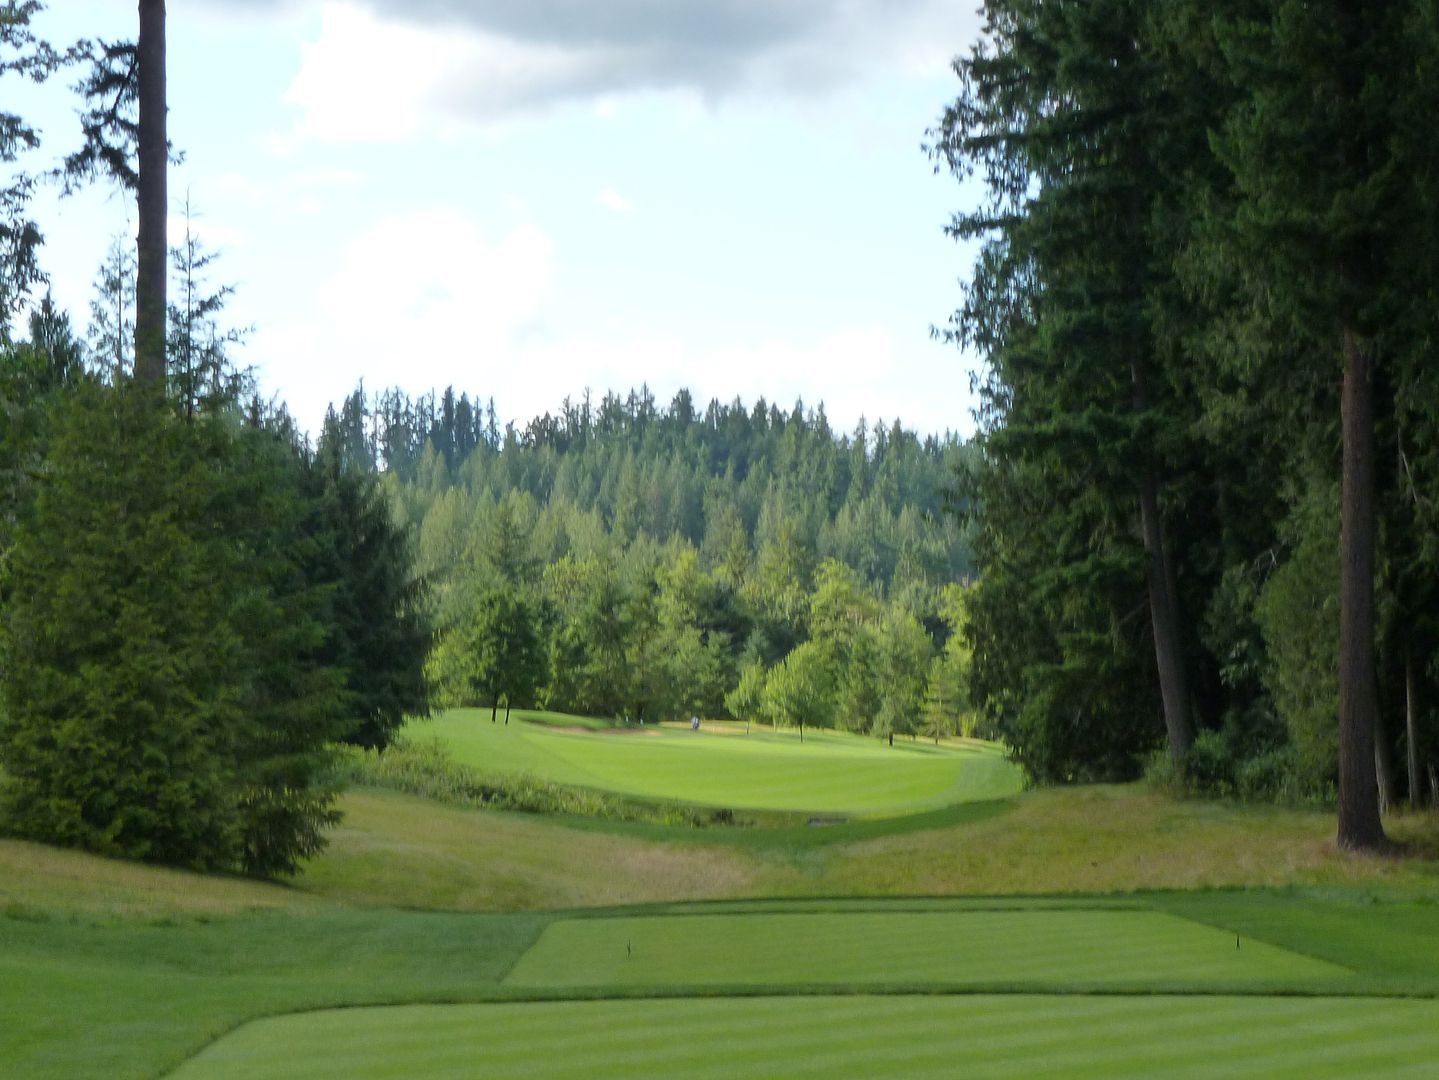
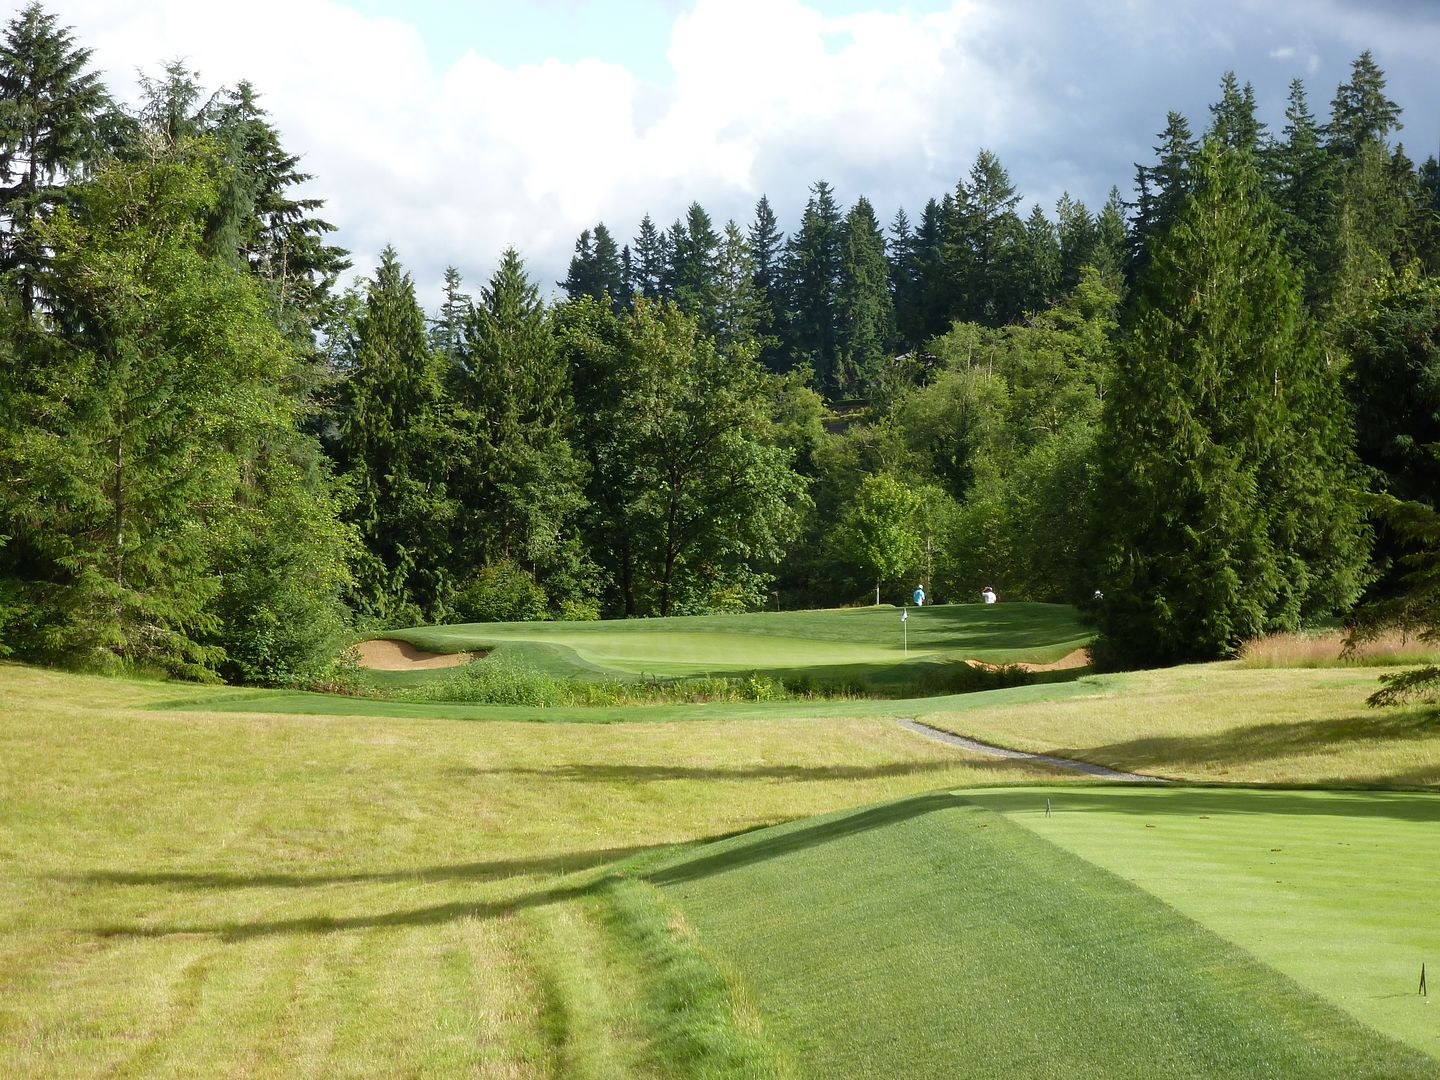
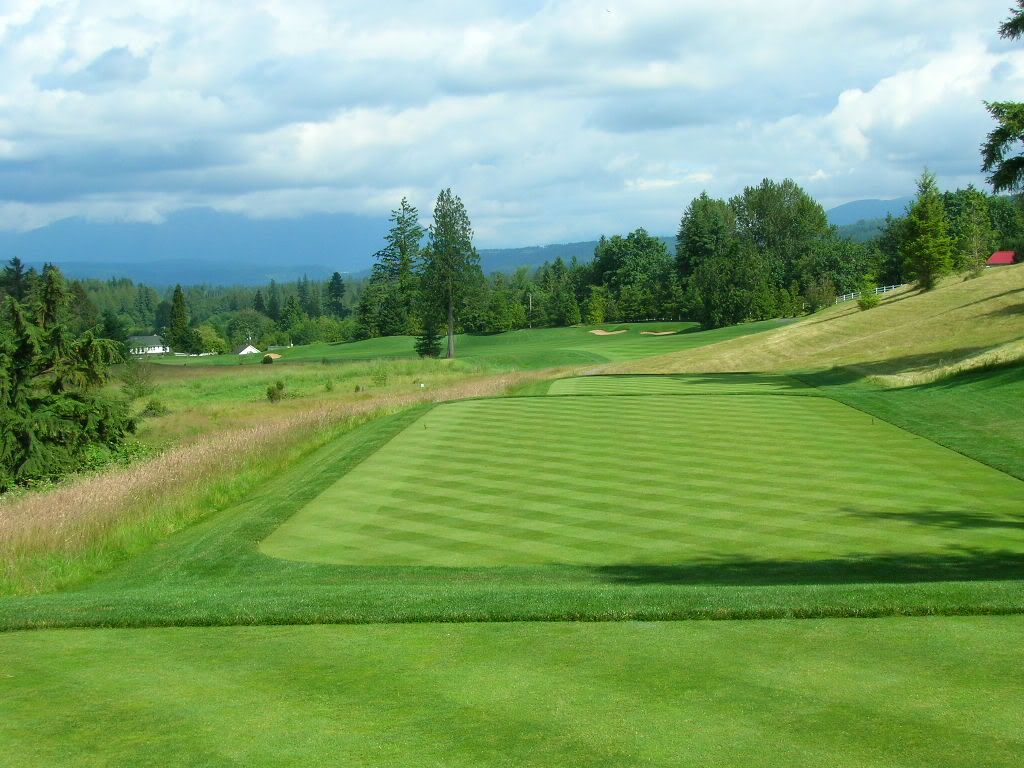
Hole 1: Par 4, 417 Yards
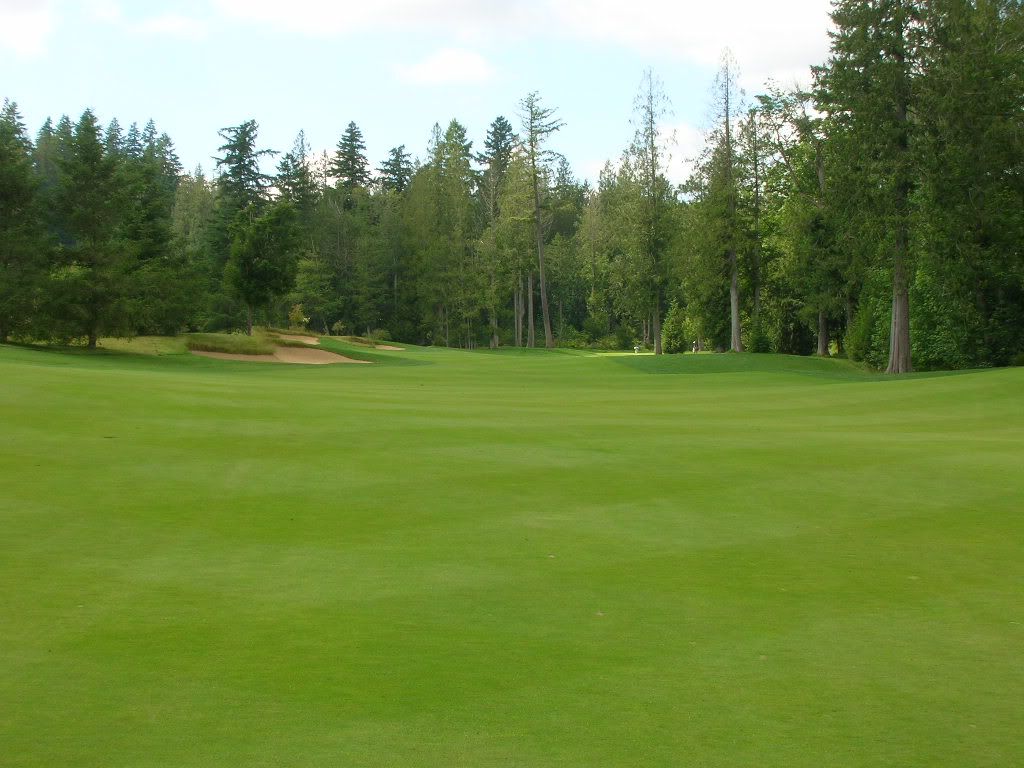
Playing #1 - The play for the longer hitter is directly over the bunker on the left side (A). This will leave a short approach shot to a two-tiered green. The shorter hitter should aim towards the right bunkers (B) and approach the green from the right side, taking the water out of play.
Aldarra is known as a player's golf course and right of the gate it shows some teeth. The first tee shot asks if you brought your game today with water and bunker left and bunker through the fairway.
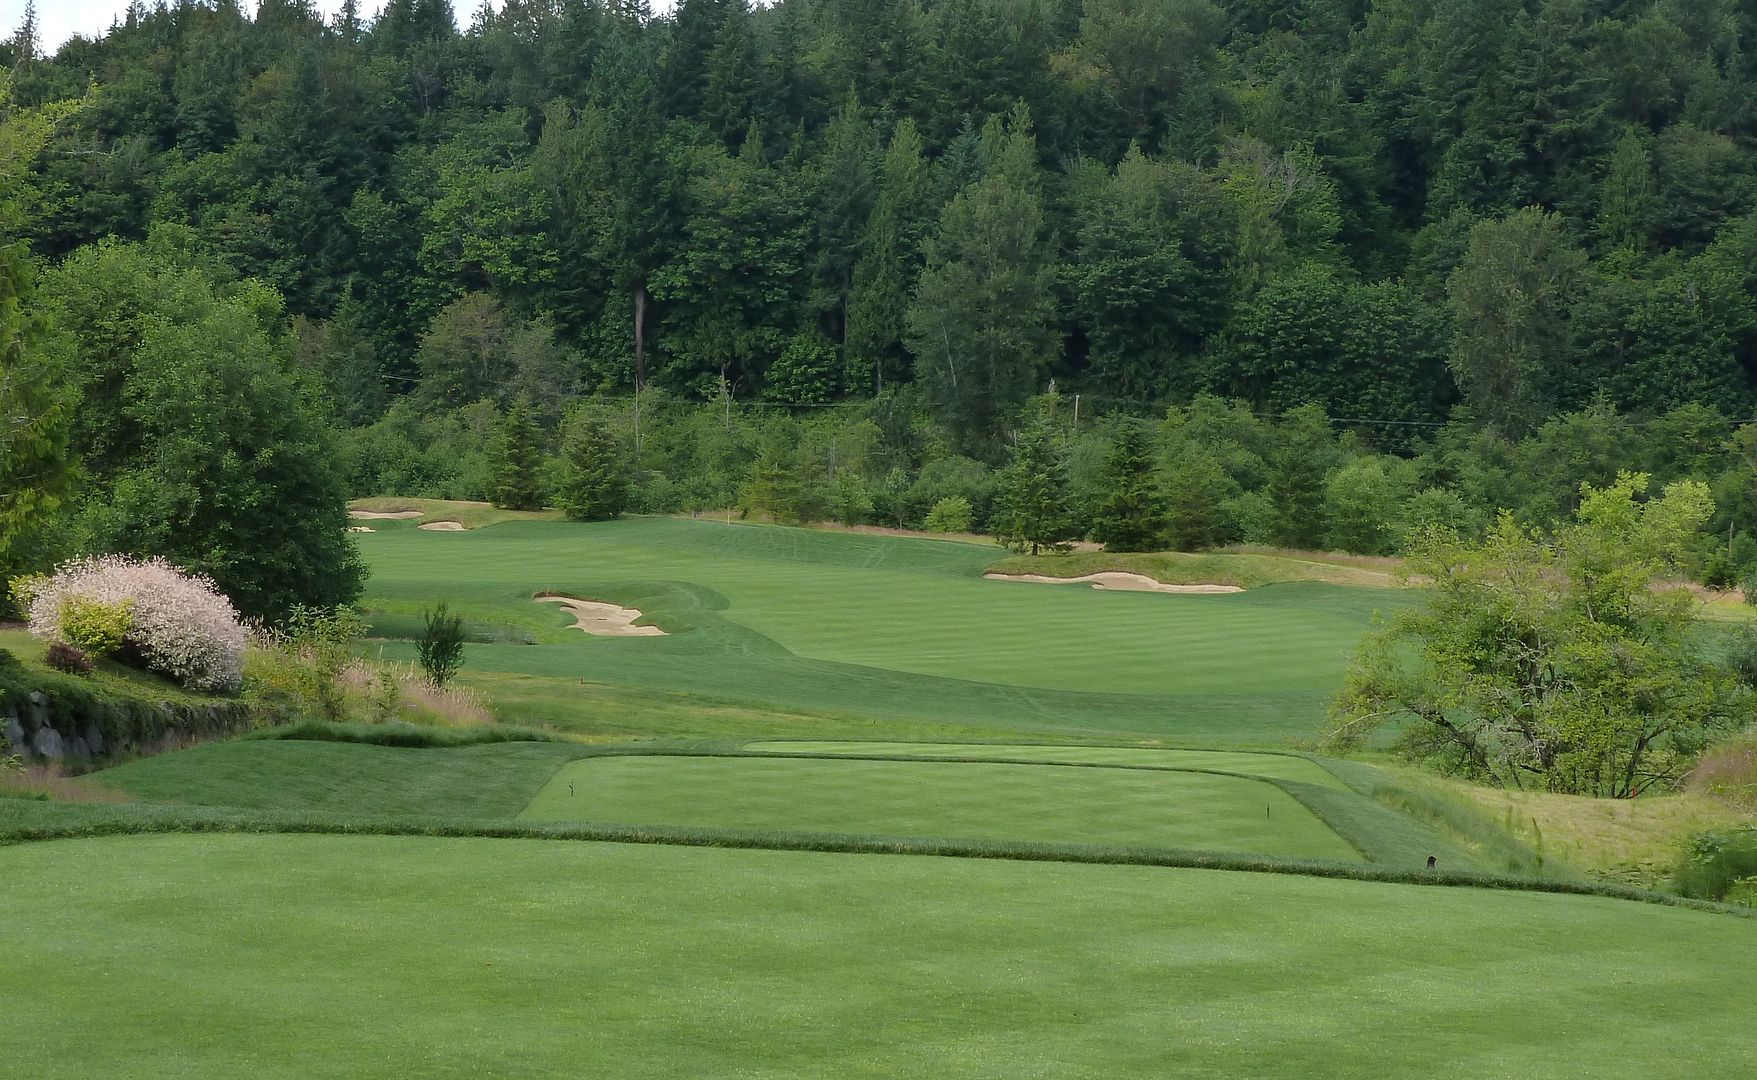
Interestingly, while tee shots down the left leave a shorter approach, they leave an approach that requires a forced carry over the water.
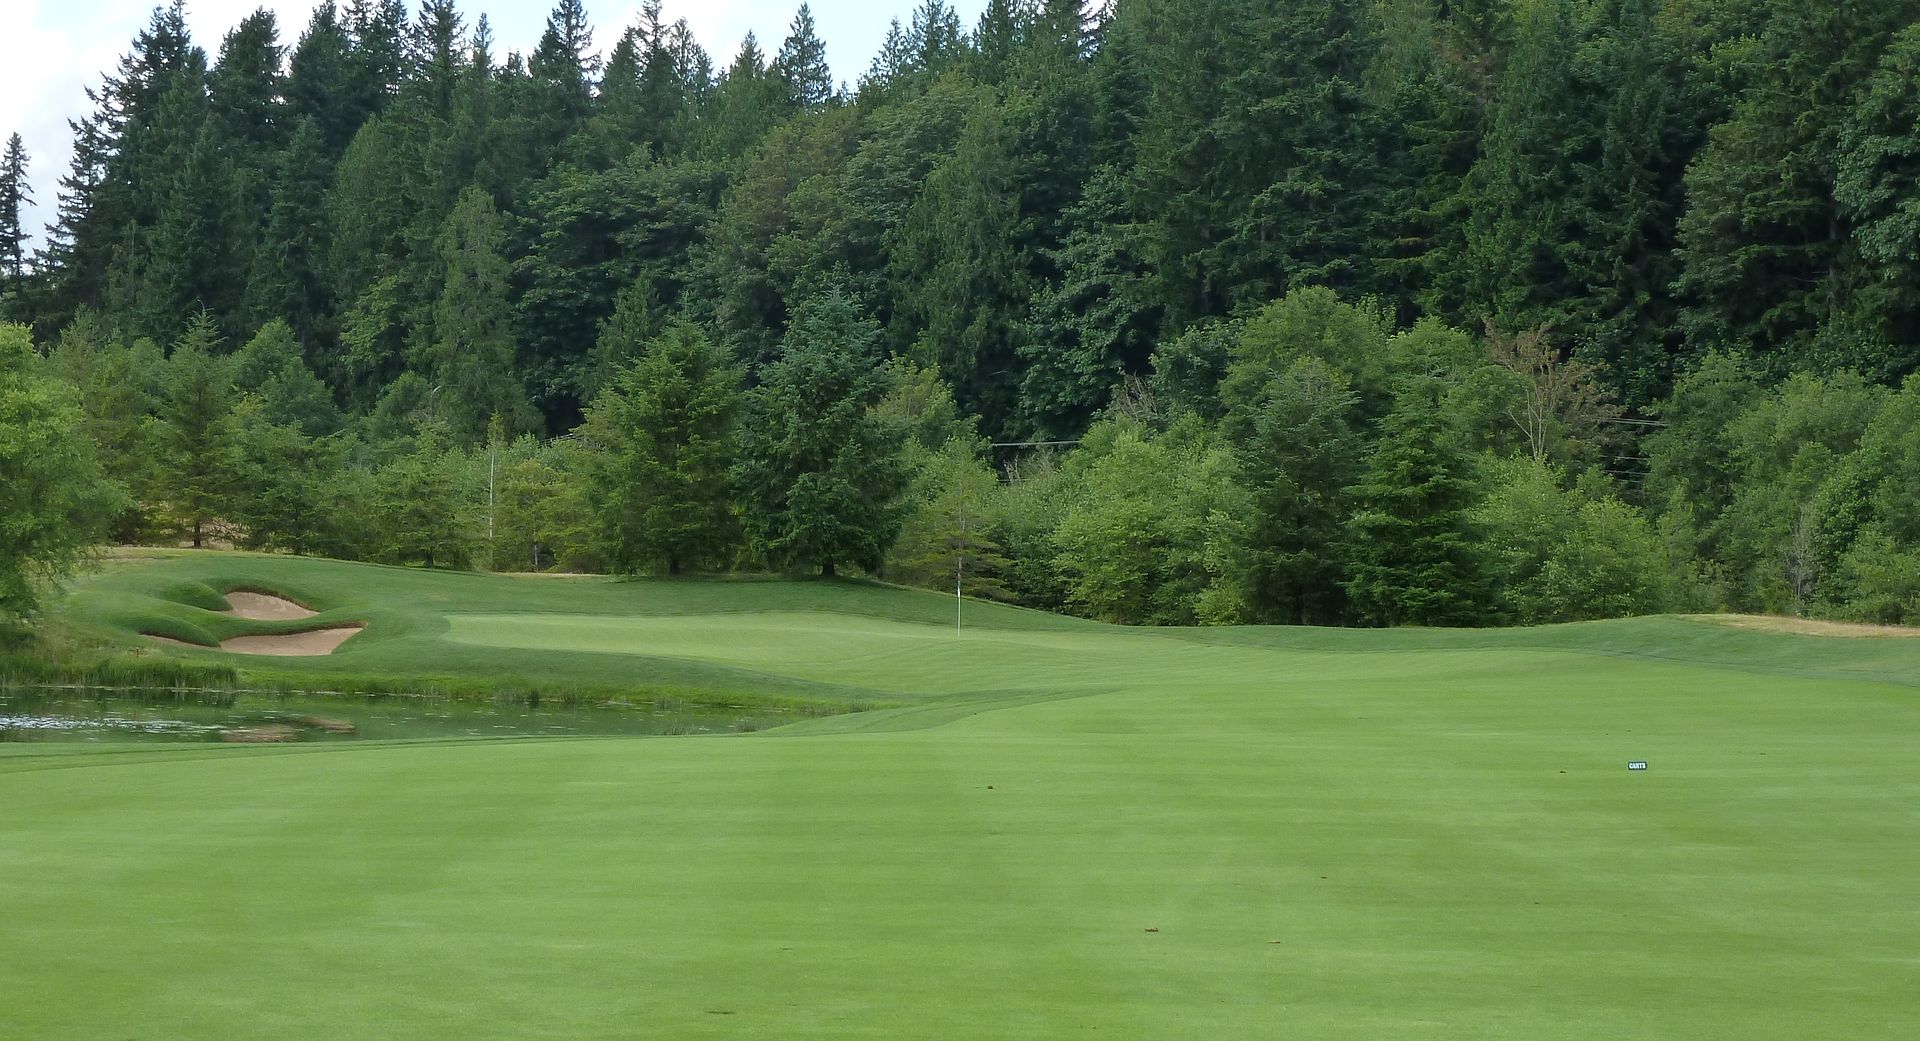
Tee shots up the right give a better look at the open green front:
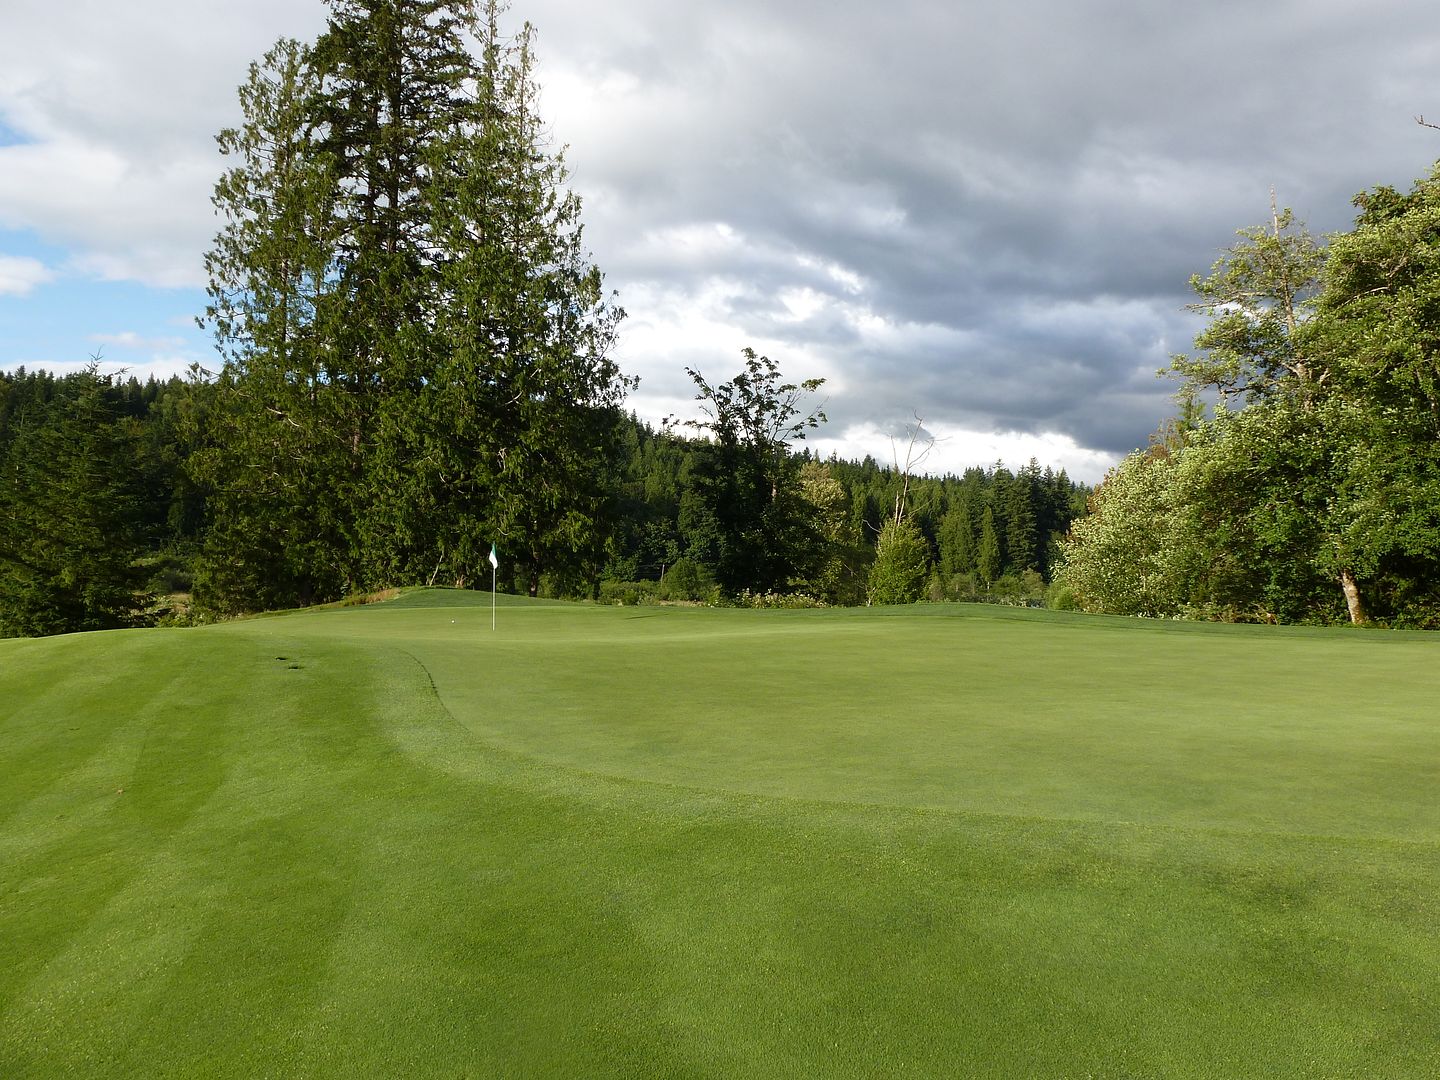
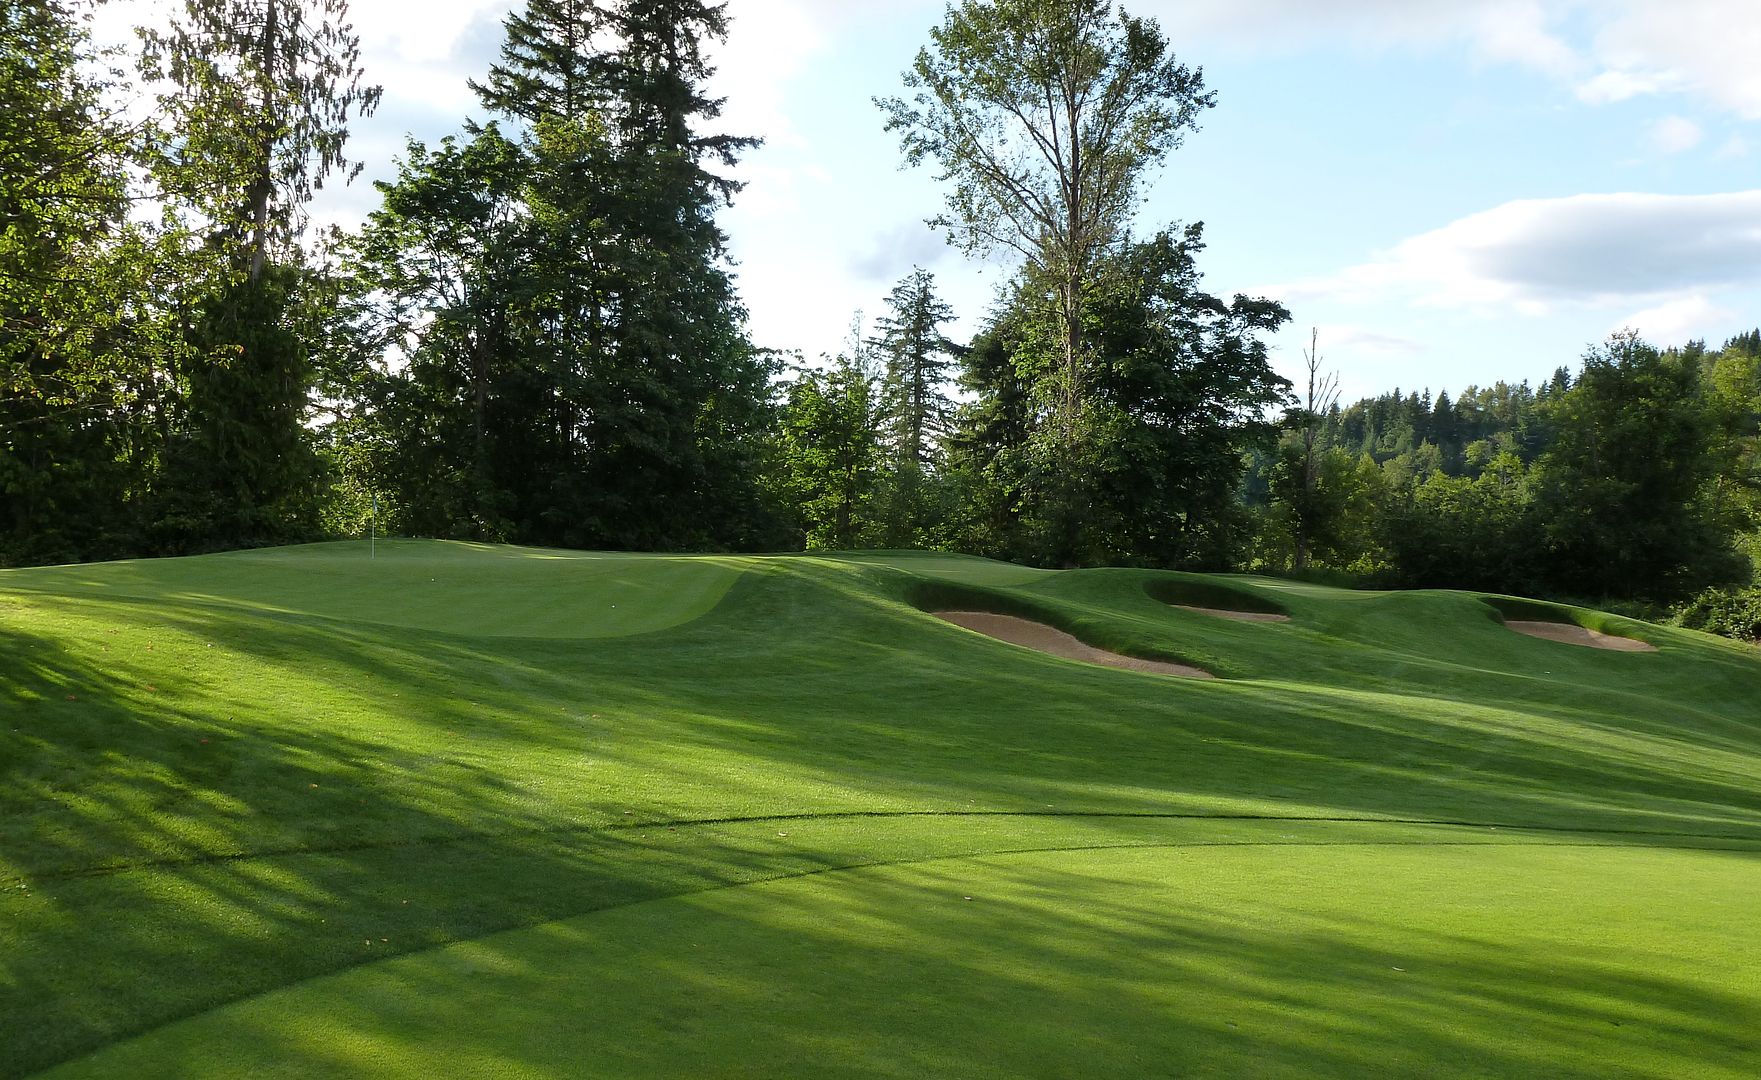
The first green gives an idea of the contouring one can expect at Aldarra. There is a large bowl in the front left portion of the green and a small, but significant ridge that bisects the back portion of the green:
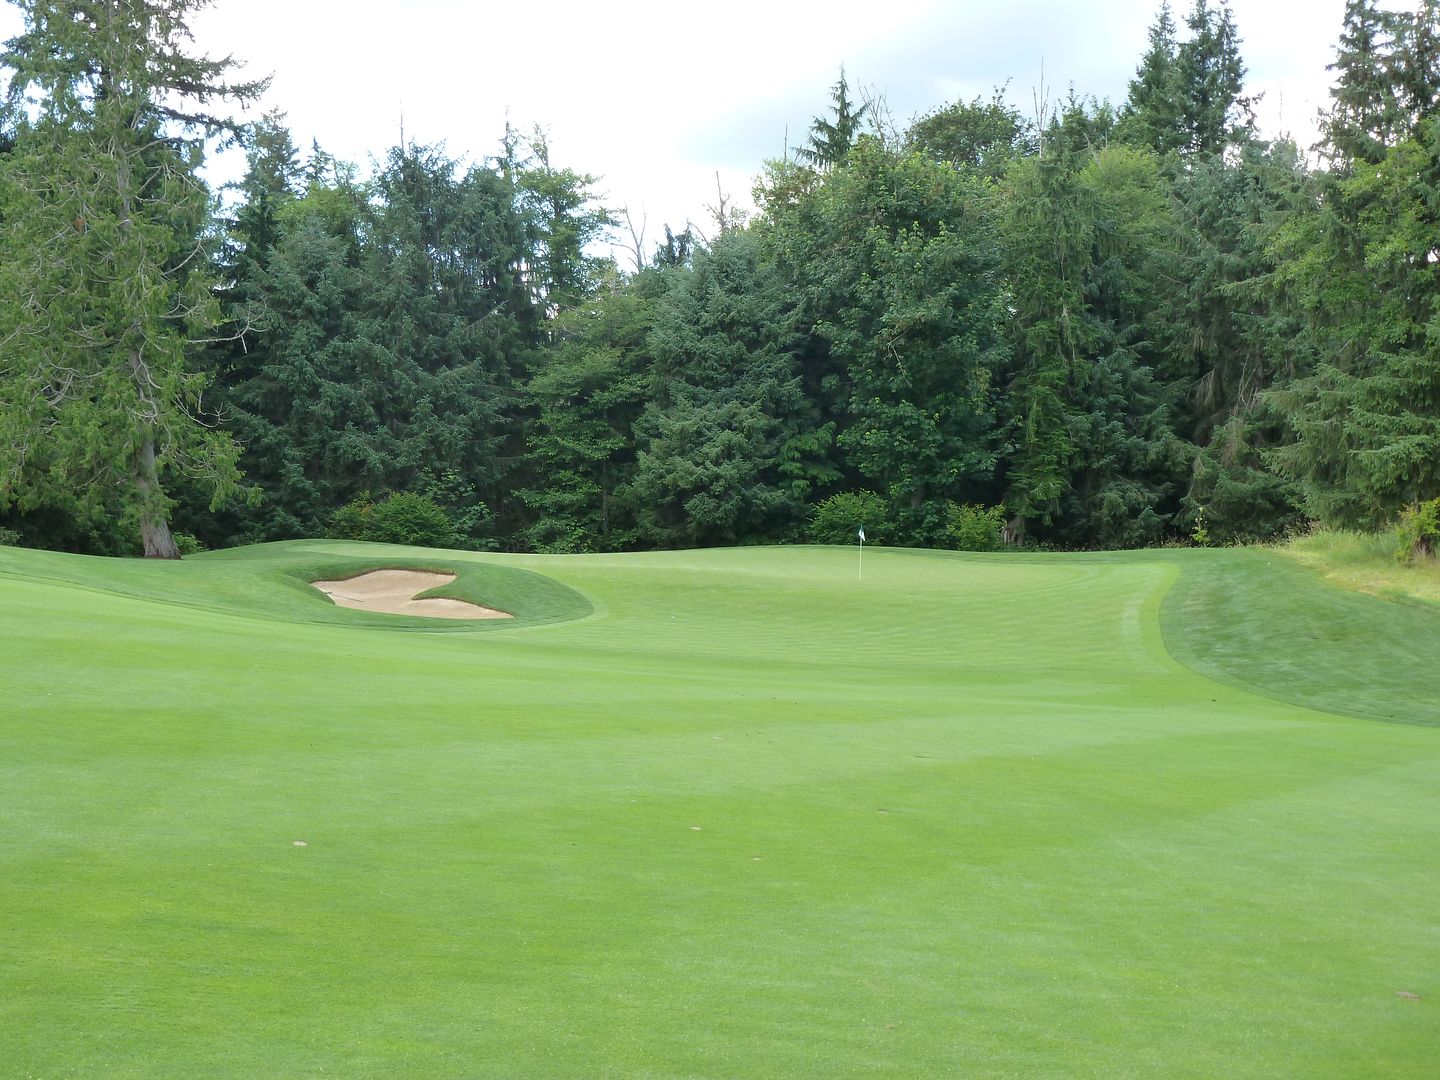
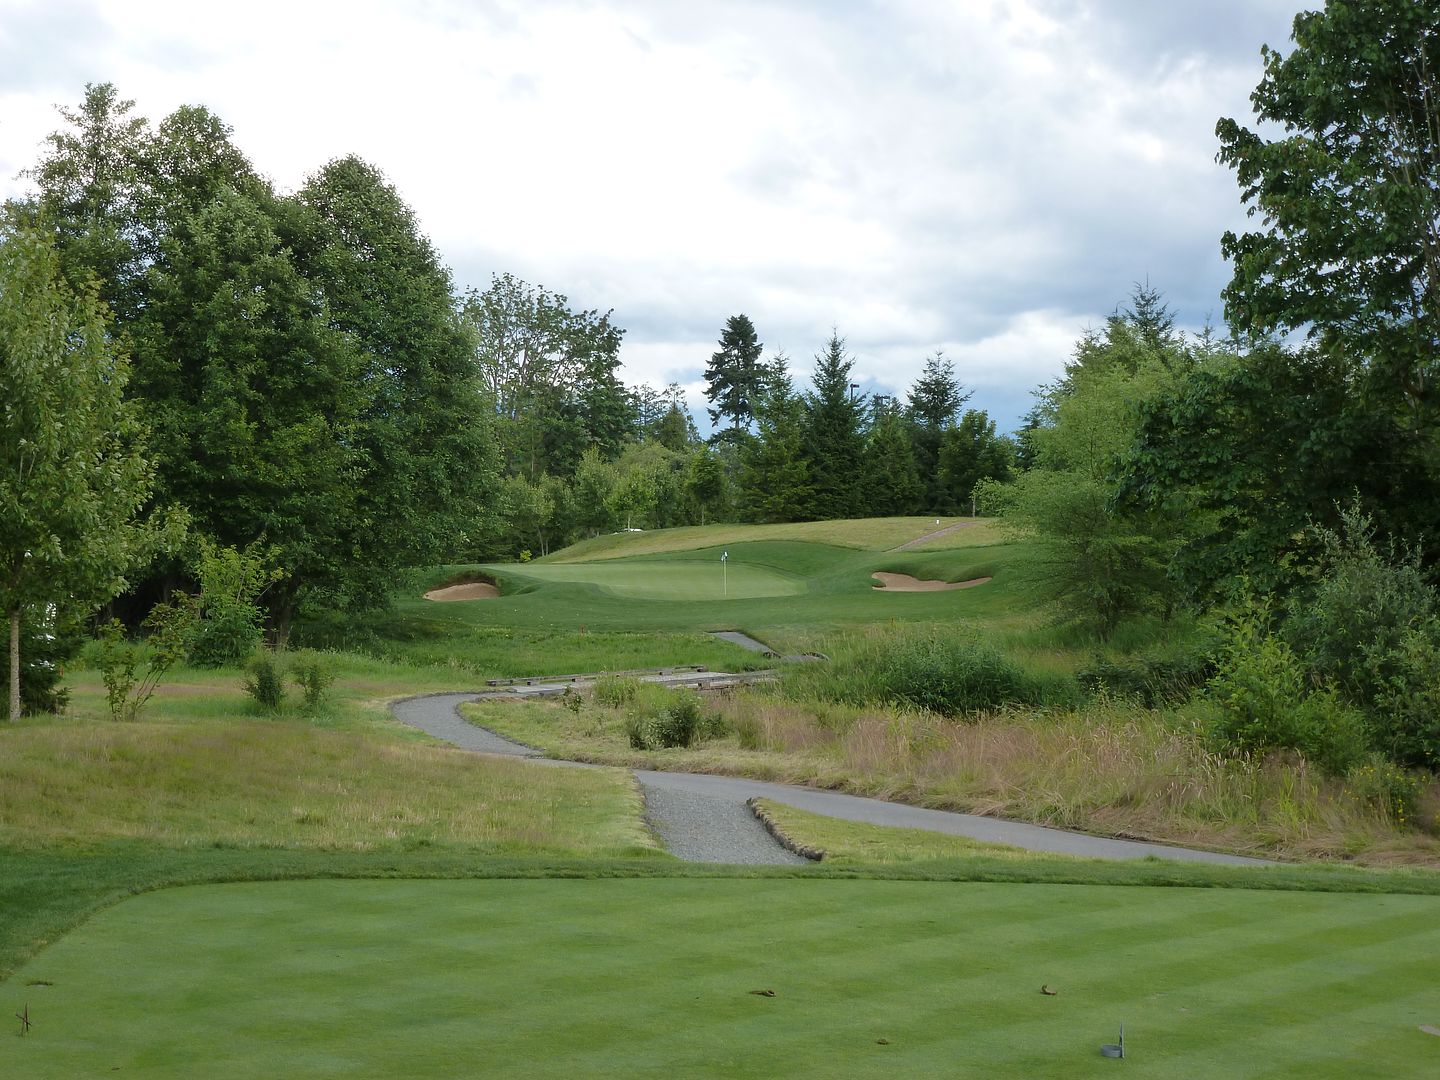
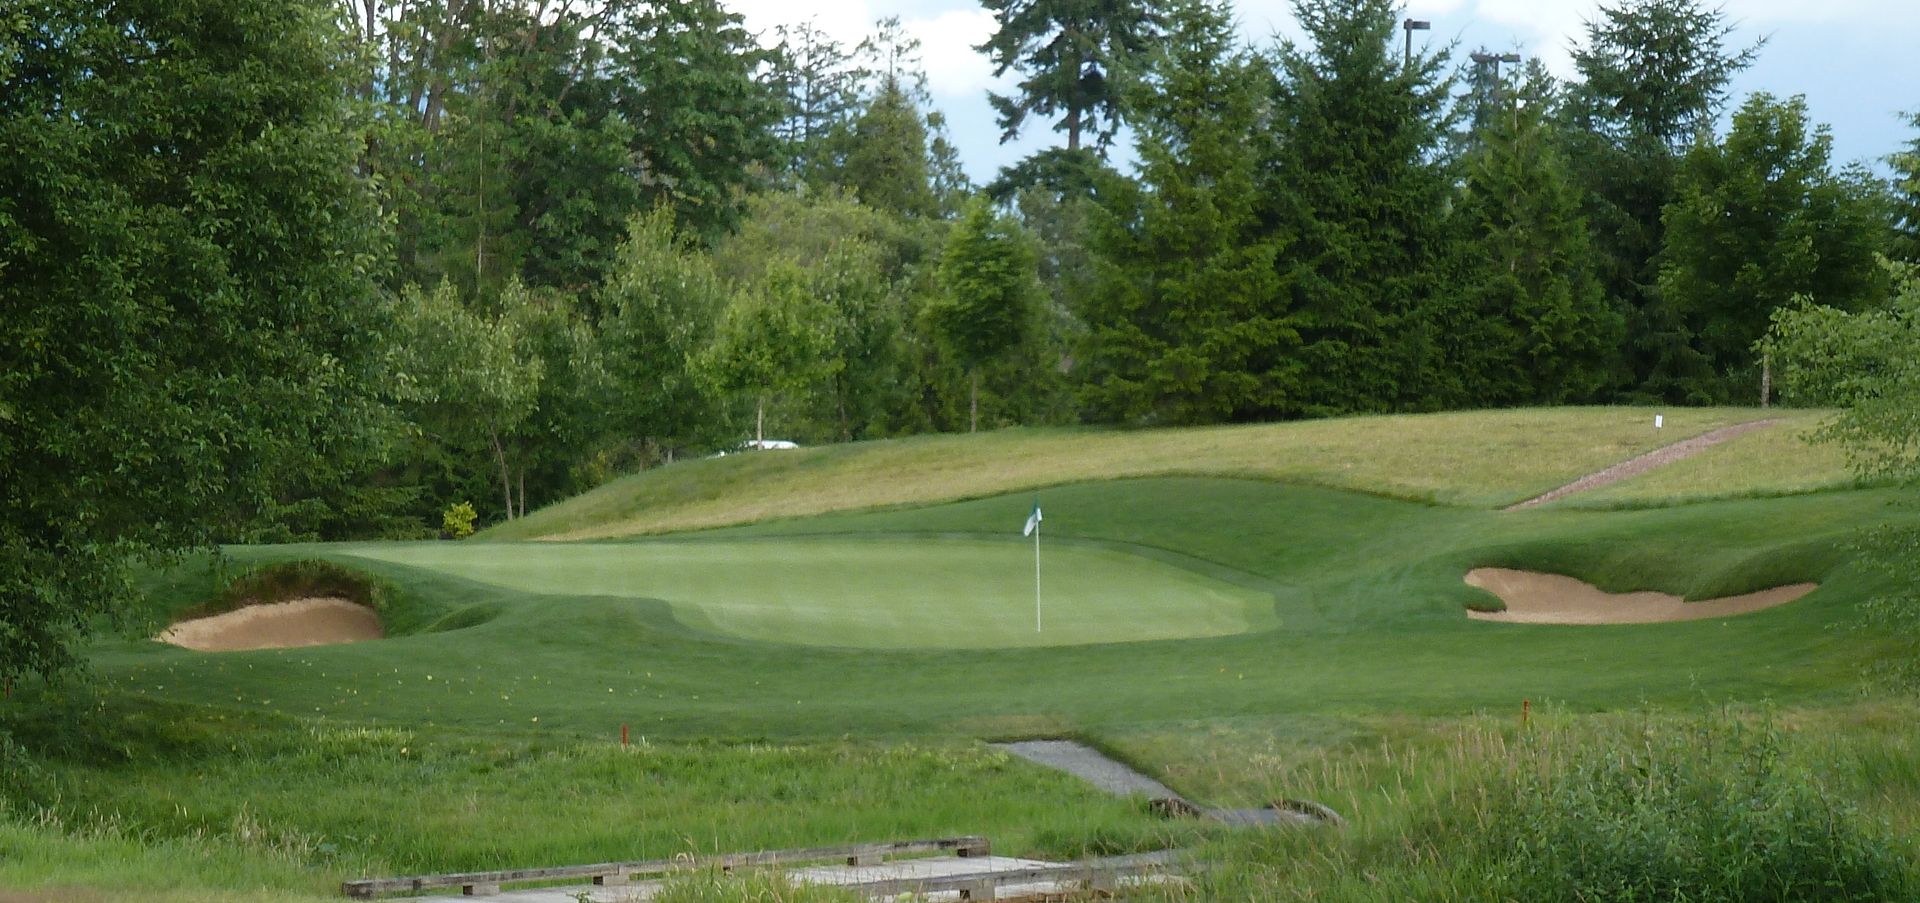
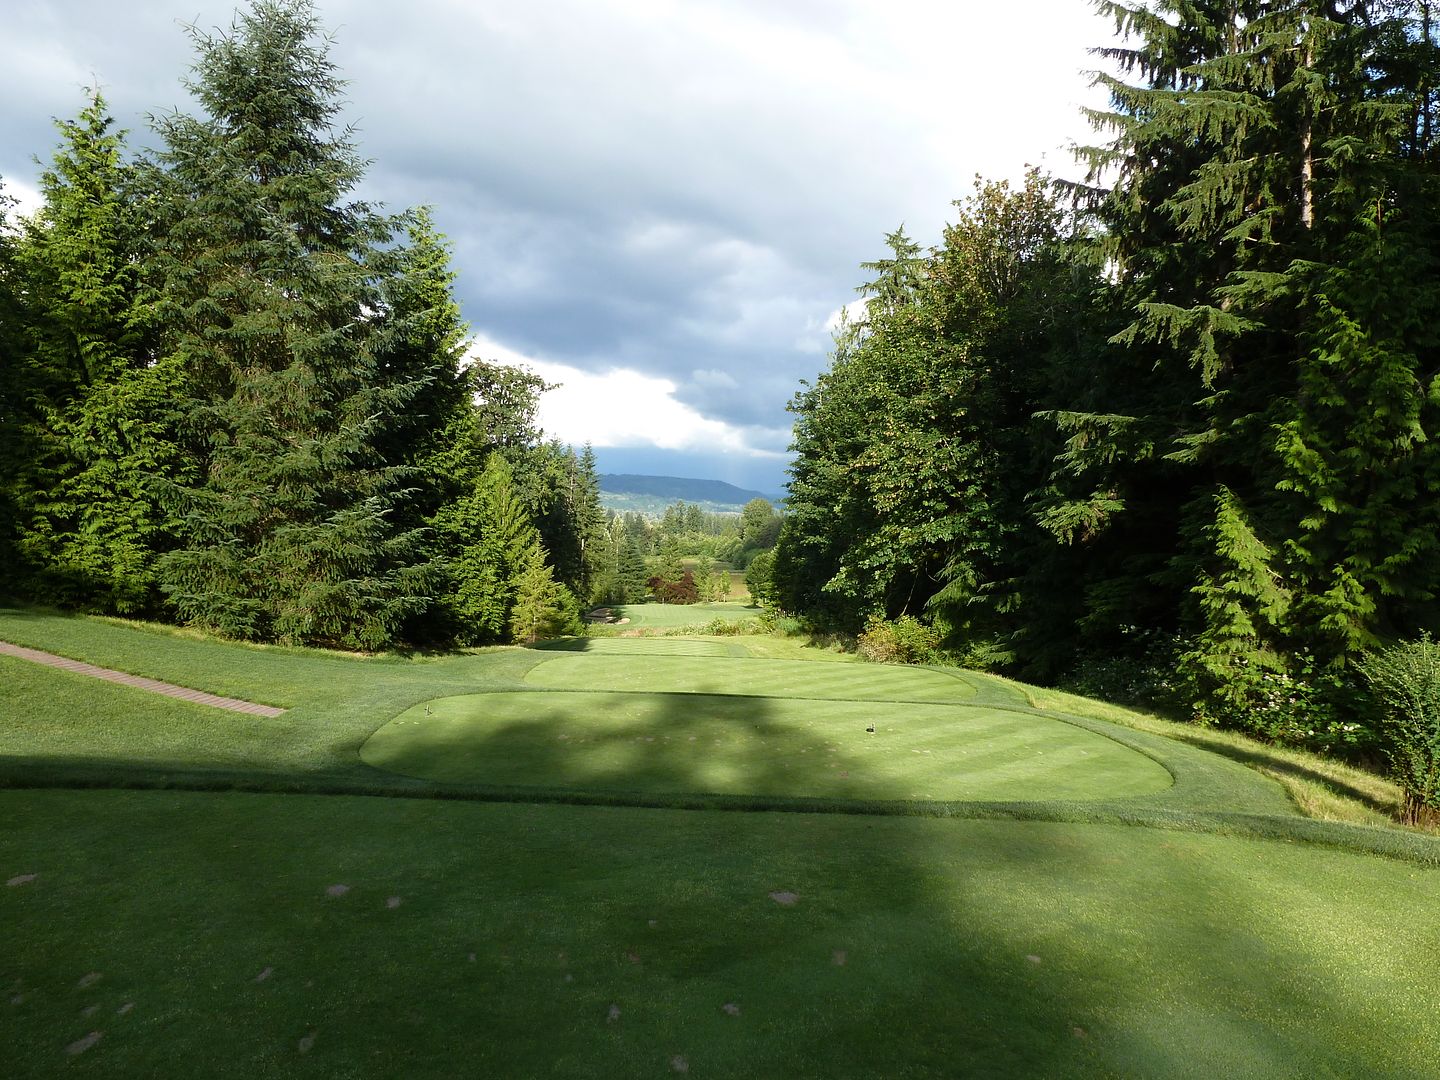
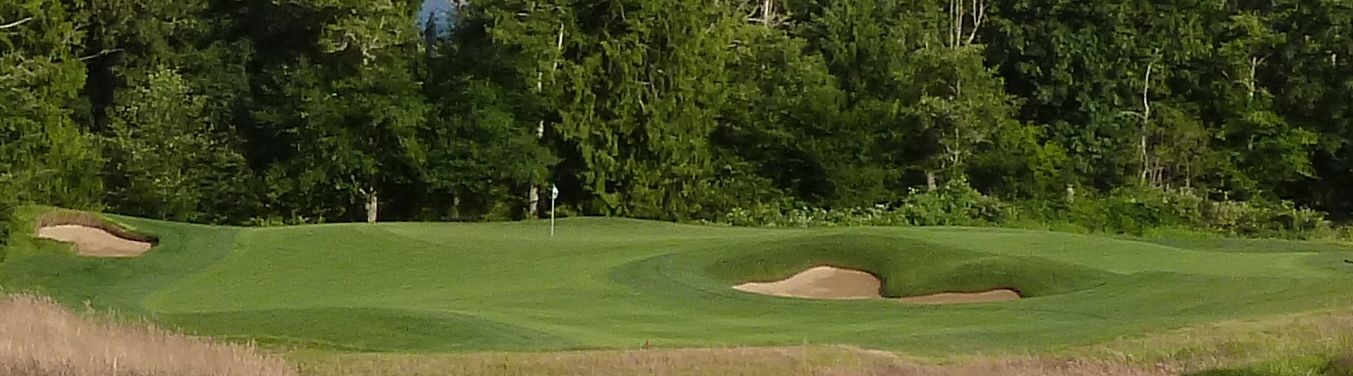
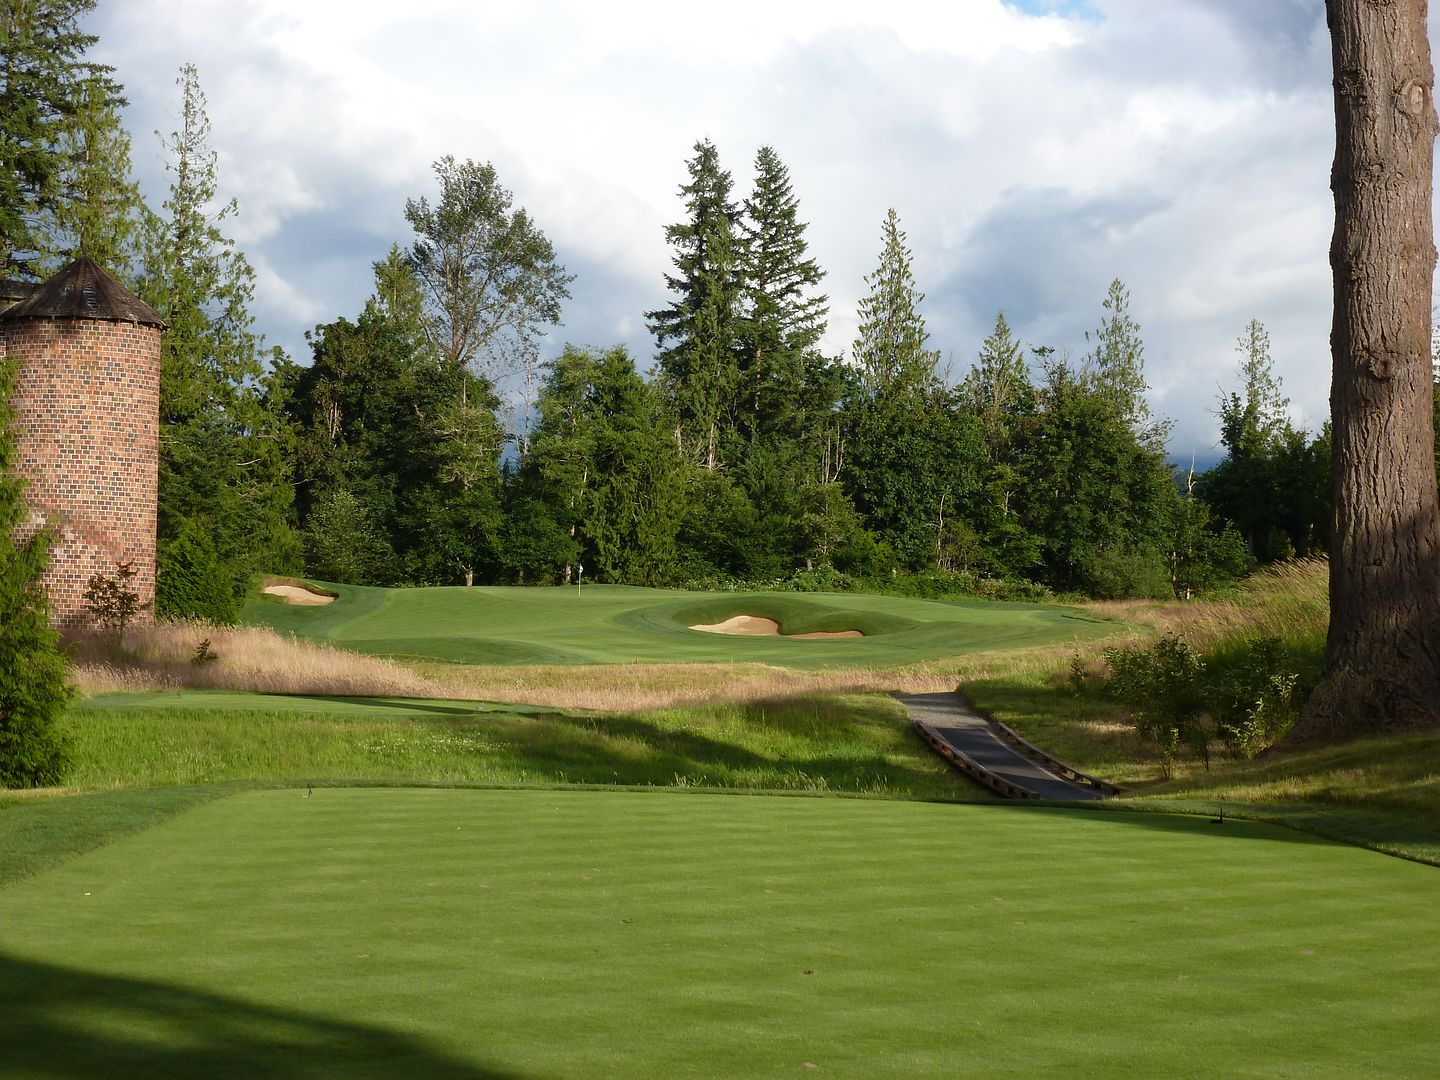
Hole 2: Par 3, 168 Yards
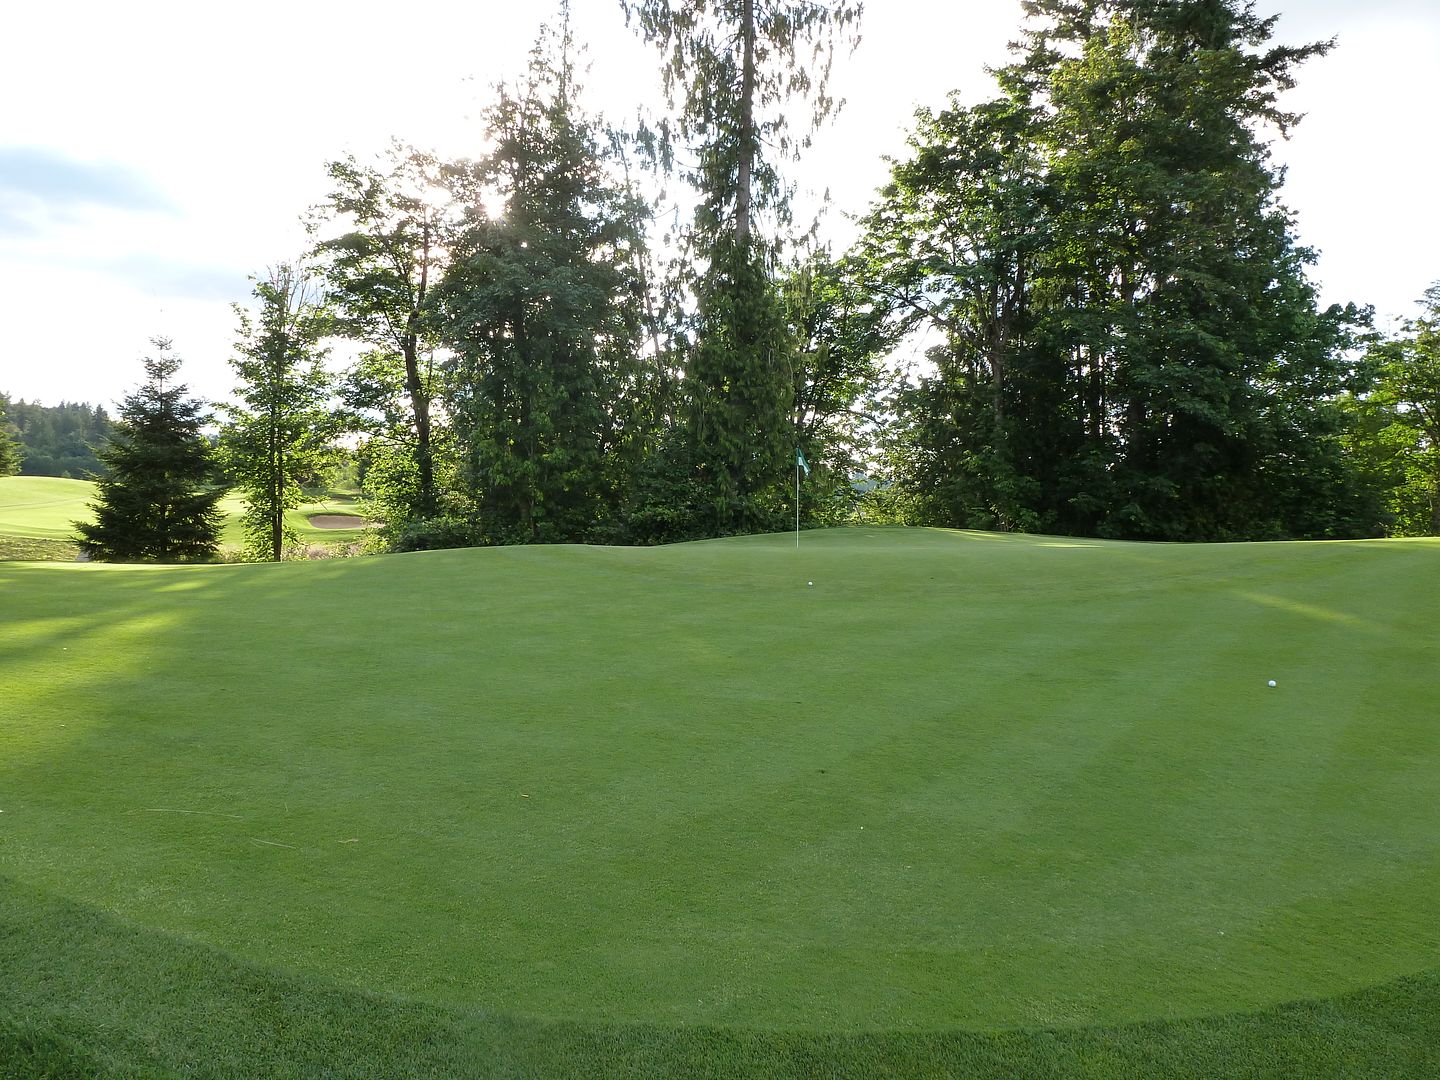
Playing #2 - The play on this par 3 is for the center of the green regardless of where the flag is located. A ball landing short left will funnel down to the rough leaving a treacherous chip/pitch/flop. This green tends to slope to the center.
While short, the second is demanding. One really must get both yardage and line right here. Bunkers protect the green on the right and a large and obvious false-front/collection area protects the left side of the green.
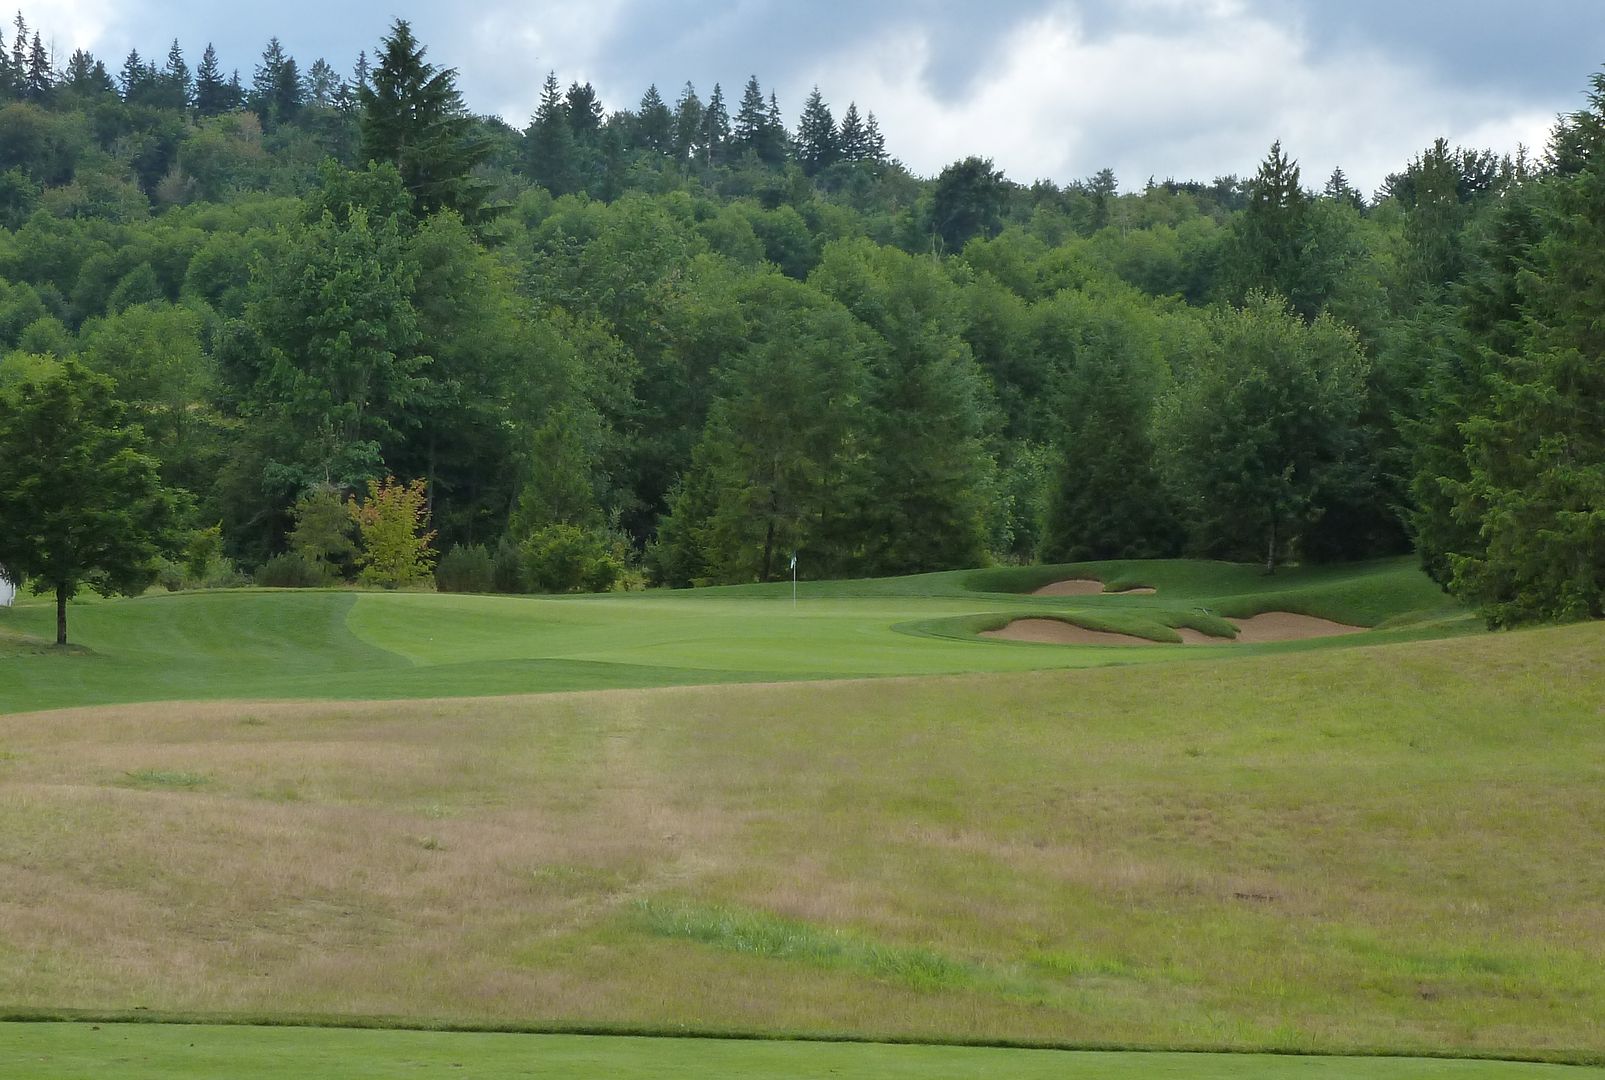
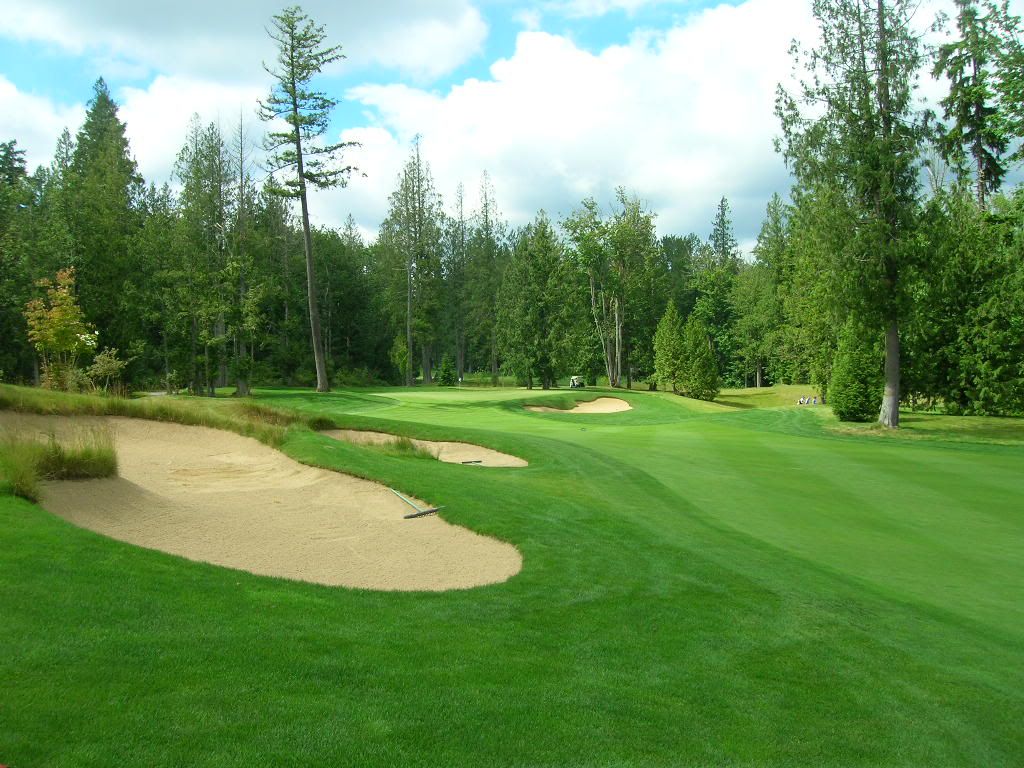
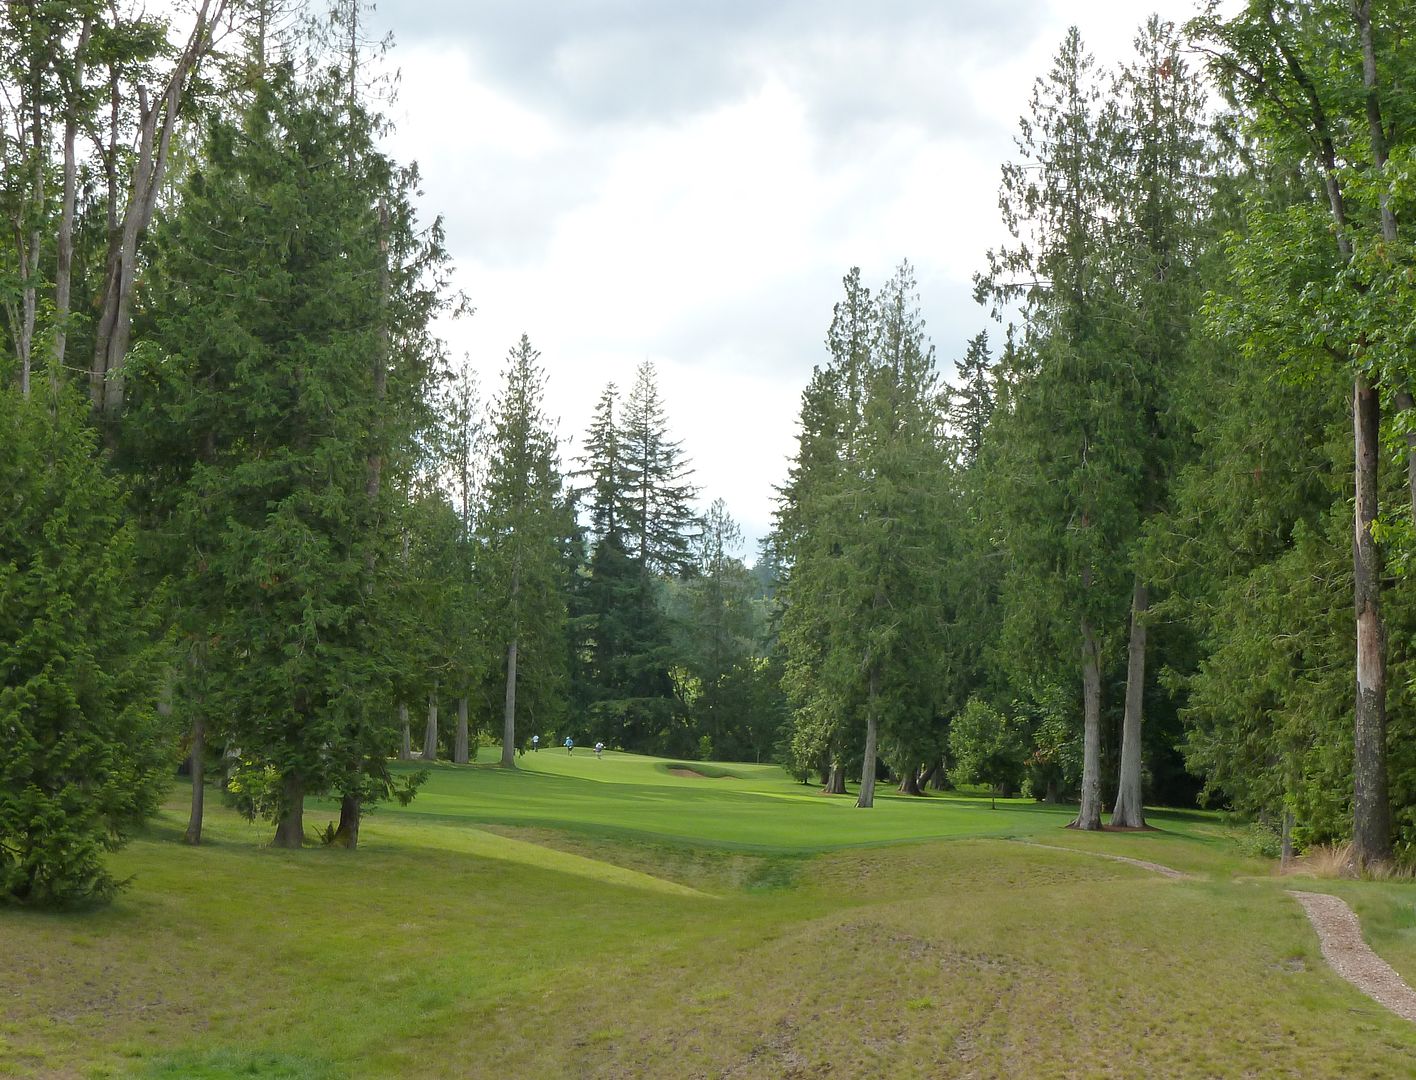
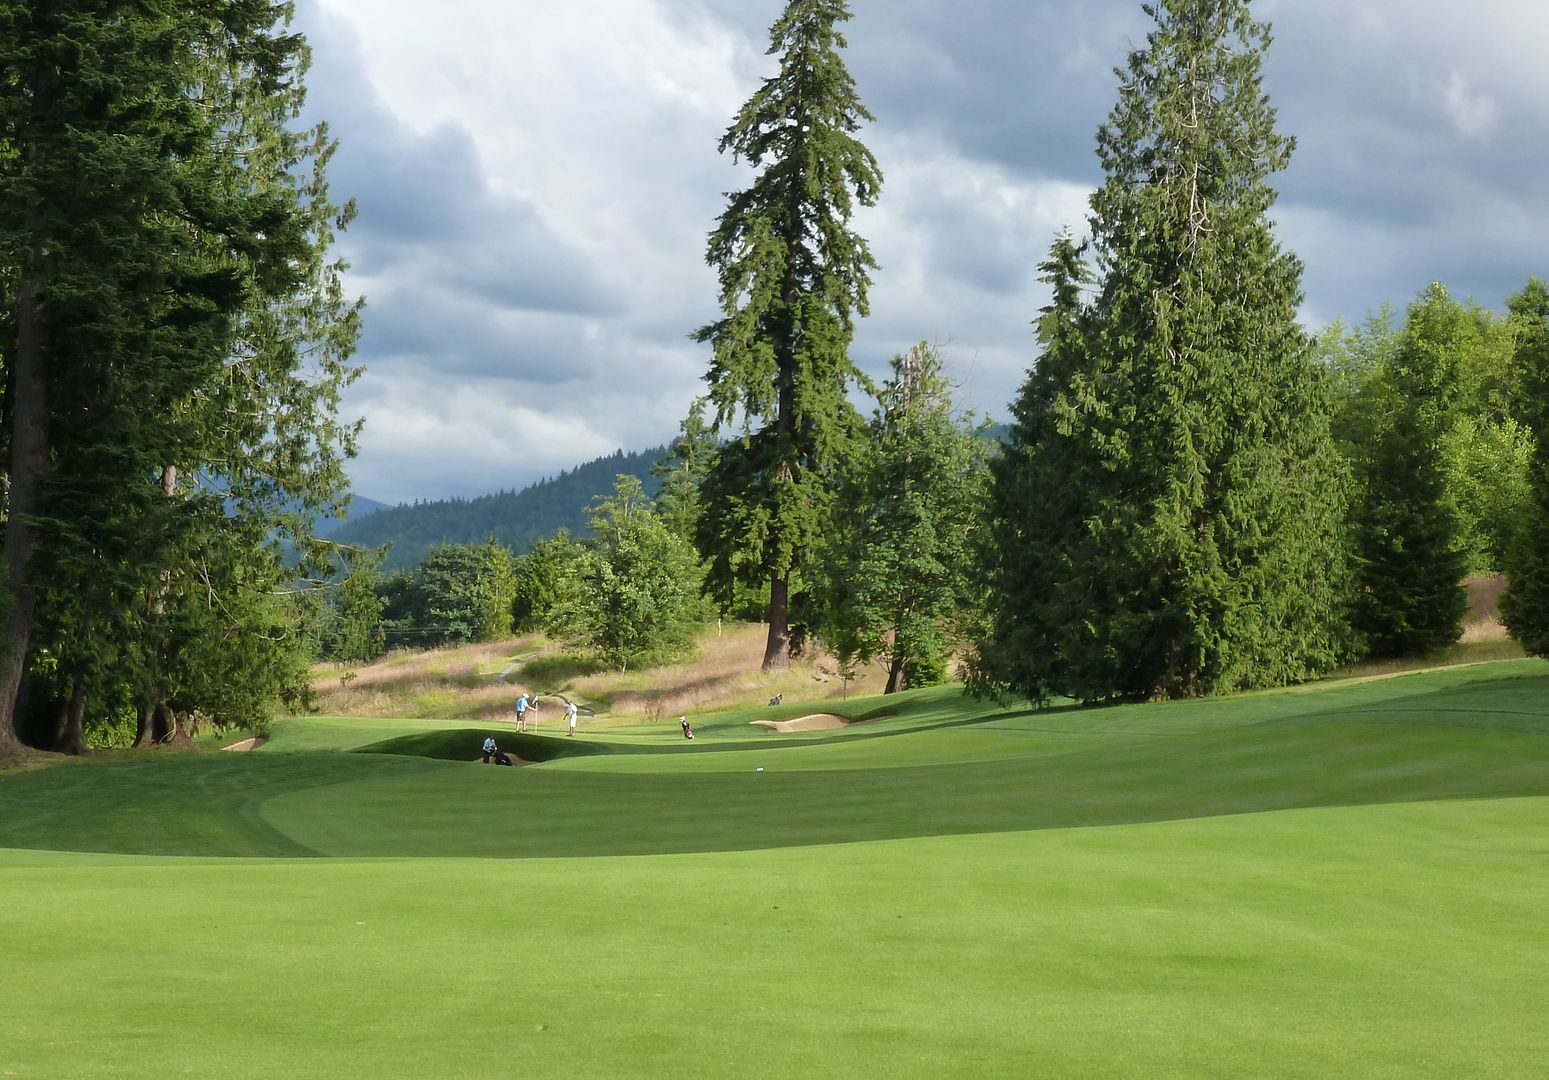
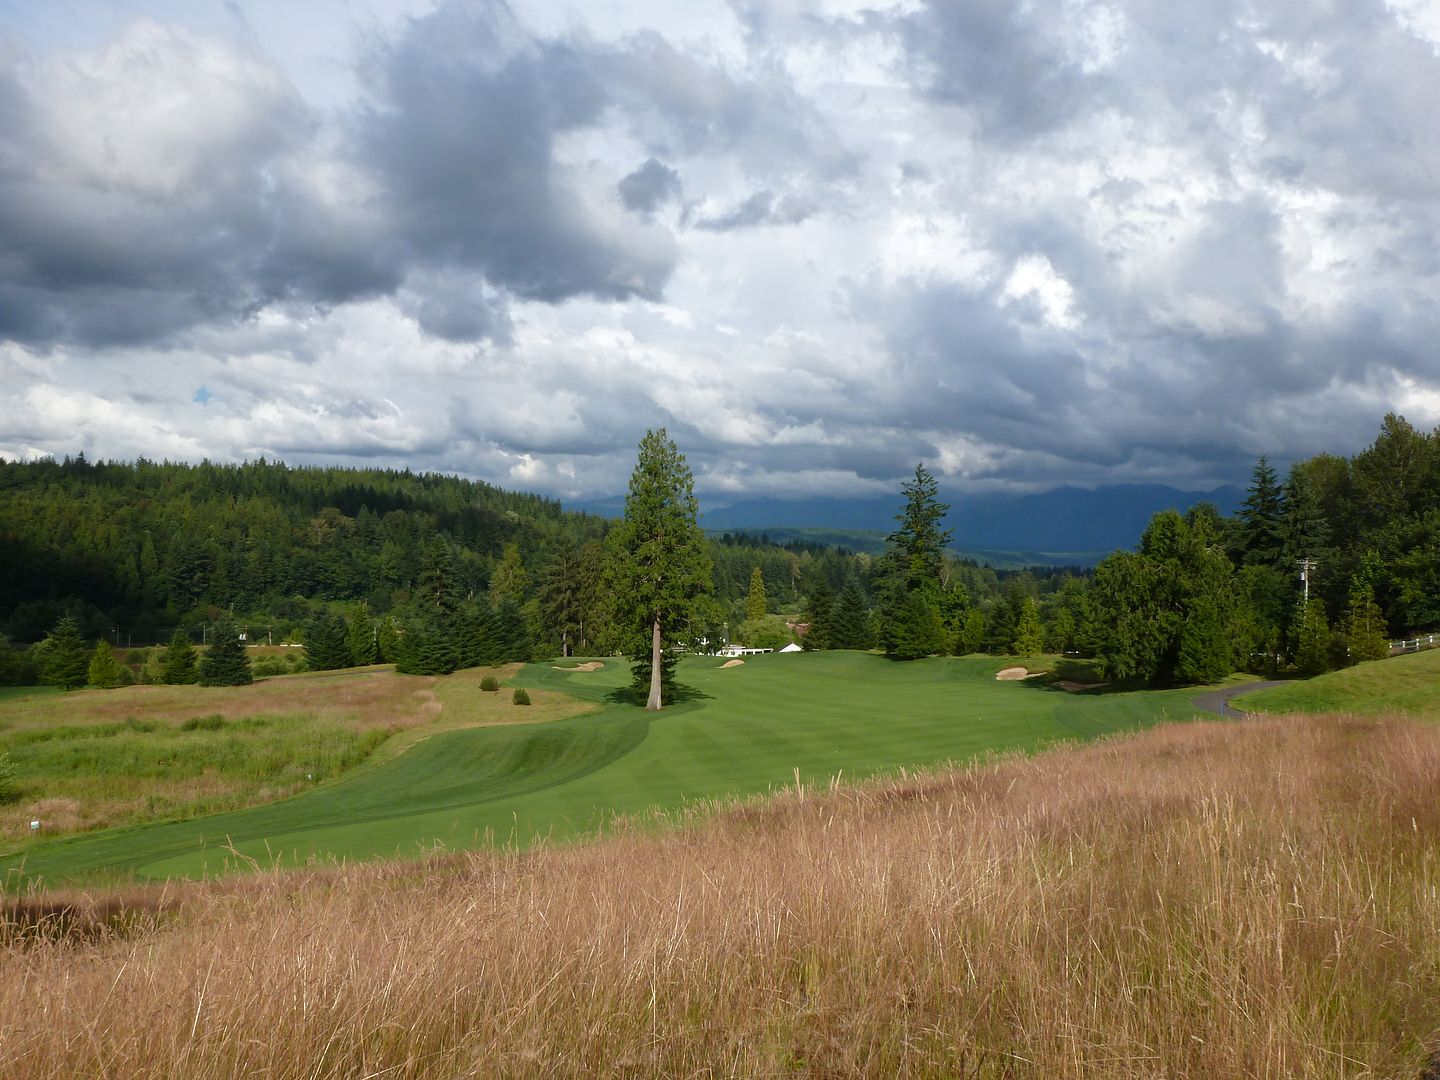
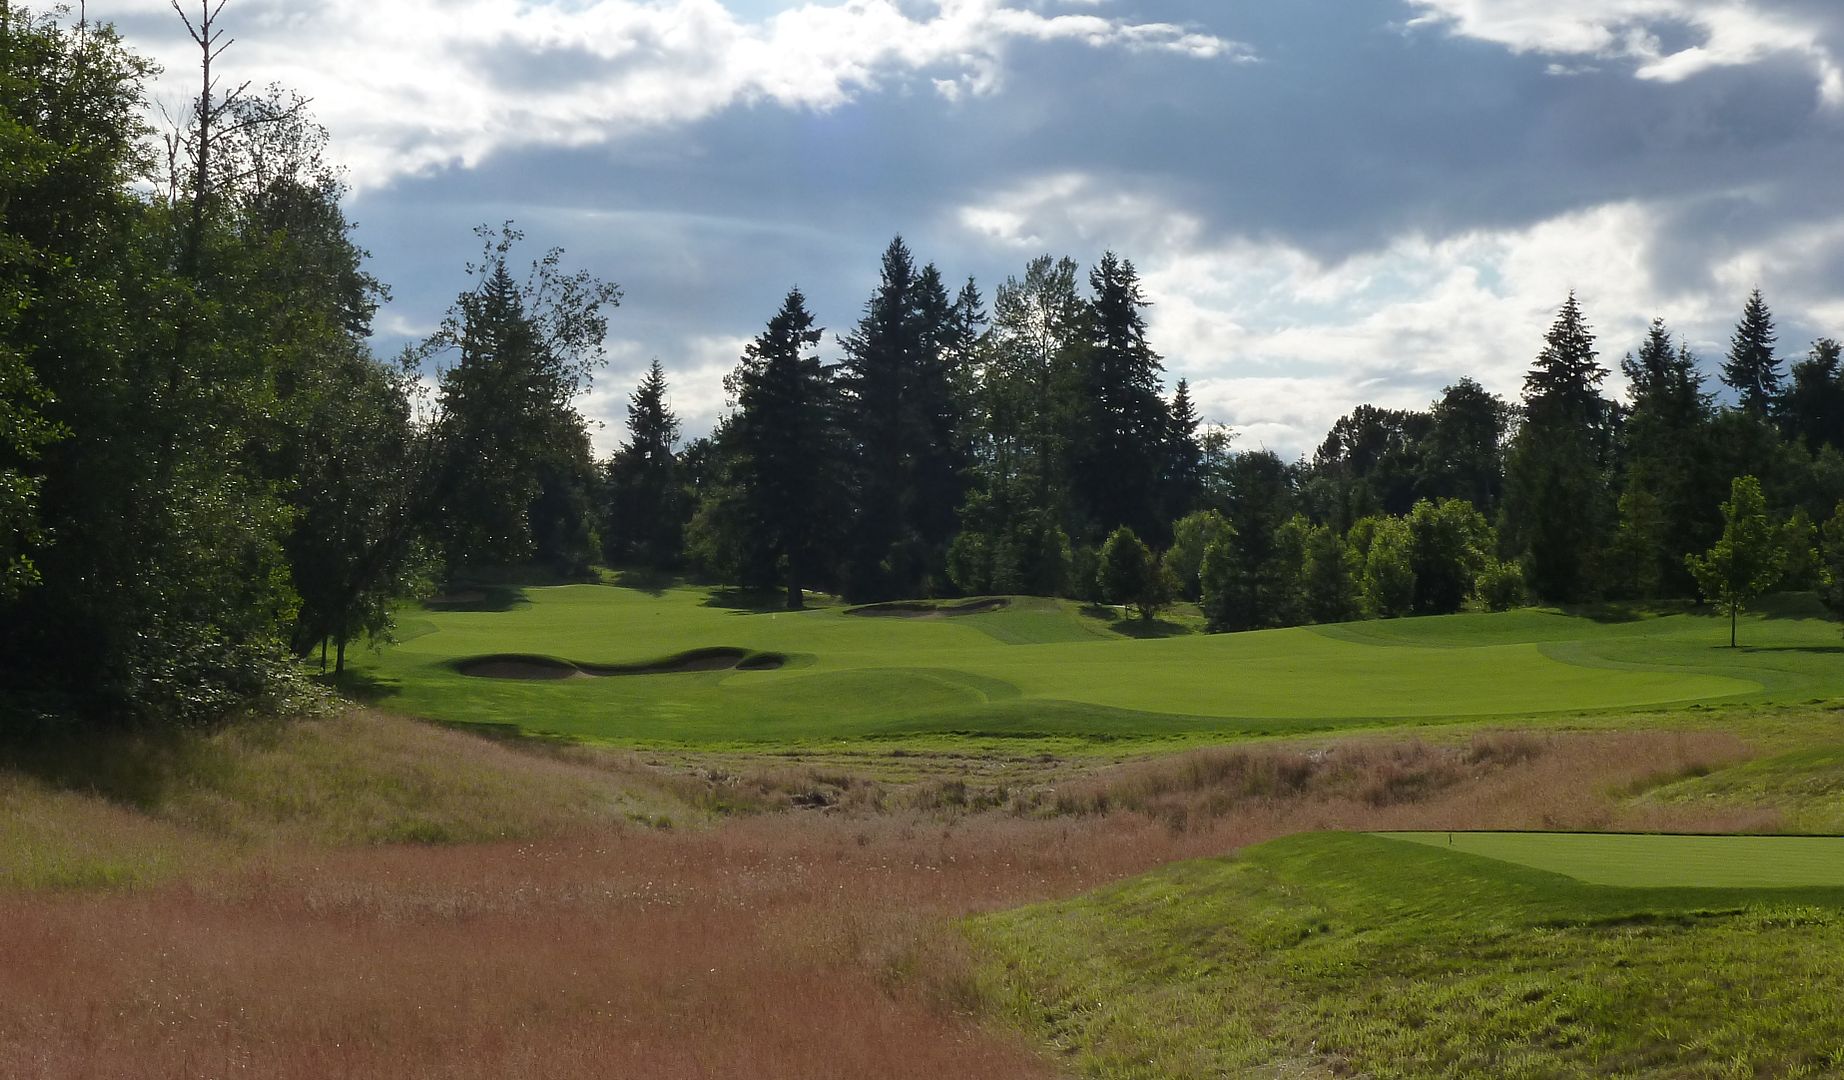
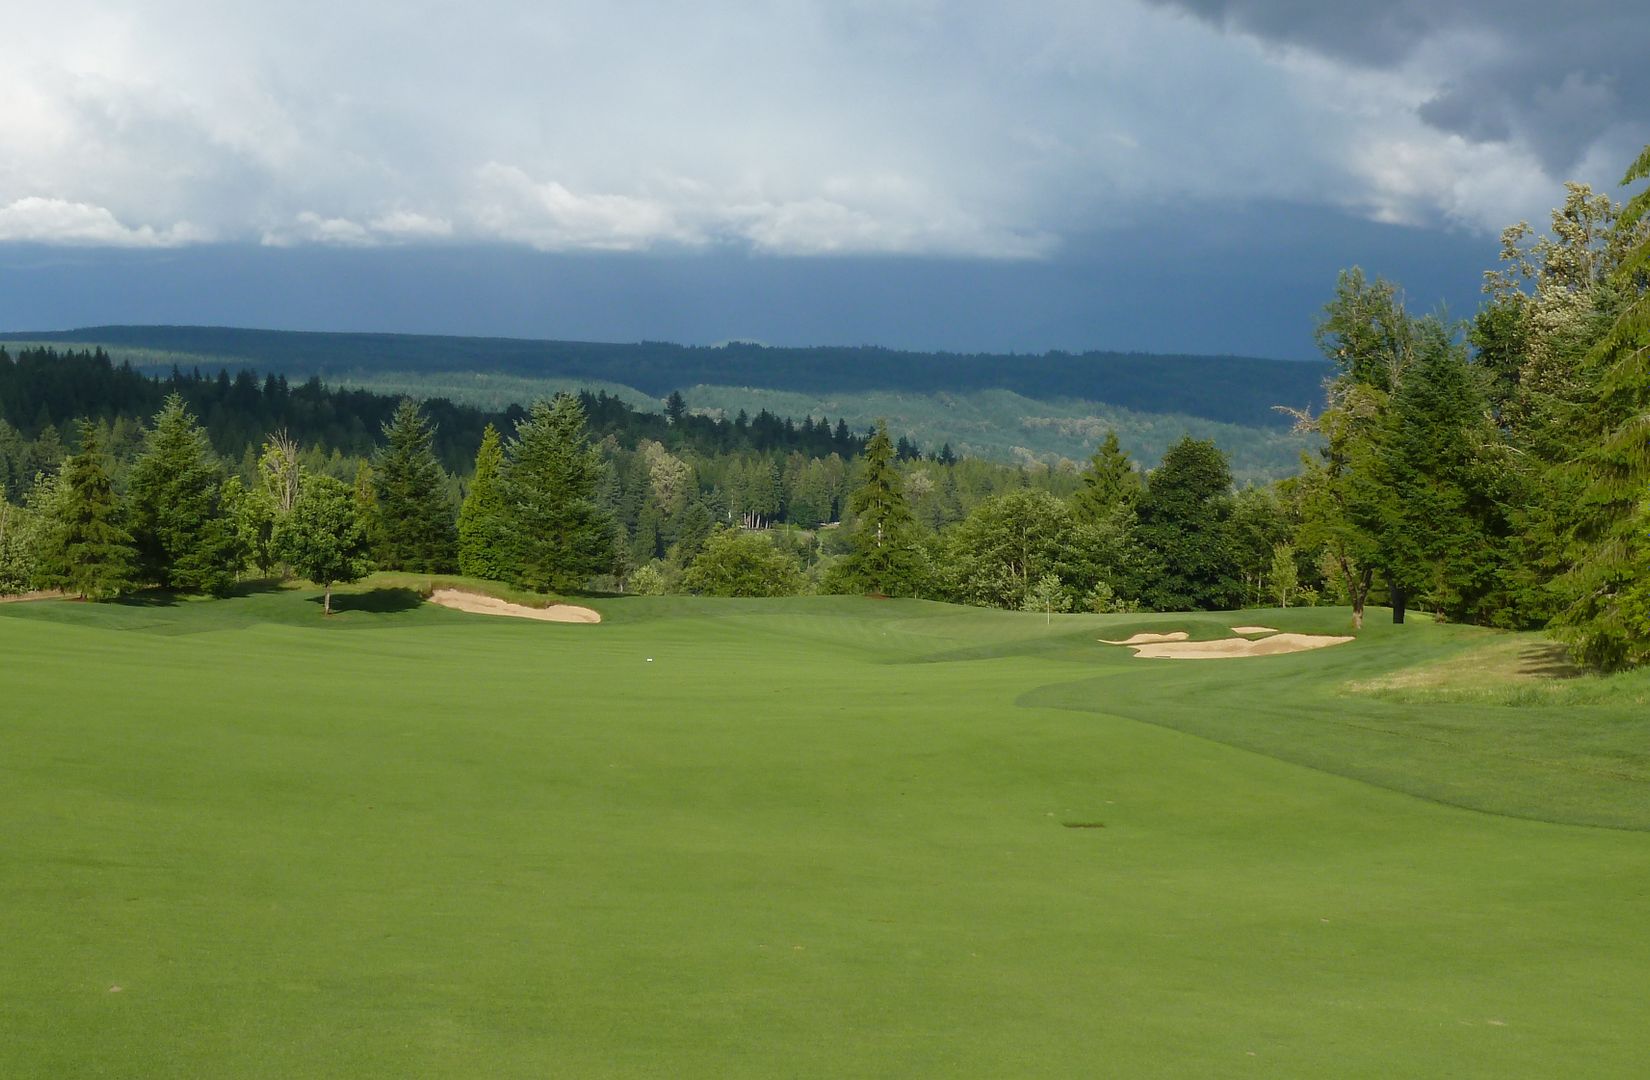
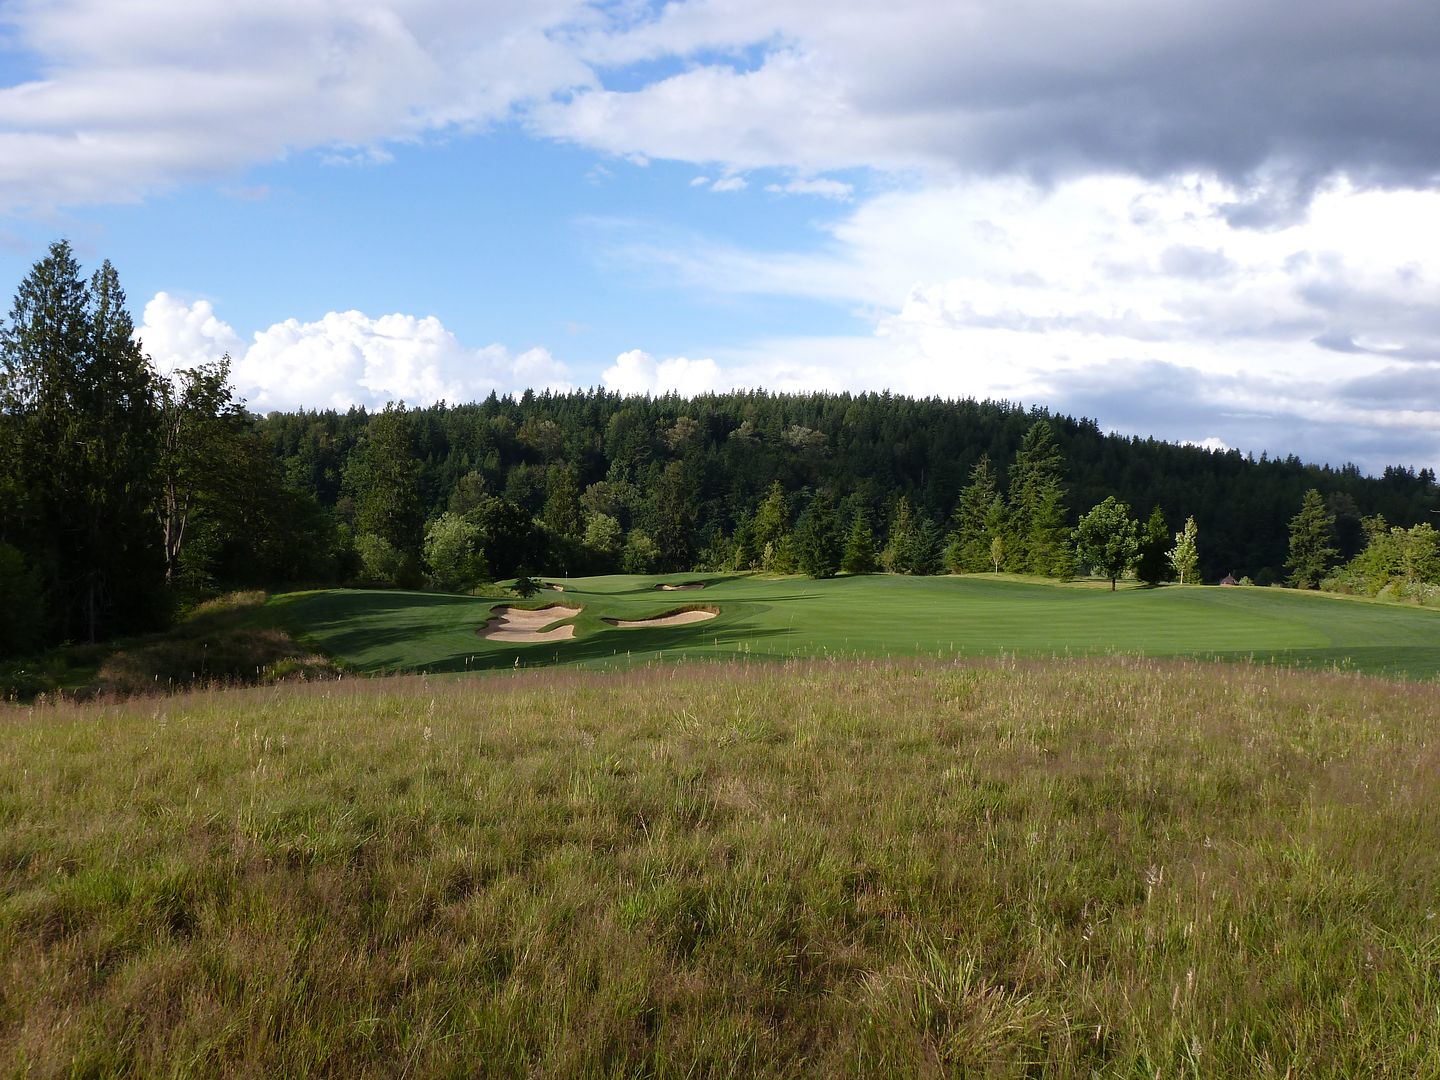
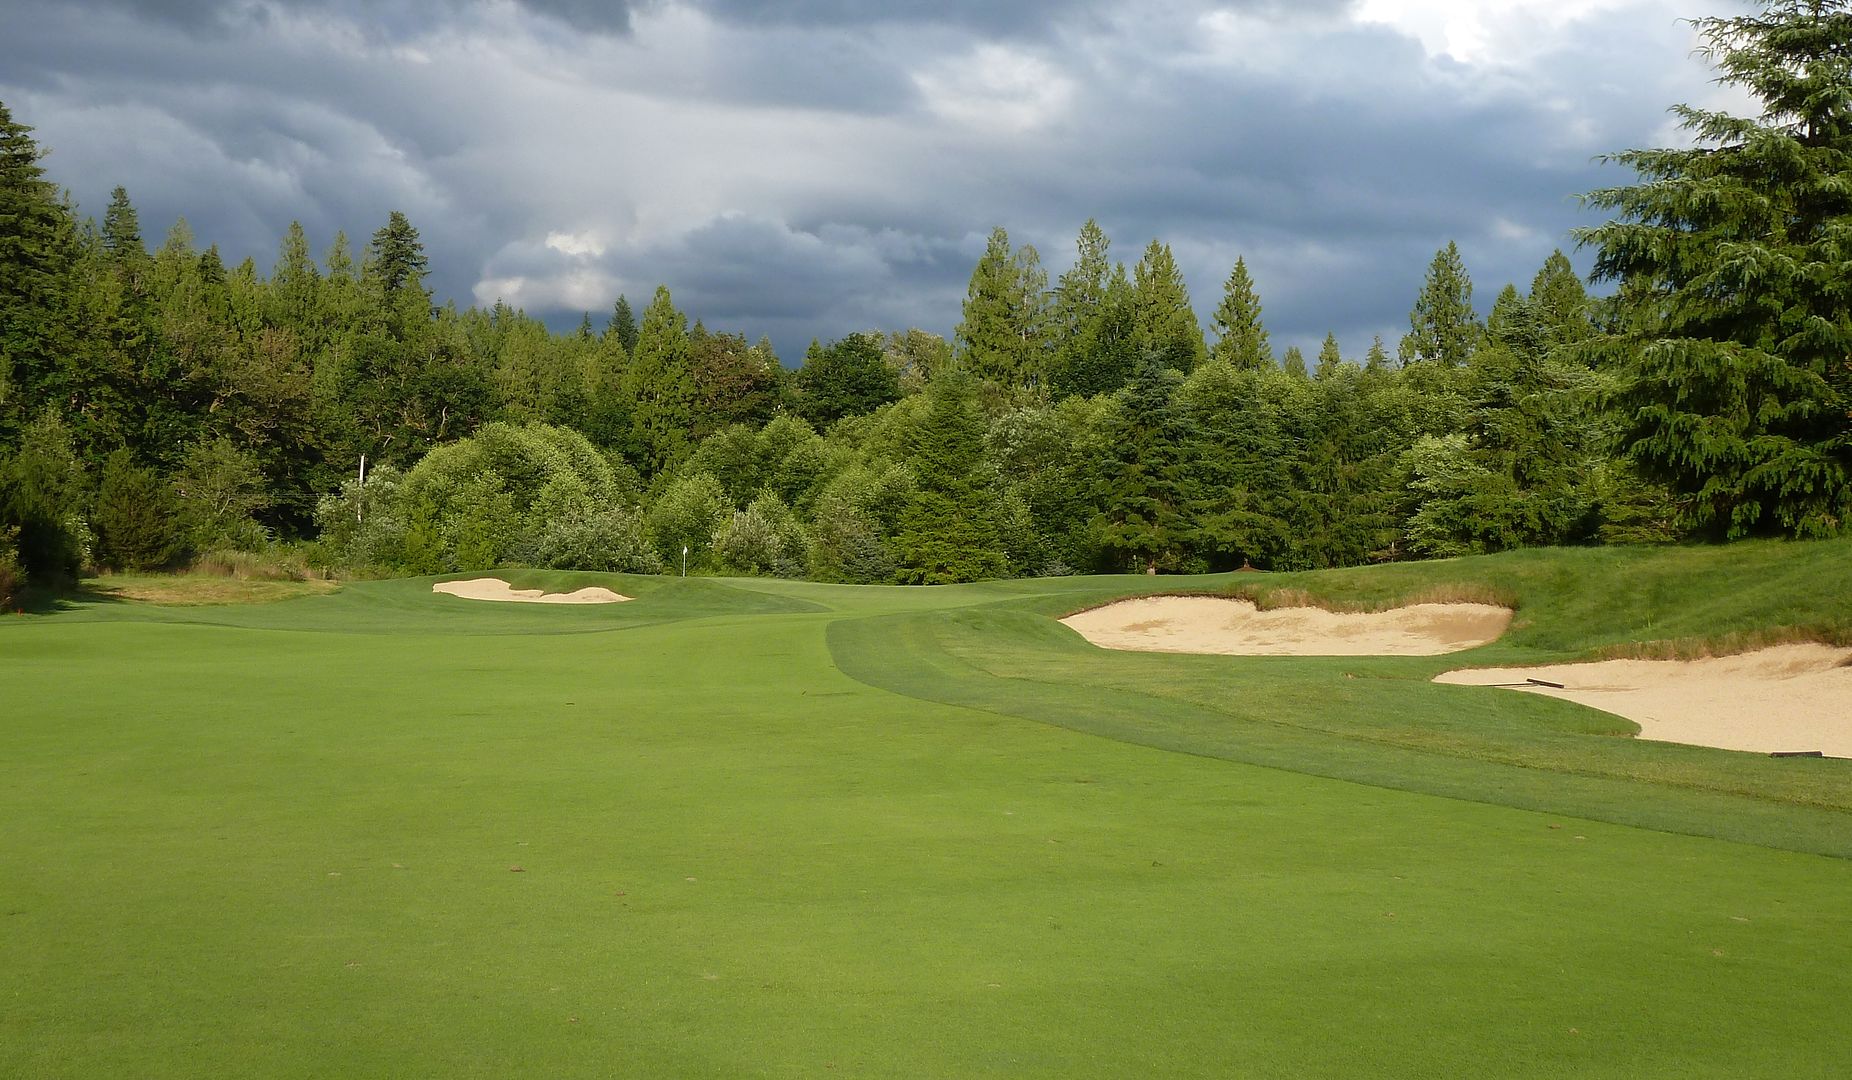
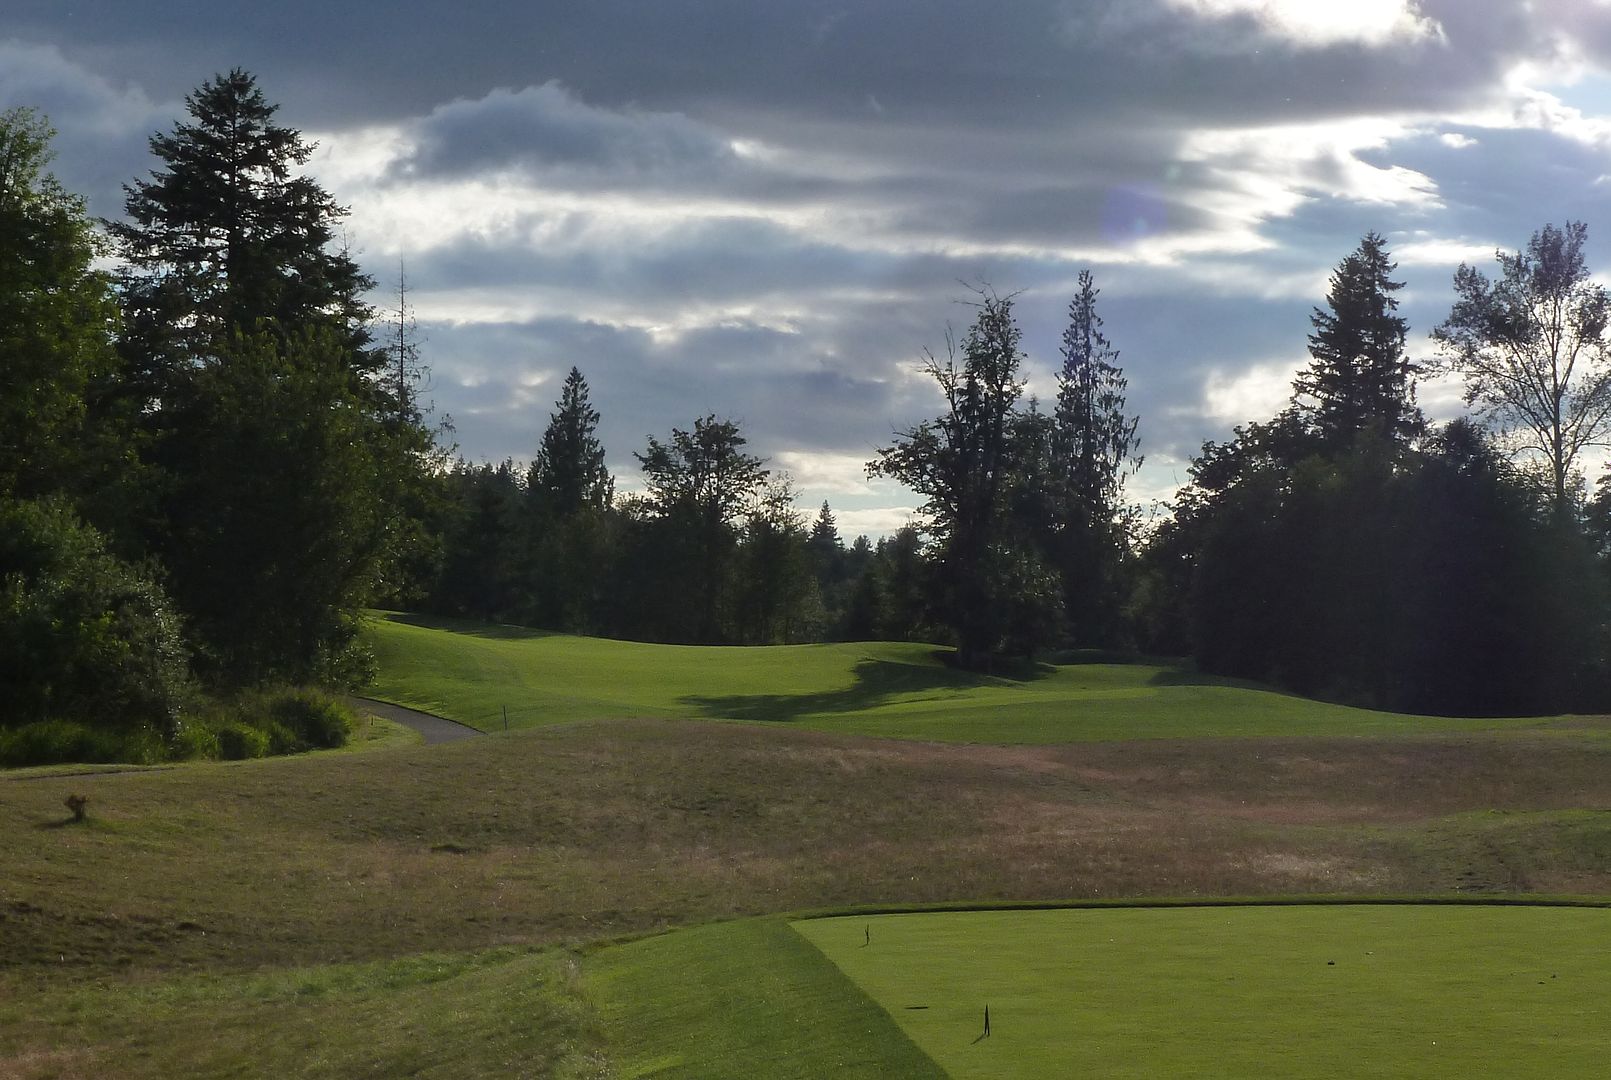
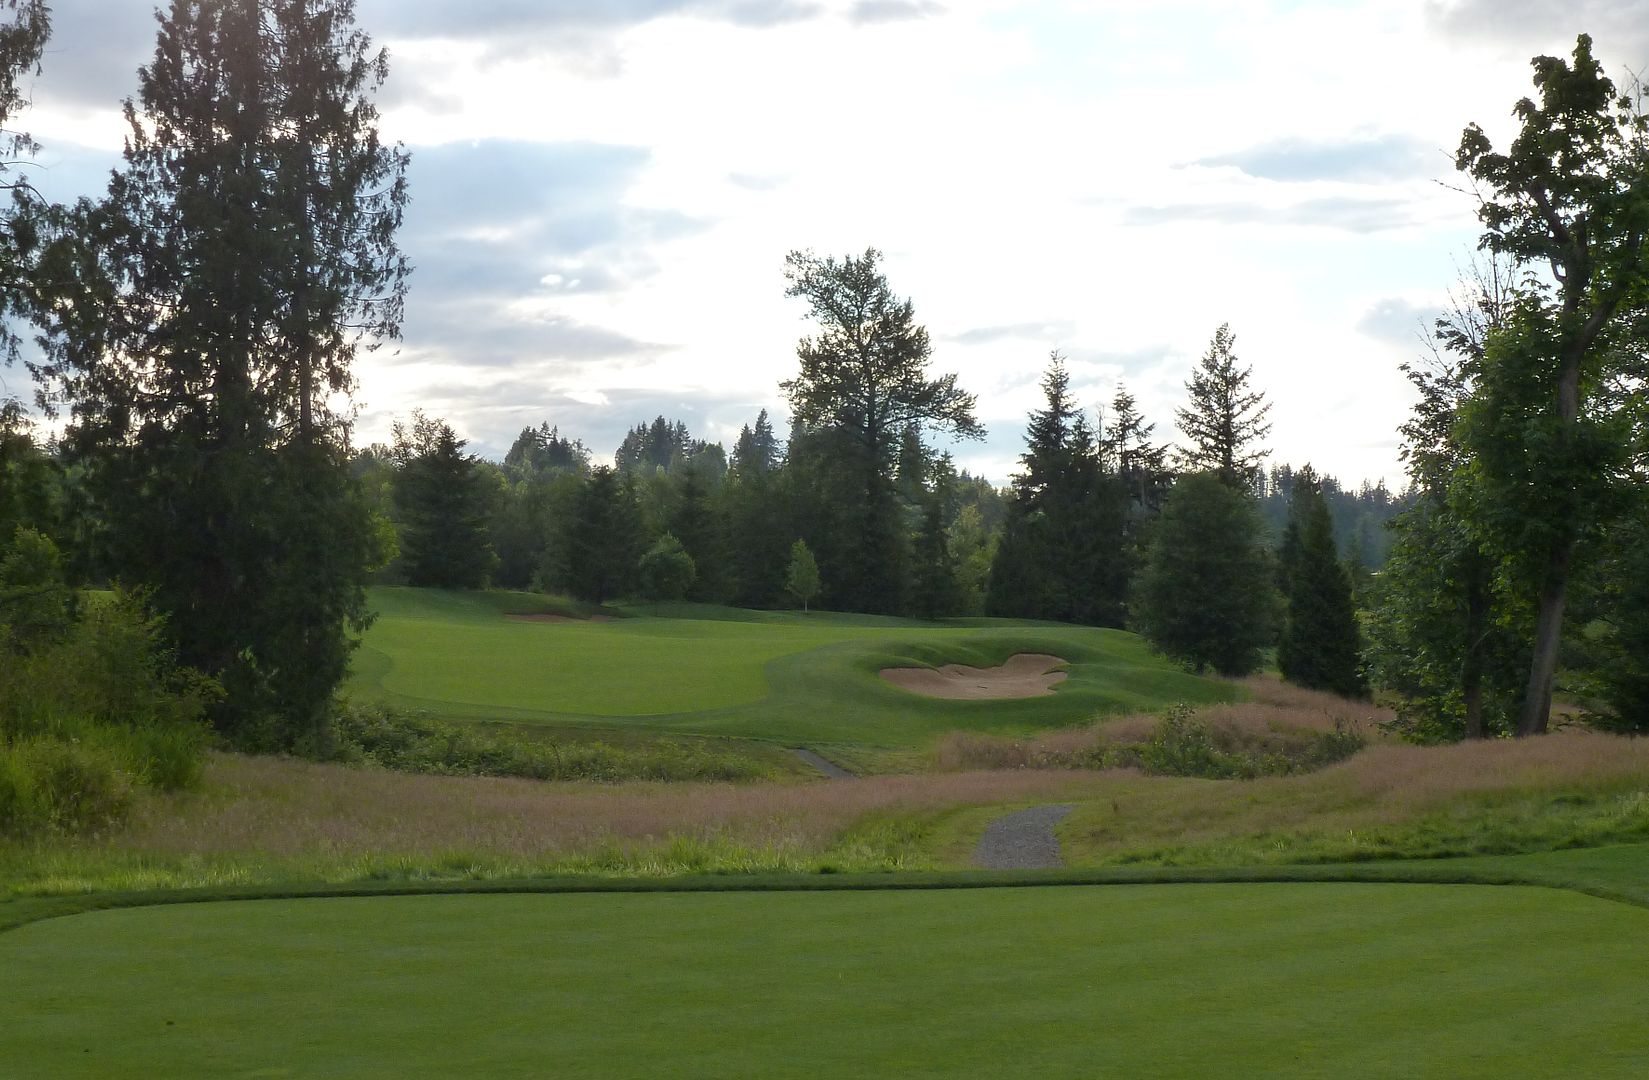
Hole 3: Par 5, 550 Yards
Playing #3 - A three-shot par 5, the play off the tee is anywhere between the left and right-side fairway bunkers (A). Longer hitters should stay towards the right side as the bunker can be carried. Shorter hitters should aim towards the left as the fairway is more accessible. The second shot should be played just short of the fairway bunkers on the left (B) to avoid being blocked from the green by an overhanging cedar tree (C). This green slopes predominantly left to right due to a ridge on the left hand side of the green.
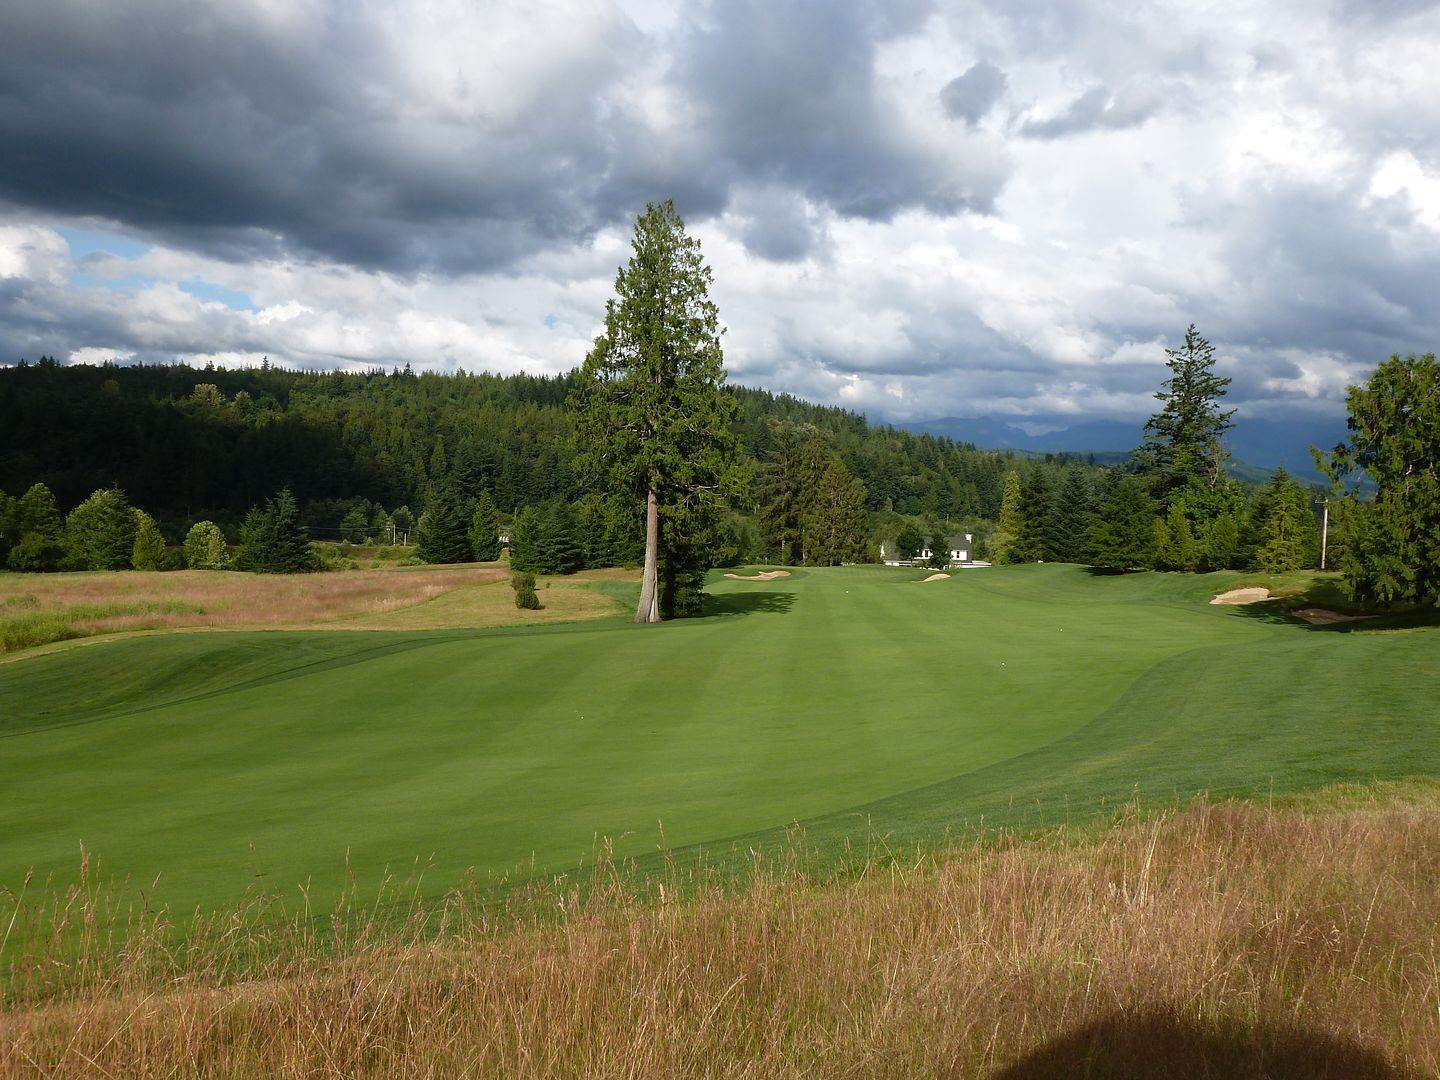
Hole 3 at Aldarra is one heck of a demanding par 5. The tee shot is very intimidating, requiring a forced carry over a diagonal hazard. For the first-time player, it is really difficult to judge the length of the carry (though it's not actually that long, probably about 190 yards at the centre of the fairway). Tee shots that are pulled (bailouts) will find trouble in the bunker left.
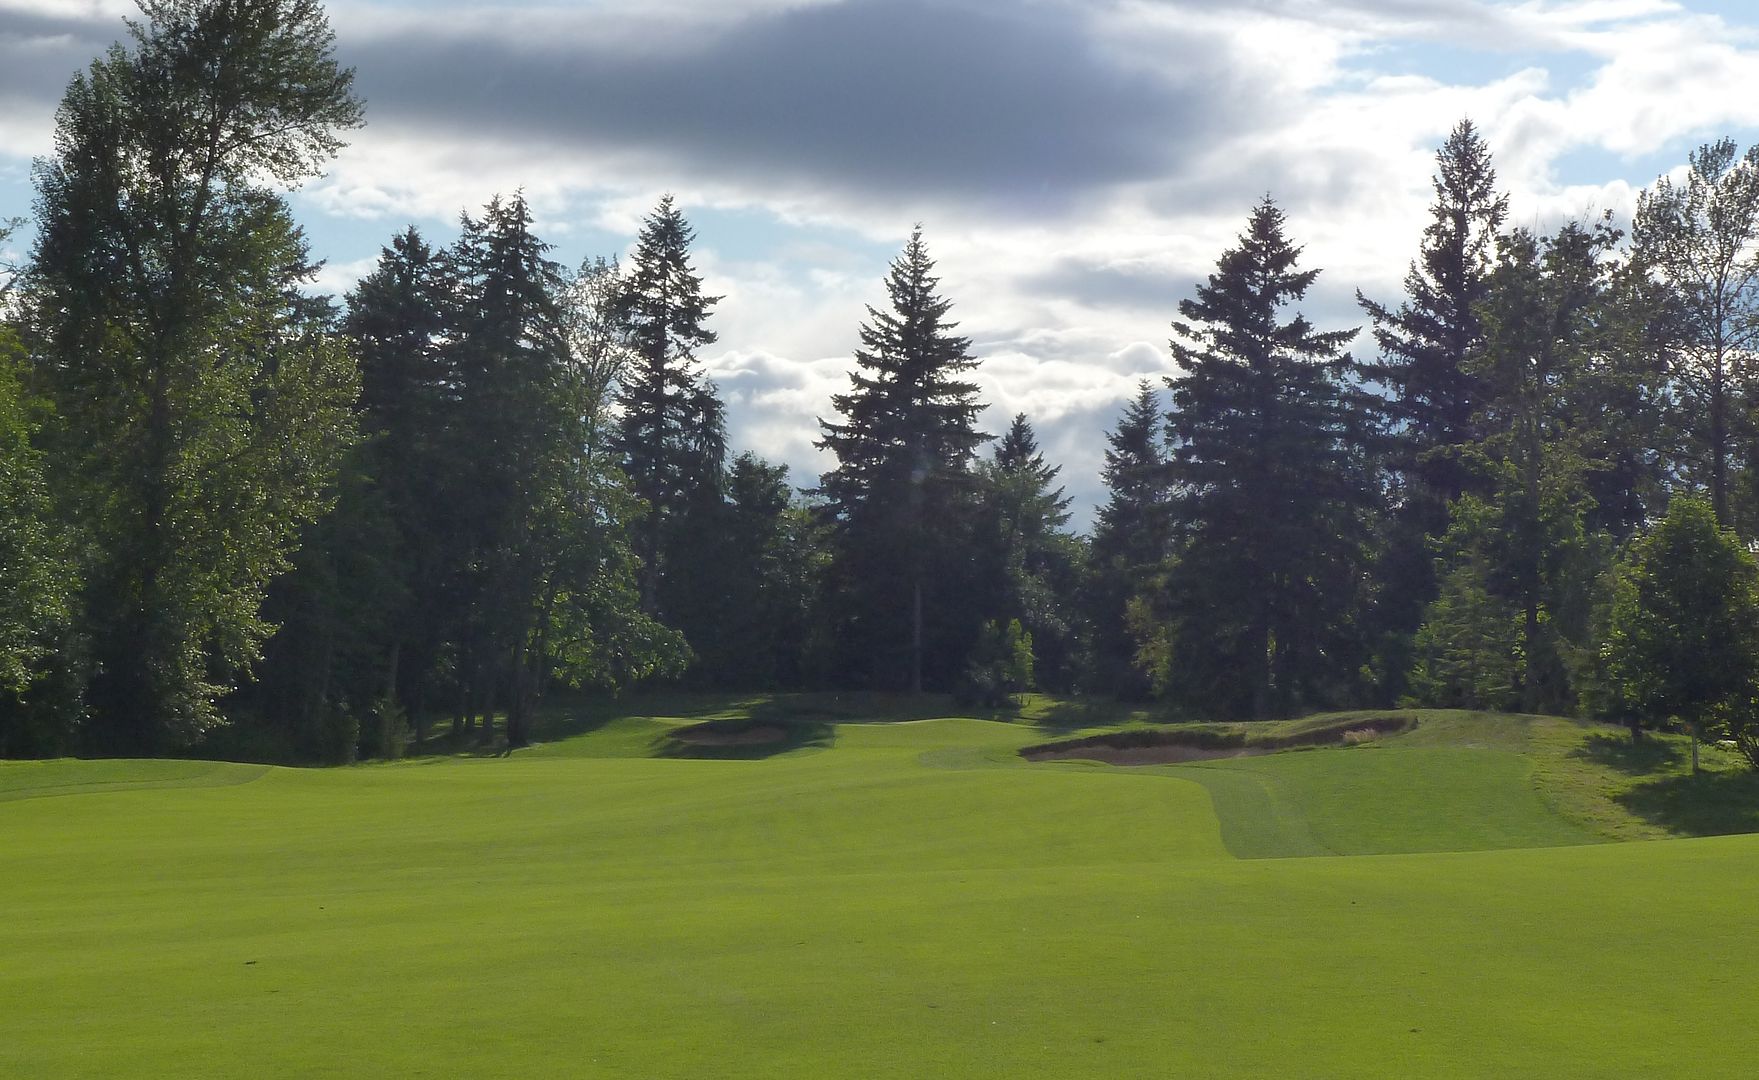
OK, now that I've found the fairway I can mindlessly knock three wood up there and hit a wedge on. Not at Aldarra, you better keep that thinking cap on (and be able to execute). For those mortals not going for the green in two, there are two options: (1) Aim it up the left, towards the bunkers, or (2) Take enough club to get at least parallel to the bunkers, but don't miss left or right.
Trees just off the right side of the fairway punish shots that either too far back or too far right. The picture below is taken from 140 yards out (IIRC) and from just right of centre. The view to the back left pin is largely obscured and the view to anything centre or right on the green is completely blocked.
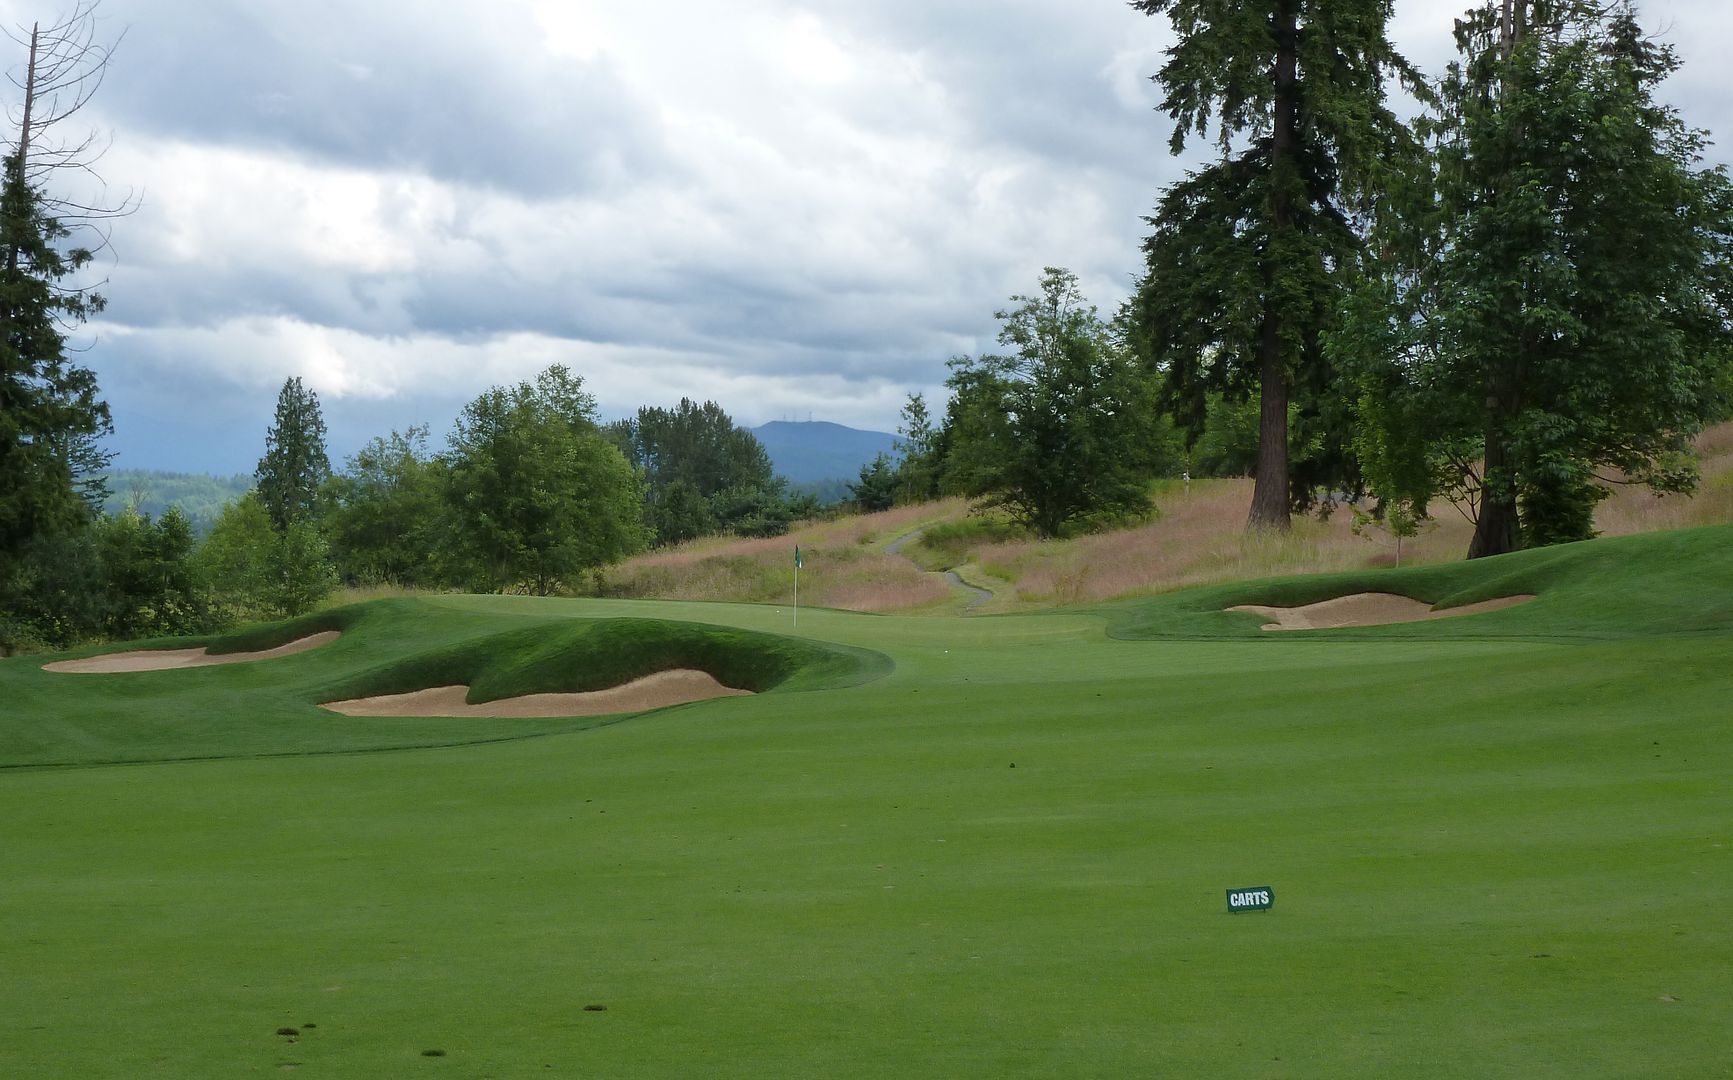
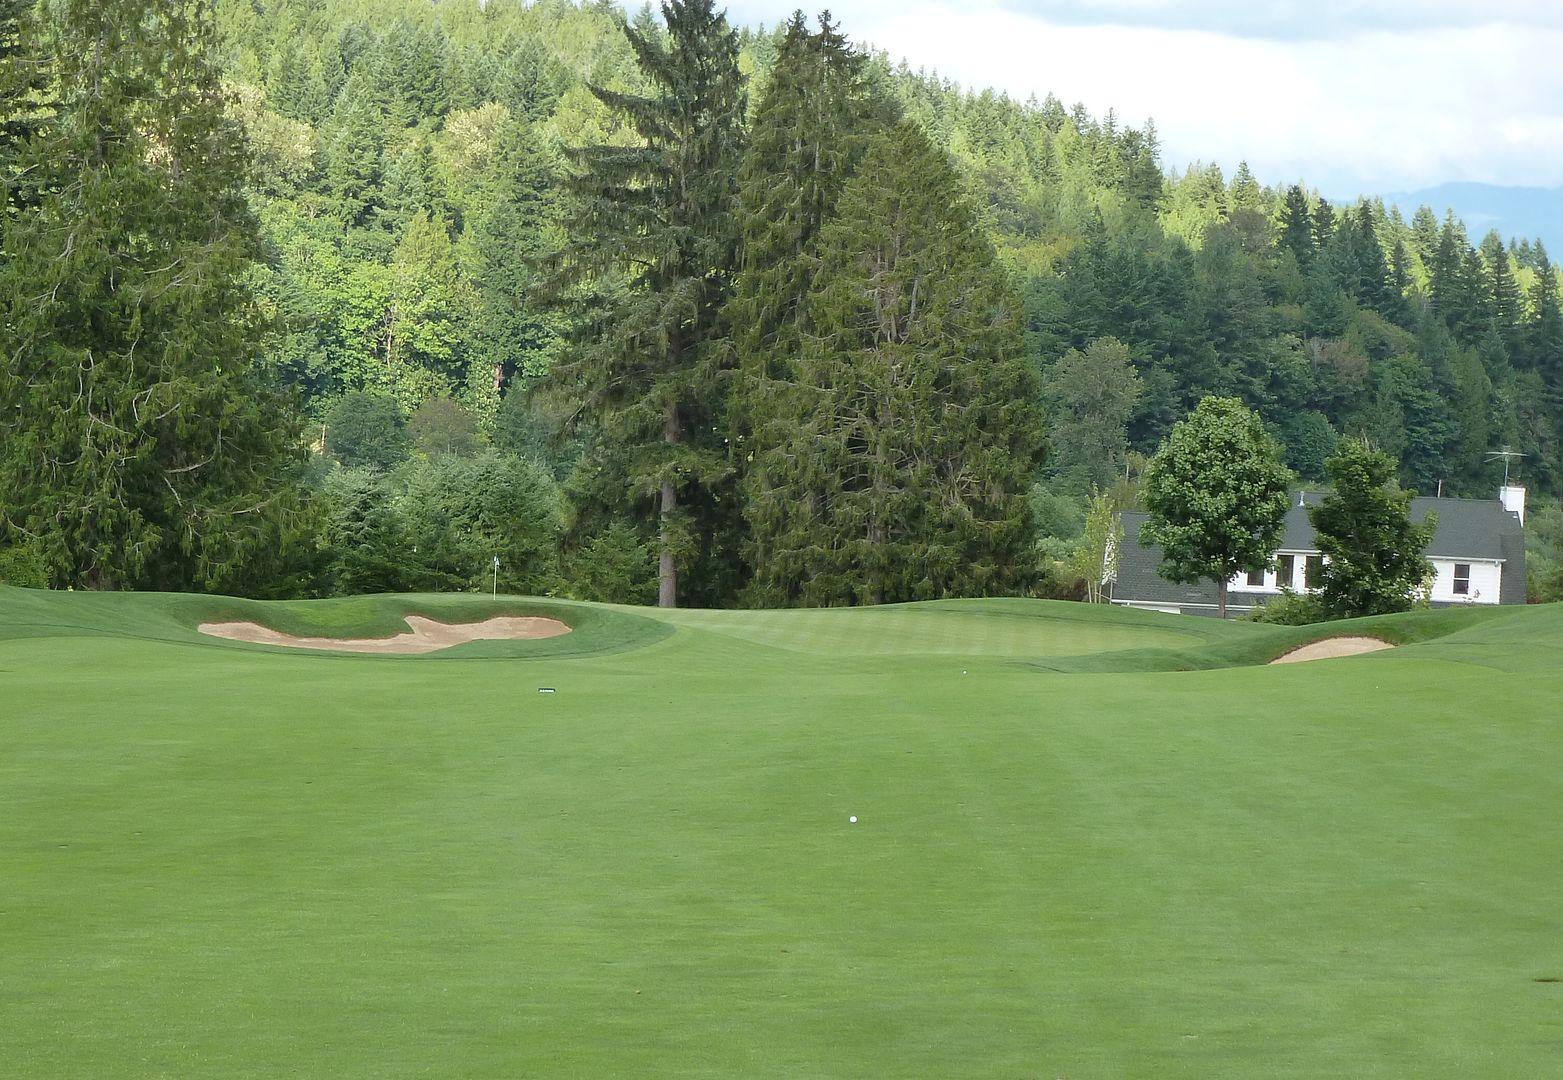
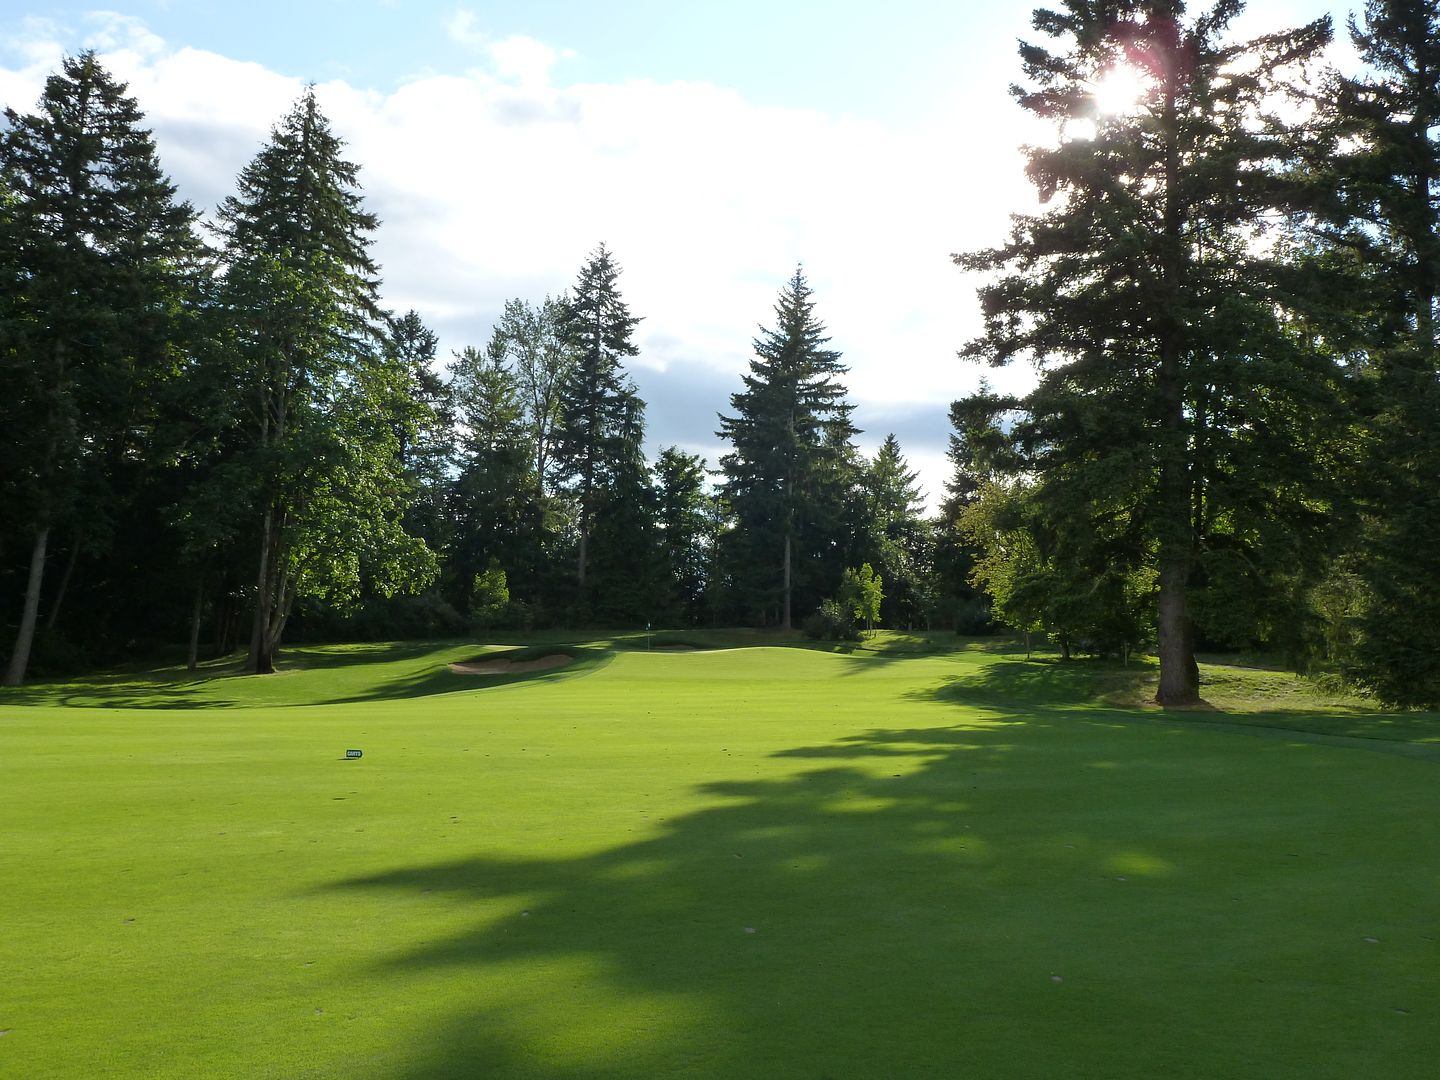
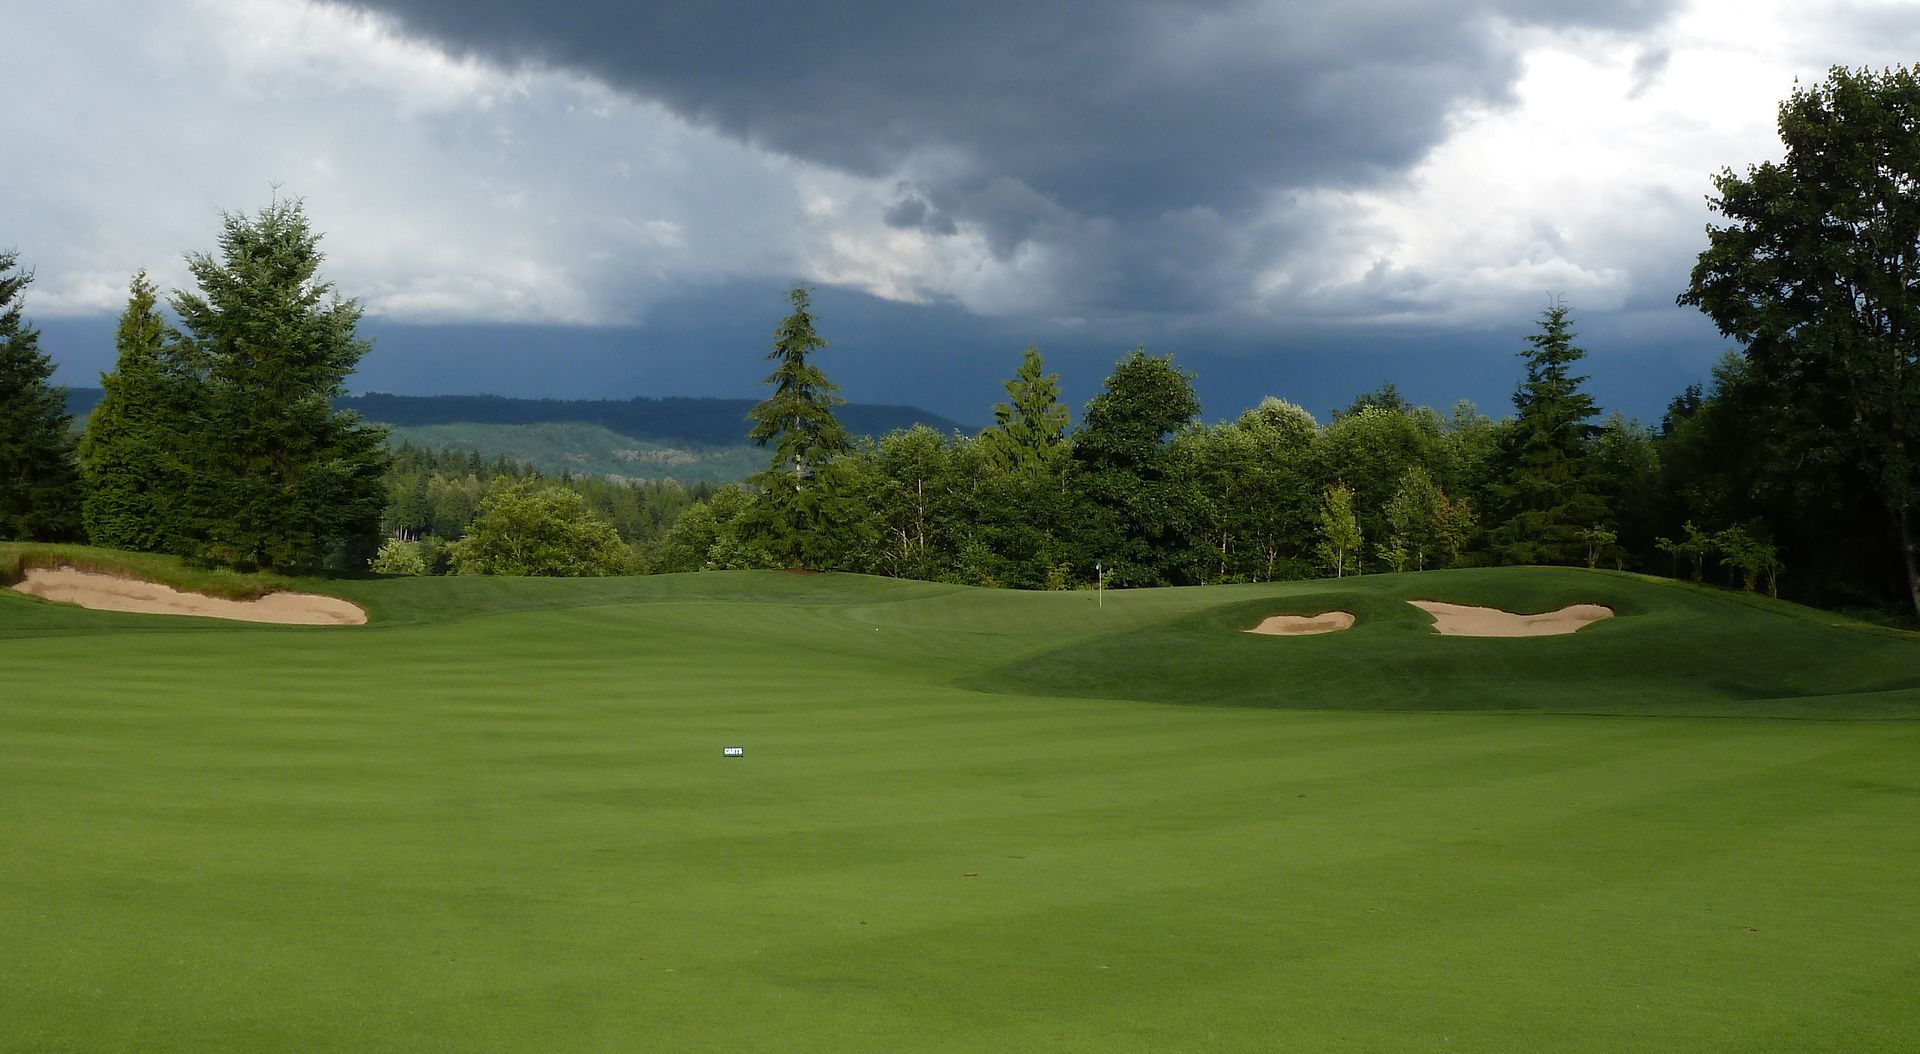
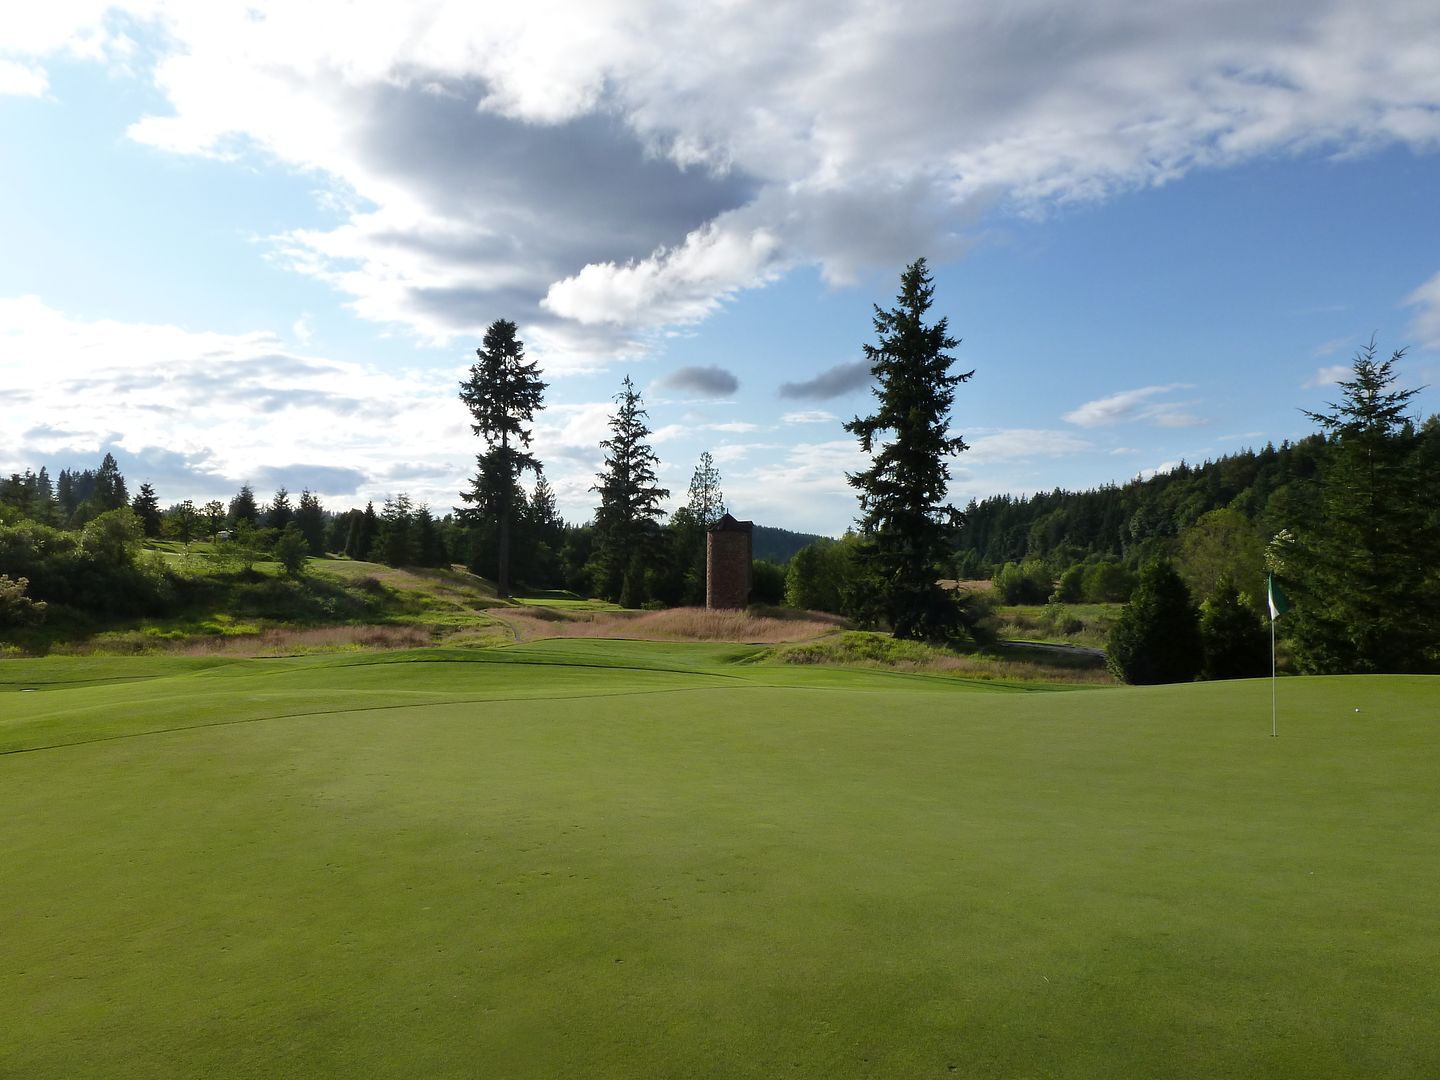
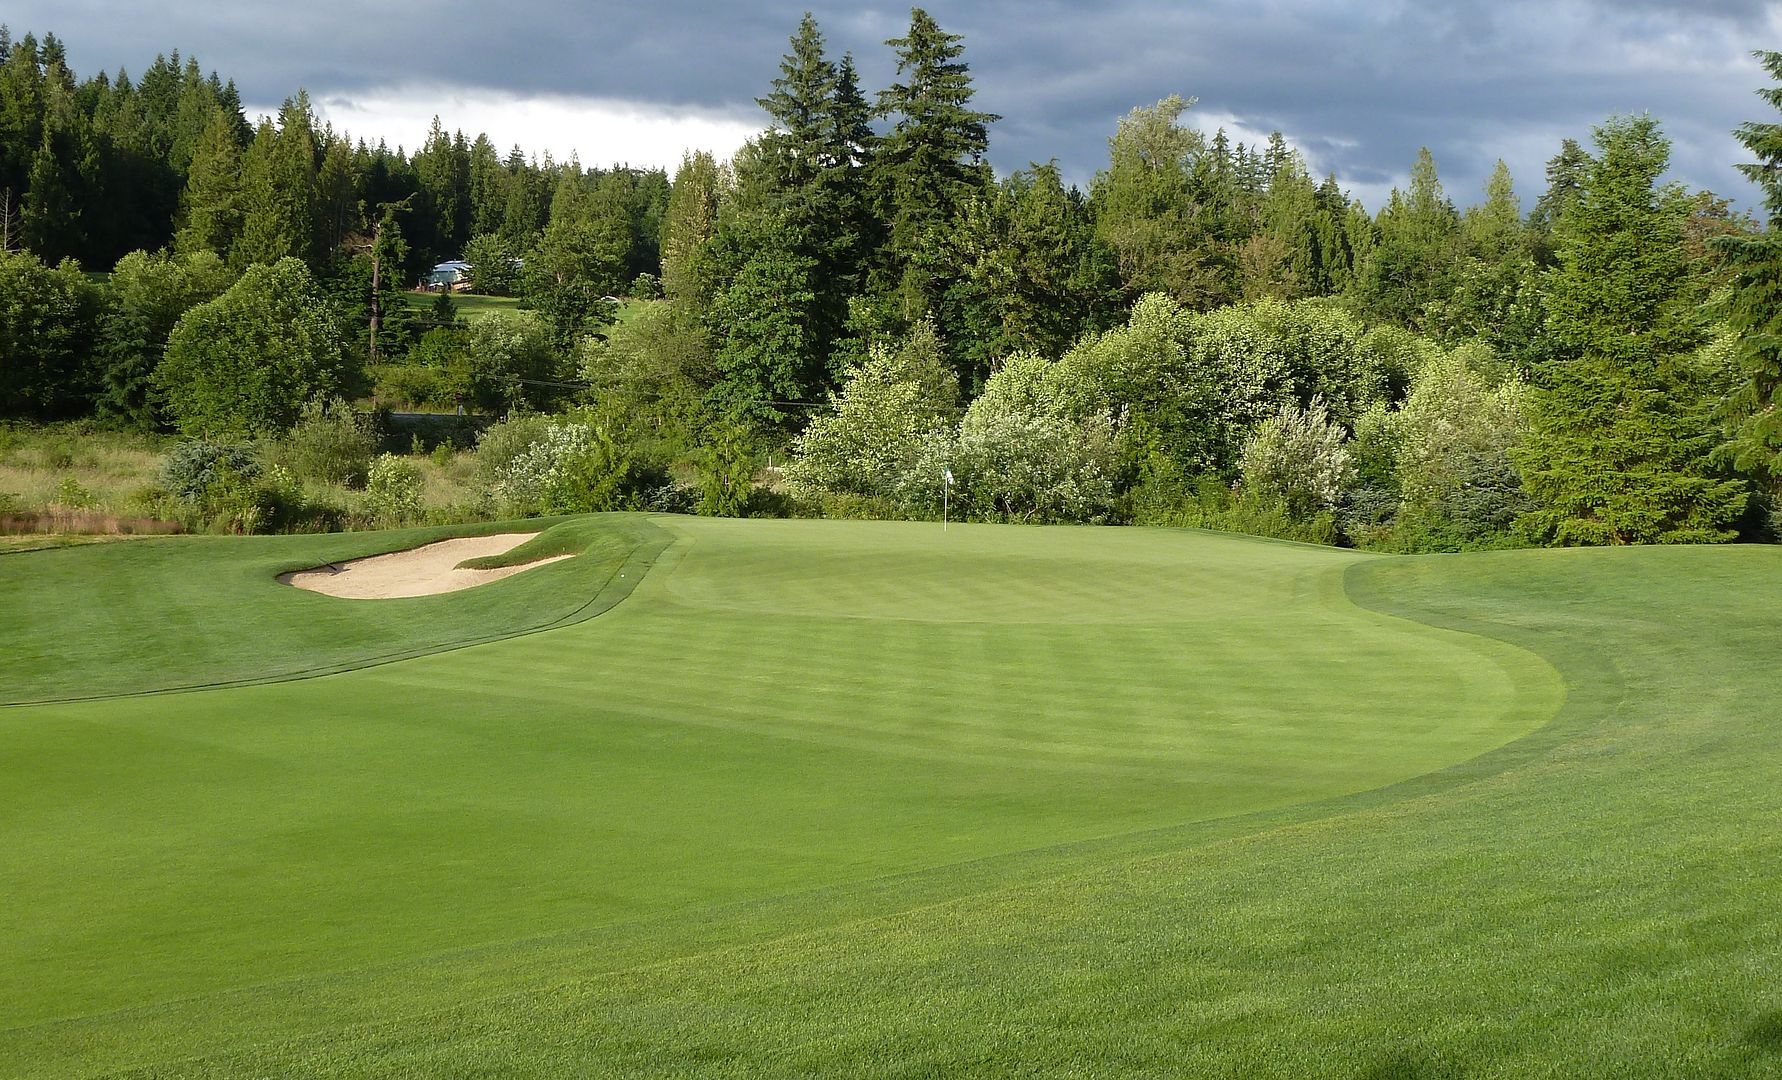
From 100 yards out in the centre of the fairway, the green is in full view and the pin ready to be attacked. The reward for two well-played shots.
Once again there is significant contouring on the green. This time a large swale in the centre of the green makes front-right and back-left pin positions difficult to get to (as well as making it difficult to get from one part of the green to another).

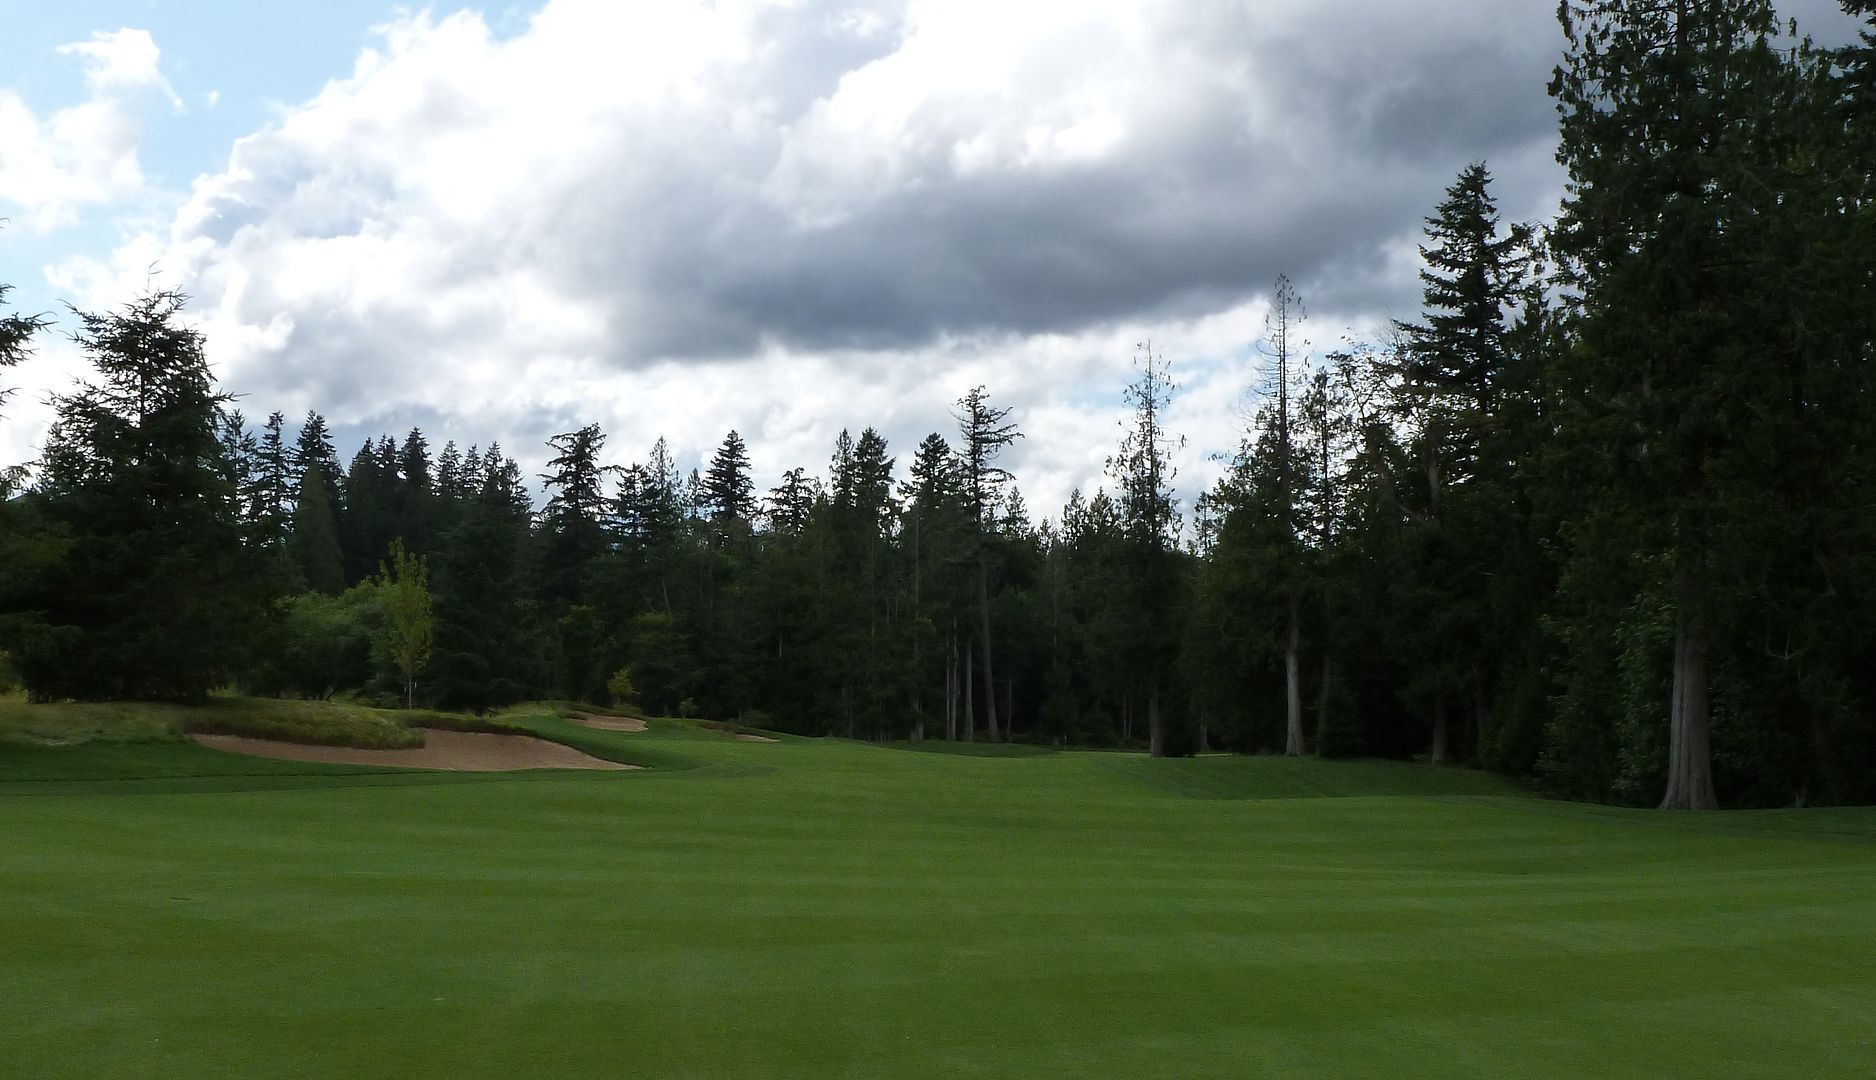
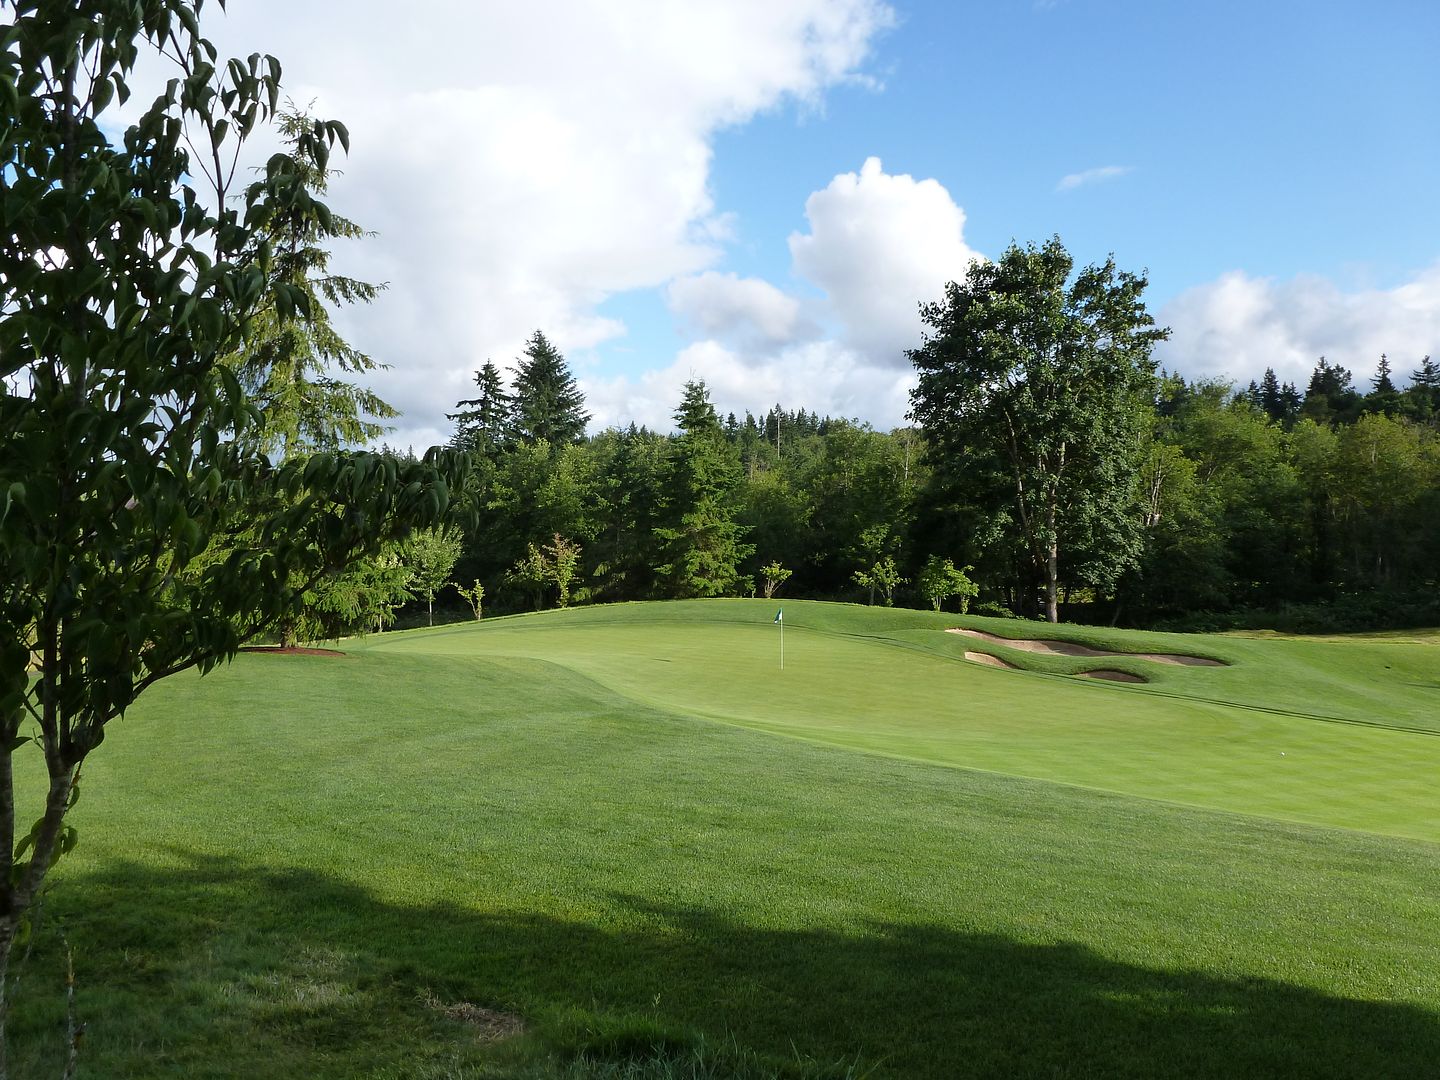
Hole 4: Par 4, 369 Yards
Playing #4 - This hole requires accuracy as well as distance. A shorter tee-shot will be easier to place properly but your approach will need to be precise as this green is very tricky. Longer second shots should try to approach this green from the left side as the bounce is usually favorable. Going over this green could be disastrous.
The 4th at Aldarra seems like Fazio's tribute to Sahalee. An unbelievably narrow and uphill mid-length par 4. Encroaching (and I believe planned this way) trees left and right mean that even shots that find the sides of the fairway will have the tree issues. Oh and for any of you banana-ballers out there, watch out for those first few trees on the left!
Even if the tee shot is hit perfectly, the rest of the hole is no pushover. Although only a short-iron, the approach must be precise as the green angles diagonally with a fronting bunker and slopes short-right that make for a difficult up-and-down.
Once again the green is noticeably undulating, with the most interesting feature being a false-side that feeds balls off the right side of the green.

Shots missing right must deal with the false-side slope. From thick rough the only real option is high and soft so hopefully you have a good lie and clean grooves.

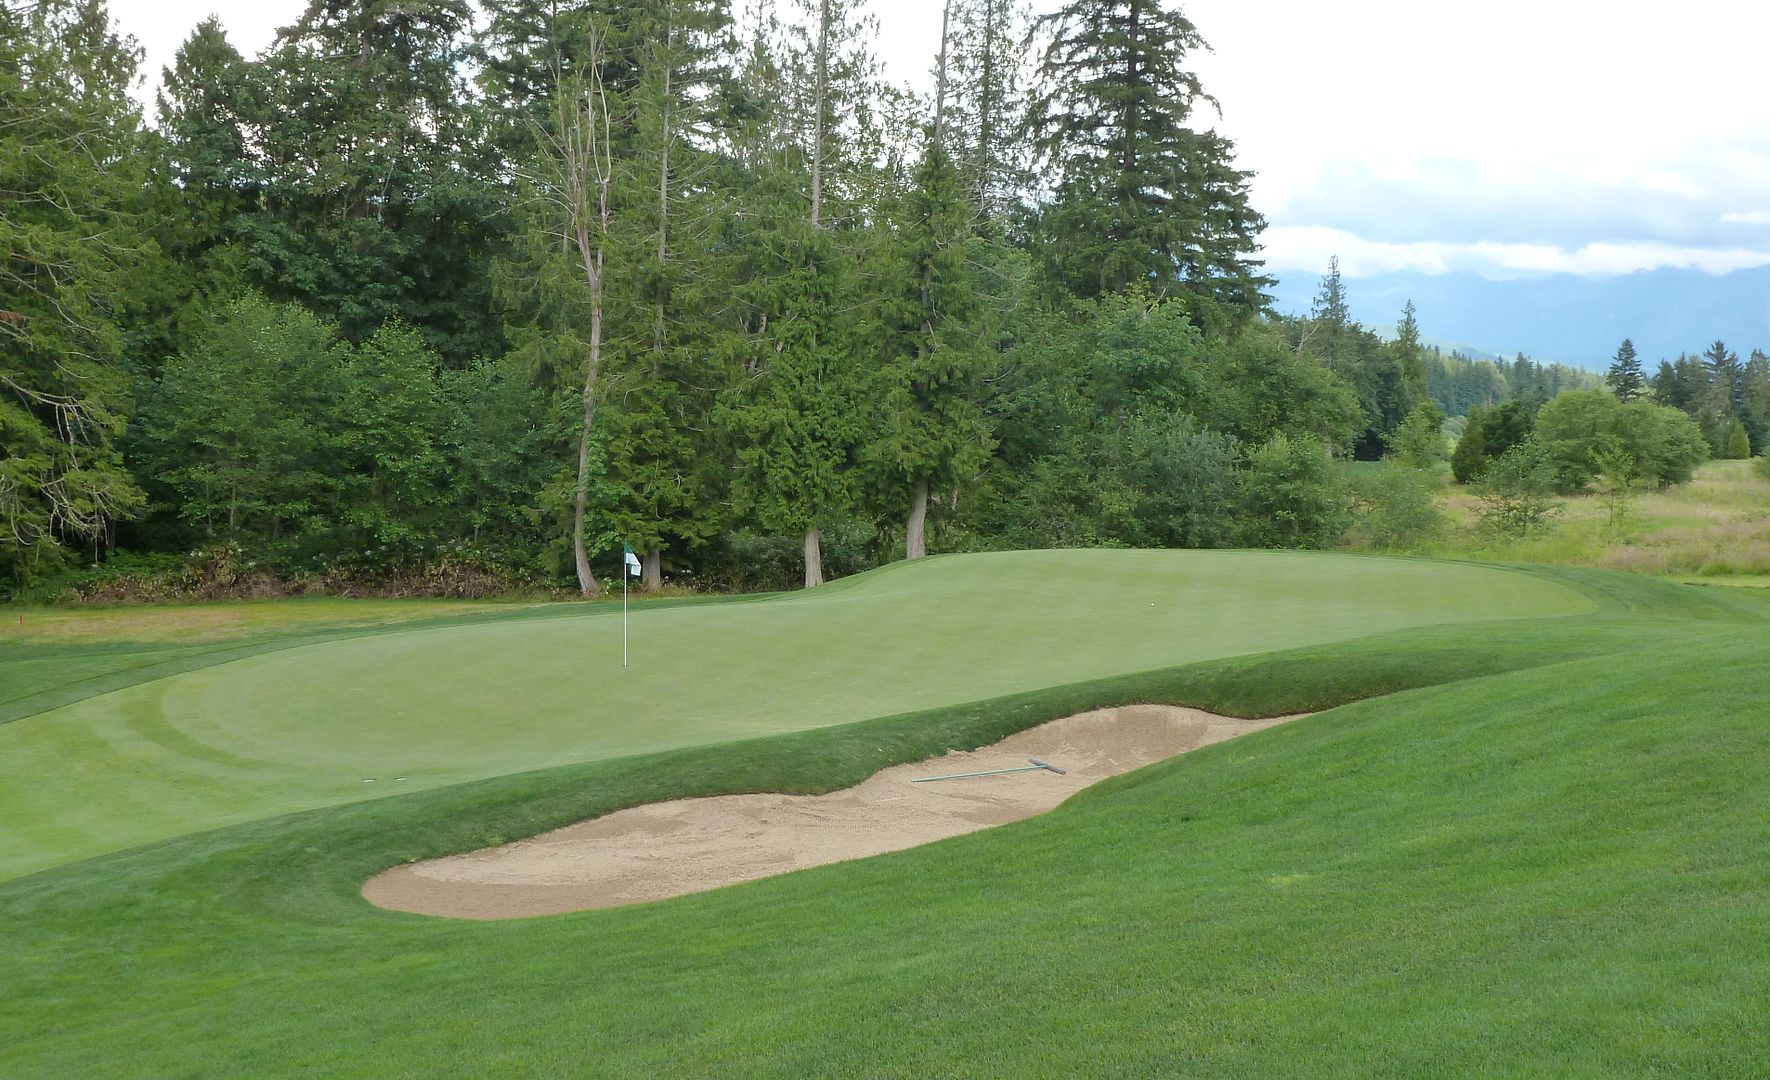
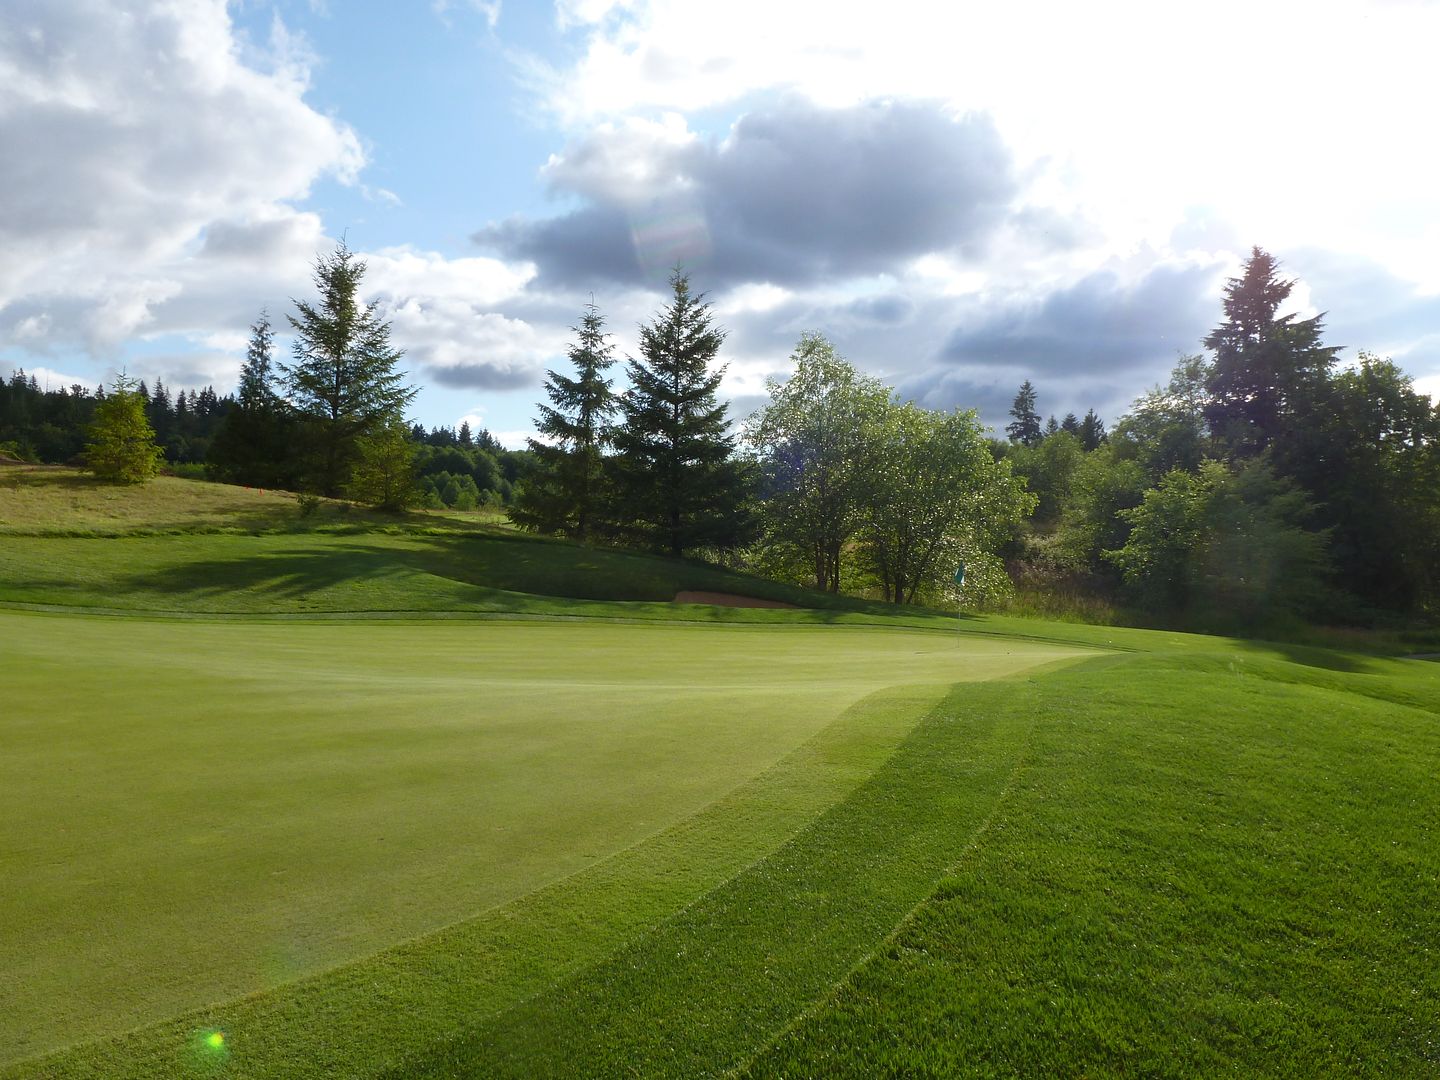
Hole 5: Par 4, 387 Yards
Playing #5 - The tee shot calls for a long, hard fade around a slight dogleg right. The fairway is very wide and the only trouble spot is a fairway bunker at the corner on the left side. A shot that ends up on the right side will have access to any flag on this green. This green has a false front and slopes from back to front.
No pictures from the championship, but it is 60 yards back and slightly to the right. From the members tees, it is still a very intimidating tee shot with forest all the way up the right and no bail out left as a bunker guards that side of the fairway. Is this bunker really necessary? I'll leave that commentary to those that know the course better, but from my one go-around I think the answer is no.
Tee shots that challenge the trees right are rewarded with a preferred angle into the green. A false-front and fronting bunker requires shots to be well-struck and carried onto the green.
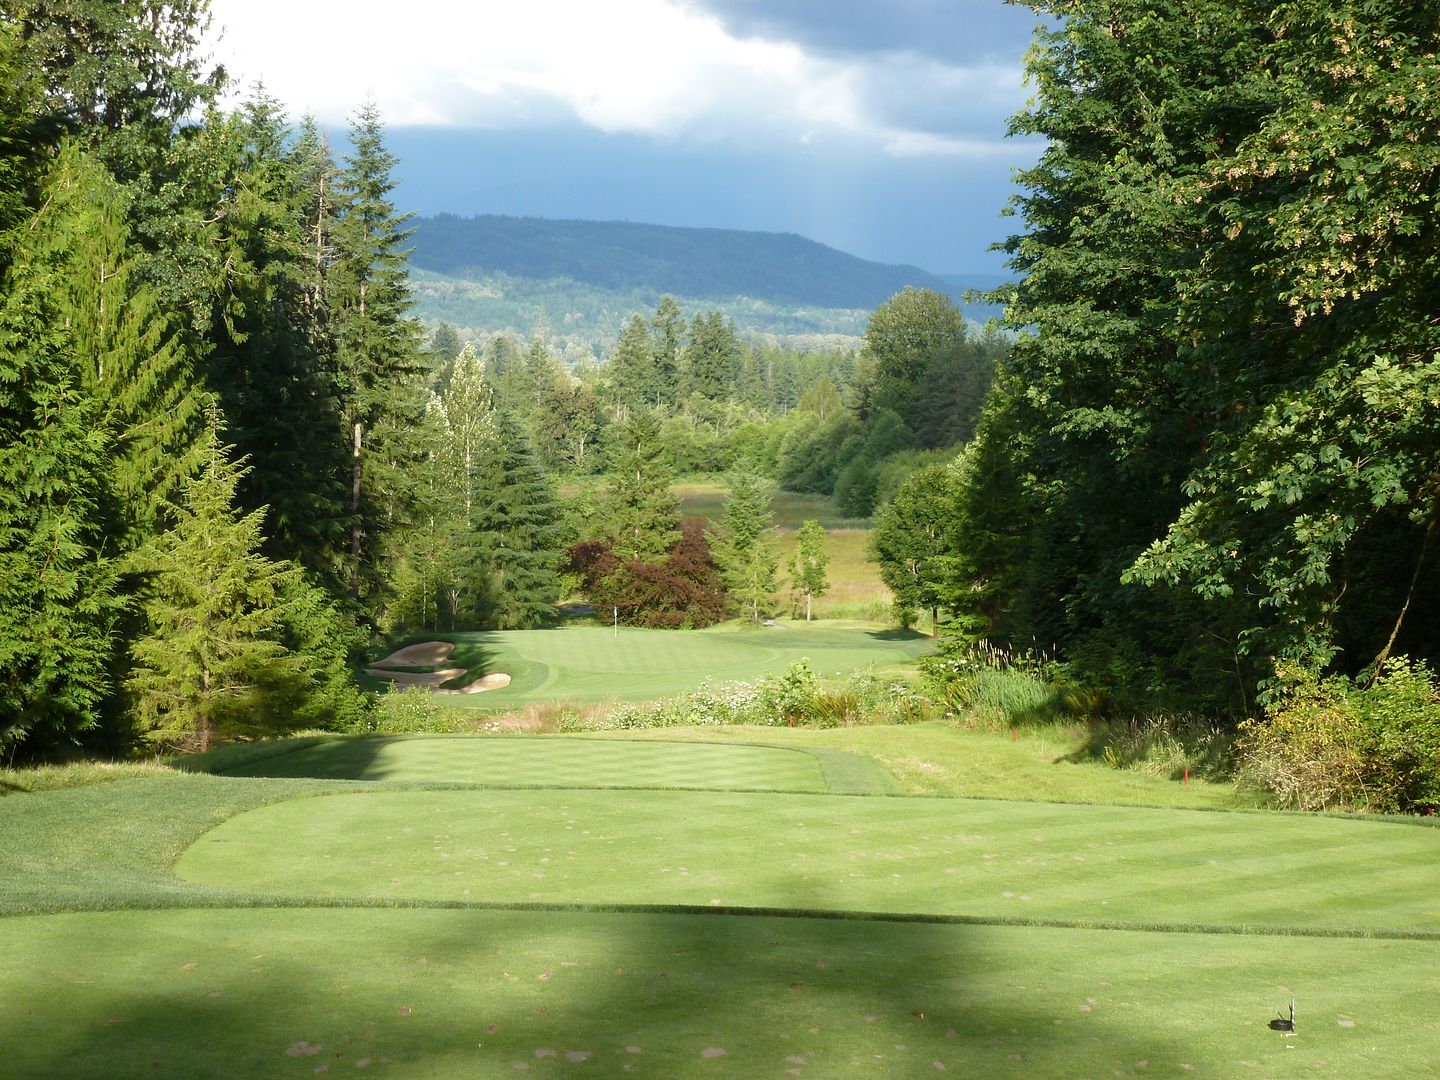
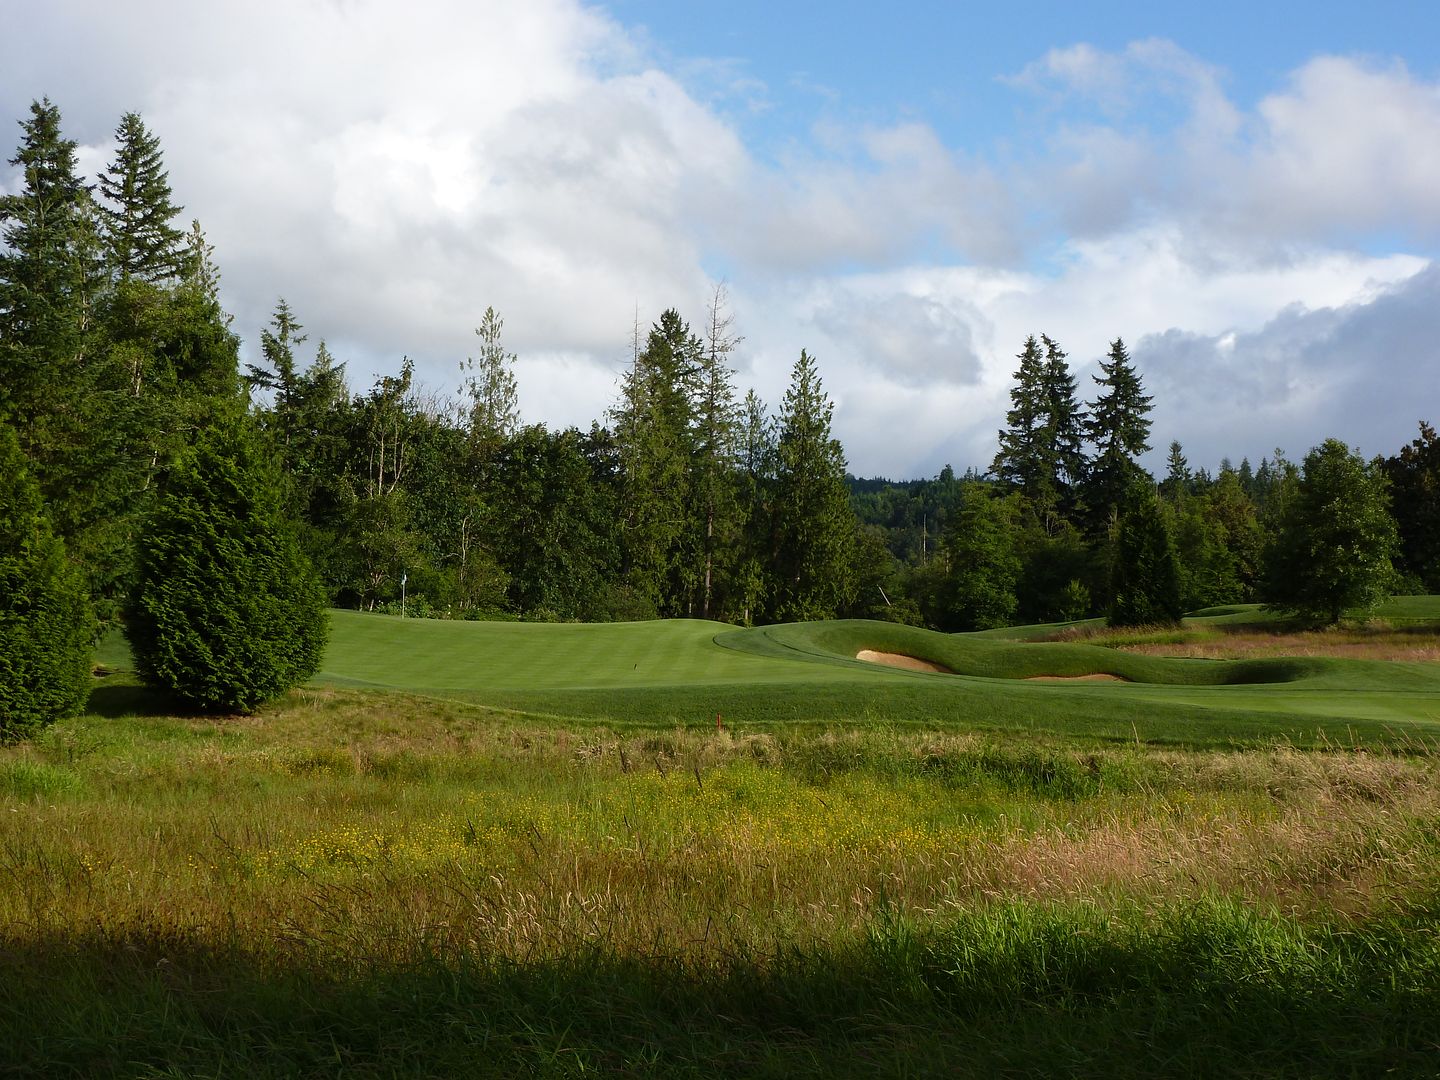
Hole 6: Par 3, 176 Yards
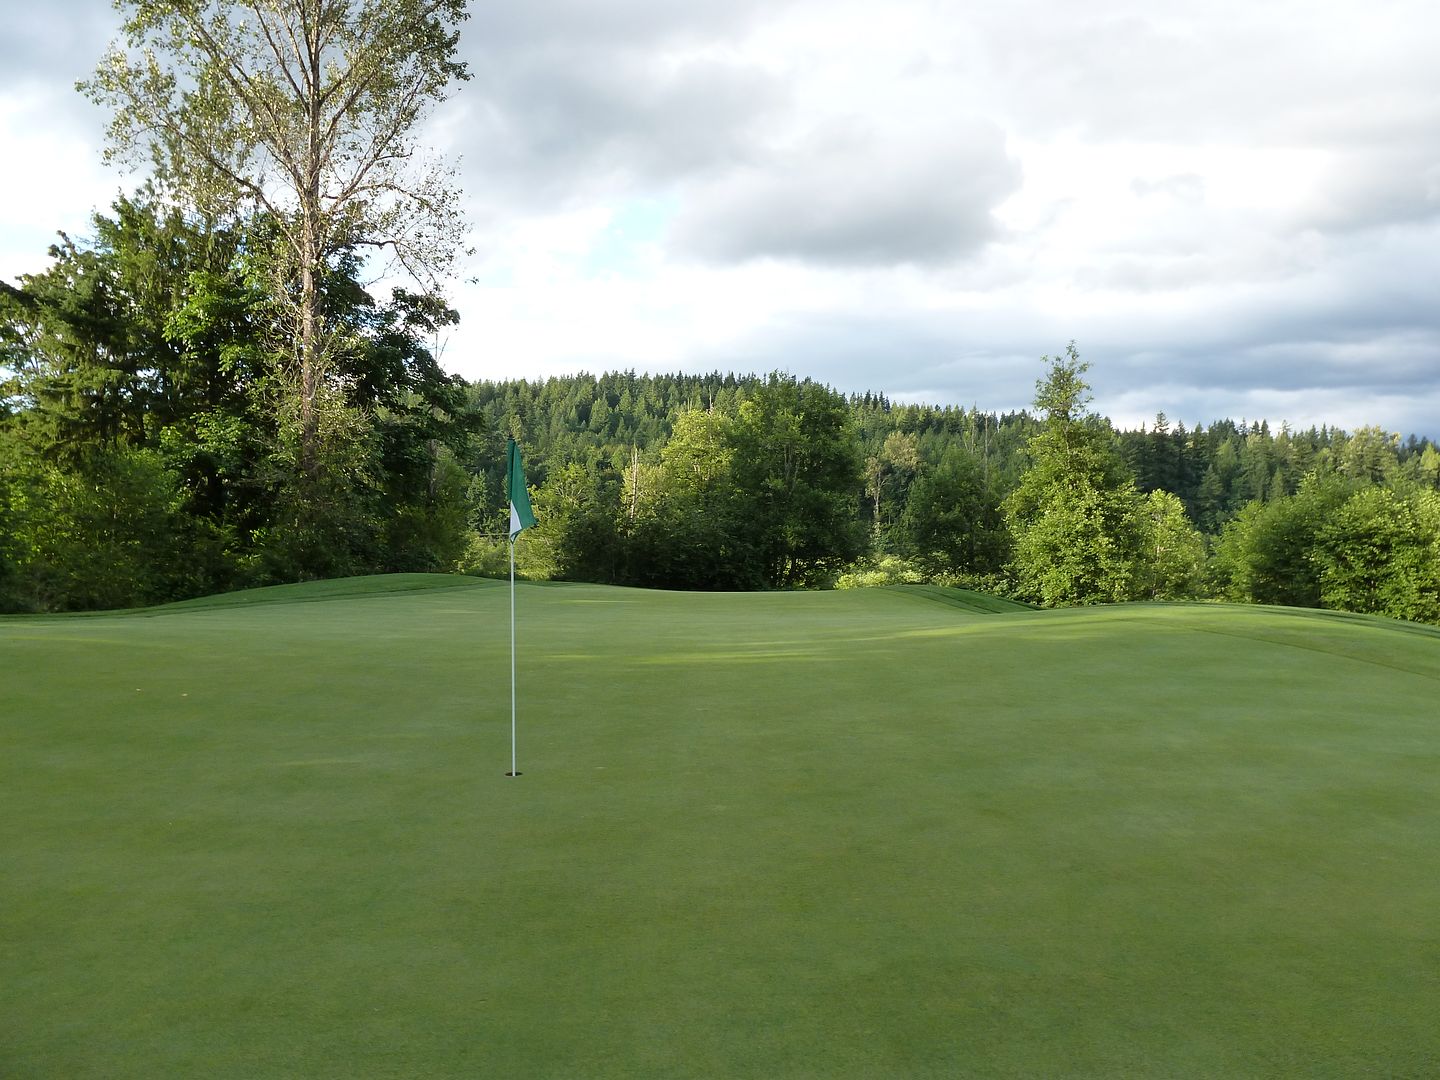
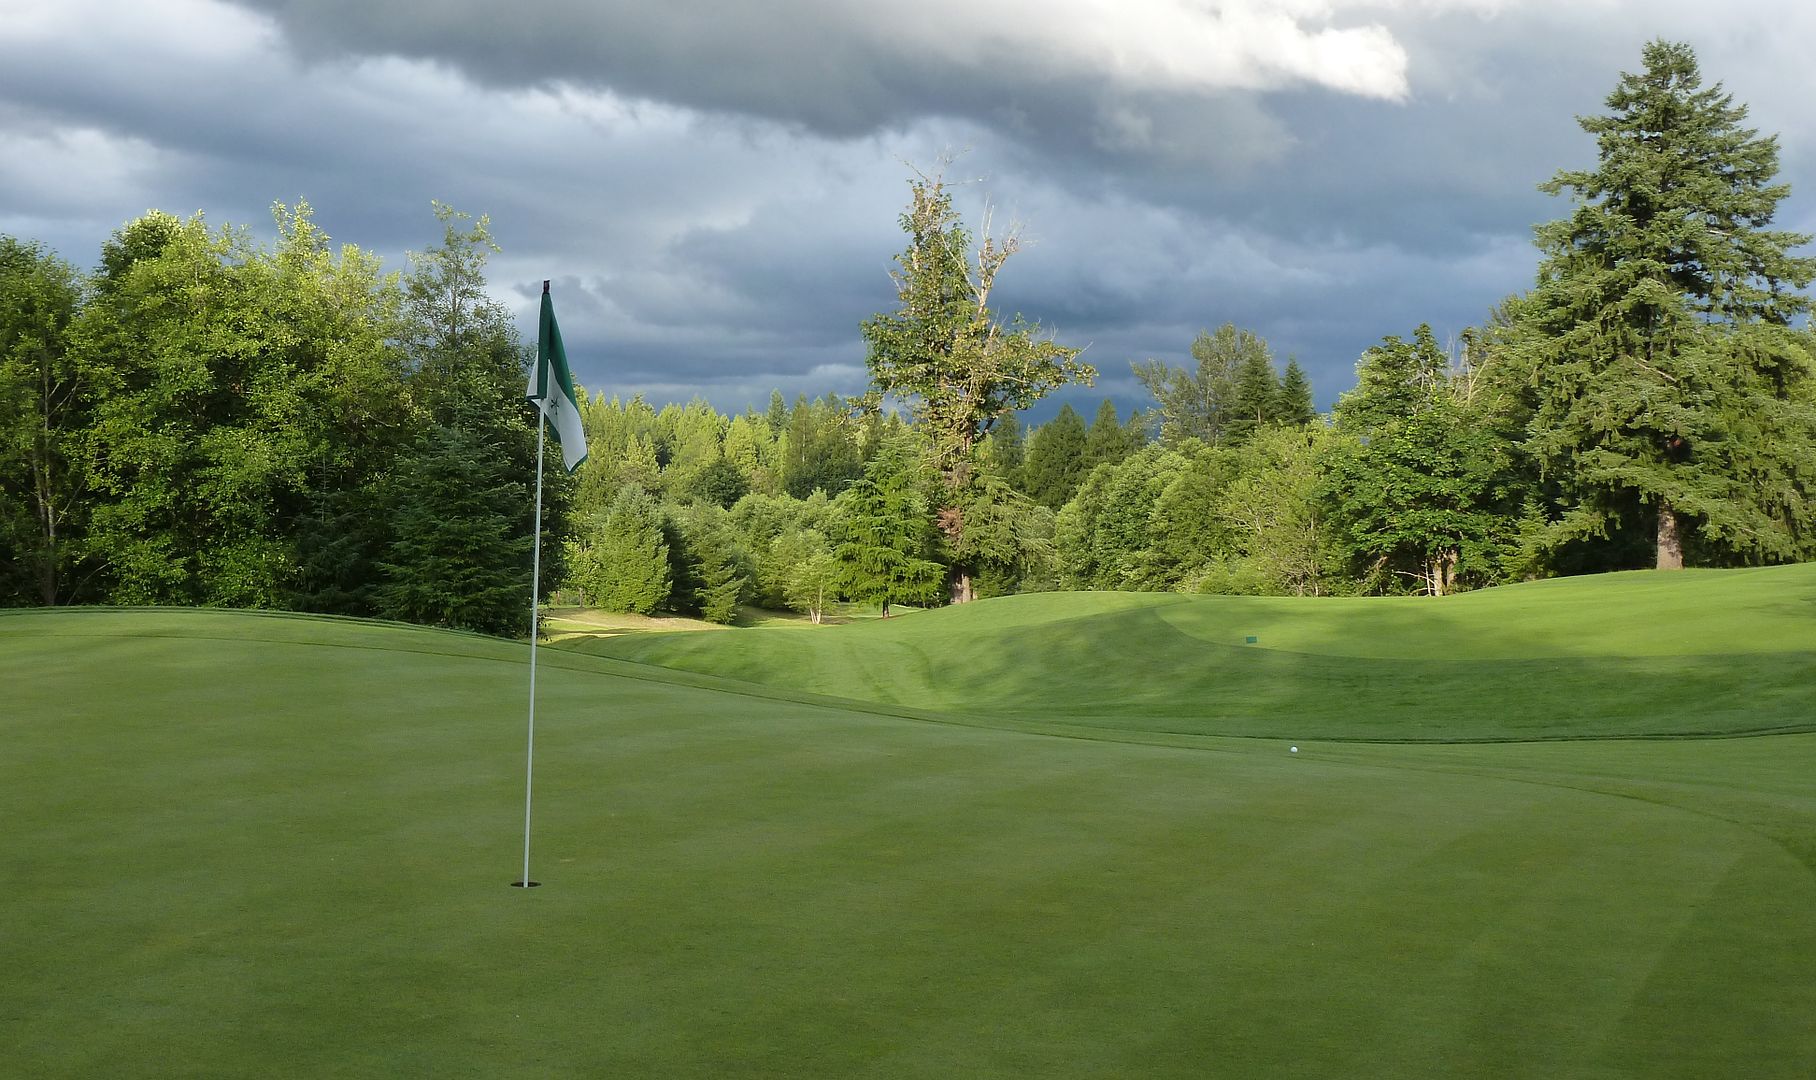
Playing #6 - Like the second hole, your tee-shot should be played towards the center of the green. There is a second tier on the upper left corner of this green that is well protected by a bunker left and slope behind the green.Though it is about the same yardage as 2 on the scorecard, 6 plays in the opposite direction.
The tee shot is more visually intimidating than it is difficult. One of those holes that when you get to the green you say, "I didn't realize there was that much room up here."
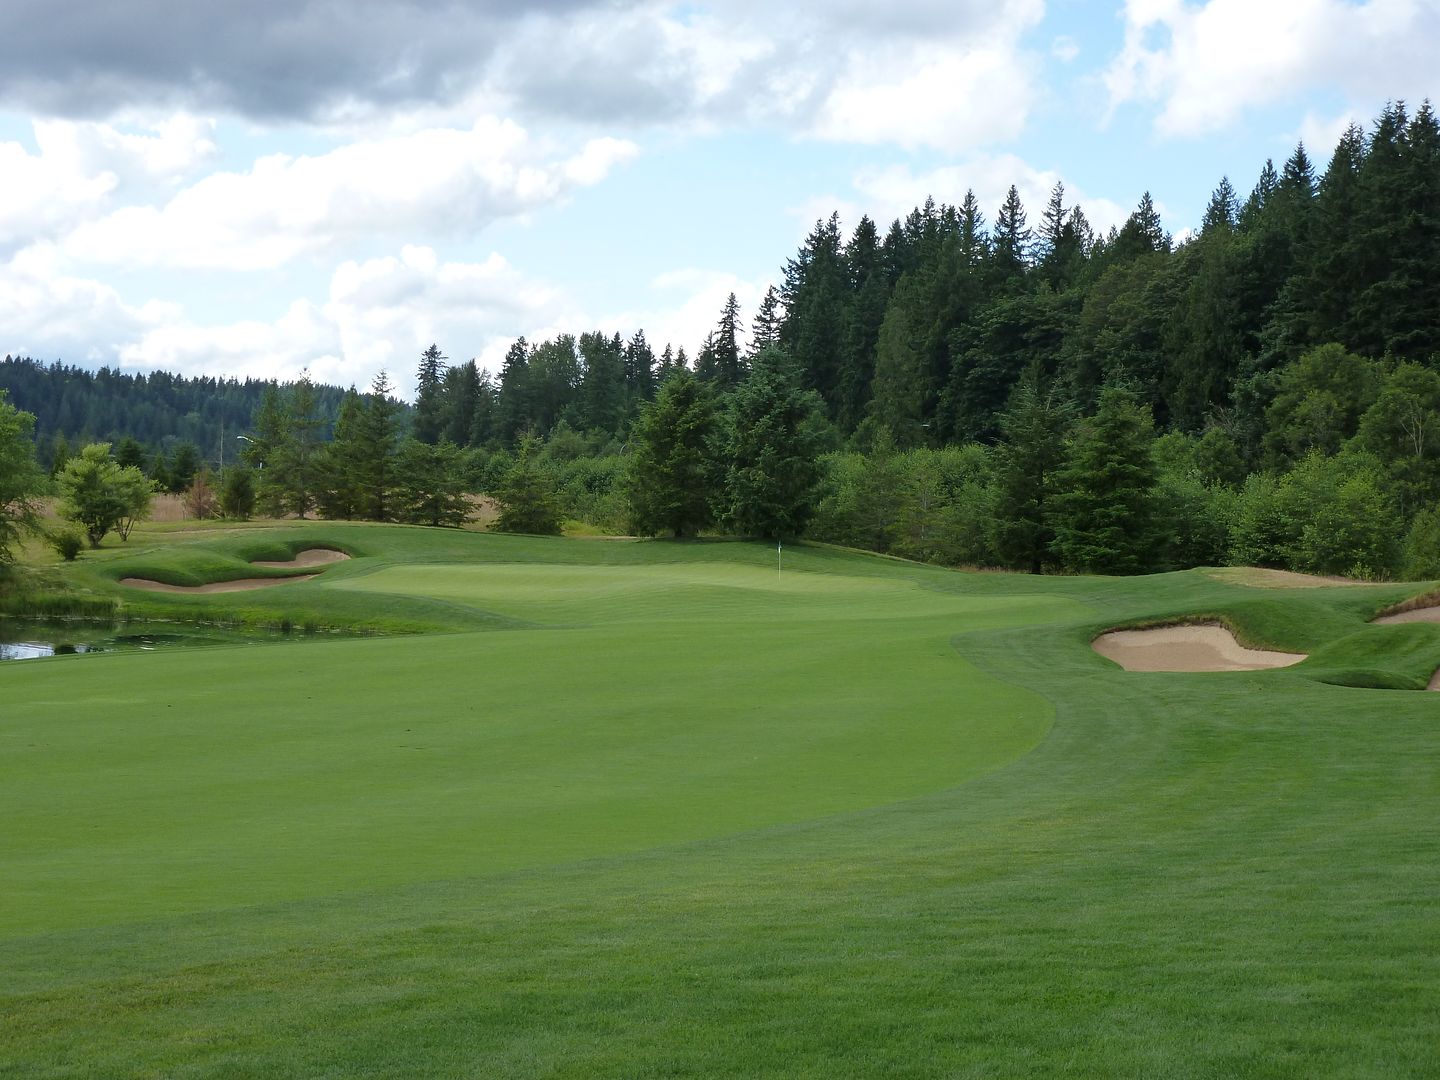
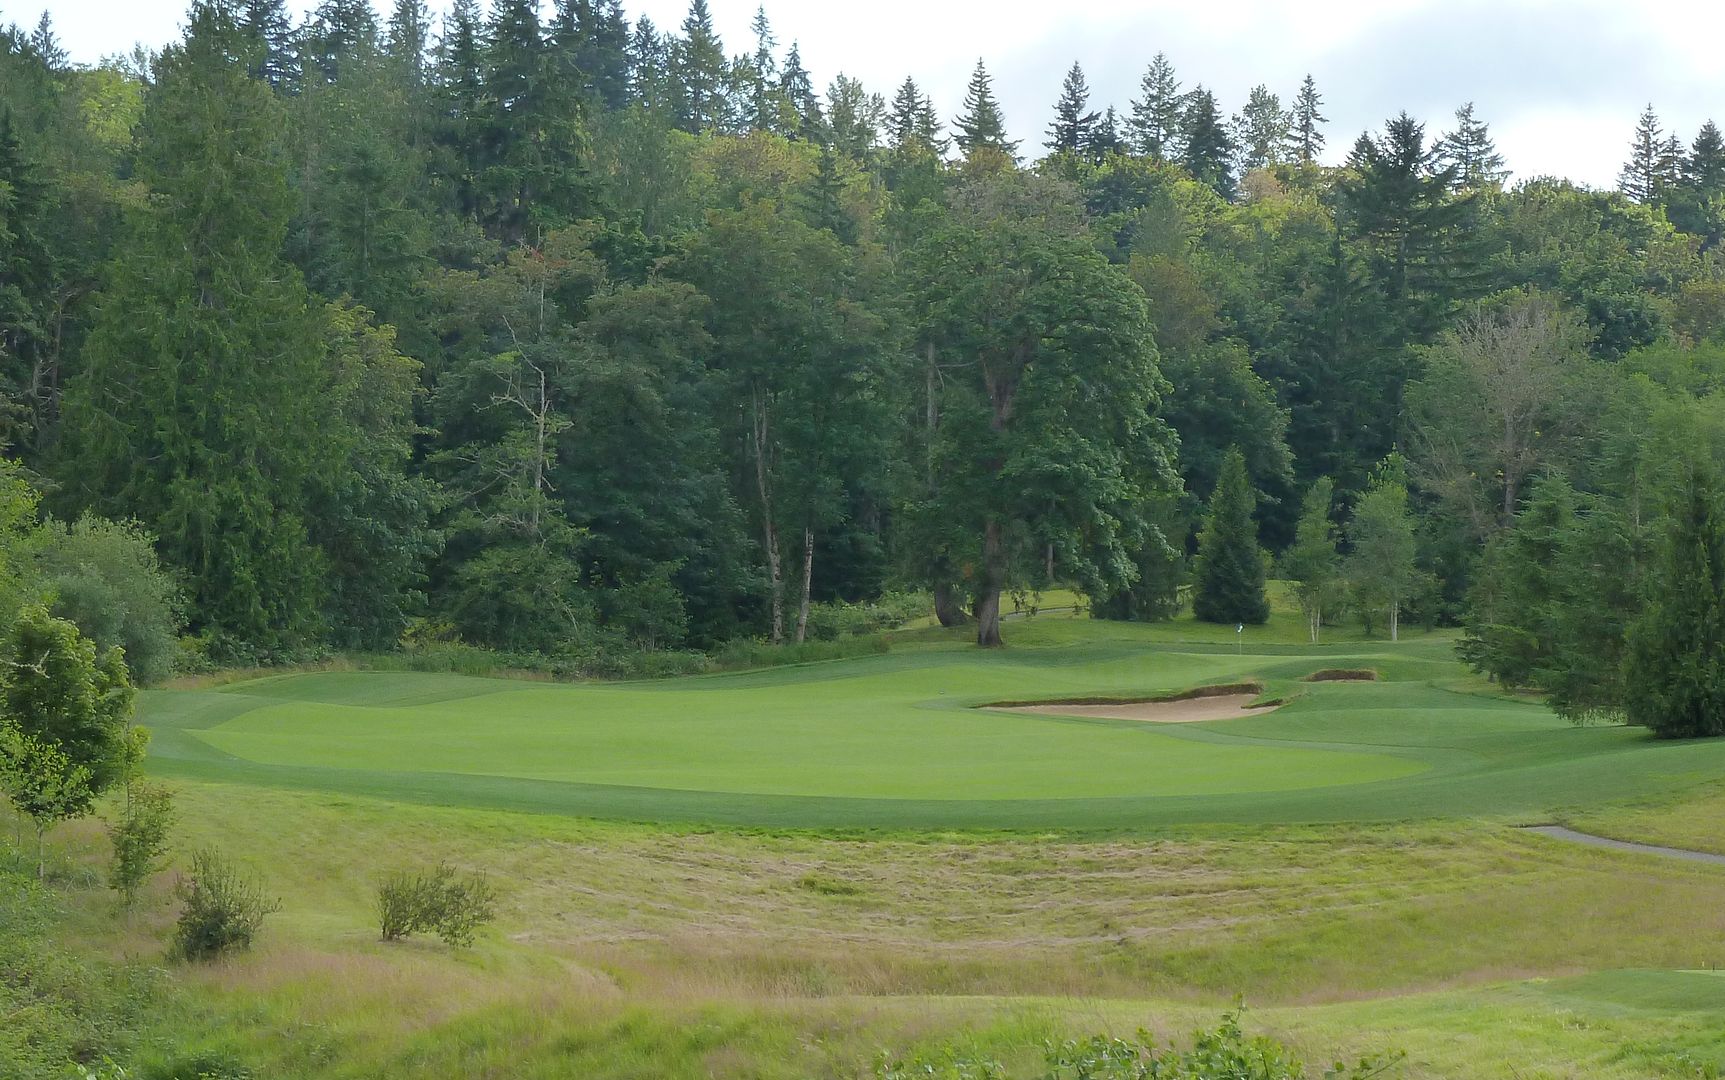
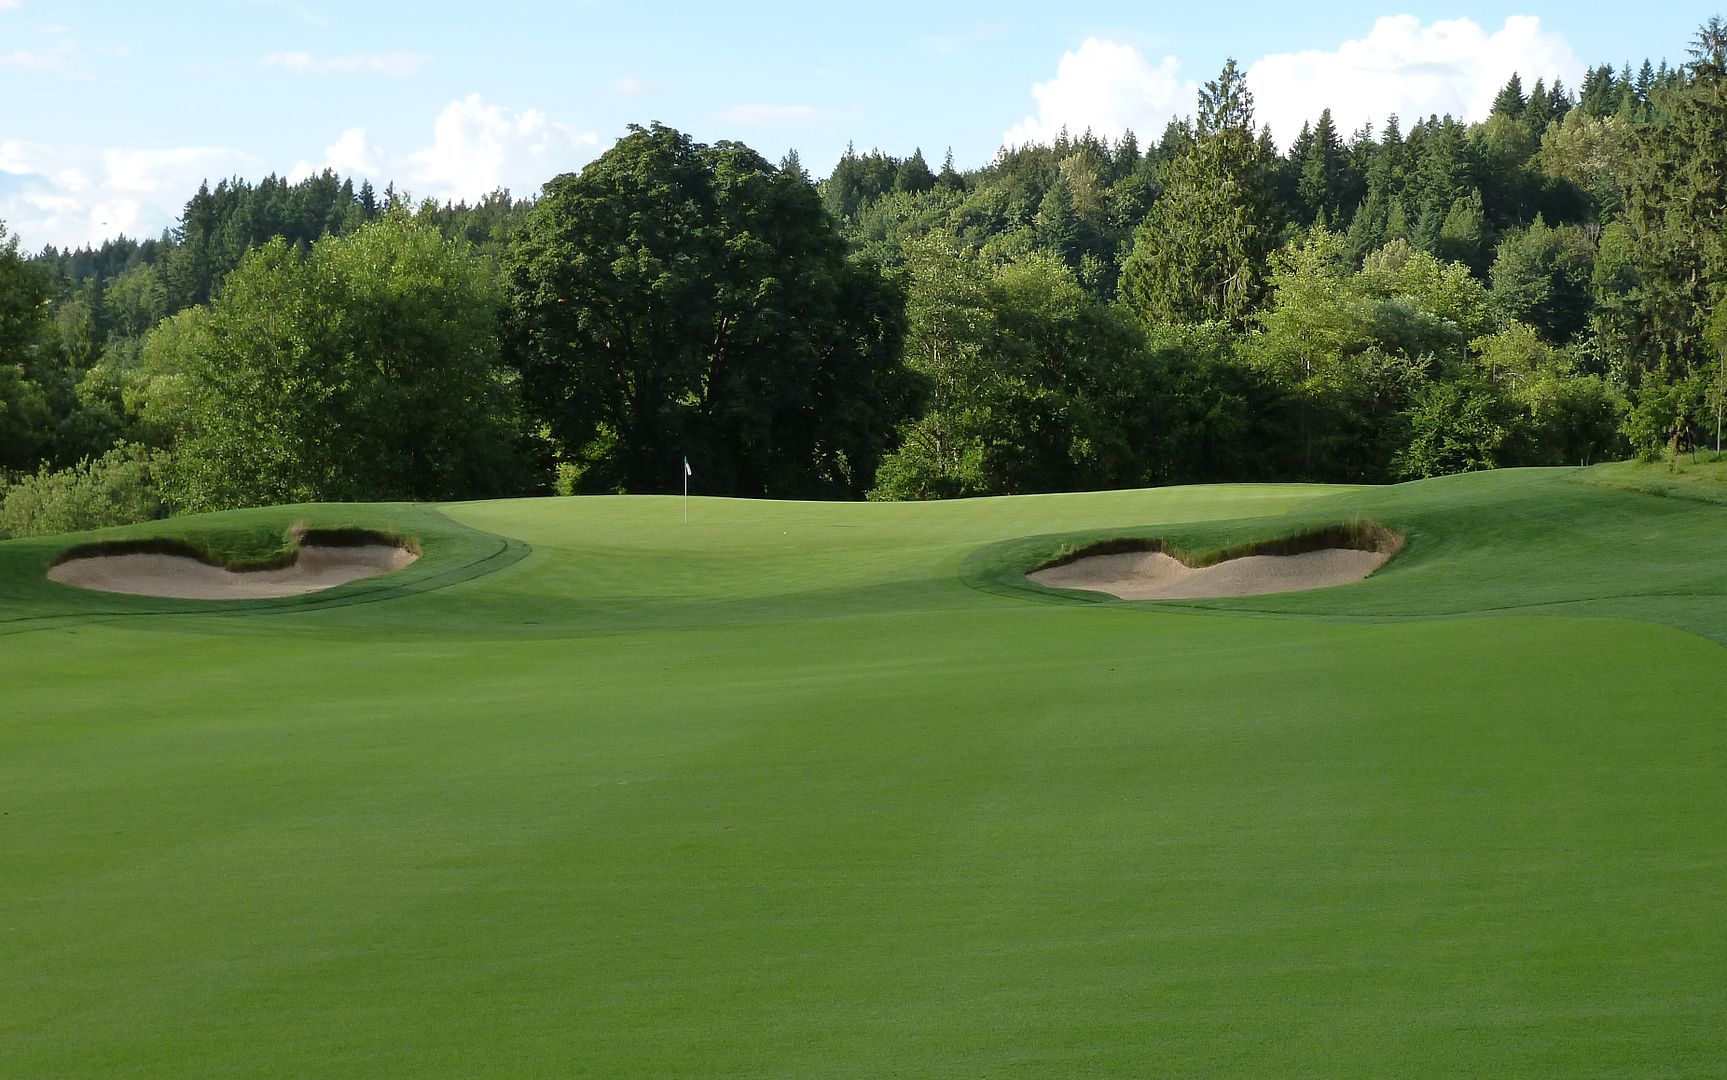
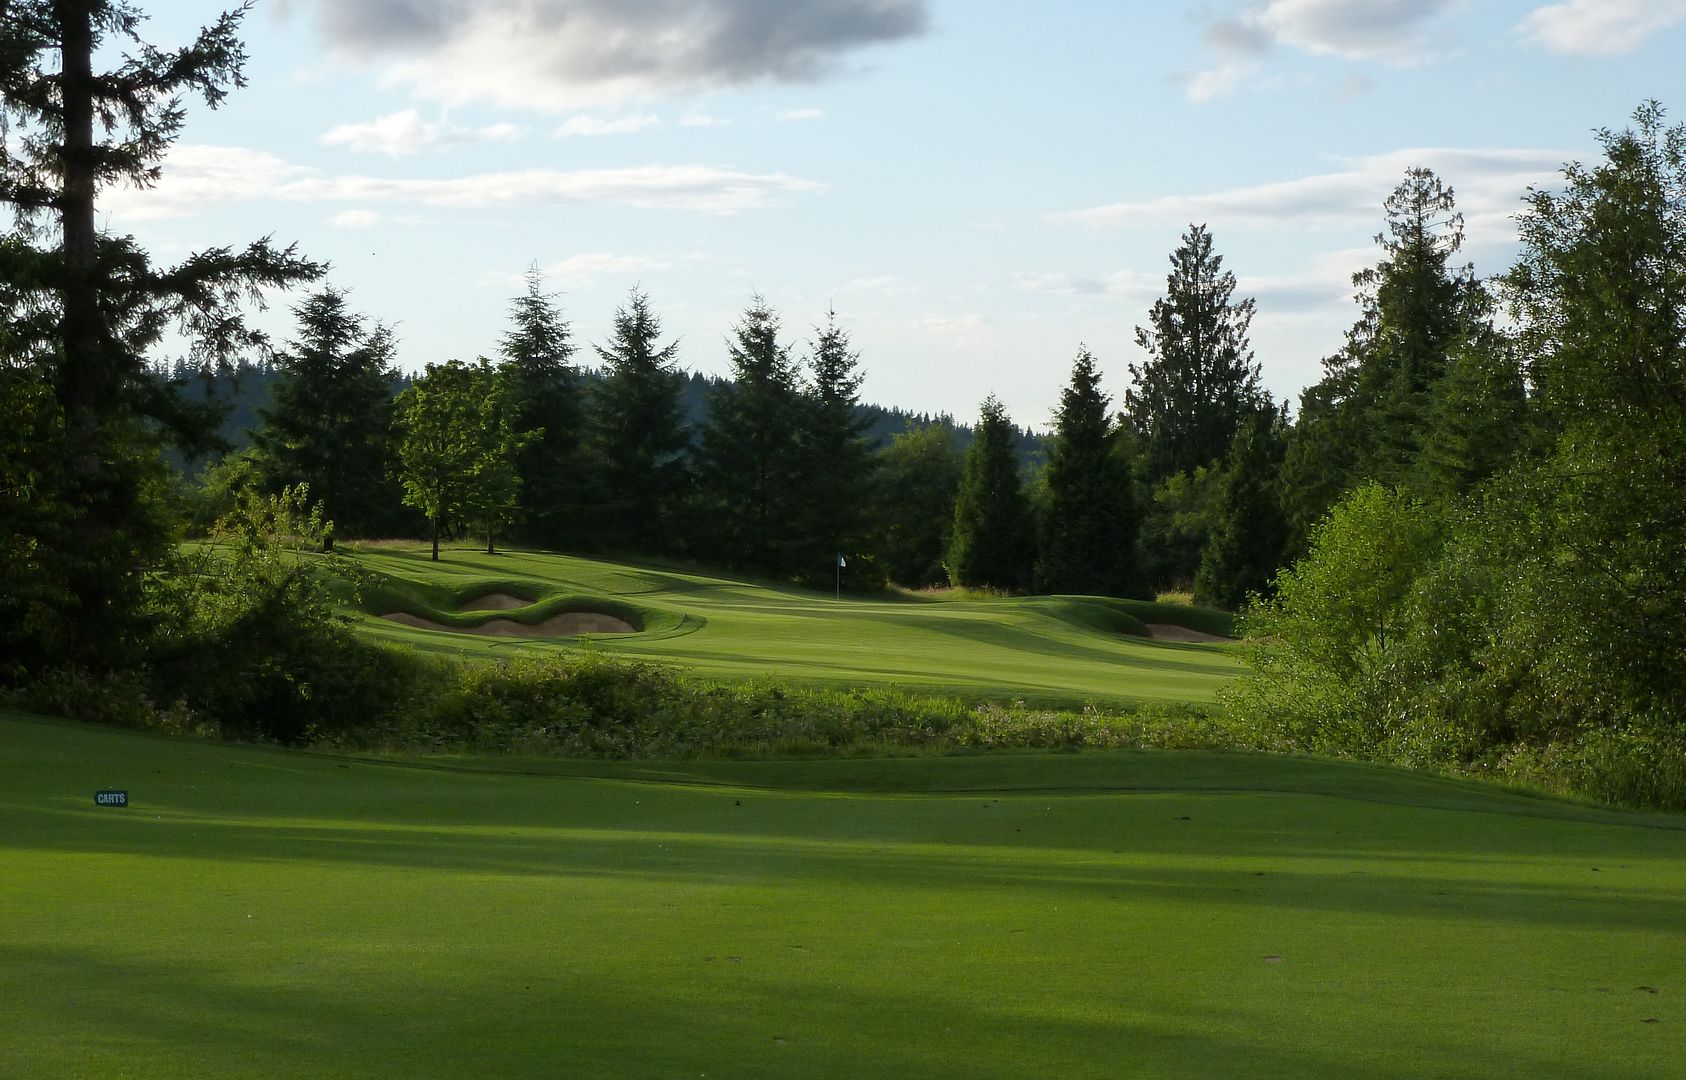
Hole 7: Par 5, 503 Yards
Playing #7 - A reachable par 5, the tee-shot can be placed anywhere in the fairway. The fairway bunker on the left side can be carried by the longer hitters. Try to keep your approach shot short of the flag as this green has many breaks, but predominantly is sloped back right to front left. There are good up-and-down possibilities from the short-left bunker but it is very difficult to play from the short-right bunker.
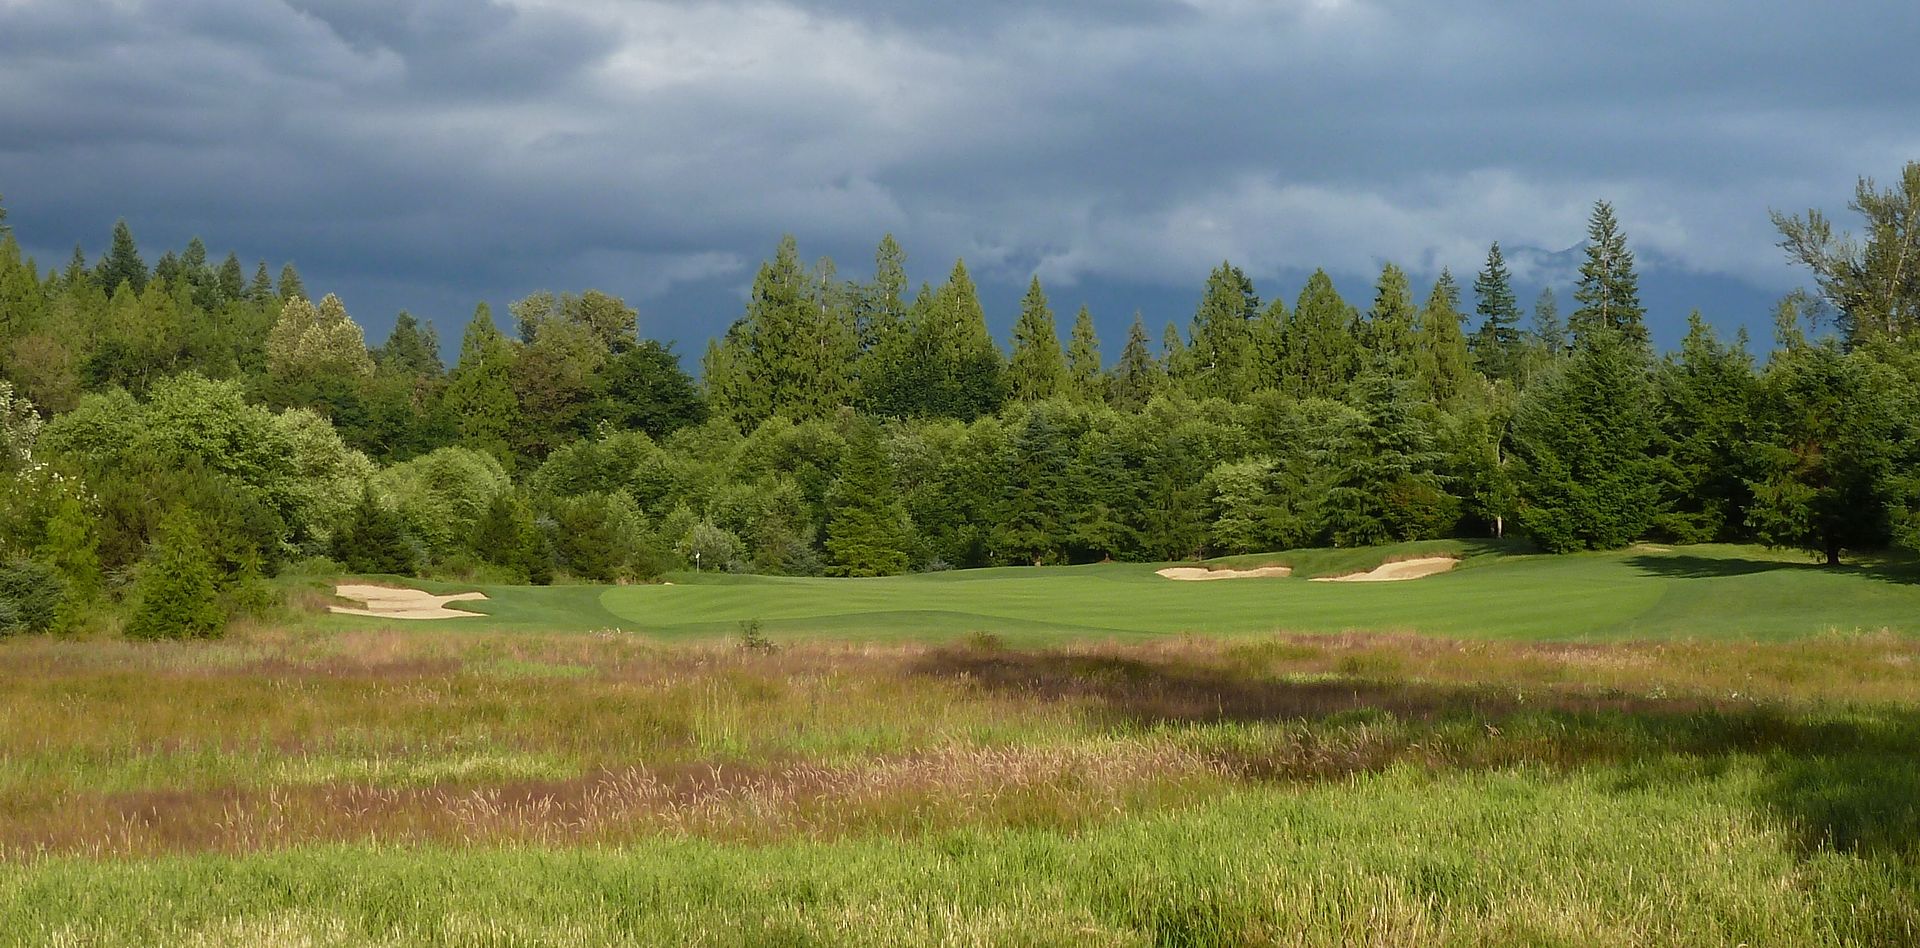
Decision time. The green is well-protected with bunkers right, short and left. The approach sets up very well for a draw and there is a small neck in the fairway that will allow a draw to run onto the green.
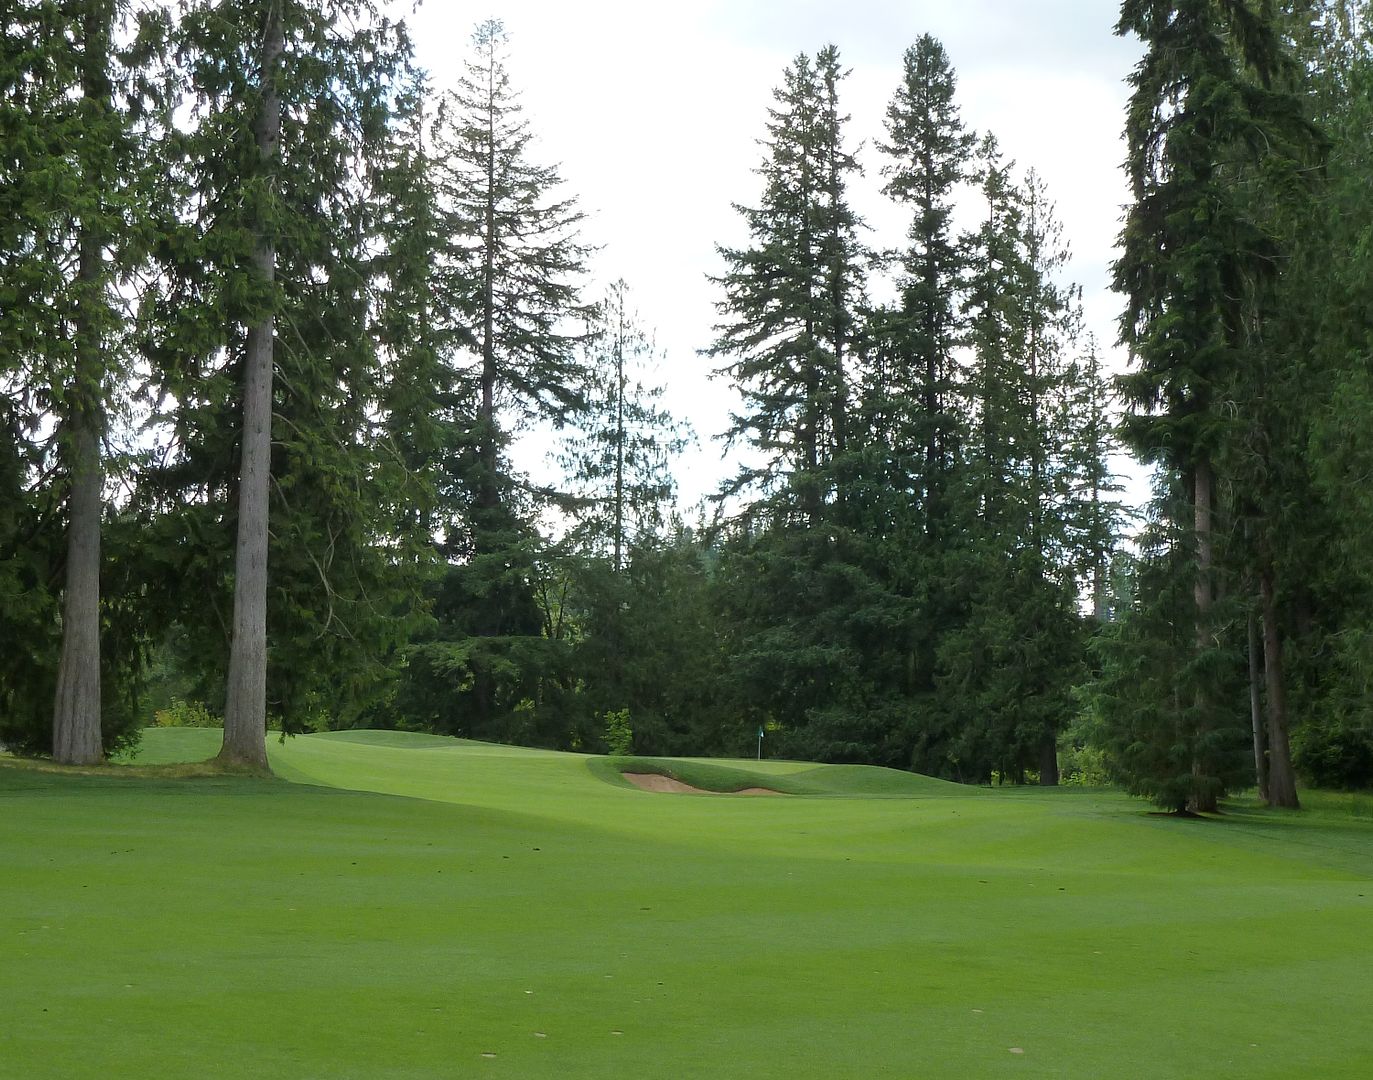
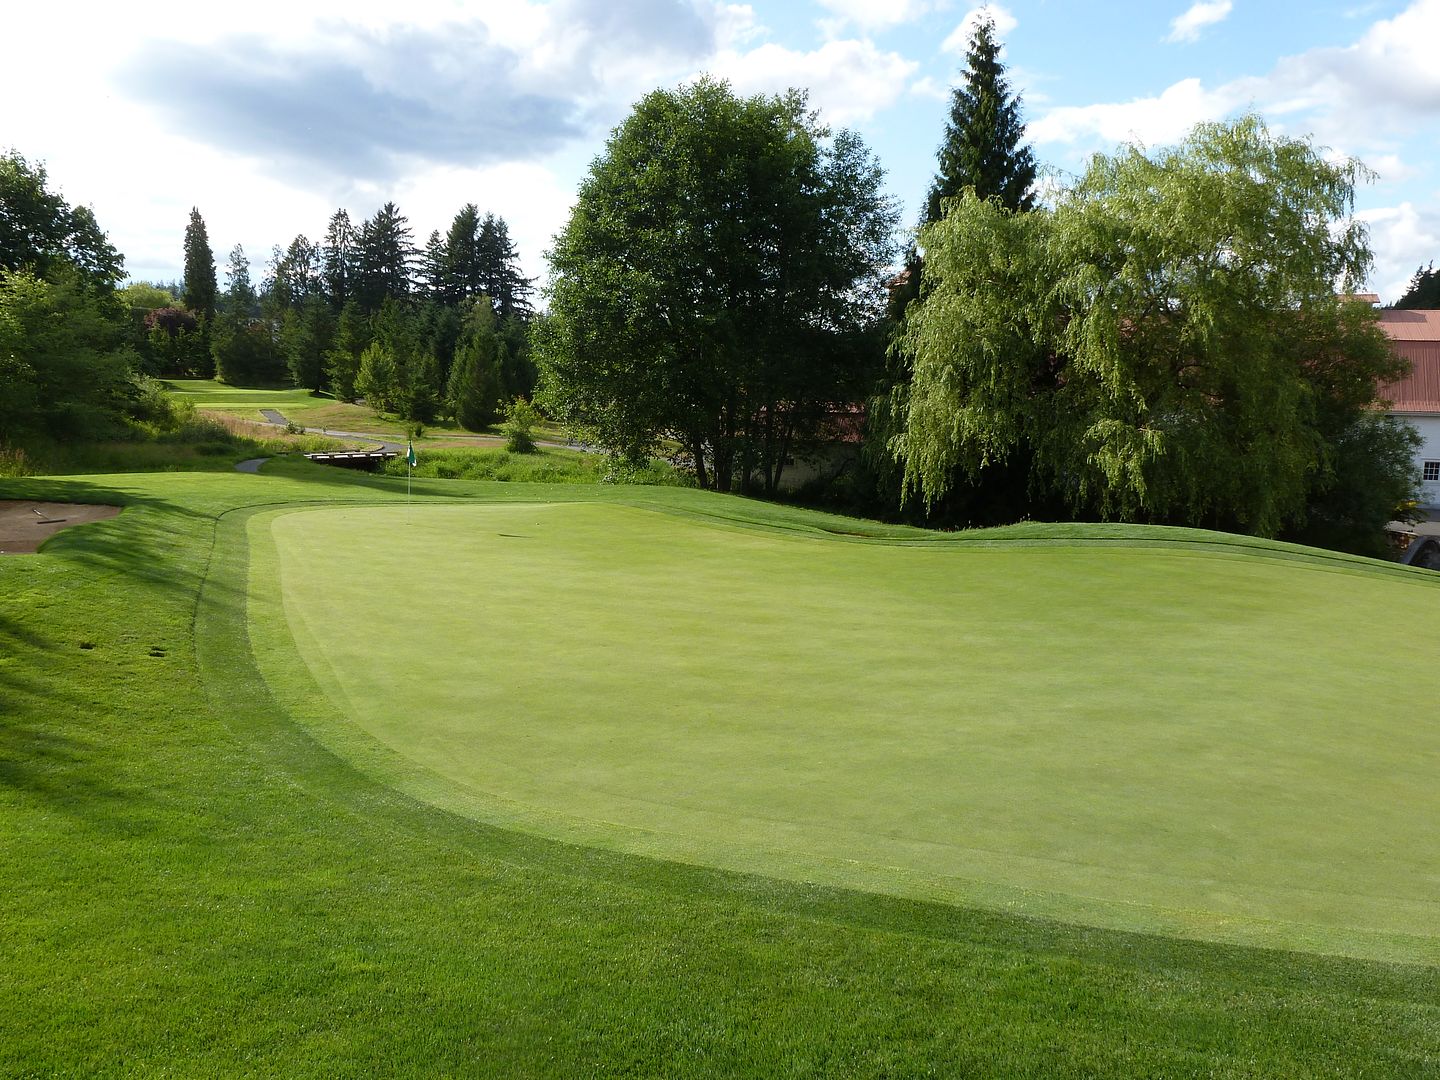
Hole 8: Par 4, 456 Yards
Playing #8 - Depending on where the tee is located, longer hitters can cut the corner just left of the tree (A) but the prudent play would be towards the right-hand fairway bunker with a slight draw. The second shot is significantly downhill to a green that is very difficult to hold on the left side. This green has many slopes.
Left or right of the tree? Length of hole + line of charm in full effect here as the golfer really wants to cutoff a little more than he probably should to leave a shorter approach into the green.
From about 180 yards out. Balls can be run onto the right portion of the green, but a back-left pin (pictured) is deadly. That fronting bunker is deep and there is not a whole lot of depth in the green in that area. Can you say sucker pin?
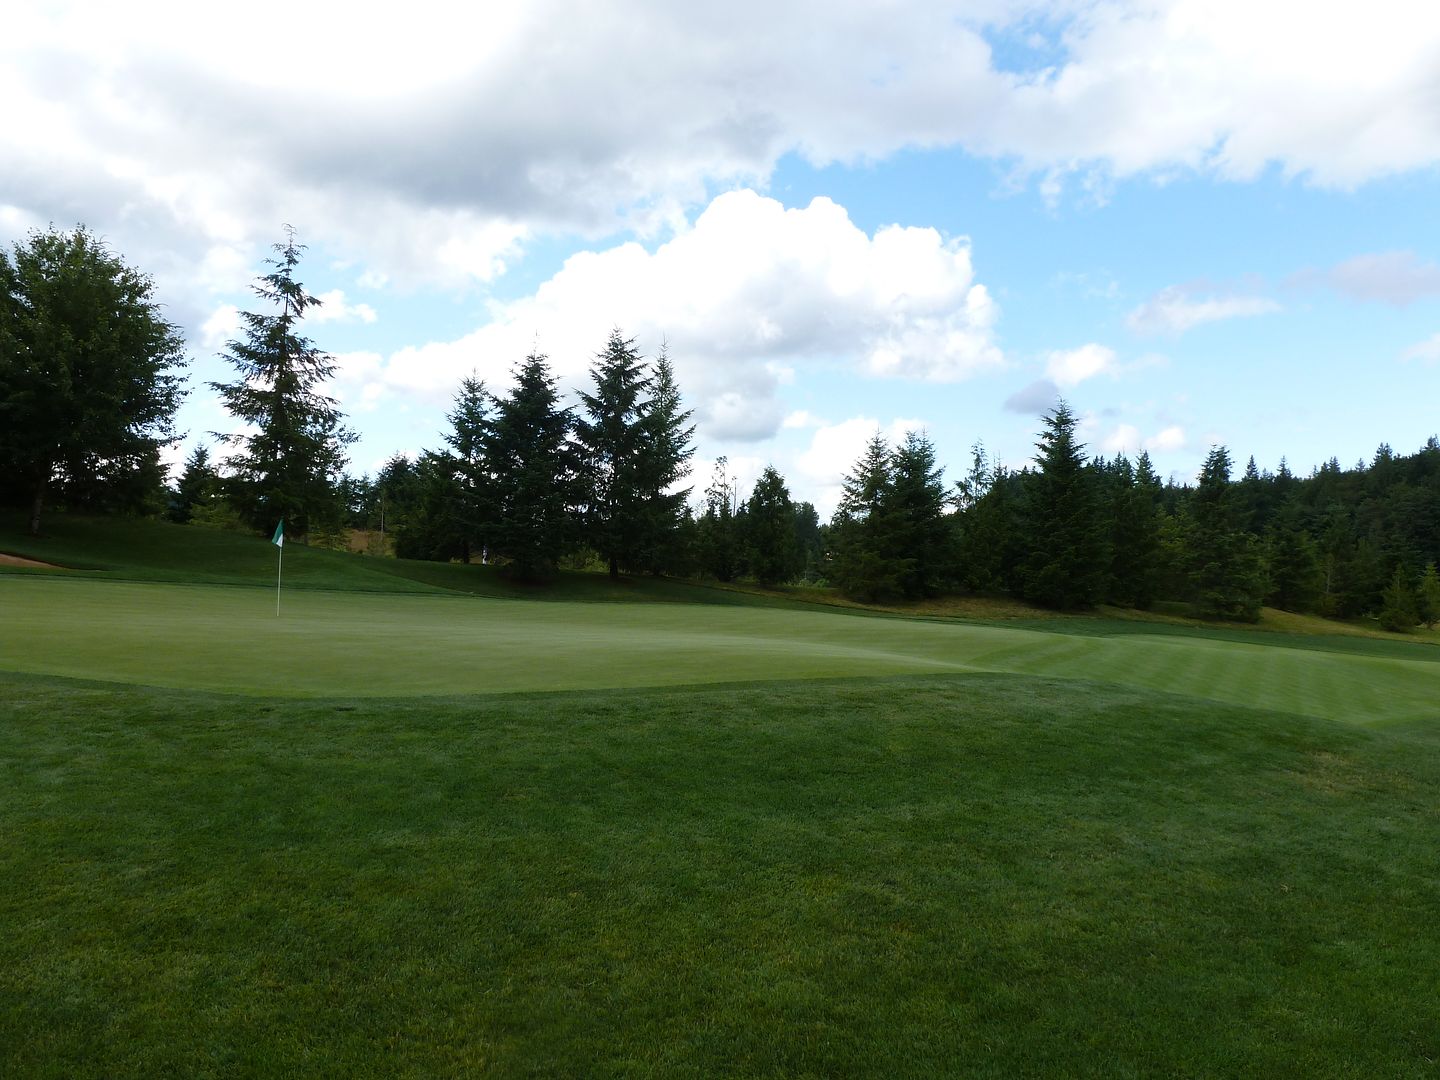
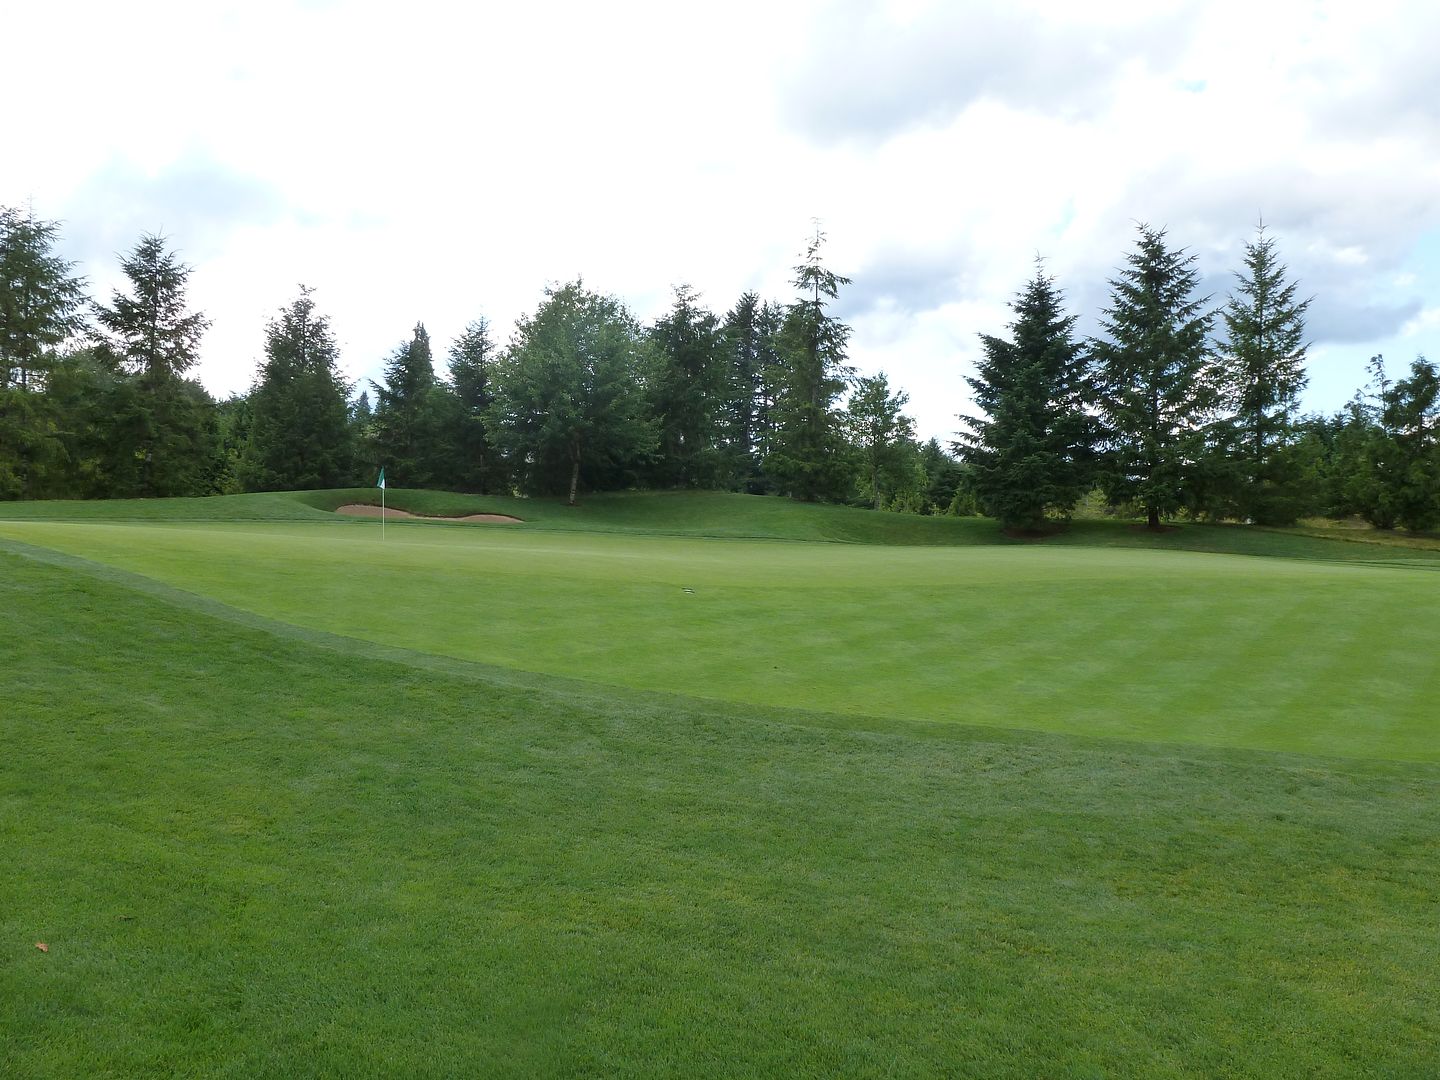
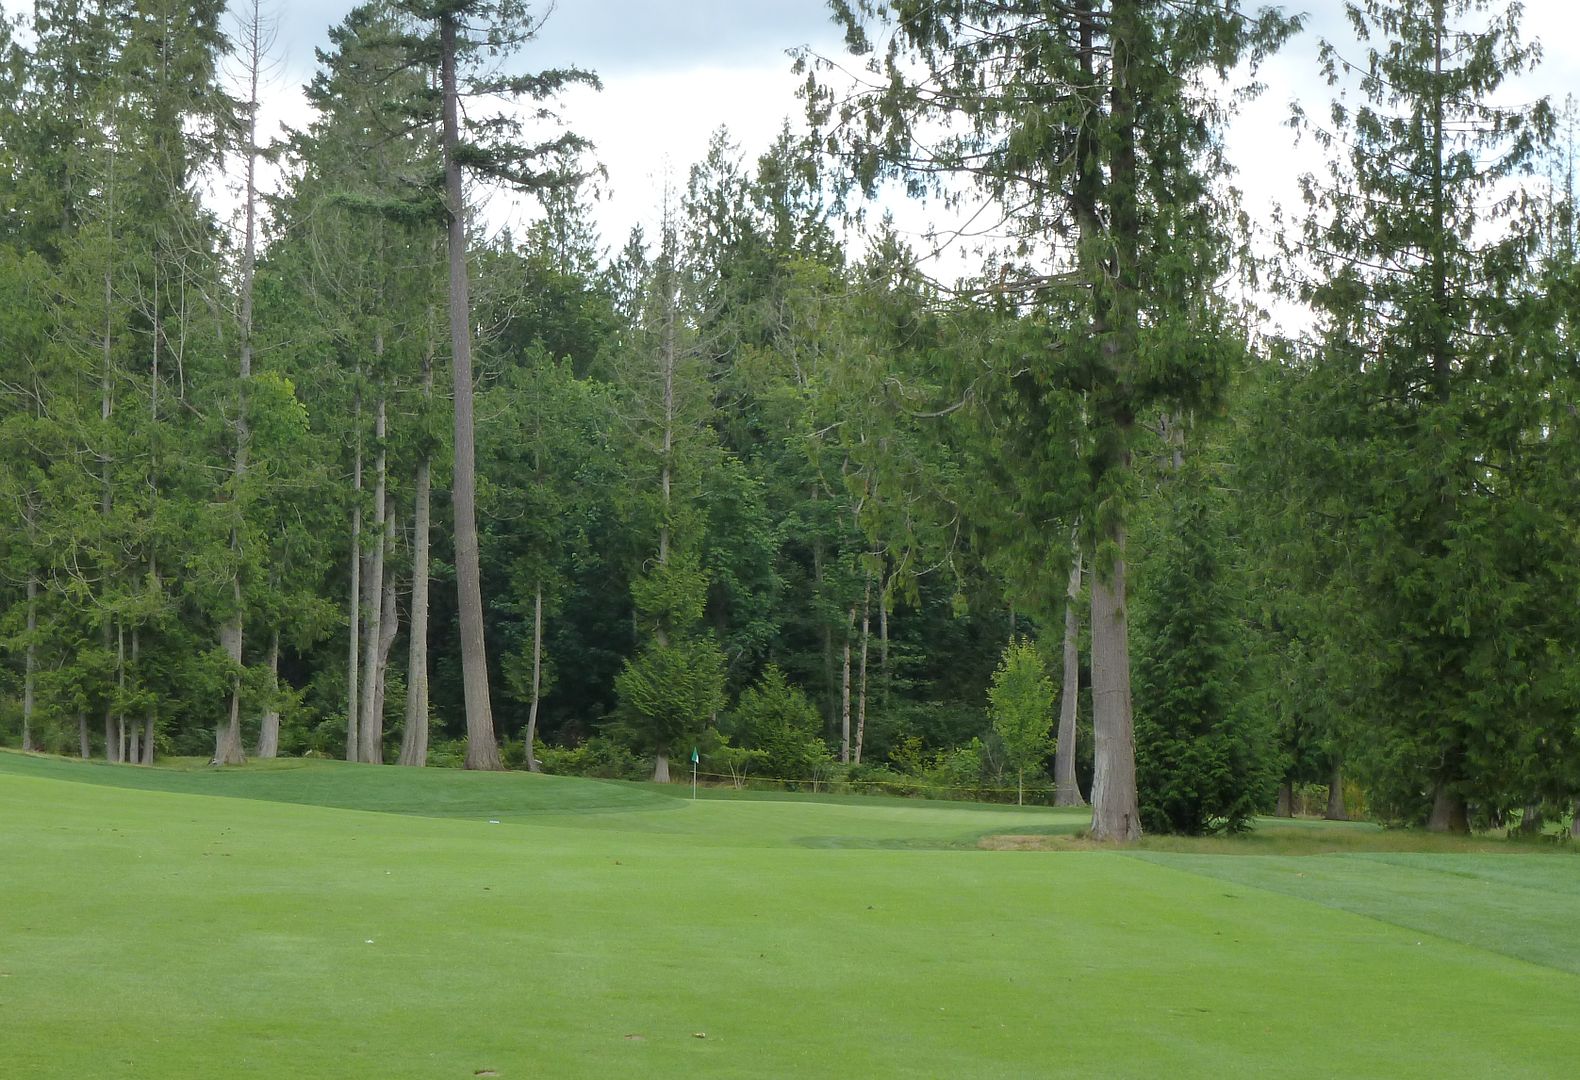
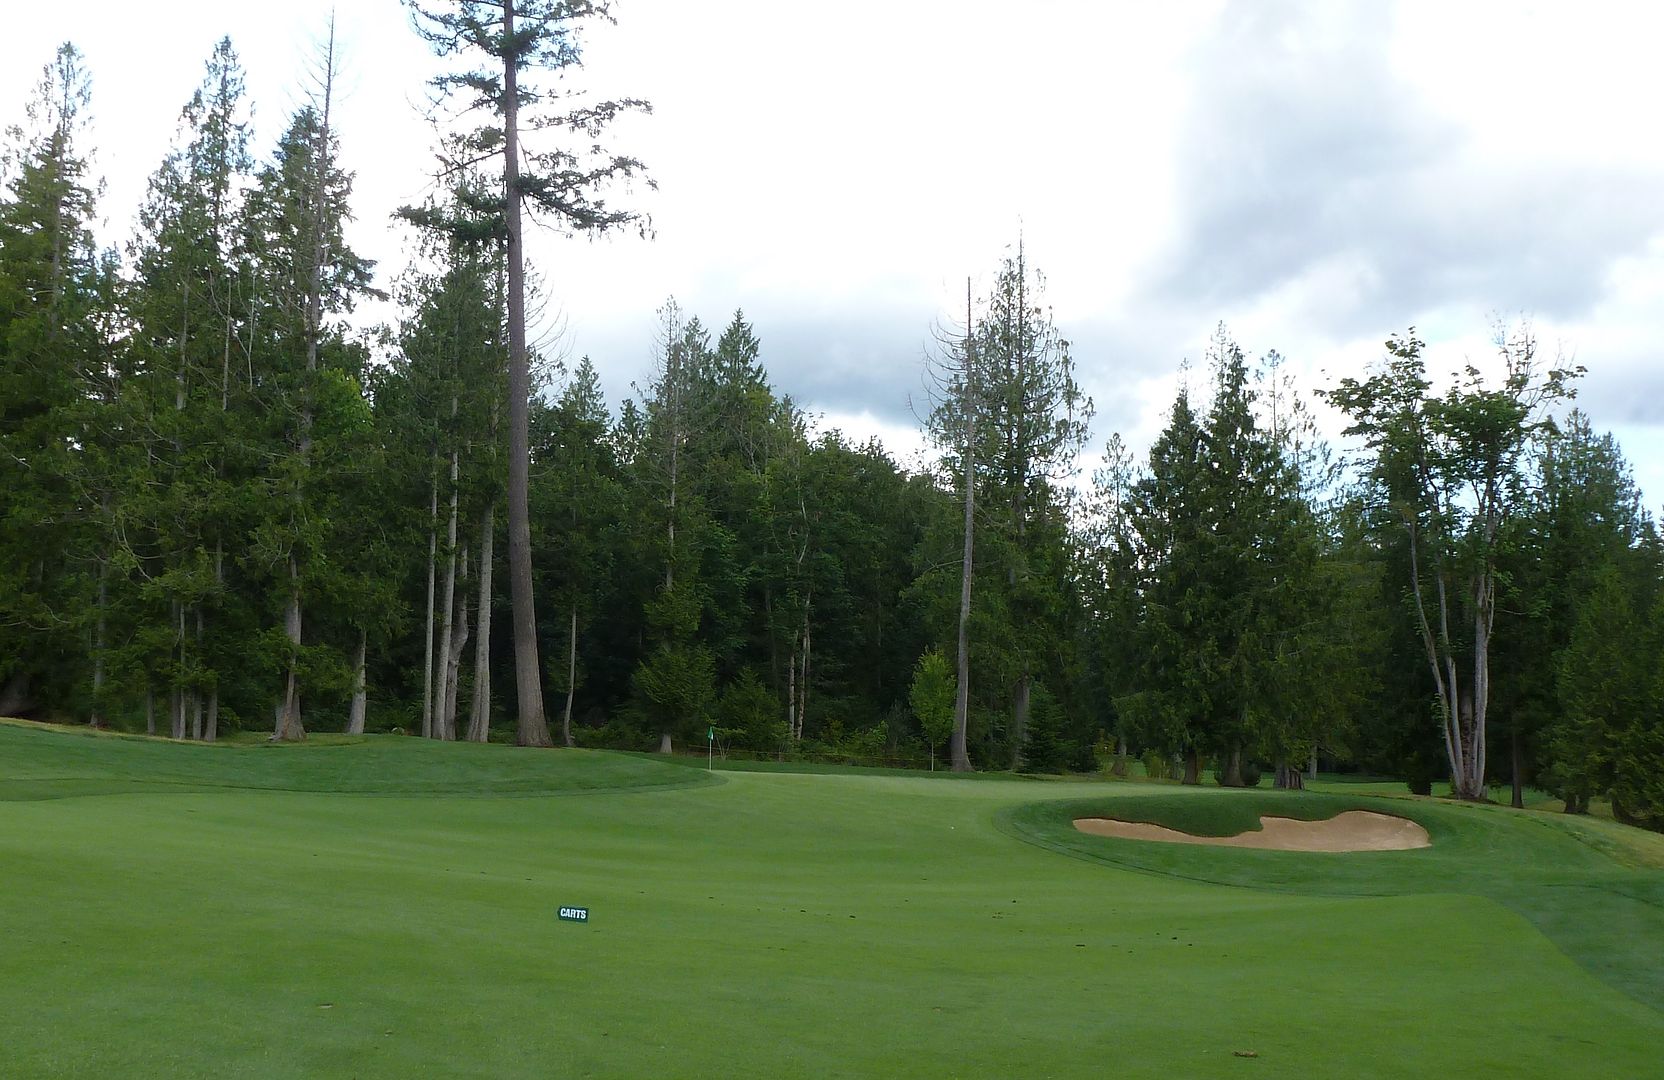
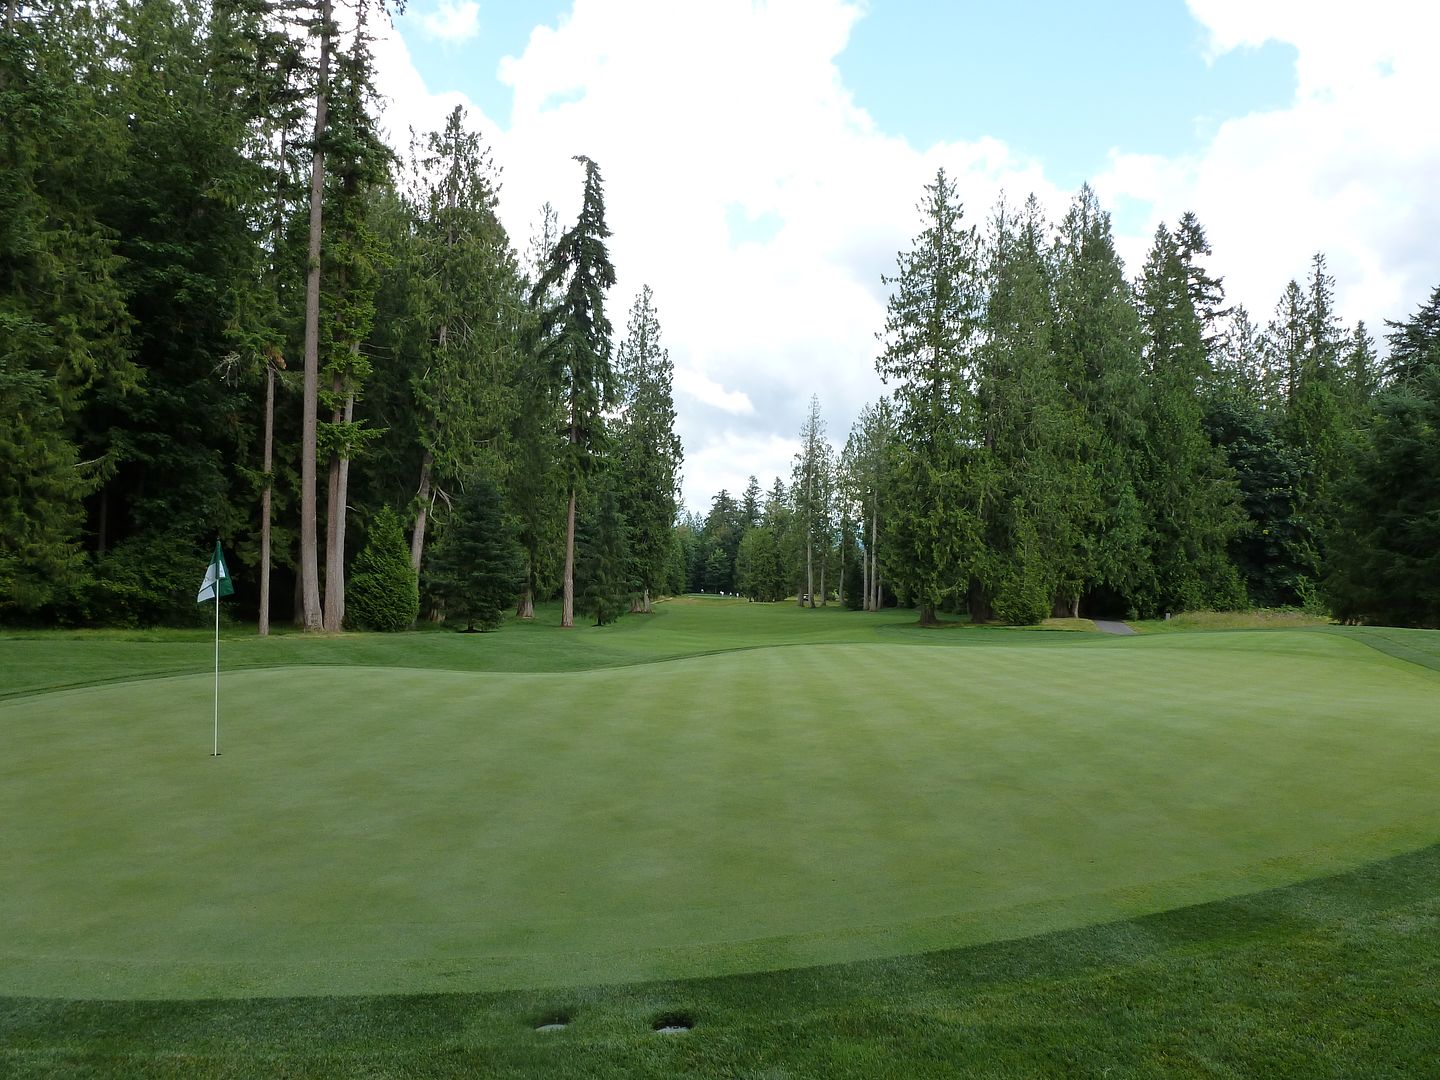
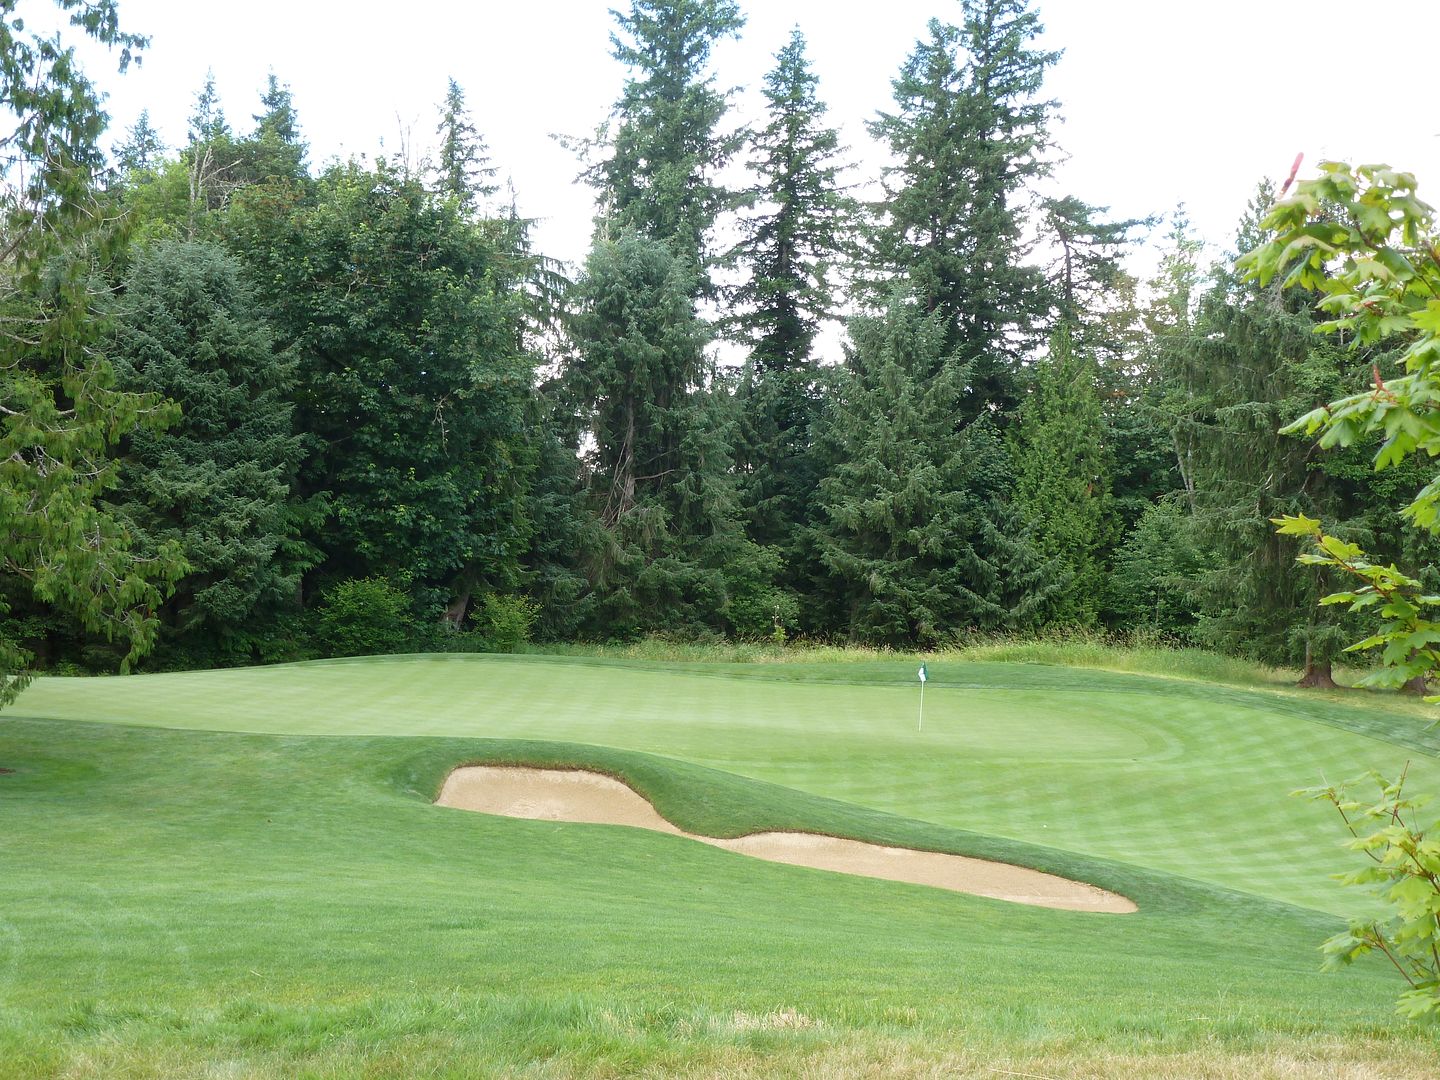
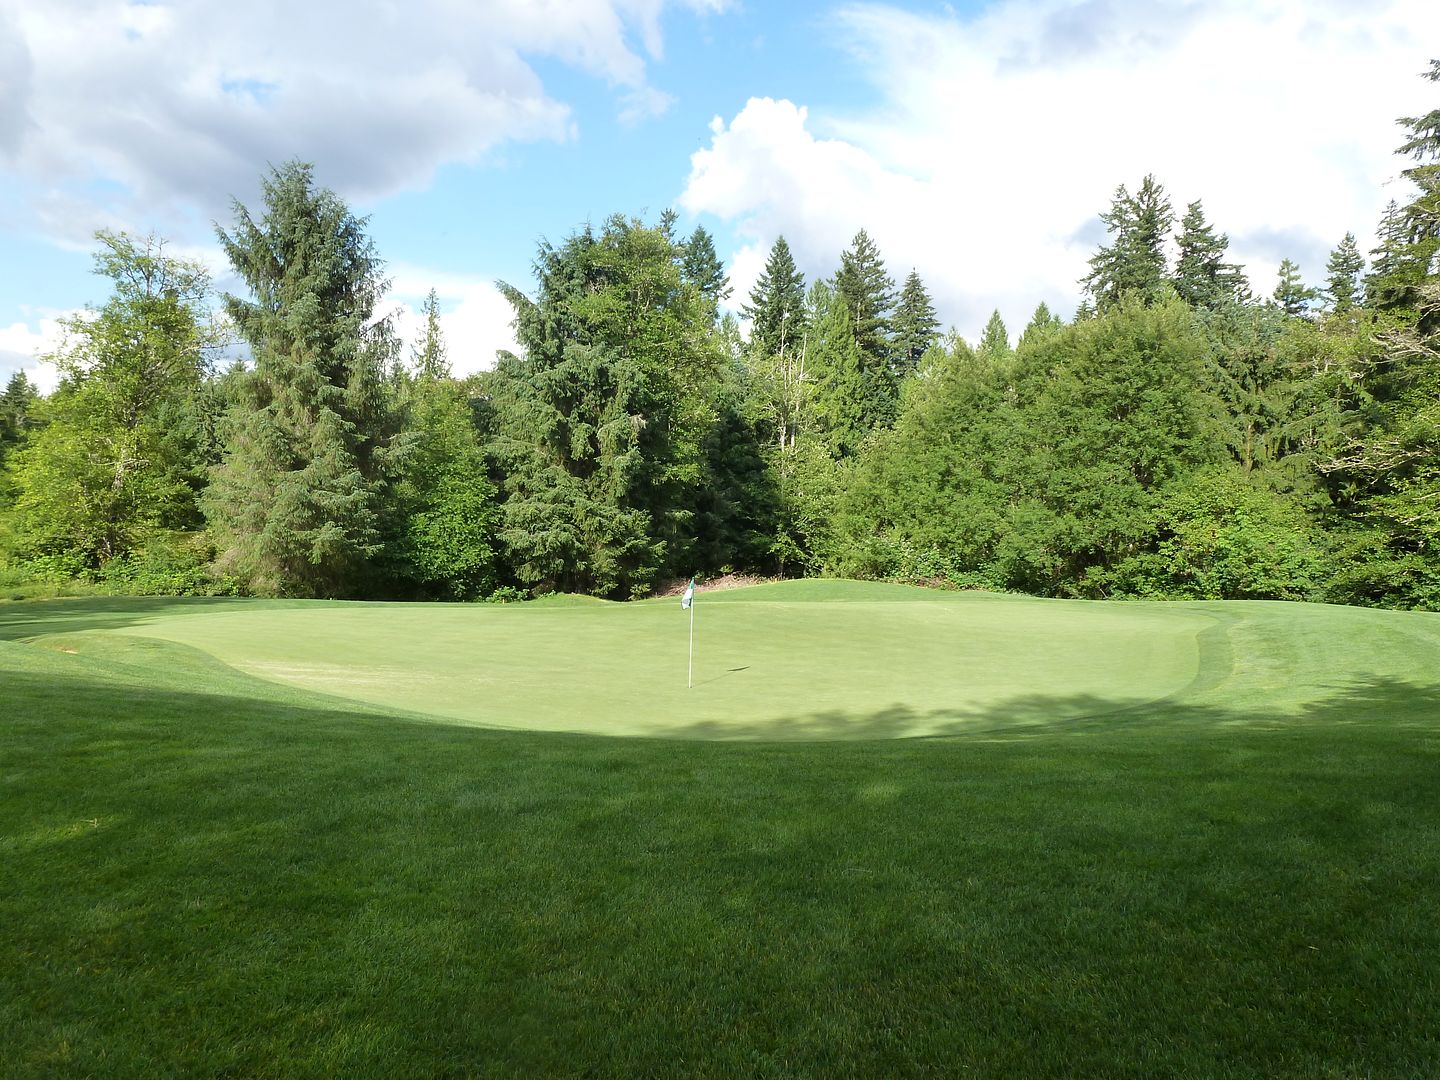
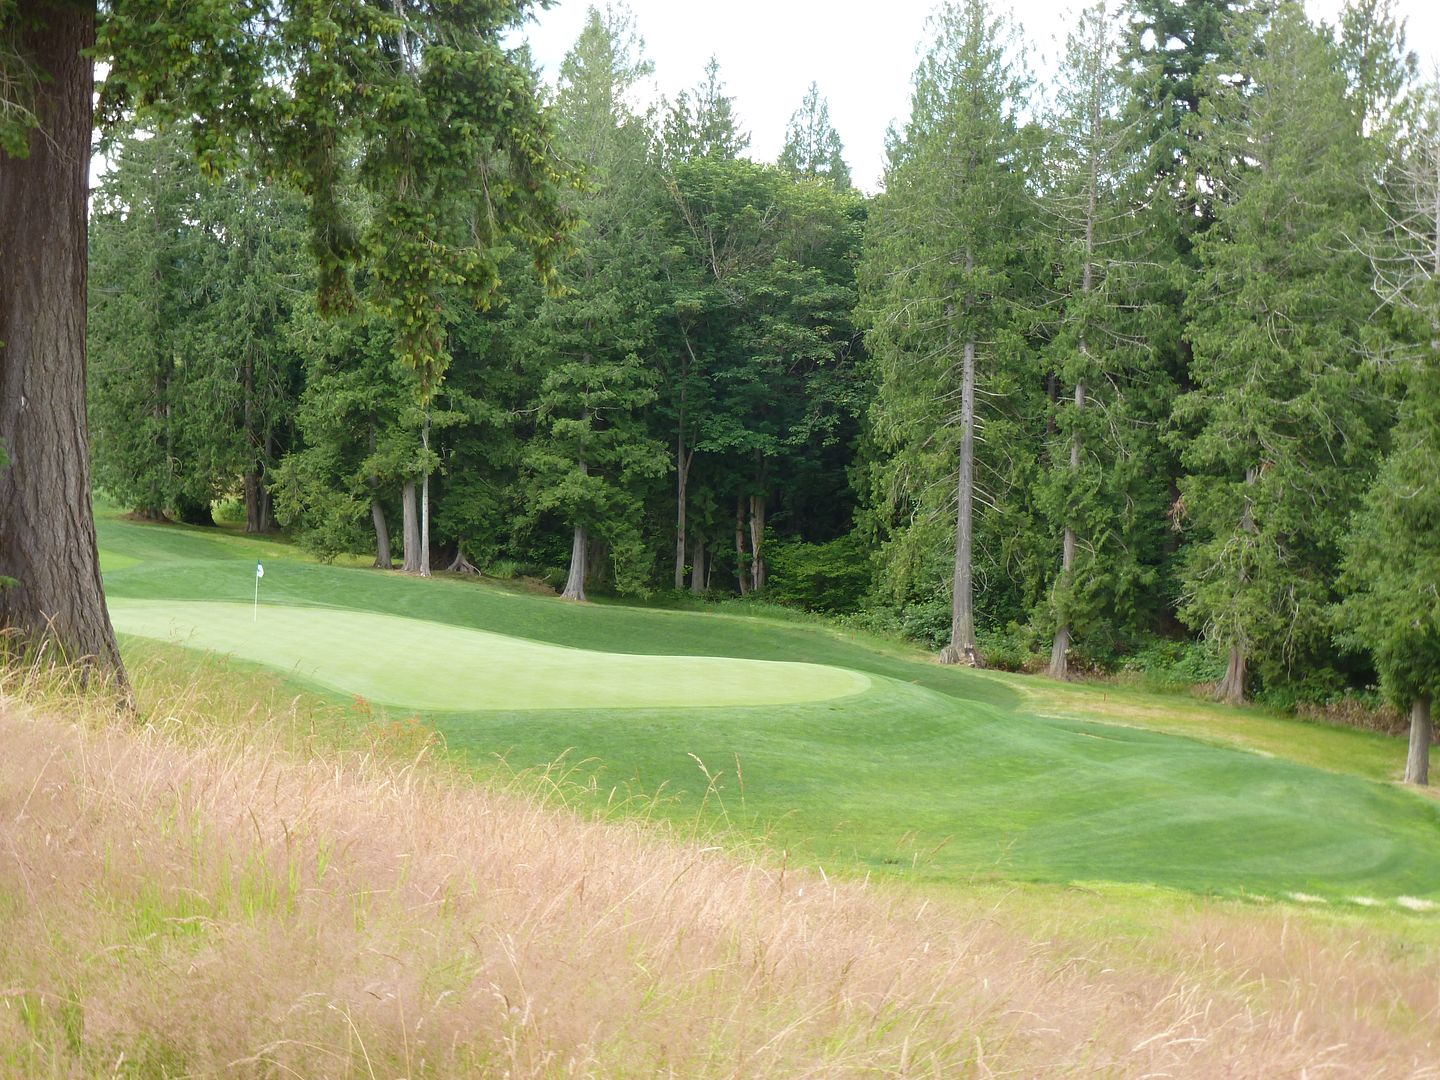
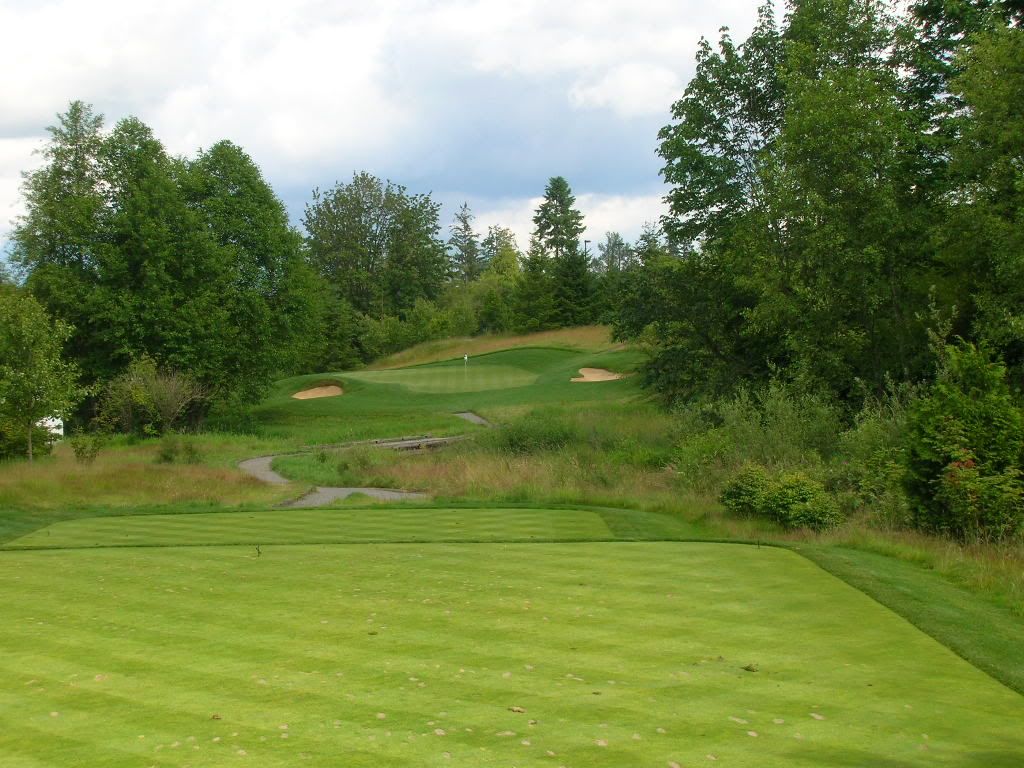
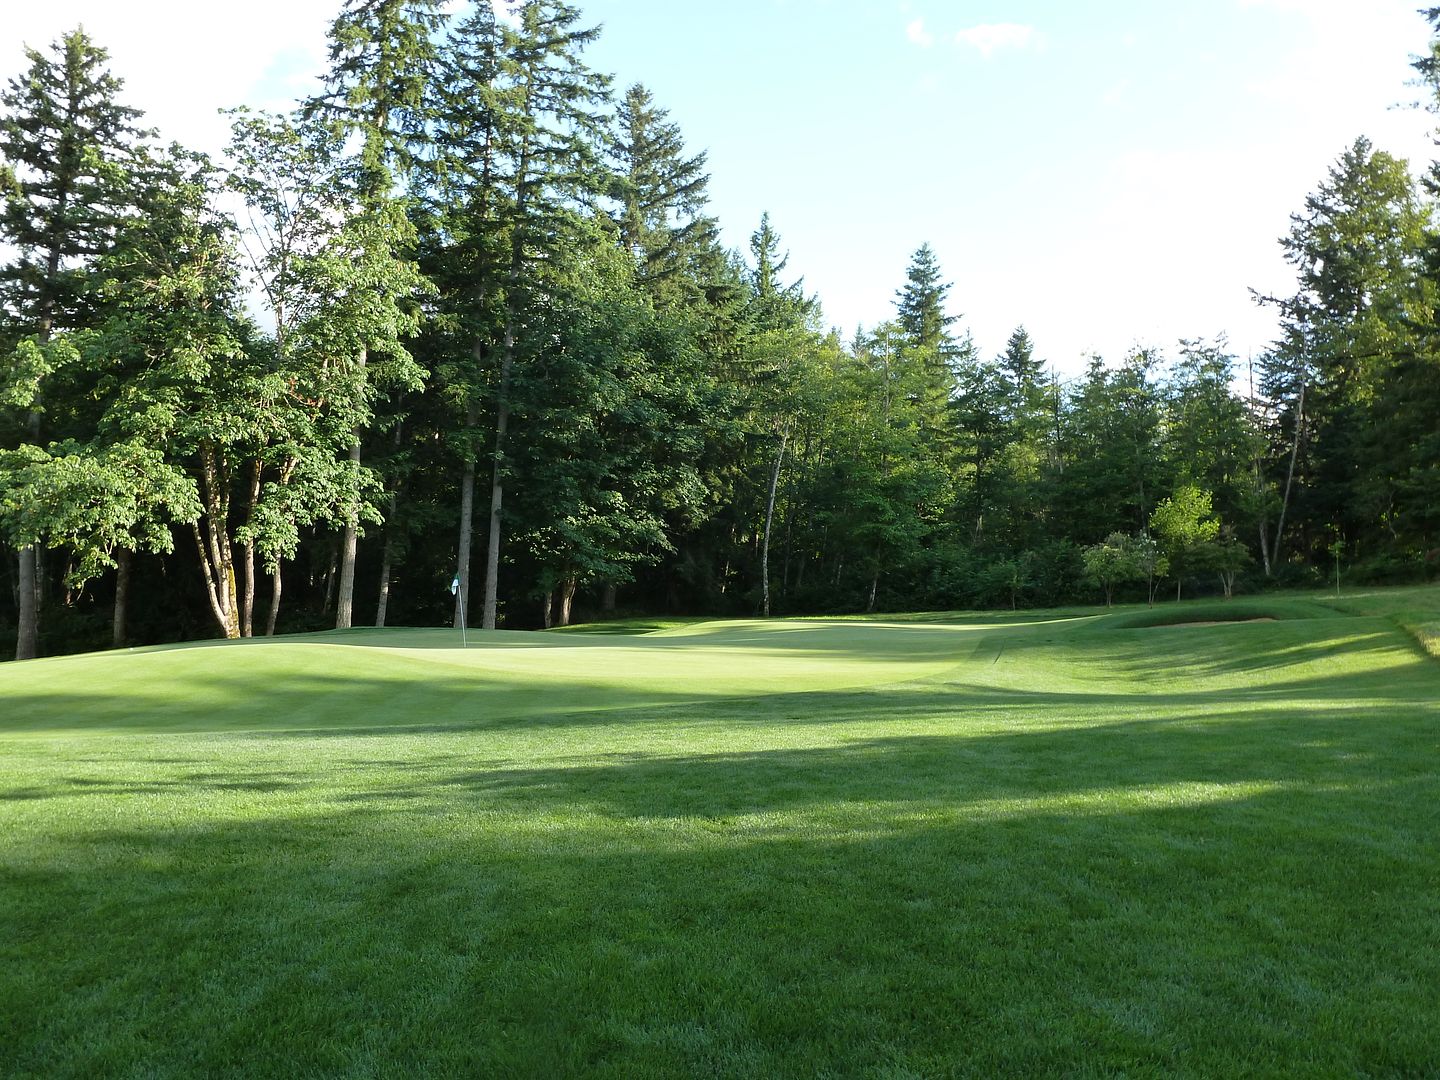
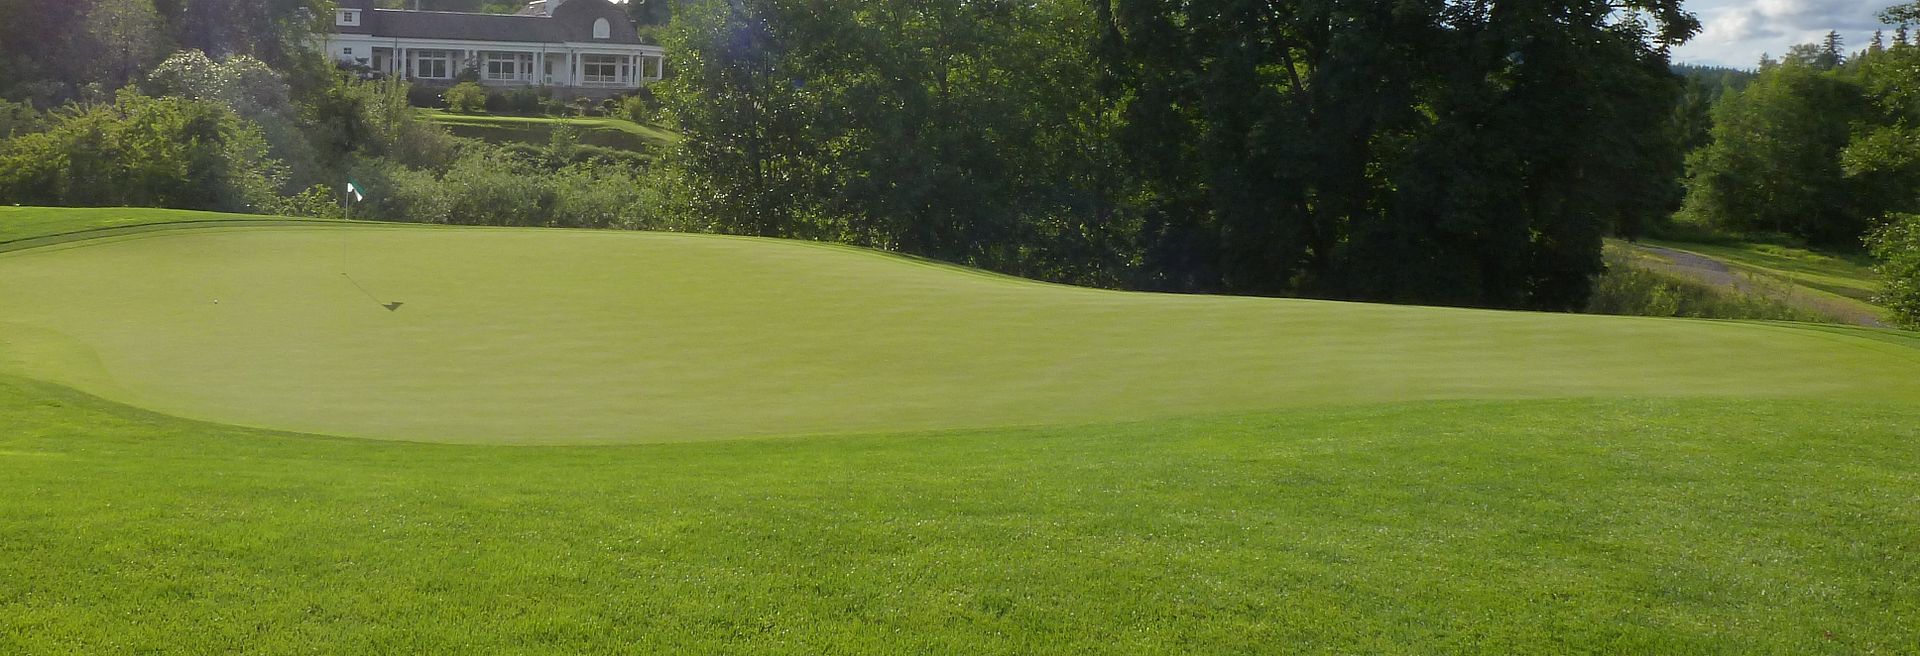
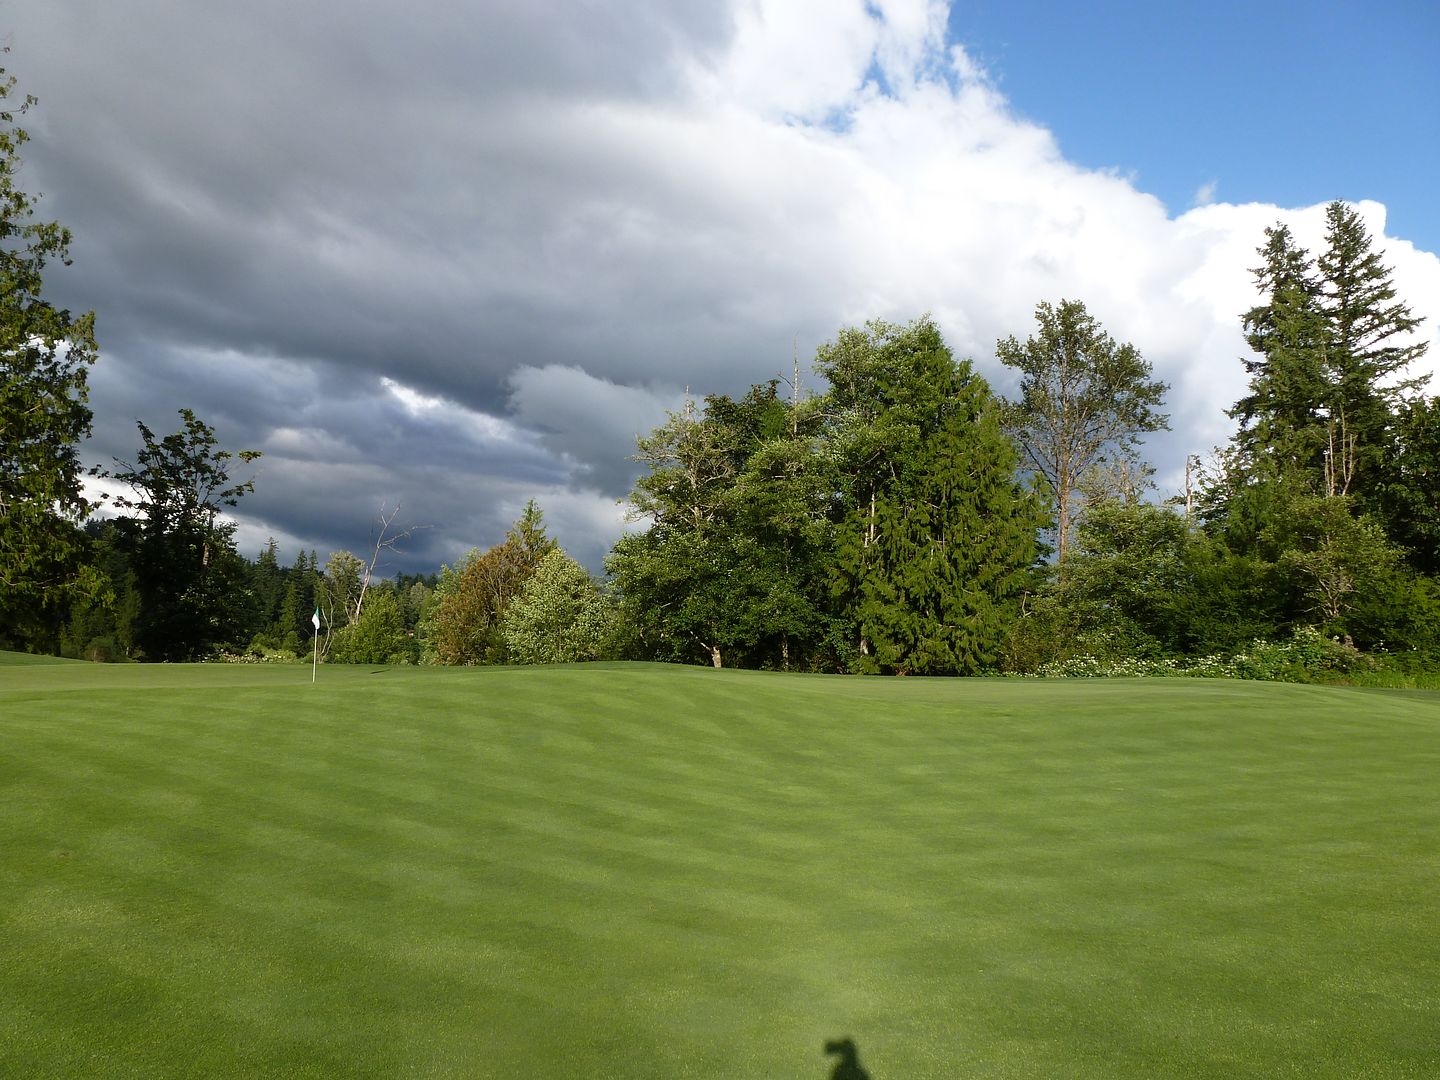
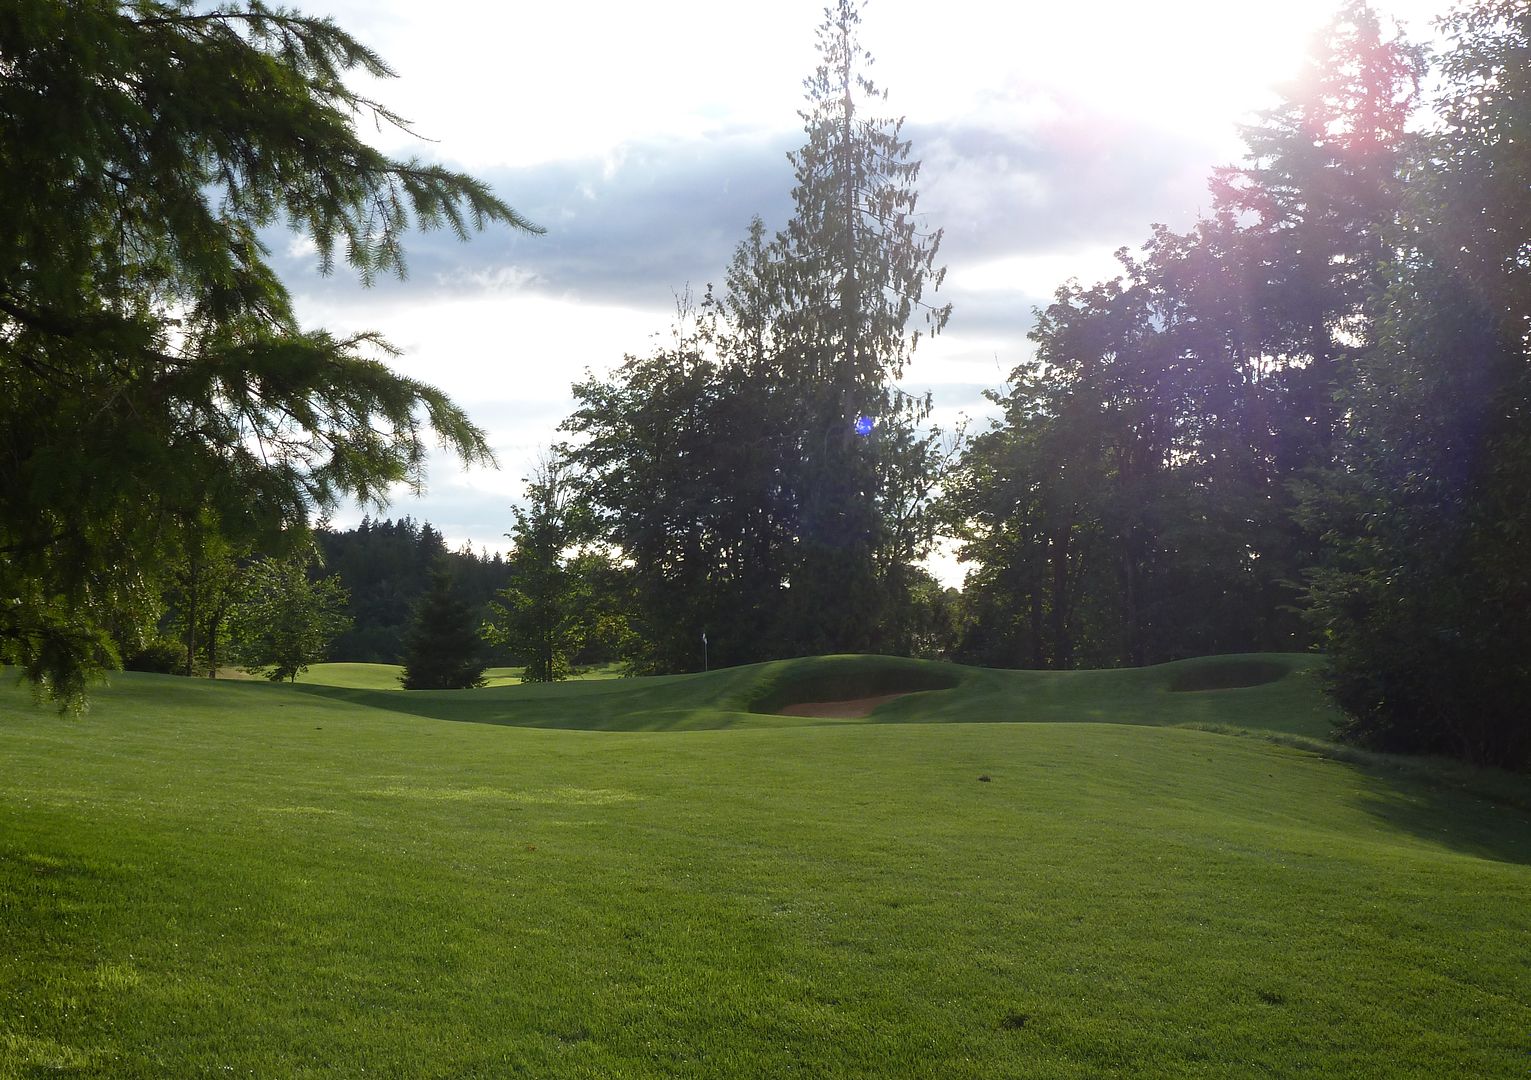
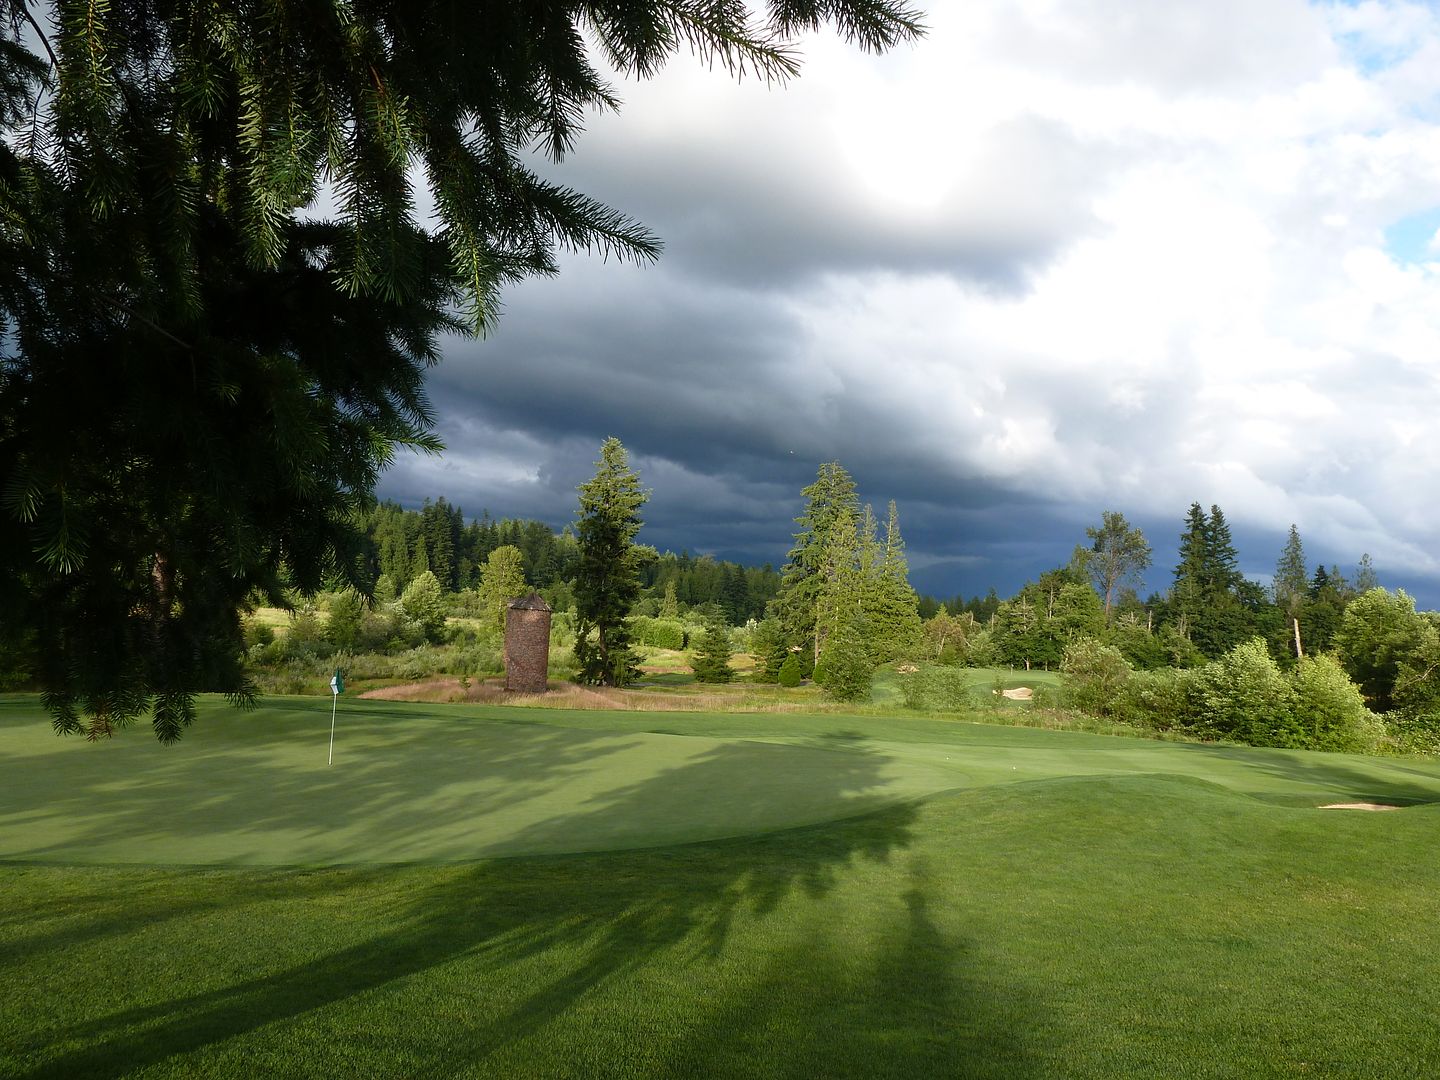
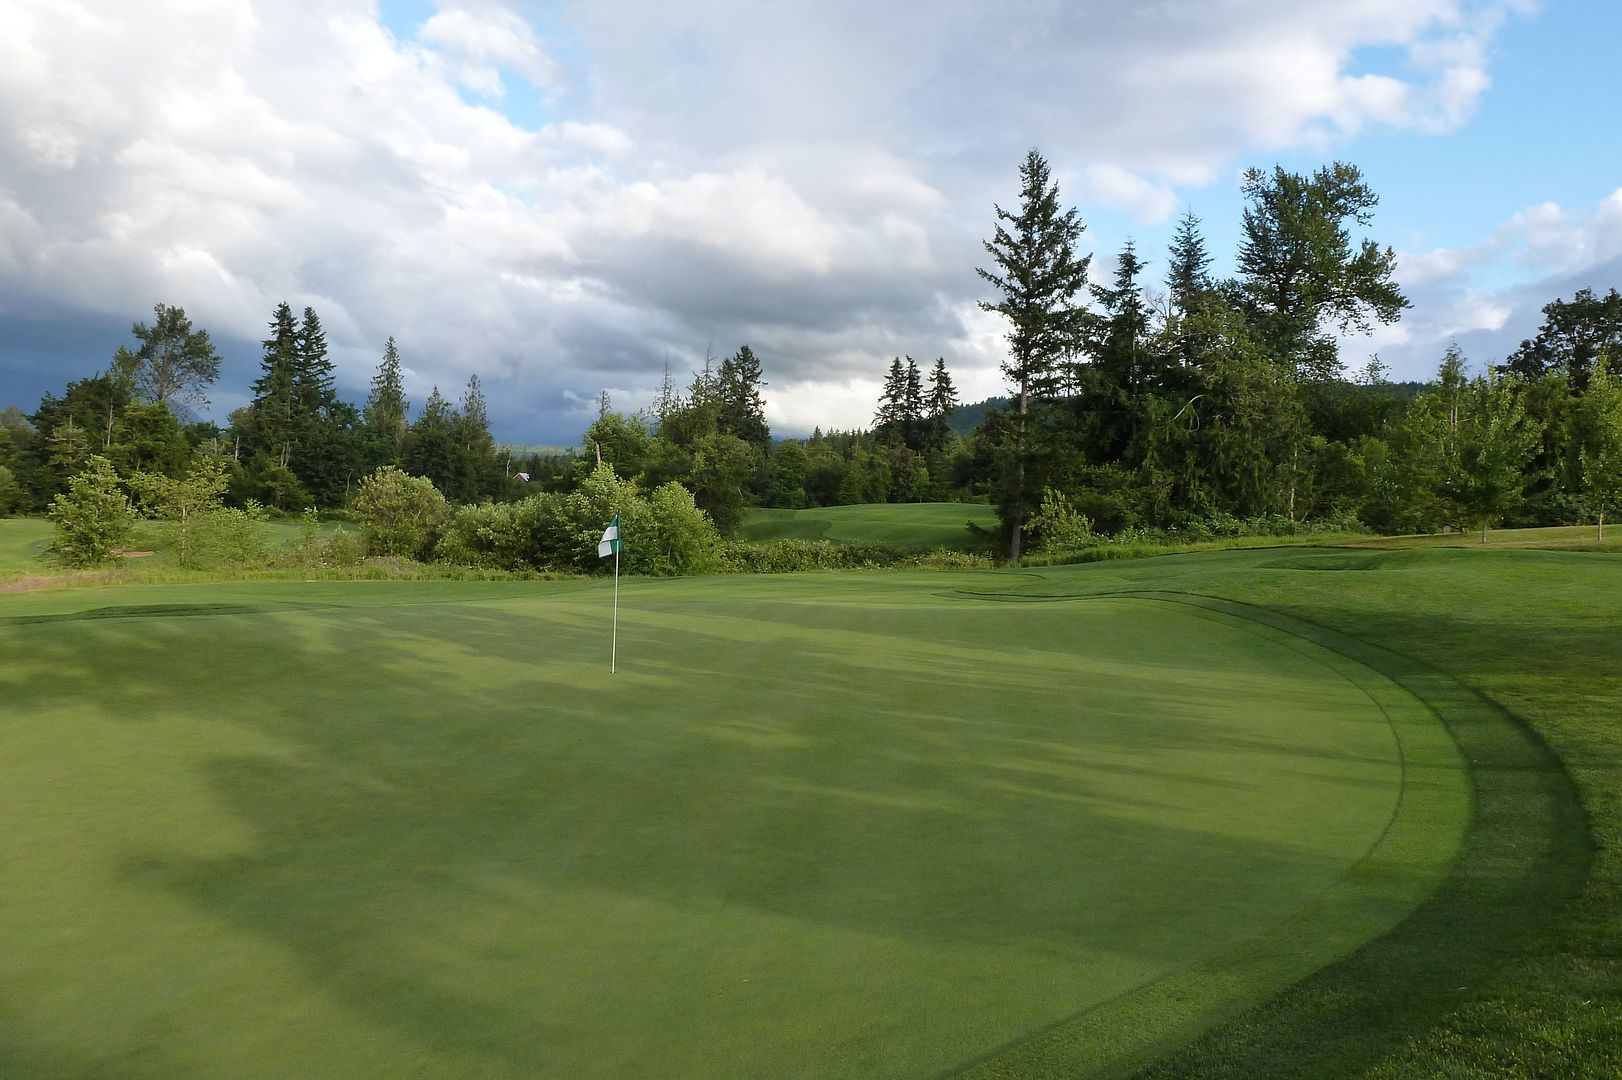
Hole 9: Par 3, 137 Yards
Playing #9 - A long but narrow green is the feature on this short par 3. The front side of the green is flanked by bunkers left and right which make up-and-downs very difficult. There is a second tier that is not very deep and slopes significantly from right to left.
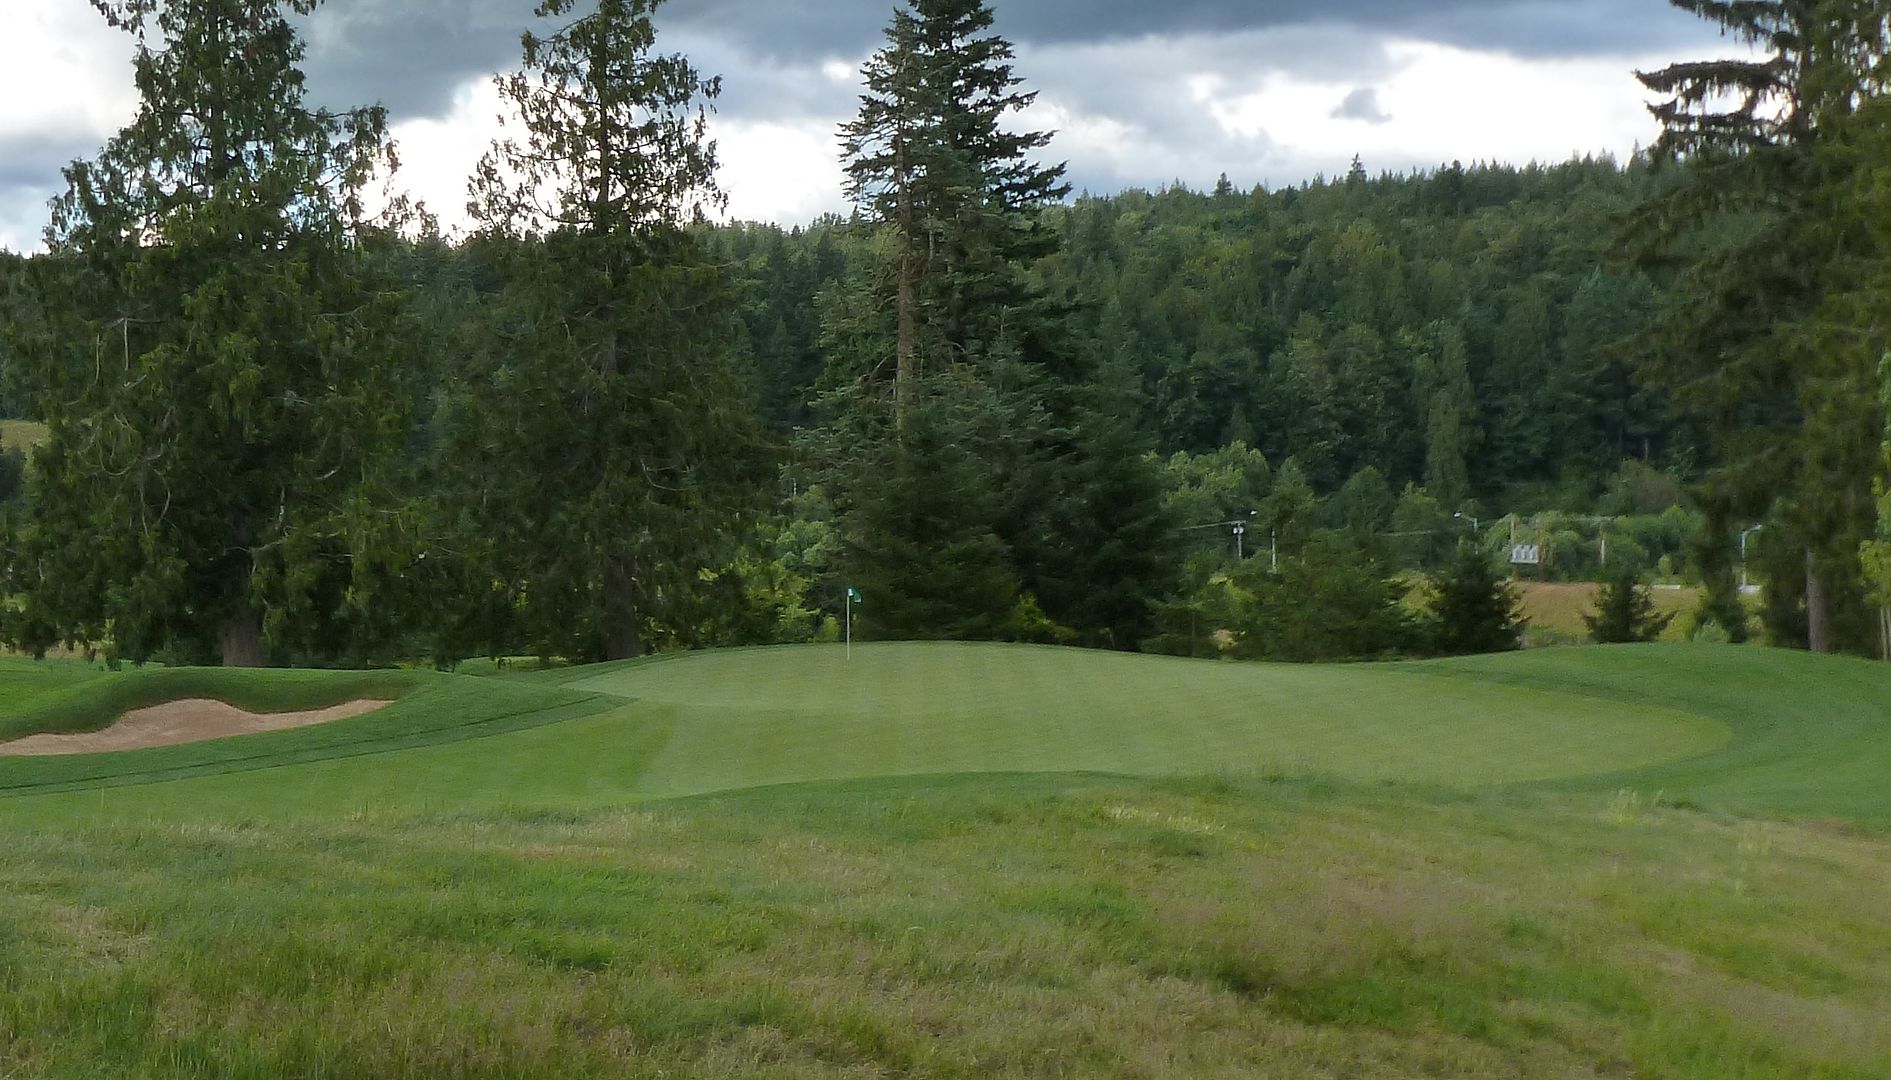
From the tee, I thought this hole was just a bit of filler, getting the player from 8 back to the clubhouse. The cartpath is awful looking and the greensite unimpressive. BUT...
When you get to the green you realize how interesting a hole it actually is. I don't know the contours of the green well enough to comment properly, but they are numerous and severe and fun. Don't miss in the wrong spot.
In particular, I noticed the contouring in the front portion of the green (and thought it was great). The front of the green is very narrow, maybe 12 yards wide(?) and the at the edges of the green here will serve to funnel shots at the edge of the green toward the middle. However, these same slopes mean that shots that miss just a bit too much left or right and find the bunker means that the recovery is basically impossible.
Hole 10: Par 4, 357 Yards
Playing #10 - The fairway narrows at the 100 yard mark so the easiest play is just short of the fairway bunker (A). The green slopes from back-left to front-right with a large tier. Putting from below the tier is better than chipping from over this green.
It was mentioned earlier that the golf course plays very long and the holes that are short on the scorecard play much longer. That is certainly the case here as this hole played uphill and into the wind and even though it is only 350ish yards, was a solid driver-8 iron hole.
A fairly simple tee shot to a wide fairway with a single bunker protecting the right and hazard down the left. Take note of the pin location as this will dictate where you want to hit your tee shot. I do not believe one can get to a left pin from the left side of the fairway.
The approach is very uphill, protected by a fronting bunker and a severe false-front that runs well into the green.

An Engh-esque shelf green. The front and back portions of the green tilt from back-to-front but are tame by Aldarra standards, but there is a huge slope in the middle of the green making back-left pin positions extremely difficult to get to.
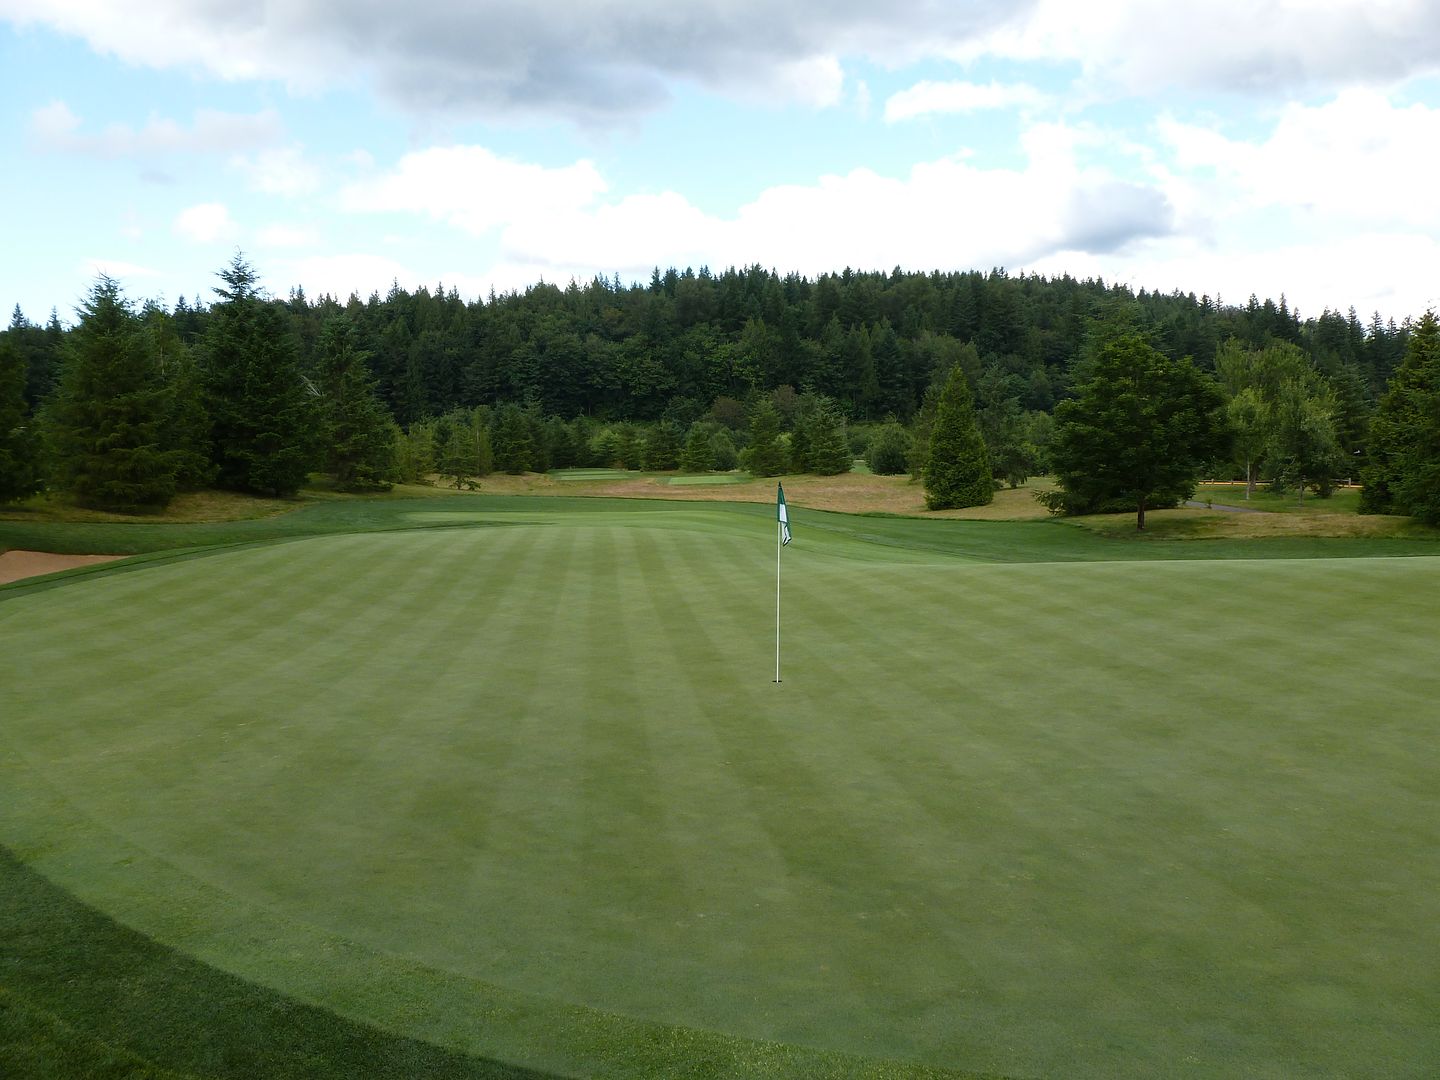
Hole 11: Par 5, 525 Yards
Playing #11 - The play on this three shot par 5 is to the right of the fairway bunker (A). A second shot played from the right rough is still better than playing from the deep bunker. The fairway is widest at 100 yards and the approach shot must be precise since this is the toughest green to putt on the course. Like many approaches here at Aldarra, keep your third shot below the hole.
The first of back-to-back parallel par-5s, 11 for me played straight uphill and into the wind. By the end of the hole, I was cursing Mr. Fazio for designing a hole that would play so long.
A single well-placed bunker makes a simple tee shot interesting. The fairway slopes right to left so there is no need to challenge the bunker, but still many players will be tempted to skirt the bunker to squeeze a couple of extra yards out of their tee shots.
The green tilts severely from back to front and shots landing just short will roll several yards back down a slope protecting the front of the green.
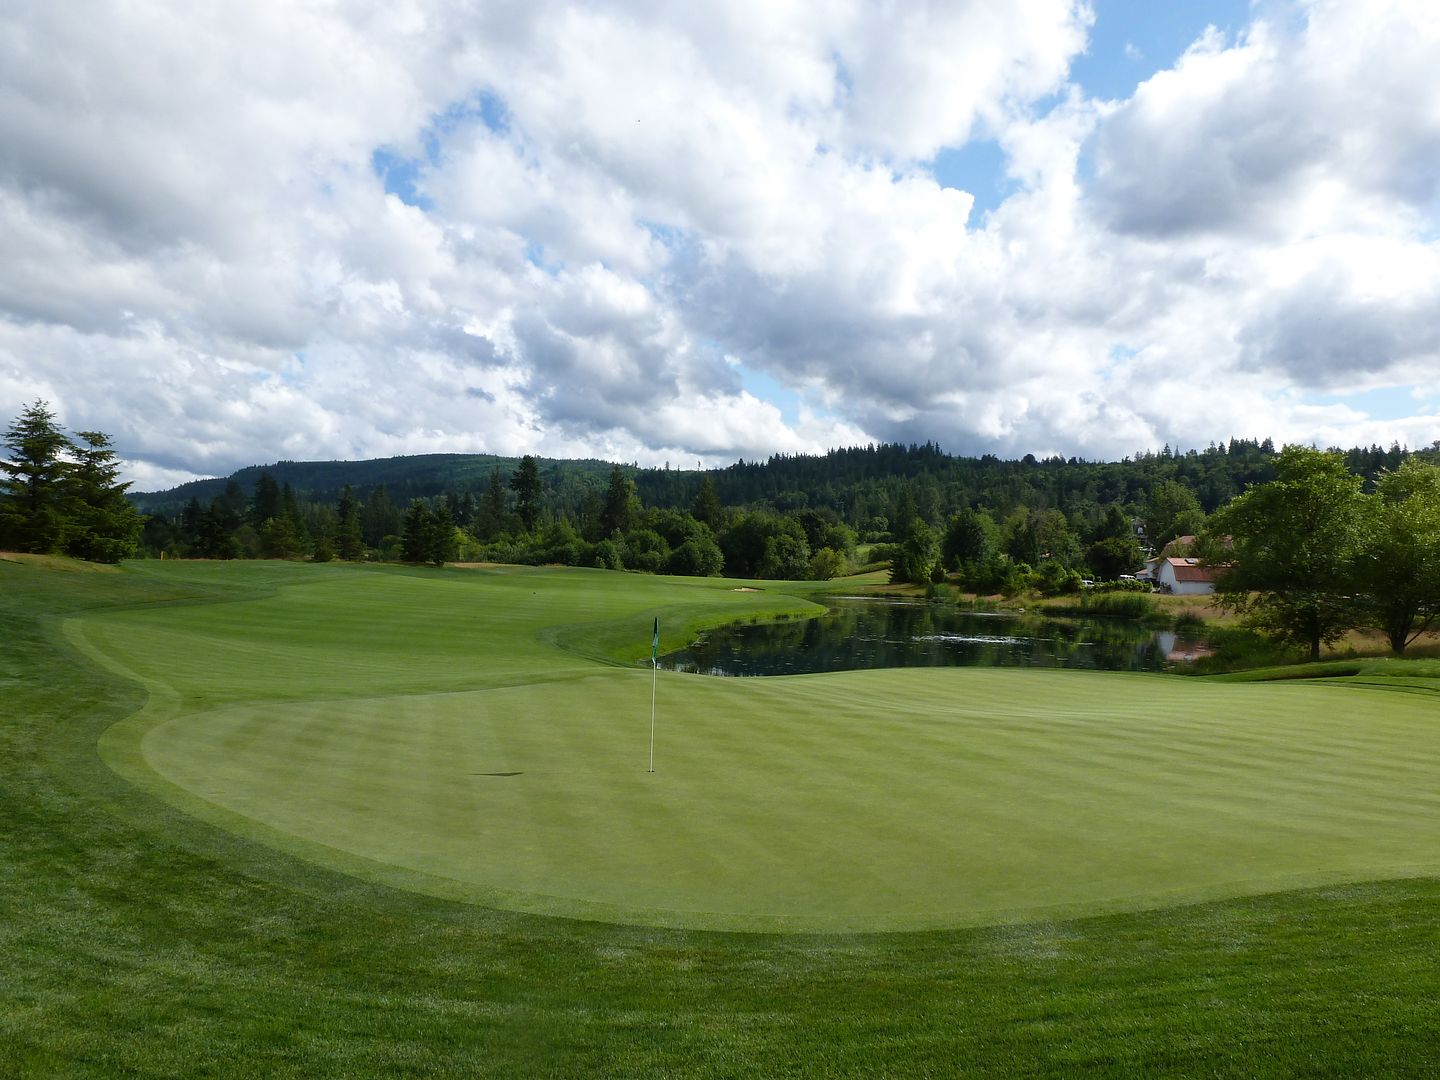
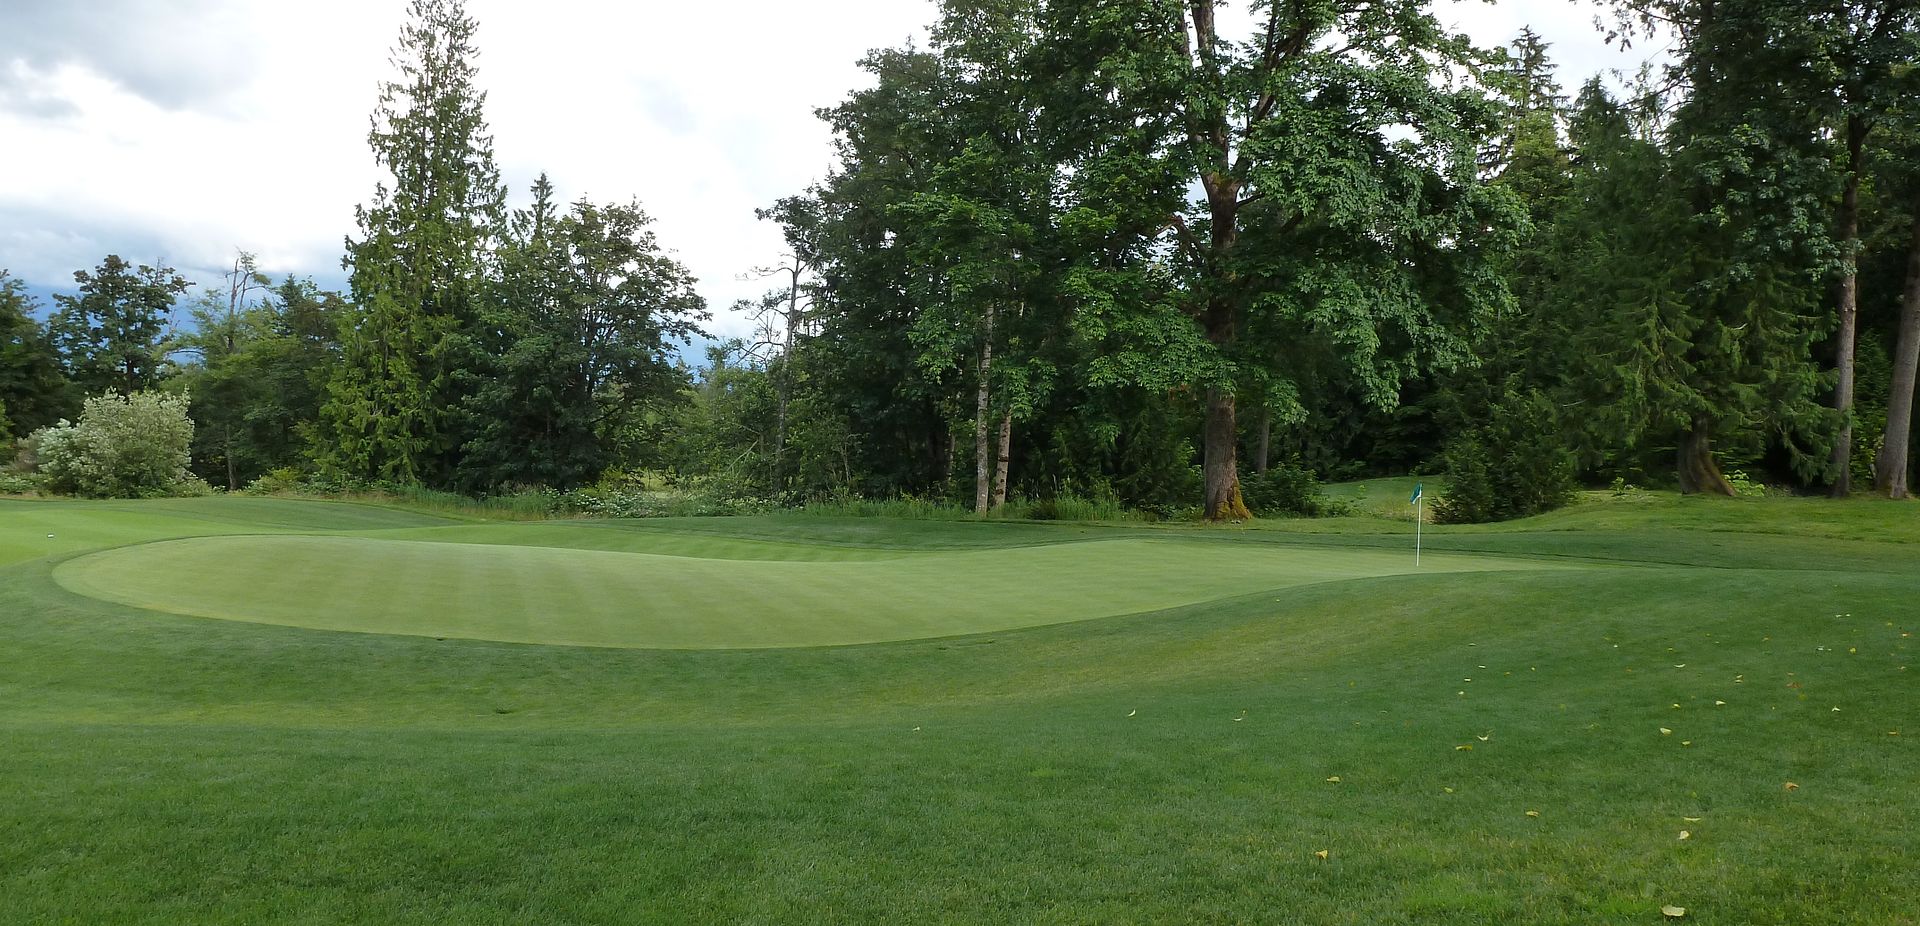
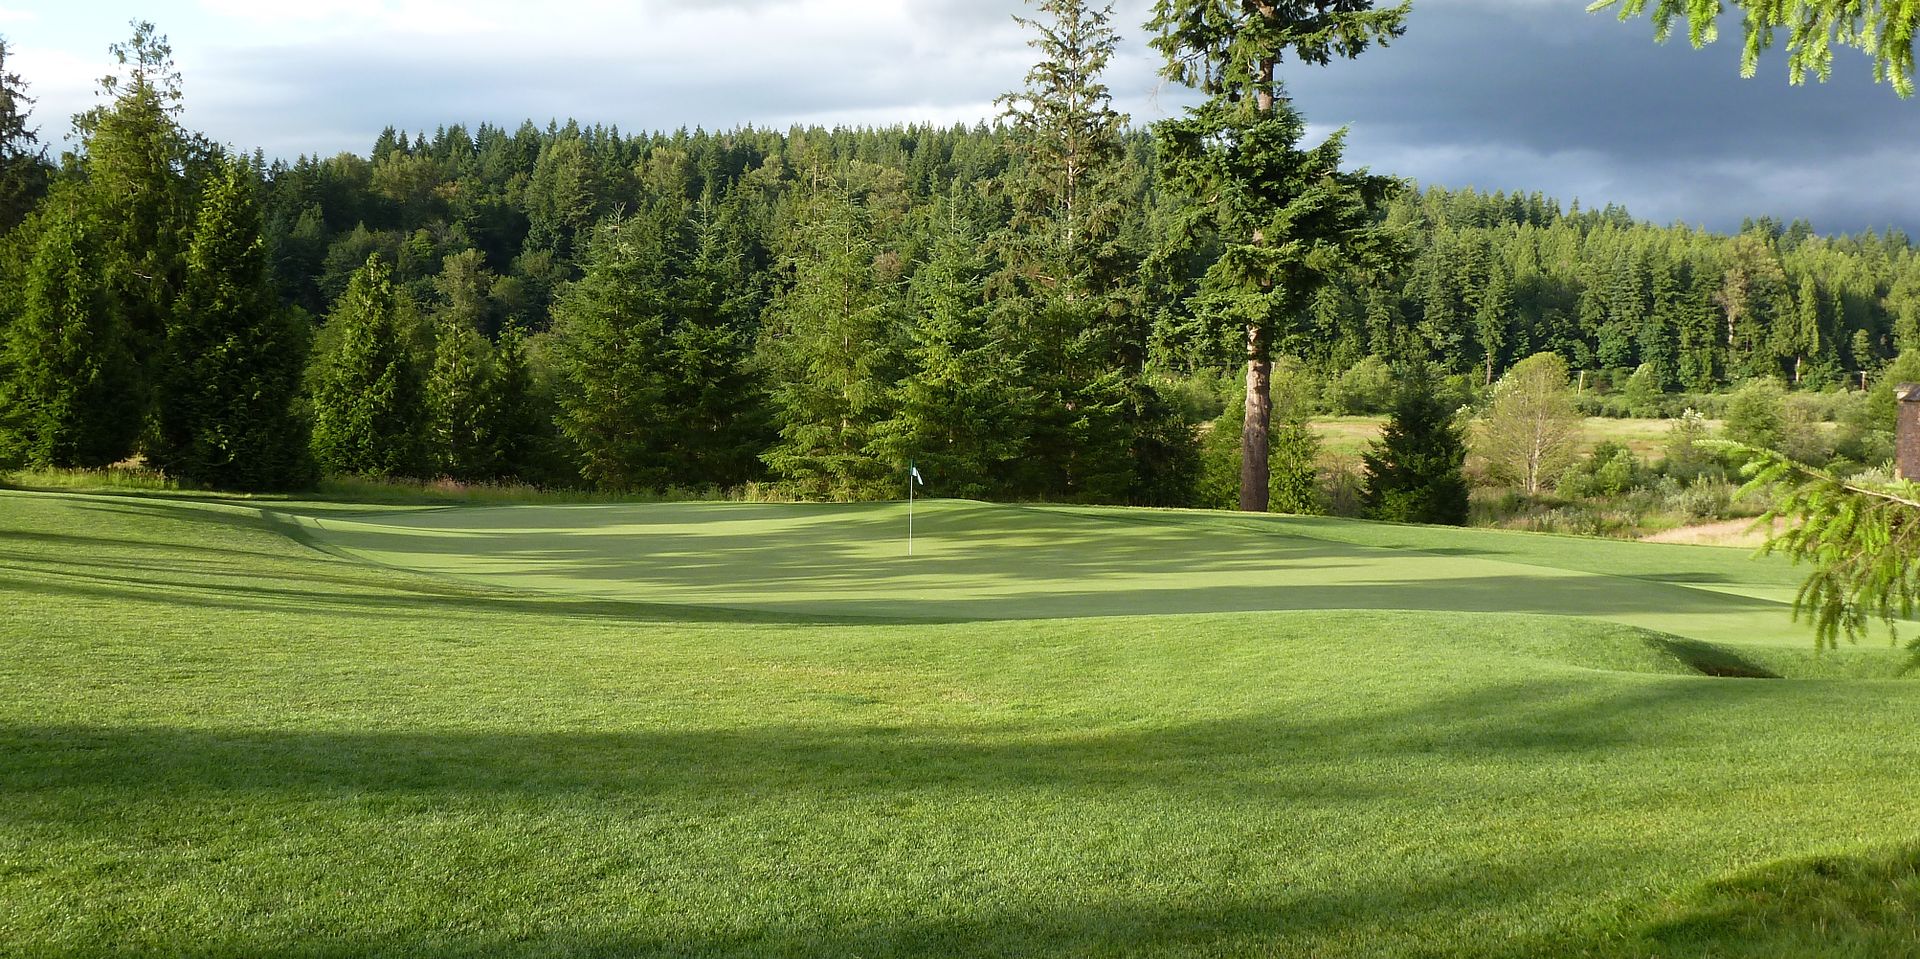
Hole 12: Par 5, 516 Yards
Playing #12 - Any tee shot in the fairway will give you a chance to reach the green in two on this downhill par 5. A second shot guided down the fairway will bounce and roll towards the green and open up the green for any short approach shots. Putting from well short of this green is not unheard of since the ball tends to funnel towards the center of the green.
After hitting three good shots and struggling to make 5 on 11, I was frustrated. But, coming to the tee on 12, a downhill, downwind par 5 that is both shorter on the card and much shorter in practice than 11, my mood lightened. This is a definite birdie hole before a stretch of holes from 13 to 16 where you better have your swing.
The tee shot is plenty wide and is perhaps the easiest on the course. Other than a bit of pressure since you know this is a birdie hole, there is zero reason to miss this fairway. Bombs away.
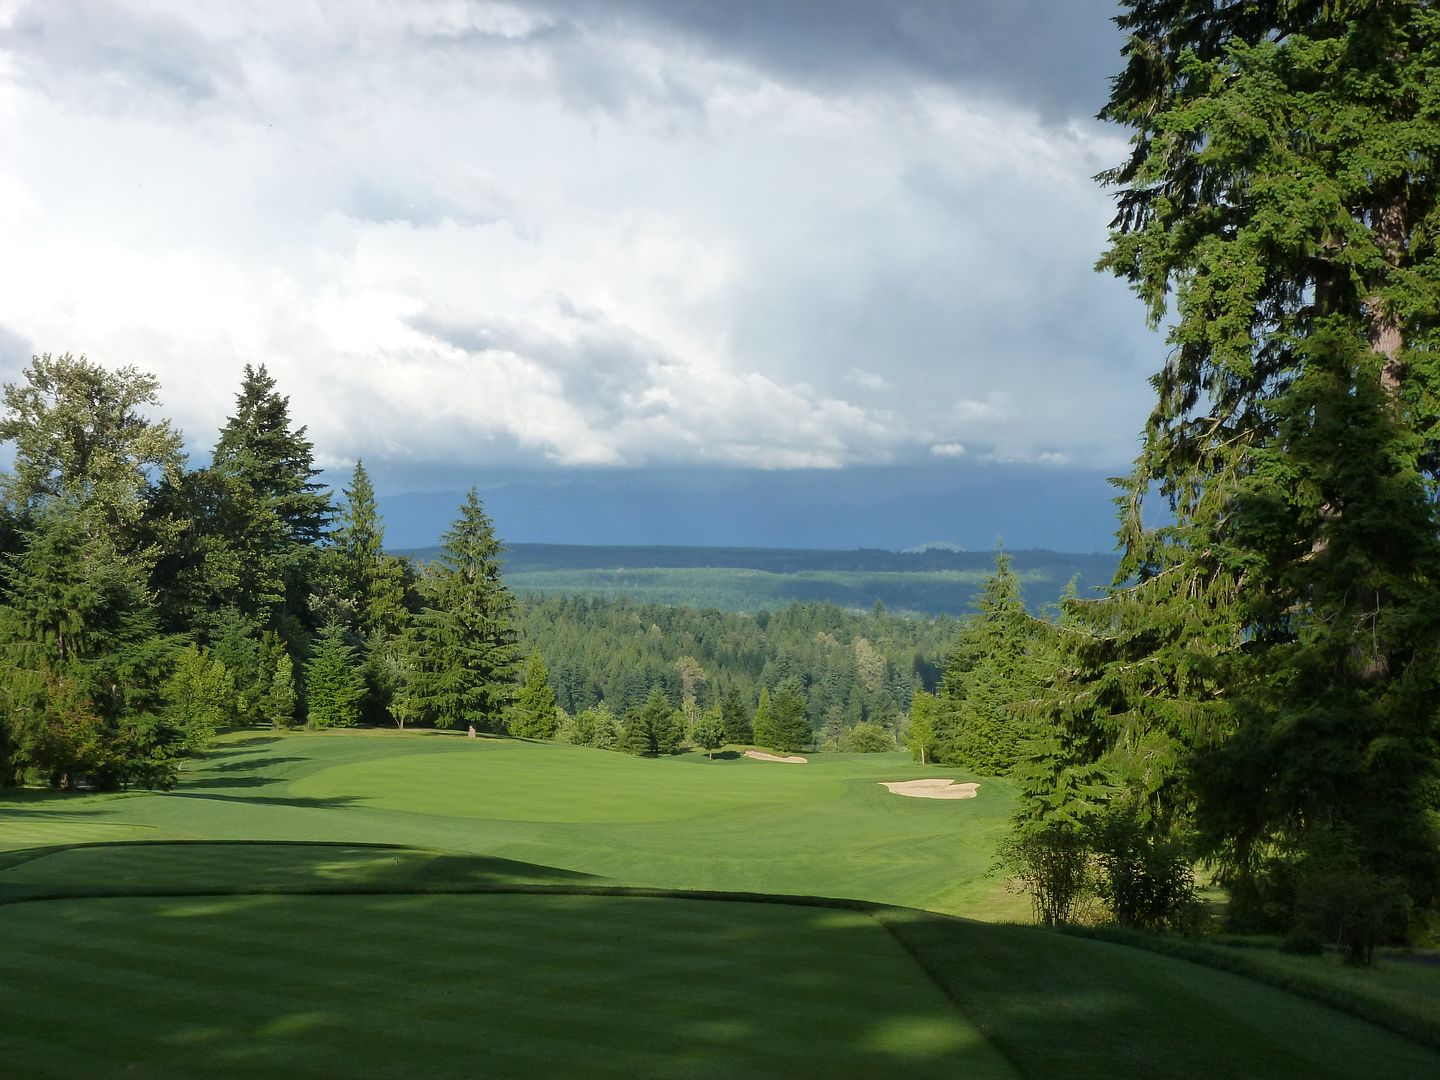
The approach from 225 yards out is straightforward as well. Left pins are easily accessible and right pins are protecting by deep fronting bunkers (though not so deep that up and down is impossible).
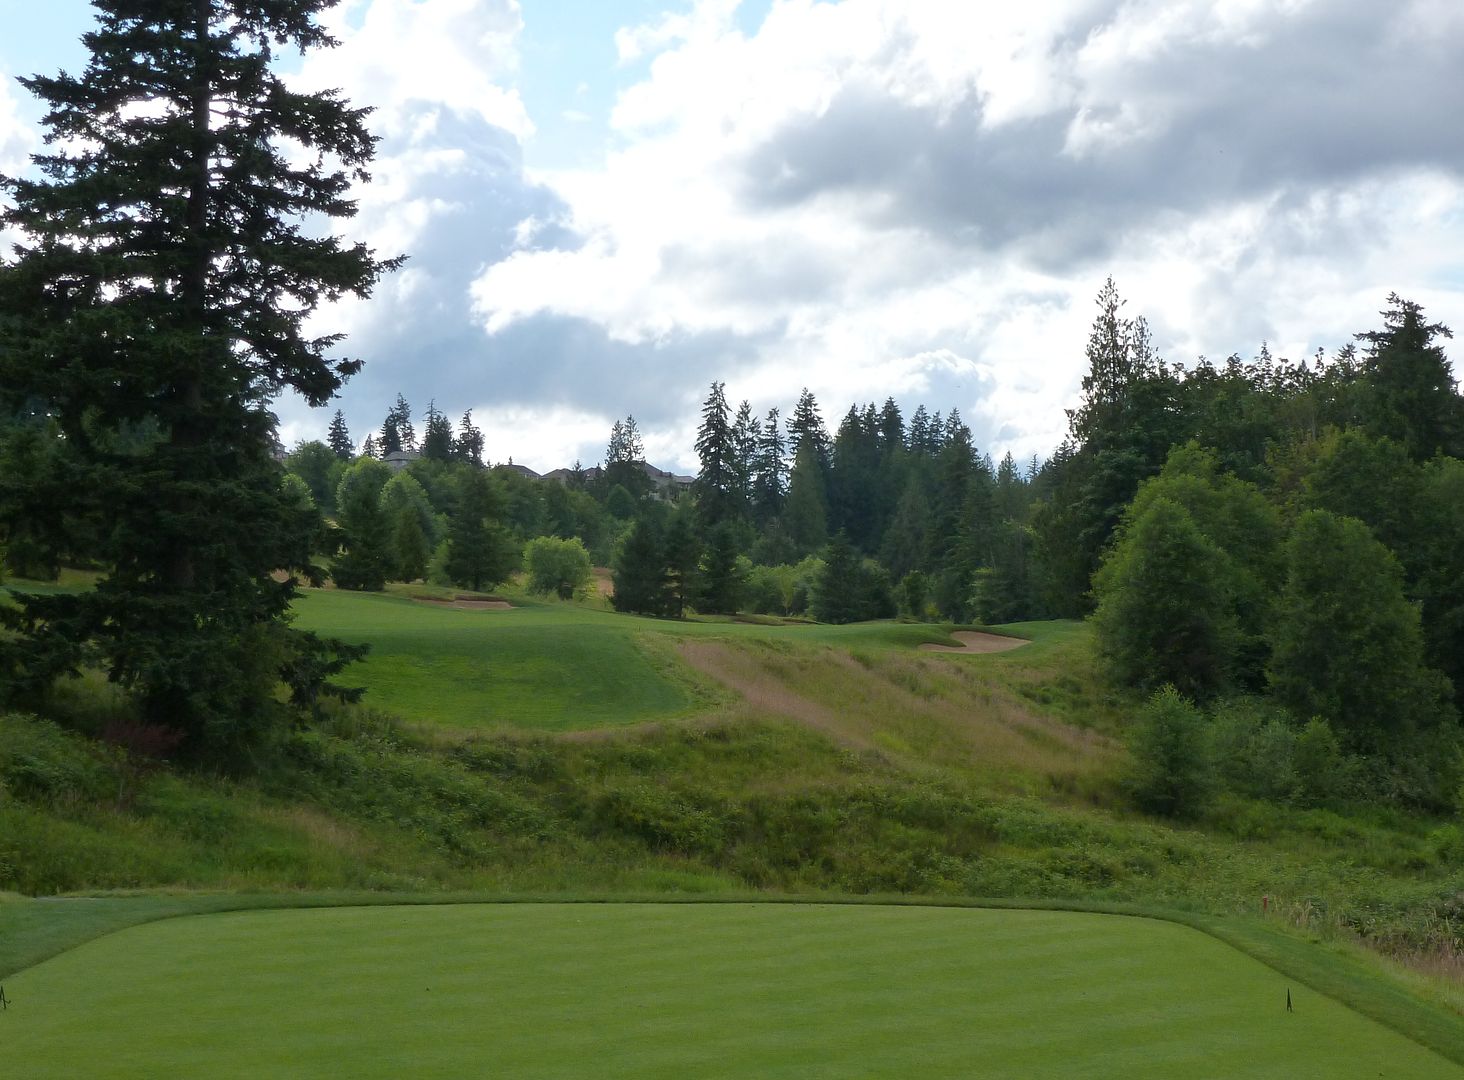
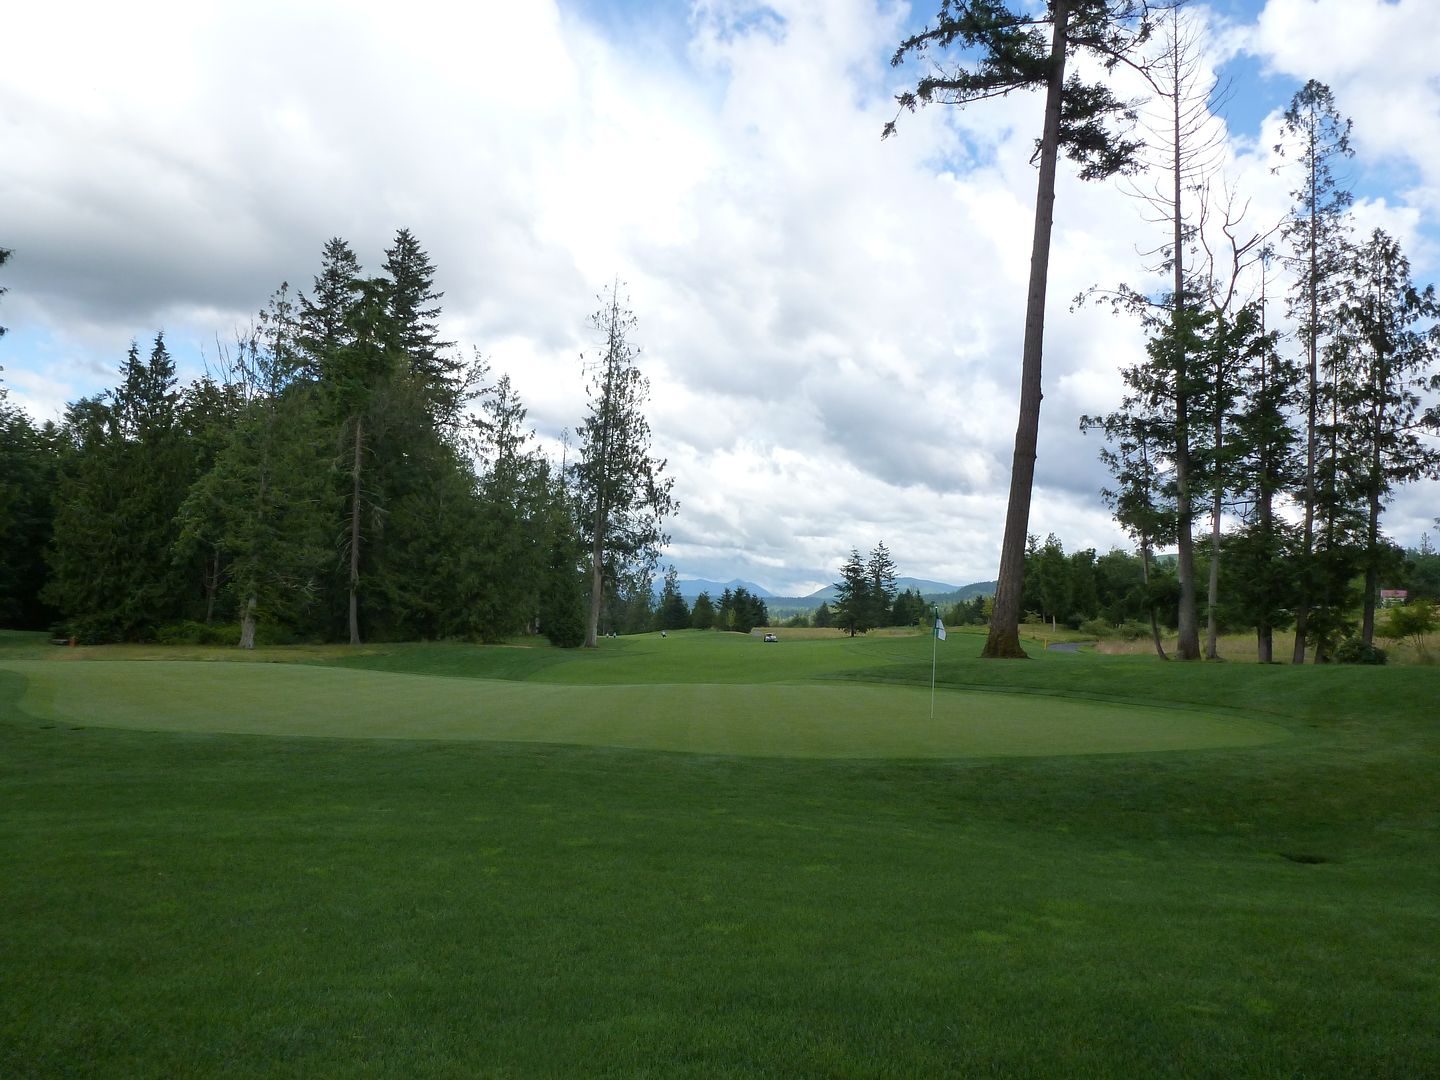
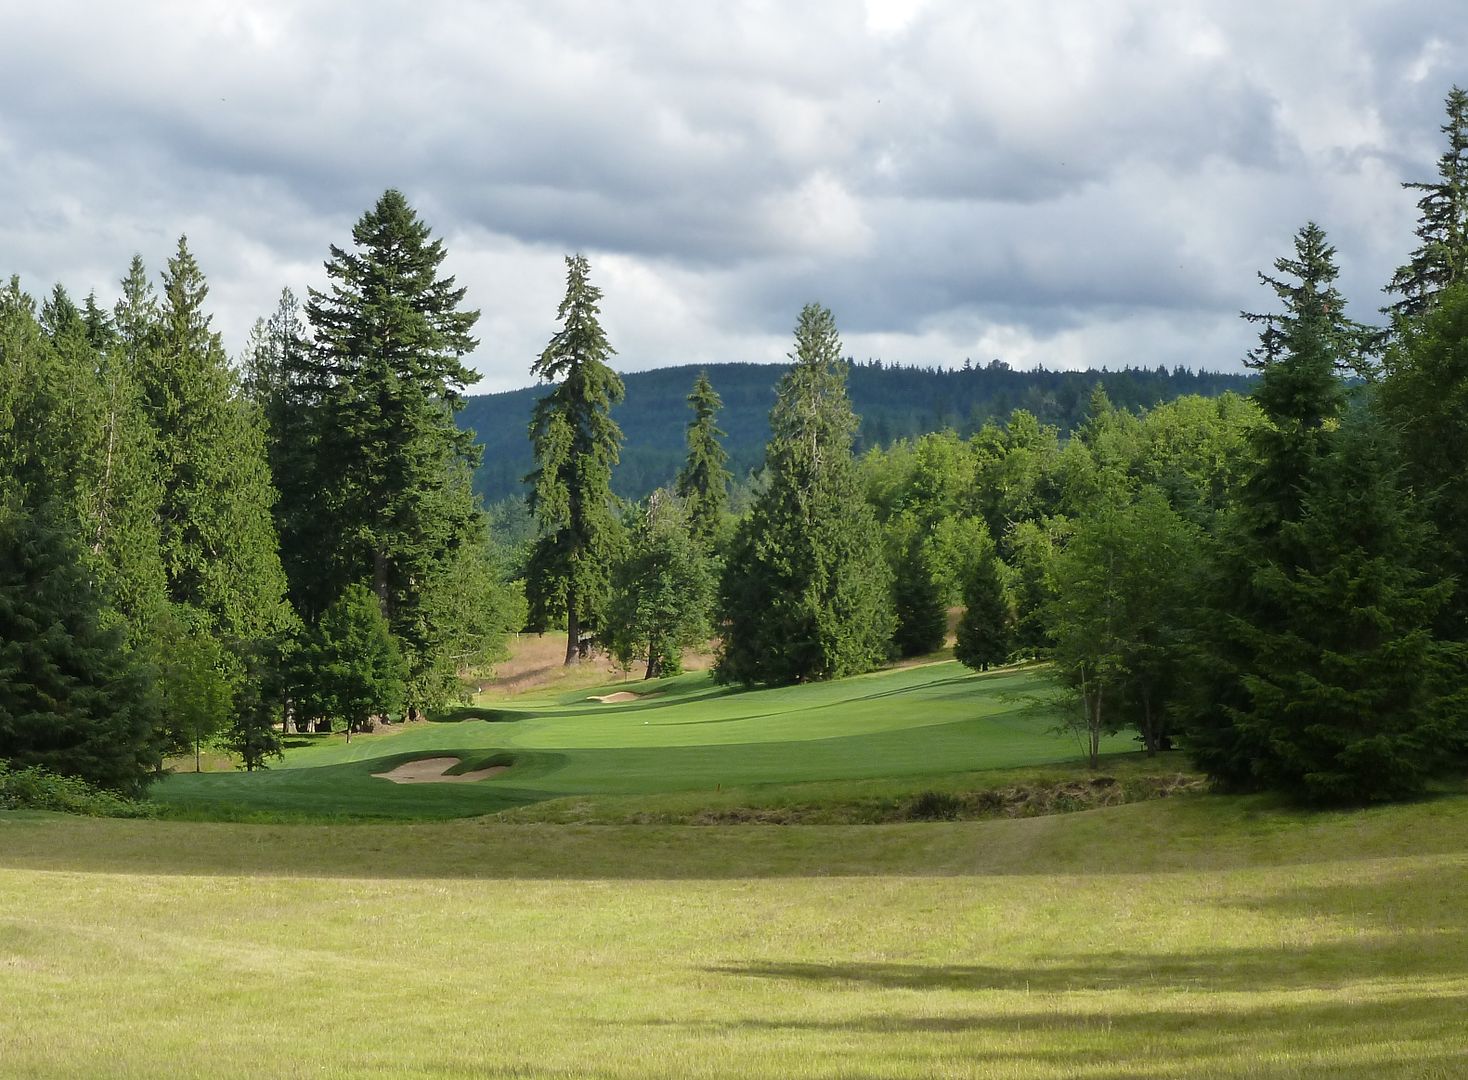
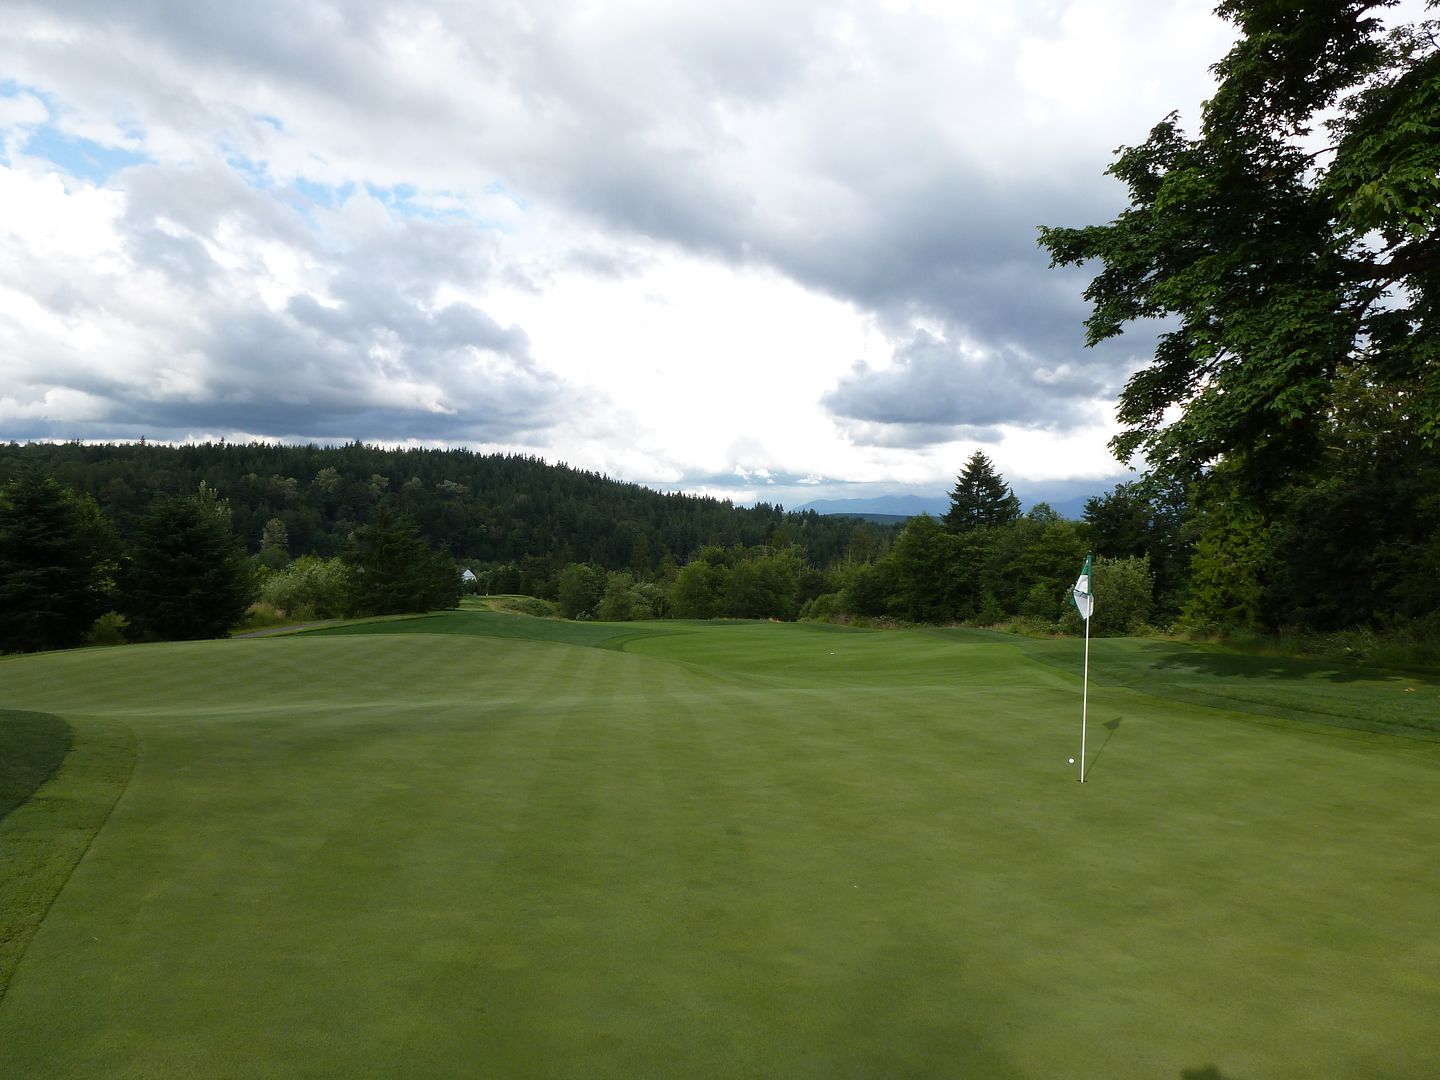
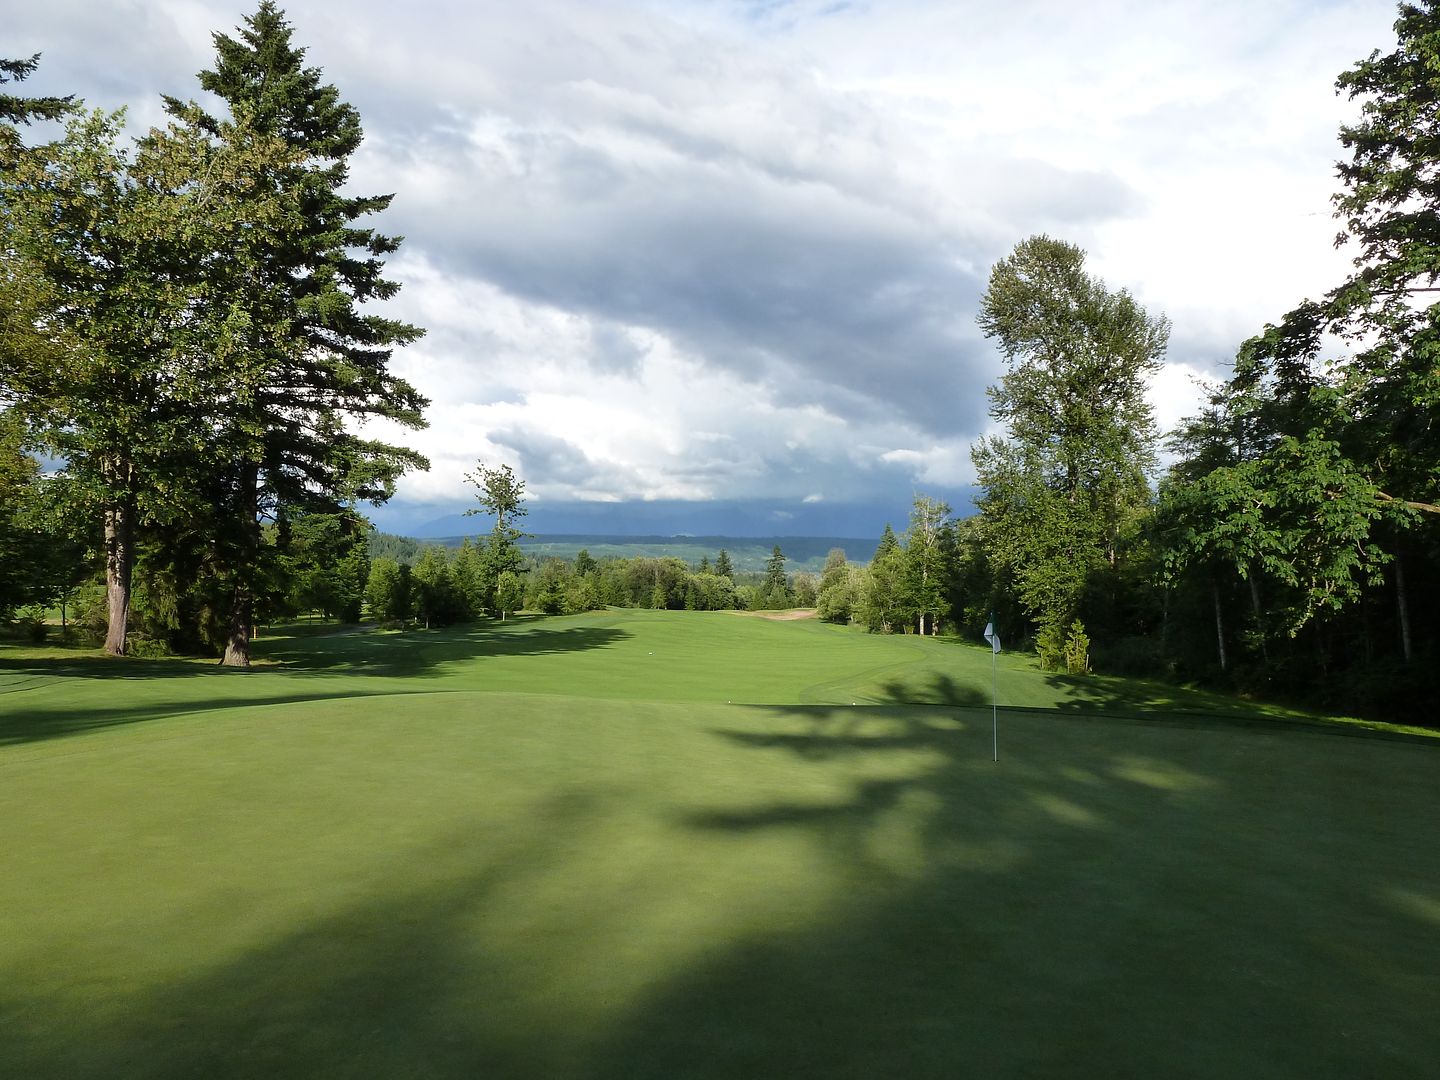
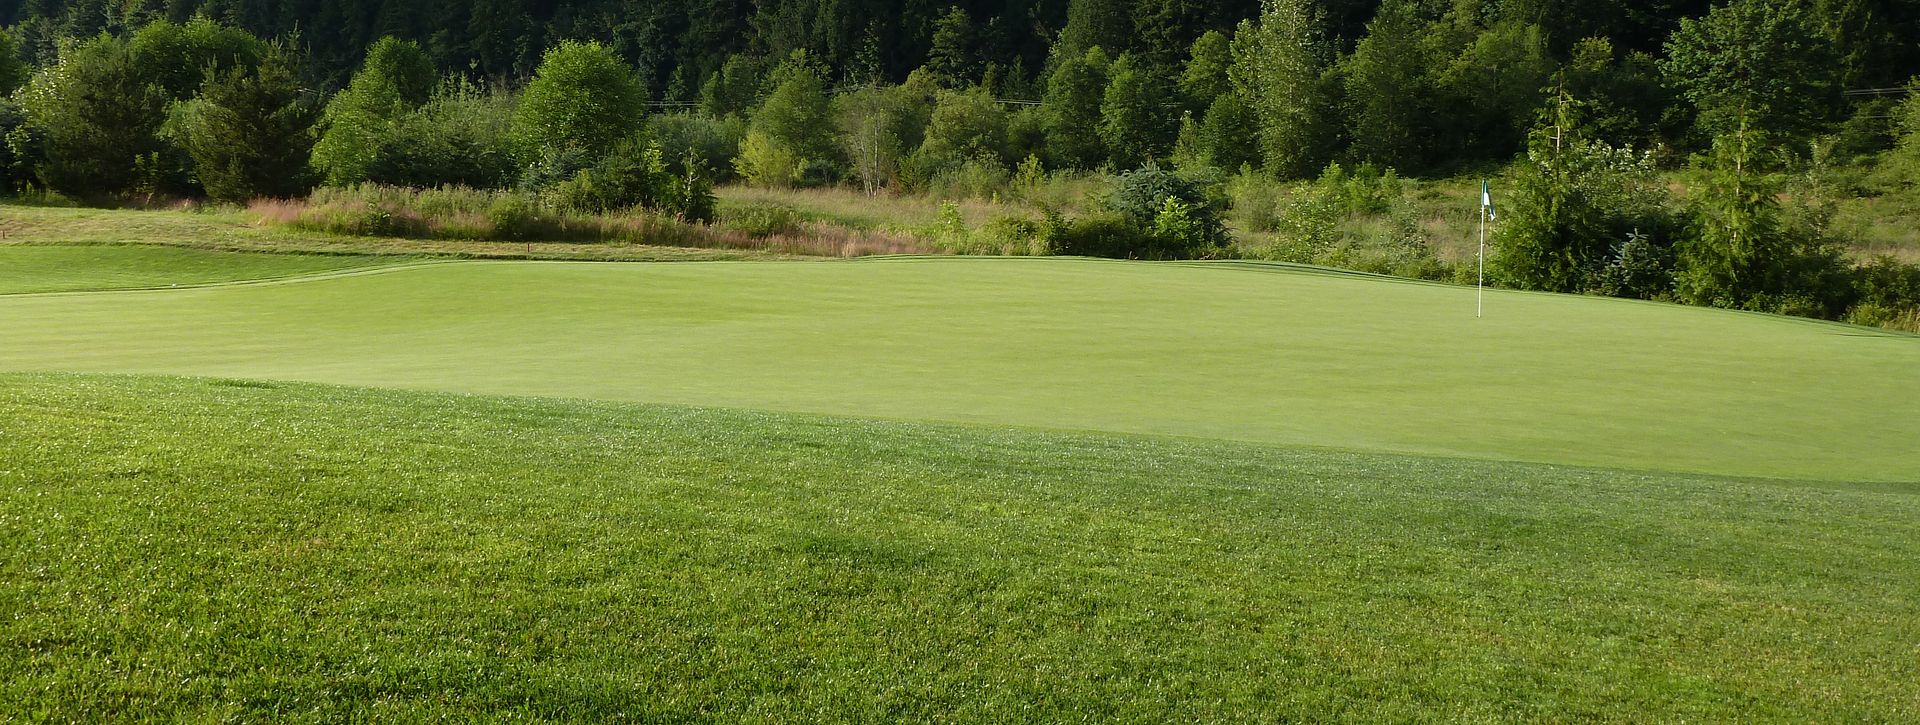
Hole 13: Par 3, 230 Yards
Playing #13 - Although ‘The Gauntlet’ doesn't begin until #15, now would be a good time to be sharp with your play. This downhill par 3 has trouble on both the left and right sides. Shots landing short and right may receive a favorable bounce towards the green. There are deep bunkers left of this green and a large slope on the right.
One of the most amazing thing about playing the picturesque/intimidating/difficult 13th from 230 yards, is that if you turn around there is another tee 20+ yards behind you.
The contouring short/right of the green will assist the player by kicking the ball toward the green. But, the close proximity of the trees both left and right add a serious intimidation factor.
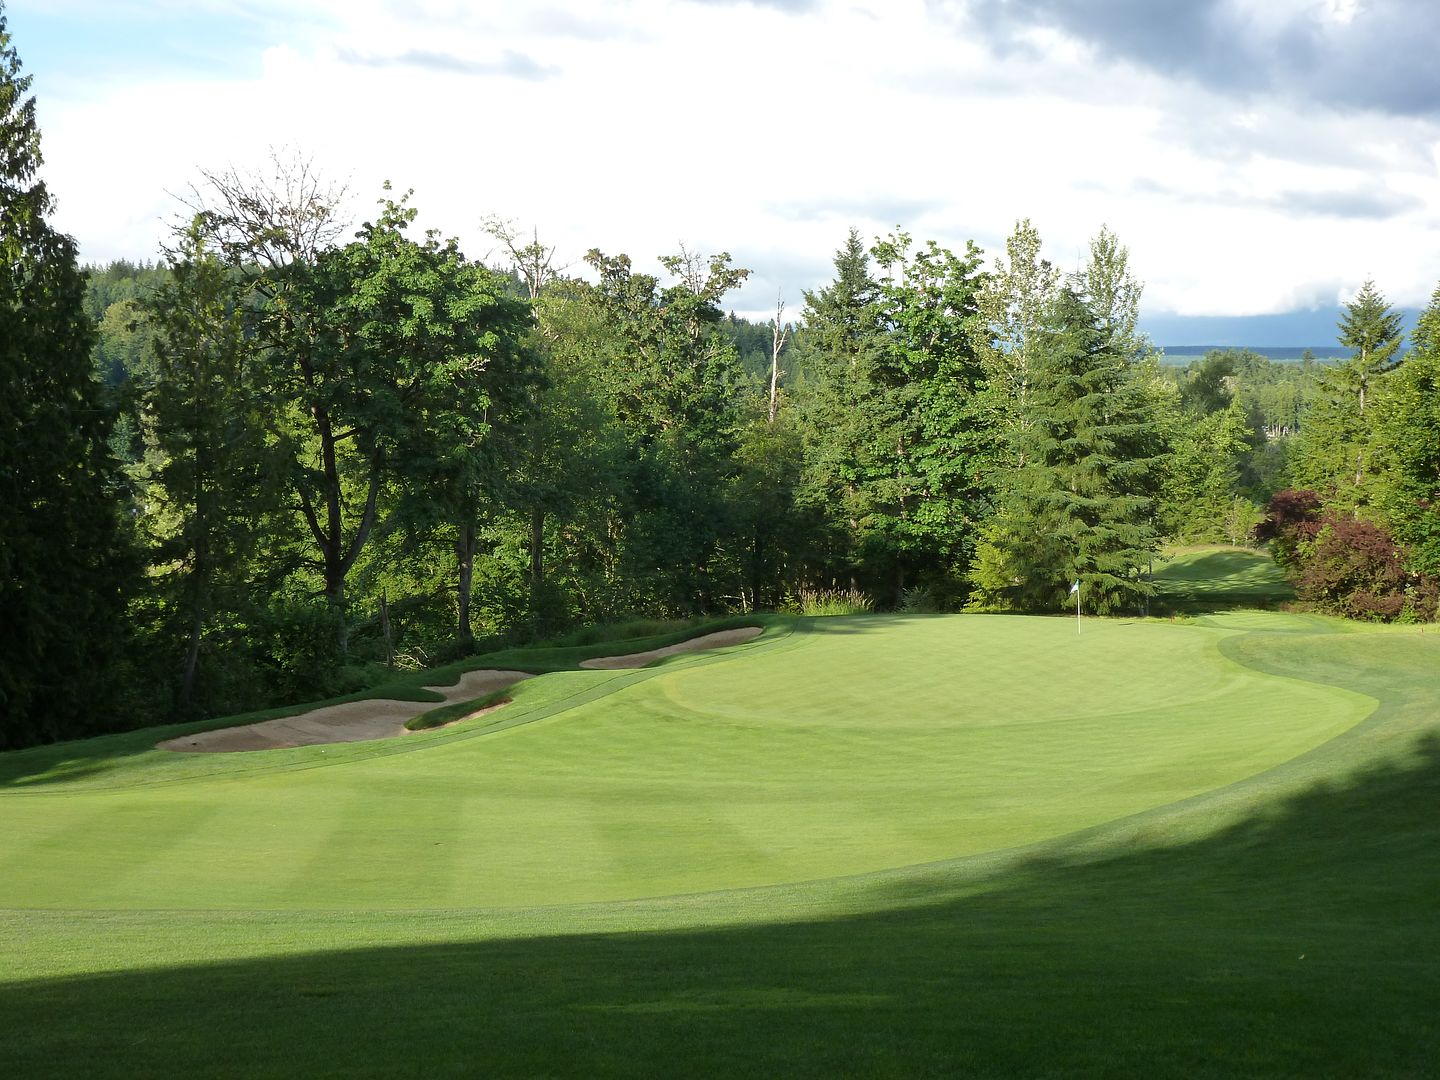
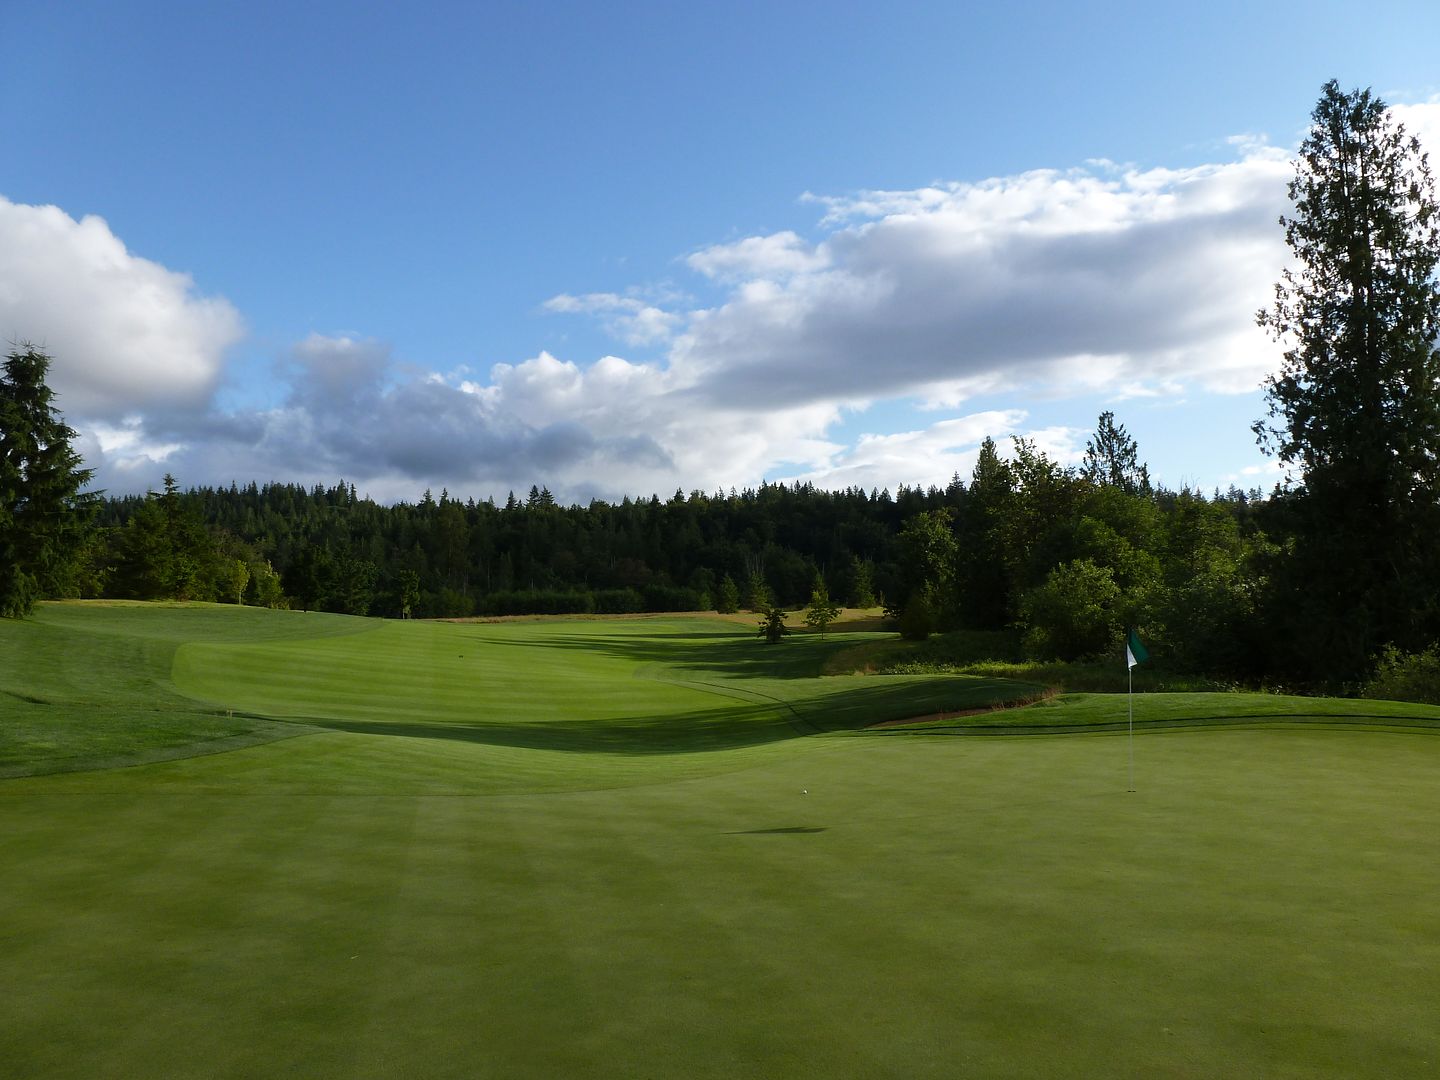
Hole 14: Par 4, 411 Yards
Playing #14 - A decision needs to be made on this dogleg left par 4. A tee-shot carrying over the bunker with a draw (A) will get an extra 20-30 yards of roll but will leave an awkward second shot. A tee-shot played towards the right side (B) will leave a flatter lie, but a somewhat longer approach. The right side of the green slopes toward the left and the slope behind the green will put you in the hazard if you go over this green.
Hole 14 is the last of the dogleg left par-4s, but unlike the others, there is a reasonable opportunity to challenge the left side and gain some extra yards.

This may be my favorite approach on the golf course. The second is played from a hanging lie to a green that slopes right to left. The oft (I presume) draw from the hanging lie causes the ball to go just a little longer than the player expects and a severe fallaway behind the green will catch this miss. Lastly, a great tuckable pin back right is extremely difficult to access from anywhere but the left side of the fairway (ie tee shots that aggressively challenge the left/bunkers).
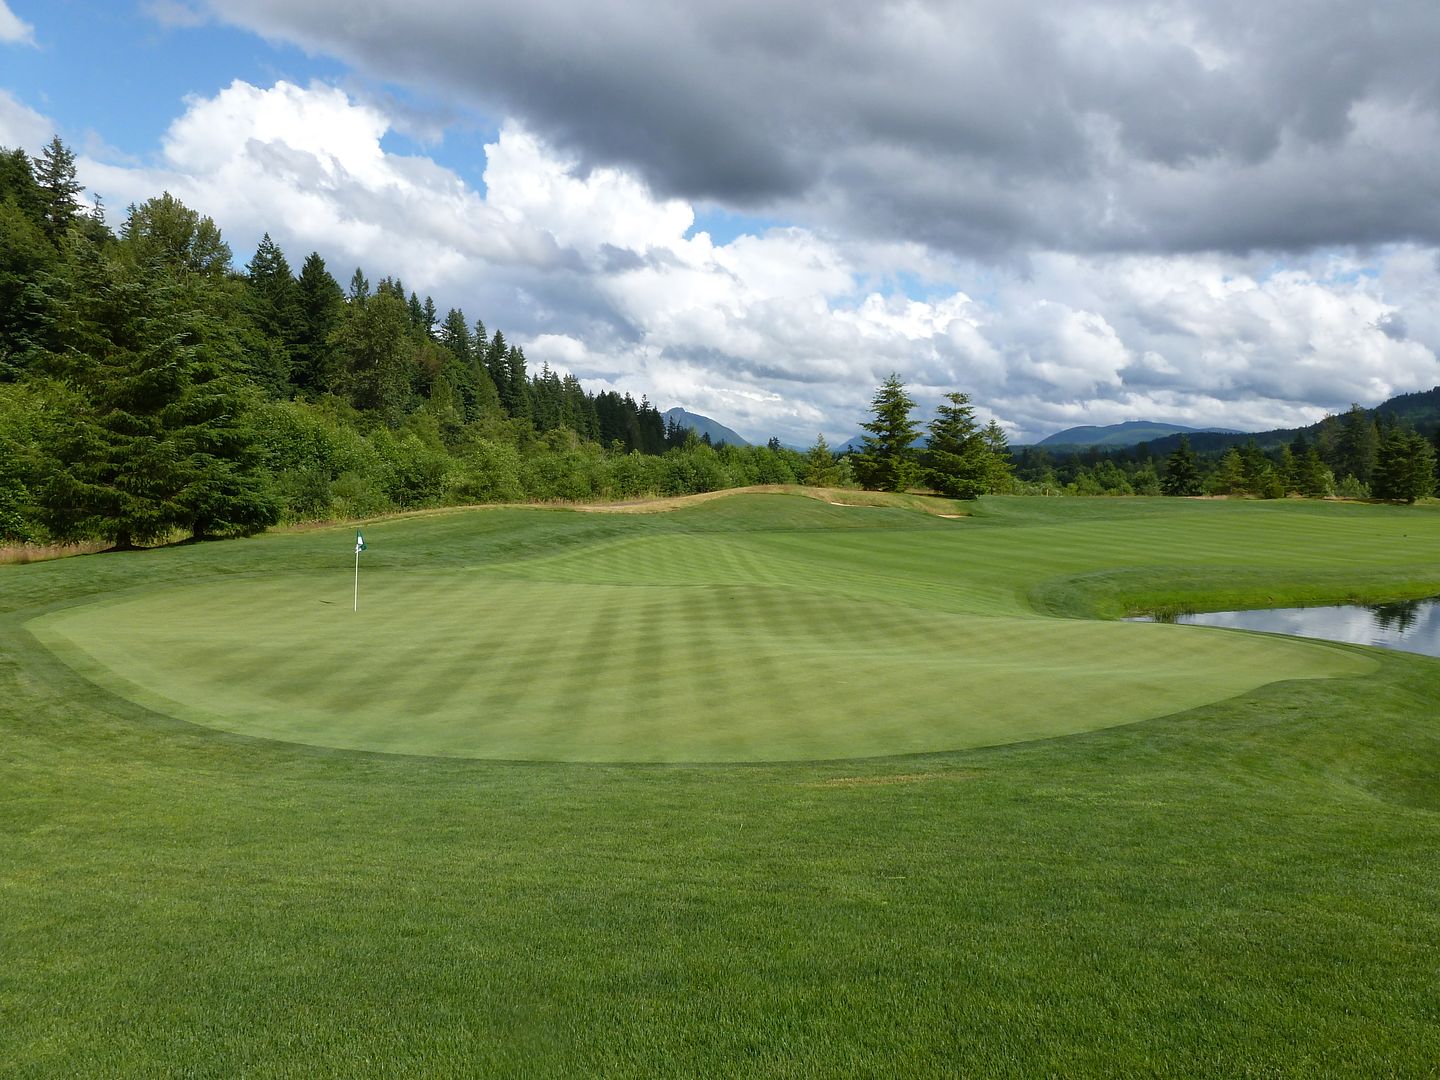
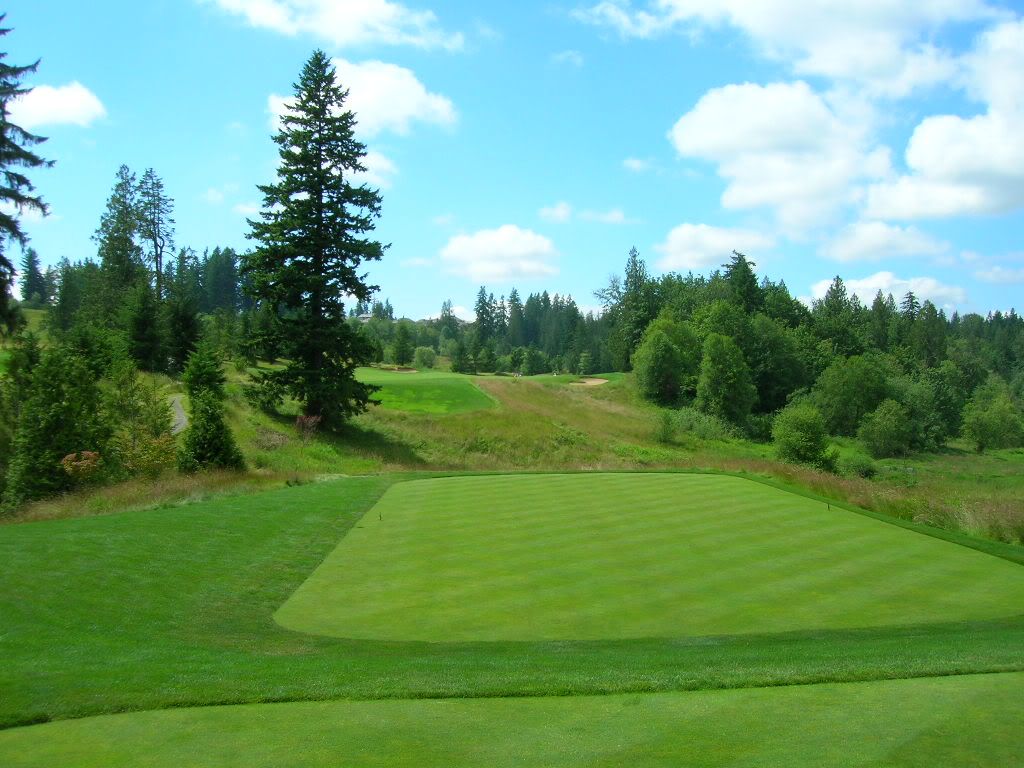
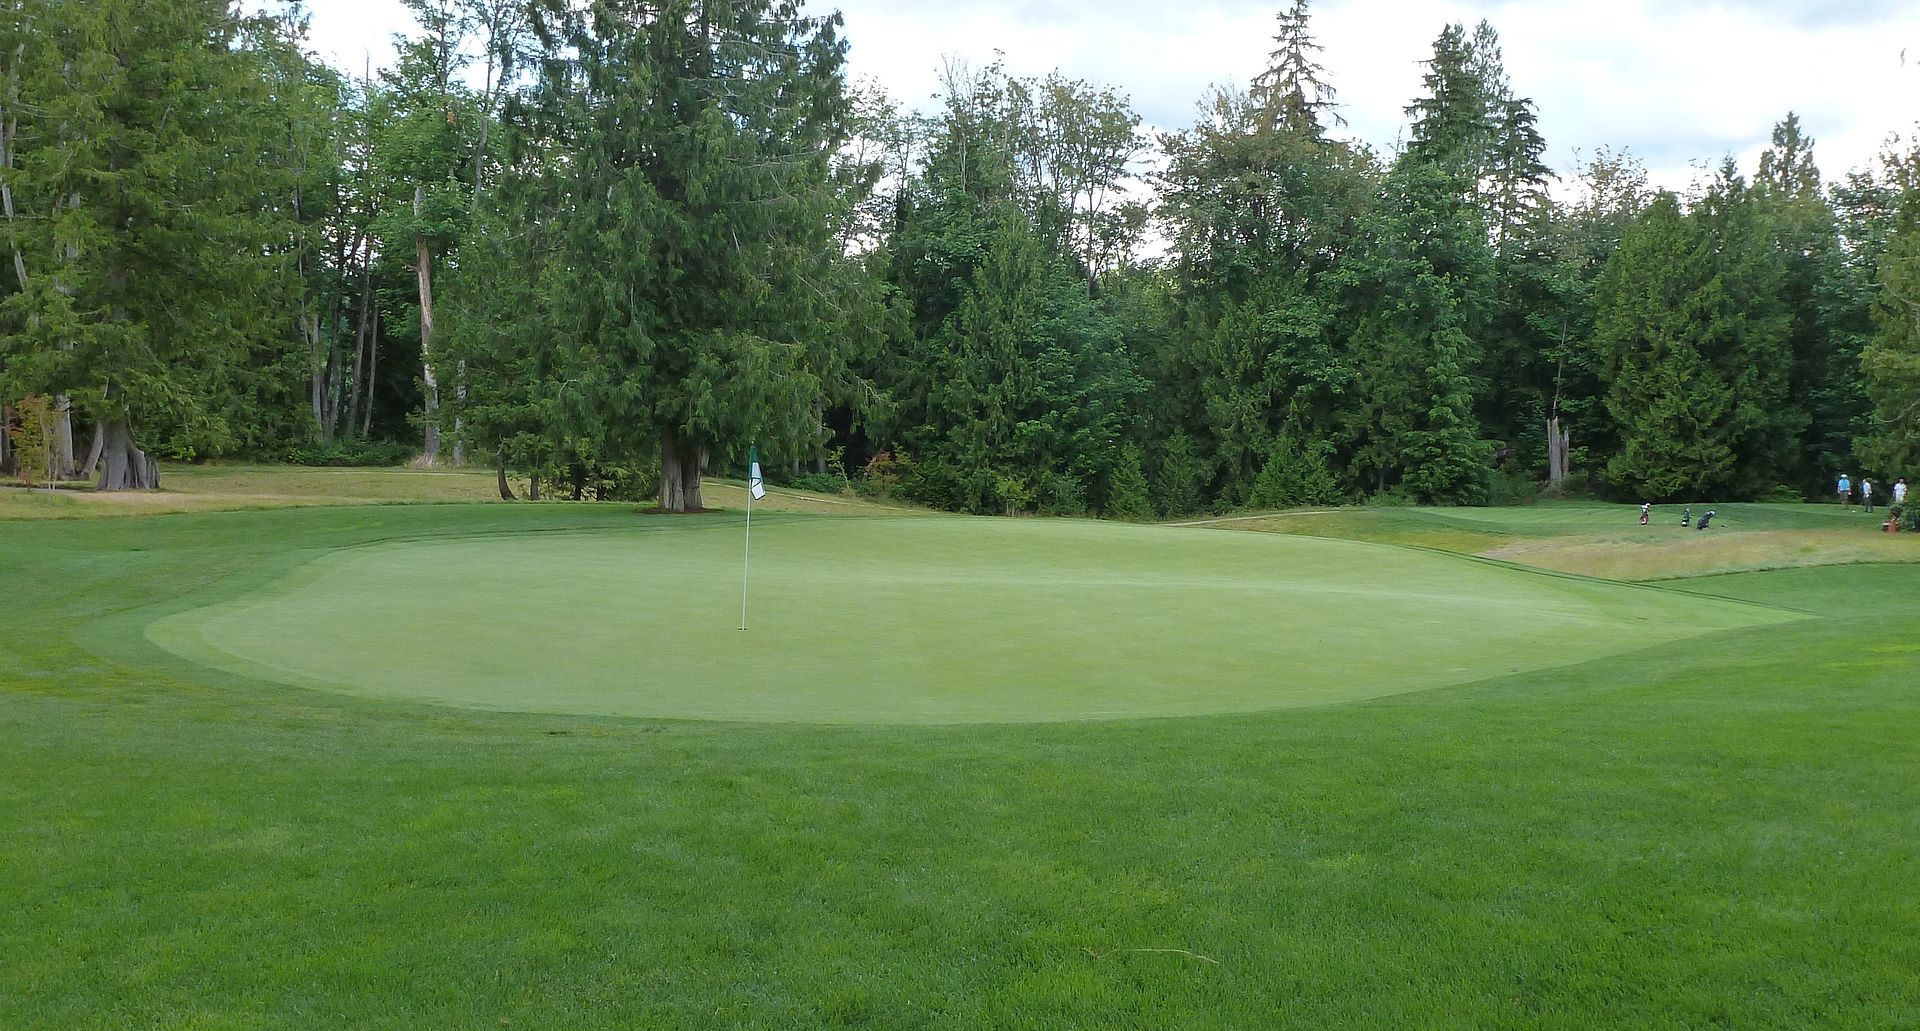
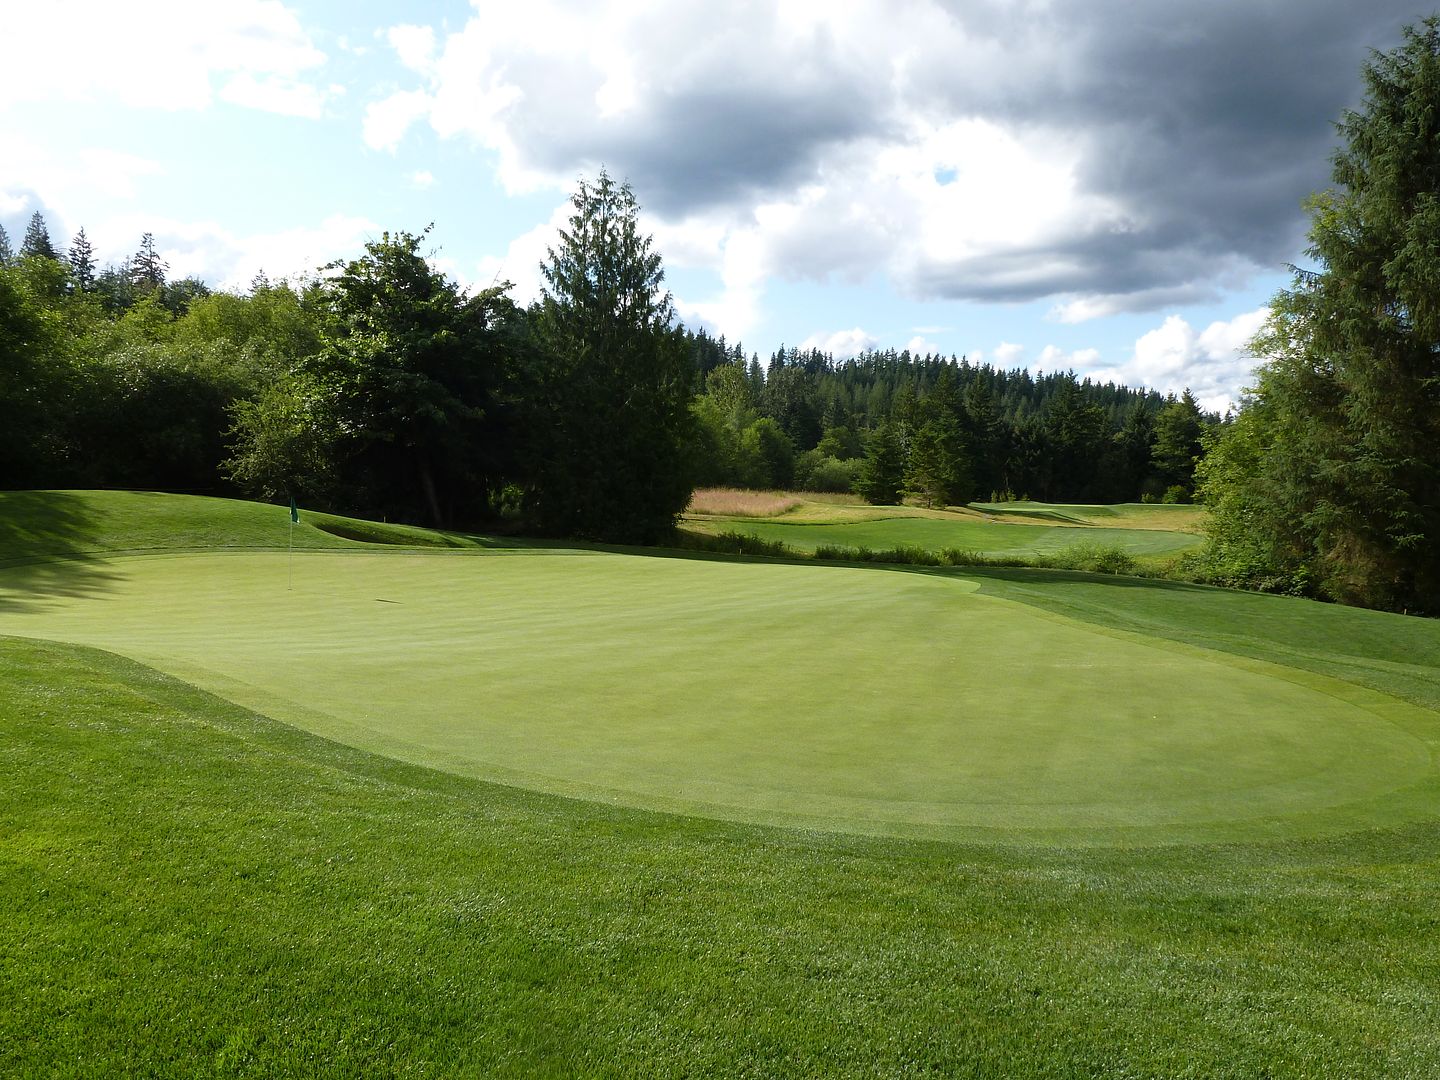
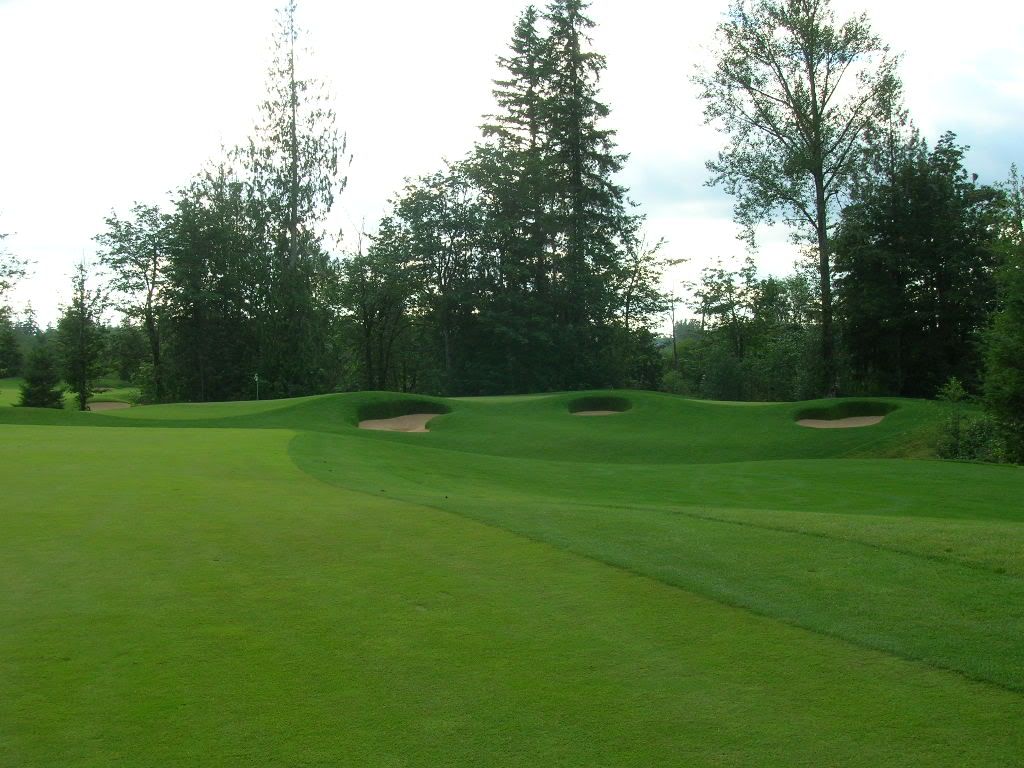
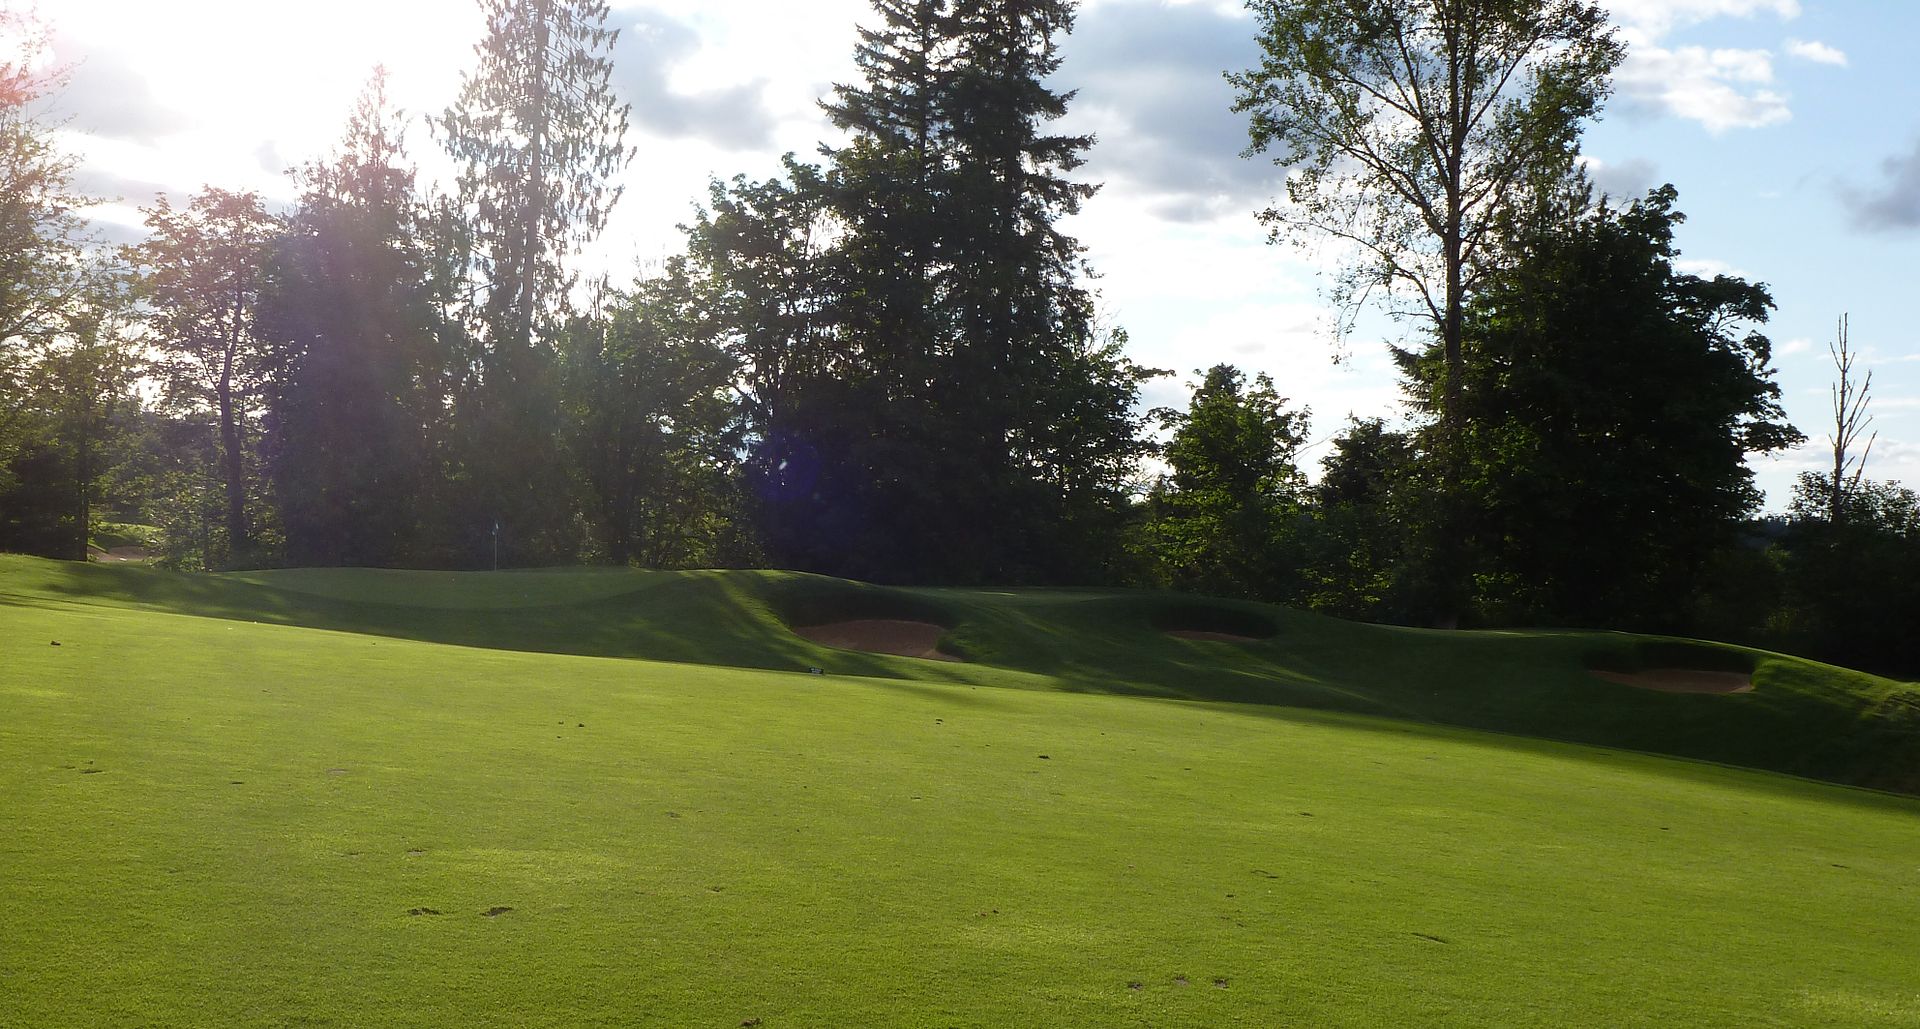
Hole 15: Par 3, 219 Yards
Playing #15 - ‘The Gauntlet’ begins with a long and very difficult par 3. There is a very deep bunker protecting the front of this two-tiered green. The tier separates the left and right sides of this shallow green. The left side slopes severely from back to front whereas the right side, although smaller, is relatively flat. Because the green is not very deep, a recovery shot played from behind this green could very easily run off the front and back down the fairway. Par is an excellent score on this hole.

The 15th at Aldarra has been called the best par 3 in the Seattle area (don't believe me? See 3 posts up!). Though a similar length to 13, the two holes feel nothing alike.
There really is no easy pin on this green. They range from hard to really hard. Front-left pins probably fall in the 'hard' category, and are much more difficult than they appear. Shots missing right find the very deep front bunker. Anything not carrying onto the green will roll back down the false-front. And anything long enough to carry onto the green but pulled will find the left bunker. Only options: hit it perfect, or hit it long-right (any righties out there ever do that? I don't).
The false-front short/left of the green
The collection area short/right of the green shows undulations making up and downs difficult
The green is split in two by a single spine
Hole 16: Par 4, 427 Yards
Playing #16 - The play on this long par 4 is just short of the right-hand fairway bunker. This will give you the best angle to a two-tiered green that is protected on the left side by another deep bunker. The lower tier slopes towards the front whereas the upper tier slopes slightly away from the player making an approach shot very difficult to stop.
Not a whole lot to add to the description above other than to say that into the wind, this is a very difficult hole. I wonder if the bunkers on the right (which are supposed to be challenged for a better angle into the green) are too far off the tee and are an aiming point for many players rather than a hazard.
Hole 17: Par 4, 340 Yards
Playing #17 - Even though this par 4 is one of the shortest on the course, don't let the yardage fool you. Your tee-shot needs to be left of the large tree on the right hand side of this fairway (A) and must be long enough to carry up the hill. Although this will leave a short approach, the shallowness of this green as well as the protecting ‘British Open’ style pot bunkers in front will force you to be very accurate with your wedge. This green has many slopes as it is very wide with three separate tiers.
Playing the hole into the setting sun, I actually thought the area right of the tee was a Hogan's Alley-type sliver of fairway. I was wrong. Right is bad. Shots behind the tree are stymied, though shots missed right of the tree will have a shot at the left portion of the green.
The green is sort of boomerang shaped with deep fronting pot bunkers (though I don't know why Fazio decided on the change in bunker type here).
The green is very undulating and generally sloping from left to right. I suppose this is because tee shots missed right can only hit left part of green and two-putt from left part of green to right part of green = impossible?
Hole 18: Par 4, 422 Yards
Playing #18 - The finishing hole at Aldarra may be the toughest in the state. Both length and accuracy are required off the tee. There is a fairway bunker on the left side of this fairway catching any wayward shots struck to avoid the hazard that runs down the right side of this hole. Your lengthy second shot must traverse over a 30 yard-long hazard that crosses the fairway 100 yards short of the green. The green is well protecting on both the left and right sides by deep bunkers and the green itself slopes predominantly front-right in front and back-right towards the back.
The 'Playing #18' description above pretty much says it all. A very stout Fazio finisher. Aim it down the right and challenge the fairway bunker for a shorter approach with a preferred angle. The bunker left means there is no bailout.
A well-placed tee shot leaves a fairly simple approach, but you really don't want to try to approach the green from out of position.
A false-front requires that shots be carried onto this green, which is not such an easy task with a mid to long iron (notice my balls short of the green).


No comments:
Post a Comment