Devil's Paintbrush
Caledon, Ontario, Canada
Architects: Dr. Michael Hurdzan and Dana Fry (1992)
6,772 Yards, Par 72
Rating/Slope: 71.9/139
My Quick Review: Great greens, firm and fast conditioning and lots of quirk -- easily one of Canada's top-5 modern golf courses.
My Thoughts
Hurdzan/Fry worked hard to give an authentic links experience at Devil's Paintbrush -- quirk included. A round at DP is certainly memorable, not just because of the wild and exciting green complexes, but also because of the stone walls, sod-walled bunkers and double-greens. The course is designed to play firm and fast (and fun!), with the tees and fairways grassed with fescue.
Overall, I think DP is very good, and clearly the better of the duo of courses at the Club (DP's sister course, Devil's Pulpit, is a polar opposite, manicured to perfection, over-engineered, full of elevation changes and less of a sense of intimacy). Width and options and lots of grass mowed at fairway height guarantee that the golf course will be fun to play over-and-over.
Still, many holes left me feeling unfulfilled, and the attempt to add quirk can be seen as over-the-top. In particular, the right-out-of-the-gate forced carry at the 1st, and the reservoir pond on the 15th do not fit well with the rest of the golf course. Furthermore, the 'ruins' (the footings of an old house on the property) on the 8th fairway are great to show guests and visitors, though are perhaps a bit gimmicky. Ditto the 10,000s of square feet (read maintenance expense) on the double greens at 2/9 and 11/14.
Keep in mind, however, that I believe Devil's Paintbrush to be among the very best modern courses in the country, and the above criticisms are more nitpicks than faults.
Scorecard Information
Holes to Note -
Aerials from The Devil's Pulpit Golf Association Website
Hole 2: Par 5, 468 Yards
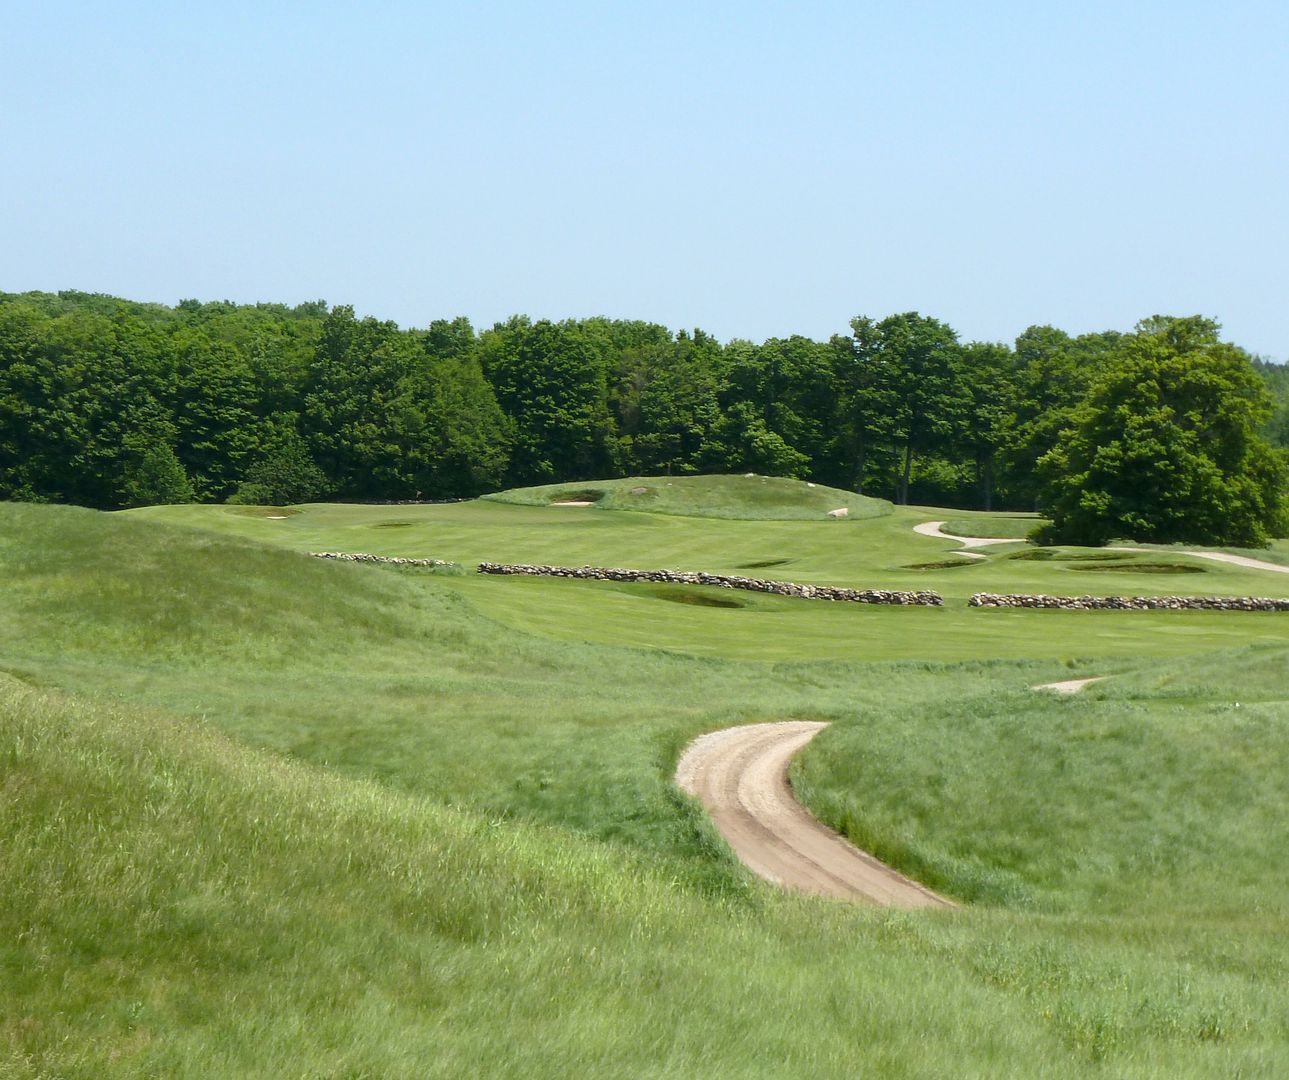
An extremely intimidating tee shot at the 2nd, with a waste area guarding the left and an extremely deep bunker guarding the right. Fortunately, a tee shot in the fairway should leave an opportunity to reach this par-5 in two.
 |
| 2nd Tee |
The approach to the 2nd is played over a large mound that blocks the view of the green -- hopefully your host pointed out the pin position on the 2nd green when you were on the 1st tee!
 |
| Approach to the 2nd |
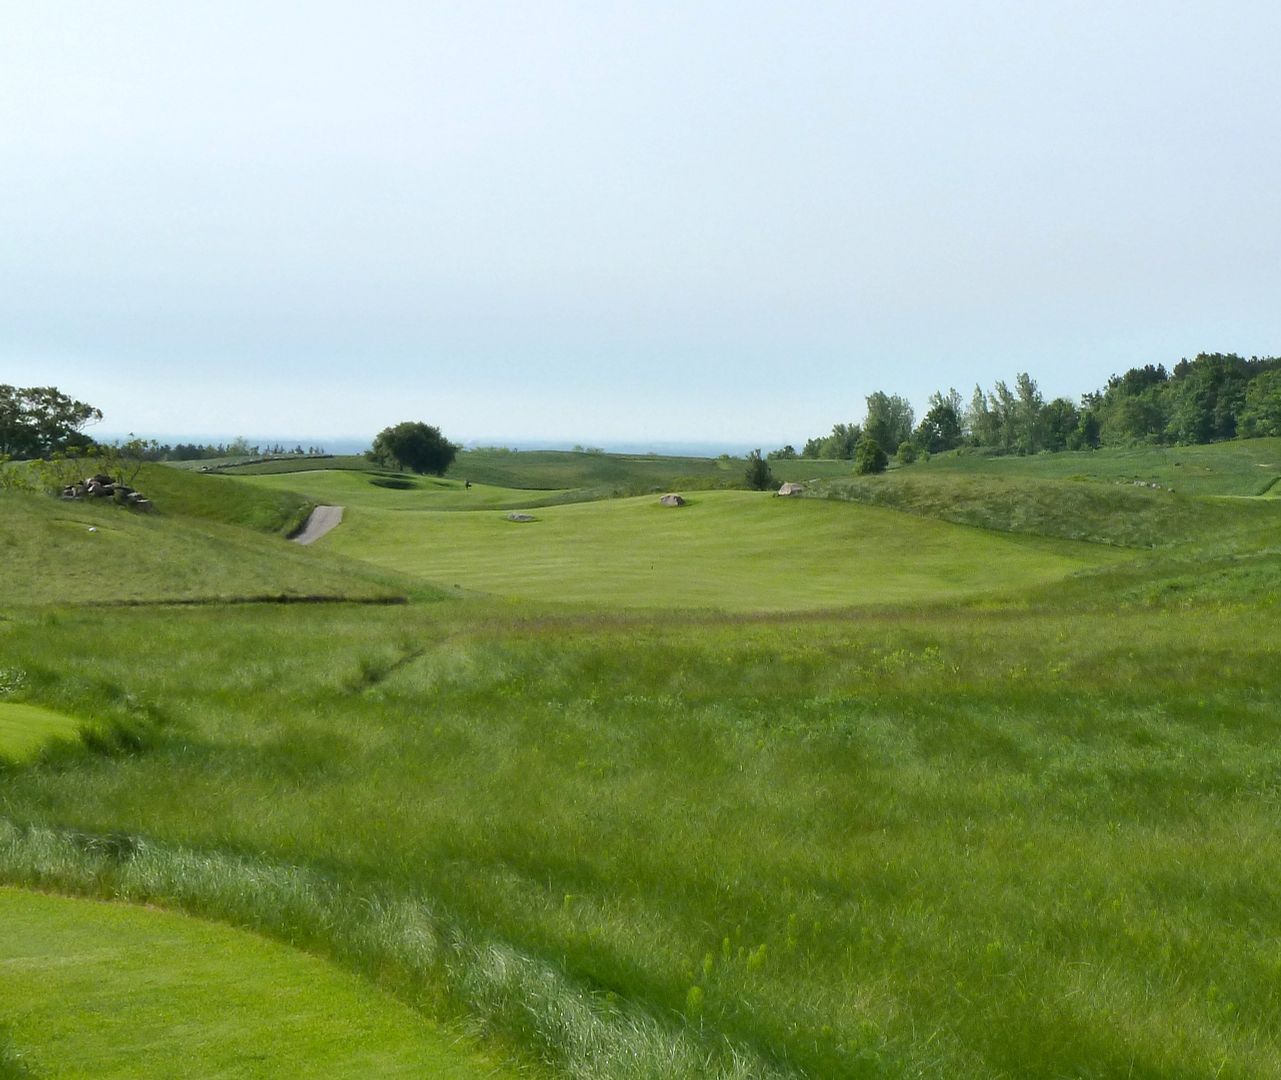
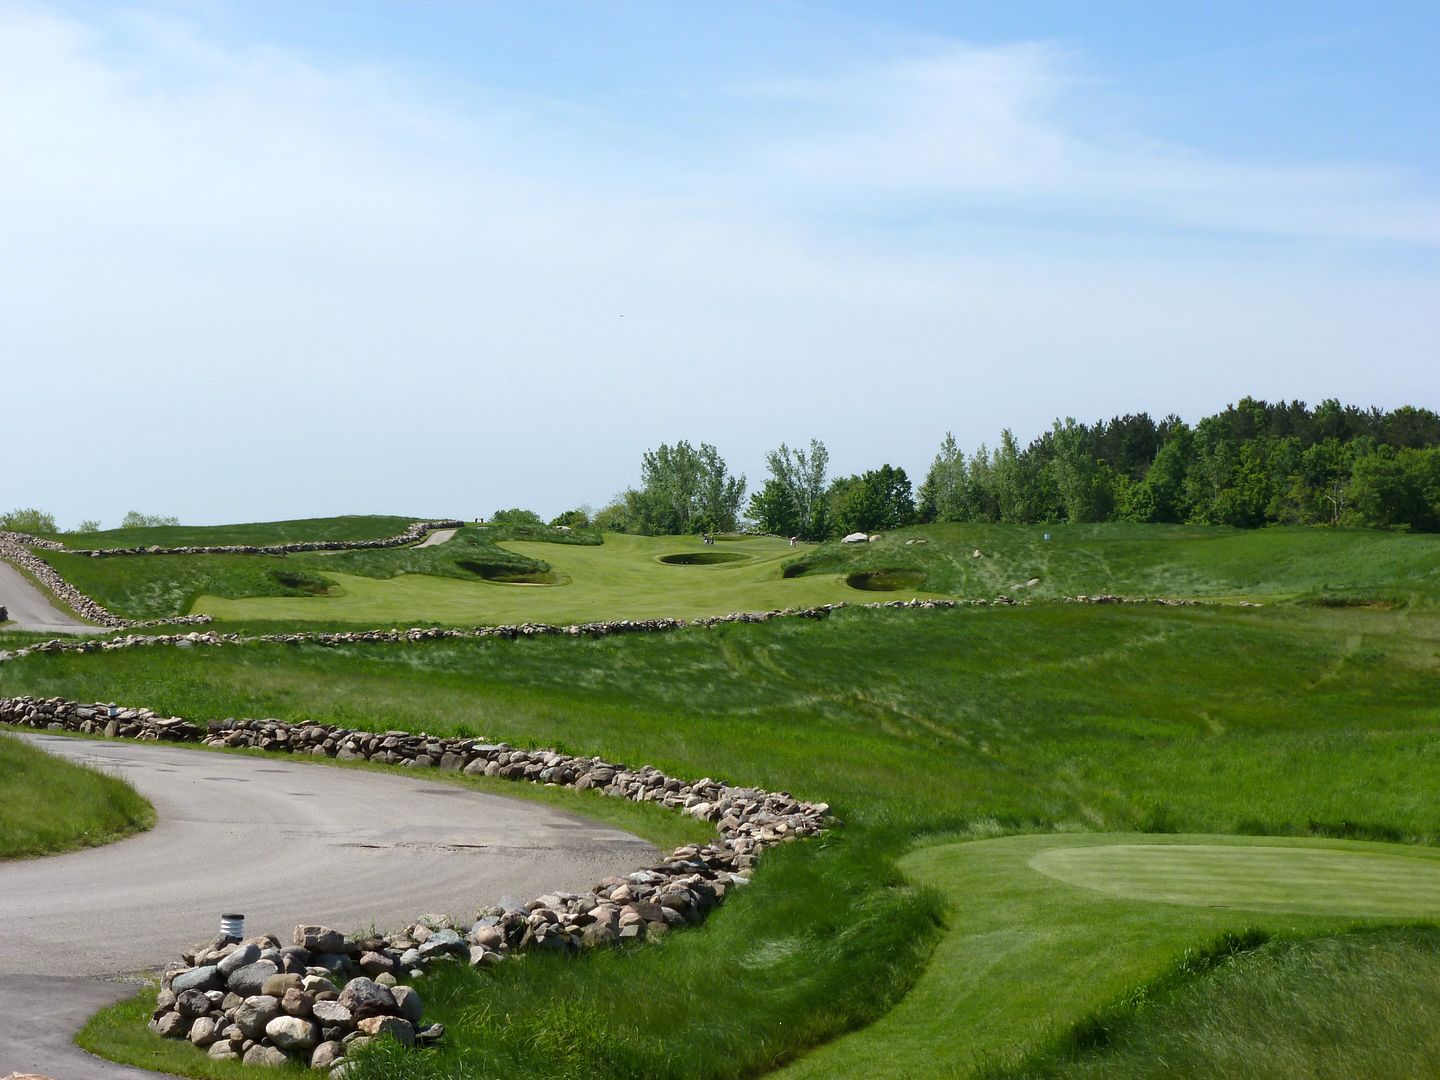
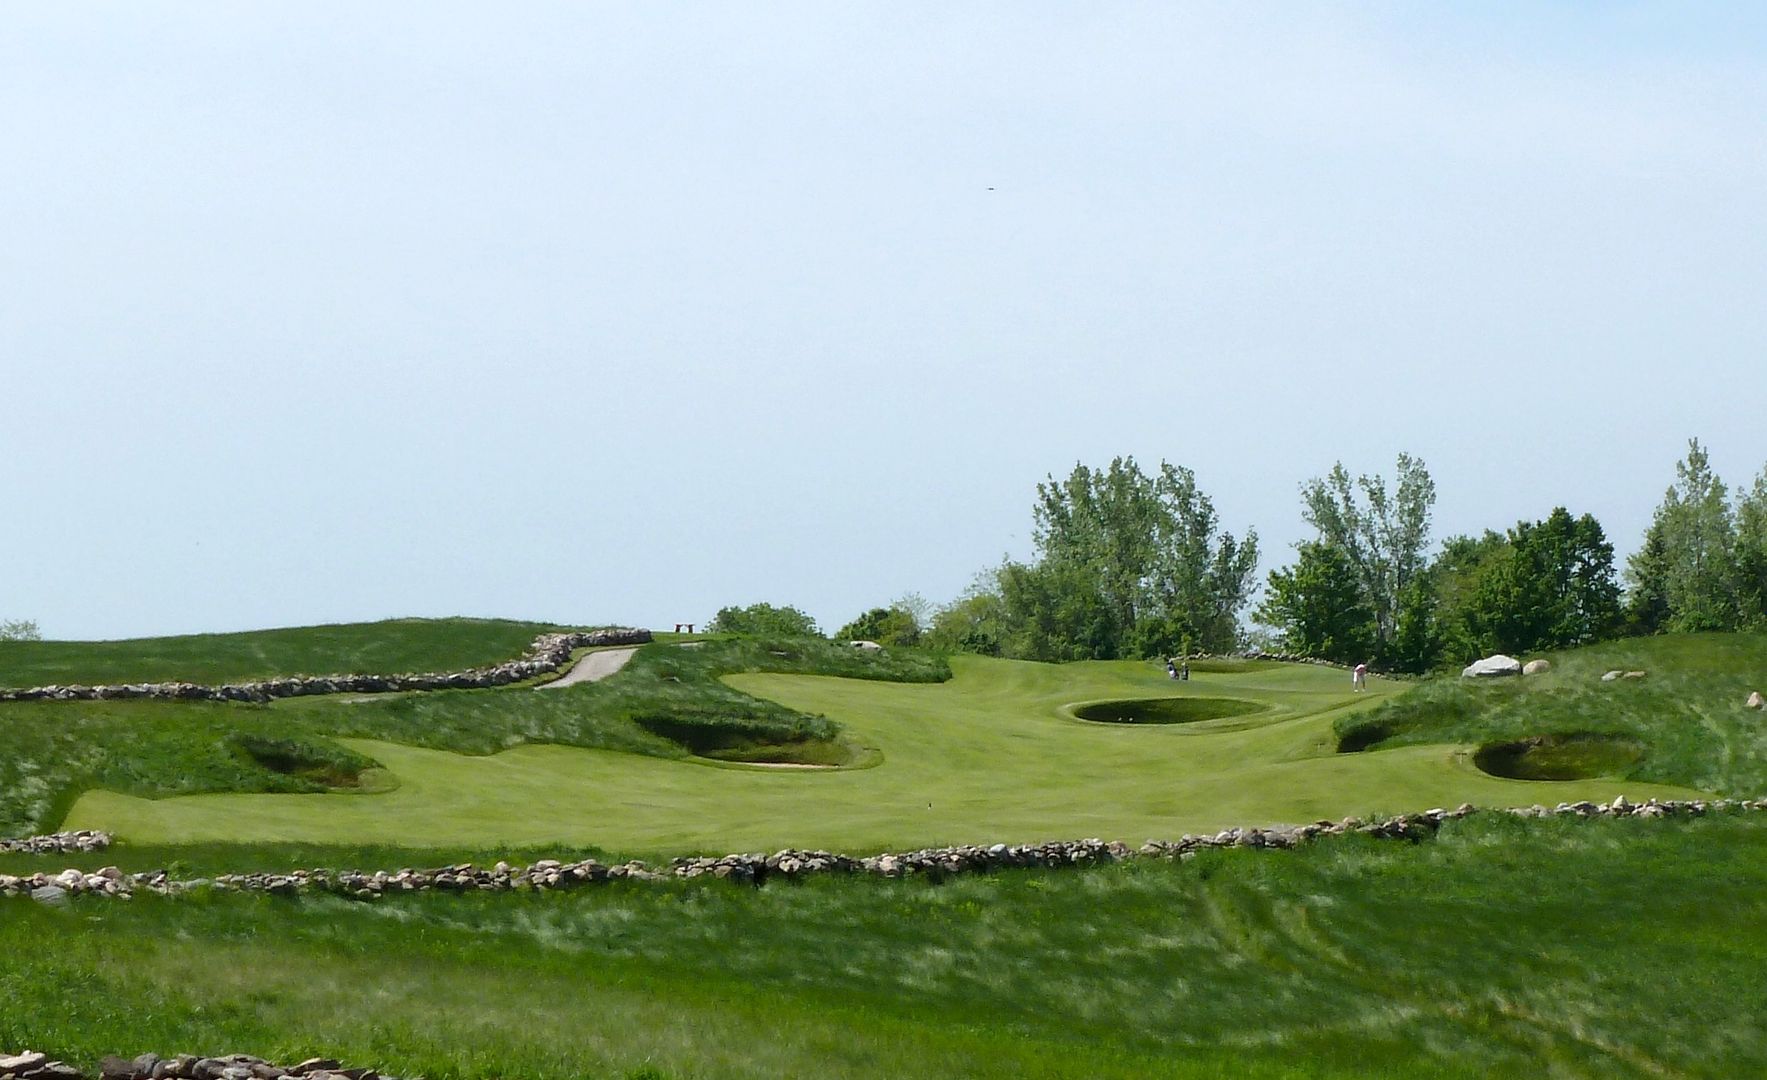
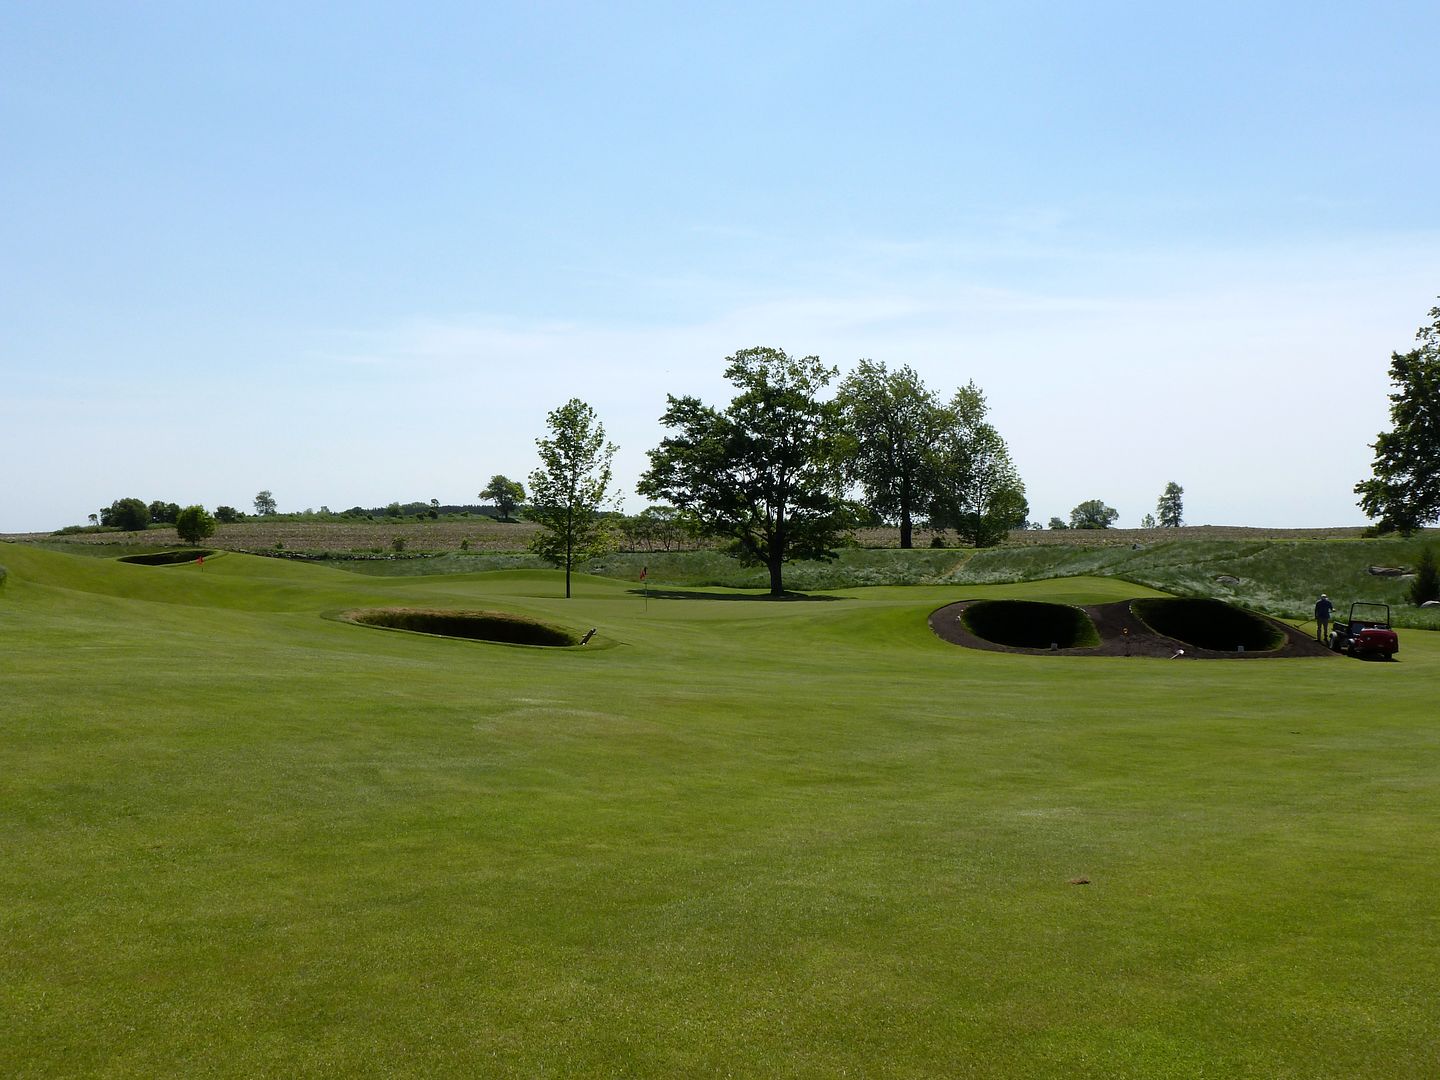
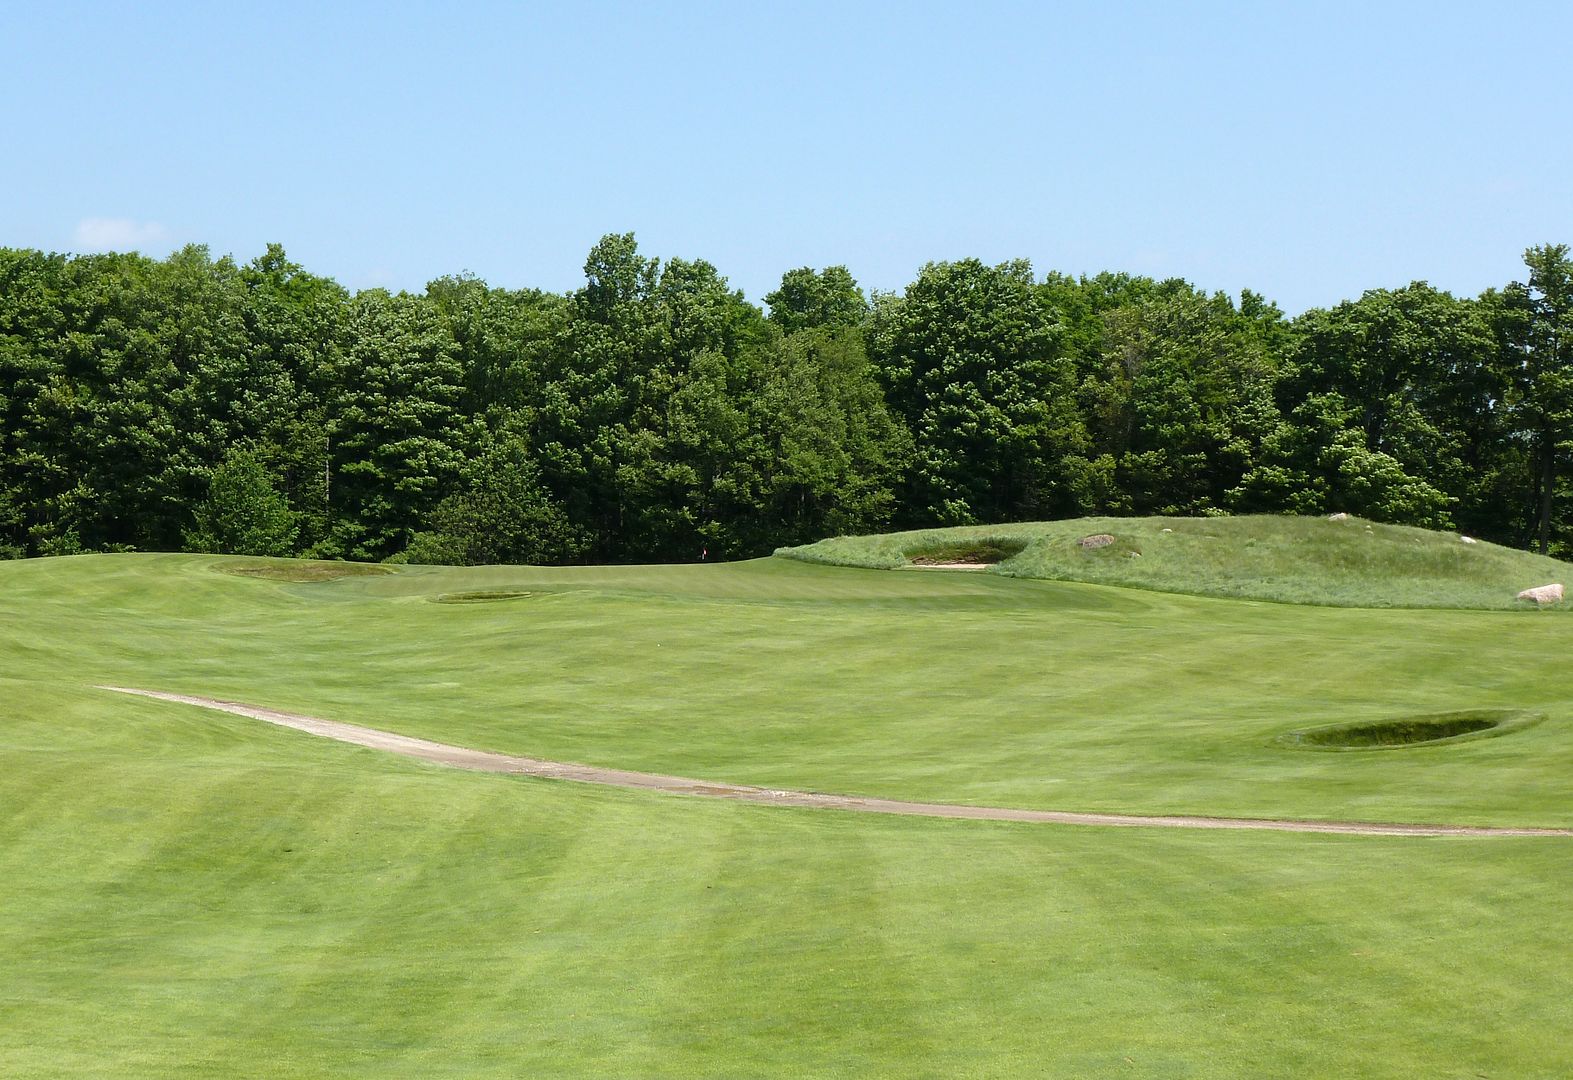
The double green at 2/9 is unlike anything I have seen before. The two greens measure some 50,000 square feet and the rolls on the green are on a scale I have never seen!
 |
| 2nd Green as Seen from 1st Tee |
 |
| 2nd Green |
Hole 5: Par 4, 428 Yards
The pictures flatten the elevation changes, but the fifth is placed up-and-over a very high hill. There is plenty of fairway width for those willing to lay back to the bottom of the hill (leaving a completely blind approach).
 |
| 5th Tee |
The approach on the 5th is played completely blind, except for a series of aiming rocks.
 |
| 5th Approach |
As the golfer crests the hill, he gets his first glance at the 5th green. The green looks small, but this appearance is deceiving, because of the scale of the green side bunkering.
 |
| 5th Greensite |
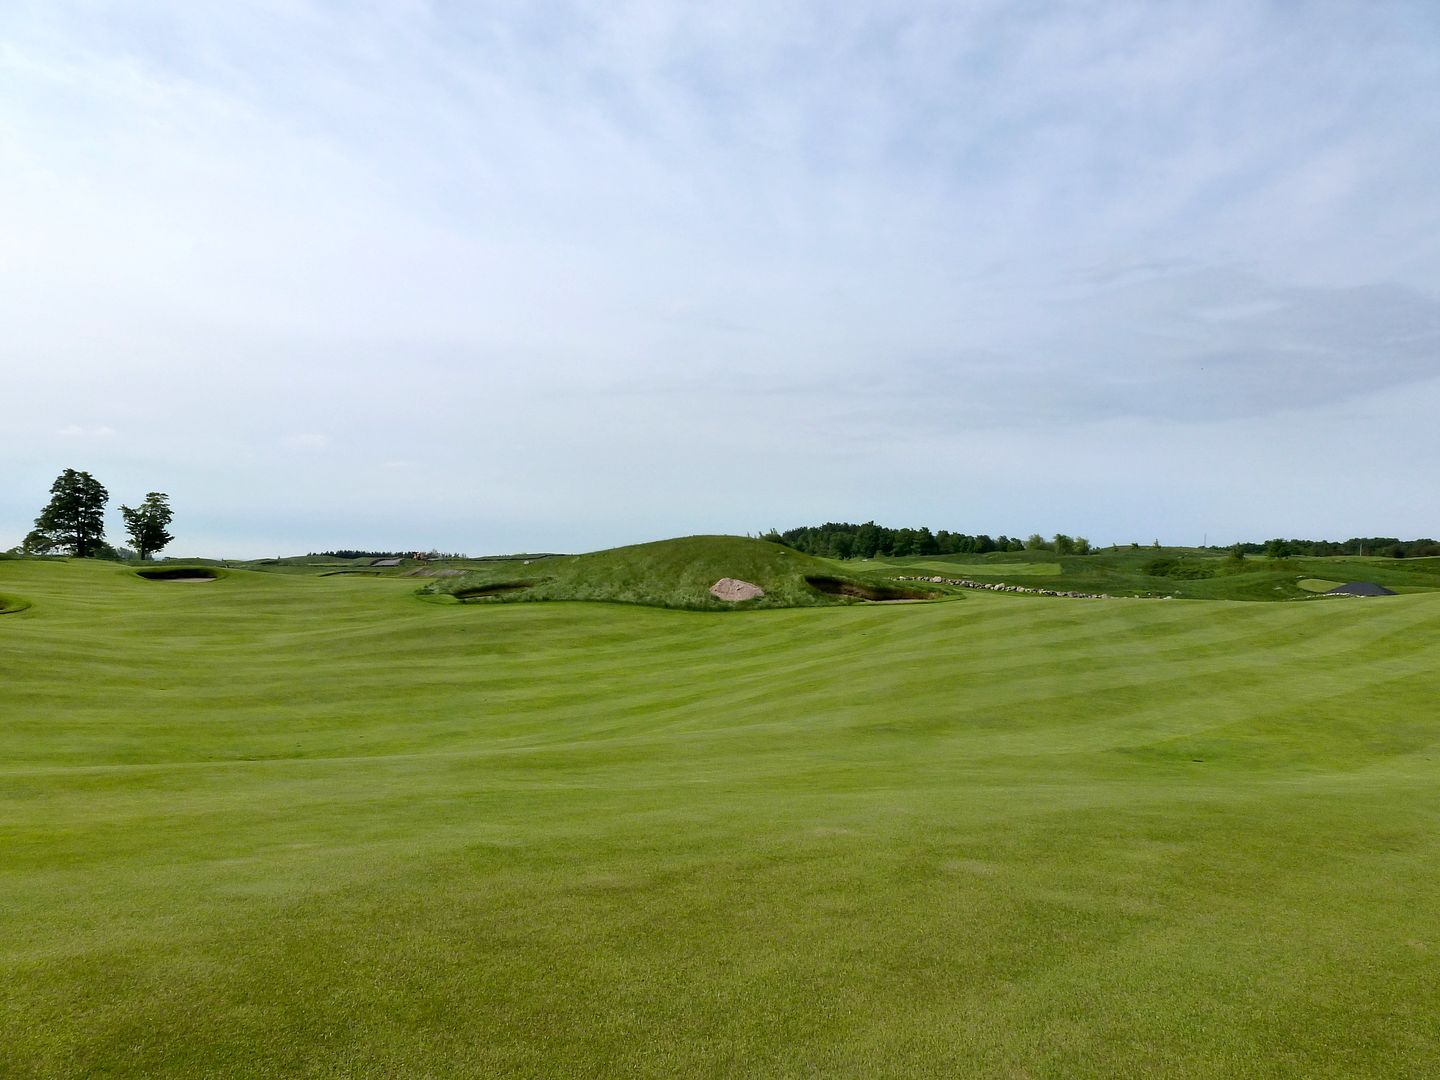
Hole 6: Par 4, 419 Yards
A single bunker guards this very wide fairway, though with 8 tee boxes, there is no shortage of variety and teeing angles.
 |
| 6th Tee |
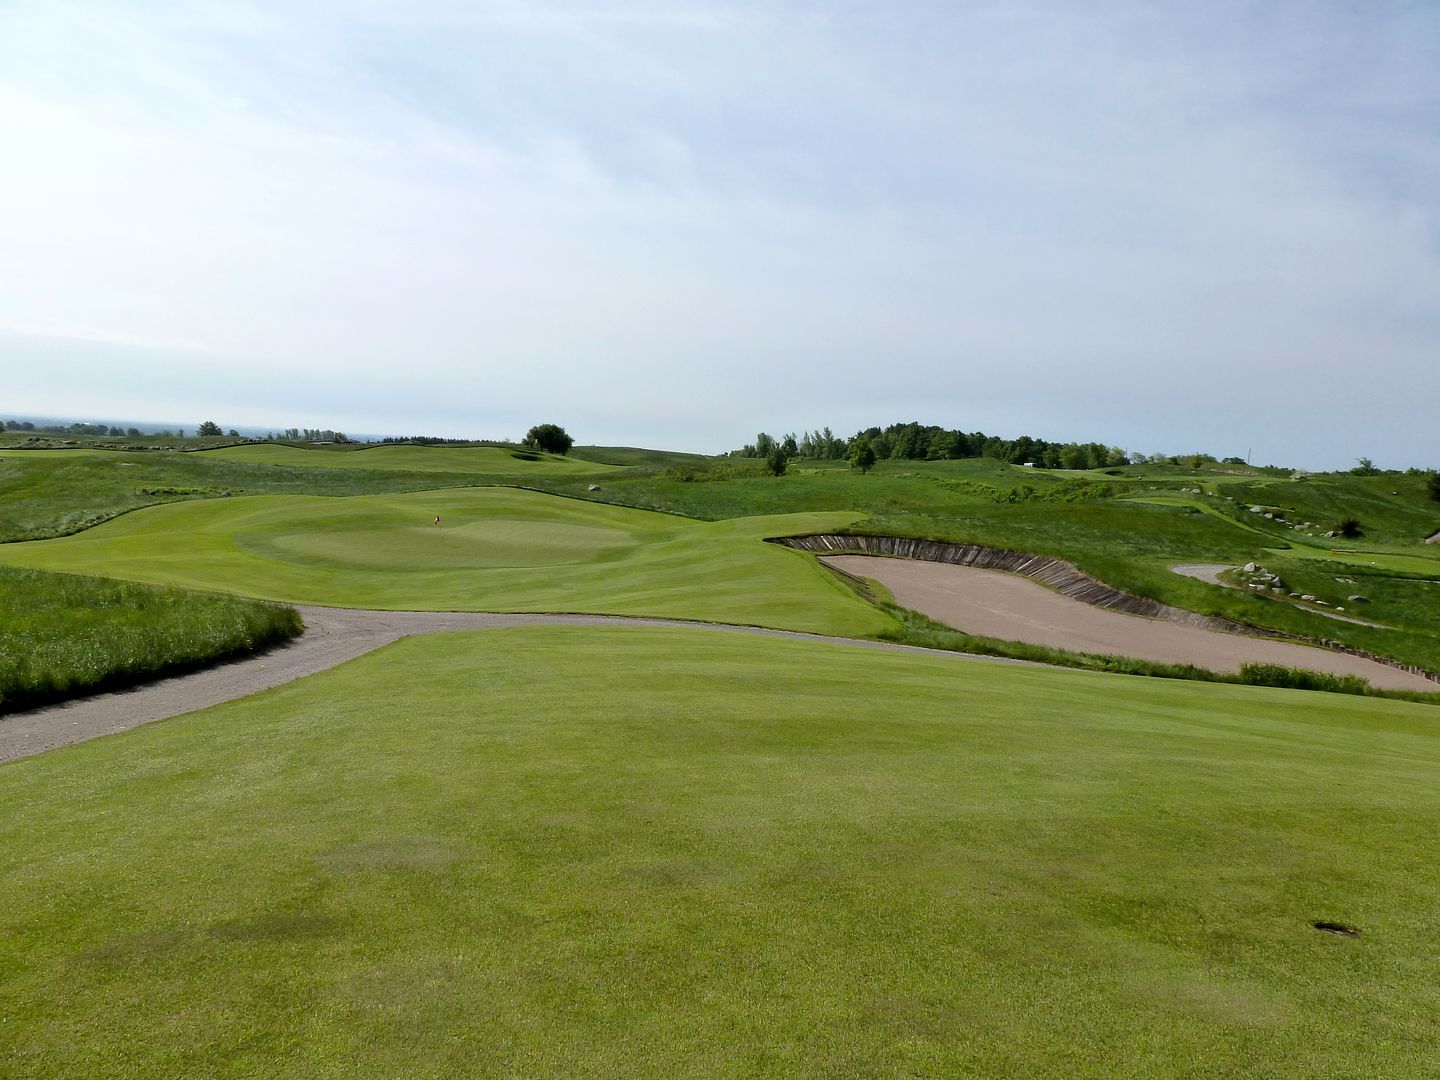
The approach is played over a deep gulley to another one of the most interesting greens I have ever seen. Shaped something like a kidney, the green is split in half by a ridge some 10 feet high! Don't miss this one long.
 |
| 6th Green from Left |
 |
| 6th Green from Front |
 |
| 6th Green from Behind |
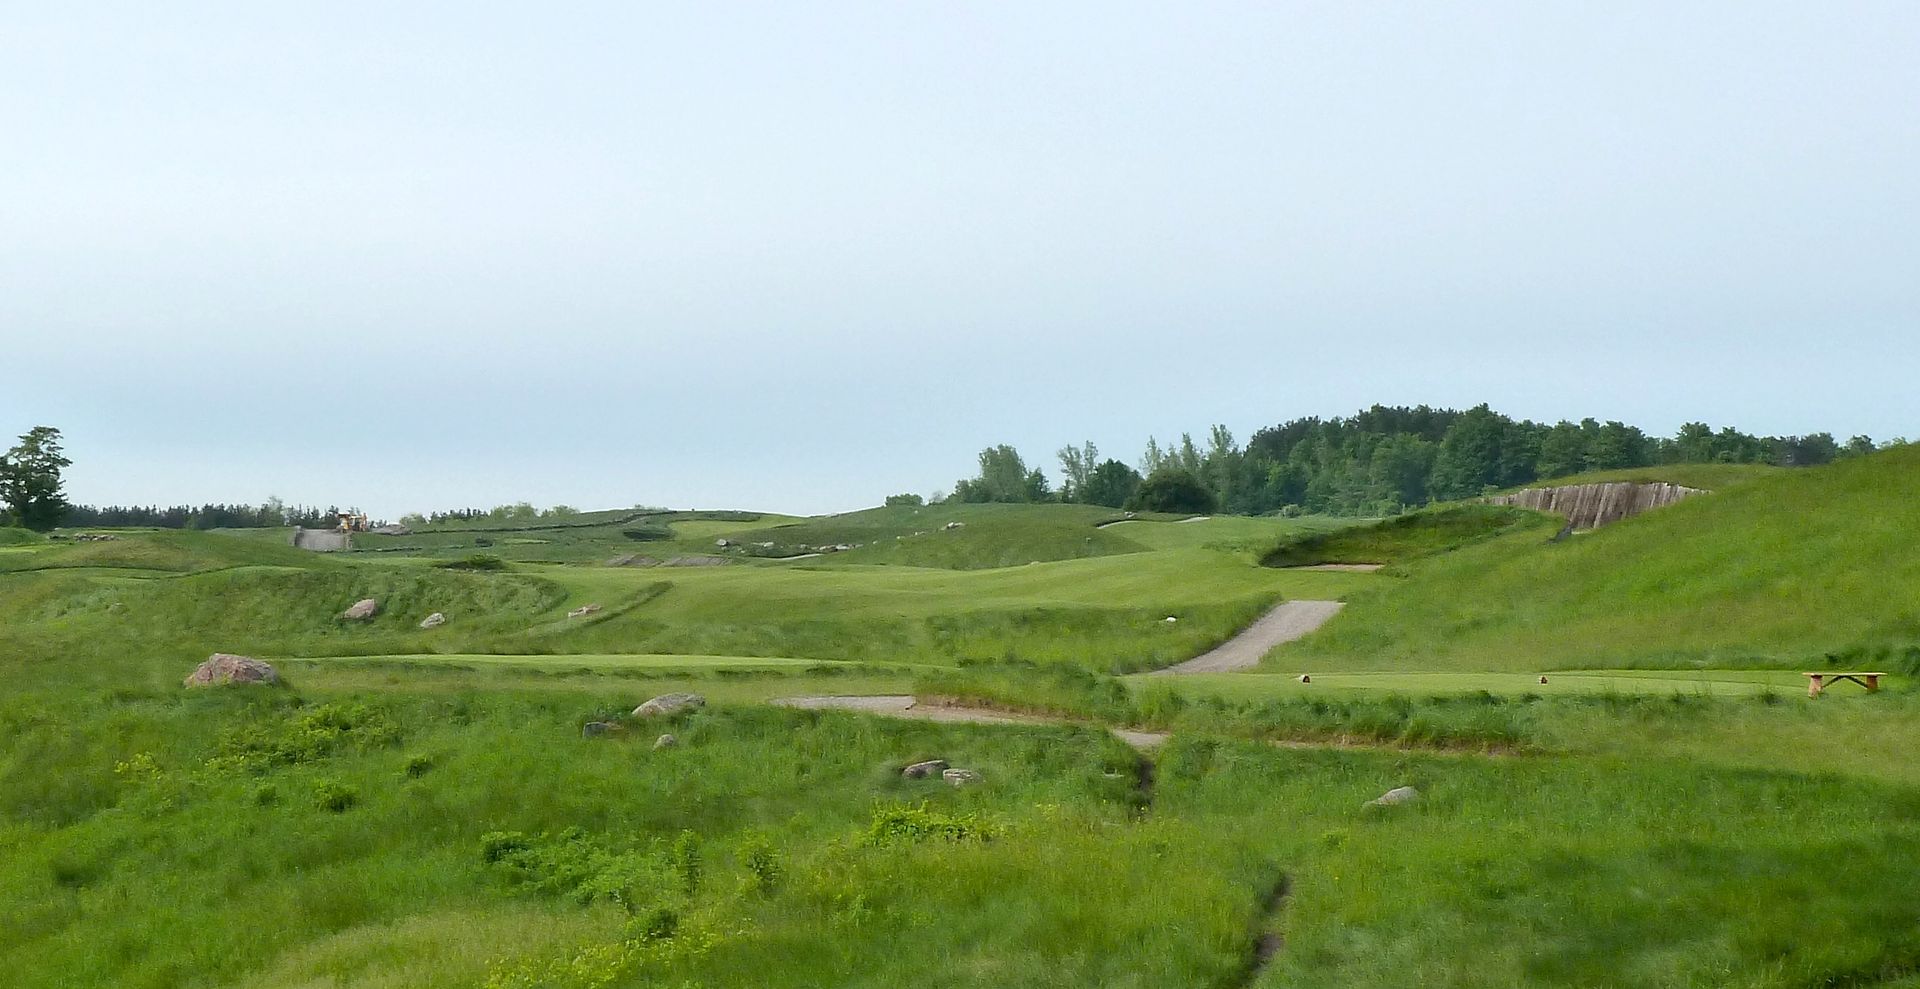
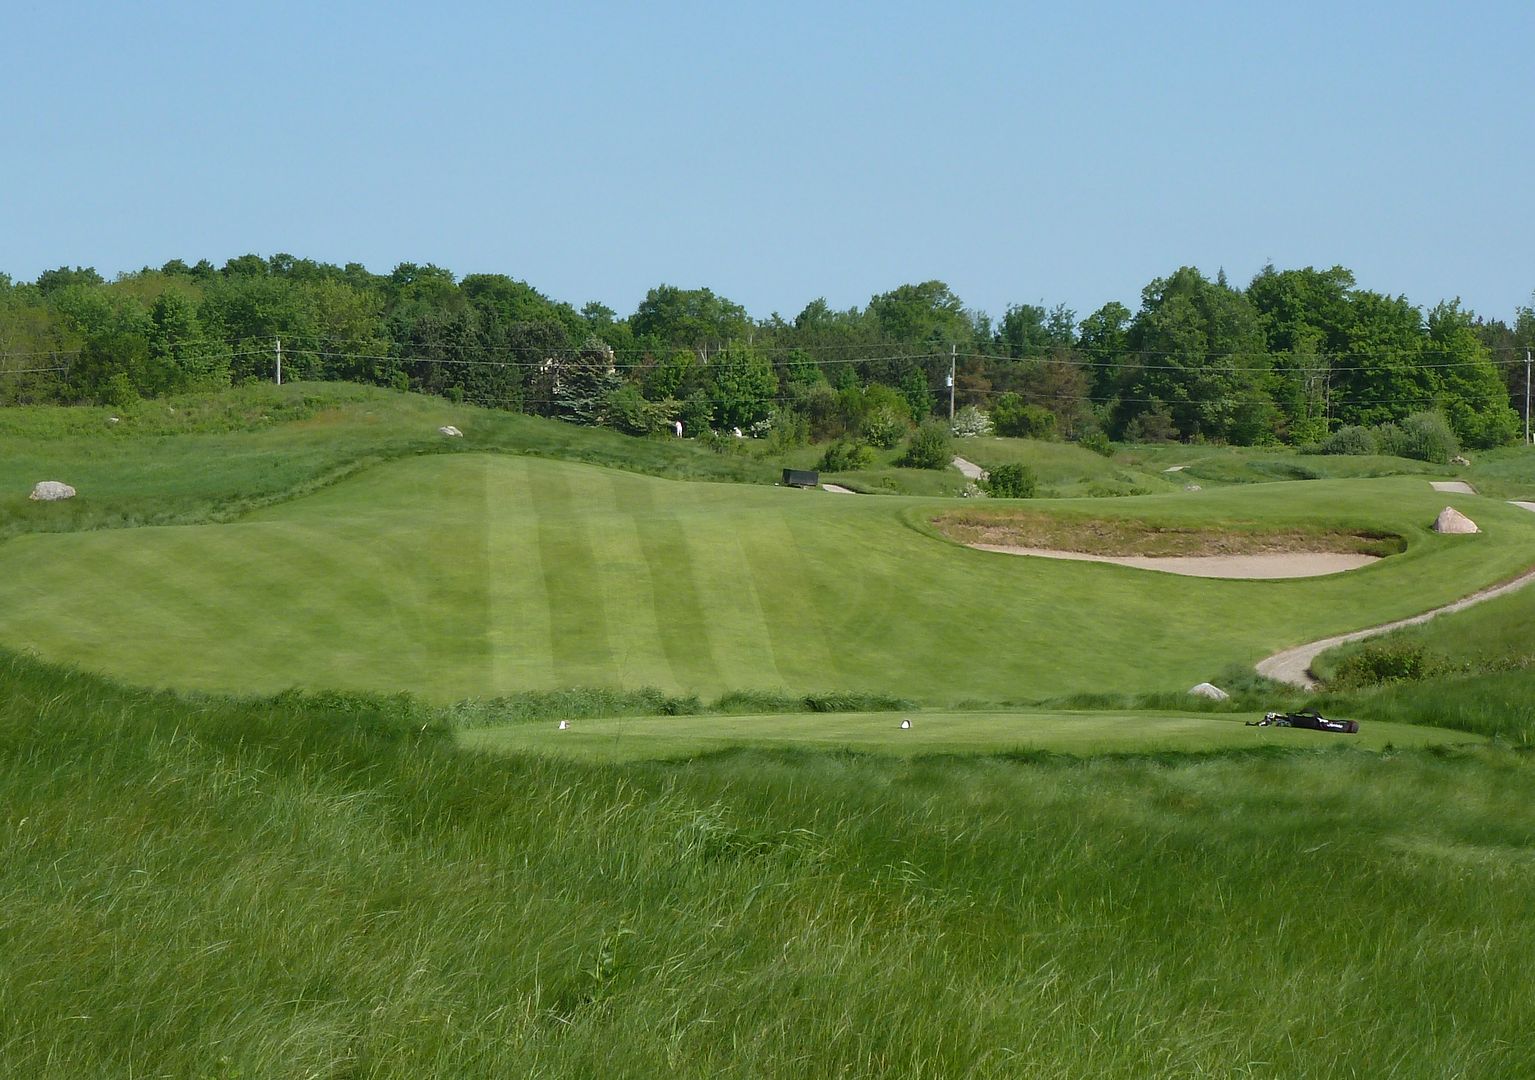
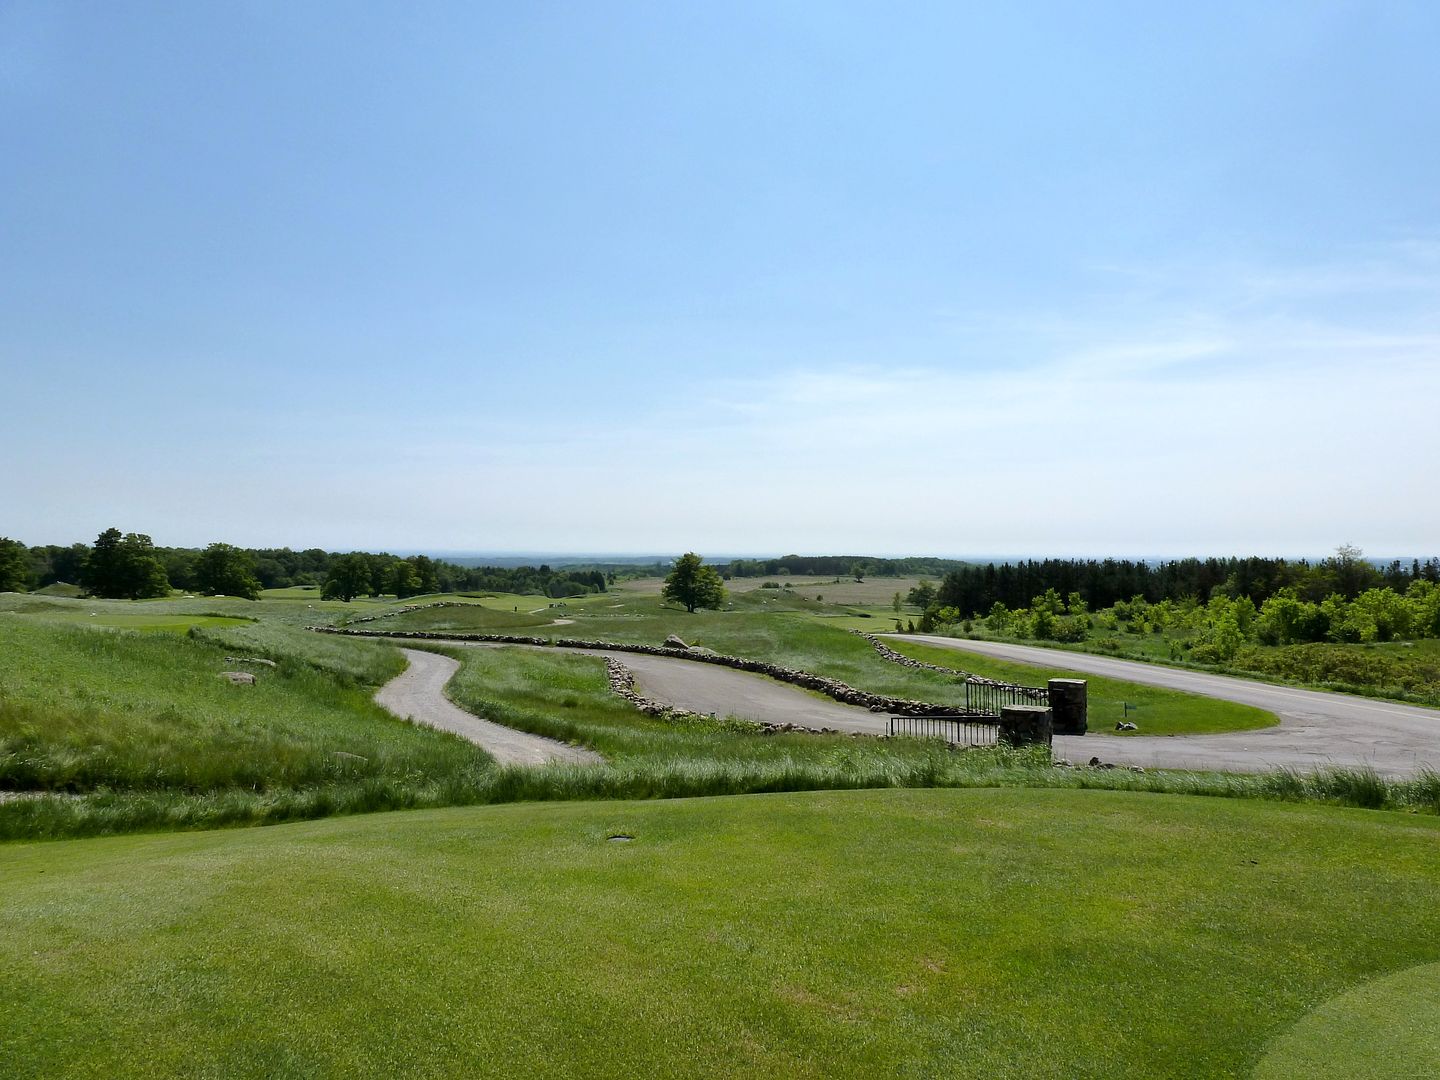
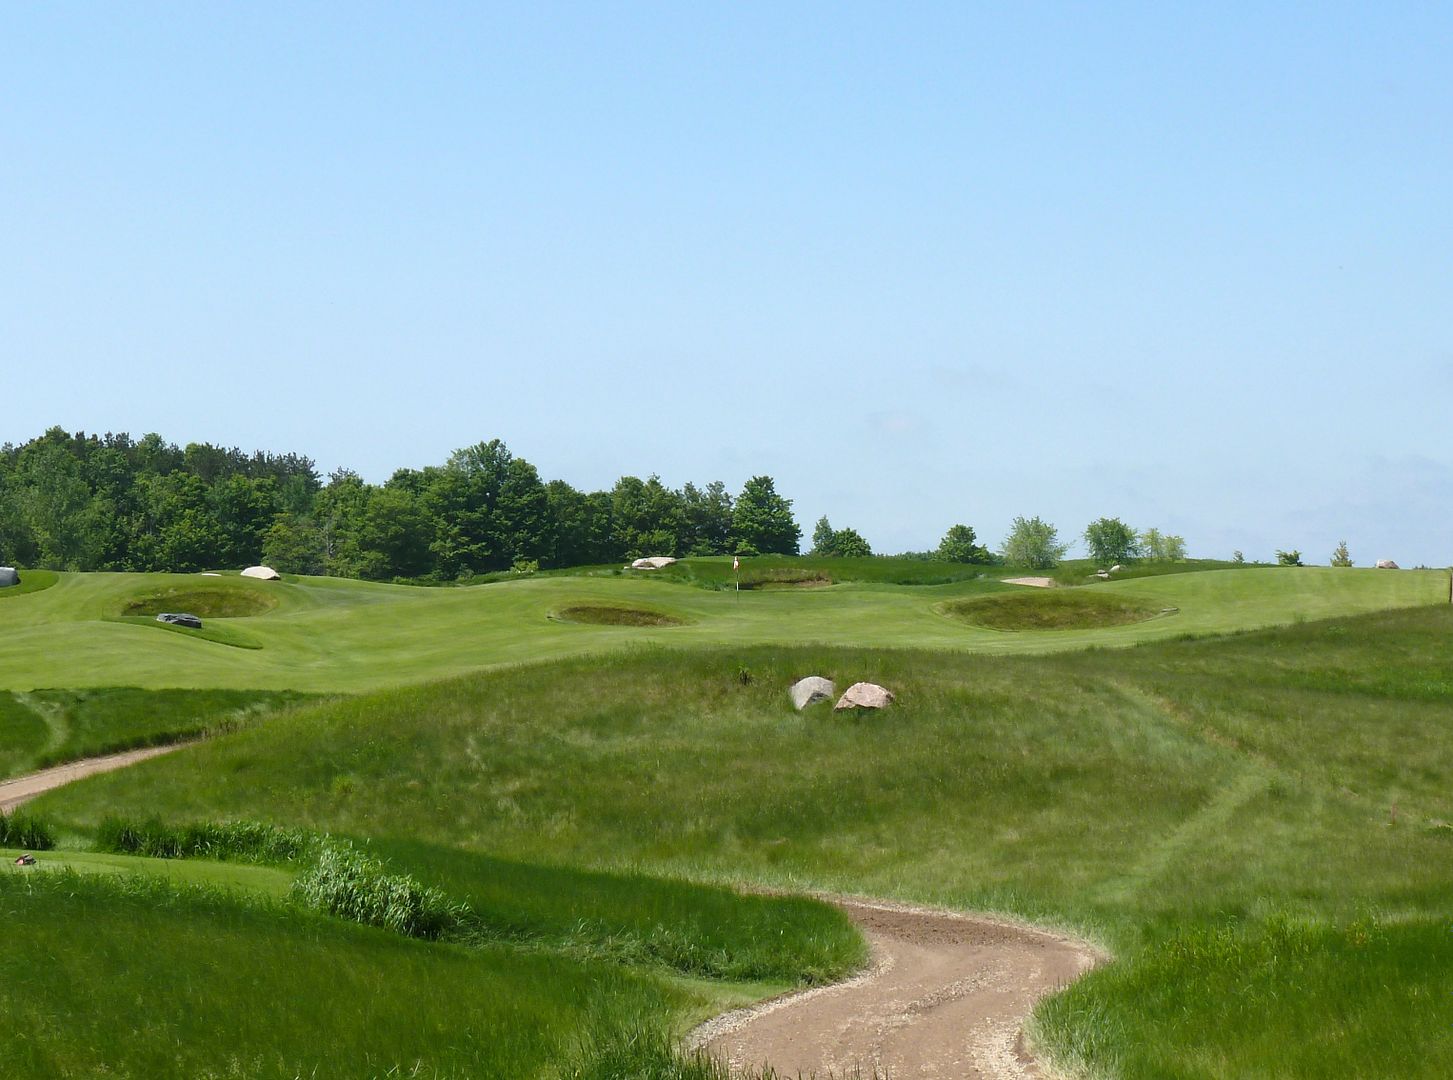
Hole 10: Par 4, 352 Yards
Short on the scorecard, but this is no easy par-4, playing uphill and into the prevailing wind. Playing over the entrance road and a stone wall, a centreline pot bunker is hidden from the tee. Laying up to the centreline is a reasonable option, as the longer the tee shot the golfer hits, the more precise he must be on this narrowing fairway.
 |
| 10th Tee |
 |
| 10th Tee Zoomed |
The approach is played to a green surface angled 45 degrees to the fairway and completely hidden from view. A spine running through the green 2/3 the way back makes for a very difficult back pin position.
 |
| 10th Approach |
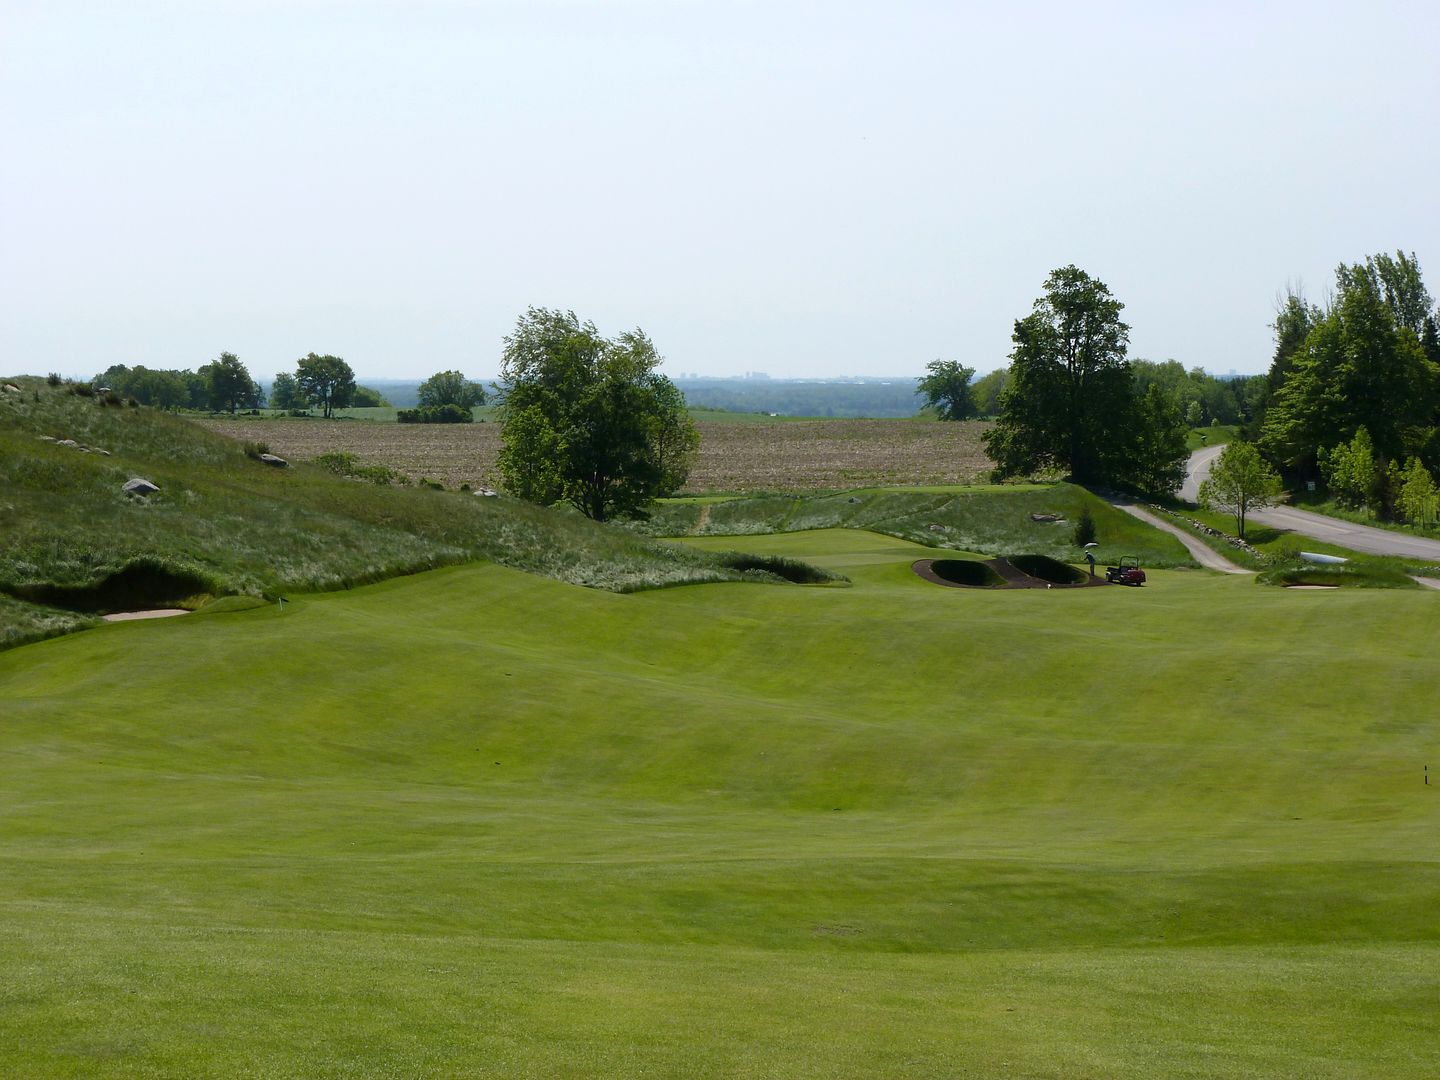
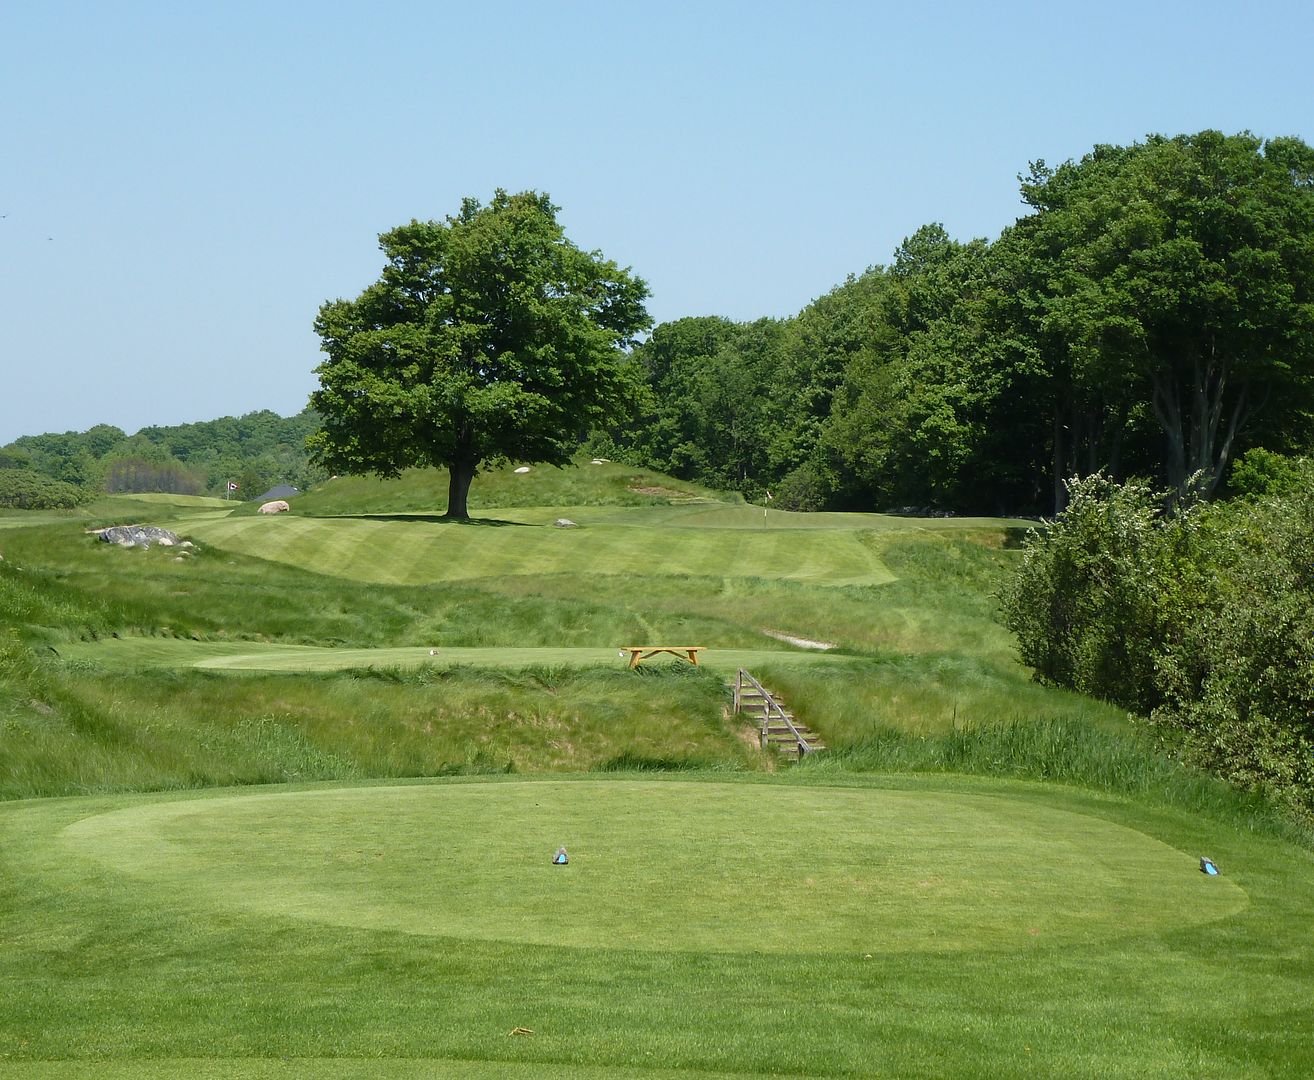
Hole 11: Par 5, 591 Yards
This would likely be considered the 'signature' hole, tumbling some 100 feet from tee to green. The line of charm is in full effect, with the green laying tantalizingly in view over the road. From the tee, it appears as though one can 'cut-the-corner' and leave a short second shot into the green, but in truth, the ideal line is much farther to the left than is obvious.
 |
| 11th Tee |
 |
| A Great Rolling Fairway on the 11th |
The approach to the double-green at 11/14 is played over the deepest pot bunkers on the golf course (being worked-on in the picture). Adding to the quirk scale is the large tree in the centre of the green!
 |
| 11th Approach |
 |
| 11th Green |
 |
| 11th and 14th Greens |
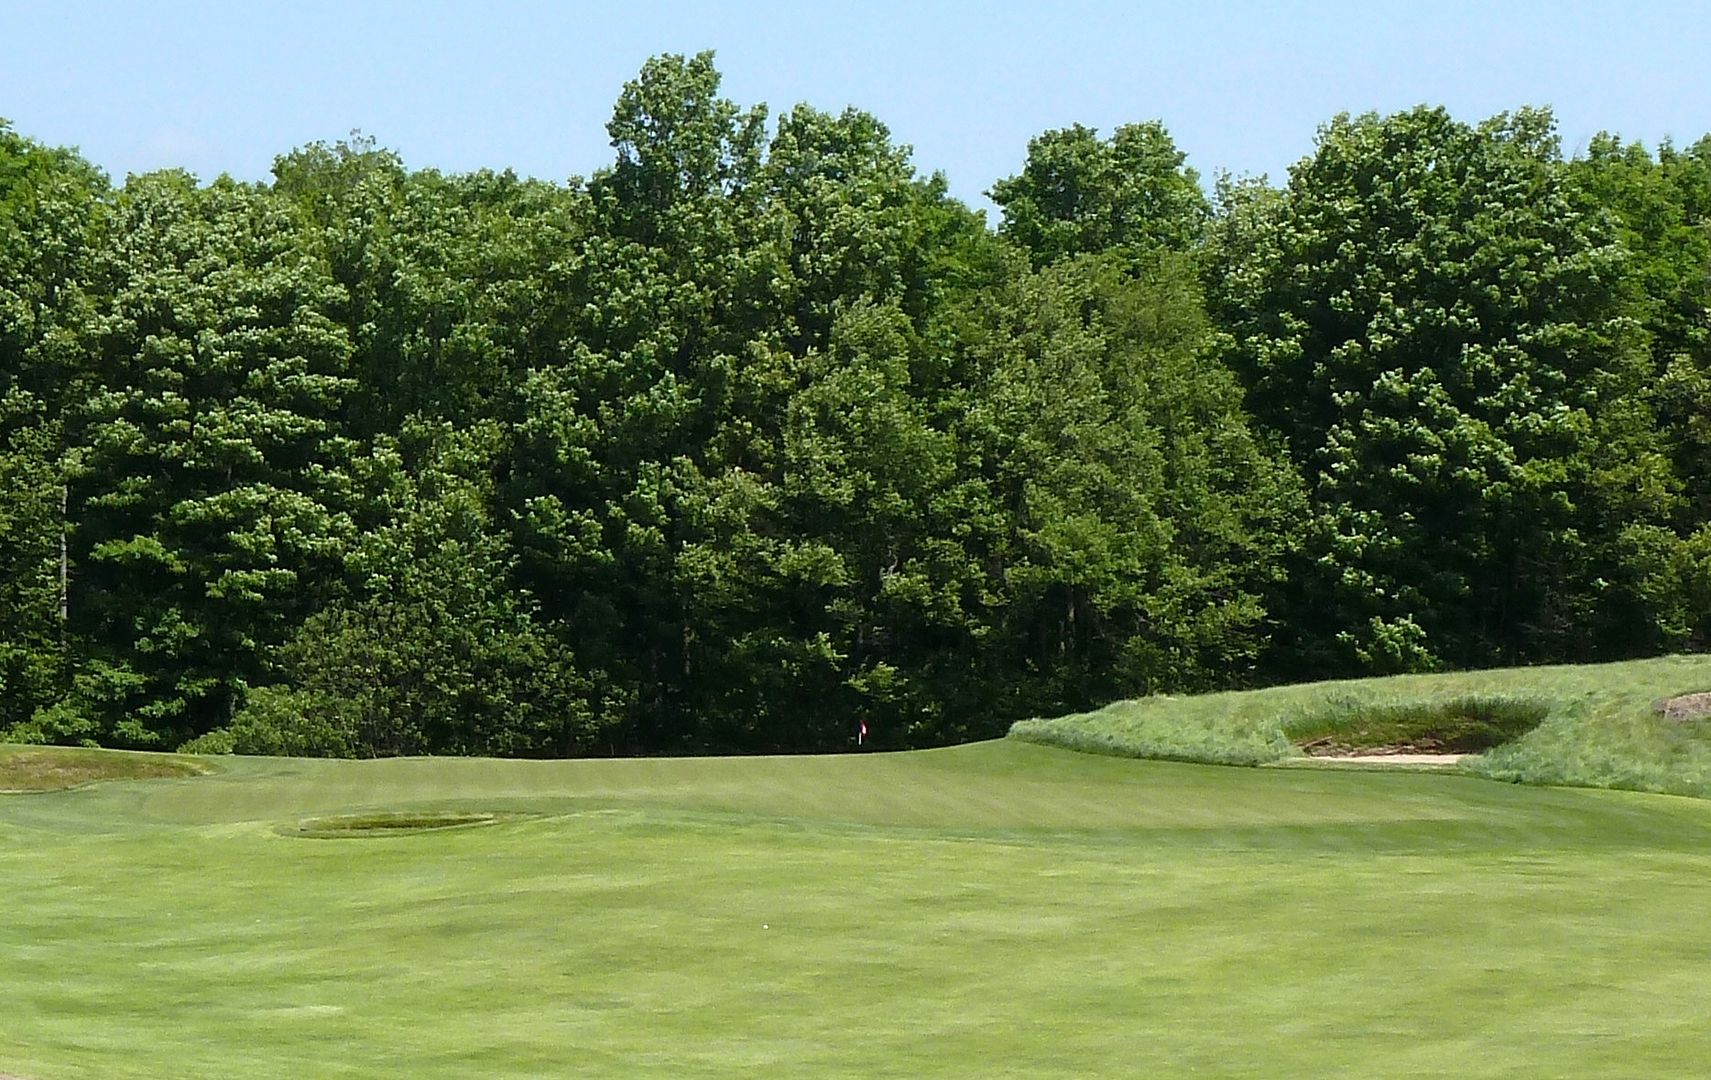
Hole 13: Par 3, 226 Yards
So much for options! The 13th is just a very difficult hole with little room to miss. Anything right of the green is a lost ball. Anything toward the 'bail-out' to the left, will have to deal with the tree overhanging the left side of the green. Perhaps the wisest option is laying-up short of the green (and tree) and trying to make 3 from there.
 |
| 13th Tee |
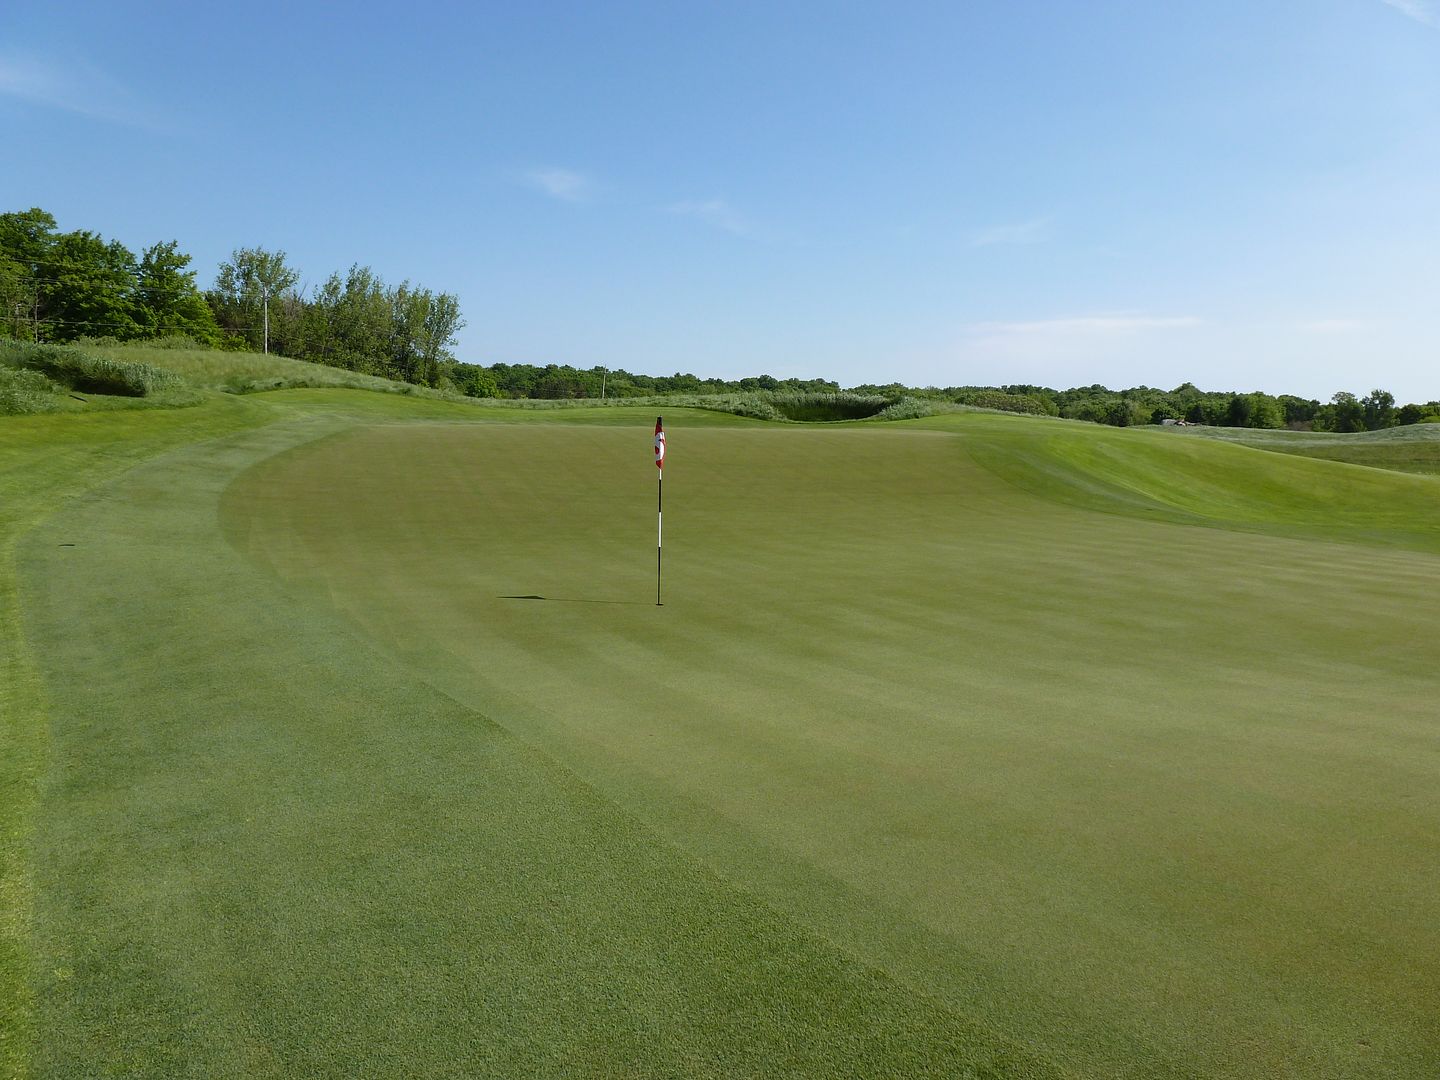
Hole 16: Par 3, 159 Yards
The 16th is a very good par-3, with another phenomenal green. The tees span a width of some 80 yards, ensuring a variety of teeing angles. Played from the farthest right tees (as pictured), the green is completely blind, played over a duo of deep (but not really in play) pot bunkers. From the tees to the left, one has a better view of the green, but a more difficult angle of play.
 |
| 16th Tee |
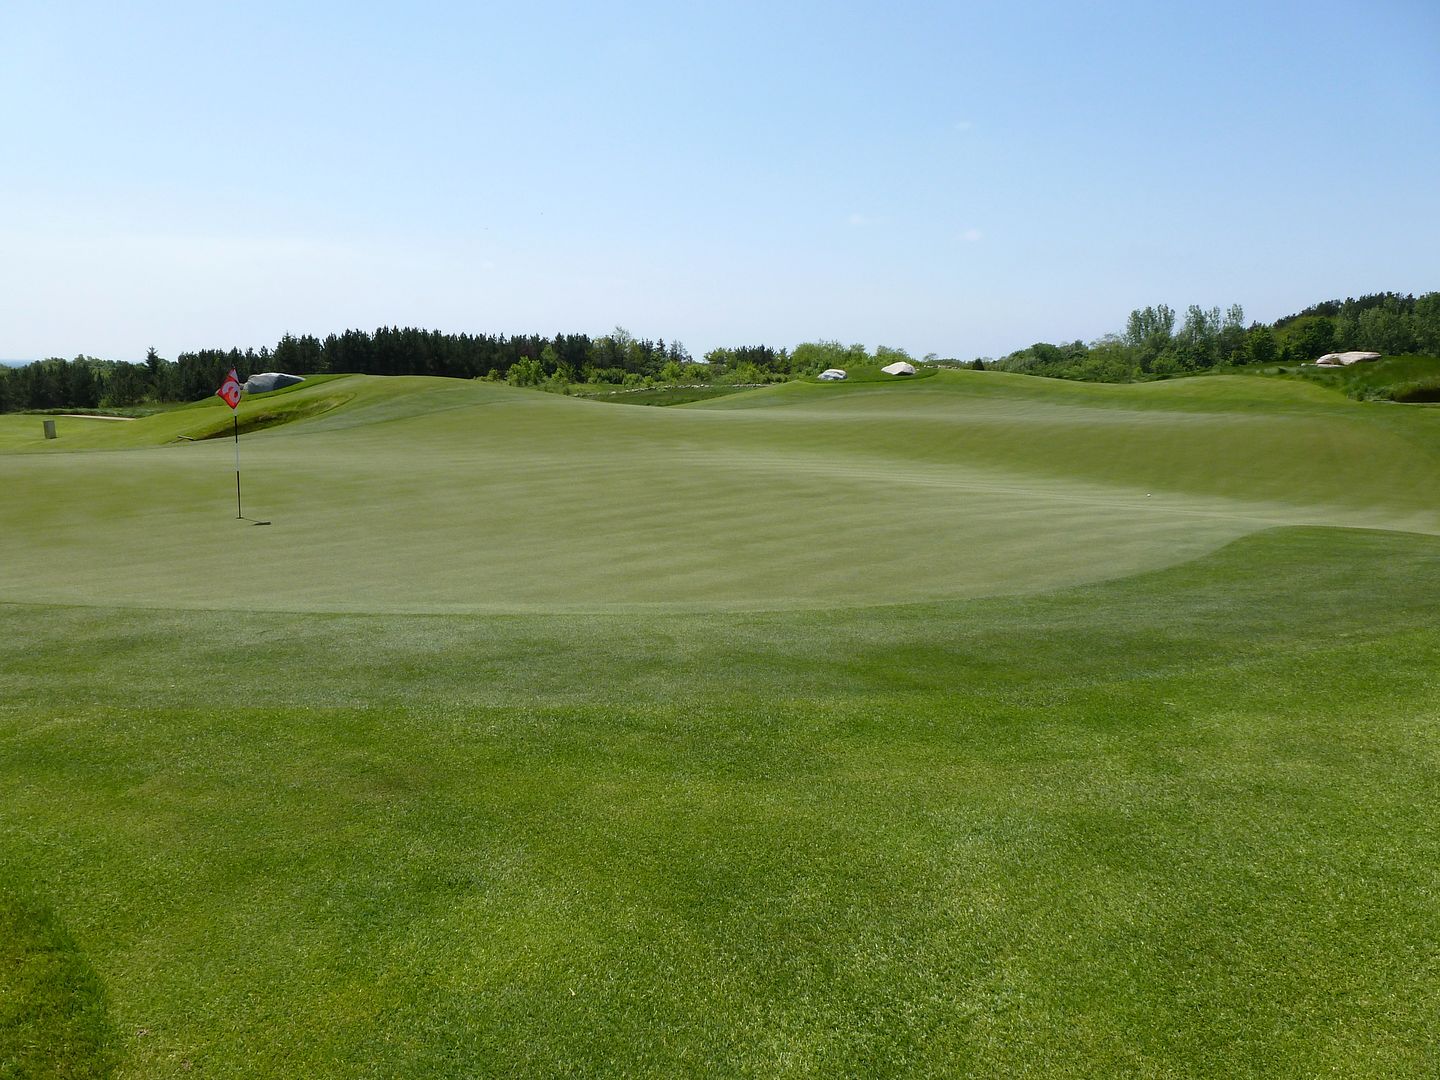 |
| 16th Green |
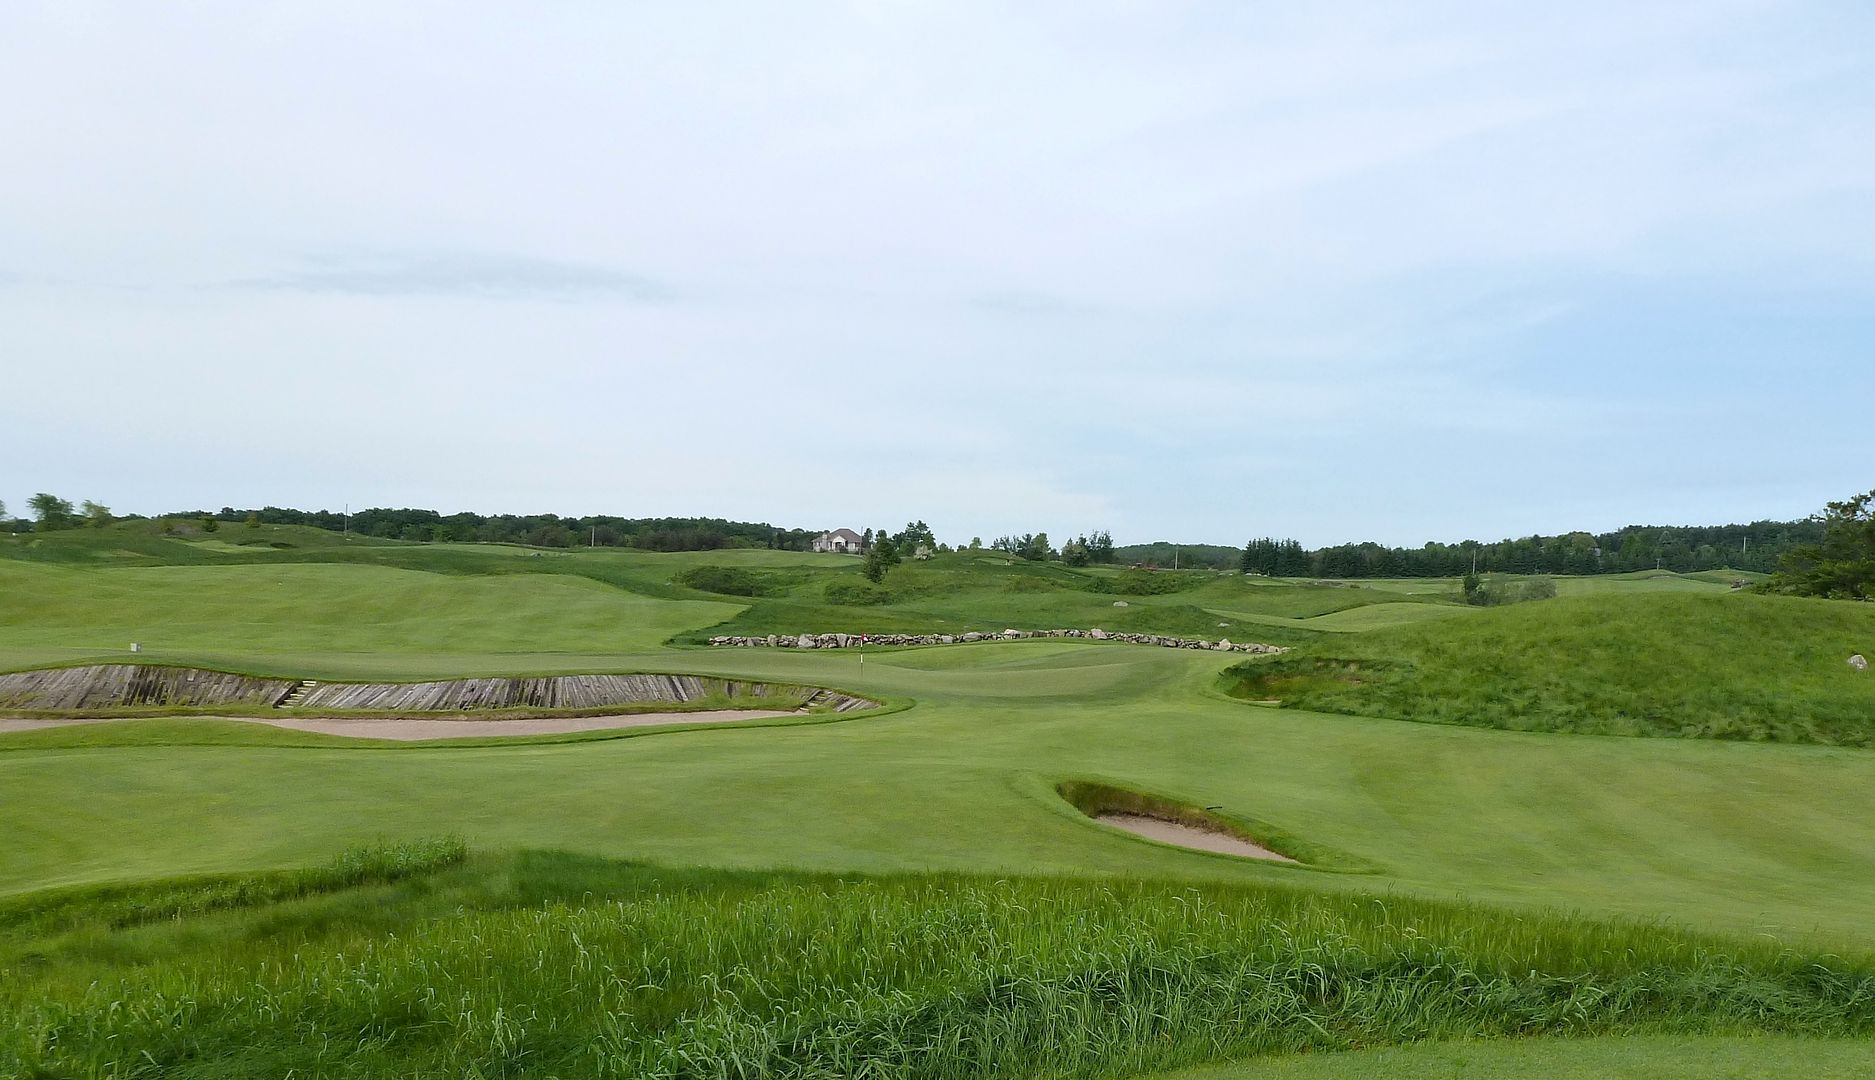
Hole 17: Par 4, 413 Yards
One must choose whether to challenge the stone wall running diagonally across the 17th fairway. The decision from the tee is dictated almost entirely by the pin position, but be mindful, centreline pot bunkers lurk everywhere.
 |
| 17th Tee |
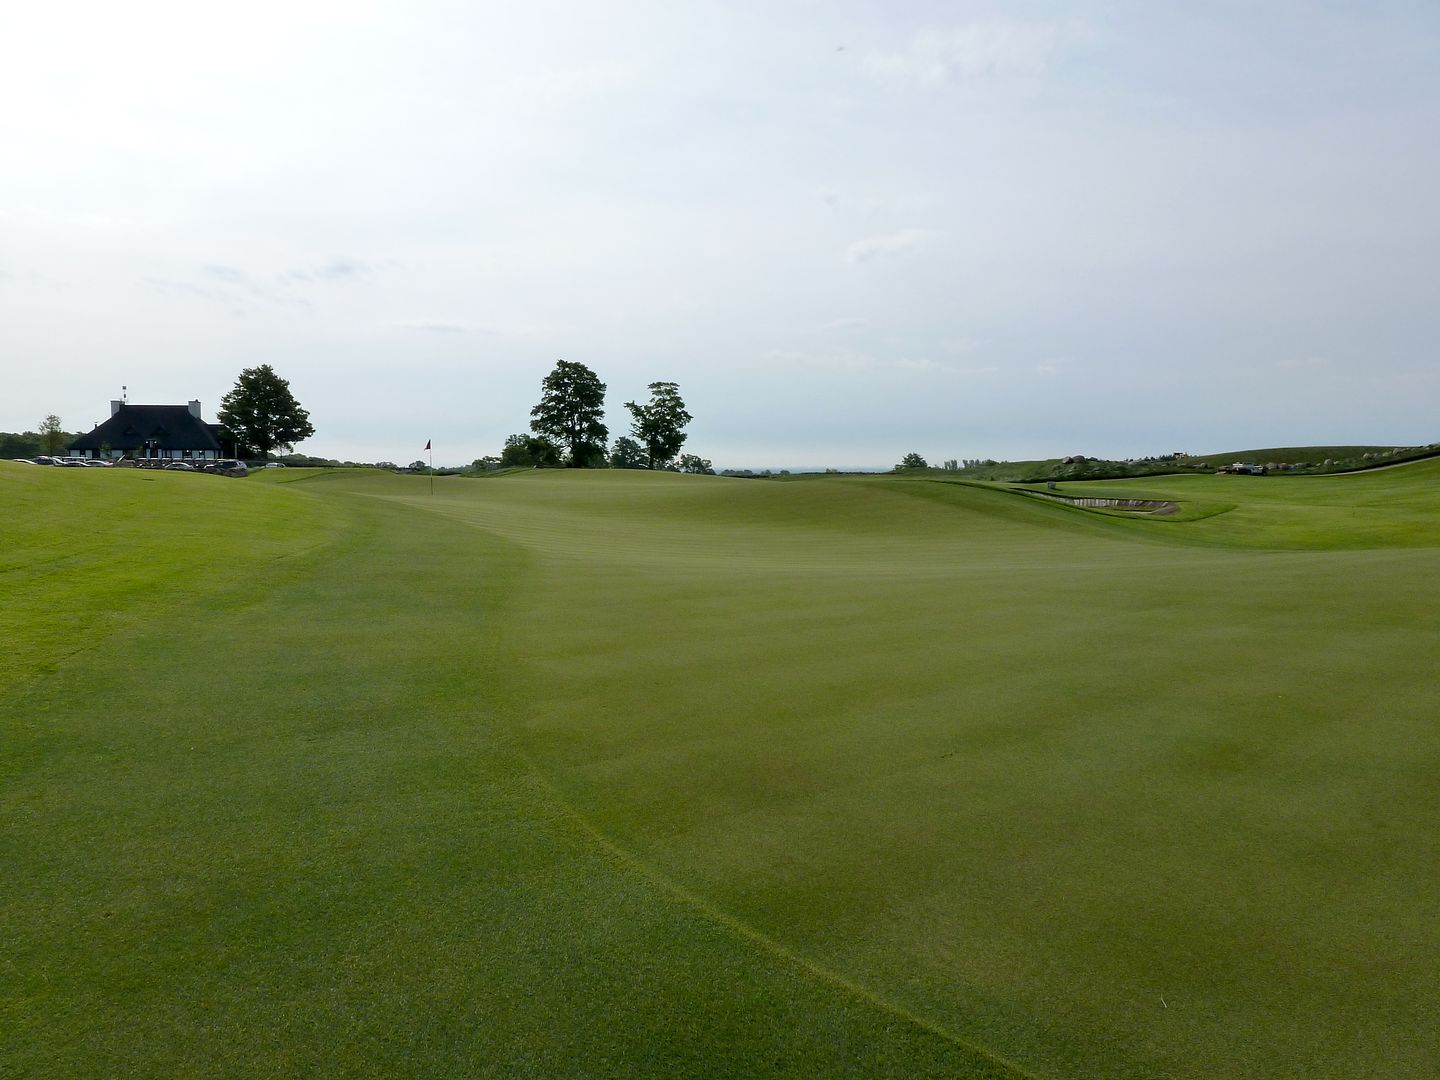
The green on the 17th is some 70 yards deep. The first 2/3 of the green slopes severely toward the fairway, and the back 1/3 slope severely toward the OB over the green. Note the location of the pin in the zoomed in picture (a back pin, obviously) -- to this pin one would want to lay-up to the wall to leave an ideal angle of approach into the green.
 |
| 17th Approach |
 |
| 17th Approach Zoomed |


Are the cart paths a negative? They are prevalent in your photos.
ReplyDeleteLooks awesome Mark - I've played the Pulpit but haven't had the pleasure of playing the Paintbrush yet. One day!
ReplyDelete